m (→Sources) |
No edit summary |
||
| (21 intermediate revisions by 9 users not shown) | |||
| Line 14: | Line 14: | ||
|modifier= |
|modifier= |
||
|sysmods= |
|sysmods= |
||
| − | |length=20 [[Imperial standard meter|meters]]<ref name="PrimaBF2">''[[Battlefront II: Prima Official Game Guide]]''</ref> |
+ | |length=20 [[Imperial standard meter|meters]]<ref name="PrimaBF2">''[[Star Wars Battlefront II: Prima Official Game Guide]]''</ref> |
|width= |
|width= |
||
|height=22.5 meters<ref name="SWCL">''[[Star Wars: Complete Locations]]''</ref> |
|height=22.5 meters<ref name="SWCL">''[[Star Wars: Complete Locations]]''</ref> |
||
| Line 32: | Line 32: | ||
|countermeasures= |
|countermeasures= |
||
|armament=*[[Taim & Bak]] [[MS-1 fire-linked heavy laser cannon]]s (2)<ref name="CCS" /> |
|armament=*[[Taim & Bak]] [[MS-1 fire-linked heavy laser cannon]]s (2)<ref name="CCS" /> |
||
| − | * |
+ | *[[FF-4 medium repeating blaster]]s (2)<ref name="CCS" /> |
*[[Durasteel]] footpads (4)<ref name="BTM" /> |
*[[Durasteel]] footpads (4)<ref name="BTM" /> |
||
Post-Endor refit: |
Post-Endor refit: |
||
| Line 61: | Line 61: | ||
|firstuse= |
|firstuse= |
||
|retired= |
|retired= |
||
| − | |era=*[[Rise of the Empire era]] |
+ | |era=*[[Rise of the Empire era]].<ref name="Star Wars Republic: The Battle of Jabiim" /> |
*[[Rebellion era]]<ref name="SW:FC">''[[Star Wars: Force Commander]]''</ref> |
*[[Rebellion era]]<ref name="SW:FC">''[[Star Wars: Force Commander]]''</ref> |
||
*[[New Republic era]]<ref name="DE II">''[[Dark Empire II]]''</ref> |
*[[New Republic era]]<ref name="DE II">''[[Dark Empire II]]''</ref> |
||
*[[New Jedi Order era]]<ref name="Revelations">''[[Star Wars: Invasion: Revelations 5]]''</ref> |
*[[New Jedi Order era]]<ref name="Revelations">''[[Star Wars: Invasion: Revelations 5]]''</ref> |
||
*[[Legacy era]]<ref name="LW3">''[[Star Wars: Legacy—War 3]]''</ref> |
*[[Legacy era]]<ref name="LW3">''[[Star Wars: Legacy—War 3]]''</ref> |
||
| − | |affiliation=*[[Galactic Republic]] |
+ | |affiliation=*[[Galactic Republic]].<ref name="Star Wars Republic: The Battle of Jabiim" /> |
*[[Confederacy of Independent Systems]] |
*[[Confederacy of Independent Systems]] |
||
*[[Galactic Empire]]<ref name="PrimaBF2" /> |
*[[Galactic Empire]]<ref name="PrimaBF2" /> |
||
| Line 76: | Line 76: | ||
{{Quote|We had the [[Battle of Gormen]] won, until the AT-ATs arrived. They came out of the fog and ripped apart the front lines. The locals ran in terror, but the experienced soldiers surrendered. We knew that you can't outrun an AT-AT.|[[Major]] [[Bren Derlin]], [[Alliance to Restore the Republic|Rebel Alliance]] [[Commander|field commander]]|The New Essential Guide to Vehicles and Vessels}} |
{{Quote|We had the [[Battle of Gormen]] won, until the AT-ATs arrived. They came out of the fog and ripped apart the front lines. The locals ran in terror, but the experienced soldiers surrendered. We knew that you can't outrun an AT-AT.|[[Major]] [[Bren Derlin]], [[Alliance to Restore the Republic|Rebel Alliance]] [[Commander|field commander]]|The New Essential Guide to Vehicles and Vessels}} |
||
| − | The '''All Terrain Armored Transport (AT-AT)''' [[walker]], also known as the '''Imperial Walker''', was a major part of the [[Galactic Empire]]'s |
+ | The '''All Terrain Armored Transport (AT-AT)''' [[walker]], also known as the '''Imperial Walker''', was a major part of the [[Galactic Empire]]'s motor-pool. It was one of the most heavily armored land vehicles in the [[Imperial Army]], but was also known for its relatively slow speed. |
==Description== |
==Description== |
||
{{Quote|Lookit 'em, boss! Great, big, fat gray targets!''"<br />"''I know, Zev, but they've got a long reach.|[[Zev Senesca]] and [[Luke Skywalker]], during the [[Battle of Hoth]]|The Empire Strikes Back (radio)}} |
{{Quote|Lookit 'em, boss! Great, big, fat gray targets!''"<br />"''I know, Zev, but they've got a long reach.|[[Zev Senesca]] and [[Luke Skywalker]], during the [[Battle of Hoth]]|The Empire Strikes Back (radio)}} |
||
[[File:AT-AT egvv.jpg|left|thumb|180px|AT-AT [[:Category:Technical drawing images|schematics]].]] |
[[File:AT-AT egvv.jpg|left|thumb|180px|AT-AT [[:Category:Technical drawing images|schematics]].]] |
||
| − | The AT-AT walker was a behemoth of a war machine, standing at a height of 22.5 meters.<ref name="SWCL" /> The quadrupedal walker closely resembled ancient beasts of war,<ref name="EGVV" /> or even a giant legendary beast from the [[dark side of the Force]].<ref name="Encyclopedia">''[[Star Wars Encyclopedia]]''</ref> Designed for the dual purpose of crushing and demoralizing enemy forces, and also serving as a transport for Imperial troops and light vehicles, the AT-AT was among the most awesome vehicles in the [[Imperial Army]] inventory.<ref name="EGVV" /> |
+ | The AT-AT walker was a behemoth of a war machine, standing at a height of 22.5 meters.<ref name="SWCL" /> The quadrupedal walker closely resembled ancient beasts of war,<ref name="EGVV" /> or even a giant legendary beast from the [[dark side of the Force]].<ref name="Encyclopedia">''[[Star Wars Encyclopedia]]''</ref> Designed for the dual purpose of crushing and demoralizing enemy forces, and also serving as a transport for Imperial troops and light vehicles, the AT-AT was among the most awesome vehicles in the [[Imperial Army]]'s inventory.<ref name="EGVV" /> Hundreds of these walkers were produced during the Galactic Civil War<ref name="NEGVV" />, and its intimidating and powerful presence often earned it the distinction of being the first vehicle into a combat zone.<ref name="BTM" /> |
| − | Serving as the "head" of the mechanical walker was a movable command section containing the command cockpit, with room for the [[commander]], [[Imperial Army pilot|pilot]] |
+ | Serving as the "head" of the mechanical walker was a movable command section containing the command cockpit, with room for the [[commander]], [[Imperial Army pilot|pilot]] and [[gunner]]. The command section housed all of the AT-AT's weapon systems, as well as [[Hologram|holographic]] [[Targeting computer|targeting systems]] allowing the gunners a 360-degree view of their position.<ref name="EGVV" /> The cockpit was also equipped with a [[holoprojector]] for purposes of external communication. Forward visualization was supplied by a glowing red command [[viewport]].<ref name="ESB">[[Star Wars: Episode V The Empire Strikes Back|''Star Wars'': Episode V ''The Empire Strikes Back'']]</ref> The head could rotate as much as ninety degrees right or left and thirty degrees up or down for an expansive field of fire. Positioned above and below the command section was the walker's [[sensor array]] and [[blaster cannon]] energizer, respectively.<ref name="EGVV" /> |
<div style="float:right">[[File:Pilot3.jpg|left|thumb|160px|An [[Imperial_Army_pilot#AT-AT_pilots|AT-AT pilot]].]]</div> |
<div style="float:right">[[File:Pilot3.jpg|left|thumb|160px|An [[Imperial_Army_pilot#AT-AT_pilots|AT-AT pilot]].]]</div> |
||
The command head was attached to the trapezoidal armed body section by a flexible armored tunnel, allowing cockpit access from the rest of the machine. The AT-AT's troop section could typically carry five [[speeder bike]]s, up to forty troops normally comprising Imperial [[stormtrooper]]s or [[Imperial land assault trooper]]s<ref name="EGVV" /> in a double-tiered passenger section, and heavy weaponry, such as [[E-Web heavy repeating blaster]]s.<ref name="BTM" /> The AT-AT could also variably hold two [[All Terrain Scout Transport]]s in lieu of soldiers in a rear vehicle bay,<ref name="EGVV" /> though they required partial disassembly to fit inside.<ref name="AT-AT Databank">{{DB|vehicle|at-at|All Terrain Armored Transport (AT-AT)}}</ref> Housing the troop section were two large side panels; each one held an escape hatch. The rear panel also housed the troop staging area. Positioned in the center of the body section was a rectangular boarding hatch with sliding ramps where the AT-AT's complement of troops loaded and disembarked. An AT-AT unloaded its troops by kneeling to three meters above ground level until the boarding ramp could extend outward.<ref name="EGVV" /> Individual stormtroopers could also be deployed rapidly by rappelling cable.<ref name="CCS" /> |
The command head was attached to the trapezoidal armed body section by a flexible armored tunnel, allowing cockpit access from the rest of the machine. The AT-AT's troop section could typically carry five [[speeder bike]]s, up to forty troops normally comprising Imperial [[stormtrooper]]s or [[Imperial land assault trooper]]s<ref name="EGVV" /> in a double-tiered passenger section, and heavy weaponry, such as [[E-Web heavy repeating blaster]]s.<ref name="BTM" /> The AT-AT could also variably hold two [[All Terrain Scout Transport]]s in lieu of soldiers in a rear vehicle bay,<ref name="EGVV" /> though they required partial disassembly to fit inside.<ref name="AT-AT Databank">{{DB|vehicle|at-at|All Terrain Armored Transport (AT-AT)}}</ref> Housing the troop section were two large side panels; each one held an escape hatch. The rear panel also housed the troop staging area. Positioned in the center of the body section was a rectangular boarding hatch with sliding ramps where the AT-AT's complement of troops loaded and disembarked. An AT-AT unloaded its troops by kneeling to three meters above ground level until the boarding ramp could extend outward.<ref name="EGVV" /> Individual stormtroopers could also be deployed rapidly by rappelling cable.<ref name="CCS" /> |
||
| − | Below the troop body section were two immense [[Kuat Drive Yards]] [[FW62 compact fusion drive system]]s that,<ref name="CCS" /> in conjunction with the walker's four giant heavily-reinforced legs, propelled the AT-AT forward at a top speed of sixty [[kilometer]]s per hour. However, this maximum rate was achievable only on |
+ | Below the troop body section were two immense [[Kuat Drive Yards]] [[FW62 compact fusion drive system]]s that,<ref name="CCS" /> in conjunction with the walker's four giant heavily-reinforced legs, propelled the AT-AT forward at a top speed of sixty [[kilometer]]s per hour. However, this maximum rate was achievable only on flat, stable terrain. At the rear of, and connected to, the drive motors were the walker's three [[fuel slug]] tanks that powered the massive machine. The AT-AT's rear also included [[Atmosphere|atmospheric]] exchangers and a filtration unit to regulate the interior living conditions.<ref name="EGVV" /> The walker's legs were supported by massive [[durasteel]] footpads with impulse terrain sensors,<ref name="BTM" /> supplemented by toe flaps, that could crush obstacles in its path with little effort, effectively helping the AT-AT to live up to its name.<ref name="EGVV" /> The legs did, however, require constant maintenance and repair.<ref name="AT-AT Databank" /> As the titanic walker marched down the battlefield, its heavy, stomping feet would cause the ground to shake, demoralizing the enemy before they were even engaged.<ref name="Encyclopedia" /> |
[[File:AT-AT barrage by Barger.jpg|left|thumb|200px|An AT-AT affirming its firepower in combat]] |
[[File:AT-AT barrage by Barger.jpg|left|thumb|200px|An AT-AT affirming its firepower in combat]] |
||
| − | The AT-AT's formidable offensive capabilities were supplied by dual, chin-mounted [[Taim & Bak]] [[MS-1 fire-linked heavy laser cannon]]s for slower, more cumbersome targets and two fire-linked medium [[repeating blaster]]s mounted on each side of the head designed for lighter, agile targets.<ref name="CCS" /><ref name="EGVV" /> The two sets of weapons could be independently rotated in order to engage multiple targets at once.<ref name="EGVV" /> However, the AT-AT head, which could move between a range of left, center |
+ | The AT-AT's formidable offensive capabilities were supplied by dual, chin-mounted [[Taim & Bak]] [[MS-1 fire-linked heavy laser cannon]]s (for slower, more cumbersome targets) and two fire-linked medium [[repeating blaster]]s mounted on each side of the head (designed for lighter, agile targets).<ref name="CCS" /><ref name="EGVV" /> The two sets of weapons could be independently rotated in order to engage multiple targets at once.<ref name="EGVV" /> However, the AT-AT's head, which could move between a range of left, center and right firing arcs, could only rotate one fire arc per heavy [[laser]] volley.<ref name="GG3" /> The walker's strong external 9095-T8511 grade durasteel [[armor]] was virtually impervious to all but the heaviest of [[artillery]] weapons.<ref name="BTM" /><ref name="Encyclopedia" /> |
| − | The most vulnerable part of the walker was |
+ | The most vulnerable part of the walker was its flexible neck, which was susceptible to lighter [[blaster]] barrages. The legs were also somewhat unstable and could be tripped<ref name="GG3" /> due to a high center of gravity,<ref name="RS II guide">''[[Star Wars: Rogue Squadron II: Rogue Leader: The Official Nintendo Player's Guide]]''</ref> leaving the walker defenseless.<ref name="GG3" /> While first appearing to be a slow, lumbering vehicle, the AT-AT would often be on top of its enemies before they knew what had hit them.<ref name="EGVV" /> The AT-AT also lacked armor covering on its underbelly, leaving the spot vulnerable to mounted guns or portable missile launchers. To remedy this weakness, [[AT-ST]]s were usually stationed around the walker's flanks to ensure nothing was given a clear shot at the AT-AT's weak underside.<ref name="Encyclopedia" /> |
| ⚫ | AT-ATs were typically deployed for ground assault from [[orbit]] by large [[dropship]]s. Walkers stationed within larger [[warship]]s, such as the [[Executor-class Star Dreadnought|''Executor''-class Star Dreadnought]], were delivered to planetary surfaces within [[Incom Corporation|Incom]] [[Y-85 Titan dropship]]s, capable of carrying four AT-ATs.<ref name="SWCL">''[[Star Wars: Complete Locations]]''</ref> Smaller [[starship]]s, such as the [[Imperial-class Star Destroyer|''Imperial''-class Star Destroyer]], deployed single walkers via the [[Theta-class AT-AT barge|''Theta''-class AT-AT barge]].<ref name="EAW">''[[Star Wars: Empire at War]]''</ref><ref name="SWCL" /> Other designs, including the [[Telgorn Corporation]] [[Warlord Dropship]], were capable of delivering a [[platoon]] of four walkers.<ref name="A World to Conquer">{{Journal|2|A World to Conquer}}</ref> |
||
| − | |||
| ⚫ | AT-ATs were typically deployed for ground assault from [[orbit]] by large [[dropship]]s. Walkers stationed within larger [[warship]]s, such as the [[Executor-class Star Dreadnought|''Executor''-class Star Dreadnought]], were delivered to planetary surfaces within [[Incom Corporation|Incom]] [[Y-85 Titan dropship]]s, capable of carrying four |
||
===Modified variants=== |
===Modified variants=== |
||
The Empire utilized several modified variants of the standard AT-AT design for purposes of fitting certain mission profiles in specific environments. The walkers used at the [[Battle of Hoth]] in [[3 ABY]]—nicknamed "snow walkers"—were specially designed with heat circulation systems, de-icing controls, and energy efficient environmental controls.<ref name="GG3" /><ref name="AT-AT Databank" /> |
The Empire utilized several modified variants of the standard AT-AT design for purposes of fitting certain mission profiles in specific environments. The walkers used at the [[Battle of Hoth]] in [[3 ABY]]—nicknamed "snow walkers"—were specially designed with heat circulation systems, de-icing controls, and energy efficient environmental controls.<ref name="GG3" /><ref name="AT-AT Databank" /> |
||
| − | The AT-AT "dune walker" was a desert terrain walker fitted with [[Sienar Fleet Systems]] [[z23 heat dissipation unit]]s; while the [[Aquatic Terrain Armored Transport]], known as the AT-AT "swimmer," was a [[repulsorcraft]] cousin of the standard model.<ref name="AT-AT Databank" /> There was also the [[All Terrain Ion Cannon]], a long-range artillery gun mounted on an AT-AT chassis.<ref name="TNEGTWAT">''[[The New Essential Guide to Weapons and Technology]]''</ref> |
+ | The AT-AT "dune walker" was a desert terrain walker fitted with [[Sienar Fleet Systems]] [[z23 heat dissipation unit]]s<ref name="NEGVV" />; while the [[Aquatic Terrain Armored Transport]], known as the AT-AT "swimmer," was a [[repulsorcraft]] cousin of the standard model.<ref name="AT-AT Databank" /> There was also the [[All Terrain Ion Cannon]], a long-range artillery gun mounted on an AT-AT chassis.<ref name="TNEGTWAT">''[[The New Essential Guide to Weapons and Technology]]''</ref> |
==History== |
==History== |
||
| Line 109: | Line 108: | ||
AT-ATs were first designed and assembled by [[Kuat Drive Yards]] during the [[Clone Wars]]. They were evolved from the [[All Terrain Tactical Enforcer|AT-TE]] walkers first employed in the [[First Battle of Geonosis|Battle of Geonosis]],<ref name="CCS" /> as well as the [[All Terrain Personal Transport|AT-PT]].<ref name="EGVV">''[[The Essential Guide to Vehicles and Vessels]]''</ref> |
AT-ATs were first designed and assembled by [[Kuat Drive Yards]] during the [[Clone Wars]]. They were evolved from the [[All Terrain Tactical Enforcer|AT-TE]] walkers first employed in the [[First Battle of Geonosis|Battle of Geonosis]],<ref name="CCS" /> as well as the [[All Terrain Personal Transport|AT-PT]].<ref name="EGVV">''[[The Essential Guide to Vehicles and Vessels]]''</ref> |
||
| − | The first-generation AT-AT walkers saw their debut during the [[Battle of Jabiim]], later on in the [[Clone Wars]]. During this battle, the overwhelmed Confederacy forces were annihilated by them. Their significance waned when the walkers were slowed down by the muddy surface |
+ | The first-generation AT-AT walkers saw their debut during the [[Battle of Jabiim]], later on in the [[Clone Wars]]. During this battle, the overwhelmed Confederacy forces were annihilated by them. Their significance waned when the walkers were slowed down by the muddy surface of the planet, making it easier for the enemy units to bring them down.<ref name="Star Wars Republic: The Battle of Jabiim">''[[Star Wars: Republic: The Battle of Jabiim]]''</ref> At some point, AT-AT walkers managed to fall into the hands of the [[Confederacy of Independent Systems|CIS]], with at least one unit being kept in a research facility on the Separatist world of [[Diado]].<ref name="It Takes a Thief">''[[It Takes a Thief]]''</ref> |
| − | During the Wars, wheeled tanks like the [[HAVw A5 Juggernaut|A5]] and [[HAVw A6 Juggernaut|A6 Juggernaut]]s were preferred over both the AT-AT and the [[All Terrain Heavy Enforcer|AT-HE]], due to the decreased ground pressure of wheeled vehicles over legged ones.<ref name="ROTS:ICS">''[[Revenge of the Sith |
+ | During the Wars, wheeled tanks like the [[HAVw A5 Juggernaut|A5]] and [[HAVw A6 Juggernaut|A6 Juggernaut]]s were preferred over both the AT-AT and the [[All Terrain Heavy Enforcer|AT-HE]], due to the decreased ground pressure of wheeled vehicles over legged ones.<ref name="ROTS:ICS">''[[Star Wars: Revenge of the Sith Incredible Cross-Sections]]''</ref> |
===Imperial refinements=== |
===Imperial refinements=== |
||
{{Quote|Will you look at those walkers? Has there ever been anything so big and gray and ugly, Luke?''"<br />"''If you don't like 'em, I'll take you down where you can do something about it, Dak.|Dak Ralter and Luke Skywalker, during the Battle of Hoth.|The Empire Strikes Back (radio)}} |
{{Quote|Will you look at those walkers? Has there ever been anything so big and gray and ugly, Luke?''"<br />"''If you don't like 'em, I'll take you down where you can do something about it, Dak.|Dak Ralter and Luke Skywalker, during the Battle of Hoth.|The Empire Strikes Back (radio)}} |
||
| − | During the time of the [[Galactic Empire]], AT-ATs were not completely forgotten, as a later-generation model participated in the [[Battle of Orion IV]].<ref>''[[Star Wars: X-Wing]]'' cutscene</ref> AT-ATs were being tested on the [[planet]] [[Carida]] when the Rebel Alliance [[Skirmish on Carida|attacked]].<ref name="EAW" /> The AT-AT was instrumental in winning the battle. After the [[Battle of Yavin]], it was [[Maximilian Veers]] that fully resurrected the concept, bringing the AT-AT into full Imperial service |
+ | During the time of the [[Galactic Empire]], AT-ATs were not completely forgotten, as a later-generation model participated in the [[Battle of Orion IV]].<ref>''[[Star Wars: X-Wing]]'' cutscene</ref> AT-ATs were being tested on the [[planet]] [[Carida]] when the Rebel Alliance [[Skirmish on Carida|attacked]].<ref name="EAW" /> The AT-AT was instrumental in winning the battle. After the [[Battle of Yavin]], it was [[Maximilian Veers]] that fully resurrected the concept, bringing the AT-AT into full Imperial service. They were deployed on a wide array of worlds in the following months, including [[Corellia]], [[Chandrila]], and [[Ghorman]]. Nearly three years after the Battle of Yavin, Veers neared completion on a superior model while on [[Zaloriis]]. This was nicknamed the "Dune Cow". With the prototype ''[[Blizzard 1]]'', constructed at [[Camp Culroon]], Veers [[Battle of Zaloriis|assaulted]] the planet's [[Zaloriis City|capital]] when Zaloriis declared their affiliation with the [[Alliance to Restore the Republic|Rebellion]].<ref name="SWGB">''[[Star Wars: Galactic Battlegrounds]]''</ref> |
[[File:ATATtripped.jpg|right|thumb|200px|A snowspeeder uses a [[harpoon and tow cable]] to trip an AT-AT.]] |
[[File:ATATtripped.jpg|right|thumb|200px|A snowspeeder uses a [[harpoon and tow cable]] to trip an AT-AT.]] |
||
At least one AT-AT was used at the [[Battle of Boz Pity (Galactic Civil War)|Battle of Boz Pity]]. The AT-AT was unknowingly steered into a trap set by [[Renegade Squadron]]; a [[detonation pack]] was used to blow up a hidden cache of explosives, and the huge explosion toppled the machine. However, the battle was ultimately a victory for the Empire.<ref name="SWBRS">''[[Star Wars Battlefront: Renegade Squadron]]''</ref> |
At least one AT-AT was used at the [[Battle of Boz Pity (Galactic Civil War)|Battle of Boz Pity]]. The AT-AT was unknowingly steered into a trap set by [[Renegade Squadron]]; a [[detonation pack]] was used to blow up a hidden cache of explosives, and the huge explosion toppled the machine. However, the battle was ultimately a victory for the Empire.<ref name="SWBRS">''[[Star Wars Battlefront: Renegade Squadron]]''</ref> |
||
| − | Several AT-ATs were also deployed to [[Ralltiir]] to [[Defense of Ralltiir|subjugate]] the scientists, although several of them |
+ | Several AT-ATs were also deployed to [[Ralltiir]] to [[Defense of Ralltiir|subjugate]] the scientists, although several of them were destroyed after [[Red Squadron (Rebel Alliance)|Red Squadron]] destroyed the bridges into the city with bombs, developed by scientists, and their speeders.<ref name="SW:RSIII:RS">''[[Star Wars: Rogue Squadron III: Rebel Strike]]''</ref> |
| − | At the [[Battle of Hoth]], the Empire |
+ | At the [[Battle of Hoth]], the Empire's [[Blizzard Force]] utilized AT-ATs to assault the Rebel's [[Echo Base]], as it was protected from above by an energy shield. Due to their weight, and the unstable terrain they were traversing, a few were lost before the battle even began.<ref name="SWCL" /> General Maximilian Veers commanded the ground forces and advanced on the shield generator, decimating [[Rebel trooper]]s in their trenches.<ref name="ESB" /> Blizzard Force's frequent usage of AT-AT's was largely the reason behind their logo adopting an image of the AT-AT. |
[[File:Battle of Hoth NEC.jpg|left|thumb|200px|AT-ATs overrun rebel positions during the [[Battle of Hoth]].]] |
[[File:Battle of Hoth NEC.jpg|left|thumb|200px|AT-ATs overrun rebel positions during the [[Battle of Hoth]].]] |
||
| − | Faced with such forces, [[Luke Skywalker]] employed a strategy earlier devised by himself and strategist [[Beryl Chiffonage]] to disable the walkers: his |
+ | Faced with such forces, [[Luke Skywalker]] employed a strategy earlier devised by himself and strategist [[Beryl Chiffonage]] to disable the walkers: his squadron of [[T-47 airspeeder|snowspeeder]]s would use their magnetic harpoons and tow cables to entangle the walkers' feet, toppling them. [[Wedge Antilles]] and his gunner, [[Wes Janson]], managed to disable one walker using this method. Luke destroyed two more by cutting a hole in each with his [[lightsaber]] and tossing in a [[concussion grenade]].<ref name="ESB" /><ref name="SW:RSIII:RS" /> |
[[Dash Rendar]] was able to bring down a third through unknown means.<ref name="SOTE">''[[Shadows of the Empire]]''</ref> Another AT-AT that closed on Echo Base was destroyed by [[Renegade Squadron]], which used [[particle cannon turret]]s to destroy the war machine.<ref name="SWBRS" /> (The dangers of AT-AT walkers toppling was discovered by an Imperial Cadet named [[Davin Felth]], but the oversight was not corrected by Colonel Veers prior to deployment.)<ref name="WTDWT:TST">''[[When the Desert Wind Turns: The Stormtrooper's Tale]]''</ref> |
[[Dash Rendar]] was able to bring down a third through unknown means.<ref name="SOTE">''[[Shadows of the Empire]]''</ref> Another AT-AT that closed on Echo Base was destroyed by [[Renegade Squadron]], which used [[particle cannon turret]]s to destroy the war machine.<ref name="SWBRS" /> (The dangers of AT-AT walkers toppling was discovered by an Imperial Cadet named [[Davin Felth]], but the oversight was not corrected by Colonel Veers prior to deployment.)<ref name="WTDWT:TST">''[[When the Desert Wind Turns: The Stormtrooper's Tale]]''</ref> |
||
| − | Despite these small successes, they were ultimately insufficient to turn the tide of the battle, and the Battle of Hoth was one of the most devastating losses for the |
+ | Despite these small successes, they were ultimately insufficient to turn the tide of the battle, and the Battle of Hoth was one of the most devastating losses for the Rebellion in the entire [[Galactic Civil War]]. The AT-ATs succeeded in destroying the shield generator, thereby allowing the main Imperial force to land and attack Echo Base. The AT-ATs would go on to devastate the Rebel defenses.<ref name="ESB" /> |
| − | During the [[Battle of Dubrillion (Galactic Civil War)|Battle of Dubrillion]], Wedge Antilles, after infiltrating the [[Dubrillion superlaser facility]] in an [[All Terrain Scout Transport]], managed to hijack an AT-AT Walker inside of a hangar |
+ | During the [[Battle of Dubrillion (Galactic Civil War)|Battle of Dubrillion]], Wedge Antilles, after infiltrating the [[Dubrillion superlaser facility]] in an [[All Terrain Scout Transport]], managed to hijack an AT-AT Walker inside of a hangar. Wedge then proceeded towards the generator room and used the walker's firepower to destroy the superlaser facility's turbines and destroy the facility and the superlaser for good.<ref name="SW:RSIII:RS" /> |
Several AT-ATs also broke out of the [[Imperial I-class Star Destroyer|''Imperial I''-class Star Destroyer]] ''[[Motivator (Imperial-class)|Motivator]]'' after it was shot down from orbit during the [[Battle of Kothlis]], although Rogue Squadron managed to down them in the ocean.<ref name="SW"RSII:RL">''[[Star Wars: Rogue Squadron II: Rogue Leader]]''</ref> |
Several AT-ATs also broke out of the [[Imperial I-class Star Destroyer|''Imperial I''-class Star Destroyer]] ''[[Motivator (Imperial-class)|Motivator]]'' after it was shot down from orbit during the [[Battle of Kothlis]], although Rogue Squadron managed to down them in the ocean.<ref name="SW"RSII:RL">''[[Star Wars: Rogue Squadron II: Rogue Leader]]''</ref> |
||
| − | At least one AT-AT patrolled the garrison base on the [[Endor|forest moon of Endor]], but had no impact on the [[Battle of Endor|battle]] there, as AT-ATs were limited in their range by the dense foliage of the moon. As a result, smaller vehicles such as [[All Terrain Scout Transport]]s saw far more use.<ref name="ROTJ">[[Star Wars: Episode VI Return of the Jedi|''Star Wars'': Episode VI ''Return of the Jedi'']]</ref> An AT-AT was originally going to be used in the Battle of Endor, but it |
+ | At least one AT-AT patrolled the garrison base on the [[Endor|forest moon of Endor]], but had no impact on the [[Battle of Endor|battle]] there, as AT-ATs were limited in their range by the dense foliage of the moon. As a result, smaller vehicles, such as [[All Terrain Scout Transport]]s, saw far more use.<ref name="ROTJ">[[Star Wars: Episode VI Return of the Jedi|''Star Wars'': Episode VI ''Return of the Jedi'']]</ref> An AT-AT was originally going to be used in the Battle of Endor, but it was crippled by Renegade Squadron, resulting in portions of the Galactic Empire attempting to fix it.<ref name="BF:RS">''[[Star Wars Battlefront: Renegade Squadron]]''</ref> |
===Beyond Endor=== |
===Beyond Endor=== |
||
| Line 142: | Line 141: | ||
Sometime after the [[Battle of Endor]], the Empire replaced the AT-AT's lasers and blasters with light [[turbolaser]]s, easily capable of defeating many highly protected defensive weapons emplacements. |
Sometime after the [[Battle of Endor]], the Empire replaced the AT-AT's lasers and blasters with light [[turbolaser]]s, easily capable of defeating many highly protected defensive weapons emplacements. |
||
| − | In [[5 ABY]], an AT-AT was patrolling on [[Ruusan]] as the Imperial faction led by the [[Seven Dark Jedi]] [[Mission to Ruusan|searched]] for the [[Valley of the Jedi]]. Shortly after cutting down [[Sariss]], Rebel [[mercenary]] and rising [[Jedi Knight]] [[Kyle Katarn]] headed for the Valley himself, passing through the standby AT-AT as he went.<ref name="Dark Forces II">''[[Star Wars: Jedi Knight: Dark Forces II]]''</ref> |
+ | In [[5 ABY]], an AT-AT was patrolling on [[Ruusan]] as the Imperial faction, led by the [[Seven Dark Jedi]], [[Mission to Ruusan|searched]] for the [[Valley of the Jedi]]. Shortly after cutting down [[Sariss]], Rebel [[mercenary]] and rising [[Jedi Knight]] [[Kyle Katarn]] headed for the Valley himself, passing through the standby AT-AT as he went.<ref name="Dark Forces II">''[[Star Wars: Jedi Knight: Dark Forces II]]''</ref> |
| − | By [[9 ABY]], [[Nomad City]] on [[Nkllon]] was a mining operation owned by [[Lando Calrissian]]. The city was built from a [[Dreadnaught-class heavy cruiser|''Dreadnaught''-class heavy cruiser]] mounted on top of 40 captured AT-ATs to move the city |
+ | By [[9 ABY]], [[Nomad City]] on [[Nkllon]] was a mining operation owned by [[Lando Calrissian]]. The city was built from a [[Dreadnaught-class heavy cruiser|''Dreadnaught''-class heavy cruiser]] mounted on top of 40 captured AT-ATs to constantly move the city away from the day side of Nkllon and prevent it from being destroyed by the intense radiation of Nkllon's sun.<ref name="HTTE">''[[Heir to the Empire]]''</ref> However, the city was damaged and later abandoned, leading to the eventual destruction of Nomad City and its AT-ATs by the intense radiation.<ref name="TLC">''[[The Last Command]]''</ref> |
| − | During the reborn [[Galactic Emperor|Emperor]] [[Palpatine]]'s [[Operation Shadow Hand|insurgency in a clone body]] from [[10 ABY]] to [[11 ABY]], the Empire developed a new variant of the AT-AT that was equipped with the most powerful Imperial [[turbolaser]]s and the new [[X-80 Power Cell|X-80 power cell]]s. These were deployed during an [[Battle of New Alderaan (Operation Shadow Hand)|attack]] on [[New Alderaan]]. During the battle, they vaporized many buildings, gun emplacements |
+ | During the reborn [[Galactic Emperor|Emperor]] [[Palpatine]]'s [[Operation Shadow Hand|insurgency in a clone body]] from [[10 ABY]] to [[11 ABY]], the Empire developed a new variant of the AT-AT that was equipped with the most powerful Imperial [[turbolaser]]s and the new [[X-80 Power Cell|X-80 power cell]]s. These were deployed during an [[Battle of New Alderaan (Operation Shadow Hand)|attack]] on [[New Alderaan]]. During the battle, they vaporized many buildings, gun emplacements and [[starfighter]]s.<ref name="DE II" /> |
Following the Galactic Civil War, AT-ATs were also used by the [[New Republic]], the [[Galactic Federation of Free Alliances]], and various other governments. |
Following the Galactic Civil War, AT-ATs were also used by the [[New Republic]], the [[Galactic Federation of Free Alliances]], and various other governments. |
||
| Line 165: | Line 164: | ||
The animators who brought the AT-AT Imperial Walkers to life in ''The Empire Strikes Back'' based their movements on elephants.<ref name="Jedi vs. Sith application on Facebook">''Jedi vs. Sith'' application on Facebook</ref> |
The animators who brought the AT-AT Imperial Walkers to life in ''The Empire Strikes Back'' based their movements on elephants.<ref name="Jedi vs. Sith application on Facebook">''Jedi vs. Sith'' application on Facebook</ref> |
||
| − | AT-ATs frequently appear in video games, though in games they vary in durability. In some games they can be damaged by shooting them, such as in ''Shadows of the Empire'' and the ''Battlefront'' series, though in the latter their durability makes using blasters impractical. In the ''Rogue Squadron'' games, AT-ATs are completely immune to all weapons and can only be destroyed with a Snowspeeder's tow cables, except for one mission where a Snowspeeder carries bombs with its tow cable that are powerful enough to destroy an AT-AT. Typically, their weapons are easy for the player to avoid, but destroying the walker can prove to be |
+ | AT-ATs frequently appear in video games, though in games they vary in durability. In some games they can be damaged by shooting them, such as in ''Shadows of the Empire'' and the ''Battlefront'' series, though in the latter their durability makes using blasters impractical. In the ''Rogue Squadron'' games, AT-ATs are completely immune to all weapons and can only be destroyed with a Snowspeeder's tow cables, except for one mission where a Snowspeeder carries bombs with its tow cable that are powerful enough to destroy an AT-AT. Typically, their weapons are easy for the player to avoid, but destroying the walker can prove to be difficult because of their strong armor. |
During development for ''Rebel Strike'', the third entry for the ''Rogue Squadron'' video game series, the development team, because of their insistance of rebuilding the ''Rogue Leader'' game coding entirely from scratch to make it different from its predecessor, ran into some gaffes and problems during animation. One of these gaffes was Luke Skywalker's harpoon cable attaching to the AT-AT's neck, and then walking it as if it were a giant dog, during the development of the Battlefield Hoth mission.<ref name="RS III Documentary">''The Making Of ''Star Wars: Rogue Squadron III: Rebel Strike''.''</ref> |
During development for ''Rebel Strike'', the third entry for the ''Rogue Squadron'' video game series, the development team, because of their insistance of rebuilding the ''Rogue Leader'' game coding entirely from scratch to make it different from its predecessor, ran into some gaffes and problems during animation. One of these gaffes was Luke Skywalker's harpoon cable attaching to the AT-AT's neck, and then walking it as if it were a giant dog, during the development of the Battlefield Hoth mission.<ref name="RS III Documentary">''The Making Of ''Star Wars: Rogue Squadron III: Rebel Strike''.''</ref> |
||
| Line 184: | Line 183: | ||
{{Quote|Outpost Beta here. I have a visual now. These things look like … animals. They're huge, maybe ten, fifteen meters high, four-legged, and their heads move. They're made out of metal. They have extremely heavy armor and armament. I count six of 'em so far.|[[Maren Kelsome|BETA]], in the [[The Empire Strikes Back (radio)|recording of ''The Empire Strikes Back'' radio dramatization]]|The Empire Strikes Back (radio)}} |
{{Quote|Outpost Beta here. I have a visual now. These things look like … animals. They're huge, maybe ten, fifteen meters high, four-legged, and their heads move. They're made out of metal. They have extremely heavy armor and armament. I count six of 'em so far.|[[Maren Kelsome|BETA]], in the [[The Empire Strikes Back (radio)|recording of ''The Empire Strikes Back'' radio dramatization]]|The Empire Strikes Back (radio)}} |
||
| − | In "Forces of the Empire," an article that was first published [[The Empire Strikes Back Official Poster Monthly 2|Issue 2]] of ''[[The Empire Strikes Back Official Poster Monthly]]'', the All Terrain Armored Transport was described as "a fifty-foot tall armored exoskeleton." The figure of fifty feet was likely derived from sources such as ''[[The Empire Strikes Back Sketchbook]]'', which suggested that the designers of the model intended for the AT-AT to appear as fifty feet tall on screen. In 1984, this figure was given as the height for the AT-AT in [[A Guide to the Star Wars Universe |
+ | In "Forces of the Empire," an article that was first published [[The Empire Strikes Back Official Poster Monthly 2|Issue 2]] of ''[[The Empire Strikes Back Official Poster Monthly]]'', the All Terrain Armored Transport was described as "a fifty-foot tall armored exoskeleton." The figure of fifty feet was likely derived from sources such as ''[[The Empire Strikes Back Sketchbook]]'', which suggested that the designers of the model intended for the AT-AT to appear as fifty feet tall on screen. In 1984, this figure was given as the height for the AT-AT in [[A Guide to the Star Wars Universe|the first edition of a ''A Guide to the Star Wars Universe'']] |
In 1983, [[The Empire Strikes Back (radio)|''The Empire Strikes Back'' radio dramatization]] included a scene in which a young Rebel officer, who would be later identified as [[Maren Kelsome]], gave the command staff of Echo Base a rough estimate of the height of the AT-ATs approaching his location. His statement that they were "twenty, twenty-five meters high" in the script later was changed to "ten, fifteen meters high" in the recorded version. |
In 1983, [[The Empire Strikes Back (radio)|''The Empire Strikes Back'' radio dramatization]] included a scene in which a young Rebel officer, who would be later identified as [[Maren Kelsome]], gave the command staff of Echo Base a rough estimate of the height of the AT-ATs approaching his location. His statement that they were "twenty, twenty-five meters high" in the script later was changed to "ten, fifteen meters high" in the recorded version. |
||
| Line 190: | Line 189: | ||
Supplements for [[West End Games]]'s [[Star Wars: The Roleplaying Game|''Star Wars'' roleplaying game]] listed the All-Terrain Armored Transport at a height of 15.5 meters.<ref name="ISB">''[[Imperial Sourcebook]]''</ref> ''[[Inside the Worlds of Star Wars Trilogy]]'' revised the AT-AT's height to 22.5 meters in a section dealing with the [[Y-85 Titan dropship|dropships]] that were used to land the walkers during the Battle of Hoth. This larger figure was based upon unofficial calculations by [[Curtis Saxton]],<ref name="swtc">http://www.theforce.net/swtc/walkers.html#atat</ref> with whom [[James Luceno]], the author of the book, consulted on technical matters. It was calculated using a scene in ''The Empire Strikes Back'' where Luke Skywalker is ascending a cable beneath a walker.<ref name="ESB" /><ref name="swtc" /> |
Supplements for [[West End Games]]'s [[Star Wars: The Roleplaying Game|''Star Wars'' roleplaying game]] listed the All-Terrain Armored Transport at a height of 15.5 meters.<ref name="ISB">''[[Imperial Sourcebook]]''</ref> ''[[Inside the Worlds of Star Wars Trilogy]]'' revised the AT-AT's height to 22.5 meters in a section dealing with the [[Y-85 Titan dropship|dropships]] that were used to land the walkers during the Battle of Hoth. This larger figure was based upon unofficial calculations by [[Curtis Saxton]],<ref name="swtc">http://www.theforce.net/swtc/walkers.html#atat</ref> with whom [[James Luceno]], the author of the book, consulted on technical matters. It was calculated using a scene in ''The Empire Strikes Back'' where Luke Skywalker is ascending a cable beneath a walker.<ref name="ESB" /><ref name="swtc" /> |
||
| − | This figure was repeated by ''[[Star Wars: Complete Locations]]'', a compilation of the ''[[Inside the Worlds of]]'' series, but the "Episodes IV-VI Data Files" section of ''[[Star Wars: Complete Cross-Sections]]'' listed the AT-AT's height at 15.5 meters, adding further confusion to this issue. Yet another alternative size for the AT-AT was shown in the [[Hyperspace: The Official Star Wars Fan Club|Hyperspace]] fan club kit, which included a desktop wallpaper depicting various vehicles in scale with each other. Compared to the [[HAVw A6 Juggernaut]], which is unambiguously known to be 49.4 meters long and 30.5 meters tall,<ref name="consistent">''[[Revenge of the Sith |
+ | This figure was repeated by ''[[Star Wars: Complete Locations]]'', a compilation of the ''[[Inside the Worlds of]]'' series, but the "Episodes IV-VI Data Files" section of ''[[Star Wars: Complete Cross-Sections]]'' listed the AT-AT's height at 15.5 meters, adding further confusion to this issue. Yet another alternative size for the AT-AT was shown in the [[Hyperspace: The Official Star Wars Fan Club|Hyperspace]] fan club kit, which included a desktop wallpaper depicting various vehicles in scale with each other. Compared to the [[HAVw A6 Juggernaut]], which is unambiguously known to be 49.4 meters long and 30.5 meters tall,<ref name="consistent">''[[Star Wars: Revenge of the Sith Incredible Cross-Sections]]'', {{DB|vehicle|turbotank|Clone turbo tank}}, and {{WizardsCite|url=default.asp?x=starwars/article/sw20050811a|text=Starships and Vehicles of ''Revenge of the Sith''|int=Star Wars Episode III: Revenge of the Sith}}</ref> the AT-AT is shown to be 18.5 meters in height.<ref name="hsfankit">{{Hyperspace|url=hyperspace/member/fankit|text=Hyperspace Fanclub Kit}}</ref> |
==Appearances== |
==Appearances== |
||
| Line 209: | Line 208: | ||
*''[[Star Tours: The Adventures Continue]]'' |
*''[[Star Tours: The Adventures Continue]]'' |
||
*[[Star Wars: Rebellion (video game)|''Star Wars: Rebellion'']] |
*[[Star Wars: Rebellion (video game)|''Star Wars: Rebellion'']] |
||
| + | *''[[Scoundrel's Luck]]'' |
||
*''[[Battle for the Golden Sun]]'' {{Mo}} |
*''[[Battle for the Golden Sun]]'' {{Mo}} |
||
*''[[Starfall (adventure)|Starfall]]'' |
*''[[Starfall (adventure)|Starfall]]'' |
||
*''[[Black Ice (adventure book)|Black Ice]]'' {{Mo}} |
*''[[Black Ice (adventure book)|Black Ice]]'' {{Mo}} |
||
| + | *{{WEGCite|book=Star Wars Gamemaster Kit|text=''Star Wars Gamemaster Kit''|story=Return to Bundim}} |
||
| + | *{{WEGCite|book=Classic Campaigns|text=''Classic Campaigns''|story=Return to Bundim}} {{C|Reprint}} |
||
*''[[Star Wars: Empire at War]]'' |
*''[[Star Wars: Empire at War]]'' |
||
*''[[Star Wars: Empire at War: Forces of Corruption]]'' |
*''[[Star Wars: Empire at War: Forces of Corruption]]'' |
||
| Line 234: | Line 236: | ||
*''[[Star Wars: Rebellion 7: The Ahakista Gambit, Part 2]]'' |
*''[[Star Wars: Rebellion 7: The Ahakista Gambit, Part 2]]'' |
||
*''[[Star Wars: Rebellion 9: The Ahakista Gambit, Part 4]]'' |
*''[[Star Wars: Rebellion 9: The Ahakista Gambit, Part 4]]'' |
||
| − | *{{WEGCite|book=Imperial Sourcebook |
+ | *{{WEGCite|book=Imperial Sourcebook|text=''Imperial Sourcebook''|story=Death of a Rebel Base|stext=''Death of a Rebel Base''}} |
*{{WEGCite|book=Imperial Sourcebook (Second Edition)|text=''Imperial Sourcebook'', Second Edition|story=Death of a Rebel Base|stext=''Death of a Rebel Base''}} {{C|Reprint}} |
*{{WEGCite|book=Imperial Sourcebook (Second Edition)|text=''Imperial Sourcebook'', Second Edition|story=Death of a Rebel Base|stext=''Death of a Rebel Base''}} {{C|Reprint}} |
||
*{{Journal|9|Combat Moon (short story)|Combat Moon}} |
*{{Journal|9|Combat Moon (short story)|Combat Moon}} |
||
| Line 322: | Line 324: | ||
*{{KennerCite|set=Star Wars: The Empire Strikes Back (toy line)|text=''Star Wars: The Empire Strikes Back''|pack=Hoth Ice Planet Adventure Set|link=vintHothIcePlanet.asp}} |
*{{KennerCite|set=Star Wars: The Empire Strikes Back (toy line)|text=''Star Wars: The Empire Strikes Back''|pack=Hoth Ice Planet Adventure Set|link=vintHothIcePlanet.asp}} |
||
*[[Star Wars: The Power of the Force (1995)|''Star Wars: The Power of the Force'' (1995)]] |
*[[Star Wars: The Power of the Force (1995)|''Star Wars: The Power of the Force'' (1995)]] |
||
| − | *''[[ |
+ | *''[[A Guide to the Star Wars Universe]]'' |
| − | *[[Star Wars: The Roleplaying Game |
+ | *''[[Star Wars: The Roleplaying Game (first edition)|Star Wars: The Roleplaying Game]]'' |
*''[[The Star Wars Sourcebook]]'' |
*''[[The Star Wars Sourcebook]]'' |
||
*''[[Star Wars Campaign Pack]]'' |
*''[[Star Wars Campaign Pack]]'' |
||
*''[[Assault on Hoth]]'' |
*''[[Assault on Hoth]]'' |
||
*''[[The Star Wars Rules Companion]]'' |
*''[[The Star Wars Rules Companion]]'' |
||
| − | *''[[ |
+ | *''[[Galaxy Guide 3: The Empire Strikes Back]]'' |
| − | *''[[ |
+ | *''[[Imperial Sourcebook]]'' |
| − | *''[[ |
+ | *''[[Galaxy Guide 5: Return of the Jedi]]'' |
| − | *''[[ |
+ | *''[[Rebel Alliance Sourcebook]]'' |
*''[[Death Star Technical Companion]]'' |
*''[[Death Star Technical Companion]]'' |
||
*[[Star Wars: The Roleplaying Game, Second Edition|''Star Wars: The Roleplaying Game'', Second Edition]] |
*[[Star Wars: The Roleplaying Game, Second Edition|''Star Wars: The Roleplaying Game'', Second Edition]] |
||
| Line 349: | Line 351: | ||
*''[[The Essential Guide to Characters]]'' |
*''[[The Essential Guide to Characters]]'' |
||
*''[[The Truce at Bakura Sourcebook]]'' |
*''[[The Truce at Bakura Sourcebook]]'' |
||
| + | *{{GalaxyCite|6|Around the Galaxy}} |
||
| + | *{{GalaxyCite|6|Cyber Notes}} |
||
*''[[The Essential Guide to Vehicles and Vessels]]'' |
*''[[The Essential Guide to Vehicles and Vessels]]'' |
||
*''[[Galaxy Guide 3: The Empire Strikes Back]]'' |
*''[[Galaxy Guide 3: The Empire Strikes Back]]'' |
||
| Line 356: | Line 360: | ||
*[[Star Wars: Shadows of the Empire Limited Collector's Edition|''Star Wars: Shadows of the Empire'' Limited Collector's Edition]] |
*[[Star Wars: Shadows of the Empire Limited Collector's Edition|''Star Wars: Shadows of the Empire'' Limited Collector's Edition]] |
||
*''[[Star Wars Gamemaster Screen, Revised]]'' <!-- December 1996 --> |
*''[[Star Wars Gamemaster Screen, Revised]]'' <!-- December 1996 --> |
||
| + | *{{GalaxyCite|10|The Ice World Cometh}} |
||
*{{CCG|Hoth Limited|cardname=AT-AT Cannon}} |
*{{CCG|Hoth Limited|cardname=AT-AT Cannon}} |
||
*{{CCG|Hoth Limited|cardname=AT-AT Driver}} |
*{{CCG|Hoth Limited|cardname=AT-AT Driver}} |
||
| Line 381: | Line 386: | ||
*{{StarWarsKidsCite|4|So You Think You Wanna Be a Rebel Pilot?}} |
*{{StarWarsKidsCite|4|So You Think You Wanna Be a Rebel Pilot?}} |
||
*{{StarWarsKidsCite|4|Meet Wedge!}} |
*{{StarWarsKidsCite|4|Meet Wedge!}} |
||
| + | *{{GalaxyCite|11|Around the Galaxy}} |
||
*''[[Star Wars: The Art of the Brothers Hildebrandt]]'' |
*''[[Star Wars: The Art of the Brothers Hildebrandt]]'' |
||
*''[[Star Wars Trilogy Sourcebook, Special Edition]]'' |
*''[[Star Wars Trilogy Sourcebook, Special Edition]]'' |
||
| Line 390: | Line 396: | ||
*[[A Guide to the Star Wars Universe (Third Edition)|''A Guide to the Star Wars Universe'' Third Edition]] |
*[[A Guide to the Star Wars Universe (Third Edition)|''A Guide to the Star Wars Universe'' Third Edition]] |
||
*''[[Rebellion Era Sourcebook]]'' |
*''[[Rebellion Era Sourcebook]]'' |
||
| − | *[[Starships of the Galaxy |
+ | *''[[Starships of the Galaxy]]'' |
| − | *{{TCG|The Empire Strikes Back (TCG)|link=http:// |
+ | *{{TCG|The Empire Strikes Back (TCG)|link=http://wizards.com/swtcg/images/esb/all_terrain_armored_transport.jpg|cardname=All Terrain Armored Transport}} |
| ⚫ | |||
| ⚫ | |||
*{{TCG|The Empire Strikes Back (TCG)|link=http://www.wizards.com/swtcg/swtcg_autocard.asp?name=All%5BTerrain%5BTroop%5BTransport|cardname=All Terrain Troop Transport}} |
*{{TCG|The Empire Strikes Back (TCG)|link=http://www.wizards.com/swtcg/swtcg_autocard.asp?name=All%5BTerrain%5BTroop%5BTransport|cardname=All Terrain Troop Transport}} |
||
*{{TCG|The Empire Strikes Back (TCG)|link=http://www.wizards.com/swtcg/swtcg_autocard.asp?name=Anti-Infantry%5BLaser%5BBattery|cardname=Anti-Infantry Laser Battery}} |
*{{TCG|The Empire Strikes Back (TCG)|link=http://www.wizards.com/swtcg/swtcg_autocard.asp?name=Anti-Infantry%5BLaser%5BBattery|cardname=Anti-Infantry Laser Battery}} |
||
| ⚫ | |||
| + | *{{TCG|The Empire Strikes Back (TCG)|link=http://www.wizards.com/swtcg/swtcg_autocard.asp?name=AT-AT%5BAssault%5BGroup|cardname=AT-AT Assault Group}} |
||
*{{TCG|The Empire Strikes Back (TCG)|link=http://www.wizards.com/swtcg/swtcg_autocard.asp?name=AT-AT%5BDriver|cardname=AT-AT Driver}} |
*{{TCG|The Empire Strikes Back (TCG)|link=http://www.wizards.com/swtcg/swtcg_autocard.asp?name=AT-AT%5BDriver|cardname=AT-AT Driver}} |
||
| ⚫ | |||
| ⚫ | |||
| ⚫ | |||
| ⚫ | |||
*{{TCG|The Empire Strikes Back (TCG)|link=http://wizards.com/swtcg/images/esb/rebel_hoth_army.jpg|cardname=Rebel Hoth Army}} |
*{{TCG|The Empire Strikes Back (TCG)|link=http://wizards.com/swtcg/images/esb/rebel_hoth_army.jpg|cardname=Rebel Hoth Army}} |
||
*{{TCG|The Empire Strikes Back (TCG)|link=http://wizards.com/swtcg/images/esb/snowspeeder_rogue_ten.jpg|cardname=Snowspeeder Rogue Ten}} {{Po}} |
*{{TCG|The Empire Strikes Back (TCG)|link=http://wizards.com/swtcg/images/esb/snowspeeder_rogue_ten.jpg|cardname=Snowspeeder Rogue Ten}} {{Po}} |
||
| − | *{{TCG|The Empire Strikes Back (TCG)|link=http://wizards.com/swtcg/images/esb/all_terrain_armored_transport.jpg|cardname=All Terrain Armored Transport}} |
||
| ⚫ | |||
| ⚫ | |||
| ⚫ | |||
*{{TCG|The Empire Strikes Back (TCG)|link=http://www.wizards.com/swtcg/images/esb/snowtrooper_squad.jpg|cardname=Snowtrooper Squad}} |
*{{TCG|The Empire Strikes Back (TCG)|link=http://www.wizards.com/swtcg/images/esb/snowtrooper_squad.jpg|cardname=Snowtrooper Squad}} |
||
*''[[Star Wars: Galactic Battlegrounds: Prima's Official Strategy Guide]]'' |
*''[[Star Wars: Galactic Battlegrounds: Prima's Official Strategy Guide]]'' |
||
| Line 413: | Line 419: | ||
*''[[Star Wars: Rogue Squadron III: Rebel Strike: The Official Nintendo Player's Guide]]'' |
*''[[Star Wars: Rogue Squadron III: Rebel Strike: The Official Nintendo Player's Guide]]'' |
||
*''[[Inside the Worlds of Star Wars Trilogy]]'' |
*''[[Inside the Worlds of Star Wars Trilogy]]'' |
||
| − | *''[[Battlefront: Prima Official Game Guide]]'' |
+ | *''[[Star Wars Battlefront: Prima Official Game Guide]]'' |
*''[[Star Wars: Complete Locations]]'' |
*''[[Star Wars: Complete Locations]]'' |
||
| − | *''[[Battlefront II: Prima Official Game Guide]]'' |
+ | *''[[Star Wars Battlefront II: Prima Official Game Guide]]'' |
*''[[Star Wars: Empire at War: Prima Official Game Guide]]'' |
*''[[Star Wars: Empire at War: Prima Official Game Guide]]'' |
||
*''[[Star Wars: The Complete Visual Dictionary]]'' |
*''[[Star Wars: The Complete Visual Dictionary]]'' |
||
| Line 434: | Line 440: | ||
*''[[Star Wars Art: Visions]]'' |
*''[[Star Wars Art: Visions]]'' |
||
*{{SWGTCG|The Price of Victory|cardname=Attack Pattern Delta}} |
*{{SWGTCG|The Price of Victory|cardname=Attack Pattern Delta}} |
||
| ⚫ | |||
*{{SWGTCG|The Price of Victory|cardname=Blizzard 1}} |
*{{SWGTCG|The Price of Victory|cardname=Blizzard 1}} |
||
*{{SWGTCG|The Price of Victory|cardname=Dark Time}} |
*{{SWGTCG|The Price of Victory|cardname=Dark Time}} |
||
*{{SWGTCG|The Price of Victory|cardname=I'm With You}} |
*{{SWGTCG|The Price of Victory|cardname=I'm With You}} |
||
| ⚫ | |||
*{{DB|vehicle|atat|All Terrain Armored Transport (AT-AT)}} |
*{{DB|vehicle|atat|All Terrain Armored Transport (AT-AT)}} |
||
*''[[The Essential Guide to Warfare]]'' |
*''[[The Essential Guide to Warfare]]'' |
||
| Line 457: | Line 463: | ||
*{{SWE|technology|atatwalker|All Terrain Armored Transport}} |
*{{SWE|technology|atatwalker|All Terrain Armored Transport}} |
||
*''[[Star Wars: Age of Rebellion Core Rulebook]]'' |
*''[[Star Wars: Age of Rebellion Core Rulebook]]'' |
||
| + | *<!-- 2014/10/20 -->''[[Star Wars: Imperial Handbook: A Commander's Guide]]'' |
||
| + | ''[[Stay on Target]]'' {{Po}} |
||
| + | *{{InsiderCite|153|Blaster (Star Wars Insider)|Blaster}} |
||
}} |
}} |
||
Revision as of 00:07, 1 February 2015
| | |

Warning: This infobox has missing parameters: designer, type and unrecognized parameters: modules, class, era, imageBG
- "We had the Battle of Gormen won, until the AT-ATs arrived. They came out of the fog and ripped apart the front lines. The locals ran in terror, but the experienced soldiers surrendered. We knew that you can't outrun an AT-AT."
- ―Major Bren Derlin, Rebel Alliance field commander
The All Terrain Armored Transport (AT-AT) walker, also known as the Imperial Walker, was a major part of the Galactic Empire's motor-pool. It was one of the most heavily armored land vehicles in the Imperial Army, but was also known for its relatively slow speed.
Description
- "Lookit 'em, boss! Great, big, fat gray targets!"
"I know, Zev, but they've got a long reach." - ―Zev Senesca and Luke Skywalker, during the Battle of Hoth
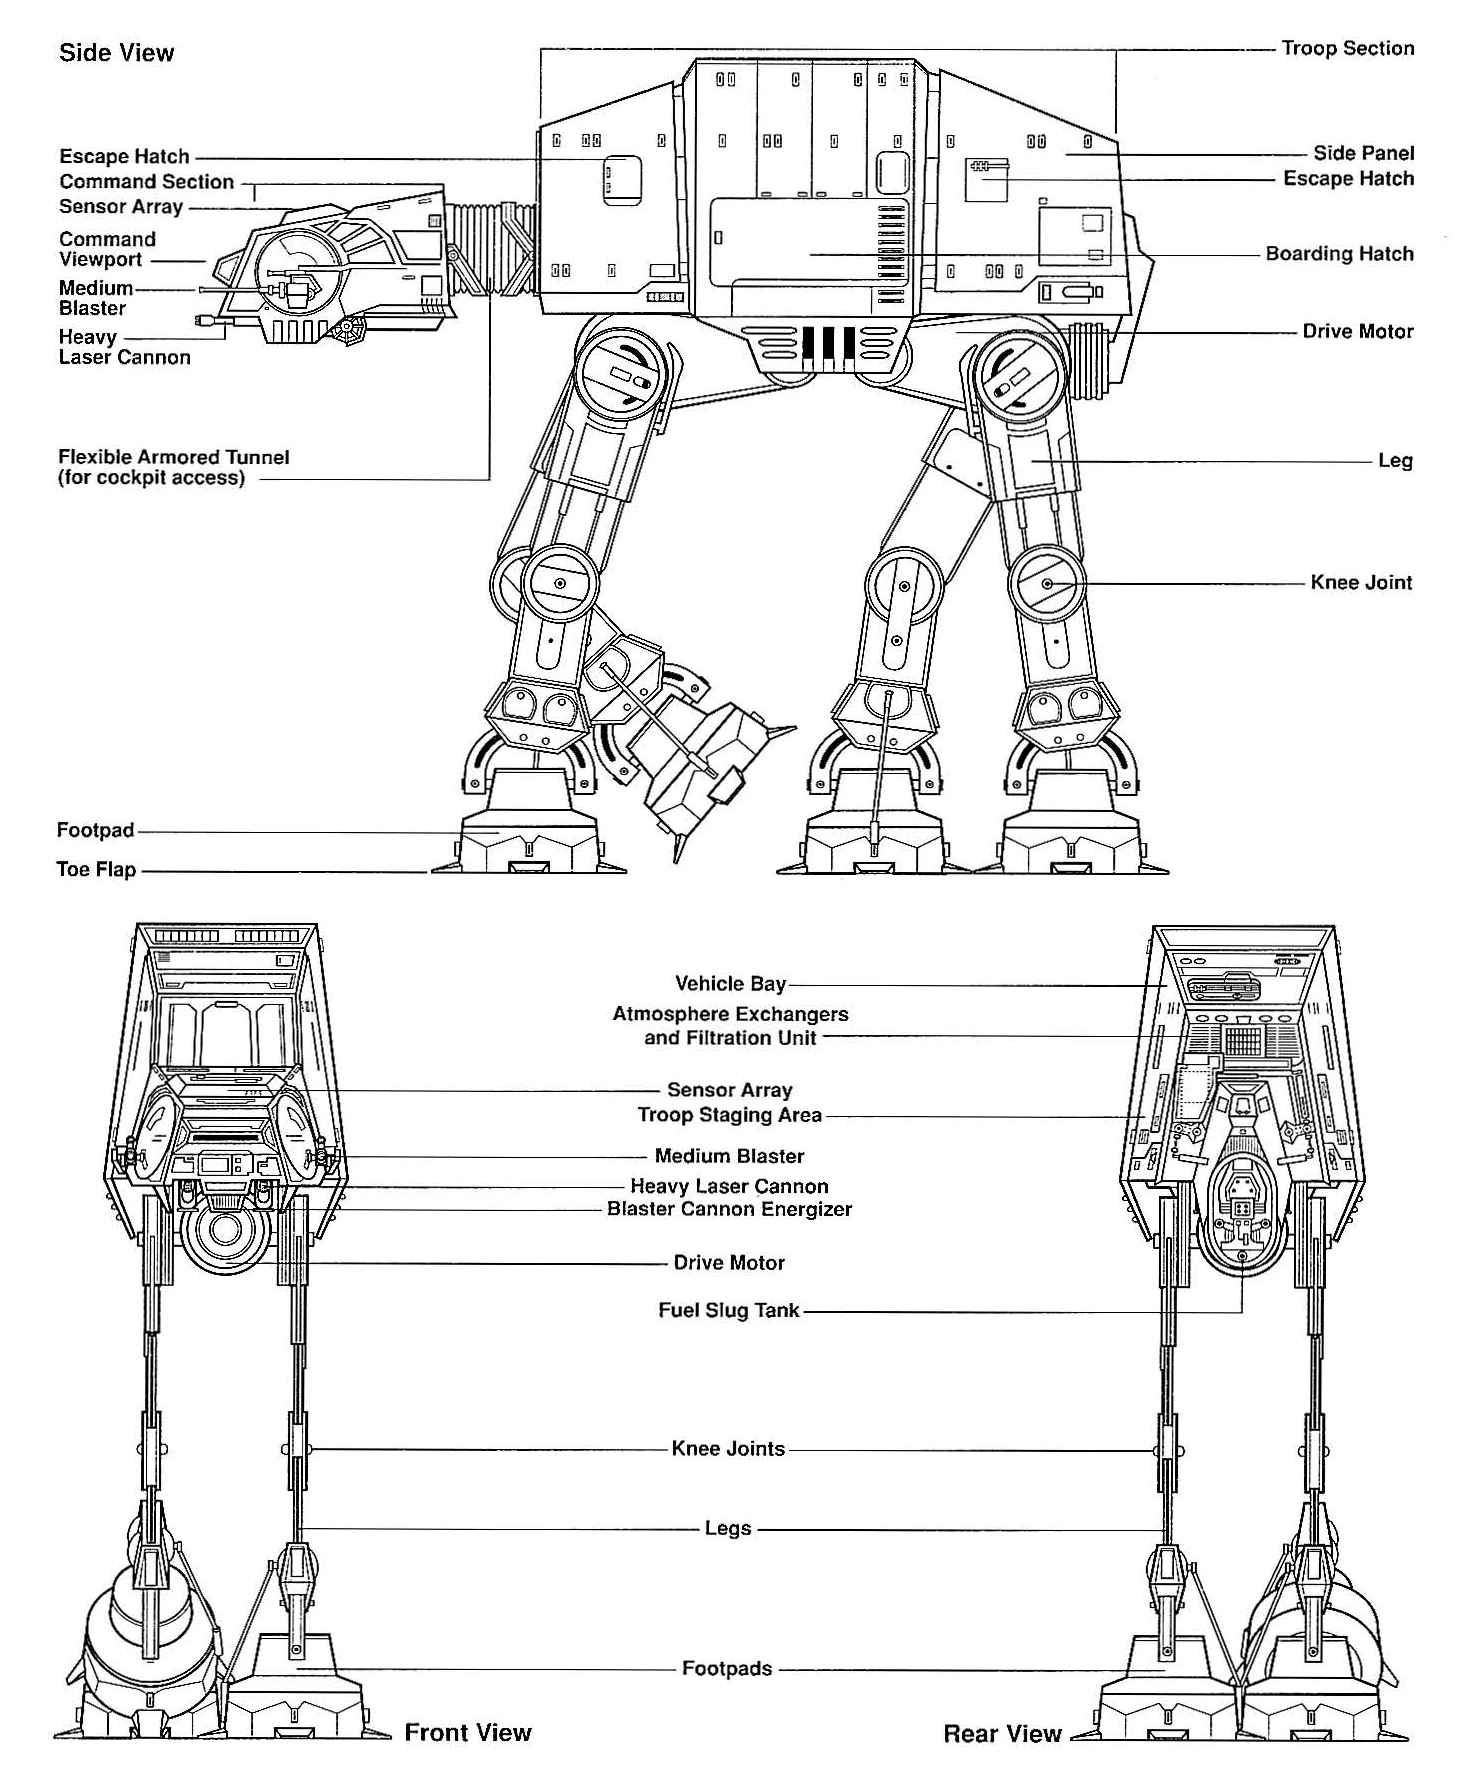
AT-AT schematics.
The AT-AT walker was a behemoth of a war machine, standing at a height of 22.5 meters.[5] The quadrupedal walker closely resembled ancient beasts of war,[3] or even a giant legendary beast from the dark side of the Force.[13] Designed for the dual purpose of crushing and demoralizing enemy forces, and also serving as a transport for Imperial troops and light vehicles, the AT-AT was among the most awesome vehicles in the Imperial Army's inventory.[3] Hundreds of these walkers were produced during the Galactic Civil War[6], and its intimidating and powerful presence often earned it the distinction of being the first vehicle into a combat zone.[7]
Serving as the "head" of the mechanical walker was a movable command section containing the command cockpit, with room for the commander, pilot and gunner. The command section housed all of the AT-AT's weapon systems, as well as holographic targeting systems allowing the gunners a 360-degree view of their position.[3] The cockpit was also equipped with a holoprojector for purposes of external communication. Forward visualization was supplied by a glowing red command viewport.[14] The head could rotate as much as ninety degrees right or left and thirty degrees up or down for an expansive field of fire. Positioned above and below the command section was the walker's sensor array and blaster cannon energizer, respectively.[3]
The command head was attached to the trapezoidal armed body section by a flexible armored tunnel, allowing cockpit access from the rest of the machine. The AT-AT's troop section could typically carry five speeder bikes, up to forty troops normally comprising Imperial stormtroopers or Imperial land assault troopers[3] in a double-tiered passenger section, and heavy weaponry, such as E-Web heavy repeating blasters.[7] The AT-AT could also variably hold two All Terrain Scout Transports in lieu of soldiers in a rear vehicle bay,[3] though they required partial disassembly to fit inside.[15] Housing the troop section were two large side panels; each one held an escape hatch. The rear panel also housed the troop staging area. Positioned in the center of the body section was a rectangular boarding hatch with sliding ramps where the AT-AT's complement of troops loaded and disembarked. An AT-AT unloaded its troops by kneeling to three meters above ground level until the boarding ramp could extend outward.[3] Individual stormtroopers could also be deployed rapidly by rappelling cable.[1]
Below the troop body section were two immense Kuat Drive Yards FW62 compact fusion drive systems that,[1] in conjunction with the walker's four giant heavily-reinforced legs, propelled the AT-AT forward at a top speed of sixty kilometers per hour. However, this maximum rate was achievable only on flat, stable terrain. At the rear of, and connected to, the drive motors were the walker's three fuel slug tanks that powered the massive machine. The AT-AT's rear also included atmospheric exchangers and a filtration unit to regulate the interior living conditions.[3] The walker's legs were supported by massive durasteel footpads with impulse terrain sensors,[7] supplemented by toe flaps, that could crush obstacles in its path with little effort, effectively helping the AT-AT to live up to its name.[3] The legs did, however, require constant maintenance and repair.[15] As the titanic walker marched down the battlefield, its heavy, stomping feet would cause the ground to shake, demoralizing the enemy before they were even engaged.[13]

An AT-AT affirming its firepower in combat
The AT-AT's formidable offensive capabilities were supplied by dual, chin-mounted Taim & Bak MS-1 fire-linked heavy laser cannons (for slower, more cumbersome targets) and two fire-linked medium repeating blasters mounted on each side of the head (designed for lighter, agile targets).[1][3] The two sets of weapons could be independently rotated in order to engage multiple targets at once.[3] However, the AT-AT's head, which could move between a range of left, center and right firing arcs, could only rotate one fire arc per heavy laser volley.[2] The walker's strong external 9095-T8511 grade durasteel armor was virtually impervious to all but the heaviest of artillery weapons.[7][13]
The most vulnerable part of the walker was its flexible neck, which was susceptible to lighter blaster barrages. The legs were also somewhat unstable and could be tripped[2] due to a high center of gravity,[16] leaving the walker defenseless.[2] While first appearing to be a slow, lumbering vehicle, the AT-AT would often be on top of its enemies before they knew what had hit them.[3] The AT-AT also lacked armor covering on its underbelly, leaving the spot vulnerable to mounted guns or portable missile launchers. To remedy this weakness, AT-STs were usually stationed around the walker's flanks to ensure nothing was given a clear shot at the AT-AT's weak underside.[13]
AT-ATs were typically deployed for ground assault from orbit by large dropships. Walkers stationed within larger warships, such as the Executor-class Star Dreadnought, were delivered to planetary surfaces within Incom Y-85 Titan dropships, capable of carrying four AT-ATs.[5] Smaller starships, such as the Imperial-class Star Destroyer, deployed single walkers via the Theta-class AT-AT barge.[17][5] Other designs, including the Telgorn Corporation Warlord Dropship, were capable of delivering a platoon of four walkers.[18]
Modified variants
The Empire utilized several modified variants of the standard AT-AT design for purposes of fitting certain mission profiles in specific environments. The walkers used at the Battle of Hoth in 3 ABY—nicknamed "snow walkers"—were specially designed with heat circulation systems, de-icing controls, and energy efficient environmental controls.[2][15]
The AT-AT "dune walker" was a desert terrain walker fitted with Sienar Fleet Systems z23 heat dissipation units[6]; while the Aquatic Terrain Armored Transport, known as the AT-AT "swimmer," was a repulsorcraft cousin of the standard model.[15] There was also the All Terrain Ion Cannon, a long-range artillery gun mounted on an AT-AT chassis.[19]
History
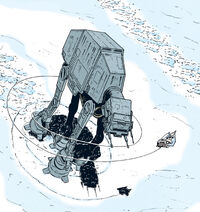
Clone Wars origin and development
First-generation AT-ATs fight in the Battle of Jabiim. The cargo compartment would be rounded out in future designs.
AT-ATs were first designed and assembled by Kuat Drive Yards during the Clone Wars. They were evolved from the AT-TE walkers first employed in the Battle of Geonosis,[1] as well as the AT-PT.[3]
The first-generation AT-AT walkers saw their debut during the Battle of Jabiim, later on in the Clone Wars. During this battle, the overwhelmed Confederacy forces were annihilated by them. Their significance waned when the walkers were slowed down by the muddy surface of the planet, making it easier for the enemy units to bring them down.[8] At some point, AT-AT walkers managed to fall into the hands of the CIS, with at least one unit being kept in a research facility on the Separatist world of Diado.[20]
During the Wars, wheeled tanks like the A5 and A6 Juggernauts were preferred over both the AT-AT and the AT-HE, due to the decreased ground pressure of wheeled vehicles over legged ones.[21]
Imperial refinements
- "Will you look at those walkers? Has there ever been anything so big and gray and ugly, Luke?"
"If you don't like 'em, I'll take you down where you can do something about it, Dak." - ―Dak Ralter and Luke Skywalker, during the Battle of Hoth.
During the time of the Galactic Empire, AT-ATs were not completely forgotten, as a later-generation model participated in the Battle of Orion IV.[22] AT-ATs were being tested on the planet Carida when the Rebel Alliance attacked.[17] The AT-AT was instrumental in winning the battle. After the Battle of Yavin, it was Maximilian Veers that fully resurrected the concept, bringing the AT-AT into full Imperial service. They were deployed on a wide array of worlds in the following months, including Corellia, Chandrila, and Ghorman. Nearly three years after the Battle of Yavin, Veers neared completion on a superior model while on Zaloriis. This was nicknamed the "Dune Cow". With the prototype Blizzard 1, constructed at Camp Culroon, Veers assaulted the planet's capital when Zaloriis declared their affiliation with the Rebellion.[23]
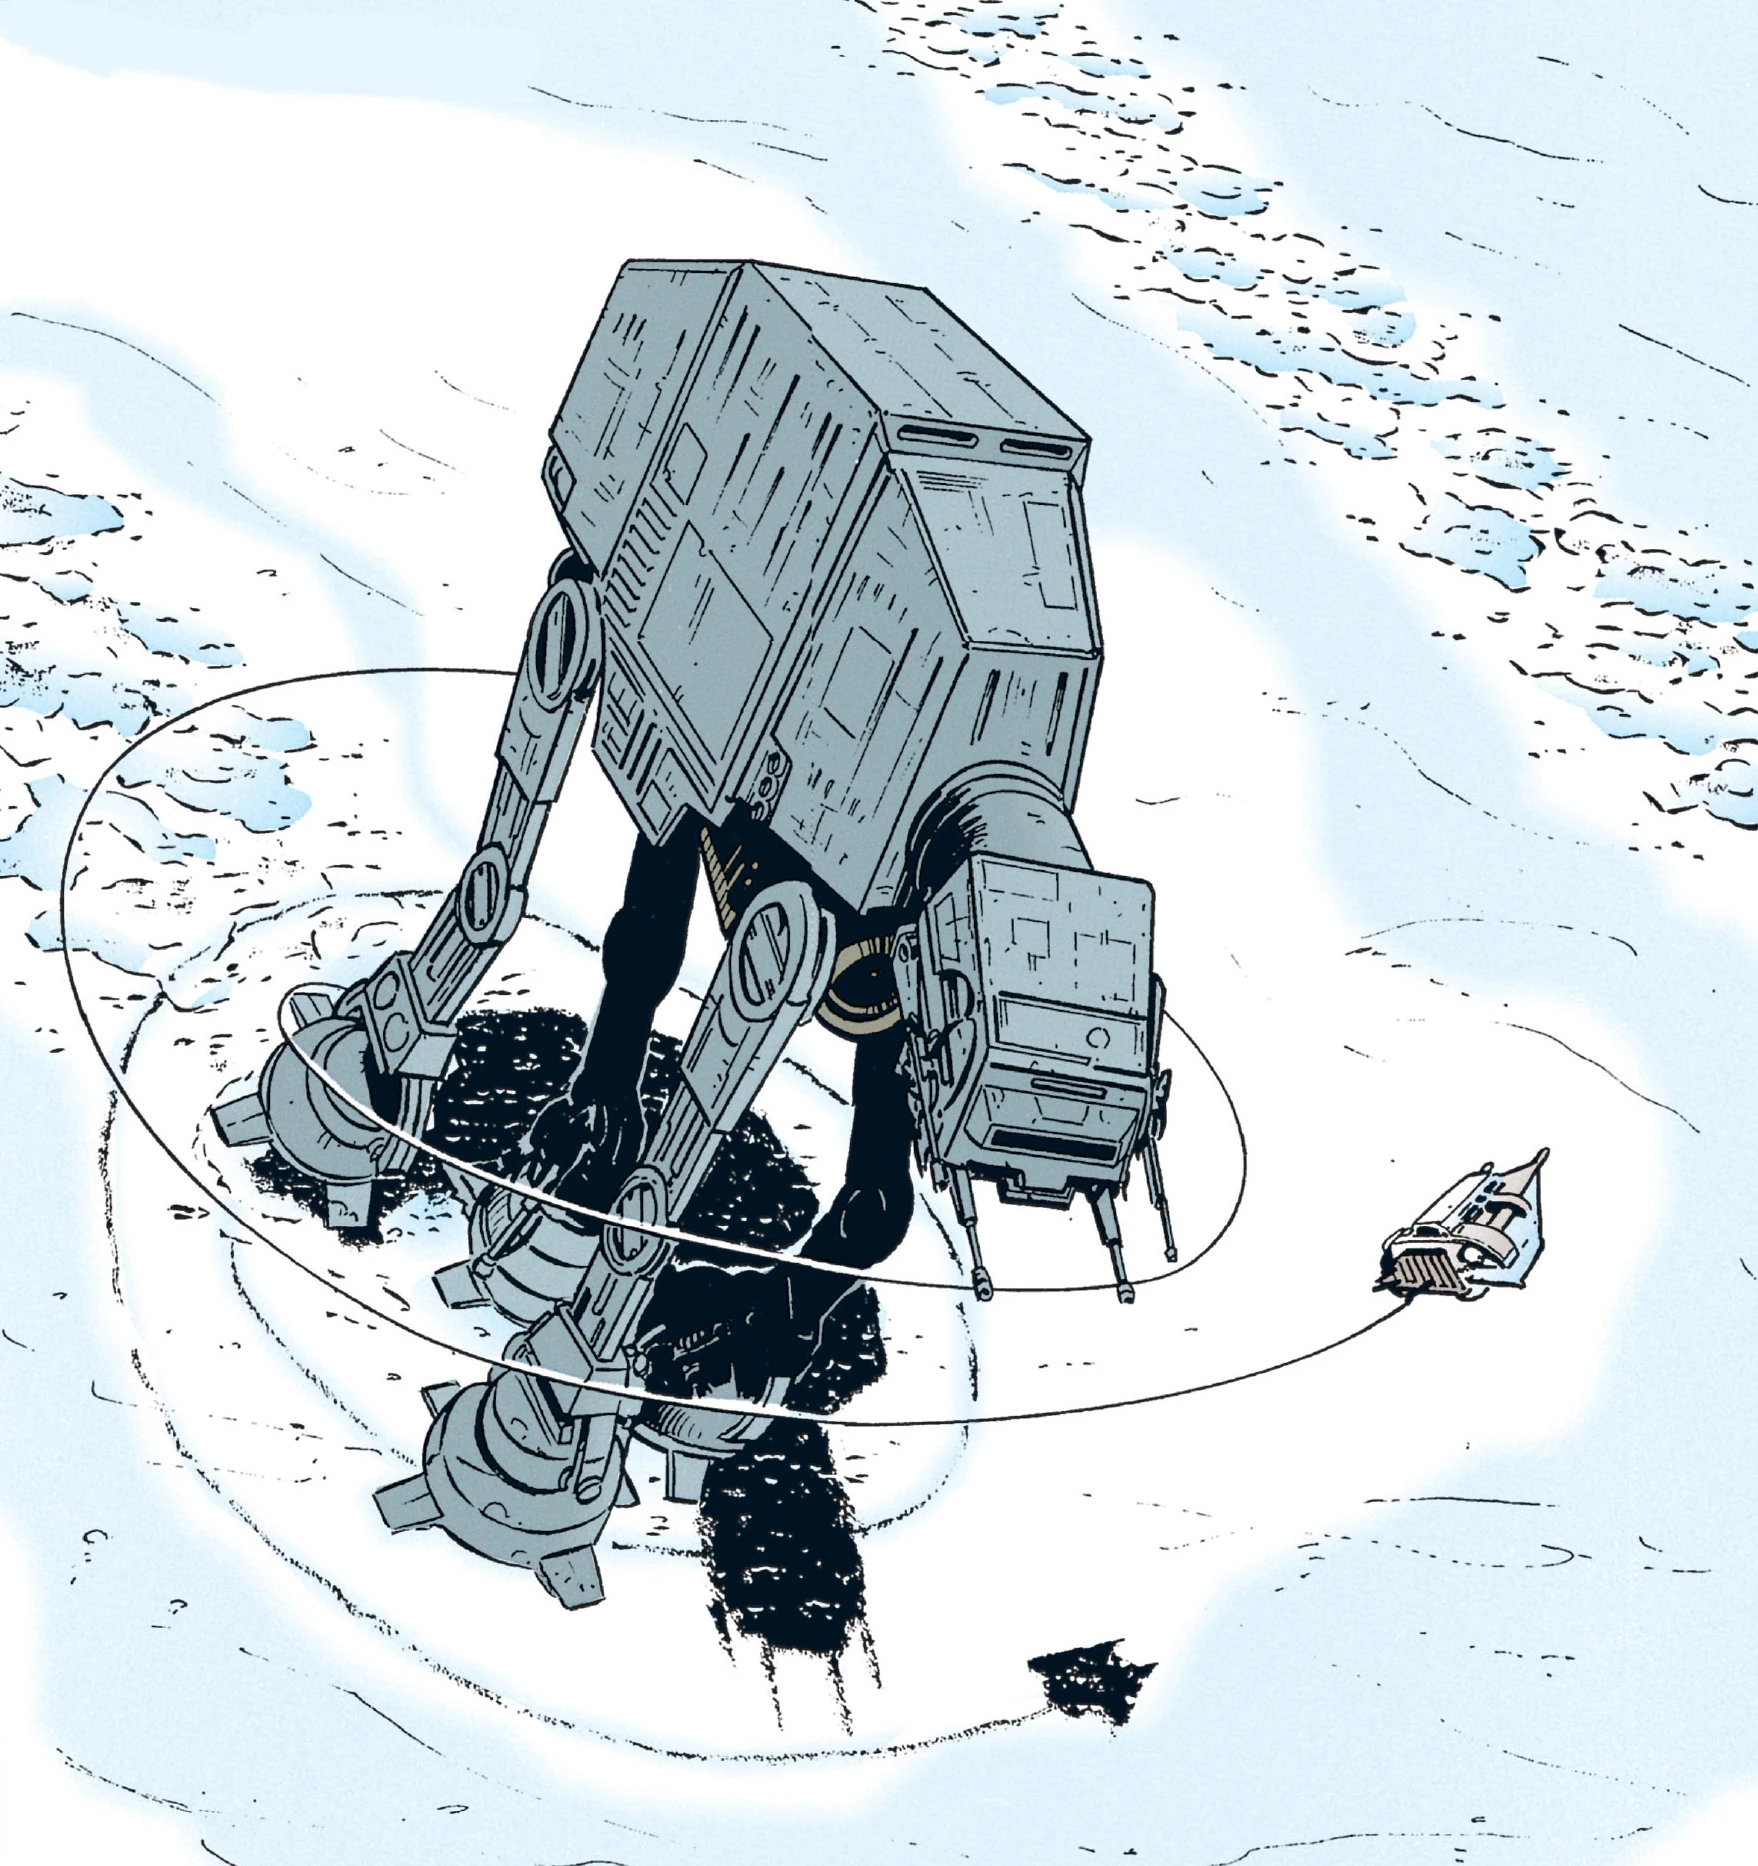
A snowspeeder uses a harpoon and tow cable to trip an AT-AT.
At least one AT-AT was used at the Battle of Boz Pity. The AT-AT was unknowingly steered into a trap set by Renegade Squadron; a detonation pack was used to blow up a hidden cache of explosives, and the huge explosion toppled the machine. However, the battle was ultimately a victory for the Empire.[24]
Several AT-ATs were also deployed to Ralltiir to subjugate the scientists, although several of them were destroyed after Red Squadron destroyed the bridges into the city with bombs, developed by scientists, and their speeders.[25]
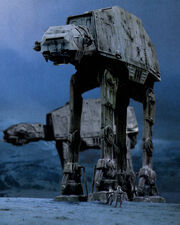
At the Battle of Hoth, the Empire's Blizzard Force utilized AT-ATs to assault the Rebel's Echo Base, as it was protected from above by an energy shield. Due to their weight, and the unstable terrain they were traversing, a few were lost before the battle even began.[5] General Maximilian Veers commanded the ground forces and advanced on the shield generator, decimating Rebel troopers in their trenches.[14] Blizzard Force's frequent usage of AT-AT's was largely the reason behind their logo adopting an image of the AT-AT.
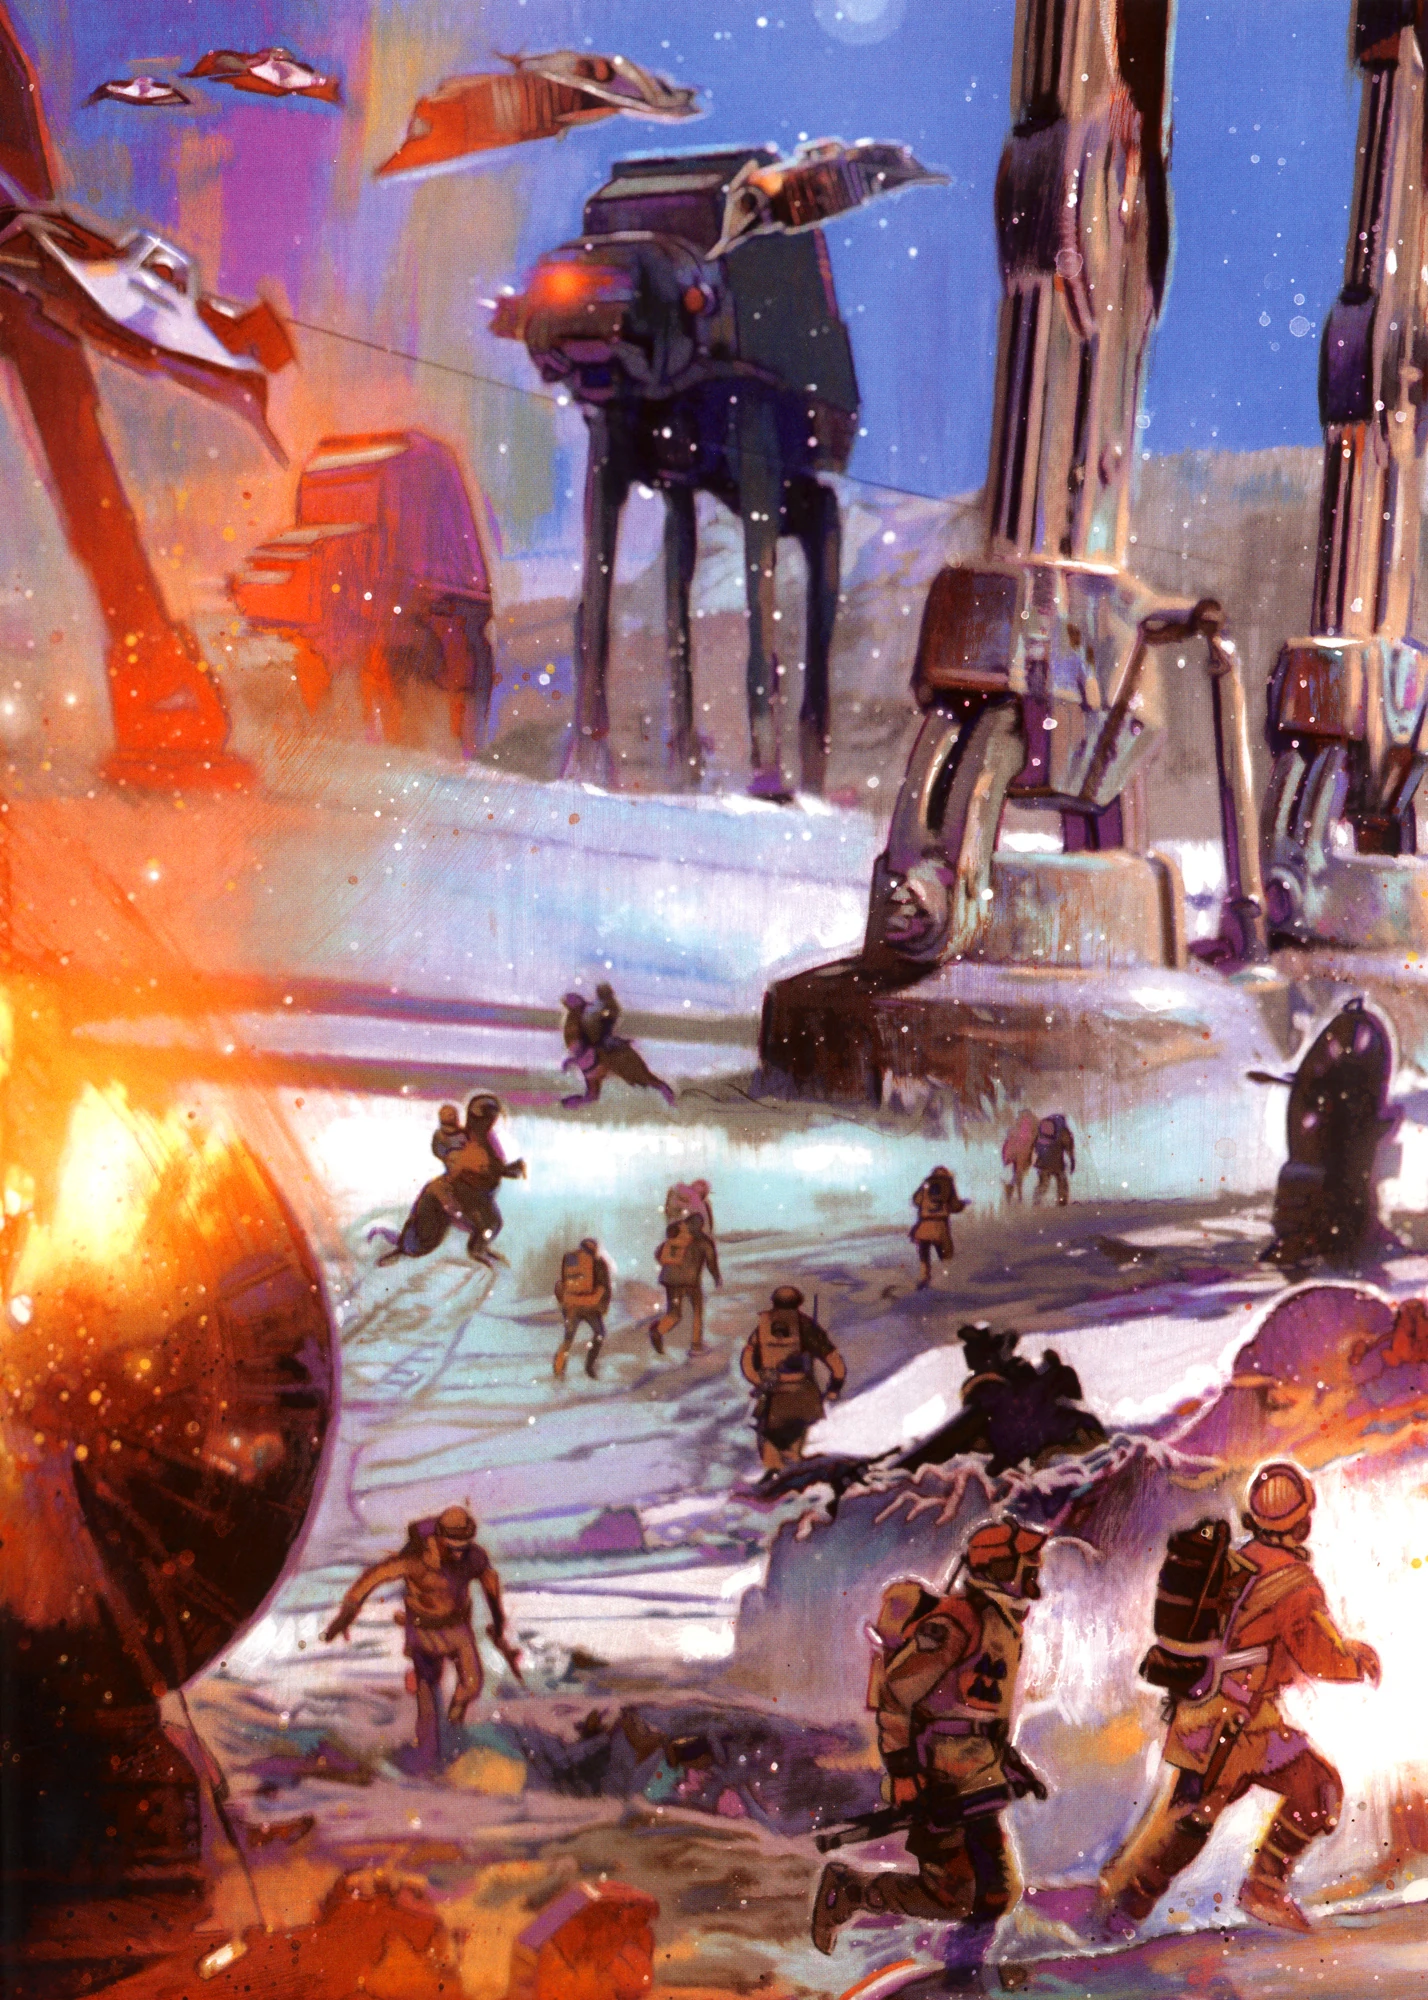

AT-ATs overrun rebel positions during the Battle of Hoth.
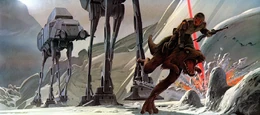
Faced with such forces, Luke Skywalker employed a strategy earlier devised by himself and strategist Beryl Chiffonage to disable the walkers: his squadron of snowspeeders would use their magnetic harpoons and tow cables to entangle the walkers' feet, toppling them. Wedge Antilles and his gunner, Wes Janson, managed to disable one walker using this method. Luke destroyed two more by cutting a hole in each with his lightsaber and tossing in a concussion grenade.[14][25]
Dash Rendar was able to bring down a third through unknown means.[26] Another AT-AT that closed on Echo Base was destroyed by Renegade Squadron, which used particle cannon turrets to destroy the war machine.[24] (The dangers of AT-AT walkers toppling was discovered by an Imperial Cadet named Davin Felth, but the oversight was not corrected by Colonel Veers prior to deployment.)[27]
Despite these small successes, they were ultimately insufficient to turn the tide of the battle, and the Battle of Hoth was one of the most devastating losses for the Rebellion in the entire Galactic Civil War. The AT-ATs succeeded in destroying the shield generator, thereby allowing the main Imperial force to land and attack Echo Base. The AT-ATs would go on to devastate the Rebel defenses.[14]
During the Battle of Dubrillion, Wedge Antilles, after infiltrating the Dubrillion superlaser facility in an All Terrain Scout Transport, managed to hijack an AT-AT Walker inside of a hangar. Wedge then proceeded towards the generator room and used the walker's firepower to destroy the superlaser facility's turbines and destroy the facility and the superlaser for good.[25]
Several AT-ATs also broke out of the Imperial I-class Star Destroyer Motivator after it was shot down from orbit during the Battle of Kothlis, although Rogue Squadron managed to down them in the ocean.[28]
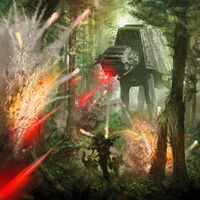
At least one AT-AT patrolled the garrison base on the forest moon of Endor, but had no impact on the battle there, as AT-ATs were limited in their range by the dense foliage of the moon. As a result, smaller vehicles, such as All Terrain Scout Transports, saw far more use.[29] An AT-AT was originally going to be used in the Battle of Endor, but it was crippled by Renegade Squadron, resulting in portions of the Galactic Empire attempting to fix it.[30]
Beyond Endor
AT-ATs wade in deep water on Kothlis.
Sometime after the Battle of Endor, the Empire replaced the AT-AT's lasers and blasters with light turbolasers, easily capable of defeating many highly protected defensive weapons emplacements.
In 5 ABY, an AT-AT was patrolling on Ruusan as the Imperial faction, led by the Seven Dark Jedi, searched for the Valley of the Jedi. Shortly after cutting down Sariss, Rebel mercenary and rising Jedi Knight Kyle Katarn headed for the Valley himself, passing through the standby AT-AT as he went.[31]
By 9 ABY, Nomad City on Nkllon was a mining operation owned by Lando Calrissian. The city was built from a Dreadnaught-class heavy cruiser mounted on top of 40 captured AT-ATs to constantly move the city away from the day side of Nkllon and prevent it from being destroyed by the intense radiation of Nkllon's sun.[32] However, the city was damaged and later abandoned, leading to the eventual destruction of Nomad City and its AT-ATs by the intense radiation.[33]
During the reborn Emperor Palpatine's insurgency in a clone body from 10 ABY to 11 ABY, the Empire developed a new variant of the AT-AT that was equipped with the most powerful Imperial turbolasers and the new X-80 power cells. These were deployed during an attack on New Alderaan. During the battle, they vaporized many buildings, gun emplacements and starfighters.[10]
Following the Galactic Civil War, AT-ATs were also used by the New Republic, the Galactic Federation of Free Alliances, and various other governments.
During the Yuuzhan Vong War, AT-ATs were found on the Imperial Remnant planet Shramar, and battled a Yuuzhan Vong army during the battle there.[11] The New Jedi Order's Myrkr strike team found one of these vehicles on the Yuuzhan Vong Koros-Strohna Baanu Rass in 27 ABY.[34] AT-ATs were also deployed by the Galactic Federation of Free Alliances during the liberation of Coruscant in 29 ABY.[35] It was the predecessor of the All Terrain Armored Heavy Transport model,[36] but was still used by Darth Krayt's Galactic Empire in 138 ABY.[12]
Behind the scenes
The name "AT-AT" is never spoken in any of the films. Instead, the machines are referred to as "Imperial walkers."
The AT-ATs used in The Empire Strikes Back and the brief appearance in Return of the Jedi were created with the use of stop-motion animation.

AT-AT concept art by Ralph McQuarrie.
When there was a wrong leg animation with the AT-ATs, George Lucas would take that scene and make a turret shoot it in the leg. This supposedly happened twice.[source?]
In the Star Wars: Episode V The Empire Strikes Back DVD commentary, George Lucas explained that he got the idea of the AT-AT from the massive tripods from H.G. Wells' 1898 novel The War of the Worlds.[37]
The animators who brought the AT-AT Imperial Walkers to life in The Empire Strikes Back based their movements on elephants.[38]
AT-ATs frequently appear in video games, though in games they vary in durability. In some games they can be damaged by shooting them, such as in Shadows of the Empire and the Battlefront series, though in the latter their durability makes using blasters impractical. In the Rogue Squadron games, AT-ATs are completely immune to all weapons and can only be destroyed with a Snowspeeder's tow cables, except for one mission where a Snowspeeder carries bombs with its tow cable that are powerful enough to destroy an AT-AT. Typically, their weapons are easy for the player to avoid, but destroying the walker can prove to be difficult because of their strong armor.
During development for Rebel Strike, the third entry for the Rogue Squadron video game series, the development team, because of their insistance of rebuilding the Rogue Leader game coding entirely from scratch to make it different from its predecessor, ran into some gaffes and problems during animation. One of these gaffes was Luke Skywalker's harpoon cable attaching to the AT-AT's neck, and then walking it as if it were a giant dog, during the development of the Battlefield Hoth mission.[39]
At Disney World's Hollywood Studios, a giant model of an AT-AT is located just outside Star Tours.
In July, 2010, Hasbro released an AT-AT vehicle capable of holding up to 19 figures. Included with the vehicle is a speeder bike and one AT-AT driver. [40] On a translucent decal image on the cockpit's "viewscreen" is a personal note from Brian Parrish (Hasbro's Design Manager for the Star Wars franchise) that reads, "HOPE YOU ENJOY THE AT AT," on the screen above the photo image of the Rebel power generator, with "B. PARRISH" on the next line, underneath. In addition, other phrases in Aurebesh are visible on the clear acrylic screen that read, "REGULAR MODE," "INFRARED MODE," "MAX," "MIN," "ZOOM IN," and "ZOOM OUT," as well as the numbers, "077 254 72 7." [41]
First use discrepancy
The 2001 video game Star Wars: Galactic Battlegrounds has a mission which describes the creation of the AT-ATs and their introduction to the service of the Empire. All this happens before the Battle of Hoth. However, there are several appearances of the AT-ATs in BBY sources, including the video games games Star Wars: Rebel Assault and Star Wars: X-Wing. The first is S-canon; however, the latter is accepted as C-canon and shows them in the Battle of Orion IV. First-generation AT-AT walkers are featured in the comic story-arc Star Wars: Republic: The Battle of Jabiim. The 2006 video game Star Wars: Empire at War shows them being introduced before the Battle of Yavin. The 2011 comic book Star Wars: Darth Vader and the Lost Command shows them in use just after the Declaration of a New Order in 19 BBY. Also, in attack of Kashyyk in Star Wars: The Force Unleashed (video game) player can see AT-AT in field, although this battle was far earlier than AT-AT creation.
AT-AT is pronounced "at-at" in Star Wars: Force Commander, and Star Wars: Galactic Battlegrounds. They are also called "A-T-A-T"s briefly in Star Wars: Rogue Squadron II: Rogue Leader. In Star Wars: Battlefront II both terms are used. However, in Star Wars Battlefront: Renegade Squadron, it is pronounced "A-T-A-T".
Height discrepancies
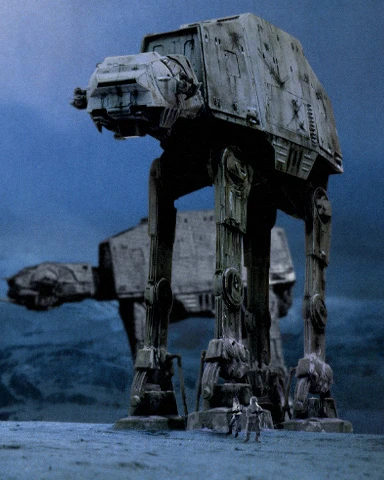
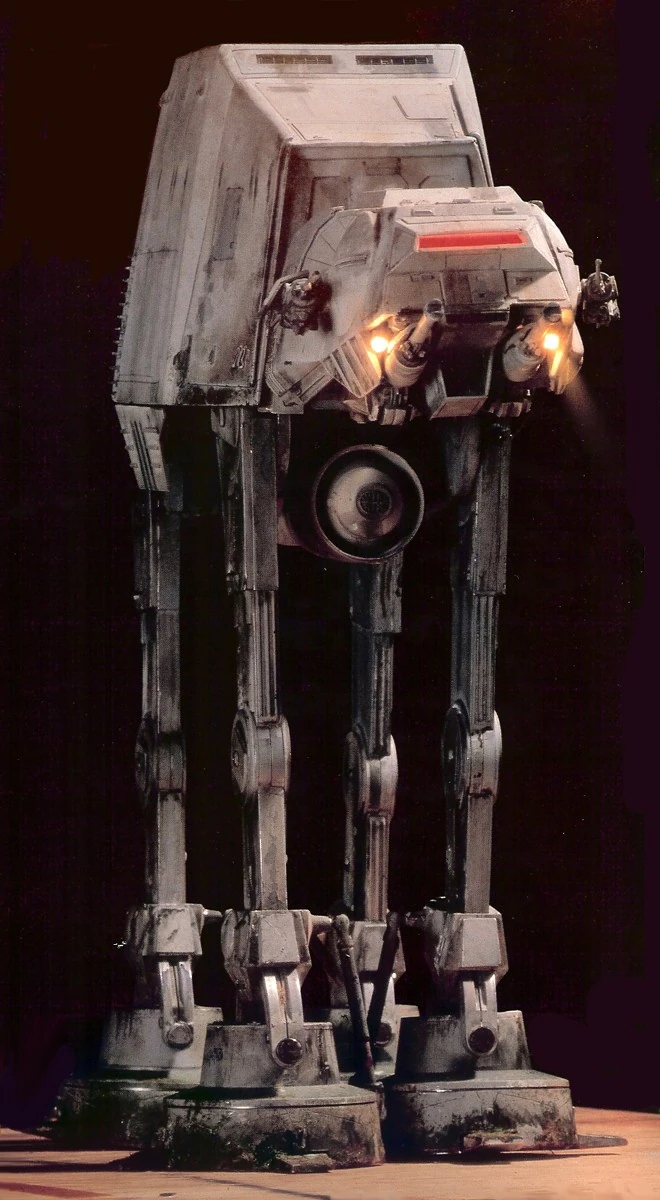
Two snowtroopers at the feet of an AT-AT, lending credence to the claim of a 20-25 meter height.
- "Outpost Beta here. I have a visual now. These things look like … animals. They're huge, maybe twenty, twenty-five meters high, four-legged, and their heads move. But they're made out of metal. They have extremely heavy armor and armament. I count six of 'em so far."
- ―BETA, in the script of the The Empire Strikes Back radio dramatization
- "Outpost Beta here. I have a visual now. These things look like … animals. They're huge, maybe ten, fifteen meters high, four-legged, and their heads move. They're made out of metal. They have extremely heavy armor and armament. I count six of 'em so far."
- ―BETA, in the recording of The Empire Strikes Back radio dramatization
In "Forces of the Empire," an article that was first published Issue 2 of The Empire Strikes Back Official Poster Monthly, the All Terrain Armored Transport was described as "a fifty-foot tall armored exoskeleton." The figure of fifty feet was likely derived from sources such as The Empire Strikes Back Sketchbook, which suggested that the designers of the model intended for the AT-AT to appear as fifty feet tall on screen. In 1984, this figure was given as the height for the AT-AT in the first edition of a A Guide to the Star Wars Universe
In 1983, The Empire Strikes Back radio dramatization included a scene in which a young Rebel officer, who would be later identified as Maren Kelsome, gave the command staff of Echo Base a rough estimate of the height of the AT-ATs approaching his location. His statement that they were "twenty, twenty-five meters high" in the script later was changed to "ten, fifteen meters high" in the recorded version.
Supplements for West End Games's Star Wars roleplaying game listed the All-Terrain Armored Transport at a height of 15.5 meters.[42] Inside the Worlds of Star Wars Trilogy revised the AT-AT's height to 22.5 meters in a section dealing with the dropships that were used to land the walkers during the Battle of Hoth. This larger figure was based upon unofficial calculations by Curtis Saxton,[43] with whom James Luceno, the author of the book, consulted on technical matters. It was calculated using a scene in The Empire Strikes Back where Luke Skywalker is ascending a cable beneath a walker.[14][43]
This figure was repeated by Star Wars: Complete Locations, a compilation of the Inside the Worlds of series, but the "Episodes IV-VI Data Files" section of Star Wars: Complete Cross-Sections listed the AT-AT's height at 15.5 meters, adding further confusion to this issue. Yet another alternative size for the AT-AT was shown in the Hyperspace fan club kit, which included a desktop wallpaper depicting various vehicles in scale with each other. Compared to the HAVw A6 Juggernaut, which is unambiguously known to be 49.4 meters long and 30.5 meters tall,[44] the AT-AT is shown to be 18.5 meters in height.[45]
Appearances
Non-canon appearances
- LEGO Star Wars: Microfighters video game
- LEGO Star Wars II: The Original Trilogy
- LEGO Star Wars: The Complete Saga
- Star Wars Infinities: A New Hope
- Star Wars Infinities: The Empire Strikes Back
- Star Wars: The Empire Strikes Back video game
- Star Wars: The Force Unleashed video game — Ultimate Sith Edition
Sources

.JPG)
.JPG)
.JPG)
.JPG)
.JPG)
.JPG)
.JPG)
.JPG)
.JPG)
.JPG)
.JPG)
Notes and references
External links
 Learning to Walk on Hyperspace (content removed from StarWars.com and unavailable)
- Walker Cabin on Hyperspace (content removed from StarWars.com and unavailable)