| | |
Warning: This infobox has missing parameters: type, designer and unrecognized parameters: era, class
- "They're the most heavily armored ground vehicles in the Imperial Army."
"...so what you're saying is that you have a thorough knowledge of just how screwed we are." - ―Thane Kyrell and Yendor, just before the Battle of Hoth
The All Terrain Armored Transport (AT-AT) was a four-legged combat walker used by the ground forces of the Galactic Empire. With the Imperial-class Star Destroyer and the TIE fighter, it was one of the most famous symbols of the Empire's military might.
Models
Early model
This model was used against the early rebellion.[3]
Later model
This model was used during the Galactic Civil War.[4]
Elite AT-AT
This was a more heavily-armored variant with a darker color scheme.[5]
First Order AT-AT
This was an upgraded version of the AT-AT used by the First Order.[6]
History
Age of the Empire
- "I heard of these. Imperial armored transports. Giant four-legged things that were used to keep the peace on conquered worlds."
- ―Scoggan, to Davjan Igo upon entering the ruins of an AT-AT
The AT-AT walker was developed for use in the Imperial Army, the ground forces of the Galactic Empire. It was the successor of the All Terrain Tactical Enforcer that saw use during the Clone Wars,[7] although it constituted a far more imposing example of walker technology.[2] Heavily armored and awe-inducing, the AT-AT positioned itself as the standard of Imperial firepower on the battlefield.[8]
In 4 BBY,[9] the Imperial Security Bureau Agent Kallus led three early AT-AT walkers on an assault on the desert planet of Seelos against the Spectres and three retired clone officers aboard an AT-TE.[3]
AT-ATs were used again in 3 BBY against the Spectres, when Princess Leia Organa arrived on the planet to give the Ghost's crew three Hammerhead corvettes. Two walkers were deployed to patrol the transports' landing platform, which were formally on Lothal to offer supplies to citizens impacted by the rebel efforts. When the rebels tried to steal the corvettes, the Ghost started firing on the AT-ATs. Four proton torpedos were not powerful enough to destroy one of the walkers, and it was necessary for Kanan Jarrus to use his lightsaber to cut its legs, toppling it. The second one was knocked down by the engines of the last Hammerhead, piloted by Ryder Azadi.[10]
In 2 BBY, Lieutenant Yogar Lyste deployed two AT-AT walkers, Walker 271 and Walker 414, to combat an attack on the east gate of the Imperial Armory Complex by members of the Lothal resistance led by Ryzder Azadi. The rebels Kanan, Ezra Bridger, and Chopper escaped in the stolen AT-DP Walker 216. However, Grand Admiral Thrawn realized that the rebels had hijacked the AT-DP walker and ordered his AT-ATs to crush them. One of the AT-AT walkers proceeded to crush the AT-DP under its heavy body but the rebels managed to use their lightsabers to cut their way aboard. Morad Sumar also fired a rocket which hit one of the walker's legs. After knocking out the AT-AT pilots, the two climbed out and escaped with Ryder's cell into the wilderness.[11]
Thrawn then deployed four of these during the battle on Atollon. Jedi survivor Kanan Jarrus then destroyed one with his lightsaber. The Force wielder, the Bendu then destroyed two of the AT-AT walkers. However, the last one was able to shoot Bendu down from the sky.[12]
Galactic Civil War
- "That armor's too strong for blasters. Rogue group, use your harpoons and tow cables. Go for the legs; it might be our only chance of stopping them."
- ―Luke Skywalker, during the Battle of Hoth

The stolen AT-AT on Cymoon 1
Around the time of the Battle of Yavin, a new AT-AT model was introduced. At this time, the Alliance to Restore the Republic stole a number of AT-ATs and provided them to Saponza's Gang.[5]
During the Rebel assault on the Imperial weapons factory moon of Cymoon 1, a group of Rebels led by Han Solo and Leia Organa stole an AT-AT from Weapons Factory Alpha. They used the walker to escape from the factory after they sabotaged its main power core to explode. During their escape, Solo fired a shot that nearly killed the Sith Lord Darth Vader, using the AT-AT's powerful quad laser cannons.[13] Soon after, Vader managed to overtake the Rebels in their escape and cut down the massive walker's back-left leg. The AT-AT fell tremendously and its passengers barely managed to escape the wreckage;[14] before fleeing Cymoon 1 entirely for the safety of the Alliance Fleet[15]

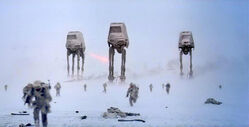
Three AT-ATs attacking Echo Base.
During the Battle of Hoth, General Maximillian Veers led a squadron of at least five AT-ATs on the icy fields of Hoth to knock out the shield generator that protected Echo Base, the Rebel headquarters. The triumph of Veers' squadron allowed the Imperials to invade Echo Base and rout the Rebels, striking a major blow in the war. However, the battle also revealed that the AT-ATs could be toppled by a cable wrapped around their legs. Although that weakness had been used effectively by the Alliance on Hoth,[4] the Empire continued to use these mechanical behemoths in the later stages of the war,[16] employing them in several skirmishes on Tatooine.[5]
In 5 ABY,[17] at least one AT-AT walker was stationed at Camp Sardo on the planet Kashyyyk. During the Liberation of Kashyyyk, several Wookiee guerrilla fighters, including Kirratha, hijacked the AT-AT walker and threw out the crew.[18] Shortly later, AT-ATs were deployed against New Republic forces during the Battle of Jakku.[19]
Rise of the First Order
Decades after the war's conclusion, a young scavenger named Rey used one of the downed AT-ATs, designated Hellhound Two, as her home on Jakku.[20]
The First Order used an upgraded version of the AT-AT as an escort to its newer AT-M6s.[6]
Behind the scenes

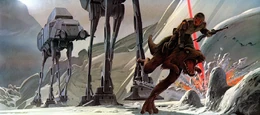
AT-AT concept art by Ralph McQuarrie
The names "All Terrain Armored Transport" or "AT-AT" is never spoken in any of the films. Instead, the machines are referred to as "Imperial walkers." The AT-ATs used in The Empire Strikes Back[4] and the brief appearance in Return of the Jedi[16] were created with the use of stop-motion animation.
Initially, the Empire was to attack the Rebel base on Hoth using tanks.[21] Joe Johnston created many designs of these vehicles,[22] one of which was the basis for the HAVw A6 Juggernaut that appeared in Star Wars: Episode III Revenge of the Sith and the HAVw A5 Juggernaut in Star Wars Legends,[21] and the tanks themselves were to be portrayed by remote controlled vehicles. However, Dennis Muren and Joe Johnston convinced George Lucas to use stop motion instead,[22] which later eventually lead to the abandonment of the tank design.[21] In the DVD commentary to The Empire Strikes Back, George Lucas explains that he got the idea of the AT-AT from the massive tripods from H.G. Wells' 1898 novel The War of the Worlds.[23] Though it is popularly believed that dock machinery was the inspiration for the AT-AT, Phil Tippett has said otherwise, recalling that it was based on the prehistoric mammal Baluchitherium.[24] The AT-ATs featured in Star Wars Rebels series are different models than the ones in the Star Wars films, inspired by the early concept arts drawn by Ralph McQuarrie during the production of The Empire Strikes Back.[25]
Appearances
Non-canon appearances
- Star Wars: Galaxy of Heroes
- Star Wars Epic Yarns: The Empire Strikes Back
 LEGO Star Wars: The Freemaker Adventures — "Showdown on Hoth"
 LEGO Star Wars: The Freemaker Adventures — "Return of the Kyber Saber"
 LEGO Star Wars: The Freemaker Adventures — "A Perilous Rescue"
 LEGO Star Wars: The Resistance Rises — "Rey Strikes Back" (Mentioned only)
 LEGO Star Wars: The Resistance Rises — "Attack of the Conscience"
- LEGO Star Wars: The Force Awakens
Sources
Notes and references
External links
Star Wars Rebels on Facebook
