
Warning: This infobox has missing parameters: type, naval and unrecognized parameters: era
- "This, my friends.This is our rebellion."
- ―Senator Mon Mothma addressing the newly formed Alliance Fleet
The Alliance Fleet, also known as the Rebel fleet, the Rebel Alliance Navy, the Rebel Navy, or simply the Rebel Alliance Fleet, was the military naval force of the Alliance to Restore the Republic during the Galactic Civil War. It was formed from starships of various rebel cells. Following the Battle of Endor and the formation of the New Republic, the Alliance Fleet transitioned into the New Republic Defense Fleet.
History
Prelude
In the early days of the rebellion against the Galactic Empire, various rebel cells began coordinating their efforts to combat the reign of the Empire. A rebel fleet was beginning to form.[31]
In 4 BBY,[32] Phoenix Cell dispatched three CR90 corvettes to rescue the rebel cell Spectres during a skirmish above Mustafar. The corvettes destroyed several TIE fighters before spiriting the Spectres away into space. The Spectres soon learned that they were one cell among many others.[31] Later elements of the rebel fleet ambushed an Imperial convoy and stole several deflector shield generators. While hiding in deep space, the Phoenix Squadron's ships came under attack from the Sith Lord Darth Vader, who destroyed several A-wings and the Squadron's flagship Phoenix Home. Despite these losses, the rebels managed to flee into hyperspace before Imperial reinforcements arrived.[33]
When the former Clone Captain Rex joined Phoenix Squadron, he supplied them with information on the location of former Republic bases in the Outer Rim Territories and some Mandalorian ones.[34] Later, the rebel fleet made two attempts to breach the Imperial blockade of Ibaar. After losing a corvette, the rebel pilot Hera Syndulla managed to break through using a prototype B-wing starfighter. As a result, she was promoted to Phoenix Leader.[35] Later on in 3 BBY, the rebel fleet was forced to abandon their facilities in Garel City after the Empire launched an attack on the planet Garel. At least one ship was shot down but most of the fleet escaped into hyperspace.[36]
After learning of the rebel fleet's losses, Senator Bail Organa sent three Sphyrna-class corvette to reinforce the fleet. The Spectres and Ryder Azadi managed to steal the ships from the Lothal Depot with the help of Princess Leia Organa.[37] During a diplomatic mission to the Concord Dawn system, elements of the Phoenix Squadron were attacked by Fenn Rau's Fang fighters. In response, the rebels attacked the Protectors' encampment on the third moon of Concord Dawn and kidnapped Rau. As a result, Rau granted the rebel fleet safe passage through the Concord Dawn system.[38]
Later, the loss of A-wings led the rebels to steal an Imperial Quasar Fire-class cruiser-carrier above Ryloth with the help of the Free Ryloth movement. The stolen Imperial ship became their new fighter carrier and flagship Phoenix Nest.[39] The Empire later tried to lure the rebel fleet into a trap in the Yost system by attacking the Phoenix Squadron in deep space. However, the rebel astromech droid Chopper and the defecting Imperial inventory droid AP-5 gave the rebel fleet the coordinates to a safe planet called Atollon.[40] Atollon became the site for a new rebel base called Chopper Base.[41]
In 2 BBY, the Imperial tactician Grand Admiral Thrawn turned his attention to defeating the rebel fleet, which he viewed as a threat to the Empire's armada and the Emperor's plans. Under his orders, Governor Arihnda Pryce, Admiral Kassius Konstantine, and Agent Kallus intercepted Phoenix Squadron above the planet Yarma. However, Thrawn realised that this was not the complete rebel fleet and instructed his subordinates to allow the rebels to escape with five stolen Y-wing bombers. These Y-wings were later transferred to General Jan Dodonna's unit.[42]
Later, the rebel fleet's Phoenix Squadron evacuated rebel sympathizers from the planet Mykapo prior to an Imperial crackdown. Commander Jun Sato also managed to rescue his nephew Mart Mattin and his Iron Squadron with the help of the Spectres. Thrawn allowed the Phoenix Squadron to escape into space since he was after the entire rebel fleet.[43]
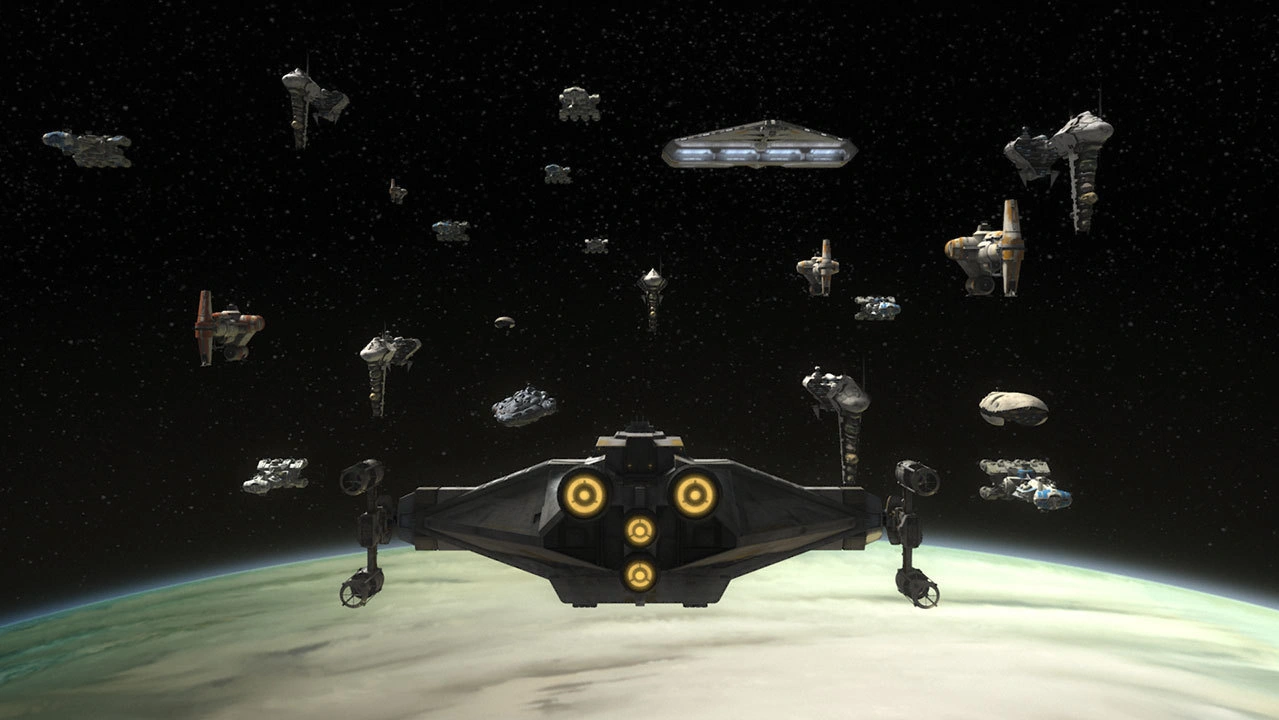
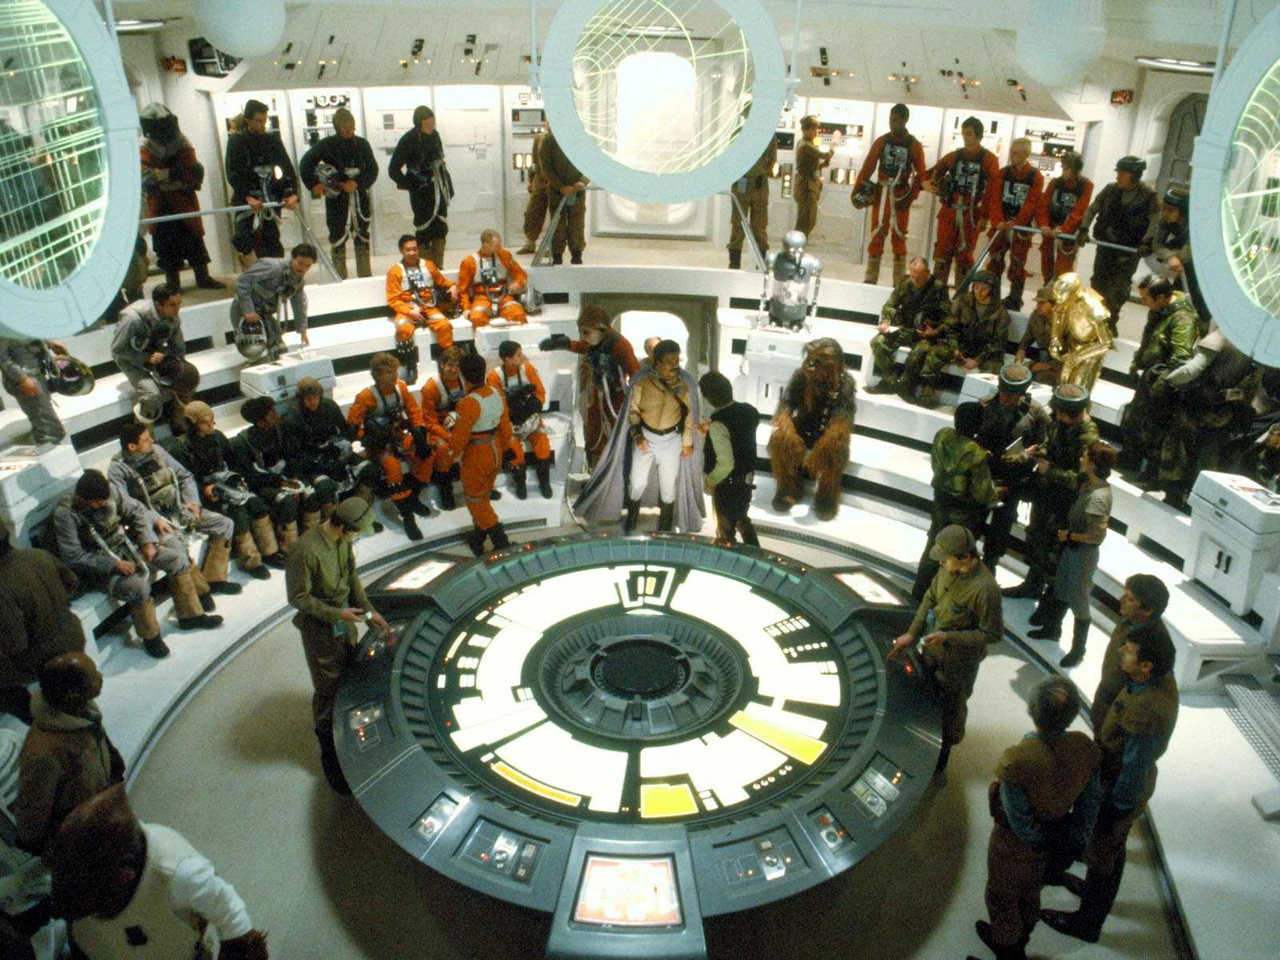
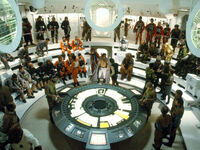
The Alliance Fleet being formed following Senator Mon Mothma's speech
Following Admiral Kassius Konstantine's failed attempt to capture Senator Mon Mothma, starships from various rebel cells assembled at Dantooine to become the Rebel Alliance's fleet to fight the Empire.[1]
Early rebellion against the Galactic Empire
Defending Atollon
- "...Thrawn believes this is the entire rebel fleet."
- ―Hera Syndulla
One of the first engagements the nascent Alliance Fleet took part in was when Phoenix Squadron and a portion of the Massassi Group massed at Chopper Base on Atollon. They planned on attacking the TIE/D Defender factories on Lothal with the help of the Lothal resistance. Grand Admiral Thrawn however, had discovered not only their plan to attack his factories, but their location as well. His Fleet ambushed the rebels and they attempted to flee. Thrawn's Interdictor vessels kept the rebels at Atollon and they began attacking his blockade. The battle was a disastrous rout for the Alliance, with many their ships falling to TIE/sa bombers and Phoenix Squadron's flagship ramming into one of the Interdictors. Ezra Bridger escaped the system, leaving the remaining rebels to defend the base from Thrawn's ground forces. Thrawn quickly took the base but not for long as a Force-sensitive creature called the Bendu attacked both sides. Ezra returned with reinforcements and they destroyed the second Interdictor Vessel allowing the remaining rebels to escape. Only the Ghost, two Hammerhead corvettes, the CR90 corvette Liberator and a scattering of starfighters survived.[4]
Galactic Civil War
- "The Rebel Alliance is too well equipped. They're more dangerous than you realize."
- ―General Cassio Tagge
Battle of Scarif
- "...send the whole Rebel fleet if you have to."
- ―Jyn Erso to the Alliance High Command
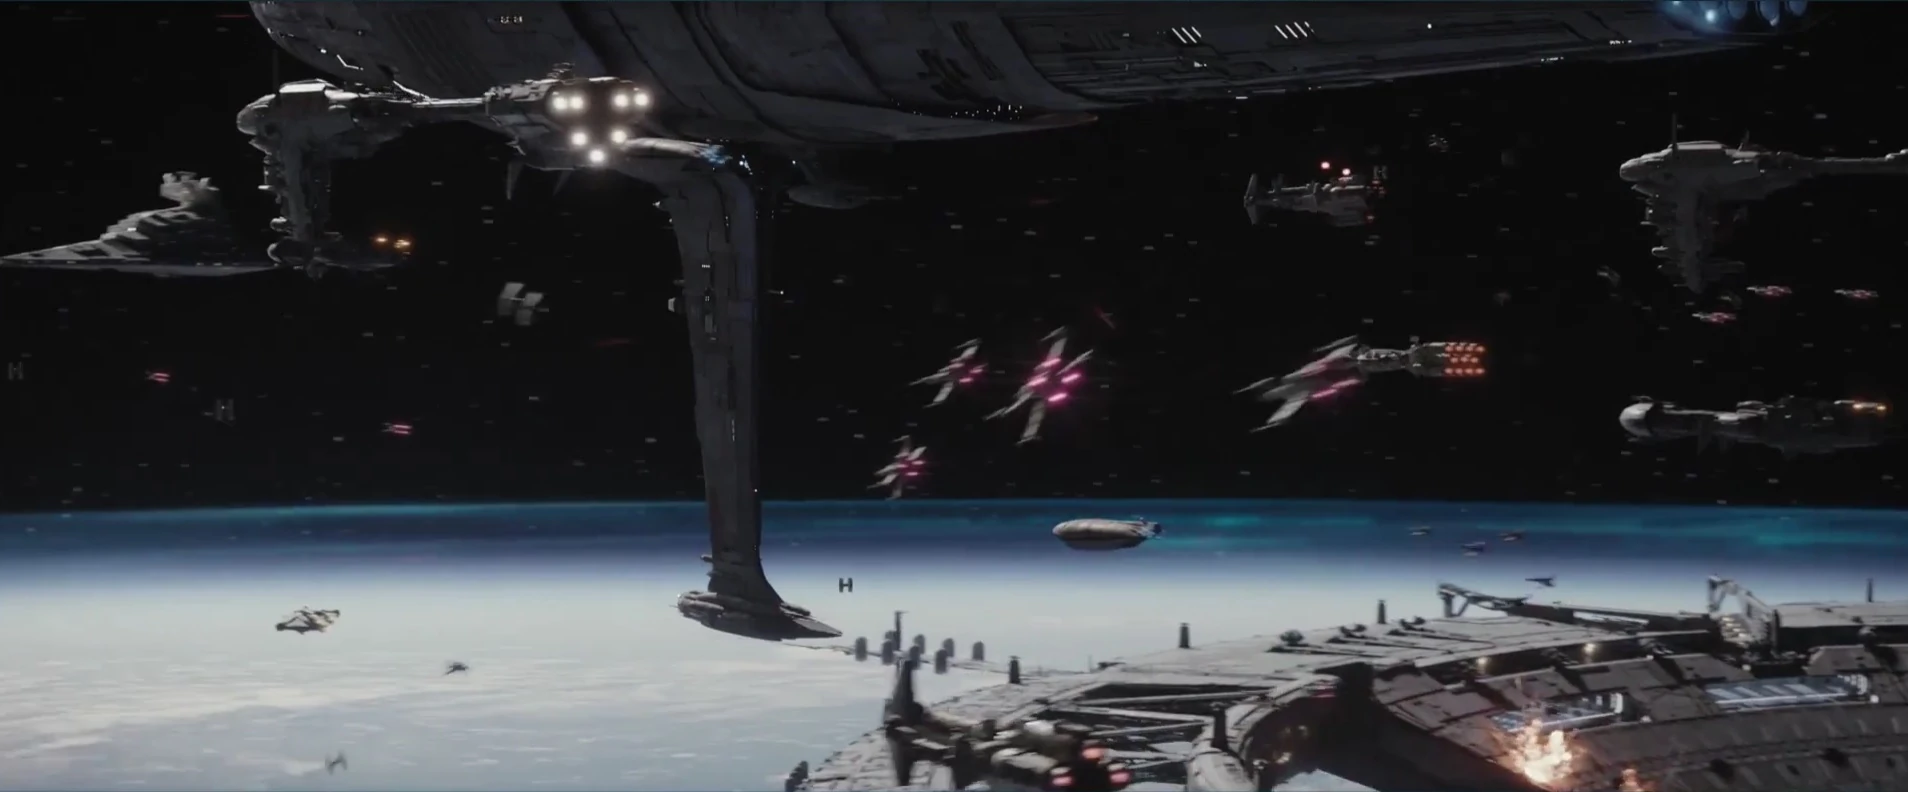
The Alliance Fleet during the Battle of Scarif
The first major action of the Alliance Fleet, was at Scarif. Here, a fleet led by Admiral Raddus assaulted the Imperial Shield Gate above Scarif, to support the theft of the Death Star plans below in the Citadel Tower. Despite being outgunned, as a majority of their ships were transports, the Alliance ships put up a fierce fight. Raddus had Blue Squadron fly through the shield gate before it closed and support the ground forces. Meanwhile, Red, Gold and Green Squadron defended the fleet whilst individually attacking the shield gate to draw it's attention. The Y-wings of Gold Squadron disabled one of the Imperial-class Star Destroyers and Raddus had the Heartbound and Deviant keep the other one from advancing.[5]
Raddus then got news from the ground that the plans to the Death Star were obtained and the shield gate would need to be destroyed in order for them to be transmitted. Raddus therefore devised a plan for the Sphyrna-class corvette Lightmaker to ram the disabled Star Destroyer into the functioning one. The Lightmaker successfully did this and managed to bring the Destroyer into the shield gate. Raddus's ships the Profundity then received the plans from the rebels in the citadel tower. Their moment of victory was cut short when the Death Star arrived and destroyed the Imperial complex and everything around it on the ground. Raddus ordered the fleet to retreat and the rebel ships began jumping to hyperspace. Raddus and the Profundity didn't make it out however as the Devastator arrived and disabled the ship. The other ships were either destroyed or fled the system. Rebel soldiers on the Profundity put the plans onto a memory piece and escaped on the Tantive IV before Darth Vader could intercept them.[5]
Pursuit Above Tatooine
Following it's escape from Scarif, the Tantive IV was on the run. It had sustained damage before it's time inside the Profundity and barely made it to Tatooine before it's hyperdrive gave out. It was then pursued by the Devastator, which had tracked it's trail of leaking radiation from the damaged hyperdrive. Unable to put up a proper fight, Tantive IV soon found itself being pulled into the hanger of the Devastator. Darth Vader and his stormtroopers stormed the ship killing many rebels and Leia Organa was captured and taken to the Death Star.[27]
The Battle of Yavin
The Alliance finally received the Death Star plans from Organa, who had been rescued from the Death Star by Luke Skywalker, Han Solo and Chewbacca. Their next move was to use it's weakness, a small Thermal exhaust port with led to the reactor, to destroy it. Grand Moff Wilhuff Tarkin had tracked Han's ship the Millennium Falcon to Yavin 4, revealing the location of Great Temple to the Empire. Tarkin took the Death Star to Yavin and the battle station began orbiting the Gas giant to be in firing range of the moon where the rebels were based. Short for time, the rebels dispatched Red and Gold and Green Squadron to attack the Death Star. The scattering of 30 X-wings and Y-wings began destroying turret emplacement and fending off the incoming TIE Fighters defending the Death Star.[27]
Gold Squadron was the first to make an attack run through the Death Stars trench with 3 Y-wings, flown by Gold Leader Jon Vander, Gold Two Dex Tiree and Gold Five Davish Krail. They started targeting the exhaust port with their targeting computers but soon found themselves under fire from Darth Vader and two other TIE fighter pilots. The three were killed before they could fire upon the exhaust port. The second attack run was done by Red Squadron with 3 X-wings flown by Red Leader Garven Dreis, Red Ten Theron Nett and Red Twelve Puck Naeco. Theron and Puck were picked off by Darth Vader but Garven managed to get a shot on the exhaust port, which missed. Garven was then shot down by Vader whenpulling out of the Death Stars trench.[27]
The final trench run was done by three of the remaining Red Squadron X-wings flown by Red Two Wedge Antilles, Red Three Biggs Darklighter and Red Five Luke Skywalker. They were too pursued by Darth Vader who killed destroyed Biggs's X-wing and damaged Wedge's X-wing to the point he had to pull out. Luke was about to be destroyed when Solo came on the Millenium Falcon and attacked Vader and his escort. Vader escaped allowing Luke to make the shot on the exhaust port. Only Luke, Han, Wedge and Gold Three Evaan Verlaine survived. The Death Star exploded killing Grand Moff Tarkin and many other high-ranking Imperial officers like Colonel Wullf Yularen.[27]
Fleeing Yavin
- "…the Empire now knows our location. Therefore, our first priority is to find a new base of operations. To that end, all Rebel fleets have arrived to assist us in evacuating Yavin immediately."
- ―General Jan Dodonna
Following the Battle of Yavin, Admiral Gial Ackbar and the Rebel Fleet arrived at Yavin 4 to begin evacuating their base.[44] Afterwards, the Rebel Fleet orbited the remote world of Orto Plutonia while waiting for a suitable base of operations to be established, sending rebel troopers to the planet below for training exercises. The mathematical genius Drusil Bephorin correctly predicted that the Rebel Fleet would be located there and was later rescued from her Imperial captivity by Luke Skywalker.[16] Following the rebel attack on Cymoon 1, Princess Leia and her team rendezvoused with the fleet to meet Ackbar and Mon Mothma.[45]
Massacre at Vrogas Vas
Shortly after the Battle of Yavin, at least five Alliance starfighter squadrons were stationed as the refueling base on Vrogas Vas, including Red Squadron. Their time there was cut short however, when Darth Vader arrived in the system to find Luke Skywalker. Vader was faced with Red, Blue and Yellow Squadron. Without hesitation, the Dark Lord of the Sith began tearing their X-wings apart until Skywalker crashed him X-wing into Vader's. The pair plummeted towards the surface and the Y-wings of Gray Squadron began a search for them. Unlucky for them, Gray Squadron found Vader first and the Sith began hurling rocks at them, destroying the Y-wings one by one.[20]
The Rebel Refueling Base began sending ground forces towards Vader's position, escorted by the T-47 airspeeders of Cyan Squadron. They faced Vader and he out-smarted them by activating their grenades and scattering them. Many airspeeders fell in the fight.[22] Later on, Leia Organa ordered the Y-wings of Amber Wing to bombard Vader's new position. The Y-wings were cut off by the Imperial forces led by Commander Karbin. The remaining rebels began retreating as infighting between Vader and Karbin broke out. Karbin was killed in the fight.[18]
Battle of Hoth


T-47 airspeeders attacking the All Terrain Armored Transports of Blizzard Force.
In 3 ABY, the Alliance had established a base on the ice planet of Hoth. It location remained a secret for a month before Darth Vader discovered it's location. He brought his armada of Imperial-class Star Destroyers, led by the Super Star Destroyer Executor, to Hoth where they blockaded the planet. Many transports from the Alliance fleet were used to evacuate personnel and equipment from Echo Base. GR-75 medium transports were escorted by X-wings under the cover of the alliances V-150 Planet Defender, many of them being destroyed trying to pass the blockade. On the ground, the T-47 airspeeders of Rogue Squadron and Corona Squadron fought off the All Terrain Armored Transports of Blizzard Force. Although the battle was a loss for the Rebellion, a significant portion of the Rebels managed to flee Hoth.[6]
Fleeing into the Outer Rim
Following the loss at Hoth, the rebel fleet utilized the scatter protocol, splitting the fleet into small fragments spread out across the galaxy in an effort to deny the Empire a swift propaganda victory like it had on Hoth, as well as overextending the Imperial Navy in its effort to engage the rebellion. A new rebel base was erected on the remote world of 5251977 where various rebel ships would be stationed.[7] Unlike the previous bold encounters following the Battle of Yavin, the Rebel Fleet now waged a war of survival.[10]
Two rebel ships, the CR90 corvette Thunderstrike and it's escort the Braha'tok-class gunship Apailana's Promise, started attacking Imperial holdouts in the Mid Rim after realising that the Imperial Navy's numbers there had dwindled to support the hunt for rebels in the Outer Rim. With the help of the soldiers of Twilight Company, the two vessels devastated many production lines in that area drawing out forces from Kuat. They would've engaged the Kuat Drive Yards if the Thunderstrike wasn't lost at Sullust.[11]
Assembling near Sullust
- "What of the reports of the Rebel fleet massing near Sullust?"
- ―Darth Vader to Emperor Sheev Palpatine
After a high-stakes meeting on the Outer Rim world of Zastiga, where numerous members of the Alliance learned of the existence and location of the second Death Star. Prior to their attack, the fleet gathered over the planet Sullust[10] which Twilight Company had liberated.[11] Knowing that their failure to immediately destroy the Empire's dreaded battle station would spell doom for the entire revolutionary movement.[10] Chewbacca, R2-D2, C-3PO, Princess Leia and Lando Calrissian joined the fleet here after rescuing Han Solo from Tatooine, where they were soon joined by Luke Skywalker after he returned from Dagobah.[8]
Battle of Endor
Before the fleet could attack the Death Star, a small strike team of Rebel Commandos had to take out the shield operating from the Forest moon of Endor. However the teams attempt was thwarted by a trap set by the Imperials at the base. The Alliance Fleet arrived at Endor and the squadrons of starfighters moved in to attack the Death Star. Led by General Lando Calrissian on the Millennium Falcon, the many squadrons consisted of X-wings, Y-wings, A-wings and B-wings But before the mass of starfighters could get to the Death Star, Lando discovered the shield was still up and the whole fleet was forces to turn around before they collided with it.[8]
The Alliance fleet was then met by a fleet of Imperial-class Star Destroyers led by the Super Star Destroyer Executor. The Imperial TIEs engaged the rebel fighters and a battle broke out around the rebel fleet. The larger capital ships of the Imperial fleet stayed dormant under orders of the Emperor himself. That was when the second Death Star's operational superlaser began firing on the Alliance Fleet, decimating the MC80 star cruisers Liberty and Nautilian. Admiral Gial Ackbar ordered the rebels fleet pull into close range of the Imperial fleet to keep escape the firing of the Death Star which would affect the Star Destroyers if they were too close.[8]


Alliance starfighters flying through the second Death Stars reactor shaft.
Despite their failed first attempt, the Endor strike team managed to capture the main base on Endor and destroy the shield generator protecting the Death Star. This meant Alliance starfighters could now enter the Death Stars Reactor shaft and fly towards the Reactor. Lando led the remaining starfighters of Red and Gold Squadron to enter the reactor shaft. They entered the shaft where they found themselves intercepted by Imperial starfighters who shot down the X-wing flown by Keir Santage. Lando ordered the group to split up to draw Imperial TIEs out away from the Millenium Falcon. Lando and Red Leader Wedge Antilles continued towards the reactor whilst the rest of the group, including Gold Nine Norra Wexley, drew other TIEs out of the Death Star down an alternative shaft.[8]
Meanwhile, the Executor was taking heavy fire from rebel ships and multiple A-wings had hit a devastating blow to their shields. Green Leader Arvel Crynyd's A-wing was damaged by turret fire and crashed into the bridge of the Executor, disabling the ship and sending it falling into the Death Star. Lando and Wedge arrived at the reactor and detonated it, bringing down the second Death Star from the inside out. Despite heavy losses, the Alliance fleet was victorious and the Emperor was killed in the battle.[8]
Legacy
After the battle, the New Republic was established by leaders of the Alliance, and the Alliance Fleet was reorganized into the New Republic Defense Fleet. The Empire was thrown into chaos and soon fell at the Battle of Jakku.[3]
Command and Control
The Alliance fleet prepares for the assault on the second Death Star
The fleet and its activities were overseen by Alliance High Command, who managed the logistical and strategic matters of the Rebellion's efforts against the dominant Galactic Empire, with Gial Ackbar serving as admiral of the Fleet. As an all volunteer military, recruits could come and go as they pleased without reporting it to their superiors. Such practice, however, was frowned upon, while members would often stay with the fleet owing to a sense of camaraderie and impracticality of returning to their home systems, which were often under Imperial control.[7] With the Fleet constantly moving, it could take weeks for a separated pilot to rejoin their squadron, owing in part to the scatter protocol for rebel pilots, which established a practice of randomly choosing a path to various worlds throughout hyperspace in order to lose any possible Imperial pursuit.[46]
Groups under the Alliance Fleet
- Fleet Troopers[47]
- Massassi Group[1]
- Mon Calamari Exodus Fleet[48]
- Phoenix Cell[1]
- Task Force Antilles[49]
- Task Force Organa[49]
Starships of the Alliance Fleet
Assault ships
- Modified Pelta-class Assault Ships[50]
Carrier
Command ships
- Modified Pelta-class Command Ships[50]
Corvettes
Cruisers
- Heavy cruisers[54]
- Star Cruisers[55][9]
- MC75 cruisers[5]
- Aspiration[56]
- MC75 Armored Cruisers[57]
- MC75 Ordnance Cruisers[57]
- Profundity (Former flagship of the Alliance Fleet)[5]
- MC80 star cruisers[58]
- Amalthea[51]
- Freedom's Run (tentatively)[51]
- Invincible Faith[23]
- Liberty[7]
- MC80a star cruisers
- Restoration[17]
- Unidentified MC80 star cruiser[23]
- MC75 cruisers[5]
Freighters
- Atom Edge[61]
- HWK-290 freighters[61]
- Mighty Oak Apocalypse[7]
- Trumpet's Call[11]
- Lucrehulk-class LH-3210 cargo freighter[62]
- Lucrehulk-class Battleship[62]
- Unidentified Rebel flight school[62]
- Lucrehulk-class Battleship[62]
- Modified VCX-100 light freighter[5]
- Modified YT-1300 light freighters[63]
- YT-2400 light freighters[61]
Frigates
Gunships and troop transports
- Braha'tok-class gunship[11]
- Modified CR-20 troop carrier[61]
- LAAT/i[61]
- X4 line[51]
- UT-60D U-wing starfighter/support crafts[66]
Shuttles
- E-50 Landseer[61]
- GX1 short hauler[21]
- Lambda-class T-4a shuttles (Stolen)[8]
- Sheathipede-class transport shuttle[4]
- Taylander shuttle[64]
Star Destroyer
- Imperial I-class Star Destroyer (Stolen)[14]
- Harbinger[14]
Starfighters of the Rebel Alliance Starfighter Corps

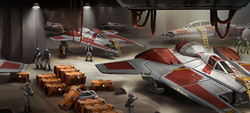
Fang fighters and a Y-wing in a hangar
- A-wing starfighters[68]
- A/SF-01 B-wing starfighters[68]
- Aggressive ReConnaissance-170 starfighters[71]
- Fang fighter[61]
- Kom'rk-class fighter[70]
- X-wing starfighters[27]
- Y-wing starfighters[27]
- Z-95 Headhunters[61]
Transports
Unidentified vessels
Appearances
Non-canon appearances
- Rogue One: Recon A Star Wars 360 Experience
 LEGO Star Wars: The Freemaker Adventures — "Return of the Kyber Saber"
- LEGO Star Wars: The Freemaker Adventures — "A New Home"
- LEGO Star Wars: The Freemaker Adventures — "Home One"
- LEGO Star Wars: The Freemaker Adventures — "Thrown Into Battle"
- LEGO Star Wars: The Freemaker Adventures — "Rowan's Secret Adventure"
- LEGO Star Wars: The Freemaker Adventures — "Zander Freemaker, Superstar Pilot Guy!"
- LEGO Star Wars: The Freemaker Adventures — "Beware, the Gamorrean Flu!"
- LEGO Star Wars: The Freemaker Adventures — "Trouble on Tibalt"
- LEGO Star Wars: The Freemaker Adventures — "The Tower of Aliston Nor"
- LEGO Star Wars: The Freemaker Adventures — "The Storms of Taul"
- LEGO Star Wars: The Freemaker Adventures — "Return to the Wheel"
- LEGO Star Wars: The Freemaker Adventures — "The Lost Crystals of Qalydon"
- LEGO Star Wars: The Freemaker Adventures — "The Pit and the Pinnacle"
- LEGO Star Wars: The Freemaker Adventures — "Flight of the Arrowhead"
- LEGO Star Wars: The Freemaker Adventures — "A Perilous Rescue"
- LEGO Star Wars: The Freemaker Adventures — "Return of the Return of the Jedi"
- LEGO Star Wars: Droid Tales — "Exit from Endor"
- LEGO Star Wars: Droid Tales — "Flight of the Falcon"
- LEGO Star Wars: Droid Tales — "Gambit on Geonosis"
- LEGO Star Wars: The Force Awakens