Warning: This infobox is missing the following parameters: conc, unit2, civilian, unit1
- "The Avenger has achieved hyperspace terminus, sir. The fleet is assembled. We are ready to annihilate the planet on your command!"
- ―Anonymous Imperial gunner to Executor Sedriss QL
The Battle of Balmorra[4] was an Imperial attack on the factory world of Balmorra launched by Military Executor Sedriss QL. It was fought 10 ABY as a part of Operation Shadow Hand. Despite the massed numbers of the Imperial forces, the Balmorrans held a technical advantage and were able to repel the Imperial assault; inflicting heaving casualties on the Galactic Empire. While both sides deployed their most advanced weapons in their arsenal, Beltane won the final round by unleashing his top-secret X-1 Viper droids. Having played all his cards, Sedriss was forced to admit defeat and negotiate with the Balmorrans.
Background
Balmorra was the primary manufacturer of AT-ST walkers and SD series battle droids. Following the Battle of Endor in 4 ABY, Balmorra was liberated by the Alliance of Free Planets and enjoyed freedom from foreign influence until 10 ABY, during the reborn Emperor Palpatine's insurrection. [2]
As a result, the planet's massive foundries were once again put into Imperial service. However, following the death of the first clone Emperor at the Battle of Pinnacle Base, the Balmorrans rebelled against Imperial rule and began supplying droids to the New Republic, thus angering the Imperials.[2]
Battle
- "Beltane—our troops will land at once to accept your surrender."
"Surrender, Sedriss?—Not a chance! This will be the battle for freedom I've long awaited!" - ―Executor Sedriss QL and Governor Beltane

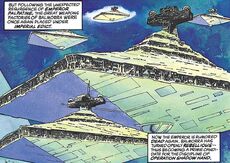
Star Destroyers led by the Avenger arrive over Balmorra.
From his flagship, Avenger, Sedriss led a fleet of Star Destroyers to Balmorra. Sedriss demanded that Governor Beltane (the ruler of Balmorra) surrender. [2]
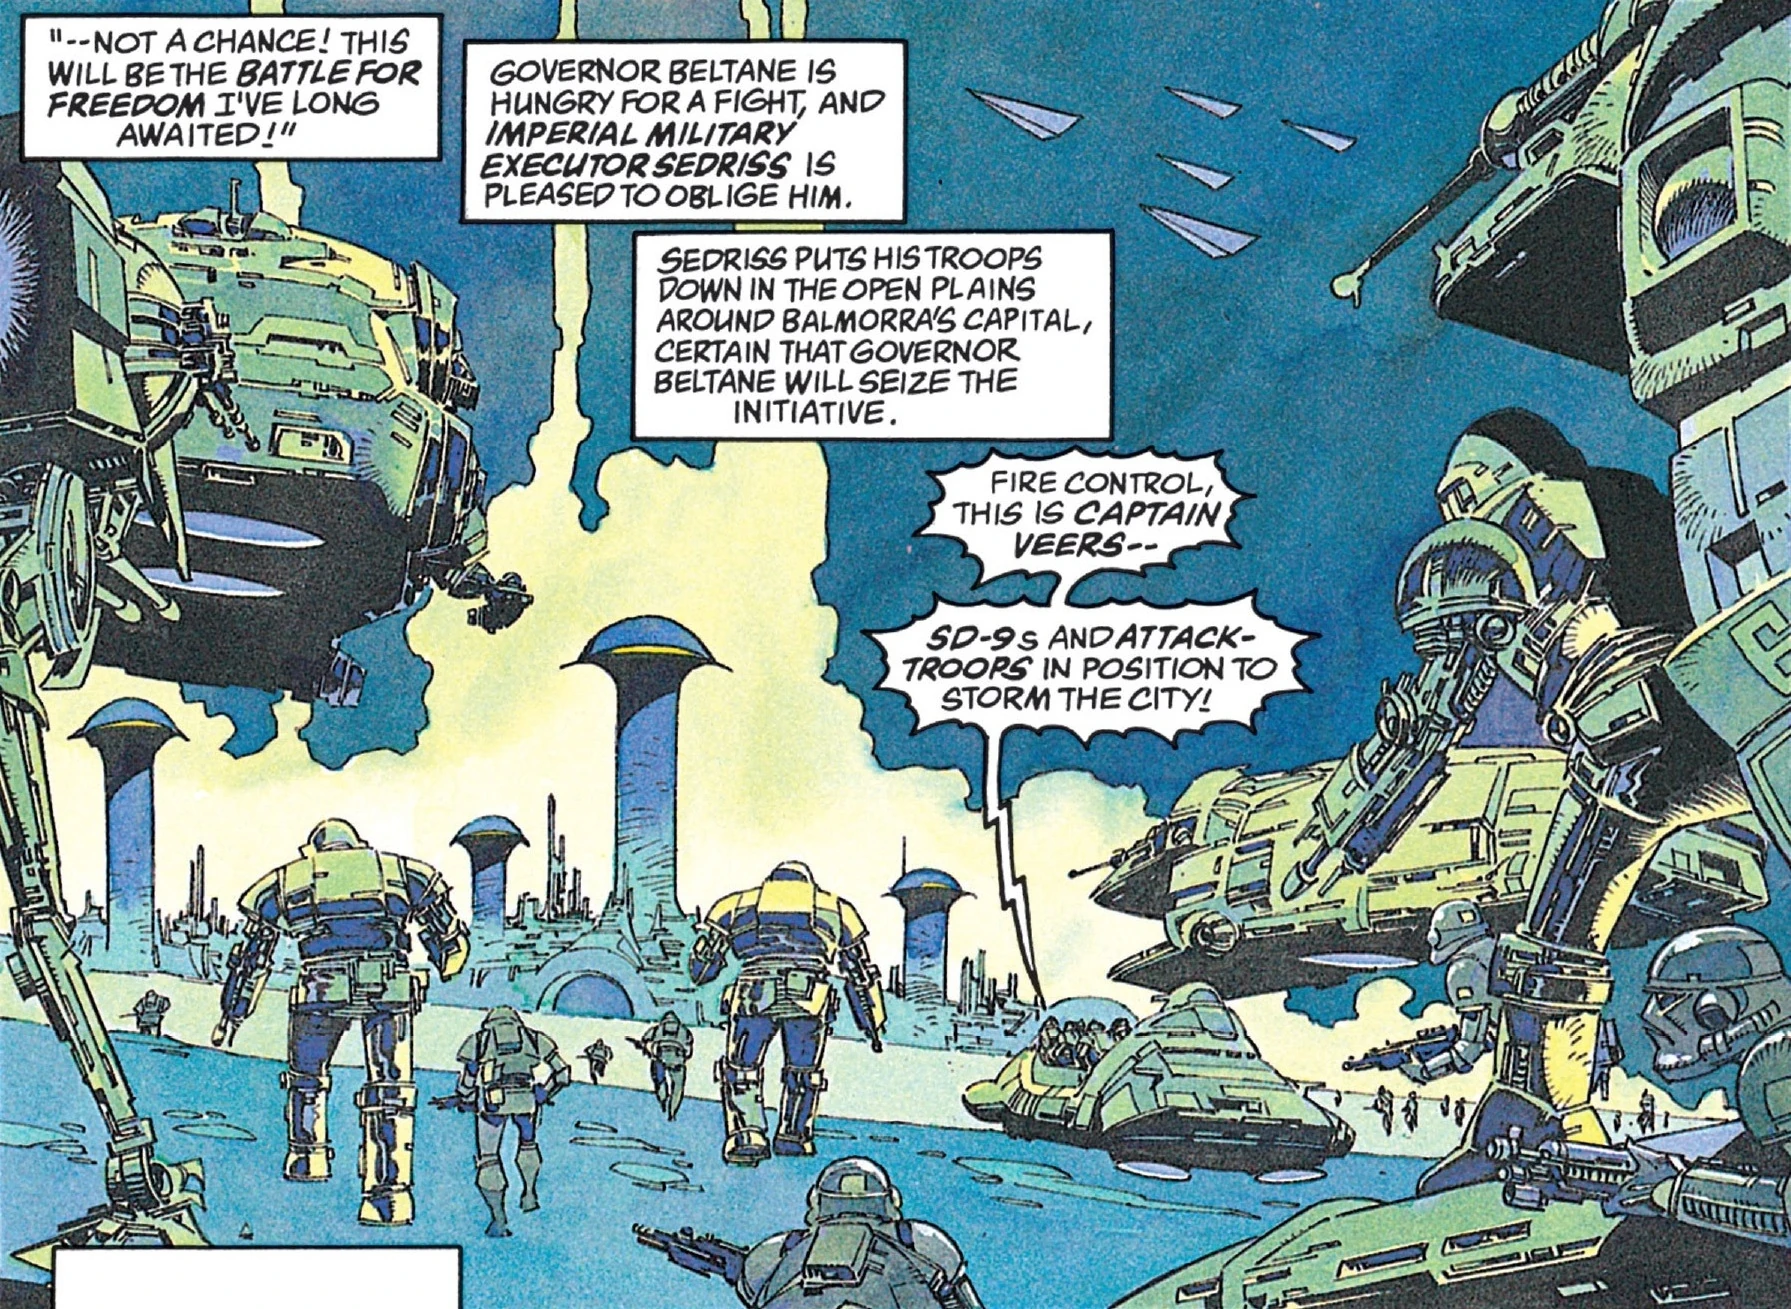
When Beltane refused, Sedriss deployed his military forces on the plains of Balmorra, near the capital Bin Prime. He intended to capture the planet with the valuable factories intact. Stormtroopers, SD-9 battle droids and AT-STs approached the edge of the city.[2]
However, Balmorra were prepared for combat. A combined force of Balmorran infantry and the newly manufactured SD-10 battle droids engaged the Imperial attack force. The SD-10s were programmed with tactics tailored to counter the older SD-9s, which were thoroughly outmatched. Sedriss had anticipated this turn of events, and had his remaining ground troops withdraw.[2]
He then ordered his Shadow Droids to destroy the exposed Balmorran forces. The unorthodox fighters inflicted heavy casualties, but Beltane had his own secret weapon. He unleashed the advanced X-1 Viper droids, which bested the Shadow Droids.[2]

The Imperial troops arrive.
After suffering heavy losses, Sedriss called off his attack. He sent down representatives to negotiate terms of peace. Balmorra won its freedom and in return would sell the Vipers to the Empire.[2]
Participants
Balmorra
Galactic Empire
Behind the scenes
The Second Battle of Balmorra first appeared in the issue Dark Empire II 1: Operation Shadow Hand of the Dark Empire series of comics. The battle was conceived and written by authors Tom Veitch, illustrated and colored by colorist Cam Kennedy. Veitch used this as the opening stage of the storyplot; introducing the Imperial Dark Jedi Sedriss QL and the Balmorran Governor Beltane.
The Second Battle of Balmorra would eventually be featured in the Dark Empire II audio drama.
The audio drama of Dark Empire differs from the original comic Dark Empire II in regards to several aspects of the chronology of events in the battle. In the audio version, Beltane has his planetary defenses fire on Sedriss' fleet, which is what prompts the Imperials to land ground troops. In the comic version, Sedriss first lands his ground troops and Beltane's forces do not open fire on the fleet.
Appearances
- Dark Empire II 1: Operation Shadow Hand (First appearance)
- Dark Empire II audio drama
Sources
- The Essential Guide to Planets and Moons
- The Essential Chronology
- The New Essential Guide to Characters
- The New Essential Chronology
 "The Empire's Finest: Who's Who in the Imperial Military" — Star Wars Insider 96
- Star Wars: The Official Starships & Vehicles Collection 4
- "25 Years of Return of the Jedi!" — Star Wars Insider 105
- The Complete Star Wars Encyclopedia, Vol. III, p. 299 ("Veers, General Maximilian") (First identified as Battle of Balmorra)
- Scavenger's Guide to Droids
- The Essential Atlas
- General Maximilian Veers in the Databank (content now obsolete; backup link)
- Star Wars: The Essential Guide to Warfare Author's Cut, 12: Tales of the New Republic on StarWars.com (article) (backup link)
Notes and references
- ↑ Star Wars: Jedi Knight: Mysteries of the Sith
- ↑ 2.00 2.01 2.02 2.03 2.04 2.05 2.06 2.07 2.08 2.09 2.10 2.11 2.12 2.13 2.14 2.15 2.16 2.17 2.18 2.19 2.20 2.21 2.22 2.23 2.24 2.25 2.26 2.27 2.28 2.29 2.30 2.31 2.32 2.33 Dark Empire II
- ↑ The Essential Chronology
- ↑ The Complete Star Wars Encyclopedia, Vol. III, p. 299 ("Veers, General Maximilian")