| | |

Warning: This infobox is missing the following parameters: unit2, unit1
- "My lord, the fleet has moved out of lightspeed. Com-scan has detected an energy field protecting an area of the sixth planet of the Hoth system. The field is strong enough to deflect any bombardment."
"The Rebels are alerted to our presence. Admiral Ozzel came out of lightspeed too close to the system."
"He...He felt surprise was wiser—"
"He is as clumsy as he is stupid. General, prepare your troops for a surface attack."
"Yes, my Lord." - ―General Maximillian Veers and Darth Vader
The Battle of Hoth was a historic confrontation between the Galactic Empire and the Rebel Alliance during the Galactic Civil War in which Imperial forces, led by the Dark Lord of the Sith Darth Vader, invaded the Rebellion's Echo Base on the ice planet Hoth after less than a month of its habitation by the Alliance. The overwhelming Imperial invasion would force the rebellion to abandon its holdings on Hoth and scatter the Alliance Fleet across the galaxy.
Prelude
Following the Rebel Alliance's major victory at Yavin, the Rebellion abandoned its base on Yavin and began searching the galaxy for new possible bases of operation, considering worlds such as Daxan Beta and Insk.[17] In the subsequent three and a half years of conflict, the Rebel Alliance eventually took refuge on the uninhabited planet of Hoth in the Anoat sector, claiming it as their new base of operations whilst hoping to avoid the watchful eyes of the Empire.[5]
Shortly before the Battle of Hoth, a strategy conference would be held at the base in which several transports would arrive rumored to carry Princess Leia Organa, General Carlist Rieekan and Commander Berryl Chiffonage, a Bothan spy and several other members of Alliance Command. The meeting would eventually end shortly before the battle, before Leia and some of the attendees could leave the system.[1] With the Empire sending out several Viper probe droids to search for hidden Rebel bases throughout the galaxy, it eventually discovered the Alliance's base of operations on Hoth. Commander Luke Skywalker would spot the probe droid crash while on a recon mission with his tauntaun, and believing it to be a meteorite, went closer to investigate but was attacked by a native wampa and dragged off into a cave before he could get a closer look. Han Solo eventually went off to rescue Skywalker during a harsh snowstorm, in spite of the concern from his comrades.[2]
Later, Solo and Chewbacca were tasked with investigating the lead that Skywalker came across, leading to their discovery of the existence of the probe droid. Upon being spotted by it, Han attempted to destroy it, but before he could the droid activated its self-destruct mechanism. Receiving new intelligence from the probe, the crew of the Executor initially dismissed the findings. In spite of Admiral Kendal Ozzel's concern that the assailants were merely smugglers, Darth Vader instructed the Imperial Death Squadron to invade the planet. With their location revealed, the wrath of the Empire would soon be unleashed upon the Rebellion.[2]
The battle
Plan Kay One Zero
- "Make ready to land our troops beyond their energy field, then deploy the fleet so that nothing gets off the system. You are in command now, Admiral Piett."
- ―Darth Vader, to Firmus Piett, as he executes Kendal Ozzel
General Rieekan correctly concluded that the probe droid was sent from the Empire and ordered the immediate evacuation of Echo Base using code K-one-zero.[1] Rieekan then ordered Rebel technicians to raise the shields of the base to its maximum power in order to minimize damage from orbital bombardment while Princess Leia Organa instructed the Rebels to escape in groups in order to avoid the Imperial blockade and meet at a pre-specified rendezvous point. Immediately, the rebel base fluttered with activity as boarding began on the many GR-75 medium transports as all noncombat personnel headed to safety while the Tauntauns utilized by the rebels were set loose onto the frozen plains. A noisy alarm immediately indicated the Empire's arrival, while a subspace alert was sent out to the transports of new recruits heading for the world to avoid the system.[2][10]
When Darth Vader's fleet arrived in the Hoth system, he quickly discovered that the Rebels were fully aware of the ambush that he had planned, which was not helped by Ozzel's Star Destroyer appearing out of lightspeed too close to the system. Vader promptly force-choked Ozzel to death for poorly handling the situation and immediately promoted Captain Firmus Piett to the rank of admiral, leaving him in charge of the invasion.[2]
Imperial offensive
- "Sergeant! What's going on?"
"Command says snowspeeders have engaged the walkers. No damage yet, but they're slowing down. The bad news, sir, is that the Empire's sent recon forces fanning out. Troops are heading this way."
"Get ready, then." - ―First Sergeant Namir and an Echo Base sergeant
AT-AT walkers spotted by Echo Station 3-T-8
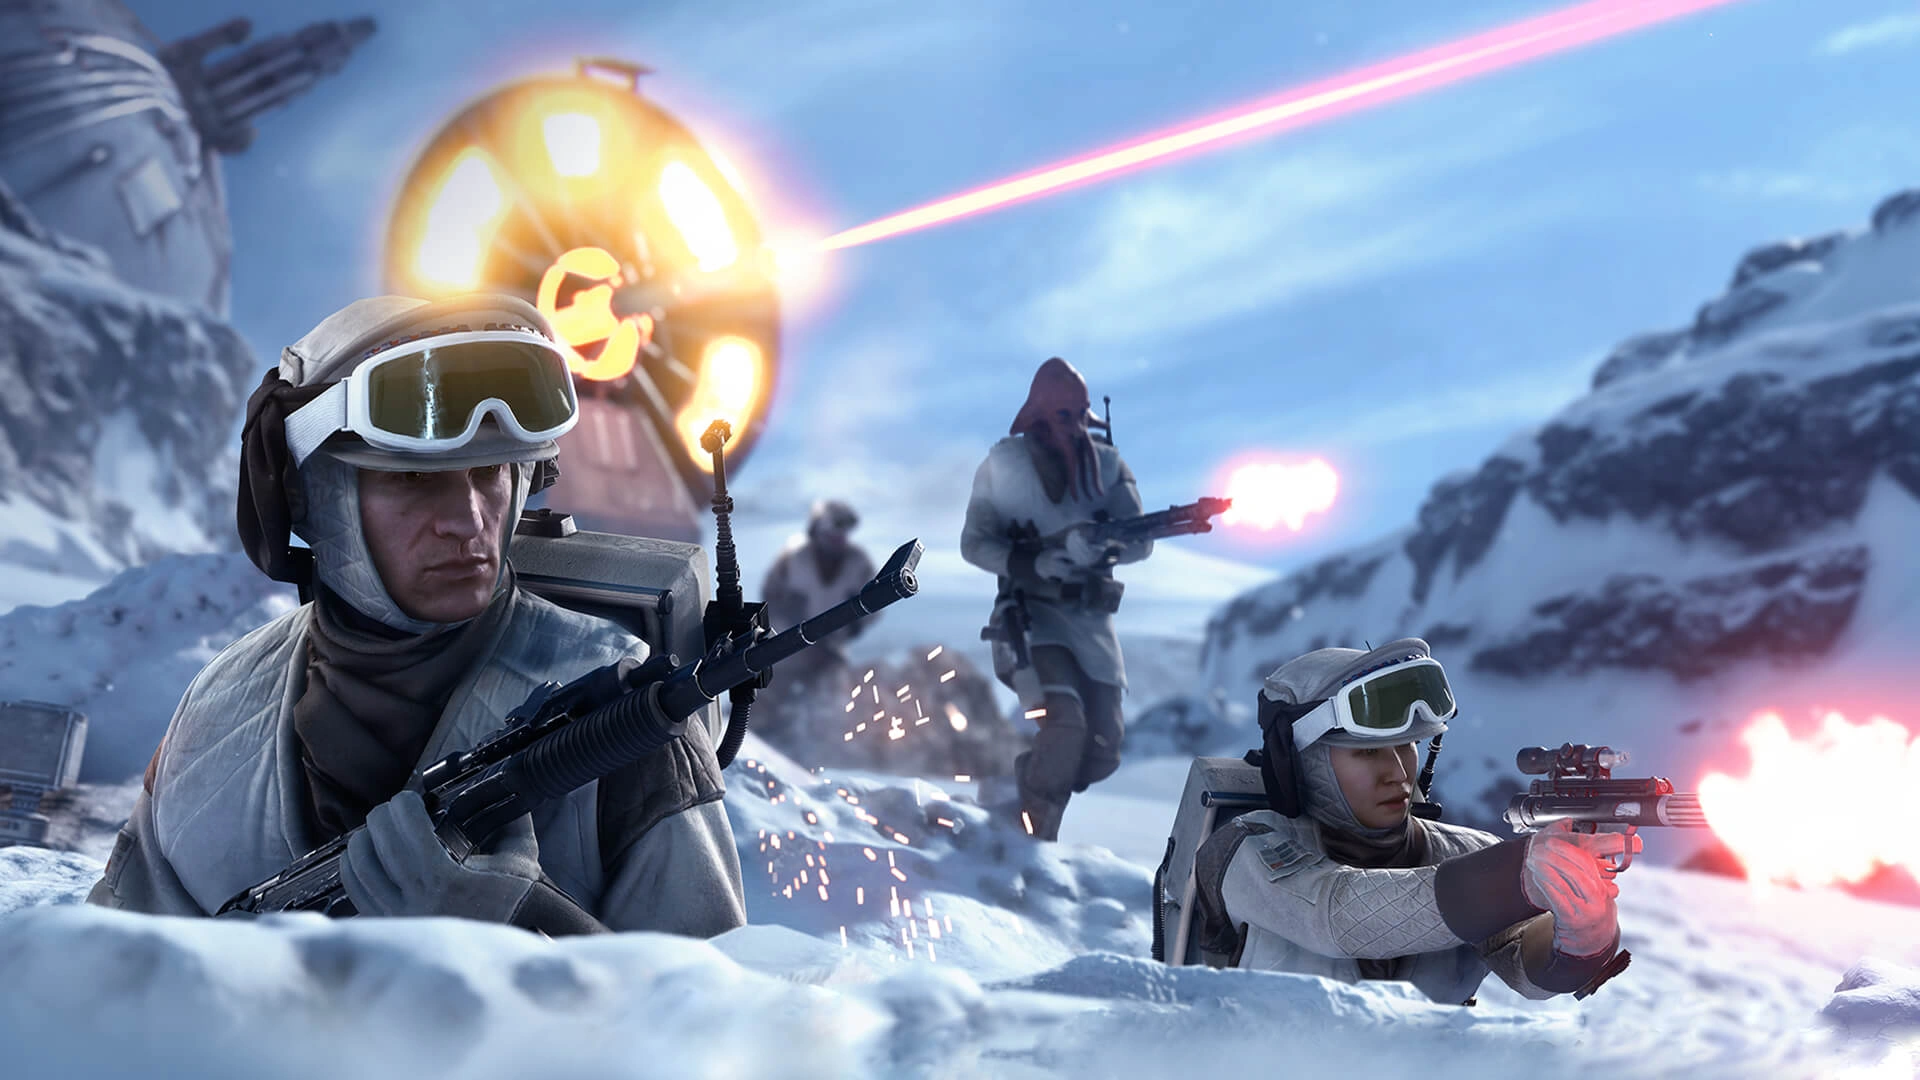
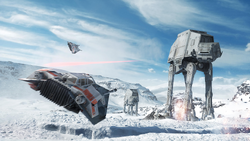
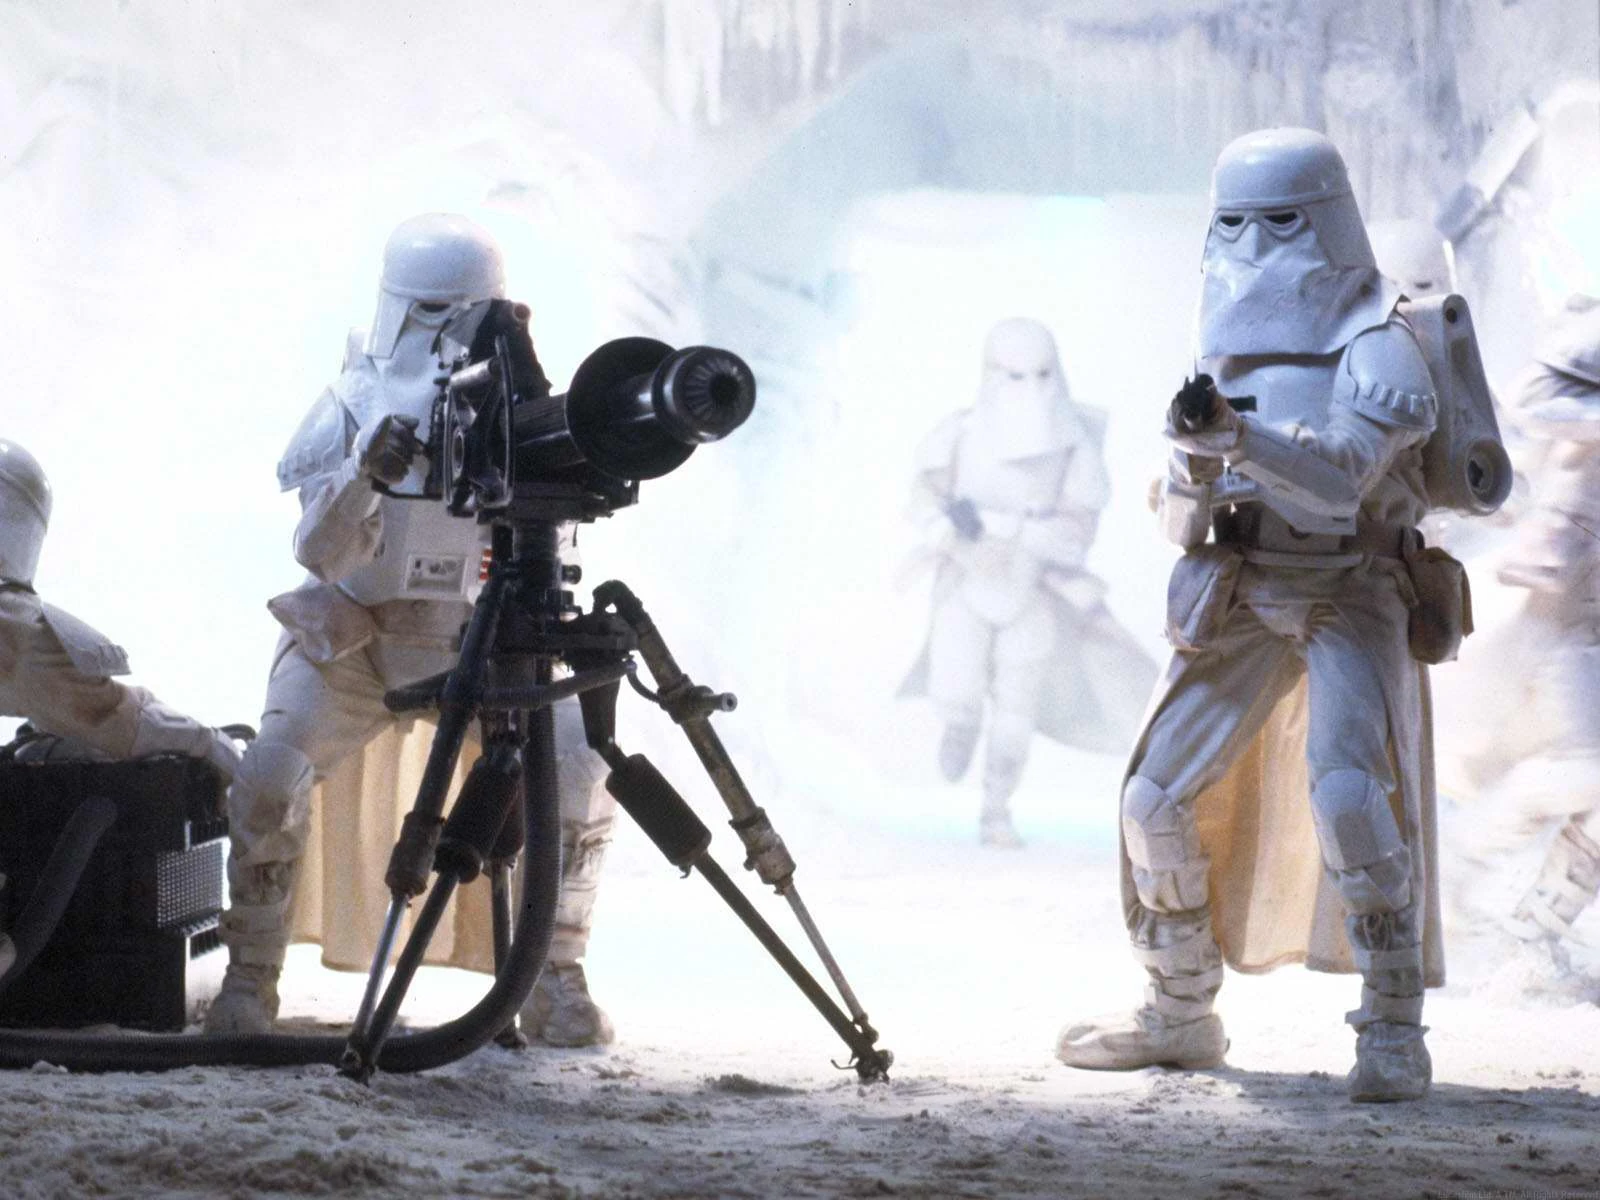
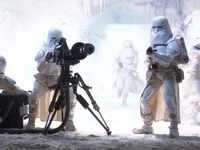
Preparing for a full-scale surface attack due to the presence of the Alliance's shield generator, thus denying the ability for an orbital bombardment, the Empire began to land their forces on the surface at the Moorsh Moraine glacial feature by utilizing several Gozanti-class cruisers. The cruisers were first reported by Perimeter Outpost Delta, while in space the first Star Destroyer was disabled by Echo Base's ion cannon, allowing the first GR-75 medium transport Quantum Storm and its fighter escort to safely escape.[12] Nonetheless it wouldn't be long until the Imperial forces on the ground would be reported in by Outpost Beta. With the Empire's force composing of several AT-ATs, AT-STs and Cold weather assault stormtroopers led by General Maximillian Veers of the dreaded Blizzard Force, Outpost Beta was subsequently the first sentry post destroyed with half a dozen laser blasts from the Imperial AT-ST walkers.[1] Blizzard Force then defeated the Rebel scouts at Echo Station 3-T-8, allowing them to continue their march towards Echo Base.[18]

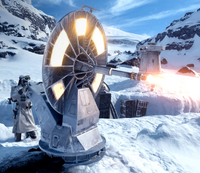
Troopers defend the planetary ion canon of Echo Base during the Battle of Hoth
Rebel ground forces attempted to hold the line against the Imperial walkers in recently dug trenches dotted with numerous DF.9 Turrets and the concentrated blasts of 1.4 FD P-Tower laser cannons, but were met with little success due to the near-impervious armor that was utilized by the AT-ATs. Due to proximity mines planted by Outpost Beta personnel having failed to damage the advancing AT-ST walkers, the main concern and official order for the rebel troops on the ground was to protect the shield generator. As with its destruction, the energy shield would no longer offer solace to any unlaunched rebel transports in the field. With rebel air support now engaging the walkers the Imperial advance slowed somewhat, if only to allow recon forces to begin fanning out to assault the other rebel positions spread across the battlefield. First Sergeant Namir of the Sixty-First Mobile Infantry and the soldiers at Outpost Delta were soon under attack by a force of several Imperial snowtroopers on floating gunnery platforms and an AT-ST walker due to their flanking position on the western edge of the Imperial advance. Despite heavy resistance and the destruction of a gunnery platform, the Scout Transport was not distracted by blaster fire from ground troops in the trenches and proceeded to destroy several rebel artillery emplacements. With the outpost no longer a threat, the walker and its ground support fell back to join the main assault on Echo Base, forcing the survivors of the encounter to proceed back to base on a hijacked Imperial wheeled combat transport.[1]

Alliance T-47s buy time against the AT-ATs
With T-47 airspeeders flying out of Echo Base's hangar to meet the approaching army, they soon realized that the AT-AT's armor was impervious to their blasters, while a single shot from an AT-AT destroyed one of the rebel airspeeders. Despite this, pilots Thane Kyrell and Yendor managed to badly damage a walker's leg by shooting at its joints, ultimately detaching its foot and disabling the behemoth.[10] Shortly afterwards, Rogue Squadron led by Luke Skywalker and Wedge Antilles were able to utilize T-47 airspeeders to somewhat halt the march of the Imperials. Antilles, aided by his gunner Wes Janson, were able to inventively use their T-47's tow cables to topple an AT-AT before blowing it to smithereens in its weakened state. Unfortunately, Skywalker's own snowspeeder was blasted by an AT-AT, killing his co-pilot Dak Ralter and leaving him stranded on the ground once his ship crashed and was subsequently crushed. Skywalker was able to attach himself to the nearby AT-AT and by utilizing his hoist cable, his Lightsaber, and a Thermal detonator, another AT-AT was brought to a screeching halt.[2]

1.4 FD P-Towers were unable to penetrate AT-AT armor.
In spite of their valiant efforts, the Rebels were unable to hold the Imperials back. With many of the Rebel defense turrets in place to halt the Imperial forces quickly being destroyed, forcing the Rebel troops to retreat back to Echo Base. With the Empire now deploying ground troops in an effort to force the Rebellion out of their crumbling last line of defense, survivors of Outpost Delta smashed through the Imperial front into friendly territory if only to discover that rebel command's last order was one of total evacuation. With confusion in the field owing to a sudden communications blackout from Echo Base, which some attributed to a walker firing at it, the demoralized rebel forces hastily made way for their escape. Upon reaching firing range of Echo Base's power generator, Veers in his AT-AT Blizzard One managed to annihilate the generator, leaving Echo Base vulnerable to an orbital bombardment and allowing for the arrival of Lord Vader's shuttle.[2][1]
Infiltration of Echo Base
- "Imperial troops have entered the base! Imperial troops have ent—"
- ―A Rebel soldier
With Alliance friend and smuggler Han Solo and Chewbacca having previously planned to leave Hoth shortly before the Empire attacked in order to pay off their debt to Jabba Desilijic Tiure, they ultimately found themselves stranded with Princess Leia, C-3PO, and R2-D2 once the bombardment began. With the snowtroopers now pouring into Echo Base, Leia instructed all remaining personnel in the base to evacuate immediately. Many of the survivors were able to escape in the transports unharmed, despite numerous TIE/LN starfighters now entering the planet's atmosphere.[10] With the interior of the base now in chaos, remaining rebels hastily made their way to their respective starships while firefights between Imperial and rebel forces erupted in the corridors, echoing across the crumbling base. Owing to occasional Wampas infiltrating Echo Base, several snowtroopers were slain after entering a room where vicious native Wampas were kept, ignoring a sign clearly marked warning in the process.[2][16]
Snowtroopers invade Echo Base
Darth Vader, having traveled to Echo Base upon the shield generators destruction seeking his son, Luke Skywalker, marched throughout the base to see personally to the rebels defeat. Encountering First Sergeant Namir, Imperial defector Everi Chalis and several other rebel troopers in a corridor, Vader swiftly dispatched the motley crew, before being informed by a snowtrooper the newly discovered location of the Millennium Falcon.[1] With troopers arriving in the hangar where the Millennium Falcon was kept, the Falcon was not able to start up immediately due to damage it had sustained earlier, but nonetheless held off approaching snowtroopers by utilizing the ship's weapons systems. Just as Vader arrived, the Falcon managed to escape to hangar and subsequently, the Hoth system.[2]
Rebel escape
- "Anything?"
"No. No signs of Rebels."
"All right, let's keep moving."
"Yeah, at least walking will help keep us a bit warmer." - ―Imperial snowtrooper chatter while flushing out rebel stragglers in Echo Base
GR-75 transports evacuate the remaining rebel troops off Hoth.
Despite most of the remnants of the Rebellion's troops on Hoth managing to escape, the Alliance Fleet and Alliance High Command would be temporarily scattered, leaving many of the leaders of the Rebel Alliance separated from their forces and without orders. Luke Skywalker was able to make his way back to Echo Base before the Empire destroyed it and took off in an X-Wing, and chose not to go to the rendezvous point in order to find Jedi Master Yoda per Obi-Wan's request. Meanwhile, Solo and his group were unable to go to lightspeed due to engine trouble, and were forced to flee from the Imperial fleet by other means.[2] With First Sergeant Namir and Governor Everi Chalis having barely survived their previous encounter with Vader, the two managed to escape in a rebel transport by sending false codes to a Star Destroyer in orbit owing to Chalis's former Imperial employment. Before the Destroyer could confirm their suspicions, the two blasted off into hyperspace, unknowing of the role they would play in future events.[1]
With Echo Base mostly cleared, Imperial forces began locking down rebel airspeeders with Imperial flight codes to prevent any straggling rebels from escaping.[15]
Nonetheless, two such rebels would be stranded on the planet after missing the last transport. Needing to escape the base, Admiral Gial Ackbar would assemble some of his best technicians in an effort to rescue the survivors. After fighting of waves of increasing Imperial assault, Ackbar's technicians were able to crack the codes, sending them to the two rebels and allowing them to escape.[15]
Aftermath


The Avenger chases the Falcon
The battle was a costly blow to the Rebel Alliance, scattering the surviving forces and lowering overall morale to the cause. For the weeks following the Battle of Hoth, Alliance High Command would remain scattered and various rebel elements left fragmented across the Outer Rim, while Imperial battle groups from the Core Worlds would be dispatched to pursue the scattered rebel fleet. Despite the communications breakdown, the Rebels would continue to persist in their effort to battle against the Empire in spite of this crushing defeat, with one fragment eventually assaulting numerous Imperial worlds in Operation Ringbreaker and also freeing the manufacturing world of Sullust.[1] Although Solo would eventually be taken prisoner by Boba Fett, Skywalker, Organa, C-3PO, R2-D2 and Chewbacca would eventually reunite with the Rebel fleet, joined by a newfound ally, Lando Calrissian.[2] Imperial tacticians would study the rebel's ability to escape with so few casualties yet inflict so many, while the Rebels were forced to abandon tons of material and snowspeeders following their hasty retreat from Echo Base. While rebel weapons were at par with the Empire's, poor body armor for foot soldiers plagued the rebel forces despite troopers at Echo Base possessing better equipment than many rebel forces during the Mid Rim Retreat.[1] The rebellion would ultimately establish a new base on the even remoter world of 5251977, while the Galactic Civil War would continue to rage across the galaxy.[10] It would not be until six months later that the Alliance would not only destroy the Death Star II and with it the Imperial head of state after the highly successful Battle of Endor, but also kill his right hand man, Lord Vader, ultimately ushering in the formation of the New Republic in its continuing effort to restore freedom to the galaxy.[19]
Appearances
- Star Wars: Galactic Defense
- The Adventures of Luke Skywalker, Jedi Knight
- Star Wars: Battle Pod
- Star Wars: Commander
- Star Wars Battlefront
- Battlefront: Twilight Company
- Lost Stars
- Star Wars: Episode V The Empire Strikes Back (First appearance)
- Epic Yarns: The Empire Strikes Back (Non-canonical appearance)
- Moving Target: A Princess Leia Adventure (Mentioned only)
 "Blade Squadron" — Star Wars Insider 149–150 (Mentioned only)
- Shattered Empire, Part III (Mentioned only in opening credits)
- Star Wars: Uprising (Mentioned only)
- Bloodline (Indirect mention only)
- Before the Awakening (Mentioned only)
- LEGO Star Wars: The Resistance Rises — "Attack of the Conscience" (Mentioned only)
Sources
- Admiral Ozzel in the Encyclopedia (content now obsolete; backup link)
- AT-AT walker in the Encyclopedia (content now obsolete; backup link)
- AT-ST walker in the Encyclopedia (content now obsolete; backup link)
- Captain Needa in the Encyclopedia (content now obsolete; backup link)
- Hoth in the Encyclopedia (content now obsolete; backup link)
- snowspeeder in the Encyclopedia (content now obsolete; backup link) (Indirect mention only)
- Stormtroopers in the Encyclopedia (content now obsolete; backup link)
- Star Wars in 100 Scenes
- Ultimate Star Wars
- Star Wars: Absolutely Everything You Need to Know
- Star Wars: Ships of the Galaxy
- Star Wars: Complete Locations
- AT-AT walker in the Databank (backup link)
- AT-ST walker in the Databank (backup link)
- Bespin in the Databank (backup link)
- Captain Needa in the Databank (backup link)
- Galactic Empire in the Databank (backup link)
- GR-75 Medium Transport in the Databank (backup link) (Indirect mention only)
- Imperial Star Destroyer biography gallery on StarWars.com (backup link (Imperial-Star-Destroyer-Biography-gallery) not verified!); image #8 (of 15)
- Stormtroopers in the Databank (backup link)
- TIE fighter in the Databank (backup link)
- X-wing Fighter history gallery in the Databank (backup link); image #5 (of 8)
Notes and references
- ↑ 1.00 1.01 1.02 1.03 1.04 1.05 1.06 1.07 1.08 1.09 1.10 1.11 1.12 1.13 1.14 1.15 1.16 1.17 1.18 Battlefront: Twilight Company
- ↑ 2.00 2.01 2.02 2.03 2.04 2.05 2.06 2.07 2.08 2.09 2.10 2.11 2.12 2.13 2.14 2.15 2.16 2.17 2.18 2.19 2.20 2.21 2.22 2.23 2.24 2.25 2.26 2.27 2.28 2.29 2.30 2.31 2.32 2.33 2.34 2.35 2.36 2.37 2.38 2.39 2.40 Star Wars: Episode V The Empire Strikes Back
- ↑
 All Terrain Scout Transport in the Encyclopedia (content now obsolete; backup link (groups/technology) not verified!)
- ↑ 4.0 4.1 Star Wars in 100 Scenes states that the Battle of Hoth occurred six months before the Battle of Endor. Knowing the chronological number of years between Ep. IV and Ep. VI due to Leeland Chee's tweet, which is four, and that a standard year has twelve months, it can be surmised that the Battle of Hoth took place forty-two months after the Battle of Yavin, thus three and a half years.
- ↑ 5.0 5.1 5.2 5.3 Hoth in the Encyclopedia (content now obsolete; backup link)
- ↑ 6.0 6.1 6.2 6.3 "Blade Squadron" — Star Wars Insider 149–150
- ↑ 7.0 7.1 Captain Needa in the Encyclopedia (content now obsolete; backup link)
- ↑ 8.0 8.1 Admiral Ozzel in the Encyclopedia (content now obsolete; backup link)
- ↑ Star Wars: Card Trader
- ↑ 10.0 10.1 10.2 10.3 10.4 10.5 10.6 10.7 10.8 Lost Stars
- ↑ AT-AT Walker (All Terrain Armored Transport) in the Databank (backup link) – Based on number of AT-AT walkers visible in this picture
- ↑ 12.0 12.1 12.2 Star Wars: Card Trader
- ↑ Stormtroopers in the Encyclopedia (content now obsolete; backup link)
- ↑ Ultimate Star Wars
- ↑ 15.0 15.1 15.2 Star Wars Battlefront
- ↑ 16.0 16.1 16.2 Star Wars: Absolutely Everything You Need to Know
- ↑ Princess Leia, Part I
- ↑ Star Wars: Galactic Defense
- ↑ Star Wars: Episode VI Return of the Jedi
Template:Canon Galactic Civil War