| | |

Warning: This infobox is missing the following parameters: unit2, unit1
The Battle of Scarif was the first major battle fought in 0 BBY between the Alliance to Restore the Republic and the Galactic Empire, marking the beginning of the five-year Galactic Civil War. The battle was preceded by years of attacks by the fledgling Rebel Alliance against the Empire and began the five-year period in which the Alliance successfully fought to replace the Galactic Empire with the New Republic.
Prior to the battle, Alliance Intelligence intercepted information suggesting that renowned scientist Galen Erso was building an Imperial superweapon capable of destroying entire planets. Alliance leadership sent Galen Erso's daughter, Jyn Erso, and Captain Cassian Andor to learn more about her father's involvement, and their subsequent efforts saw the Alliance discover the existence of the Death Star, as well as a fatal flaw in the design placed there by Galen Erso.
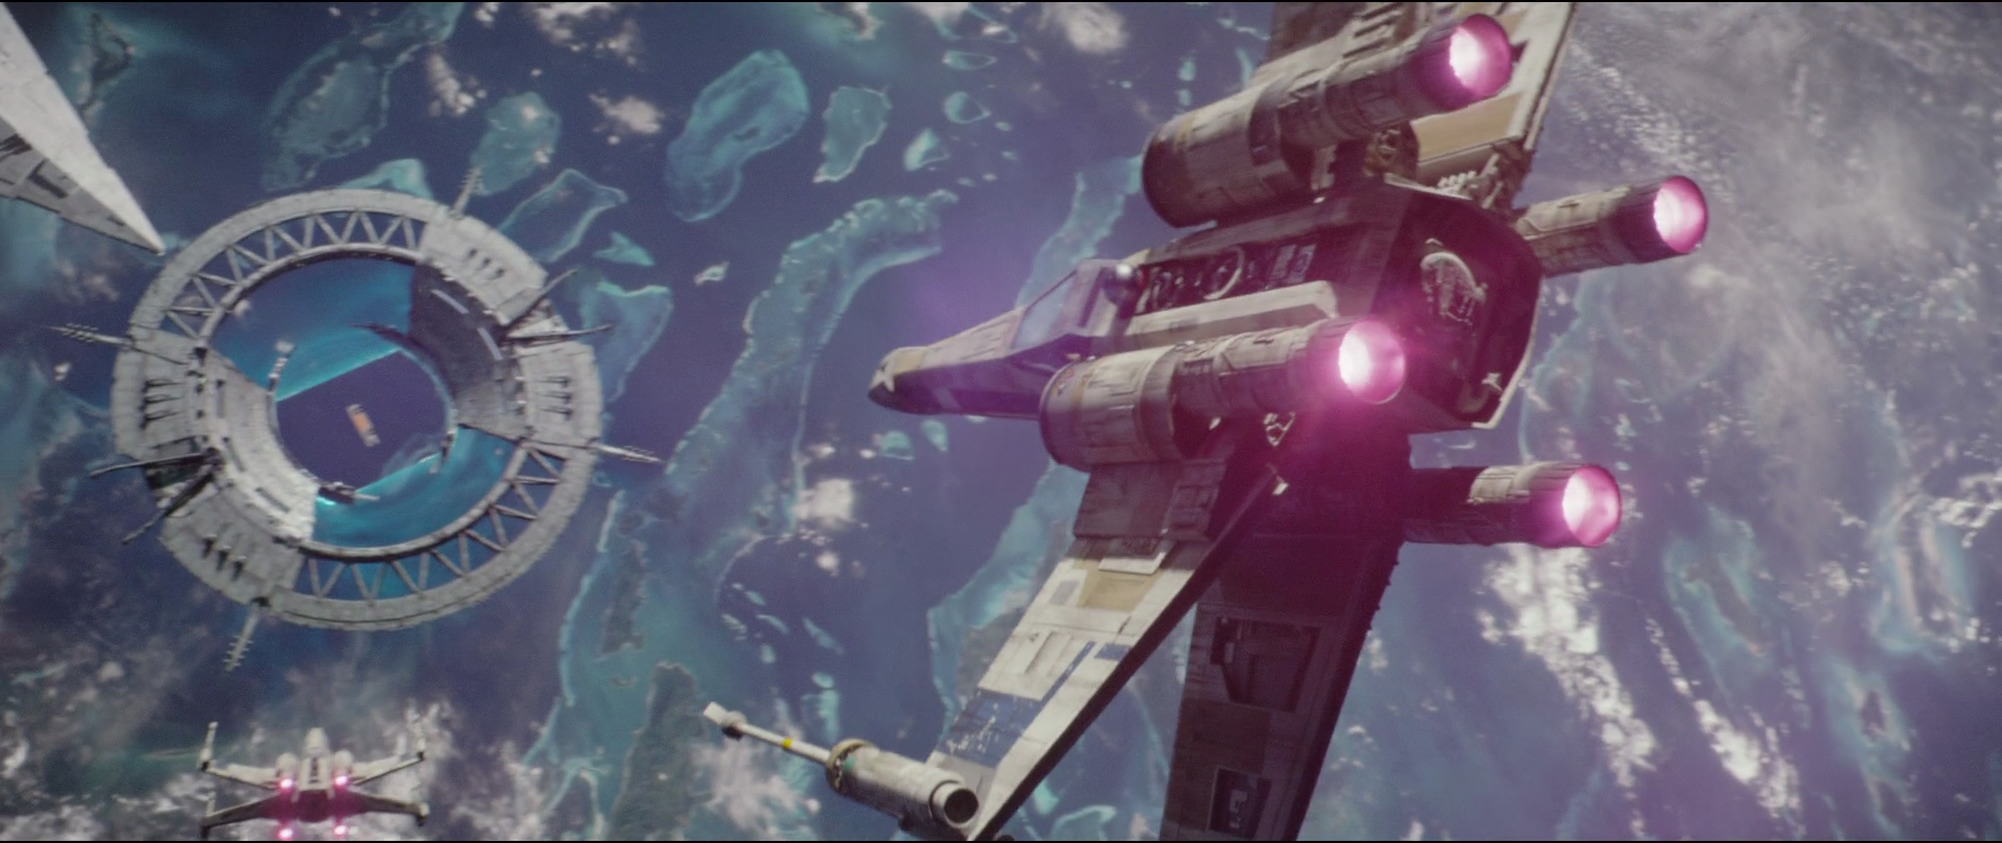
Though the Alliance High Command refused to openly oppose the Empire, Erso and Andor led a small unit of Rebel soldiers and other allies and defied orders, taking it upon themselves to infiltrate the heavily-guarded Citadel Tower base on Scarif to retrieve the Death Star plans. Under the callsign Rogue One, the unit infiltrated Scarif's planetary shield in a stolen Zeta-class cargo shuttle and proceeded to wage a guerrilla assault on the Citadel's outskirts, drawing away Imperial forces so that Andor, Erso, and the droid K-2SO could infiltrate the facility. Director Orson Krennic, the former commander of the Death Star, attempted to stop Erso and Andor from stealing the plans, but the heavily-outnumbered Rebels received support from the Alliance Fleet under Admiral Raddus, whose forces engaged the Imperial Star Destroyers above Scarif and worked to destroy the Shield Gate protecting the planet.
With the Shield Gate's destruction, Rogue One was able to transmit the stolen plans to the fleet above, though all remaining Rebel ground forces were eradicated by a low-powered blast from the newly-arrived Death Star that destroyed the Citadel and surrounding area. The Sith Lord Darth Vader's forces made short work of the rebel ships that did not manage to retreat, but Princess Leia Organa managed to escape the battle in the Tantive IV; Vader pursued her to the planet Tatooine and captured her there, but the plans were already out of his reach. The plans eventually found their way to the Alliance, who used them to pinpoint the Death Star's weakness and destroy it at the Battle of Yavin.
Prelude
- "I'm sorry, Jyn. Without the full support of the council, the odds are too great."
- ―Chancellor Mon Mothma to Sergeant Jyn Erso that the High Command will not support any direct confrontation with the Galactic Empire
Following the Mission to Eadu, Jyn Erso, and Captain Cassian Andor participated in an Alliance Council meeting, where they told the gathered beings what they had learned about the Death Star, and that they needed to get the plans held at Scarif; however, most were skeptical that such a weapon existed, and those that believed it did were unconvinced that it had a deliberate weakness-on account of the fact that the news came from a criminal who was the daughter of an Imperial engineer-and thought that it would be better to hide or surrender. Disheartened, Erso walked away from the meeting, only to find that Andor and many others were still willing to go with her and fight. Together, they undertook an unsanctioned mission to Scarif using the Imperial cargo shuttle that had been stolen earlier, and headed to planet.[1]
Once there, Bodhi Rook transmitted the shuttle's clearance codes, which got them through the planetary shield and onto the surface.[1]
Around the same time, Director Orson Callan Krennic also returned to Scarif in order to have the command staff scour through any and all Death Star-related project files made by the deceased designer for the Death Star, Galen Erso. The motive behind this was to see if there were any irregularities, after Vader informed Krennic that he can only get the Emperor's favor if he can make sure Erso didn't leak anything to the Rebels regarding the Death Star's weaknesses.[1]
The battle
Sneak attack
- "Make ten men feel like a hundred."
- ―Captain Cassian Jeron Andor, to the soldiers of Rogue One
Aided by the element of surprise, Jyn Erso and Cassian Andor sent teams to set up a distraction to allow them to infiltrate the Citadel Tower and locate the plans. Erso and Andor, posing as Technician Kent Deezling and Lieutenant Colin Hakelia after knocking the two out and stealing their uniforms, proceeded to enter the security complex.[10] They then lured a K-2X droid over to an isolated area so K-2SO could find the direct path to the plans via the droid's imbedded map. K-2SO found the path and warned them that three squads of Imperials stood in their way. Andor then gave the Marines the order to detonate the explosives. The battle began with Rebel Marines setting off multiple explosives on the landing pads around the Scarif complex (shortly delayed by command center staff watching the explosions before Director Krennic ordered them to deploy the base garrison). This attracted many of the troopers at the base, allowing Erso, Andor, and K-2SO to get further inside the Citadel and search for the Death Star plans while the rest of Rogue One dealt with the complex garrison.[1]
Attacking the Shield Gate
- "This is Gold Leader, we're starting our attack run on the shield gate."
- ―Captain Jon Vander, to the rebel fleet.

General Merrick heads toward the shield before it closes.
Soon after, the rest of the Alliance fleet arrived to support the initial assault squadron. Following the arrival of the Alliance's fleet, Admiral Raddus ordered all squadron leaders to report in then assigned them duties; Red and Gold Squadrons were to defend the fleet, while Blue Squadron was ordered to get to the surface to reinforce those battling on the beaches. 12 X-wings, including Blue Leader Antoc Merrick, and a single U-wing made it through the opening before Shield Gate control ordered the gate closed. 6 other X-Wings attempted to get through with the rest of their squadron but none of them made it; one was shot down, two were destroyed when they impacted the shield and the other four attempted to pull out but one was destroyed when it collided with the gate station. The remaining members of Blue Squadron in space, now consisting of 1 U-wing and 3 X-wings, brought down the bridge shield generators of a Star Destroyer along with one TIE fighter as they helped the rest of the rebel fleet. After Blue Squadron had made it through, Red Squadron attempted a diversionary attack on the Shield Gate by using 10 X-Wings to attack the defense turrets, losing a number of their ships in the process to enemy fire but inflicting severe damage to many of the turbolasers. This tactic drew the attention of several defense turrets, creating an opening for Gold Squadron to begin their attack run on the Shield Gate. Using 10 of their Y-Wings, Gold Leader instructed his pilots to begin their initial bombardment, warning his pilots to use caution around the defense towers. Gold Squadron conducted several bombing runs on the shield gate, utilizing proton bombs in the process but losing 3 Y-Wings as well. The battle intensified as the Imperial forces launched TIE fighters in response from its Star Destroyers and the shield gate, which began to batter the rebel cruisers with laser fire and shooting down many starfighters, including Red Five (Pedrin Gaul). After seeing that there was no progress on that front, Admiral Raddus ordered the fleet to engage the Star Destroyers.[1]
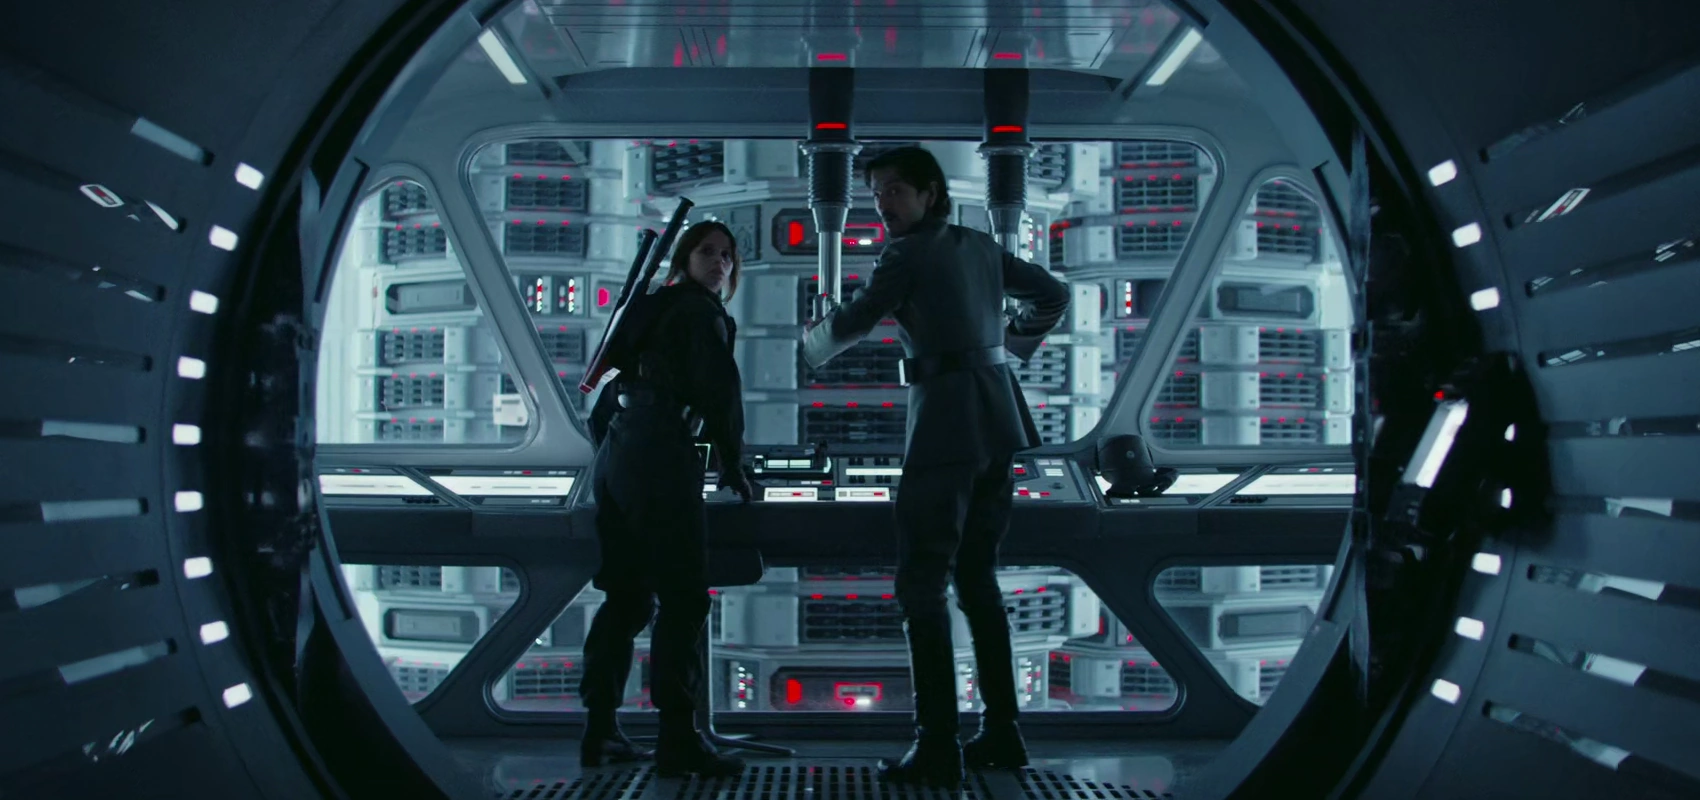
Infiltrating the tower
Andor, Erso and K-2SO infiltrate the tower
Once inside the base, Andor, K-2SO, and Erso made their way to the archives. After disabling the technician, K-2SO began searching for the files as Andor and Erso entered the vault. After noticing the dead technician, a multitude of stormtroopers besieged the main archive room, while K-2SO managed to hold many of them off with a single blaster pistol. After withstanding heavy blaster fire, K-2SO located the Death Star plans and marked the canister. He then locked Erso and Andor in the vault to allow them enough time to retrieve the plans, and was subsequently destroyed fending off stormtroopers, taking down the archive room console in the process.[1]
AT-ACT assault


Baze Malbus shoots a rocket at an AT-ACT.
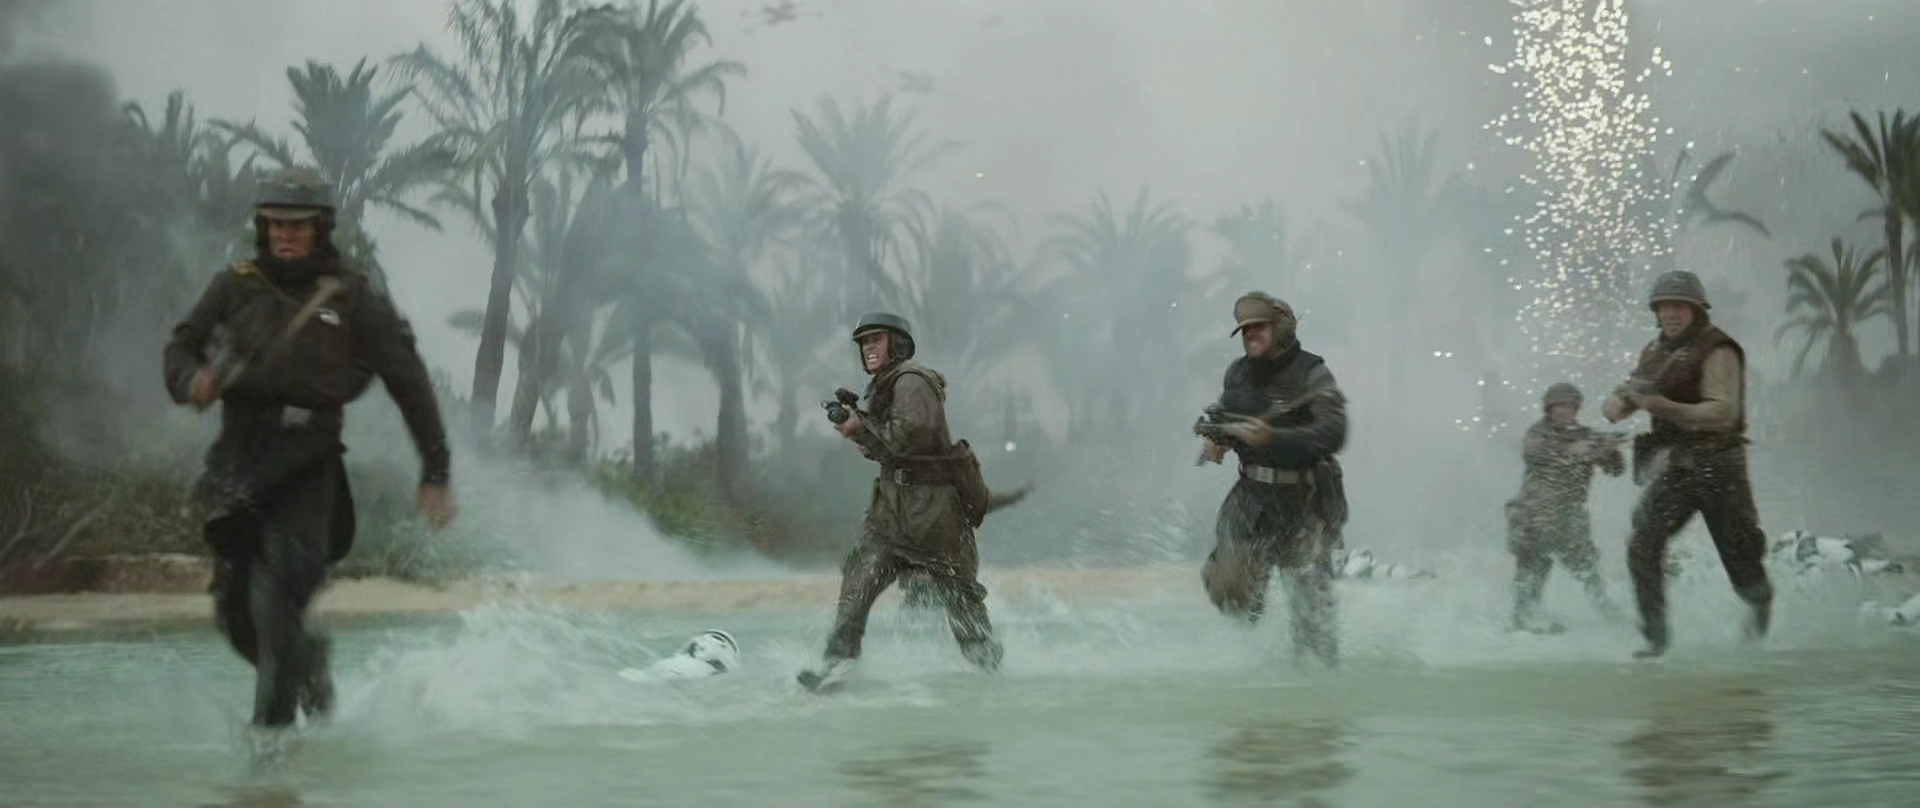
As the rest of Rogue One held down the line, Chirrut Îmwe heard the sound of walkers headed their way. He yelled at Baze Malbus, who then turned around and saw an AT-ACT headed their way. Now outmatched due to the presence of the walkers, the Rebels were forced to fall back to the beach, with a number of them being cut down by fire from stormtroopers and the pursuing walkers. As the Rebels reached a beach and dug in, Baze fired a smart rocket at a pursuing AT-ACT, to no effect. However, right before it could obliterate their position the walker was fired on and destroyed by Blue Squadron's X-wings, which had arrived to provide support. Another walker was brought down by a U-wing when its door-mounted ion cannon disabled its legs and a third imploded when an X-wing fired on its open cargo bed.[1]
Reinforcements
- "For Jedha!"
- ― A Rebel marine's warcry.
With Blue Squadron having made it through the shield gate, the Imperial air defenses were scrambled in order to defend the Citadel Tower from the rebel incursion. Rebel X-wings engaged the numerous TIE Strikers stationed on Scarif, with both sides suffering substantial casualties. As the air battle raged on, Merrick ordered a U-wing Gunship to reinforce the overwhelmed troops on the beach while the rest of the squadron defended them from Imperial fire. Rogue One continued to draw out the Imperial garrison, allowing Jyn and Cassian the time they needed to recover the plans. [1]
Flipping the master switch

The shuttle is destroyed, with Rook inside.
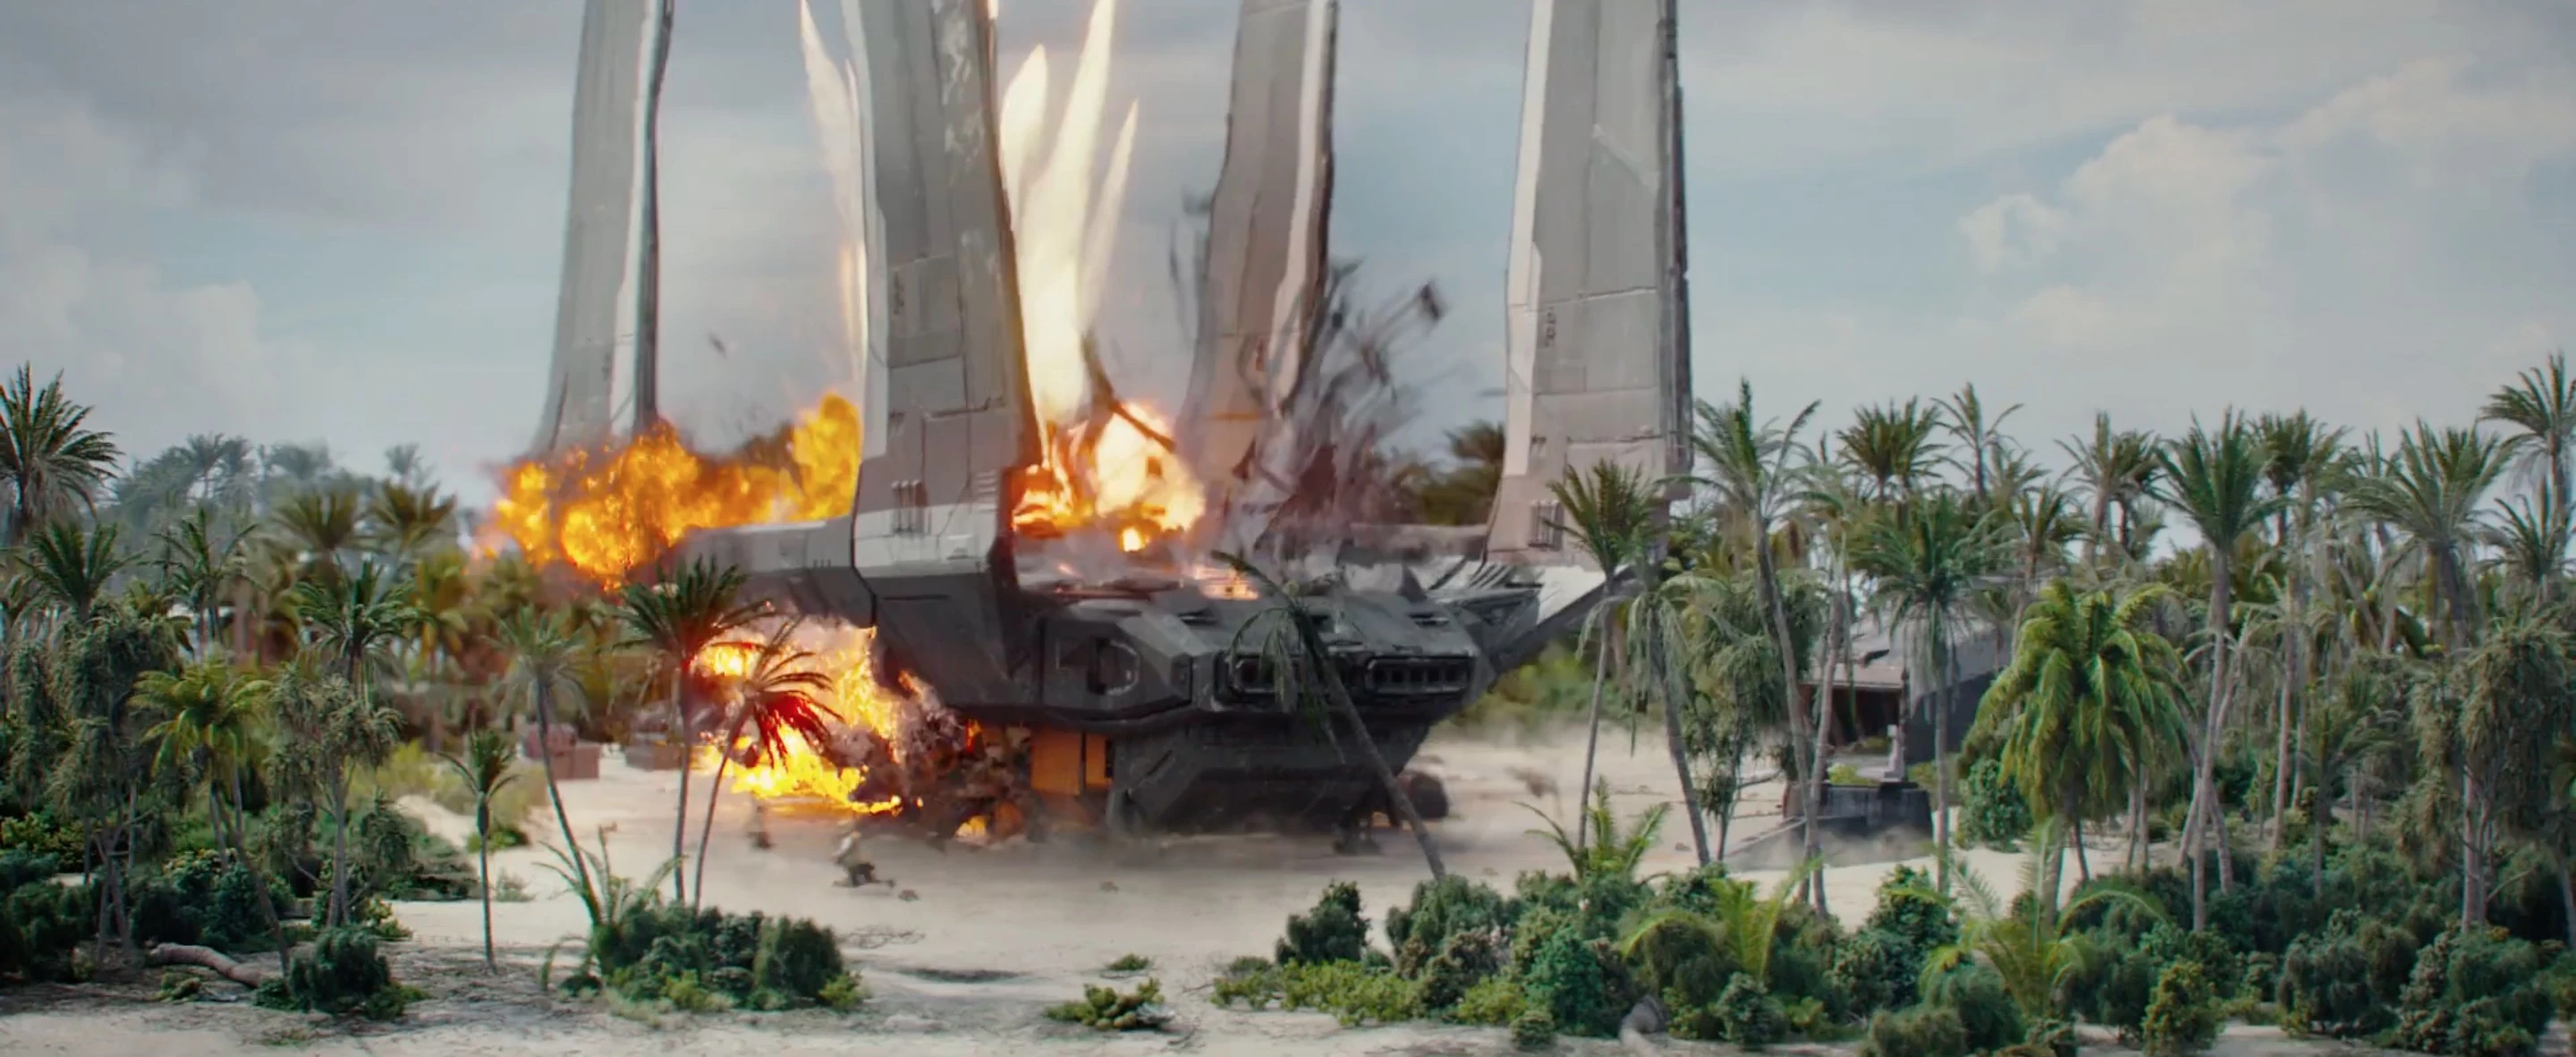
Following this, Rook was tasked with opening the deflector shield so that the plans could be transmitted to the Alliance flagship above the planet. Bodhi directed Chirrut Îmwe and Baze Malbus to the master power switch for communications on Scarif. The two managed to turn off the signal disruptor, but perished doing so though not before killing the entire complement of Death Troopers sent against them. Rook managed to contact the Alliance flagship and told them they had to open the deflector shield to allow the Death Star plans to be transmitted to them. Shortly after, a thermal imploder was thrown into his ship, killing him and destroying the shuttle.[1] Having received Rook's transmission, Raddus formulated a plan to break open the shield.
Krennic closes in
- "My father built a fuse in the middle of your machine, and I just told the whole galaxy how to light it."
- ―Jyn Erso to Orson Krennic
Inside the Scarif Citadel Tower, Orson Krennic, along with two death troopers, opened a security door to the archive vault and began to shoot at Andor and Erso. Andor managed to kill the two troopers, but was hit by Krennic, rendering him unconscious. Erso continued her ascent to the escape hatch at the top of the vault and exited onto the roof of the Scarif Base. On top of the base was the communications dish. After reorienting it, Erso was about to send the plans to the rebels when Krennic appeared. Whilst Krennic confronted her, declaring the Empire's inevitable victory, Andor regained consciousness and made his way to the roof of the station. Right before Krennic was about to kill Erso, Andor shot the director. [1]
Taking down the shield
- "Hit that opening!"
- ―Jon Vander

The Lightmaker and Star Destroyers before crashing into the Shield Gate.
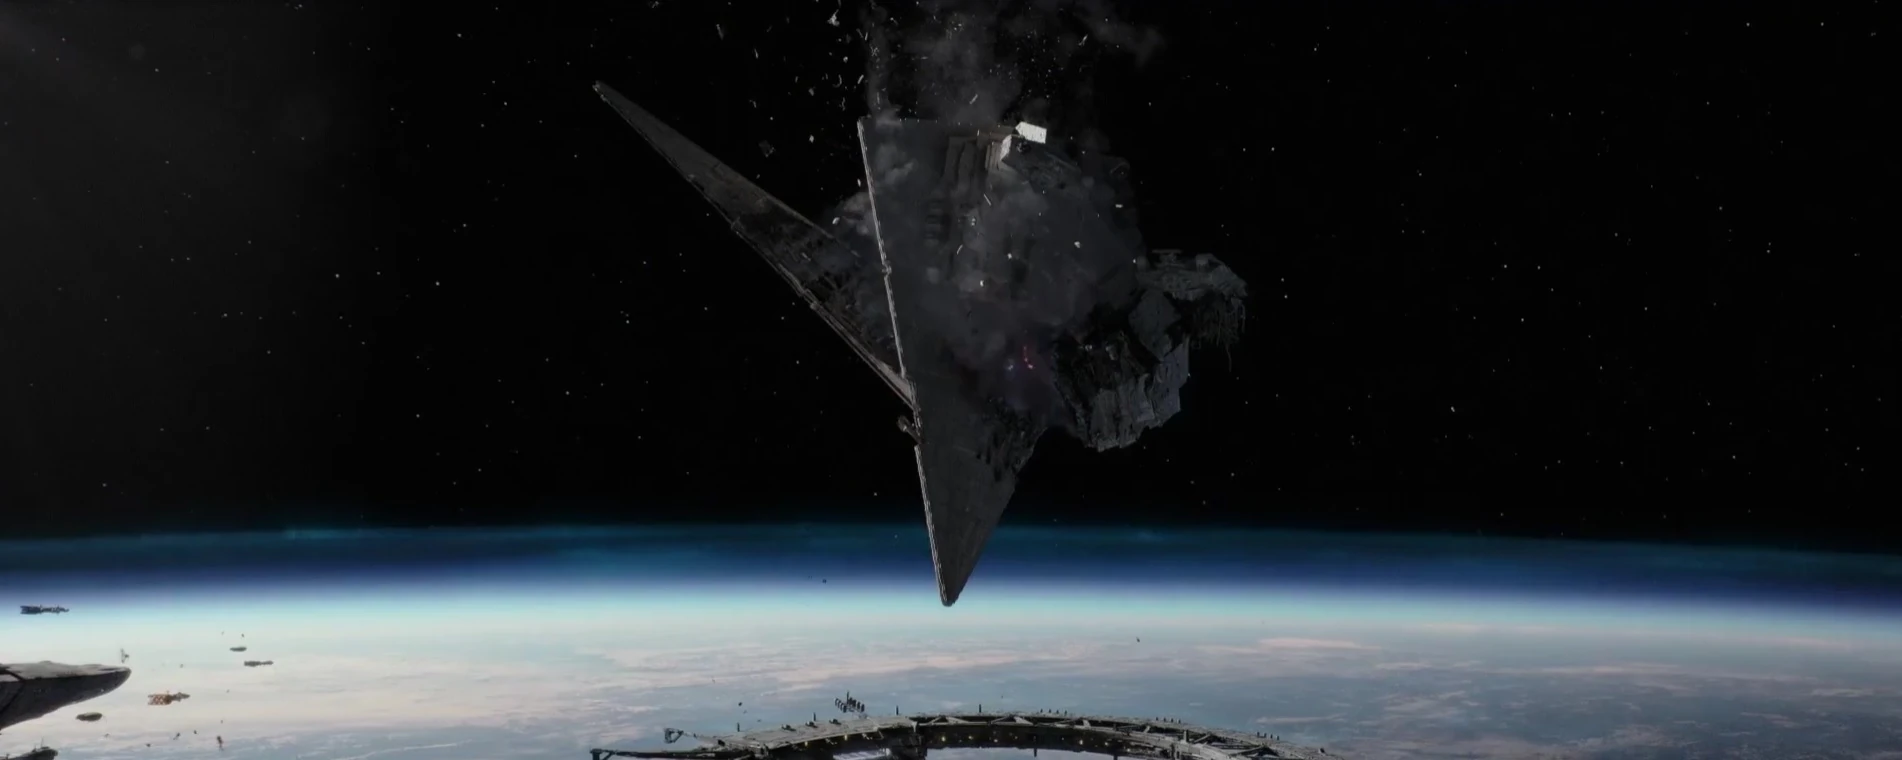
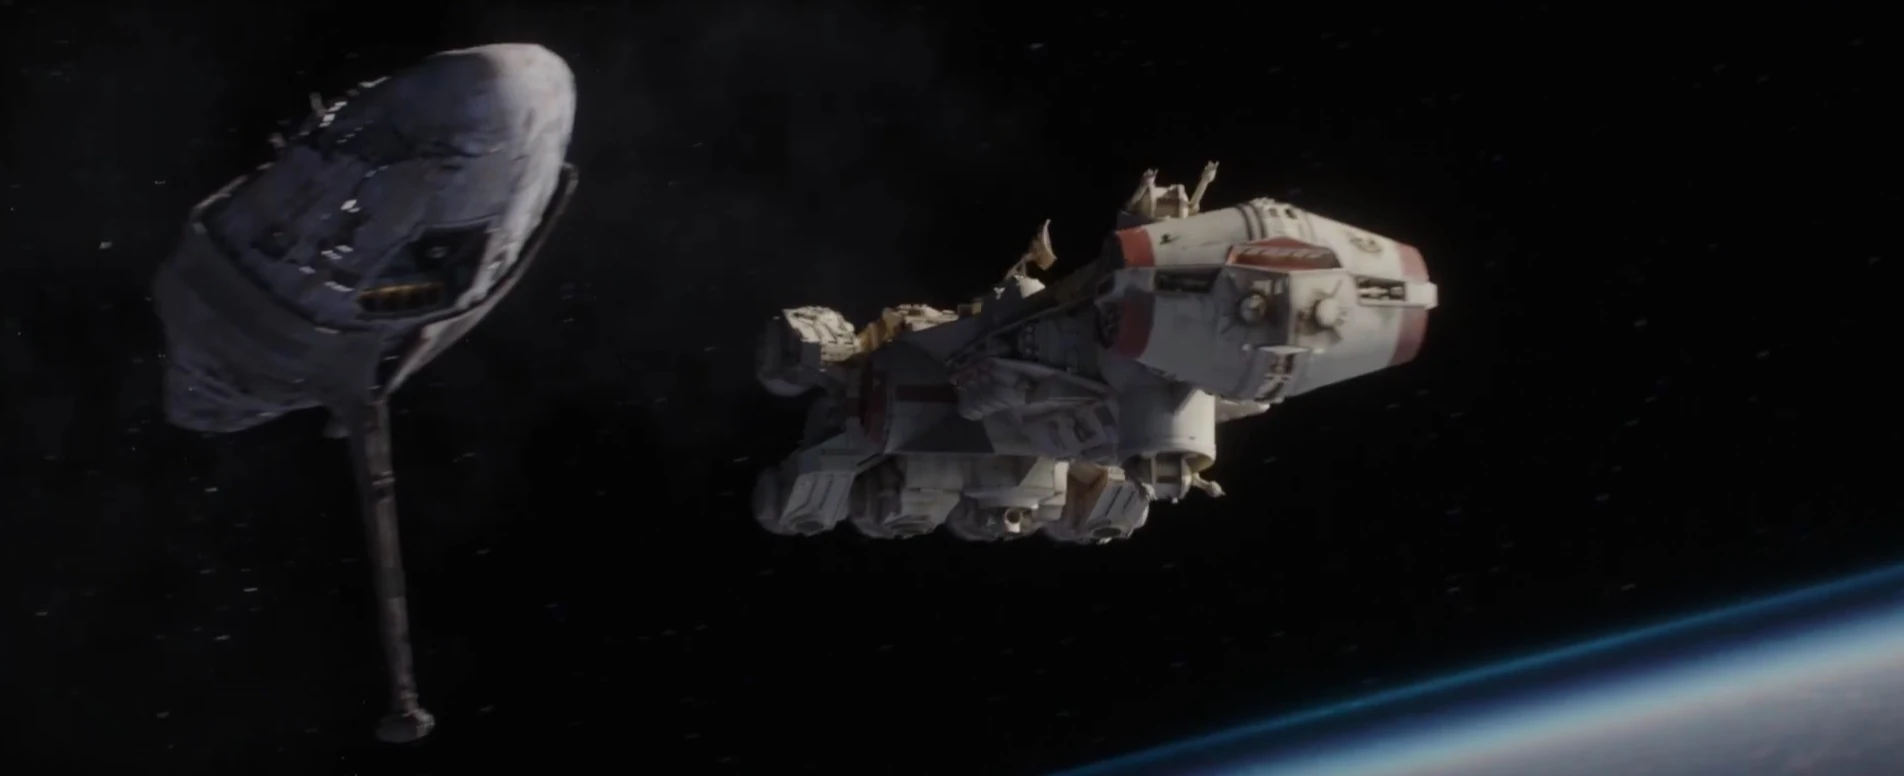
Far above, the Alliance Fleet was taking a significant beating. Although the rebel fleet scrambled its ships and defence cannons, bringing down some of the attacking Imperial fleet, endless waves of TIE fighters battered the rebel ships, destroying a GR-75 medium transport and damaging one of the Nebulon-B frigates, while the Profundity's shielding was reduced to half strength. Gold Leader gave an order for his squad mates to form on his wing, informing them that a path had been cleared. Along with four of his squad mates, Vander launched multiple ion torpedoes at a Star Destroyer, disabling it. Noticing the disabled capital ship, Admiral Raddus contacted a Hammerhead corvette and explained his plan to break open the shield.[1]
The corvette he had chosen to carry out his plan was the Lightmaker, commanded by Kado Oquoné. The ship had earlier sustained heavy damage and was covering the line of retreat. Having evacuated all non-essential personnel, leaving a skeleton crew behind including Oquoné himself[7], the corvette rammed the disabled Destroyer and activated its sublight engines, sending it on a collision course for the other one. Admiral Gorin, seeing the incoming hazard, ordered full reverse thrust to avoid the collision, but it was too late. As the two Star Destroyers collided, they broke apart and fell towards Scarif, crashing into the orbital docking station that controlled the deflector shield, disabling it. With the shield down, Erso and Andor were able to successfully transmit the Death Star plans to the Alliance flagship above Scarif.[1]
Plans received and Vader arrives
- "Lord Vader will handle the fleet. Target the base of Scarif. Single reactor ignition... You may fire when ready."
- ―Wilhuff Tarkin

Immediately after the transmission of the plans, the Death Star exited hyperspace. Grand Moff Wilhuff Tarkin, aware of Darth Vader's impending arrival aboard the Devastator, chose to ignore the rebel ships and instead ordered a single reactor ignition aimed at the Citadel base on Scarif. Regaining consciousness on top of the Citadel Tower, Krennic looked up into the sky to see the Death Star looming over the base. Watched by the horrified Rebel fleet, the superlaser fired upon the surface, dissipating the planetary shield as it did so. The beam vaporized the top third of the Citadel Tower, which was in its direct path, and impacted the surface several kilometers away. Soon after, everyone at the base (including Erso and Andor) along with the Imperial security complex, were vaporized and destroyed by the monumental aftereffects of the impact. Once the Alliance forces received the Death Star schematics, they attempted to escape to hyperspace. Three CR90 corvettes, two GR-75 transports, one Hammerhead corvette (the Consonance), and a number of starfighters made the jump in time, but the others were intercepted by the Devastator as it suddenly emerged from hyperspace. Three Y-wings, two X-wings and a Dornean gunship successfully took evasive action to avoid crashing into it, but a GR-75 transport was obliterated as it crashed onto the Destroyer's hull when it couldn't pull away in time. Vader's flagship immediately opened up its forward batteries, aiming for the Profundity; one unfortunate Nebulon-B frigate was caught in the barrage instead and split in half under the sheer brute firepower. The Destroyer then turned its guns on the Profundity while the rest of the ships scattered. The flagship's already weakened shields gave way and the ship was crippled by further barrages. After disabling the Profundity, Vader, along with a boarding party, boarded the ship in an attempt to regain the Death Star plans, and came across a party of rebel soldiers attempting to flee with the plans but trapped by a malfunctioning security door. Revealing his presence, Vader cut through the entire group with his lightsaber as they fired on him, but the one holding the plans managed to pass it to the security forces from Alderaan who escaped on the Tantive IV before being killed by Darth Vader. The corvette, captained by Raymus Antilles and carrying Princess and Senator Leia Organa, made the jump to hyperspace, narrowly escaping, thus ending the Battle of Scarif.[1] By the end of the battle, the Profundity was destroyed and Raddus was killed.[5]
Aftermath
- "Your highness, the transmission we received. What is it they sent us?"
"Hope." - ―Captain Raymus Antilles and Princess Leia Organa
The Devastator chasing the Tantive IV.
The Battle of Scarif was the first major victory for the fledgling Rebel Alliance and marked the official beginning of the Galactic Civil War. Having restrained itself from openly engaging the Empire, this was the first time the rebellion had deployed its fleet in open combat and though it took heavy losses, was able to hold its own. The theft of the plans was a major embarrassment to the Empire, and though few believed that they would reveal any weakness in the station, it was deemed imperative that the plans be returned.
With the Death Star plans in the hands of Princess Leia, the Tantive IV was pursued by the Devastator, where Vader personally oversaw the operation. The Devastator followed the Tantive IV to the desert world of Tatooine, where Vader captured the princess and brought her to the Death Star. Imperial forces, meanwhile, searched for two droids, R2-D2 and C-3PO, the former of whom held the Death Star plans. The droids came into the possession of Luke Skywalker, who, along with Jedi Master Obi-Wan Kenobi and the smuggling partners Han Solo and Chewbacca, made his way to the Death Star and rescued Organa. Although Kenobi was killed by Vader, his former apprentice, during the escape, the princess and the others traveled to the Rebel base on Yavin 4 and participated in the Battle of Yavin. The battle was conceived after the Rebels analyzed the Death Star plans and discovered the weakness-an exposed exhaust port, which Luke Skywalker exploited to destroy the Death Star during the battle.[2]
Behind the scenes
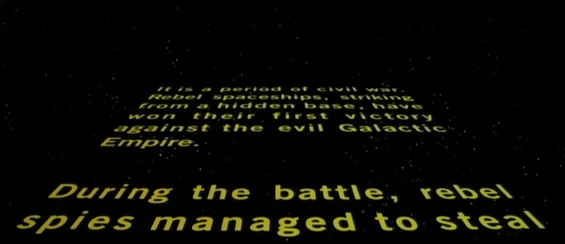
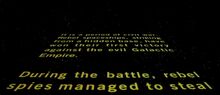
- "It is a period of civil war. Rebel spaceships, striking from a hidden base, have won their first victory against the evil Galactic Empire. During the battle, Rebel spies managed to steal secret plans to the Empire's ultimate weapon, the DEATH STAR, an armored space station with enough power to destroy an entire planet."
- ―The Star Wars: Episode IV A New Hope opening crawl
The first ever mention of the Battle of Scarif.
The event that became the Battle of Scarif was first described in the opening crawl of Star Wars: Episode IV A New Hope.[2] The event is the central plot of Rogue One: A Star Wars Story. In Star Wars Legends, which is non-canon in the official Star Wars continuity following 2014,[13] the battle where the plans were stolen was identified as the Battle of Toprawa, while the operation as a whole was identified as Operation Skyhook.[14]
The first footage of the battle was shown in the Rogue One teaser trailer on April 7, 2016.[15] The battle of Scarif made its first appearance in Star Wars Battlefront as a a free downloadable level available on December 6, 2016 for season pass holders.[3] On December 16, 2016,[16] the battle made its first formal appearance with the release of the film, Rogue One: A Star Wars Story.[1]
The battle ends right before A New Hope begins, with Leia Organa narrowly escaping the battle aboard the Tantive IV, en route to Tatooine in search of Obi-Wan Kenobi, closely pursued by Vader himself.[1]
Appearances
Sources
Notes and references
- ↑ 1.000 1.001 1.002 1.003 1.004 1.005 1.006 1.007 1.008 1.009 1.010 1.011 1.012 1.013 1.014 1.015 1.016 1.017 1.018 1.019 1.020 1.021 1.022 1.023 1.024 1.025 1.026 1.027 1.028 1.029 1.030 1.031 1.032 1.033 1.034 1.035 1.036 1.037 1.038 1.039 1.040 1.041 1.042 1.043 1.044 1.045 1.046 1.047 1.048 1.049 1.050 1.051 1.052 1.053 1.054 1.055 1.056 1.057 1.058 1.059 1.060 1.061 1.062 1.063 1.064 1.065 1.066 1.067 1.068 1.069 1.070 1.071 1.072 1.073 1.074 1.075 1.076 1.077 1.078 1.079 1.080 1.081 1.082 1.083 1.084 1.085 1.086 1.087 1.088 1.089 1.090 1.091 1.092 1.093 1.094 1.095 1.096 1.097 1.098 1.099 1.100 Rogue One: A Star Wars Story
- ↑ 2.0 2.1 2.2 Star Wars: Episode IV A New Hope
- ↑ 3.00 3.01 3.02 3.03 3.04 3.05 3.06 3.07 3.08 3.09 3.10 3.11 3.12 3.13 Star Wars Battlefront: Rogue One: Scarif
- ↑ This event takes place during Rogue One: A Star Wars Story. Star Wars: Galactic Atlas places the events of Rogue One in 0 BBY.
- ↑ 5.0 5.1 5.2 5.3 5.4 5.5 Star Wars: The Last Jedi: Incredible Cross-Sections
- ↑ Star Wars: Absolutely Everything You Need to Know, Updated and Expanded
- ↑ 7.0 7.1 7.2 7.3 7.4 7.5 Rogue One: A Star Wars Story novelization
- ↑ Star Wars: On the Front Lines
- ↑ Star Wars: The Rebel Files
- ↑ 10.0 10.1 10.2 10.3 10.4 Star Wars: Rogue One: The Ultimate Visual Guide
- ↑ 11.0 11.1 Cinefex 151
- ↑ "Raymus" — From a Certain Point of View
- ↑
 The Legendary Star Wars Expanded Universe Turns a New Page on StarWars.com (backup link)
- ↑ Star Wars Radio Drama
- ↑
 Rogue One on StarWars.com (backup link)
Template:Canon Galactic Civil War