| | |
Warning: This infobox has missing parameters: unit1, unit2, unit3 and unrecognized parameters: imageBG
- "I doubt if the Empire would even fight to keep this system."
- ―Laze Loneozner
The First Battle of Tatooine in the Galactic Civil War was a series of battles and skirmishes in the Tatoo system, primarily on the planet Tatooine, within a few days before the climactic Battle of Yavin. It resulted in the capture of Princess Leia Organa by Darth Vader.
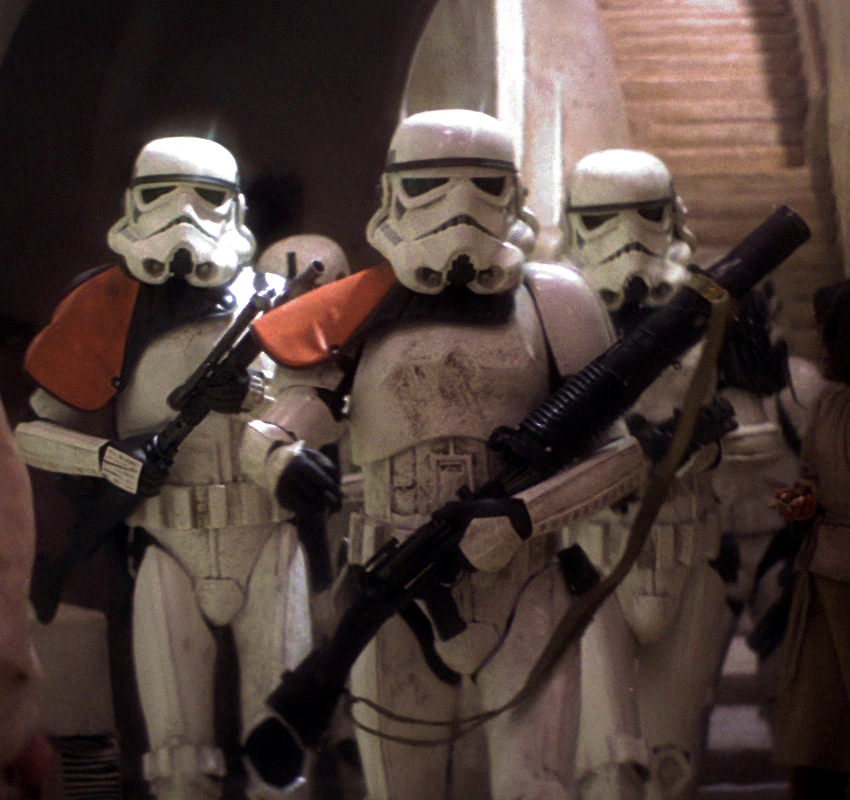
Many of the local Rebel enemies of the Galactic Empire were captured or killed, with most operations being carried out in parts by the Desert Sands and the renowned 501st Legion of stormtroopers.
Prelude
- "With the information gathered on Polis Massa, Vader concluded that the stolen plans had been given to Princess Leia Organa of Alderaan. We weren't surprised. For all their talk of being a peaceful planet, Alderaan had been thumbing its nose at the Empire for years."
- ―Unidentified 501st stormtrooper
The battle was part of the Galactic Civil War, a major conflict that opposed the Galactic Empire and the Alliance to Restore the Republic. An unwitting instigator to the battle was the disguised Alderaanian diplomatic corvette Tantive IV, being used as an important vessel in the Rebel Alliance fleet, most notably in the operation to steal the plans of the Death Star: the new Imperial superweapon.[7][11]
The theft of these plans was the aim of the wider Operation Skyhook.[11] It successfully occurred during a distracting Rebel prisoner revolt on the Death Star,[5] being supplemented by partial documents stolen during the Battle of Danuta and the Battle of Toprawa.[11] Immediately, an Imperial assault on a makeshift Rebel base on Polis Massa was initiated, being tasked with retaking the stolen plans. This, however, failed in recovering the lost schematics.[5] Nonetheless, the information they did receive on Polis Massa caused them to conclude that the Alderaanian Senator and Princess Leia Organa was involved in the theft. As Alderaan had been a nusiance to the Empire for years, it came as little shock to the 501st legion.[5]
The next attempt in the recovery effort involved the Emperor Palpatine's feared enforcer, Sith Lord Darth Vader, taking his legion of Imperial stormtroopers, the 501st Legion, to where the Tantive IV was harbored—within the Tatoo system. They managed to track the Tantive IV with the unknowing aid of the protocol droid U-3PO, who had earlier been programmed to act as a sleeper agent and covertly placed on the ship's droid pool on Ralltiir.[18] The information that the Tantive IV held the plans had been obtained by captured Rebels,[7] as well as a Bothan who revealed it to the Emperor on Bothawui.[1]
The battle
Recovering the plans
- "Where are those transmissions you intercepted? What have you done with those plans?!"
"We intercepted no transmissions…! This is a consular ship…! We're on a…diplomatic mission…" - ―Darth Vader and Captain Antilles
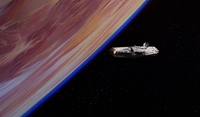
The Star Destroyer Devastator chasing down the Tantive IV over Tatooine.
Upon reaching the Tatoo system, the Imperial fleet was ambushed by a pirate fleet near the planet Tatooine. Upon taking out most of the pirate attackers, the Navy then hid in the surrounding nebulas, avoiding detection by Rebel Alliance Blue Squadron, led by Raymus Antilles, who were scouting the area.[1]
When Tantive IV moved toward the uplink station, Interdictor-class cruisers were activated, preventing it from escaping. A clash between the Imperial fleet and the Alliance fleet broke out, with both sides taking several casualties in the crossfire.[1] The Star Destroyer Devastator pursued Tantive IV out of the battlefield and chased it around the planet Tatooine,[7] Vader's homeworld.[19]
A laser bolt hit near the engine section of the Tantive IV, disabling the main reactor and preventing the vessel from entering Tatooine's atmosphere. The Devastator moved in and caught the corvette in a tractor beam.[7] Vader then dispatched a TIE boarding craft filled up with troops, to board and secure the ship as soon as possible,[15] but later the crew of the destroyer attached a portable accessway to the corvette.[7]
Devastator also captured what they thought was Tantive IV, but in fact it was just a decoy called Tantive V. After searching the ship and finding no one except Gungans, Tantive V was set adrift into space and the Devastator continued to pursue Tantive IV.[20]
Inside the Tantive IV
- "Retrieve the plans and bring the ambassador to Lord Vader--alive."
- ―Instructions given to all 501st stormtroopers, prior to the battle on the Tantive IV.
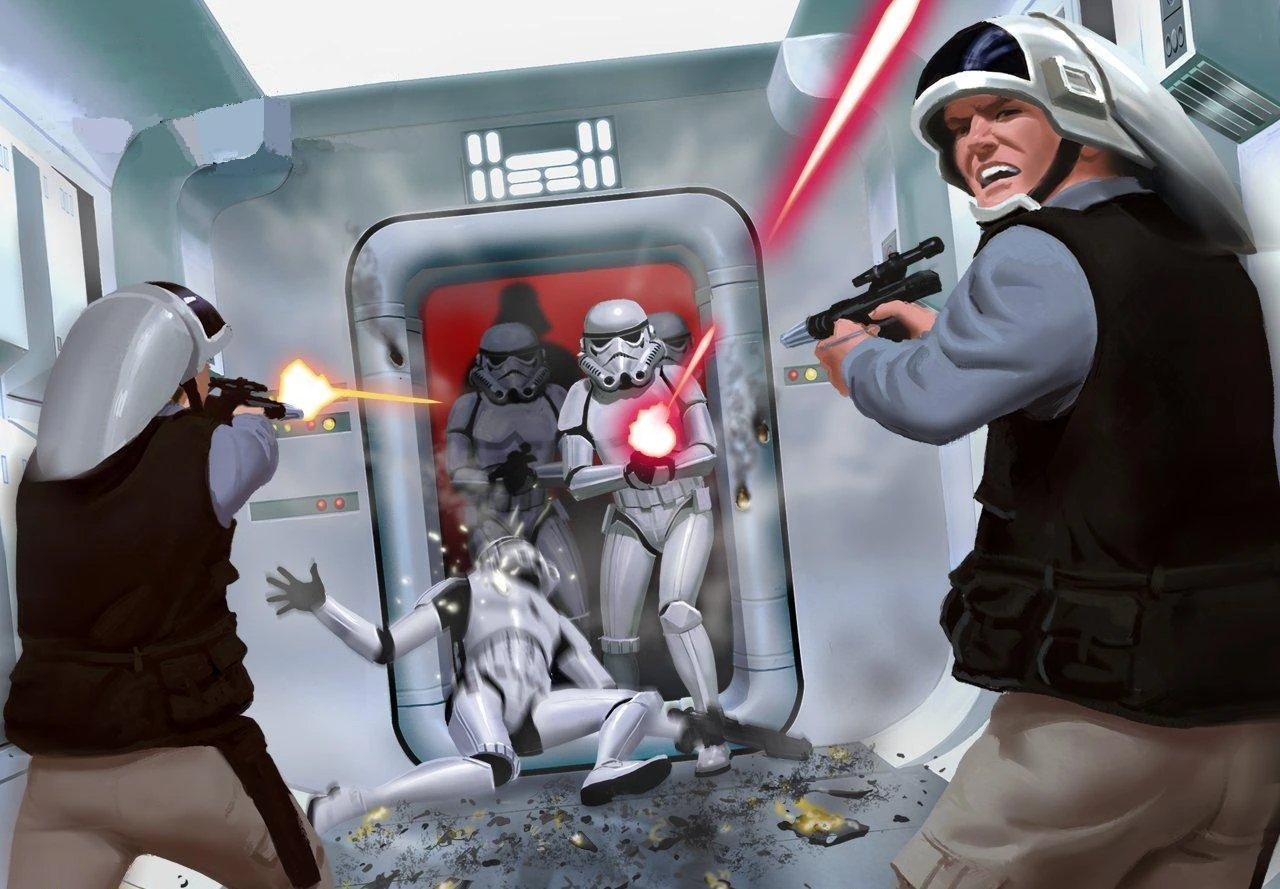
Rebel troopers try to repel the Stormtrooper assault aboard Tantive IV.
As troopers of the 501st Legion stormed the hallways of Tantive IV, a skirmish erupted between them and Rebel troopers defending the ship,[5] with one of the stormtroopers being killed just as he boarded the ship.[7] Due to the use of grenades, both sides incurred heavy casualties, but the 501st broke through, capturing the main Rebel barracks and clearing the way for Lord Vader's arrival. Vader himself was personally displeased with Tatooine being the location of their capture of the Tantive IV, due to it being his hated homeworld and it bringing back bad memories of the last time he saw his mother.[21] Vader personally destroyed all security terminals on the bridge, in order to send the defenses into disarray, and disabled a turbine console to steal a set of access codes, in an attempt to gain entry to the ship's escape pod bays. He and a set of Imperial bodyguards then set out through the corridors, killing some Rebel troopers and capturing many more. The team then stormed the cockpit of the corvette.[5]
During the initial lightfight, the astromech droid R2-D2 and protocol droid C-3PO slipped through the confusion, but eventually ended up separated. R2-D2 then met with Princess Leia Organa. Organa, anticipating that she was cornered with no option of escape, ordered R2-D2 to use the escape pods to ensure the plans weren't recovered by the Imperials, and managed to record a SOS transmission intended for Kenobi, requesting for his assistance in delivering the stolen plans to her father, Bail Organa, on Alderaan. Sensing someone arriving, she then hastily placed the datadisk containing all the pieces of the Death Star blueprints, and left for the shadows just as C-3PO arrived looking for the R2 unit. R2 then suggested to C-3PO to follow him to the escape pod section.[7]
During the first stages Vader captured most of the soldiers, including the ship's captain, Raymus Antilles. He dealt with Antilles personally. In addition, while escorting the already captured soldiers as well as searching the vessel, the Imperials also had their droids R2-Q2 and R4-M9 scour the ship's databanks for the stolen Death Star plans.[18] However, the 501st commander reported back to Vader with bad news: the stolen plans were no longer on the ship's main computer. This resulted in Vader interrogating Antilles by stranglehold on their transmission interceptions relating to the plans, and what they'd done with them. Antilles attempted to deny any interceptions and that the Tantive IV was on a diplomatic mission due to being a consular ship. Vader then questioned where the ambassador was, but Antilles died before he could answer, Vader having snapped his neck.[7]


Princess Leia Organa, escaping Imperial forces.
Vader then proceeded to order the 501st Legion to search for the missing plans and also locate and retrieve the passengers, including the ambassador and bring them to him alive. After giving this command, Vader proceeded to utilize an IT-O interrogator droid on several of the remaining prisoners to extract any information on any knowledge of the Death Star plans.[17] The 501st Legion then managed to find the ambassador, who was none other than Alderaanian Senator and Princess Leia Organa, whom they proceeded to stun, with DV-692 performing the actual stun, although not before one of the soldiers ended up shot by Organa in the chest, killing him. Vader then personally confronted her, and ordered for her arrest under the charge of treason, unaware at the time that she was his own daughter.[7] In addition, the Devastator also destroyed any escape pods that were utilized by any escaping Rebel personnel.[15]
The Rebel protocol droid C-3PO, along with R2-D2, an astromech droid vital to the Rebellion, subsequently escaped the ship: R2-D2 having secretly obtained the Death Star schematics Vader had been so eager to recover. R2-D2 chose to escape via an escape pod despite droids being forbidden, both due to Leia's orders, and due to prior experience in the Maramere system.[22] The Devastator also prepared to destroy the escape pod C-3PO and R2-D2 were on, but stopped when they realized that it contained no life signs, and subsequently dismissed it as a malfunction. Nonetheless, they reported the incident to Vader, who deduced that the escape pod must have been where Leia stashed the Death Star plans, and ordered them to search Tatooine for the plans.[7] The planet Tatooine had already been scouted some times ago by Imperial operatives who had not reported any Rebel presence on the world.[23]


Rookie One versus a Star Destroyer.
Meanwhile, a distress signal was sent to a Rebel base on Kolaador. Soon after the capture of the Tantive IV, a small squadron of X-wings arrived from Kolaador. Commander Ru Murleen, Rookie One and Thurlow Harris, flew their fighters in space above Tatooine and turned their weapons towards an Imperial-class Star Destroyer. Using their proton torpedoes, they managed to strike a critical blow and headed to the surface. However they were not in time to prevent three TIE/LN starfighters from attacking and destroying their base, located near Anchorhead. Acting quickly to prevent the TIEs reporting their presence back to their commanders, Rookie One gave chase through Beggar's Canyon and destroyed all three Imperial fighters. Captain Merrick Simms survived the destruction of the Anchorhead base flying in his X-wing and then joined the three other Rebels.[10]
Desert Extermination
- "She must have hidden the plans in the escape pod. Send a detachment down to retrieve them… See to it personally Commander."
- ―Darth Vader, to Commander Praji
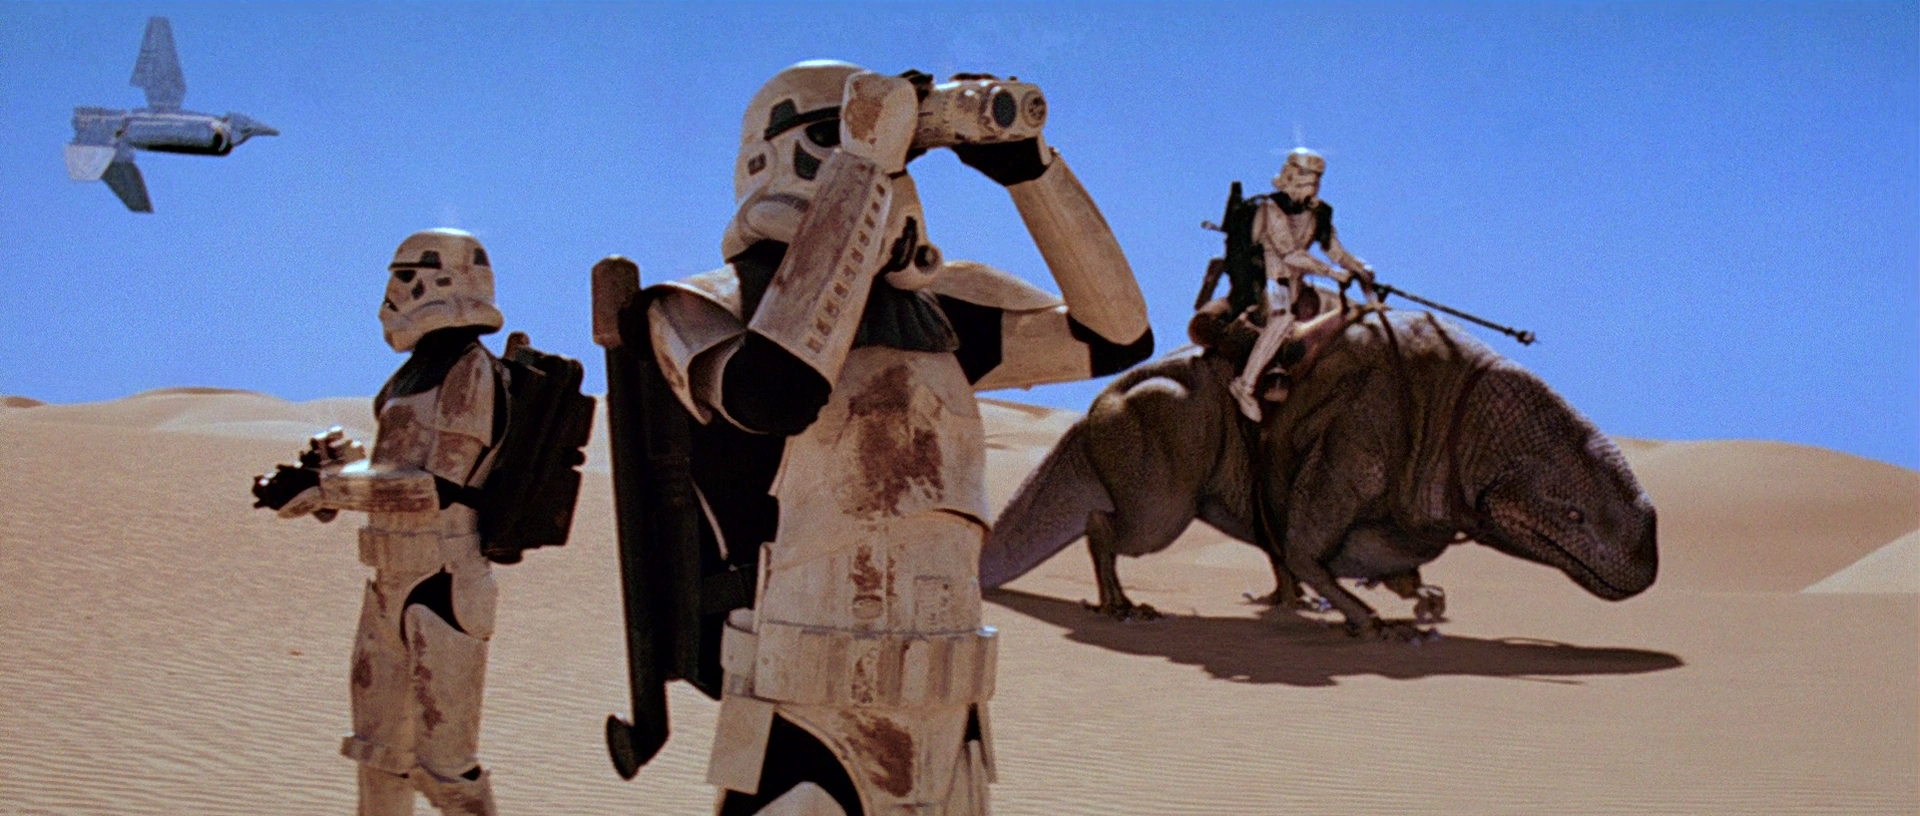

Desert Sands searching for the Death Star plans
Darth Vader ordered Commander Praji to lead personally the search the Death Star plans on Tatooine's surface.[7] He assigned Captain Kosh's local garrison to the task, while Commander Jir's 501st was readied. These events coincided with the arrival of the Star Destroyer Inquisitor in the system.[24] Under command of General Malcor Brashin,[3] the Inquisitor was carrying Captain Terrik and his Desert Sands for training exercises[24] and eventually to relieve the 37th Detachment stationed on the planet.[14] Primarily, the Star destroyer accompanied the Desert Sands to test the experimental Battlefield Holographic Control Interface during the exercises of Captain Terrik's troopers.[3]
Alerted to the situation, the Desert Sands quickly landed on the planet to undertake the search for the Rebel corvette's escape pod. Split into Alvien, Drax and Zeta Squadrons, the sandtroopers explored the deserts of Tatooine during hours. Terrik personally commanded Zeta Squadron which was assisted by dewbacks, one HAVr A9 floating fortress and two Arunskin 32 cargo skiffs from the local garrison.[14]


A Rebel trooper attacks an Imperial AT-ST.
As Imperial sandtroopers attempted to construct command stations in the Dune Sea, they were assaulted by the fierce, nomadic Tusken Raiders.[3] Soon after, Rebel soldiers appeared and a three-way battle broke out near the Tusken camps stationed around a fierce Sarlacc. The Rebels were able to deploy some Rebel combat speeders and X-wings to support their troops but the small army was completely eradicated by Imperial forces.[2]
The crashed escape pod was eventually found in the Dune Sea[7] by Davin Felth of Zeta Squadron. The sandtroopers discovered evidence that the pod's occupants were droids,[14] in the form of one of C-3PO's o-rings.[7] They followed a trail leading away from the escape pod and discovered that the droids had been intercepted by a Jawa sandcrawler. They eventually intercepted the digger crawler, where they learned from the Jawas that the droids had been already sold to moisture farmers. Captain Terrik then ordered his men to attack the sandcrawler, leaving no survivors among the Jawas. To cover up the Imperial attack on the Jawas, they left gaffi sticks nearby in order to implicate a Tusken Raider raid as being responsible for the attack.[7] The Imperials then largely destroyed the Sandcrawler with a Reconnaissance Troop Transporter.[25]
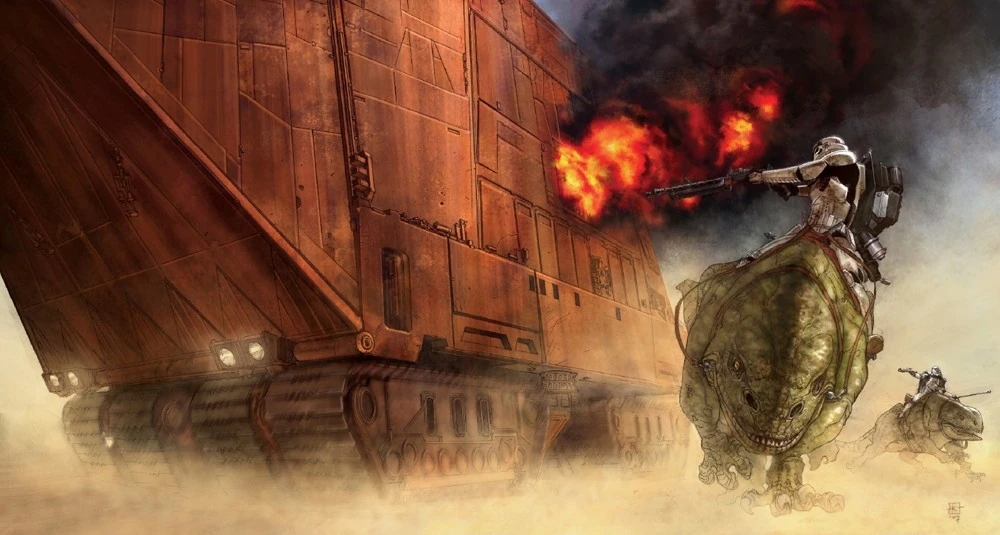

Sandtroopers attack the Jawa sandcrawler.
The Imperials then proceeded to pay a visit to the moisture farm that had purchased the droids.[14] Its inhabitants, Owen and Beru Lars,[7] not only refused to hand the droids over, but their patriarch, Owen Lars, also spat at Terrik.[14] The soldiers, under Vader's personal orders via hologram, noticed that a landspeeder was missing from their garage. The Sith Lord ordered the establishing of checkpoints to detain any droids entering Mos Espa or Mos Eisley spaceports. Vader eventually watched the troopers carry out his orders on their helpless victims.[26] They executed Lars and Beru and cremated their remains.[14]
The droids were in fact in possession of their nephew: Luke Skywalker.[7] After this new failure, Captain Terrik ordered the troopers to regroup in the city of Mos Eisley, the only way to leave the planet for any fugitive.[14]
Siege of Mos Eisley
- "Local smugglers from Mos Eisley have escaped with the Rebel droids. It is time to bring Imperial order to Tatooine. Seize control of Mos Eisley and terminate any who resist."
- ―Emperor Palpatine's briefing before the Mos Eisley mission
Sandtroopers plowing through Mos Eisley.
Luke Skywalker and the droids eventually arrived in Mos Eisley, a spaceport renowned as a magnet for outcasts, crooks, and intergalactic escapees. With their new unexpected ally, Jedi Master Obi-Wan Kenobi, they wished to find a transport in order to leave the planet and bring the Death Star plans to Alderaan.[7] But Mos Eisley was believed to be the refuge of the fugitive droids dispatched by the Rebellion.[14] With the stolen schematics in its databanks, R2-D2 had become a high-priority Imperial target and Imperial sandtroopers scattered throughout the city, to retrieve information about the stolen plans. Ironically, the sandtroopers ended up unwittingly allowing the wanted droids to pass by, thanks to a mind trick placed by Obi-Wan Kenobi.[7]
A few local Rebels, using guerrilla tactics, kept the sandtroopers on their toes by coming out through alleys, striking suddenly, and then shrinking away. Armed stormtroopers, some on dewbacks, casually strolled through neighborhoods and homes, interrogating anyone they wished.[source?]

Zeta Squadron marches toward Docking Bay 94.
Luke Skywalker, Obi-Wan Kenobi, and the droids made their way to the Mos Eisley cantina in order to look for a pilot to the Alderaan system. There, they finally met with the pilot who would soon fly them: Han Solo, and his copilot Chewbacca. In the cantina, Skywalker encountered the Aqualish scoundrel Ponda Baba, who threatened to kill him. In defense of the young man, Kenobi was forced to use his lightsaber, removing Baba's arm. A patron, Garouf Lafoe, rushed to notify the Imperial troops upon witnessing a scuffle including a man wielding a lightsaber. Upon the troops' arrival, Luke and Obi-Wan had already vacated the premises. Meanwhile, the spy Garindan informed the stormtroopers of the droids' location, and that the smuggler Han Solo was helping the droids escape Tatooine.[7] Captain Mod Terrik and Zeta Squadron moved into Docking Bay 94, where they engaged Solo in a firefight, only to have him escape.[7] During the firefight, Terrik was gunned down by one of his men, Imperial traitor and Rebel sympathizer Davin Felth.[14]
After the Millennium Falcon's escape, a "pacification" campaign was waged in the streets. Several Mos Eisley citizens, along with Rebels, managed to secure run-down apartment districts and a damaged sail barge among other locales. The Stormtroopers managed to squelch the resistance in short order.[2]
Stormtroopers fighting Rebels in the streets of Mos Eisley.
During the pacification, Garindan led a stormtrooper contingent toward Anchorhead, but was intercepted by the Rebel Ketwol. Ketwol managed to kill some infantry and Garindan fled. Having lost their informant, the Imperials retreated back to Mos Eisley.[source?]
At some point, Merrick Simms and the pilots from Kolaador, proceeded to Mos Eisley where the Empire was deploying ground forces. While Murleen left to attempt to cut off the Imperial supply lines, Rookie One joined Simms and Harris in engaging All Terrain Scout Transports and Imperial landing craft. After causing as much damage to the Imperial forces as they could, and with TIE fighters incoming, the group was forced to withdraw.[10]
Ultimately, the Rebels ended their hit-and-run attacks—most blasted dead before causing any real harm to Imperial soldiers—leaving the Empire victorious during this final operation.[2] However, Vader never recovered the lost Death Star plans, as several Star Destroyers blockading the planet failed to capture Millennium Falcon as it fled to make contact with Bail Organa at Alderaan.[7]
Pursued by TIE fighters and interceptors, the pilots from Kolaador fled through the nearby asteroid field, losing their pursuers before rendezvousing with the fleet and proceeding to Gamma Base on the ice-world of Hoth.[10]
Aftermath
- "Leave that to me. Send a distress signal. Then report that the ship was destroyed in an asteroid collision with all onboard killed."
- ―Darth Vader

The Millennium Falcon leaves Tatooine.
Although the Millennium Falcon managed to elude their Imperial pursuers, they nonetheless failed in their objective of getting Kenobi to Alderaan, due to it being blown away by the Death Star's superlaser. The Falcon and its crew were later forced to dock in the gargantuan space station after mistaking it for a moon, and eventually commenced a rescue operation for Princess Leia Organa onboard the Death Star when planning a way to escape. The loss of the Death Star plans would ultimately result in the Rebel's amazing victory in the Battle of Yavin not long after.[7] Garindan later discovered in local records the name of a young man, Luke Skywalker, who sold his landspeeder to leave the planet on the Millennium Falcon, helping Vader to confirm the origins and identity of the Death Star's destroyer.[26]
Vader's decision to allow the Stormtroopers to kill the Lars family also resulted in their nephew Luke Skywalker joining the Rebel Alliance, an event that proved to turn the Galactic Civil War in the Rebels' favor,[7] and ironically to the redemption of Vader four years afterward.[27]
To hide their attack on Tantive IV, Imperial officials declared that the pirate resistance over Tatooine had attacked the corvette,[1] and a meteor shower had destroyed it. It was claimed the Imperial task force had simply gone to investigate. In addition, in order to ensure no one got suspicious, the Imperials, under Vader's command, also sent a fake distress signal from the Tantive IV, and dispatched a survey ship, the Wide-Eyed, to "confirm" the asteroid collision that doomed the ship and its passengers. It was only nine years later that the BoSS case on the Tantive IV's destruction was officially closed, and the Imperial report exposed as a complete fabrication.[28]

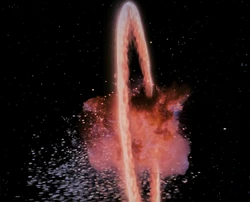
The Death Star is destroyed.
Likewise, a permanent Imperial garrison base was symbolically established in Mos Eisley as a result of the Battle of Yavin and the destruction of the Death Star.[29] While the Imperial garrison remained on high alert for some time to come,[source?] the 501st detachment left Tatooine and returned to the Death Star where most died when the station was destroyed.[5]
Six months after the Battle of Yavin,[30] the Empire decided to make a harsh maneuver — viper probe droids and TIE Bombers were ordered to harass homesteads and to execute a bombing run on Mos Eisley[31] to root out Luke Skywalker.[30] Fortunately, Skywalker's newly-formed Rogue Squadron happened to be training in the area of Beggar's Canyon at the time and were available for assistance. In the ensuing skirmish, Rogue Squadron was successful in intercepting and destroying the TIE Bombers before they could cause too much damage to the city.[31] Despite this setback, the Empire would continue to maintain nominal control over Tatooine for the next few years. The citizens would finally be freed soon after the Battle of Endor.[32]
Behind the scenes
The space battle over Tatooine was created by George Lucas appeared first in the novelization of Episode IV A New Hope, ghostwritten by Alan Dean Foster and published in 1976.
The battle was later widely extended in the Expanded Universe, sometimes contradictory, in the novel When the Desert Wind Turns: The Stormtrooper's Tale and in several video games: Star Wars: Rebel Assault, Force Commander, Battlefront and Empire at War. The 2009 Hyperspace article Tinker, Tailor, Soldier, Praji intended to reconcile those sources.
The 2013 smartphone app Star Wars: Force Collection features the skirmish aboard the Tantive IV as its introduction, with Leia Organa asking the player, who is armed with a lightsaber, for help.
Appearances
- Star Wars: Battlefront
- Star Wars: Battlefront II
- Star Wars: Empire at War
- Death Star
- Star Wars: Rebel Assault
- Star Wars: Force Commander
- Star Wars: Empire 8: Darklighter, Part 1
- Star Wars Journal: The Fight for Justice
- Star Wars Episode IV: A New Hope novelization (First appearance)
- Star Wars: Episode IV A New Hope
- Star Wars 1
- Star Wars: A New Hope - The Special Edition 1
- Star Wars Manga: A New Hope 1
- Star Wars Droids 6: Star Wars According to the Droids, Book I
- Heroes in Hiding
- When the Desert Wind Turns: The Stormtrooper's Tale
- Star Wars 31: Return to Tatooine (Mentioned only)
- The Rise and Fall of Darth Vader (In flashback(s))
- A New Hope: The Life of Luke Skywalker (In flashback(s))
- The Courtship of Princess Leia (Indirect mention only)
- Darksaber (Mentioned only)
- Legacy of the Force: Exile (Indirect mention only)
- Star Wars: Legacy 39: Tatooine, Part 3 (In flashback(s))
Non-canon appearances
- LEGO Star Wars: The Video Game
- LEGO Star Wars II: The Original Trilogy
- LEGO Star Wars: The Complete Saga
- "Trooper" — Star Wars Tales 10
- Tantive IV
- Star Wars: Force Collection
Sources
- Galaxy Guide 1: A New Hope
- Star Wars: The Roleplaying Game, Second Edition
- Galaxy Guide 7: Mos Eisley
- The Movie Trilogy Sourcebook
- The Essential Guide to Characters
- Star Wars: The Power of the Force 2
- The Essential Guide to Vehicles and Vessels
- The Secrets of Star Wars: Shadows of the Empire (Indirect mention only)
 Star Wars Customizable Card Game — A New Hope Limited (Card: Conquest) (backup link)
- Star Wars Customizable Card Game — A New Hope Limited (Card: Tantive IV) (backup link)
- Star Wars: Incredible Cross-Sections
- Star Wars Customizable Card Game — Endor Limited (Card: Sergeant Tarl) (backup link)
- The Essential Chronology
- The Official Star Wars Fact File 4 (SKY2, Luke Skywalker) (Indirect mention only)
- The Official Star Wars Fact File 9 (ELE1, Electrobinoculars) (Indirect mention only)
- Inside the Worlds of Star Wars Trilogy
- Star Wars: The Ultimate Visual Guide
- Star Wars: Complete Locations
- The New Essential Chronology
- Star Wars: Empire at War: Prima Official Game Guide
- "Refresher Reading" — Star Wars Insider 90
- Star Wars: Empire at War: Forces of Corruption: Prima Official Game Guide
- Tinker, Tailor, Soldier, Praji on Hyperspace (article) (content removed from StarWars.com and unavailable)
- The Essential Atlas
- Star Wars Character Encyclopedia
- Star Wars: The Ultimate Visual Guide: Updated and Expanded
- "Droids Re-Animated, Part 1 {{{3}}}" — {{{4}}} — [[{{{5}}}|{{{5}}}'s]] StarWars.com Blog (Droids Re-Animated, Part 1 backup link (2013/06/13/the-droids-re-animated-part-1//The Droids Re-Animated, Part 1) not verified!)
- Visual Guide -- Chapter 3: Imperial Boarding Party on StarWars.com (content now obsolete; backup link)
- 30th Anniversary Collection (Pack: Capture of Tantive IV) (backup link (tacBPtantiveIV.asp) not verified!)
- Star Wars: Force Collection (Card: Cariso Smadis)
- Star Wars: Force Collection (Card: Darth Vader (★★★)) (Picture only)
- Star Wars: Sith Wars
- "Imperial Icons" — Star Wars Insider 148
Notes and references
- ↑ 1.00 1.01 1.02 1.03 1.04 1.05 1.06 1.07 1.08 1.09 1.10 1.11 1.12 1.13 1.14 1.15 1.16 1.17 1.18 1.19 1.20 1.21 1.22 1.23 1.24 1.25 1.26 Star Wars: Empire at War
- ↑ 2.00 2.01 2.02 2.03 2.04 2.05 2.06 2.07 2.08 2.09 2.10 2.11 2.12 2.13 2.14 2.15 2.16 2.17 2.18 2.19 2.20 2.21 2.22 2.23 2.24 2.25 2.26 2.27 2.28 2.29 Star Wars: Battlefront
- ↑ 3.00 3.01 3.02 3.03 3.04 3.05 3.06 3.07 3.08 3.09 3.10 3.11 3.12 3.13 3.14 3.15 3.16 Star Wars: Force Commander
- ↑ "Resurrection" — Star Wars Tales 9
- ↑ 5.00 5.01 5.02 5.03 5.04 5.05 5.06 5.07 5.08 5.09 5.10 5.11 5.12 5.13 5.14 5.15 5.16 5.17 5.18 Star Wars: Battlefront II
- ↑ War on the Jundland Wastes
- ↑ 7.00 7.01 7.02 7.03 7.04 7.05 7.06 7.07 7.08 7.09 7.10 7.11 7.12 7.13 7.14 7.15 7.16 7.17 7.18 7.19 7.20 7.21 7.22 7.23 7.24 7.25 7.26 7.27 7.28 7.29 7.30 7.31 7.32 7.33 7.34 7.35 7.36 7.37 7.38 7.39 7.40 7.41 7.42 7.43 7.44 7.45 7.46 7.47 7.48 7.49 Star Wars: Episode IV A New Hope
- ↑ 8.0 8.1 Galaxywide NewsNets
- ↑ Star Wars: X-Wing Rogue Squadron ½
- ↑ 10.00 10.01 10.02 10.03 10.04 10.05 10.06 10.07 10.08 10.09 10.10 10.11 Star Wars: Rebel Assault
- ↑ 11.0 11.1 11.2 11.3 11.4 11.5 The Essential Atlas
- ↑ Heroes in Hiding
- ↑ Galaxy Guide 1: A New Hope
- ↑ 14.00 14.01 14.02 14.03 14.04 14.05 14.06 14.07 14.08 14.09 14.10 When the Desert Wind Turns: The Stormtrooper's Tale
- ↑ 15.0 15.1 15.2 Star Wars: Incredible Cross-Sections
- ↑
 Star Wars Customizable Card Game — A New Hope Limited (Card: Conquest) (backup link)
- ↑ 17.0 17.1
 30th Anniversary Set (Pack: Capture of Tantive IV) (backup link (tacBPtantiveIV.asp) not verified!)
- ↑ 18.0 18.1 Visual Guide -- Chapter 3: Imperial Boarding Party on StarWars.com (content now obsolete; backup link)
- ↑ Star Wars: Episode I The Phantom Menace
- ↑ Tantive IV
- ↑ Star Wars: The Complete Visual Dictionary
- ↑ "Droids Re-Animated, Part 1 {{{3}}}" — {{{4}}} — [[{{{5}}}|{{{5}}}'s]] StarWars.com Blog (Droids Re-Animated, Part 1 backup link (2013/06/13/the-droids-re-animated-part-1//The Droids Re-Animated, Part 1) not verified!)
- ↑ Death Star
- ↑ 24.0 24.1 Tinker, Tailor, Soldier, Praji on Hyperspace (article) (content removed from StarWars.com and unavailable)
- ↑ Imperial troop transporter (story booklet)
- ↑ 26.0 26.1 The Rise and Fall of Darth Vader
- ↑ Star Wars: Episode VI Return of the Jedi
- ↑ "Refresher Reading" — Star Wars Insider 90
- ↑ Tatooine Sojourn
- ↑ 30.0 30.1 Star Wars: Rogue Squadron: The Official Nintendo Player's Guide
- ↑ 31.0 31.1 Star Wars: Rogue Squadron
- ↑ "The Dark Forces Saga, Part 3" (original article link) on Wizards.com (content now obsolete; backup link)