m (Canon/Legends switch-over, Stage 3) Tag: apiedit |
m (Canon/Legends switch-over, Stage 3) Tag: apiedit |
||
| Line 11: | Line 11: | ||
|conflict=[[Galactic Civil War]]<ref name="SWE-Yavin 4">{{SWE|locations|yavin-4|Yavin 4}}</ref> |
|conflict=[[Galactic Civil War]]<ref name="SWE-Yavin 4">{{SWE|locations|yavin-4|Yavin 4}}</ref> |
||
|date=19 [[Standard year|years]] after the founding of the [[Galactic Empire]]<ref name="Expl">{{SW|url=films/star-wars-episode-iv-a-new-hope|text=Star Wars: Episode IV on Star Wars.com}}</ref> |
|date=19 [[Standard year|years]] after the founding of the [[Galactic Empire]]<ref name="Expl">{{SW|url=films/star-wars-episode-iv-a-new-hope|text=Star Wars: Episode IV on Star Wars.com}}</ref> |
||
| − | |place=[[Death Star |
+ | |place=[[Death Star II|Death Star]]<ref name="ANH" /> |
|result=Decisive [[Alliance to Restore the Republic|Rebel Alliance]] victory<ref name="ANH" /> |
|result=Decisive [[Alliance to Restore the Republic|Rebel Alliance]] victory<ref name="ANH" /> |
||
*Destruction of the First Death Star<ref name="ANH" /> |
*Destruction of the First Death Star<ref name="ANH" /> |
||
| Line 52: | Line 52: | ||
{{Quote|This will be a day long remembered. It has seen the end of Kenobi; it will soon see the end of the rebellion.|Darth Vader to Grand Moff Tarkin before the battle|Star Wars: Episode IV A New Hope}} |
{{Quote|This will be a day long remembered. It has seen the end of Kenobi; it will soon see the end of the rebellion.|Darth Vader to Grand Moff Tarkin before the battle|Star Wars: Episode IV A New Hope}} |
||
| − | The '''Battle of Yavin''' was a major battle of the [[Galactic Civil War]] that led to the destruction of the [[Death Star |
+ | The '''Battle of Yavin''' was a major battle of the [[Galactic Civil War]] that led to the destruction of the [[Death Star II|First Death Star]] and was one of the [[Alliance to Restore the Republic|Rebellion's]] first major victories. |
==Prelude== |
==Prelude== |
||
{{Quote|Any attack made by the Rebels against this station would be a useless gesture, no matter what technical data they've obtained.|[[Conan Antonio Motti|Conan Motti]]|Star Wars: Episode IV A New Hope}} |
{{Quote|Any attack made by the Rebels against this station would be a useless gesture, no matter what technical data they've obtained.|[[Conan Antonio Motti|Conan Motti]]|Star Wars: Episode IV A New Hope}} |
||
| − | Agents of the [[Alliance to Restore the Republic|Rebel Alliance]] [[Theft of the Death Star plans|stole]] detailed [[Death Star plans|plans]] and design specifications for the [[Galactic Empire|Imperial]] [[battle station]] known as the [[Death Star |
+ | Agents of the [[Alliance to Restore the Republic|Rebel Alliance]] [[Theft of the Death Star plans|stole]] detailed [[Death Star plans|plans]] and design specifications for the [[Galactic Empire|Imperial]] [[battle station]] known as the [[Death Star II|Death Star]] and transmitted them to [[Prince|Princess]] [[Leia Organa|Leia.]] Imperial forces under the command of [[Anakin Skywalker|Darth Vader]] soon captured Princess Leia and the crew of the the [[Tantive IV]].<ref name="ANH" /> |
Princess Leia was taken prisoner aboard the Death Star by Darth Vader. The Princess soon was [[Rescue of Princess Leia|rescued]] from [[detention block|captivity]] by an unlikely alliance of the [[smuggler]] [[Han Solo]], [[Jedi Master]] [[Obi-Wan Kenobi]], and a young farmboy from [[Tatooine]] named [[Luke Skywalker|Luke Skywalker]]. The group, in possession of the Death Star plans, fled to the [[Great Temple of Massassi|Rebel base]] on [[Yavin 4]]—closely pursued by the battle station.<ref name="ANH" /> |
Princess Leia was taken prisoner aboard the Death Star by Darth Vader. The Princess soon was [[Rescue of Princess Leia|rescued]] from [[detention block|captivity]] by an unlikely alliance of the [[smuggler]] [[Han Solo]], [[Jedi Master]] [[Obi-Wan Kenobi]], and a young farmboy from [[Tatooine]] named [[Luke Skywalker|Luke Skywalker]]. The group, in possession of the Death Star plans, fled to the [[Great Temple of Massassi|Rebel base]] on [[Yavin 4]]—closely pursued by the battle station.<ref name="ANH" /> |
||
Revision as of 21:45, 13 December 2015
| | |
Warning: This infobox has missing parameters: unit2, unit1 and unrecognized parameters: imageBG
- "This will be a day long remembered. It has seen the end of Kenobi; it will soon see the end of the rebellion."
- ―Darth Vader to Grand Moff Tarkin before the battle
The Battle of Yavin was a major battle of the Galactic Civil War that led to the destruction of the First Death Star and was one of the Rebellion's first major victories.
Prelude
- "Any attack made by the Rebels against this station would be a useless gesture, no matter what technical data they've obtained."
- ―Conan Motti
Agents of the Rebel Alliance stole detailed plans and design specifications for the Imperial battle station known as the Death Star and transmitted them to Princess Leia. Imperial forces under the command of Darth Vader soon captured Princess Leia and the crew of the the Tantive IV.[1]
Princess Leia was taken prisoner aboard the Death Star by Darth Vader. The Princess soon was rescued from captivity by an unlikely alliance of the smuggler Han Solo, Jedi Master Obi-Wan Kenobi, and a young farmboy from Tatooine named Luke Skywalker. The group, in possession of the Death Star plans, fled to the Rebel base on Yavin 4—closely pursued by the battle station.[1]
The battle
- "Lock S-foils in attack position."
- ―Red Leader
An analysis of the plans provided by Princess Leia identified a weakness in the battle station: a small thermal exhaust port, the destruction of which would cause a chain reaction that would destroy the battle station.[1]
Rebel pilots were briefed by General Jan Dodonna on the plan. The Death Star's defenses were designed for a direct, large-scale assault. By using small, one-man fighters, the Rebels would slip through the Death Star's main defenses, maneuver down a narrow trench leading to the exhaust port, and destroy the exhaust port using proton torpedoes.[1]
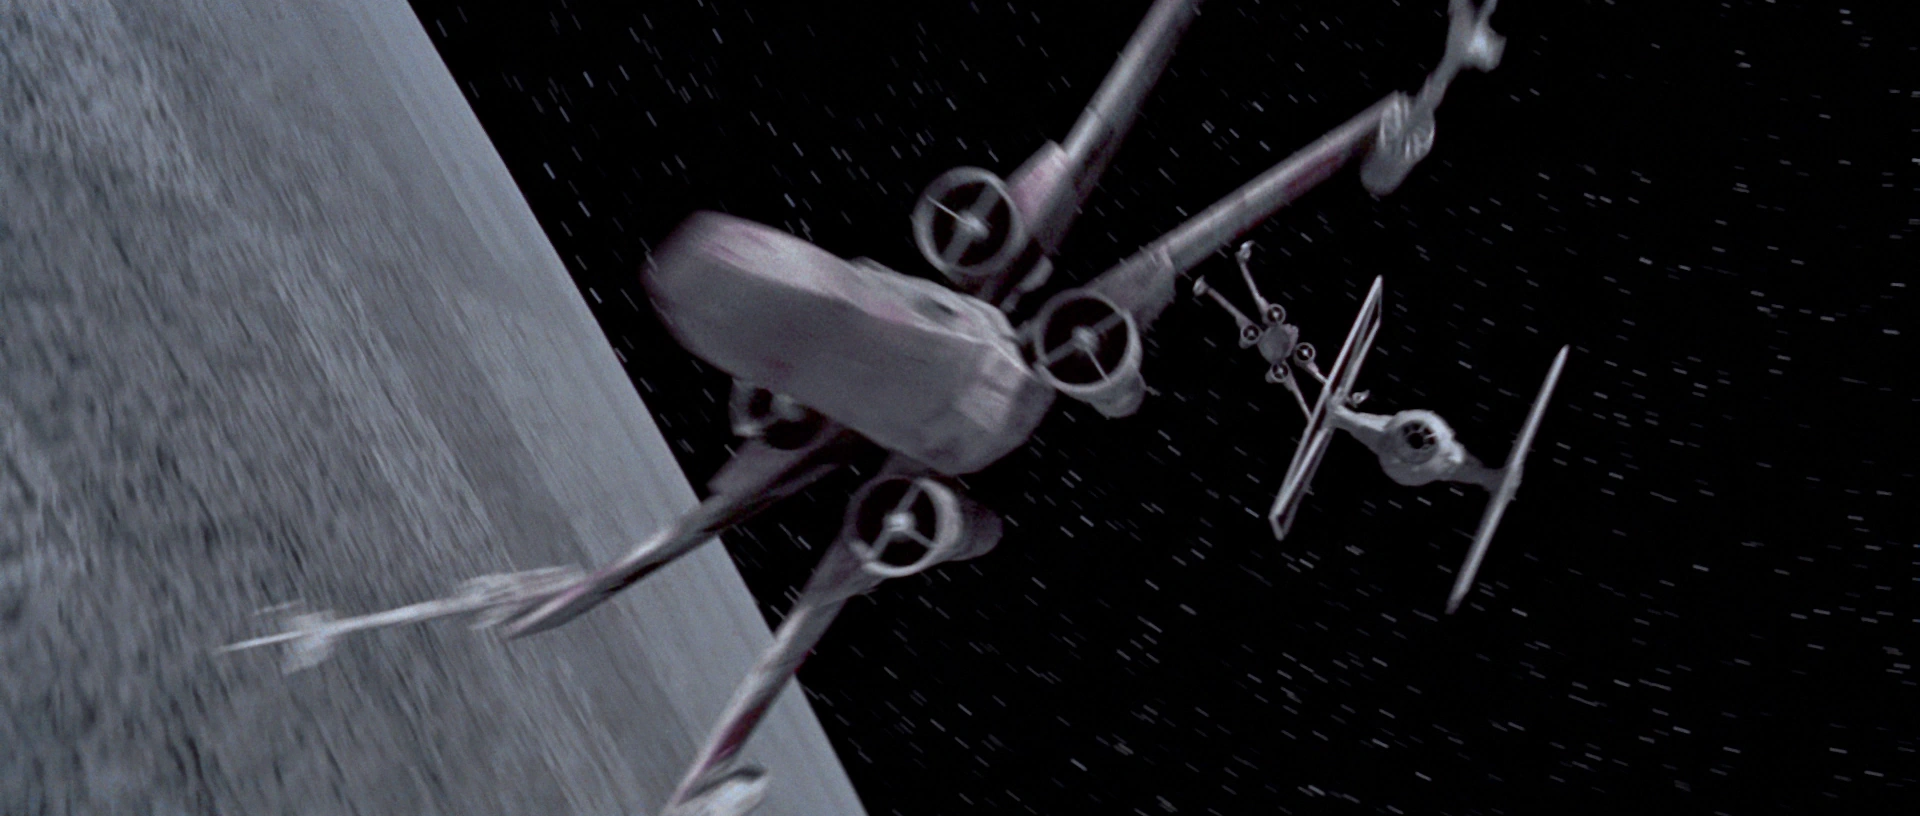
Dogfight between X-Wings and TIE fighters over the Death Star surface.
With the Death Star approaching, Y-wings from Gold Squadron and X-wings from Red Squadron were dispatched to carry out the attack plan. The deployment of Imperial TIE/LN starfighters served to devastate the Rebel attackers, destroying them with far more speed and efficiency than the station's weapon emplacements had been able to.[1]
Some time into the fighting, Imperial officer Jude Edivon aboard the Death Star identified the threat of the Rebels' attack strategy, and attempted to warn her superiors of the danger. However, Grand Moff Tarkin ignored the warning and refused to evacuate. Meanwhile, Darth Vader himself decided to lead a squadron of TIE fighters to destroy the remaining Rebel fighters.[1]
The first attack run was performed by a trio of Y-wings from Gold Squadron. Led by Jon "Dutch" Vander, the three Y-Wings were shot down by Darth Vader. A second trench run was performed by a trio of X-wings from Red Squadron led by Garven Dreis. Dreis was able to fire off a shot at the exhaust port, but his proton torpedoes missed their mark. Before being shot down by Darth Vader, Dreis ordered that another attack run.[1]
Following the final command of Red Leader, Luke Skywalker led the final attempt with Wedge Antilles and his old friend, Biggs Darklighter, as wingmen. Rushing down the trench at full throttle, they found themselves being tailed by Darth Vader and his fighters.[1]
Vader personally damaged Antilles' fighter and destroyed Darklighter's X-wing, but had difficulty destroying Skywalker. Vader was surprised when one of his fighters exploded beside him. Han Solo, believed to have abandoned the Rebels before the battle began, unexpectedly returned to assist Skywalker in his most desperate moment.[1]

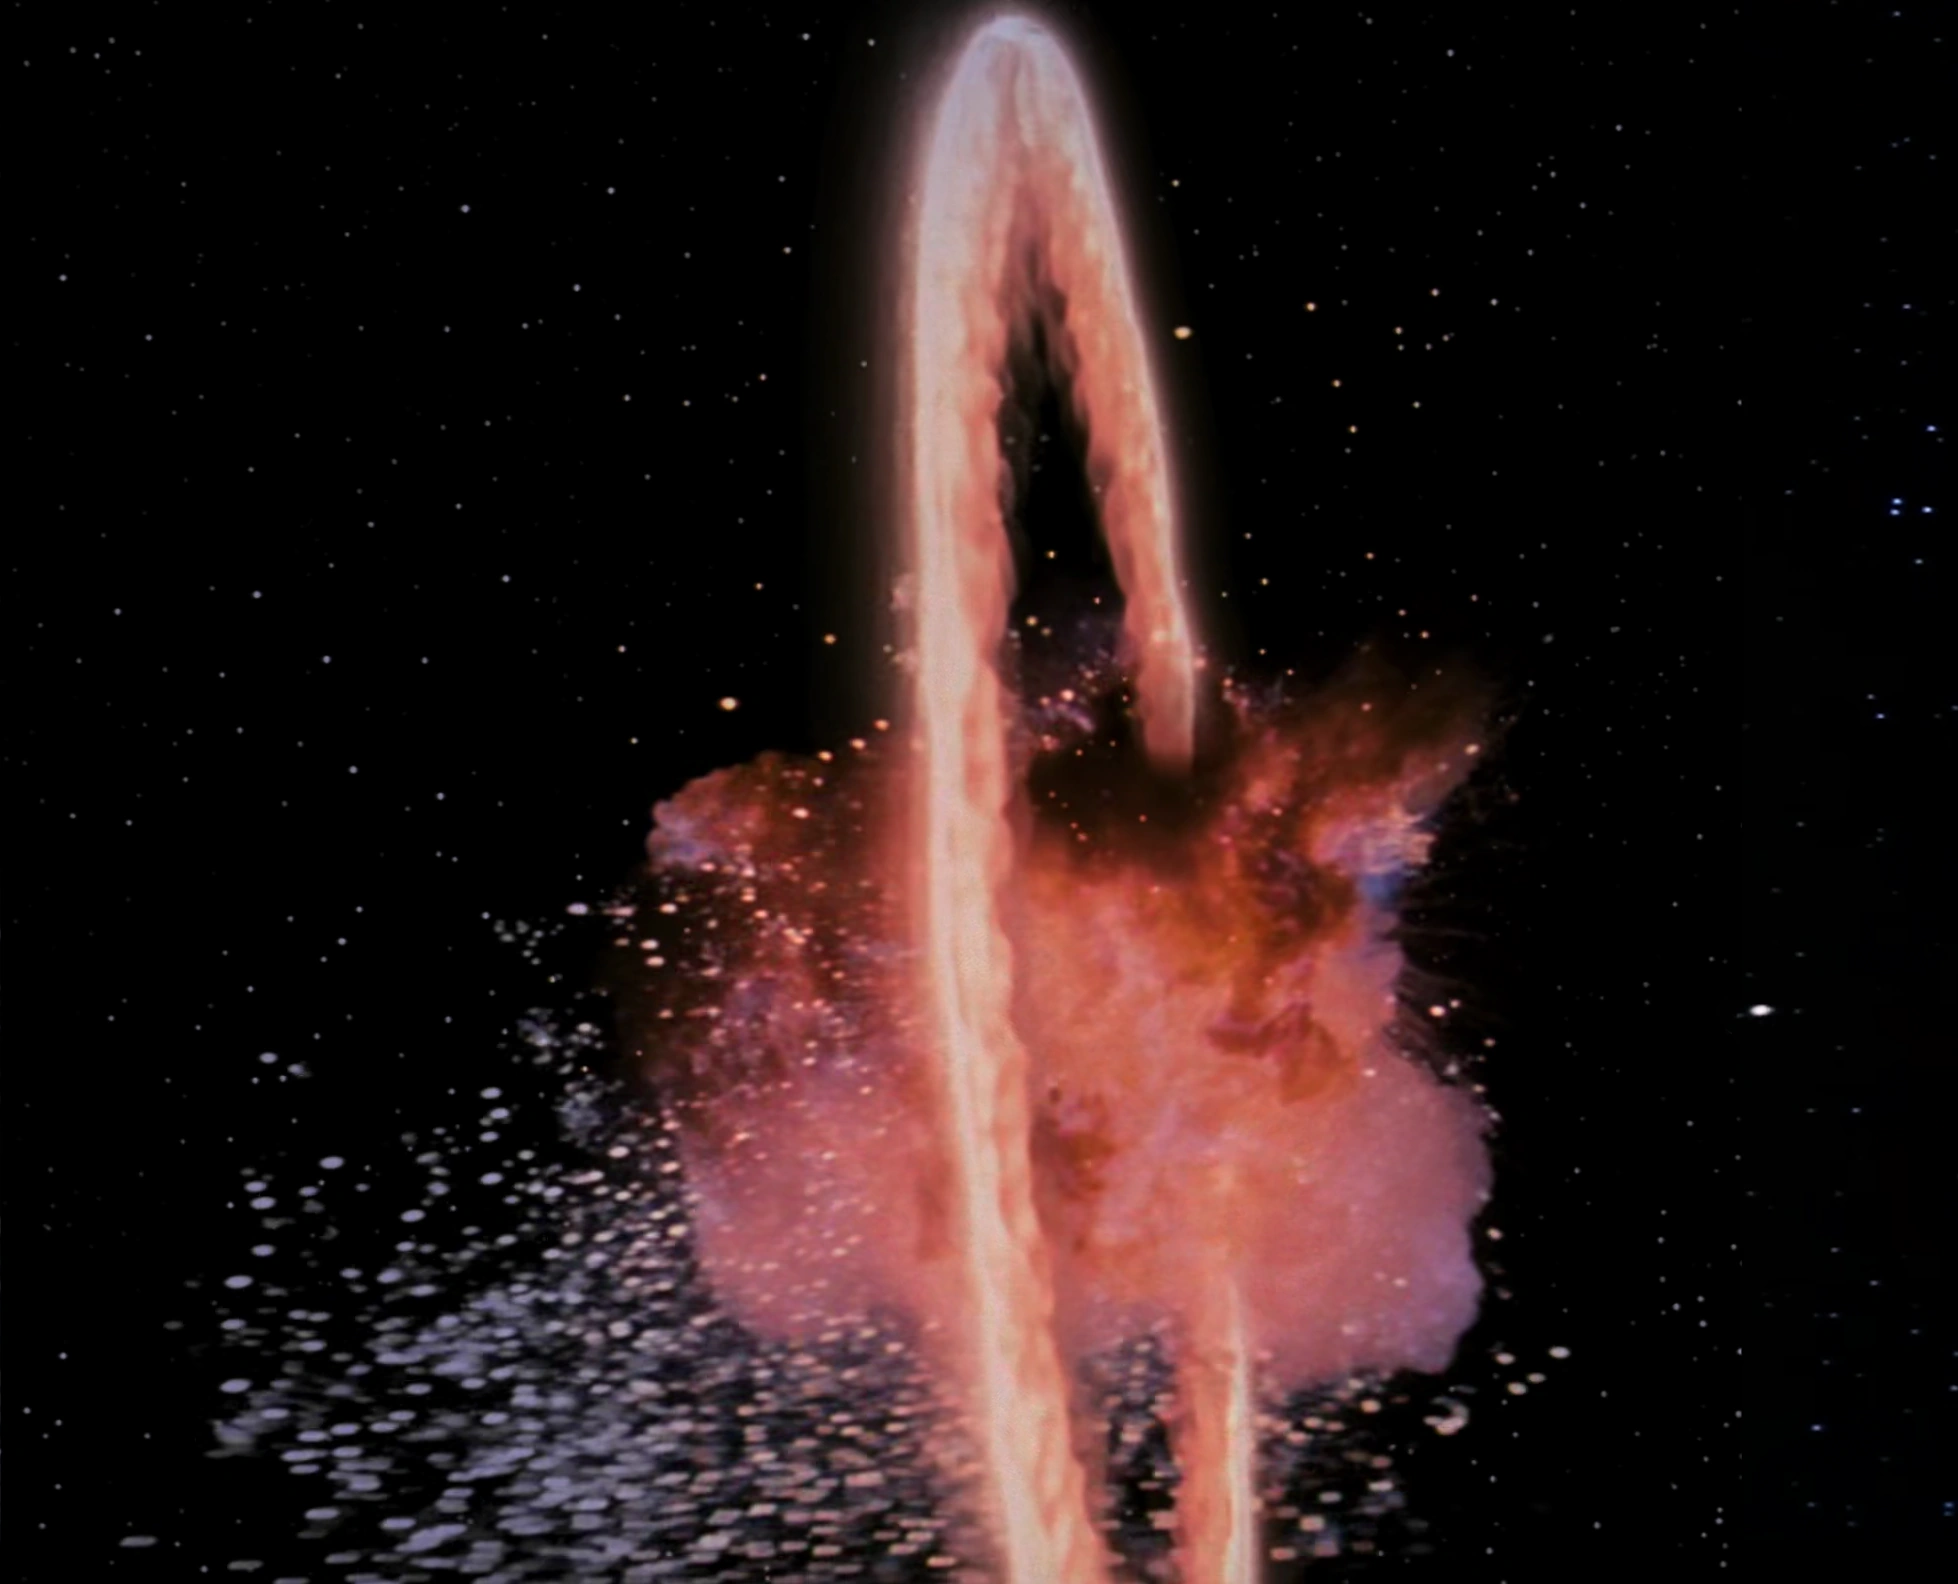
The destruction of the Death Star.
Momentarily distracted by the intervention, Vader's remaining wingman attempted to protect Vader but accidentally smashed into his fighter, both spiraling himself into the side of the trench while knocking Vader away from the Death Star, allowing Skywalker to fire the shot that would destroy the Death Star.[1]
Aftermath
- "Great shot, kid! That was one in a million!"
- ―Han Solo to Luke Skywalker
Skywalker, Solo, and the surviving Rebel fighters returned to Yavin, where they held a celebration ceremony and awarded the pair with medals for their achievement in saving the Rebellion.[1] Darth Vader, the sole Imperial survivor of the battle, was recovered in his damaged TIE Advanced x1 by Imperial pilots Ciena Ree and Berisse Sai.[10]
The destruction of the Death Star caused chaos within the Imperial Ranks, leading to deliberate oversights on internal investigations and the rapid promotion of many young officers and lieutenants such as Ciena Ree to replace the higher-ranked officers killed on the Death Star.
Eventually, the Rebels were forced to leave the site of their victory, fleeing the Empire once again.[11] In order to maximize on the Empire's weakness following the destruction of the Death Star, the Rebels begun to conduct dozens of raids against Imperial targets to weaken the now-vulnerable Empire. In addition to attacks carried out on the shipyards of Kuat and a supply base on Imdaar, a Rebel team composed of Leia Organa, Han Solo and Luke Skywalker assaulted and destroyed the Empire's largest armament factory on Cymoon 1, severely undermining Imperial military production.[12]
Appearances
- Lost Stars (Mentioned only)
- Star Wars: Episode IV A New Hope (First appearance)
- A New Hope Read-Along Storybook and CD
- The Adventures of Luke Skywalker, Jedi Knight
- Star Wars: Battle Pod
- Star Wars: Princess Leia, Part I (Mentioned only)
- Smuggler's Run animated comic (Mentioned only)
- Star Wars: Princess Leia, Part IV (Mentioned only; in the opening crawl)
 "Last Call at the Zero Angle" — Star Wars Insider 156 (Indirect mention only)
- Heir to the Jedi (Mentioned only)
- Star Wars 1: Skywalker Strikes (Indirect mention only)
- Star Wars 2: Skywalker Strikes, Part II (Indirect mention only)
- Star Wars 3: Skywalker Strikes, Part III (Indirect mention only)
- Star Wars: Darth Vader 1: Vader (In flashback(s))
- Star Wars 4: Skywalker Strikes, Part IV (Indirect mention only)
- Star Wars: Darth Vader 2: Vader, Part II (Mentioned only; in opening crawl)
- Star Wars: Darth Vader 3: Vader, Part III (Indirect mention only)
- Star Wars: Darth Vader 5: Vader, Part V (Mentioned only; in the opening crawl)
- Star Wars: Darth Vader 6: Vader, Part VI (In flashback(s))
- Star Wars 11: Showdown on the Smuggler's Moon, Part IV (Mentioned only)
- Star Wars: Darth Vader 11: Shadows and Secrets, Part V (Mentioned only)
- Star Wars: Vader Down, Part I (Indirect mention only)
- Star Wars: Darth Vader 13: Vader Down, Part II (Mentioned only)
- Star Wars Battlefront
- Battlefront: Twilight Company (Mentioned only)
- Star Wars: Commander (Mentioned only)
- Star Wars: Episode V The Empire Strikes Back (Indirect mention only) (opening crawl)
- Star Wars: Shattered Empire, Part II (Indirect mention only)
- Star Wars: Uprising (Mentioned only)
Sources
- Biggs Darklighter in the Encyclopedia (content now obsolete; backup link)
- Chewbacca in the Encyclopedia (content now obsolete; backup link)
- Darth Vader in the Encyclopedia (content now obsolete; backup link (chracters/darth-vader) not verified!)
- Death Star in the Encyclopedia (content now obsolete; backup link)
- General Dodonna in the Encyclopedia (content now obsolete; backup link)
- Imperial probe droid in the Encyclopedia (content now obsolete; backup link)
- Rebel Pilots in the Encyclopedia (content now obsolete; backup link)
- Super Star Destroyer in the Encyclopedia (content now obsolete; backup link)
- X-wing fighter in the Encyclopedia (content now obsolete; backup link)
- Yavin 4 in the Encyclopedia (content now obsolete; backup link (locations/yavin-4) not verified!)
- Star Wars in 100 Scenes
- Ultimate Star Wars
- Star Wars: Absolutely Everything You Need to Know
- Star Wars: Ships of the Galaxy
- Biggs Darklighter in the Databank (backup link)
- Chewbacca in the Databank (backup link)
- Death Star in the Databank (backup link)
- Galactic Empire in the Databank (backup link)
- Galactic Senate in the Databank (backup link)
- Imperial Star Destroyer biography gallery on StarWars.com (backup link (Imperial-Star-Destroyer-Biography-gallery) not verified!); image #6 (of 15)
- Rebel Pilots in the Databank (backup link)
- TIE fighter in the Databank (backup link)
- Wookiee in the Databank (backup link)
- Y-wing Starfighter in the Databank (backup link)
Notes and references
- ↑ 1.00 1.01 1.02 1.03 1.04 1.05 1.06 1.07 1.08 1.09 1.10 1.11 1.12 1.13 1.14 1.15 1.16 1.17 1.18 1.19 1.20 1.21 1.22 1.23 1.24 1.25 1.26 1.27 1.28 1.29 1.30 1.31 1.32 1.33 1.34 1.35 1.36 1.37 1.38 Star Wars: Episode IV A New Hope
- ↑
 "One Thousand Levels Down" — Star Wars Insider 151
- ↑ Star Wars: Princess Leia, Part I
- ↑ Yavin 4 in the Encyclopedia (content now obsolete; backup link (locations/yavin-4) not verified!)
- ↑ Star Wars: Episode IV on Star Wars.com on StarWars.com (backup link)
- ↑ General Dodonna in the Encyclopedia (content now obsolete; backup link)
- ↑ Darth Vader in the Encyclopedia (content now obsolete; backup link (chracters/darth-vader) not verified!)
- ↑ Death Star in the Encyclopedia (content now obsolete; backup link)
- ↑ 9.0 9.1 [1] – Based on number of starfighters visible in the picture
- ↑ 10.0 10.1 Lost Stars
- ↑ Star Wars: Episode V The Empire Strikes Back
- ↑ Star Wars 4: Skywalker Strikes, Part IV
Template:Canon Galactic Civil War