| | |

- "Transport, this is Solo. Better take off, I can't get to you. I'll get her out on the Falcon."
- ―Han Solo orders the Bright Hope to take off
The Bright Hope was a GR-75 medium transport that served the Rebel Alliance. There were twenty-nine other transports of the same model used by the rebels to escape Hoth. During the Battle of Hoth in 3 ABY, the transport was a part of the evacuation plan. Rebel personnel like Lieutenant Harlize Dana, Rainn Poras and communications officer Toryn Farr boarded the Bright Hope while the kitchen worker Chase Wilsorr helped Doctor Tristan Melthabi, Officer Sendak and the Tauntaun handler Jordan Smythe make it to the transport. The Bright Hope then took off, escorted by three T-65B X-wing starfighters piloted by Wedge Antilles, Wes Janson and Tarrin. It was the last transport to leave Hoth.
Characteristics[]
The Bright Hope was a GR-75 medium transport built by Gallofree Yards, Inc..[1] Standing at 90 meters,[2] the transport could travel at 650 kph and was equipped with a class 4 hyperdrive. The Bright Hope also had a capacity of 19,000 metric tons[3] as well as shield generators. The transport was built for the roles of transportation[1] as well as the specialized roles of communications, medical ship, fireship, resupply, rescue and fire support.[2]
History[]
- "The Bright Hope is leaving in ten minutes. I repeat, ten minutes. This is the last transport for all evacuees."
- ―Toryn Farr, over Echo Base's intercom
During the Galactic Civil War, the Bright Hope served under the Rebel Alliance at Echo Base,[4] the Alliance High Command's secret base on the ice planet Hoth.[7] In 3 ABY,[8] the Galactic Empire discovered the base, prompting the Alliance to begin its evacuation from the planet. The Empire arrived and attacked Echo Base in the meantime, and the Bright Hope was the last scheduled transport to be departing Hoth,[4] with the help of rebel pilots Wedge Antilles, Wes Janson,[1] and Tarrin[9] being assigned as escort.[4] Deck officers, including Serenity Meeks directed evacuees to the Bright Hope and other GR-75s, which left one by one.[6]
When the kitchen worker Chase Wilsorr and Lieutenant Harlize Dana reached the transport, Meeks reported to Major Bren Derlin that Doctor Tristan Melthabi and three medtechs were trapped at the medical facility. Wilsorr went to rescue the medical staff and directed them towards the Bright Hope while he searched for more stragglers. The communications officer Toryn Farr soon announced that the transport would be leaving in ten minutes.[6] Farr eventually fled her post at the command center for the Bright Hope.[10] Princess Leia Organa also left the center for the transport with Captain Han Solo and the protocol droid C-3PO.[4] Injured rebel pilots were taken to the Bright Hope. Farr and found her injured sister, Samoc Farr, among the injured pilots.[10]
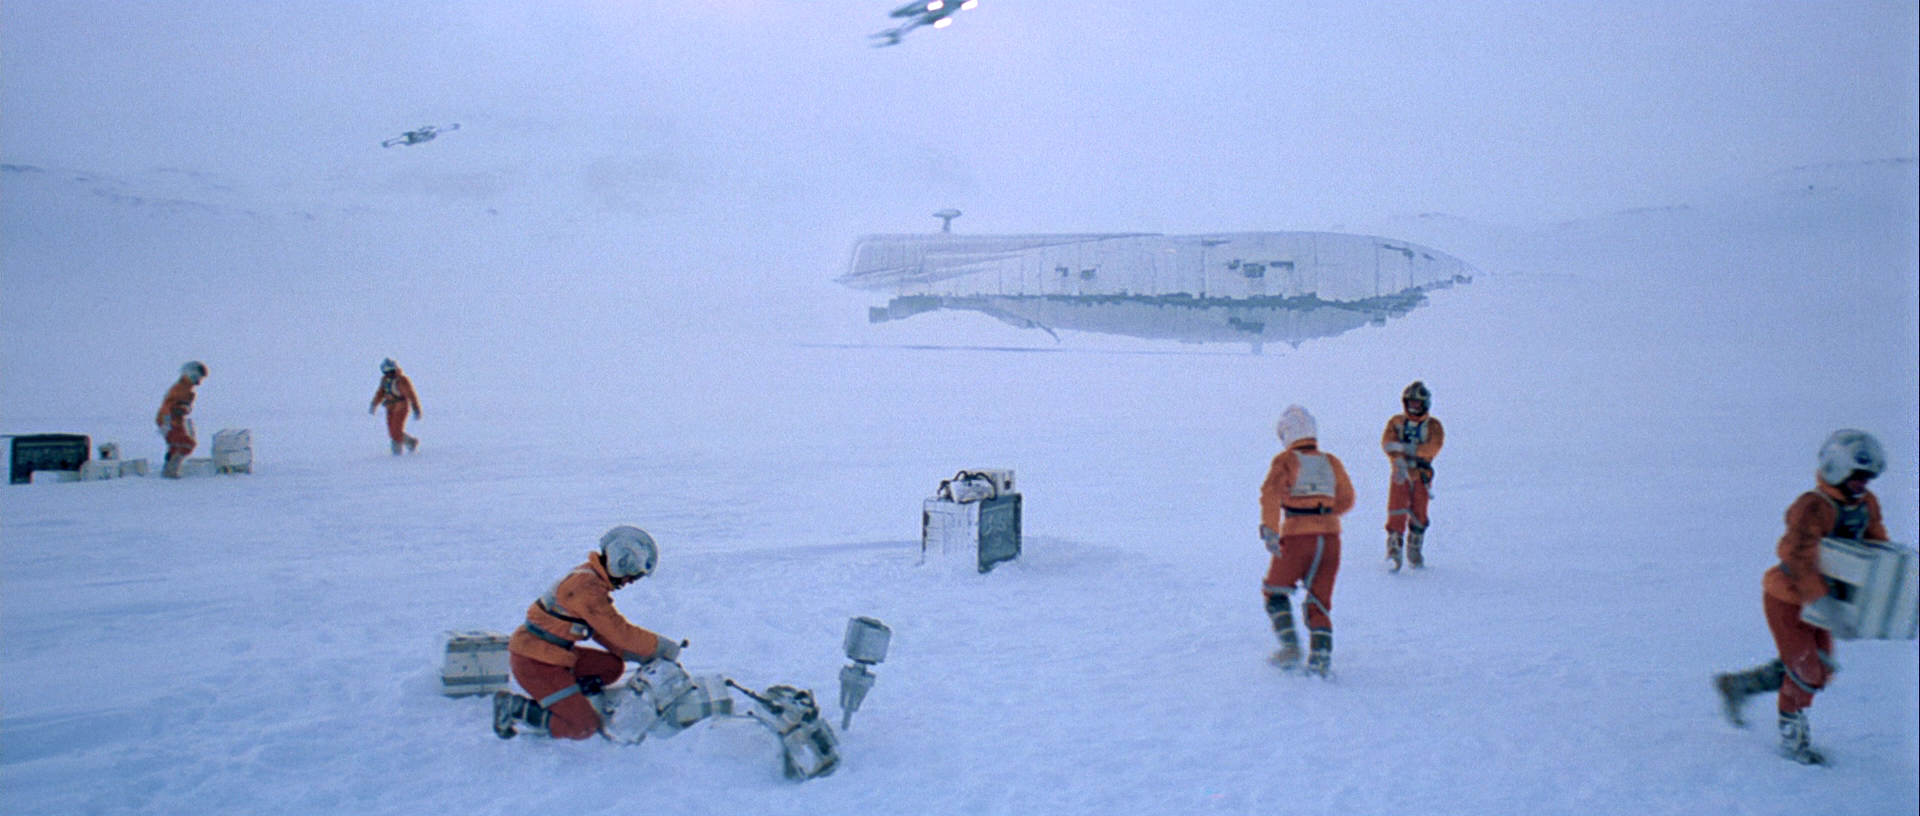
The Bright Hope during takeoff
Wilsorr also returned to the Bright Hope with other personnel he had found, including communications officer Sendak. With three minutes until take off, the kitchen worker rushed to the Tauntaun pens and evacuated the handler Jordan Smythe.[6] After Organa, Solo and C-3PO were cut off by a tunnel collapse, Solo contacted Bright Hope, giving the starship clearance to take off without them, taking his two comrades aboard his light freighter the Millennium Falcon instead.[4] Meeks stalled the Bright Hope from taking off to allow Wilsorr and Smythe to board the vessel. After the pair arrived on the transport, riding the tauntaun Sunshine, other rebels like Rainn Poras congratulated Wilsorr for his help saving personnel.[6] The Bright Hope then took off from Hoth with its X-wing escort.[4] The Bright Hope then became part of the Fourth Division of the Alliance Navy alongside the EF76 Nebulon-B escort frigate Redemption and multiple other corvettes and transports, and was present at Backup Rendezvous Point Gamma-Nine.[5]
Behind the scenes[]
The Bright Hope first appeared in the 1980 film Star Wars: Episode V The Empire Strikes Back, directed by .[4] The transport was identified by DK publishing's 2015 reference book Ultimate Star Wars, which stated that Derek "Hobbie" Klivian was part of the starfighter escort for Bright Hope.[1] However the 2017 reference book Star Wars: On the Front Lines, written by Daniel Wallace, later contradicted that by saying Hobbie died crashing his snowspeeder during the Battle of Hoth.[11] Furthermore, another reference book by DK publishing named Star Wars: Complete Locations, published on 2016, replaced Hobbie with Tarrin as one of starfighter escort pilots.[9]
In Star Wars Legends continuity, the Bright Hope was first featured in the M. Shayne Bell's short story Of Possible Futures: The Tale of Zuckuss and 4-LOM, part of the 1996 anthology book Tales of the Bounty Hunters, which revealed the transport to be the one which Han Solo attempts to bring Leia Organa to during the Battle of Hoth in Star Wars: Episode V The Empire Strikes Back. The name Bright Hope came from one of C-3PO's spoken film lines, when he suggested to Organa that the final transport was their "only hope" for escape.[12][4] Later, the 1998 PC program Star Wars: Behind the Magic retroactively revealed that the Bright Hope was the GR-75 medium transport taking off in the background scene during which Luke Skywalker gets into his X-wing to evacuate Hoth in The Empire Strikes Back, establishing ship's first in-universe appearance.[13]
Appearances[]
- Star Wars: Episode V The Empire Strikes Back (First appearance)
- Star Wars: The Empire Strikes Back junior novelization
- "A Good Kiss" — From a Certain Point of View: The Empire Strikes Back
- "A Good Kiss" — From a Certain Point of View: The Empire Strikes Back audiobook
- "Ion Control" — From a Certain Point of View: The Empire Strikes Back
- "Ion Control" — From a Certain Point of View: The Empire Strikes Back audiobook
 "Tales of Villainy: Invasion of Echo Base" — Star Wars Adventures (2020) 1 (Indirect mention only)
- "Rendezvous Point" — From a Certain Point of View: The Empire Strikes Back (Indirect mention only)
- "Rendezvous Point" — From a Certain Point of View: The Empire Strikes Back audiobook (Indirect mention only)
Sources[]
- Star Wars: The Empire Strikes Back on StarWars.com (backup link) (Indirect mention only)
- Princess Leia Organa in the Encyclopedia (content now obsolete; backup link) (Indirect mention only)
- Ultimate Star Wars (First identified as Bright Hope)
- Star Wars: Build the Millennium Falcon 20 (Secrets of Spaceflight: Cargo Handling)
- Star Wars: Armada — Rebel Transports Expansion Pack (Card: Bright Hope)
- Star Wars: Complete Locations
- Star Wars: Galactic Atlas
- Star Wars: Geektionary: The Galaxy from A - Z
- Ultimate Star Wars, New Edition
- Star Wars: X-Wing Second Edition — Huge Ship Conversion Kit (Card: Bright Hope)
- Star Wars: Armada — Upgrade Card Collection (Card: Bright Hope)
- "The Battle of Hoth and the Second Death Star" — Star Wars Encyclopedia
- Star Wars: Unlimited — Spark of Rebellion (Card: Bright Hope—The Last Transport) (SWUDB backup link)
Notes and references[]
- ↑ 1.0 1.1 1.2 1.3 1.4 1.5 1.6 1.7 1.8 1.9 Ultimate Star Wars
- ↑ 2.0 2.1 2.2 2.3 Star Wars: The Rebel Files
- ↑ 3.0 3.1 3.2 3.3 Star Wars Encyclopedia of Starfighters and Other Vehicles
- ↑ 4.00 4.01 4.02 4.03 4.04 4.05 4.06 4.07 4.08 4.09 4.10 4.11 4.12 Star Wars: Episode V The Empire Strikes Back
- ↑ 5.0 5.1 Star Wars: Build the Millennium Falcon 20 establishes that the Bright Hope was present at the Backup Rendezvous Point Gamma-Nine in Star Wars: Episode V The Empire Strikes Back. Star Wars (2020) 1 establishes that the rebel starships present at Backup Rendezvous Point Gamma-Nine were part of the Fourth Division. Therefore, the Bright Hope must have been part of the Fourth Division, which included the EF76 Nebulon-B escort frigate Redemption, corvettes, and other starships.
- ↑ 6.0 6.1 6.2 6.3 6.4 "A Good Kiss" — From a Certain Point of View: The Empire Strikes Back
- ↑ Battlefront: Twilight Company
- ↑ Star Wars: Galactic Atlas
- ↑ 9.0 9.1 Star Wars: Complete Locations
- ↑ 10.0 10.1 "Ion Control" — From a Certain Point of View: The Empire Strikes Back
- ↑ Star Wars: On the Front Lines
- ↑ "Of Possible Futures: The Tale of Zuckuss and 4-LOM" — Tales of the Bounty Hunters
- ↑ Star Wars: Behind the Magic