| | |
Warning: This infobox has missing parameters: parents, pronouns, children, siblings, partners, families, feathers and unrecognized parameters: era
- "Do you think we've got a chance, General?"
"I don't believe in chance, Commander. I know if we work together, we will stay alive, and someone will find us." - ―Wolffe and Plo Koon
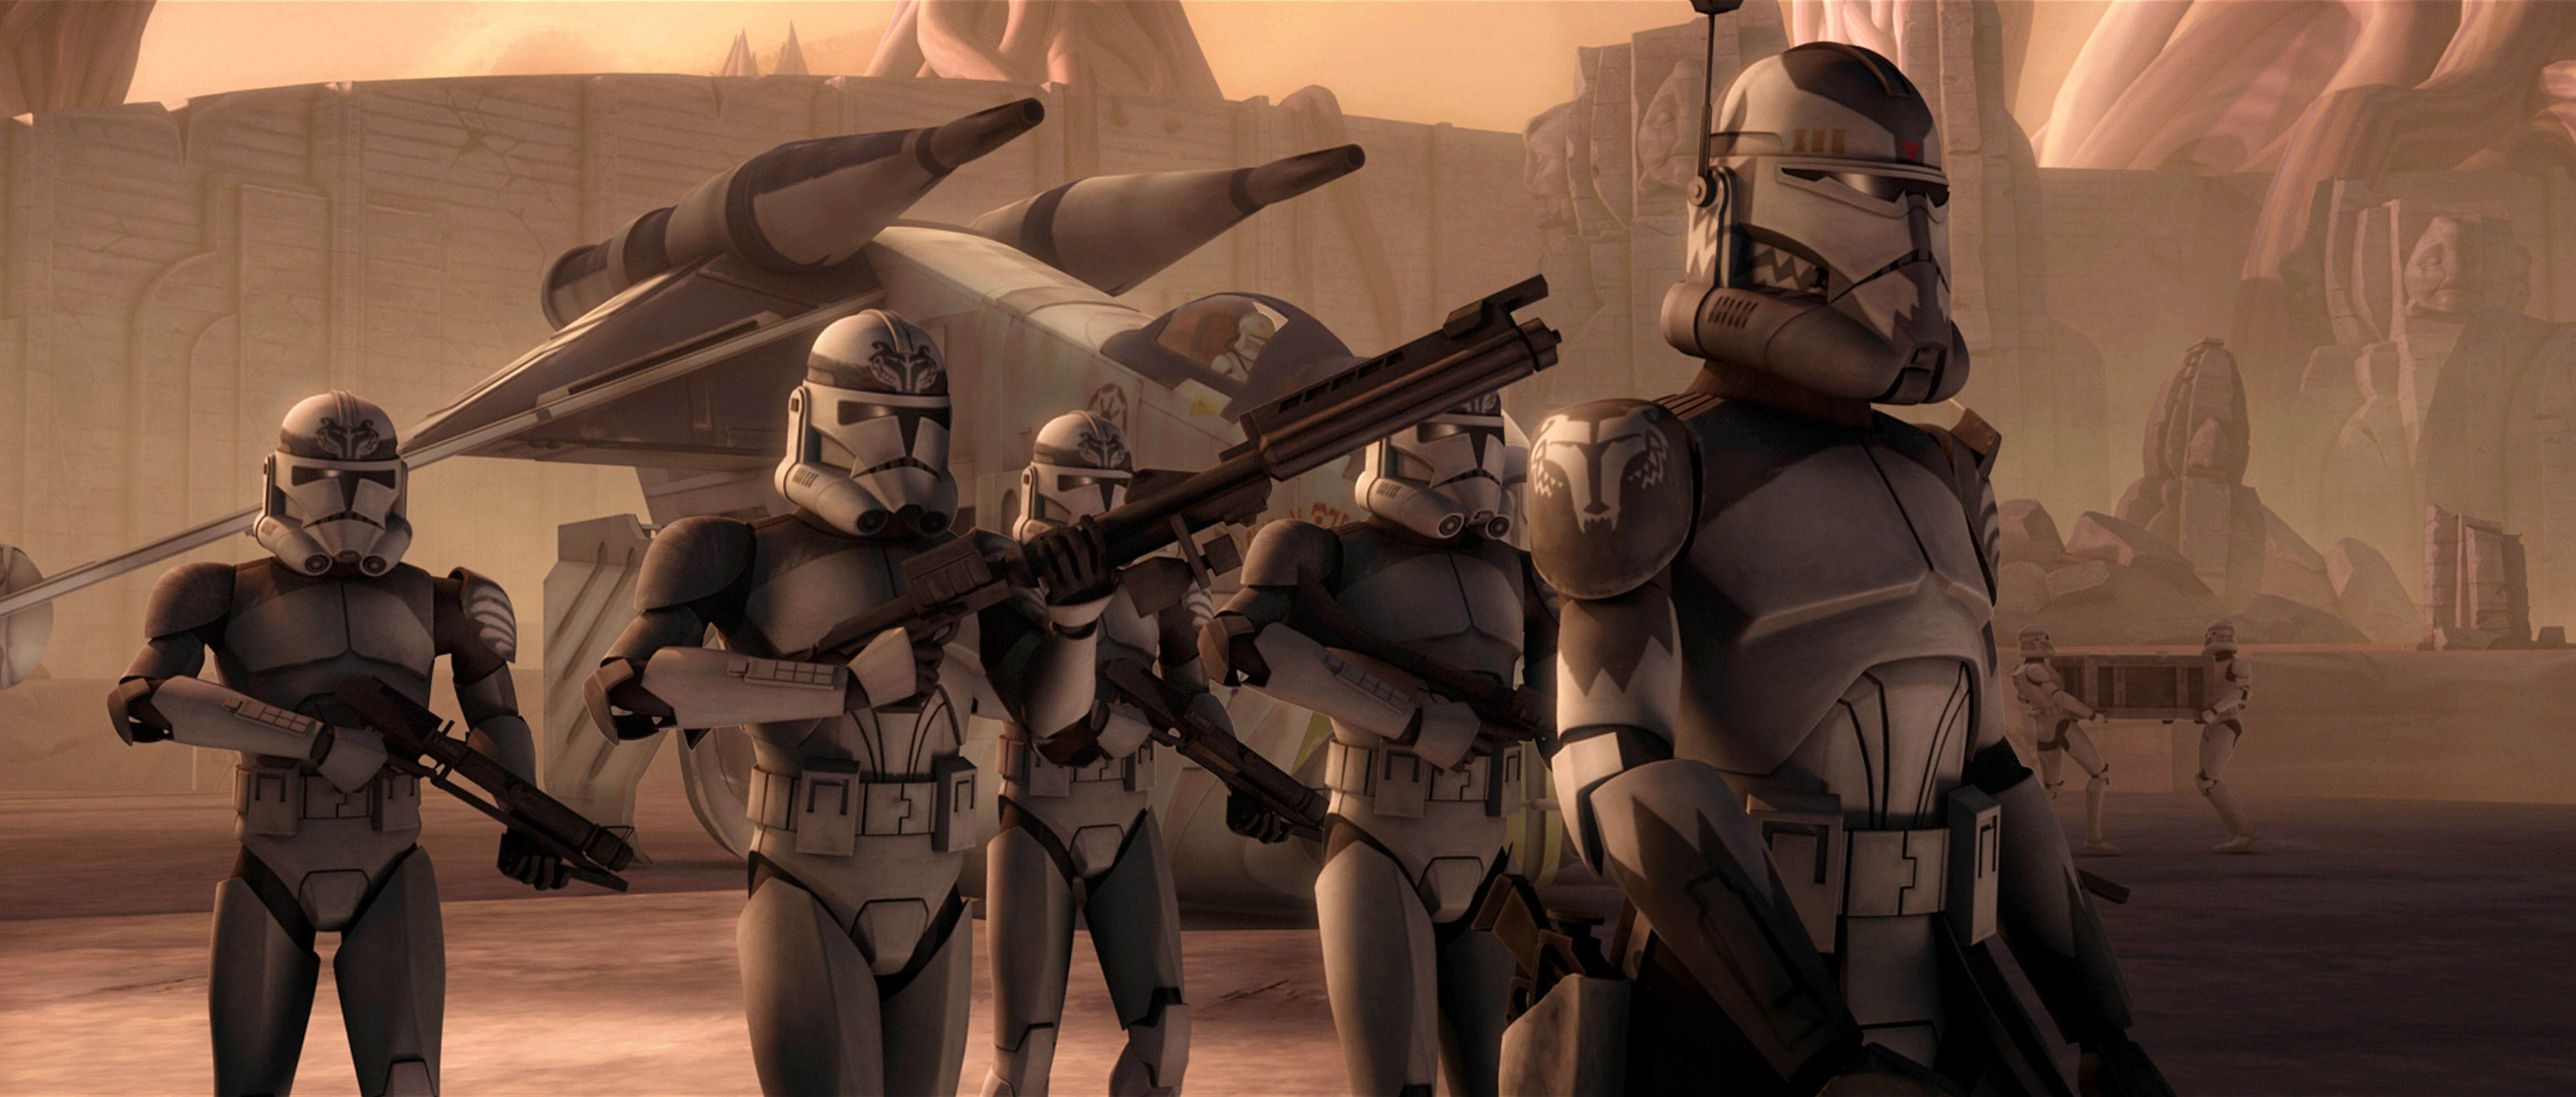
CC-3636, nicknamed "Wolffe," was a veteran clone trooper commander in the Grand Army of the Republic who served with Jedi General Plo Koon during the Clone Wars. The leader of the 104th Battalion's famed Wolfpack squad, Commander Wolffe proved to be tireless in his efforts against the Confederacy of Independent Systems, displaying an affinity for strategy. In 22 BBY, on his first mission with Koon, Wolffe served on board the Jedi Master's flagship, the Triumphant, when Koon led a task force to eliminate the Separatist warship Malevolence. While confronting the Malevolence in the Abregado system, however, all of the Wolfpack was eliminated, save for Koon, Wolffe, and troopers Sinker and Boost. The four were rescued by Jedi General Anakin Skywalker and his Padawan, Ahsoka Tano, and Wolffe had his unit adopt new clone trooper armor in honor of his fallen comrades. Refusing to let the loss of the Wolfpack deter him from his service, he inspired loyalty amongst his men.
Wolffe's loyalty to the Jedi put him at odds with the ambitious Major Kendal Ozzel during the Battle of Khorm, in which they participated alongside Generals Koon, Kit Fisto, and Tauht. Though Wolffe lost his right eye in a fight with the Dark Acolyte Asajj Ventress, the Republic defeated the Separatists and liberated Khormai slaves, thus securing the planet's repositories of rare agrocite ore for the Grand Army. Although scarred and forced to wear a cybernetic eye replacement, Wolffe continued his military service to the Republic, undertaking several key rescue missions with Koon to Felucia, Vanqor, and Lola Sayu. He even joined Koon in challenging General Grievous during the Second Battle of Felucia and the following Mission to Iceberg Three. He personally oversaw a supply mission to the groundquake-devastated planet Aleen, assisted in liberating Togruta slaves from the Zygerrian Slave Empire on Kadavo, and took part in a 104th mission that recovered the lightsaber of the late Jedi Master Sifo-Dyas.
Biography
Early career
Battle of Abregado
- "Thanks for getting us out of there in one piece, General Skywalker."
"You have my Padawan to thank for that. She always said you guys would pull through."
"General Plo said someone would come for us. We're glad he was right." - ―Wolffe and Anakin Skywalker
Clone Commander 3636,[5] who earned the nickname "Wolffe,"[2] was born on Kamino as a clone trooper to serve in the Grand Army of the Republic.[6] During the Clone Wars, Wolffe was assigned to Jedi General Plo Koon, with whom he developed a close working relationship.[1] Wolffe also led a squad[4] in the 104th Battalion[3] named the "Wolfpack,"[4] which came to be reputed for being extremely close-knit; it was he who chose the unit's original colors.[2]
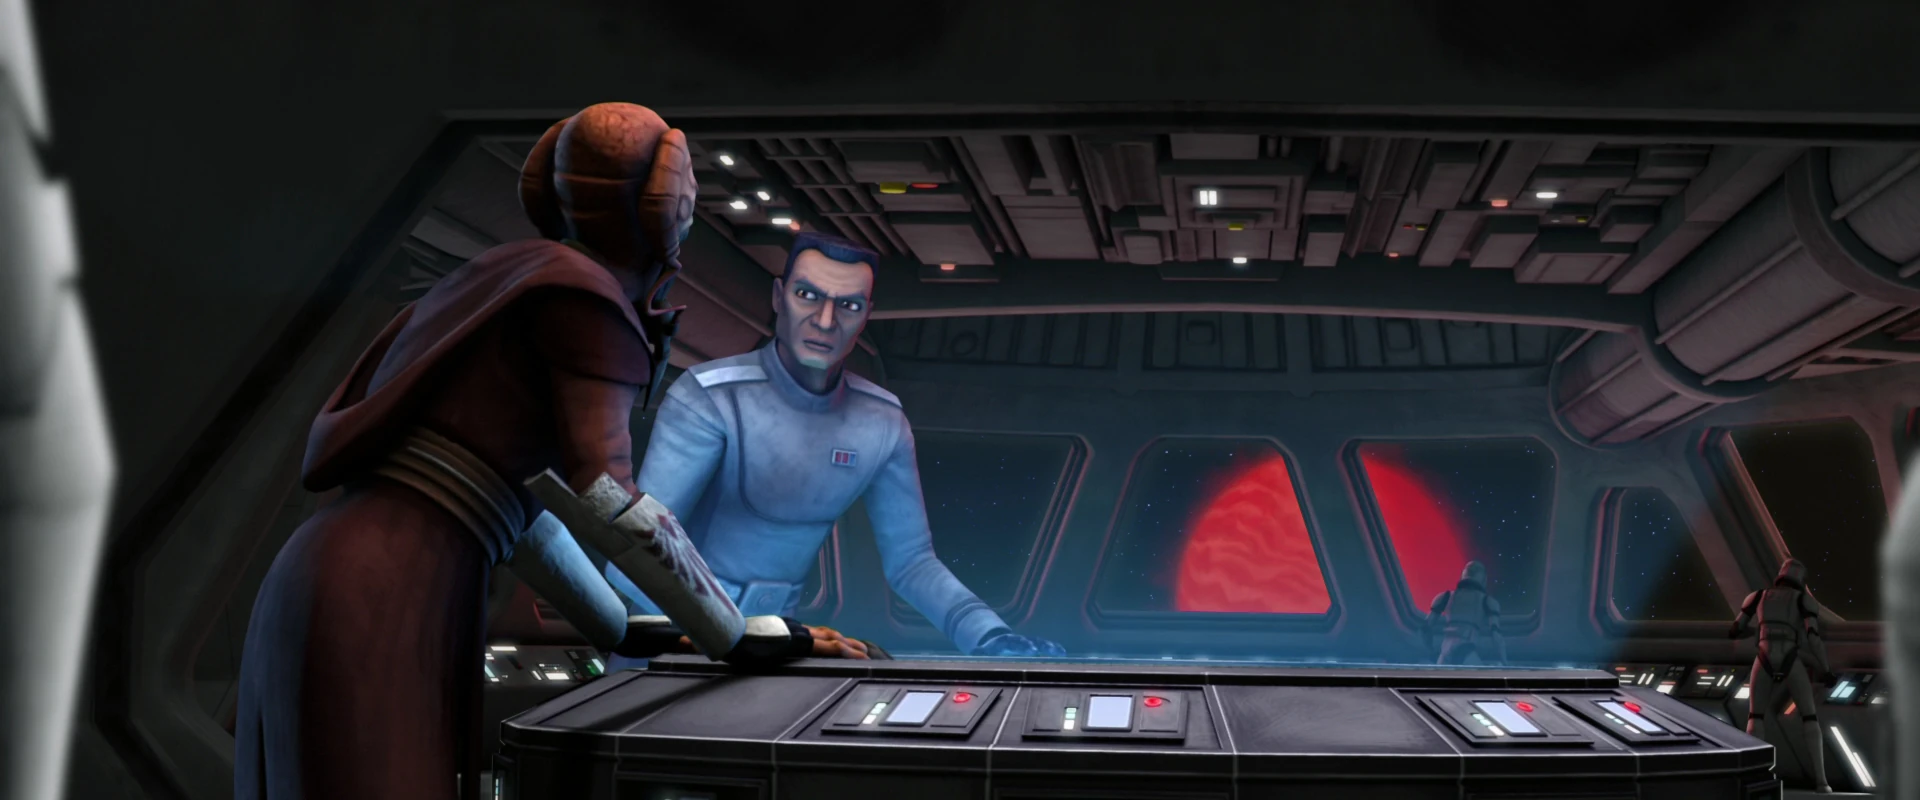
In 22 BBY,[7] on their first mission with Koon,[4] Wolffe and the Wolfpack[2] served aboard Koon's fleet when the Jedi Master was sent to find and destroy a Separatist superweapon that had been ambushing and ravaging Republic fleets. In actuality, the weapon was the ion cannon–equipped battlecruiser Malevolence, commanded by the Confederate General Grievous.[8] As he was on an out-of-armor duty rotation,[2] Commander Wolffe served as the first officer on board Koon's flagship, the Star Destroyer Triumphant.[9] Tracking the superweapon to the Abregado system, Koon's task force of three Venator-class Star Destroyers arrived and approached the massive Separatist warship, which Wolffe reported to be holding its position. When Koon recommended that they report their position before commencing attack on the superweapon, Wolffe offered that Jedi General Anakin Skywalker's fleet was stationed in the nearby Bith system, and Koon and Wolffe made contact with Skywalker and his Padawan, Jedi Commander Ahsoka Tano.[8]

Koon and Wolffe command the Triumphant as they prepare to attack the Malevolence.
As Koon requested reinforcements for the impending assault on the Separatist ship, the Malevolence's battle droid crew jammed the Republic's transmissions, severing Koon and Wolffe's HoloNet connection to Skywalker and Tano. The Malevolence converged upon Koon's fleet, and before the three Star Destroyers were able to get within firing range, the Confederate weapon fired one of its ion cannons at the task force. With their deflector shields disabled from the blast, the unprotected Triumphant and the rest of the fleet fell under turbolaser fire from the Malevolence. Koon immediately ordered his crew to flee in escape pods, and Wolffe accompanied Koon, Clone Sergeant Sinker, and trooper Boost in one of the craft. The four jettisoned shortly before the Triumphant was ripped apart by the intense laser fire.[8] By the time the Malevolence's attack on the Republic forces was over, the entirety of the Wolfpack—save for Wolffe, Boost, and Sinker—had perished with the remainder of Koon's fleet.[10]
Drifting amidst the debris field that had been erected from the wreckage of the cruisers, Wolffe reported that their pod's power grid had burned out, limiting both communications and life support. While Sinker and Boost worked to restore the power, Wolffe questioned Koon if he believed that they had a chance, to which Koon replied that although he did not believe in chance, he knew that they would survive and be rescued if they worked together. Spotting another escape pod nearby, Wolffe mused that if only their own pod had power, they would have been able to contact the other survivors. When Koon used the Force to telekinetically rotate the pod, however, the Jedi and clone troopers were met with a grim surprise—the pod's viewport had been split wide open, its dead passengers floating in the vacuum of space. After Sinker and Boost were finally able to reactivate their pod's power, Wolffe picked up a signal from another life pod, Pod 1977. Wolffe soon spotted the pod, which was under attack from a Separatist Droch-class craft and several rocket battle droids. Unable to help the other pod, Koon and the troopers were forced to watch as the B1 battle droids split open the pod, submitting the craft's clone survivors to the airless vacuum of space. By that time, Koon, Wolffe, Sinker, and Boost were the only survivors of the battle, as the remainder had been hunted down and eliminated by the Confederacy.[8]
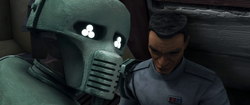
Having been spotted by the rocket battle droids, Koon decided to personally confront the enemy,[8] as his species was able to withstand the pressure of space for a brief amount of time.[9] Sinker and Boost utilized their armor suits' oxygen supply and accompanied Koon, leaving the armor-lacking Wolffe inside the pod to keep its communication signal alive—as it was the only chance of being found and rescued. Just as the Separatist craft latched onto the life pod with its pincers, Koon, Sinker, and Boost appeared to the battle droids and engaged their adversaries in combat. While the droids retreated into their own craft and activated its "squeeze" mechanism to crush the pod, Wolffe picked up a signal from Ahsoka Tano, who had arrived in the system with her Master, Anakin Skywalker, to search for the survivors of the encounter with the Malevolence. Yet, the Separatists' damage to the pod caused Wolffe to lose the signal before he was able to return a message to Tano. Koon severed the Confederate vessel's pincers, breaking its hold on the pod, and then Force-pushed the craft away, causing it to hit some nearby debris and explode. Skywalker and Tano eventually found the escape pod floating amongst the debris field and pulled it into the rear cargo hold of Skywalker's freighter, the Twilight. After the survivors were inside the vessel's airlock, Skywalker freed Wolffe from the damaged pod by pulling off its viewport with the Force. Skywalker supported the coughing and weakened Wolffe before lowering him to sit beside Sinker and Boost against the life pod.[8]

Rescued from the vacuum of space, Wolffe is tended to by TB-2 aboard the Twilight.
Leaving the clones to recover in the Twilight's cargo hold with the ship's medical droid, TB-2, to tend to them, Koon went to debrief the failed attack on the Separatist superweapon with Skywalker and Tano on the freighter's bridge. The Malevolence itself soon approached the Twilight in search of the destroyed Droch-class craft, and the Jedi were forced to shut down all of the freighter's systems to avoid detection. With the cargo hold's lights disabled, Wolffe deduced that the power had gone out and suspected that the Separatist ship had returned. Despite his weak condition, Wolffe attempted to get up to the bridge to find out what was wrong. Yet he nearly collapsed, and TB-2 caught him and went to check on the situation for the clones. Picking up the signal from the Twilight's still-active medical droid, the Malevolence fired its ion cannon at the freighter, but the Republic ship was able to avoid the ion wave by escaping the debris field and jumping to hyperspace. The Twilight rendezvoused with the Republic fleet,[8] and aboard Skywalker's flagship, the Resolute,[9] Wolffe thanked both Skywalker and Tano for rescuing them, glad that Koon's admonitions that someone would find them had come true.[8]
Although the Wolfpack was replenished with new troops, the loss of the original unit[10] hardened Wolffe and his attitude.[11] In honor of his comrades that had fallen to the Malevolence, Wolffe had his clone trooper armor's design changed from the Wolfpack's original symbols and colors to a new design,[10] which his troops also adopted.[12]
Battle of Khorm
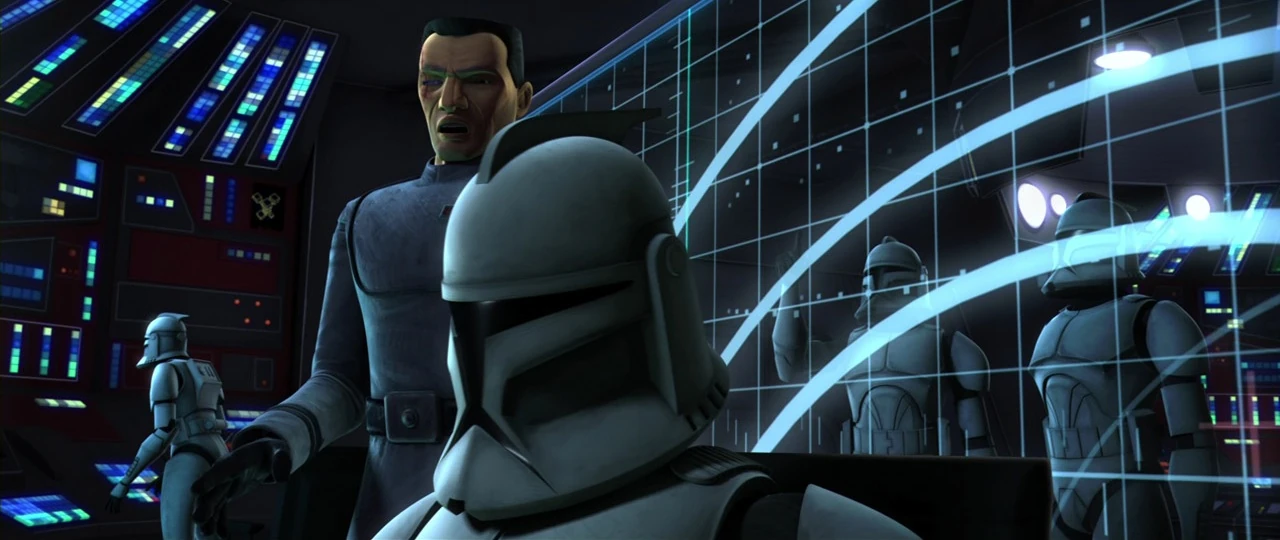
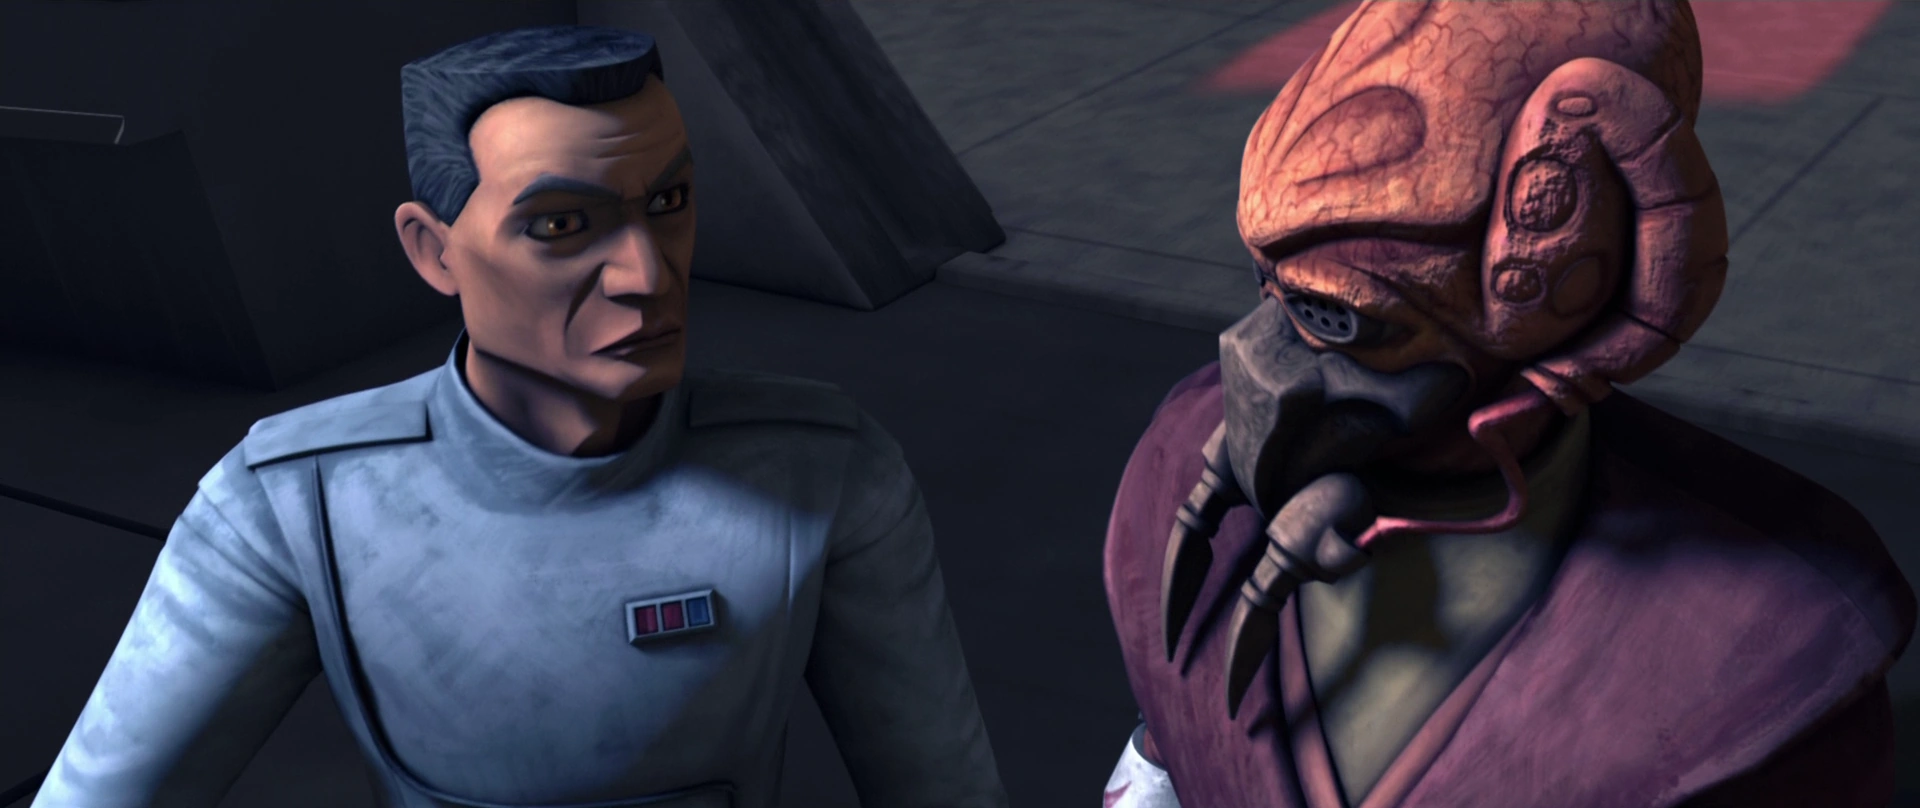
- "Sir, shouldn't we attempt to contact the Jedi?"
"The Jedi are dead, Commander Wolffe! You can join me in winning this battle—or mourn the dead and the end of your career." - ―Wolffe and Kendal Ozzel
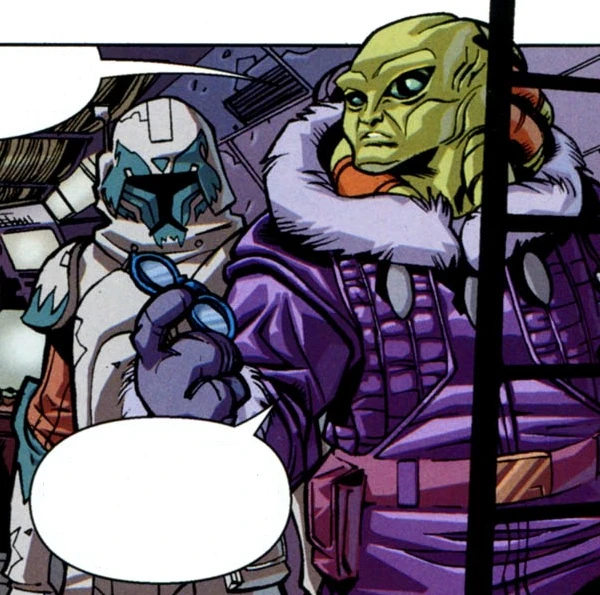
Dressed for Khorm's cold climate, Wolffe and Fisto prepare to meet with Adaroo.
Later in the war, Wolffe was dispatched alongside Jedi Masters Plo Koon, Kit Fisto, and Tauht, as well as the ambitious and recently promoted Major Kendal Ozzel, to the planet Khorm in order to secure its deposits of agrocite, a rare ore that granted exceptional power to starfighters. However, the Separatists had already arrived on the planet and, under an alliance with native Khormai Warlord Unger Gout, had enslaved the majority of the planet's species and put them to work in an agrocite processing facility. After landing on Khorm during a storm, the Republic deployed its forces to attack the processing plant. En route to the facility with a squad of All Terrain Tactical Enforcers, Wolffe—who had donned cold assault armor as protection from Khorm's icy climate—conferred with Fisto on the subject of Koon, whose age had been of much recent debate in the clone commander's unit and whose curious manner had sparked the clone's curiosity.[5]
Wolffe and Fisto met with Koon himself atop an AT-TE walker before rendezvousing with Adaroo and others of the Republic's Khormai allies. As the Republic forces approached the Separatist processing plant, Warlord Gout's[5] J-1 semi-autonomous proton cannons[13] attacked the AT-TE walkers in defense of the agrocite facility. Ozzel ordered the clone troops to disembark, and Wolffe and Adaroo followed as Generals Koon, Fisto, and Tauht led the attack. After the walkers were in position, Ozzel commenced fire on the Separatist cannons, destroying them and forcing Gout to flee from the facility on a rail jet. With the processing plant secured, the Republic forces established a command post at their newly won position. Wolffe and Ozzel met with the Jedi Generals to discuss the primary objective at hand—liberating the Khormai slaves in the mine. While the major petitioned for a direct assault on the mine, Koon maintained that such an attack would cost them too many casualties.[5]
Receiving word from Admiral Wieler and the Republic fleet in orbit of Khorm that a Separatist ship—Dark Acolyte Asajj Ventress's Trident—had somehow reached the surface through an opening in the ongoing storm, the Jedi realized that the Separatists possessed a sort of weather-control station. Believing that air support would be able to participate in the impending assault on the mine if the storm were to stop, Koon and Fisto departed with the Devil Dogs unit to eliminate the Confederate station, leaving Ozzel, Tauht, and Wolffe at the Republic base, with Tauht in command. The Republic's recently established base soon came under attack by Ventress and a deployment of Separatist battle droids. Ventress killed Tauht, leaving Ozzel in overall command of the Republic forces. While Ozzel ordered his troops to charge on the Separatist lines, Wolffe maintained that they should obey the Jedi's orders for holding the facility, but Ozzel refused to idly wait for the Separatists to attack again. As the Republic forces charged, however, a large amount of DSD1 dwarf spider droids appeared and surrounded them, forcing Ozzel to surrender. Wolffe, Ozzel, and several clone captives were taken to be interrogated at the agrocite processing plant. There, despite Wolffe's admonitions to keep silent, Ozzel—influenced by the fear of death, which Ventress had invoked by beheading of two of the clones—betrayed the Jedi's mission.[5]
Wolffe, Ozzel, and their men were only saved from death at the Dark Acolyte's hand by Gout, who instead had Wolffe, Ozzel, and troopers Spitter and Comet imprisoned.[5] While Ozzel attempted to justify his actions, the clones were able to cut through their cell's lock. Wolffe and his comrades commandeered an Armored Assault Tank to make their escape, cutting through the facility's droid forces and blasting out of the base. Returning to the Republic command post, Wolffe stated that they should contact Koon and Fisto, while Ozzel, believing them to be dead, ordered the clone commander to mobilize the transports and rendezvous with the fleet to prepare a counterattack. Before the Republic forces escaped, however, Confederate tanks led by Ventress appeared and assaulted the base once more. With their transports frozen and their heavy armor destroyed in the first offensive, the Republic forces were trapped. Wolffe protected Ozzel—who was fully prepared to surrender—and gave the order to retreat to the ships. Before Ventress and her battle droid forces could exterminate the Republic detachment, the Jedi's elimination of the weather-control station allowed Admiral Wieler and the Republic fleet to move in. The approaching LAAT/i gunships and V-19 Torrent starfighters forced the Dark Acolyte and her army to retreat. While Ozzel took credit for the victory, Wolffe was able to contact the Jedi, bringing them up to date on the situation.[14]

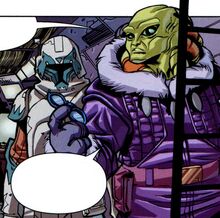
Major Ozzel and Wolffe were often at odds while on Khorm.
As Koon and Fisto reconnoitered the Separatist mine in preparation for an assault on Gout's final position, Ozzel mobilized the Republic troops for an assault on the facility. Though he did not agree with Ozzel's orders—since the Jedi had intended to scout out the mine before besieging it—Wolffe began preparations for the coming battle with troopers Sinker and Boost. When the Republic's attack on the mine began, Wolffe accompanied Ozzel as he led the Republic forces from an LAAT/i gunship. However, Gout loaded several agrocite cannons and targeted the approaching task force. An Acclamator-class transport was ripped apart by the heavy fire, and a shocked Ozzel panicked before being knocked out in the subsequent retreat. In Ozzel's place, Wolffe led a ground assault on the mine with a line of AT-TE walkers. After Fisto eliminated the agrocite cannons, Wolffe and a squad of troops arrived to assist Koon in his ongoing lightsaber duel with Ventress, who was preparing to detonate explosives planted in the mine. Koon Force-pushed the Dark Acolyte's detonator away from her, allowing Wolffe to personally shoot the remote. In making her escape, Ventress slashed at Wolffe,[15] gouging out his right eye.[16]
Back at the command post, Wolffe was bandaged and witnessed Ozzel's promotion[15] to captain[17] by Supreme Chancellor Palpatine. After Ozzel's promotion, Wolffe once again inquired after Koon's age, and Koon told Wolffe and Fisto that he was 382 Kel Dor years old, though he left the two to figure out how long that meant.[15] Wolffe's facial injury in his fight with Ventress left him with a large scar across the side of his face and forced him to use a silver cybernetic eye replacement for his lost eye.[10]
Scarred but steadfast
Rescue missions
- "They made it through the first wave. Concentrate all fire on the cruiser on the left."
- ―Wolffe commands the Republic fleet during the battle over Felucia

Wolffe oversees the Republic fleet as they assault the Separatist blockade of Felucia.
Following[1] the Battle of Khorm,[15] Wolffe[1] and Koon were dispatched with a three-cruiser fleet of Venator-class Star Destroyers,[18] including the Star Destroyer Negotiator,[19] to support an ongoing Republic battlefront: the planet Felucia, where Republic forces had been trapped by a Separatist blockade and an overwhelming force from the Separatist Droid Army. While Koon led several LAAT/i gunships and an escorting squadron of V-19 Torrent starfighters to rescue the Jedi and clones stranded on Felucia's embattled surface, Wolffe oversaw the Republic fleet's assault on the Confederate flotilla from the bridge of one of the Star Destroyers, having his cruisers exchange heavy turbolaser fire with the Confederate Munificent-class star frigates.[18] Once the Republic Navy's Hunter Squadron had destroyed one of the enemy frigates,[20] Koon and his rescue ships were able to secure passage through the besieged blockade, making it past the first wave of Vulture droid starfighters. Wolffe subsequently had his Star Destroyer concentrate its fire on one of the approaching Separatist frigates. Although the Republic was forced to pull out from Felucia, Koon was able to rescue Anakin Skywalker, Ahsoka Tano, Master Obi-Wan Kenobi, and their remaining beleaguered troops.[18]
While serving with Koon away from the galactic capital of Coruscant, Wolffe and his Jedi General remotely witnessed General Grievous report his capture of Jedi Master Eeth Koth over a holotransmission broadcast directly to the Jedi Temple communication center, in which Grievous also brutally tortured the captive Koth. Wolffe noticed that Koth was using discreet hand gestures to disclose his location to the Jedi, and he informed Koon of Koth's exploit once the transmission had ended. Koon relayed Wolffe's discovery to the other Jedi back at the Jedi Temple and had them play back the transmission, leading to the localization of Grievous and the hostage Koth in the Saleucami system. Thanks to Wolffe's observation, the Jedi were able to mount a rescue mission and free Koth from Grievous's clutches.[21]
When word reached the Jedi Temple that Generals Anakin Skywalker and Mace Windu had been stranded on the planet Vanqor by bounty hunters, Wolffe, Koon, and Ahsoka Tano immediately left with troops from the Wolfpack to rescue them. Wolffe and the Jedi led a force of three LAAT/i gunships to Vanqor, where they found Skywalker and Windu trapped under layers of debris in the bridge section of the crashed Star Destroyer Endurance. As the Endurance's bridge began to crumble, Koon and Tano held the section steady with the Force, and the Wolfpack troopers added their assistance by attaching their DC-15A blaster rifles' grappling hooks to the span. With their comrades holding the bridge section in place, Wolffe and trooper Comet scaled the gap between the two ships and jumped across to rescue Skywalker and Windu. Wolffe and Comet freed the two Jedi Generals from the rubble and helped them back to the gunship, returning moments before Tano was forced to cut the cables connected to the Endurance. All three of the gunships pulled out of the area just as the entire bridge section was compromised, sparking a chain of explosions that consumed the Endurance. After briefly touching down at a staging area so that the wounded Skywalker and Windu could be properly loaded aboard stretchers, the group departed Vanqor, their rescue mission a success.[12]

Wolffe, Tano, Koon, and the Wolfpack arrive on Vanqor to rescue Skywalker and Windu.
In 21 BBY,[22] in the course of the continuing war, Wolffe assisted Koon in the rescue of a Republic team from the Separatist-held planet Lola Sayu, which was home to the feared prison known as the Citadel. The elite Republic squad—led by Skywalker, Tano, and Obi-Wan Kenobi—had infiltrated the Citadel to free Jedi Master Even Piell and Captain Wilhuff Tarkin, who had been captured and incarcerated in the installation for their discovery of the Nexus Route, a series of strategically valuable hyperspace lanes. While rescuing Piell and Tarkin, however, the Jedi's team had lost their ship, necessitating an extraction. Koon, Wolffe, and the Wolfpack subsequently set out to rescue the stranded team before the Separatists could recapture them.[23]
A four-cruiser fleet of Republic Star Destroyers took Koon, Wolffe, and Jedi Masters Saesee Tiin, Adi Gallia, and Kit Fisto to Lola Sayu, where the Republic launched a full-on assault on the Separatist blockade of the world. With Tiin, Gallia, and Fisto providing starfighter cover, Koon, Wolffe and Comet were deployed to the planet's surface in a space gunship to retrieve Skywalker, Kenobi, Tano, Piell, Tarkin, and their men. Although Piell had already been killed in the fight against the pursuant Separatists, the remainder of the team was holding position at the rendezvous point—a small island in the middle of a lake of sulfurous lava. Just as LM-432 crab droids were about to overrun the squad, Koon and Wolffe arrived with their gunship, and Tarkin and the others were able to escape from Lola Sayu aboard the craft. Once Koon and Wolffe had brought the freed prisoners to the Republic fleet, the four Star Destroyers jumped to hyperspace and returned to the Jedi Temple on Coruscant, where the Republic began debriefing on the Nexus Route intelligence.[23]
The war against Grievous
- "All this fighting will have been in vain if General Skywalker and Senator Amidala can't prevent Mon Calamari from plunging into civil war."
"Small victories are just as important as the grand ones, Commander. We saved lives here, and that is the important thing." - ―Wolffe and Plo Koon, following the retreat from Iceberg III


Skywalker, Koon, Wolffe, and Tano plan their attack on the Separatist outpost.
After the Wolfpack underwent some more armor modifications, Wolffe and Koon joined Skywalker and Tano on Felucia, where the Republic was battling the Confederacy for control of the strategic world. As the Jedi pressed their assault into Separatist-held territory, General Grievous dispatched battle droid reinforcements aboard a C-9979 landing craft to one of his outposts on Felucia to secure his grip on the system. To attack Grievous's troops at the source, Koon, Skywalker, Tano, Wolffe, and Clone Captain CT-7567, nicknamed "Rex," proceeded to the droid outpost with their troops. Just as Grievous's reinforcements were being deployed, Koon developed a three-part strike plan to divide and conquer the droids' defenses: while he and Wolffe assaulted the outpost's left flank, Skywalker and Rex would attack the front gate, and Tano would breach the base's rear entrance. Once all of the Jedi's forces had moved into position, Koon had the Republic's AT-TE walkers open fire on the droid outpost from an adjacent ridge. While Skywalker and Rex battled the droids at the front gate, Koon led the way to the top of the base via a Force Jump, and Wolffe and the Wolfpack followed with their JT-12 jetpacks.[24]
Koon, Wolffe, and their men cut through the battle droids on top of the base before joining Skywalker's men on the ground, where—with the aid of Comet, Sinker, Boost, and the others of Tano's Wolfpack division—they captured the outpost's command center and destroyed the remainder of the battle droids, including the base's T-series tactical droid commander, TZ-33. Unbeknownst to her comrades, however, Tano had been captured by Trandoshan hunters during the battle and had been taken to the Trandoshan moon of Wasskah, to be subjected to a ritualistic and brutal Trandoshan hunt. Although Tano was nowhere to be found at the Felucian outpost the next morning, Skywalker, Koon, Wolffe, Rex, and their men were forced to pull out from Felucia and return to Coruscant without her, though Koon relayed the matter of the missing Padawan to the Republic's intelligence assets throughout the rest of the Outer Rim Territories and within the Confederacy itself.[24] Tano was eventually rescued and returned to the Jedi Temple alongside Skywalker and Koon.[25]
Following the victory on Felucia,[26] Grievous led a Separatist invasion of the Calamari system, home to the Mon Calamari shipbuilders who were crucial to the Republic war effort. After Mon Calamari King Yos Kolina petitioned for Republic assistance to combat Grievous's invasion, Koon, Wolffe, a Jedi Knight, and the 104th Battalion were dispatched to reinforce the Calamari system. Upon arrival in the Calamari system, Koon's task force discovered that the situation was far worse than previously believed: a comet named Iceberg III was the only Republic position left to defend the system against complete Separatist control. Thanks to the Jedi Knight's leadership of the Republic starfighter squadrons, Koon's fleet was able to reach Iceberg III's Republic outpost with minimal casualties, and Wolffe and his men were deployed on the comet with cold assault gear. As the Jedi High Council had to be notified of the Republic's slipping hold on the Calamari system, Wolffe and the Jedi Knight took a single LAAT/i gunship to the last standing Communications Tower on the comet, cutting through waves of battle droids and droid starfighters to reach the tower. Once they had relayed the news of Grievous's invasion to the High Council, Wolffe and the Jedi Knight returned to the Republic outpost. There, Wolffe and the Jedi Knight found that Iceberg III's civilians were being evacuated off-world to a Republic base on the nearby planet Mon Eron, under the threat of an impending Separatist assault on Iceberg III.[3]

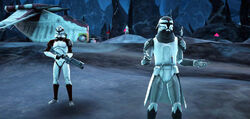
Wolffe leads the Wolfpack on Iceberg Three in preparation for the battle with Grievous.
As Koon held off the Confederate attack fleet in orbit of the comet, the task of protecting the LAAT/i evacuation transports until their departure fell to Wolffe and the Jedi Knight. The 104th Battalion quickly set up defensive turret platforms along the route to the Republic base, just as Grievous launched his assault on the outpost. While the Jedi Knight oversaw the defensive turrets, Wolffe led the Wolfpack into battle against Grievous's ground forces, defending the two paths leading to the outpost and only stopping to re-supply with ammunition. Wolffe and the Jedi Knight were able to hold off the invaders long enough for all three waves of the Republic's refugee transports to depart. Just as the 104th Battalion prepared to retreat from Iceberg III, Grievous landed at the outpost to personally lead his forces to victory. Wolffe and his men left the task of battling Grievous to the Jedi Knight, who managed to defeat the Separatist general in a one-on-one lightsaber duel.[3]
With the Separatists temporarily pushed back, Wolffe, the Jedi Knight, and the 104th Battalion evacuated from Iceberg III to Koon's fleet in orbit. Upon meeting with Koon, Wolffe was alarmed to learn that Yos Kolina had been assassinated—with the king gone, tensions were quickly escalating between the Mon Calamari and their Quarren neighbors. In response to the loss of Kolina, the Republic dispatched Anakin Skywalker and Senator Padmé Amidala to quell the ensuing turmoil on Mon Cala, though the Separatists also sent their own envoy, Commander Riff Tamson. Despite the rising prospect of civil war on Mon Cala, Koon, Wolffe, and their Jedi Knight companion took solace in the fact that they had saved the civilian lives on Iceberg III.[3] In the resulting Battle of Mon Cala,[27] the Republic was able to resolve the Mon Calamari–Quarren tensions and secure the Calamari system against the Confederacy, which was revealed to be responsible for Kolina's murder.[28]
Relief effort on Aleen
- "Here's how it is. My orders are to deliver supplies and re-establish power and communication systems. Report back to the transport the moment that R2 unit has completed the download. Tell them we'll be out of their hair in no time."
- ―An impatient Wolffe, to C-3PO, the translator for the Aleena
When the Confederacy moved to annex the Qiilura system, Wolffe and the 104th Battalion were dispatched aboard an Acclamator-class transport to aid Plo Koon in thwarting the Separatists' plans. En route to Qiilura, Wolffe and his men were reassigned to deliver desperately needed humanitarian supplies to the Republic-allied world Aleen, where catastrophic groundquakes had inflicted mass casualties among the native Aleena species.[29] Placed in command of the mercy mission,[30] Wolffe proceeded to Aleen with his transport and a trio of Pelta-class medical frigates. After his sensor crews located clusters of Aleena survivors numbering in the thousands, he reported his discovery of the refugees to Senator Padmé Amidala and Jedi Grand Master Yoda, who were pleased to learn that many had lived through the disaster. Moving in on Aleen, Wolffe took several LAAT/i gunships, LAAT carriers with AT-TE walkers, and a single Pelta-class frigate to the surface to deliver the relief supplies, while the rest of their task force remained in orbit. The 104th Battalion brought along the protocol droid C-3PO to translate the Aleena's native language and the astromech droid R2-D2 to restore Aleen's computer systems, which had sustained damages from the catastrophe.[29]

Wolffe and the Wolfpack land on Aleen.
Landing at an Aleena refugee zone, Wolffe and his men met with King Manchucho, the leader of the Aleena. With C-3PO serving as a translator, Manchucho welcomed the 104th Battalion to Aleen and promised to provide them with food and shelter during the duration of their stay on the world. An aftershock from the groundquakes suddenly shook the area, and Wolffe quickly dispatched his trooper squads to scan for unstable ground and designate hazardous zones. While 104th troops and CLL-M2 ordnance lifters offloaded the provision crates, Wolffe had Sergeant Sinker, Boost, and other members of the Wolfpack complete their priority assignment on Aleen: repairing the world's mainframe computers with R2-D2, who had been entrusted with the Republic's manuals for new equipment that would be left with the Aleena.[29]
Passing over Manchucho's peculiar request for them to "make peace in the ground," Wolffe and his men established a temporary hospital and communal kitchen at the Aleena's refugee camp. When Manchucho refused the kitchen and again requested their assistance for the supposed subterranean trouble, Wolffe grew impatient and left, ordering C-3PO to report back once R2-D2 finished downloading the computer mainframe. Wolffe also recalled Sinker, Boost, and their team from the mainframe station back to the staging area. The Aleena soon asked C-3PO and R2-D2 to travel into their planet's subterranean wilderness, which had been the source of the devastation, to prevent the advent of more groundquakes. C-3PO and R2-D2 were able to restore the separation between Aleen's surface and subsurface peoples, and the groundquakes were put to a stop. With their assignment completed, Wolffe and the 104th Battalion were instructed to rendezvous with Jedi Master Adi Gallia. As the Wolfpack departed with C-3PO and R2-D2 aboard several gunships, Wolffe agreed with his troops that they would offload the talkative protocol droid and his companion at the earliest opportunity.[29]
Once they had transferred R2-D2 and C-3PO to Gallia's flagship, Wolffe and the Wolfpack rendezvoused with Koon's fleet. However, Gallia was soon captured by General Grievous, and Koon consequently staged a mission to rescue her from Grievous's Providence-class carrier/destroyer. After finding Grievous's destroyer, Koon's fleet assaulted the warship while a boarding party was prepared to retrieve Gallia. Bringing several squads from the Wolfpack along, Wolffe and Koon boarded Grievous's destroyer and battled through its B1 battle droid defenses. Wolffe personally took several men to rescue Gallia from the bridge, while Grievous escaped in the midst of the battle. After rejoining Koon in his fight against the battle droids in one of the ship's corridors, Wolffe reported Grievous's retreat to Koon, who issued out orders to finish off the warship's remaining droid forces. Wolffe was then stunned to find C-3PO and R2-D2, who had managed to stow aboard after a harrowing series of adventures that had started with the destruction of Gallia's flagship, during Grievous's capture of Gallia. As the group moved on to defeat Grievous's remaining embarked forces, Wolffe was resignedly subjected to another conversation with C-3PO, who at length began to describe all of his recent experiences to him.[31]
Mission to Kadavo
- "That's everyone. We have to go. The facility's breaking up!"
- ―Wolffe, to Ahsoka Tano
Wolffe, Koon, and the 104th Battalion were called in for support when Anakin Skywalker and Ahsoka Tano set out to liberate a group[32] of 50,000 Togruta colonists from the planet Kiros, who had been enslaved by the Separatist-backed Zygerrian Slave Empire. The Togrutas were being held at a slave-processing facility on Kadavo alongside Obi-Wan Kenobi and Captain Rex, who had been captured during an investigation on Zygerria.[33] Skywalker and Tano went ahead to the Kadavo system aboard the Zygerrian slave ship Tecora, with Koon, Wolffe,[32] and their fleet officer,[34] Admiral Barton Coburn, following with a Venator-class Star Destroyer and the Arquitens-class light cruiser[32] Hand of Justice.[35] While Koon and clone pilot Warthog led the starfighter assault on the facility's aerial defenses, Coburn and Wolffe commanded the Hand of Justice, which was to be used to rescue the Togruta slaves. Although they had intended to retrieve the colonists from the landing platform, Keeper Agruss and his fellow Zygerrian slavers locked the Togrutas in an electrified holding cell, with the floor receding inward so as to drop them into the crater below.[32]

Wolffe, Sinker, and Comet fire their cables for the Togruta slaves to escape.
With the Togrutas unable to reach the landing pad, Tano devised a plan for Coburn to bring the Hand of Justice underneath the facility so that the slaves could escape onto the light cruiser's hull. Once Coburn had brought the cruiser underneath the holding cell, Wolffe took Sinker, Comet, and two other Wolfpack troopers top-side, hovering overhead with jetpacks and firing ascension cables onto the opening holding cell. Tano, who had joined the Togruta slaves to aid their escape, directed them to use the cables to reach the Hand of Justice. Sinker and Comet even caught two Togrutas who lost their footing and fell from the cell's receding floor. As soon as everyone was aboard, Wolffe took them back to safety in the main cabin. On Koon's orders, the LAAT/i gunships of their extraction team fired upon the supports of the building, and the slave-processing facility tumbled into the depths of the crater. Koon and Wolffe later joined Skywalker, Tano, Rex, and Kenobi aboard the Star Destroyer to debrief the successful mission. Governor Roshti, the leader of the Togrutan colony, even considered forgoing his people's neutrality in the war to join the Republic, which the Jedi believed would be a wise choice.[32]
While Wolffe was serving with a Republic task force, a crashed Munificent-class frigate led their detachment to the remote world Carlac, where they discovered an entrenched presence of the Mandalorian splinter group known as the Death Watch. After establishing an outpost, Wolffe dispatched a squad of his troops to eliminate the remaining battle droids at the frigate's crash site, though intelligence was soon uncovered that the Death Watch had set up several training camps on Carlac. Upon learning of the Republic's arrival, the Death Watch leader, Pre Vizsla, took a native village hostage, threatening to raze the entire encampment to the ground if Wolffe and his men did not withdraw from Carlac immediately. Because his troops were already spread thin, Wolffe sent a Jedi Knight to destroy the training camps and free the village from Vizsla's grip. The Jedi targeted the enemy sites, in part thwarting the Death Watch's control of Carlac.[36]
The hunt for Ahsoka Tano
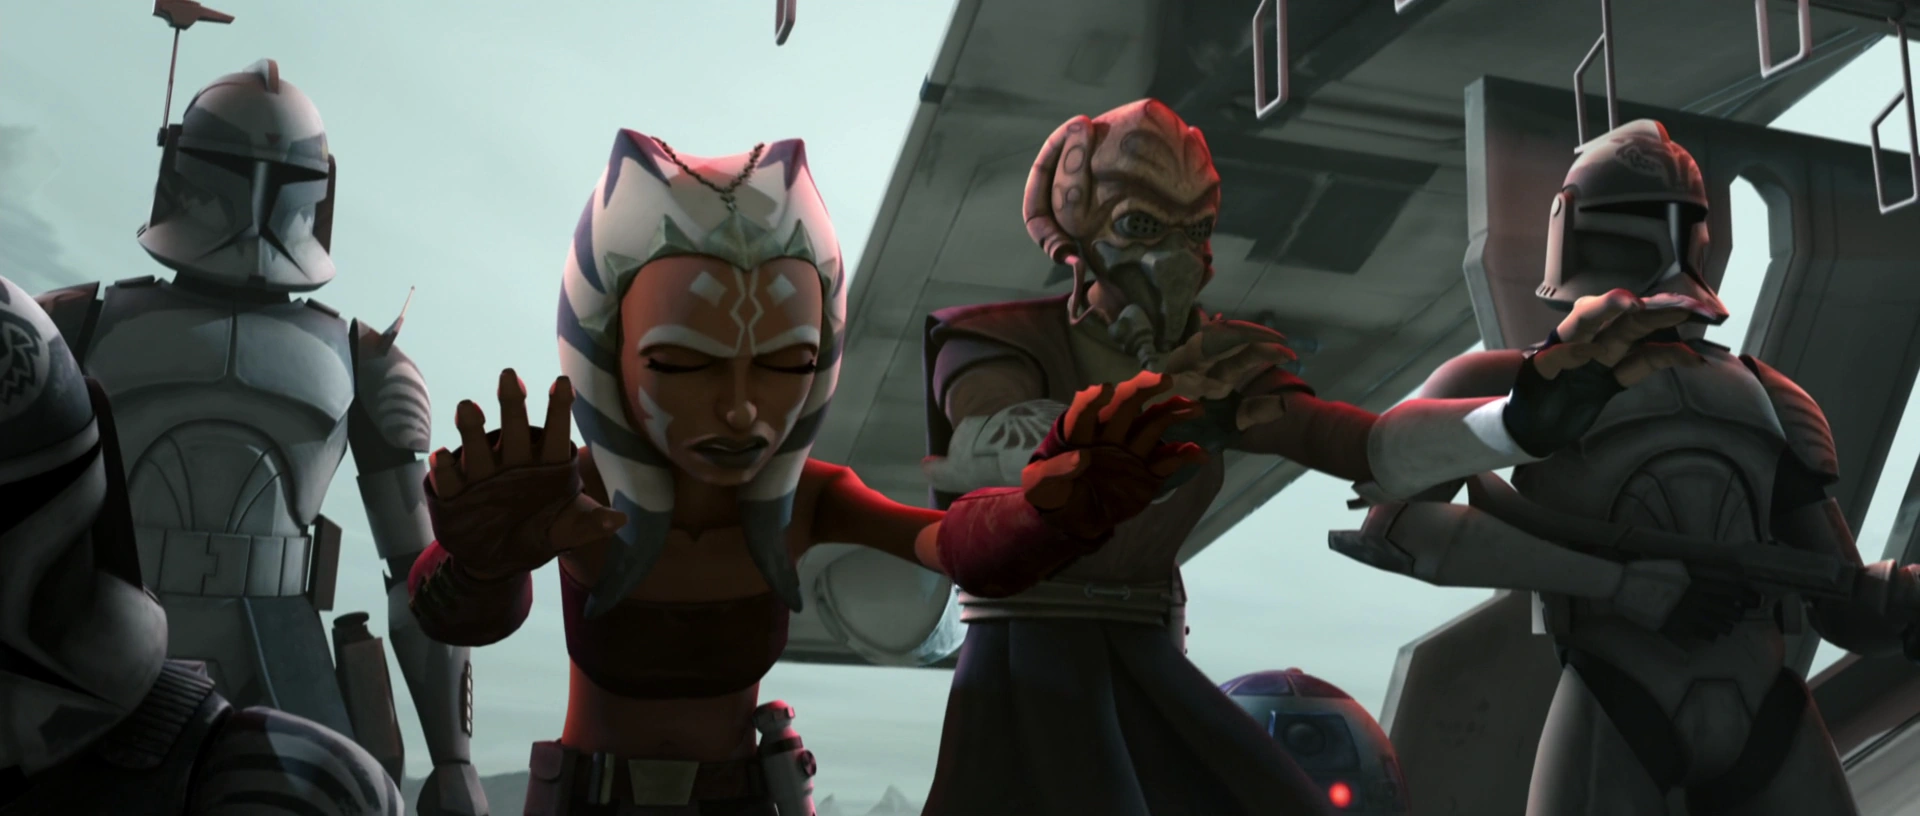
- "We're taking you in now, Commander."
"That's not going to happen, trust me. Now, I'm not going to hurt any of you… We're not going to hurt any of you, but you're not taking me in."
"Commander, we are taking you in." - ―Wolffe and Ahsoka Tano, the latter refusing to be arrested alongside Asajj Ventress
In 20 BBY,[37] Wolffe was invited to attend the Republic strategy conference on the Valor space station in orbit of Carida, alongside several other clone commanders, including CC-8826 and CC-2224, nicknamed "Neyo" and "Cody," respectively. Anakin Skywalker, Obi-Wan Kenobi, Mace Windu, and other Republic naval officers were also in attendance. Just as the meeting was about to start, the Separatists attempted to sabotage the conference by ramming the Valor station with[38] the Star Destroyer Renown,[39] which had been laden with Rhydonium ore explosives, but the intervention of Colonel Meebur Gascon's D-Squad saved Wolffe and his comrades, as the astromech R2-D2 detonated the explosives before the Renown crashed into the Valor.[38]

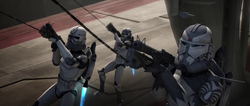
Wolffe and his Coruscant Guard troopers corner Tano and Ventress on Level 1312.
In 19.1 BBY, the final month of the war,[40] Ahsoka Tano was framed for the murder of Letta Turmond,[41] the orchestrator of a bombing at the Jedi Temple.[42] Tano escaped from Republic Military custody at the Republic military base on Coruscant, venturing into the Coruscant underworld to search for a way to clear her name. Believing that Tano was responsible for Turmond's murder, the Jedi High Council subsequently assigned Koon and Skywalker to track down the fugitive Padawan, with Wolffe and Captain Rex bringing along clone contingents from the Grand Army's Coruscant Guard and 501st Legion, respectively. Deploying on separate Republic police gunships, Koon's and Skywalker's search teams descended into the ventilation shaft portal to the underworld, first heading to Level 1312 to follow a lead from the lower-level police.[43] Upon reaching Level 1313's terminal 24,[44] Wolffe and his comrades spotted Tano absconding with Separatist agent–turned–bounty hunter Asajj Ventress. Tano and Ventress activated the terminal gate's ray shield, thwarting direct pursuit and leading Skywalker to dispatch a group of probe droids after the two fugitives. Wolffe and his team of Coruscant Guard shock troopers then disembarked from the police gunship to monitor the probe droids' on-site findings.[43]
Before long, Wolffe learned from one of the probe droids that Tano had been glimpsed further down on Level 1312, and he immediately took his troopers to apprehend them. Upon being cornered and held at blaster-point by Wolffe's men, Tano attempted to order them to back down, but Wolffe refused to let her escape. A brawl ensued, with Ventress activating her lightsabers and cutting through the clone soldiers' blasters. Tano also joined the fight, making sure that she and her criminal accomplice did not harm the troopers beyond rendering them unconscious. Wolffe grappled with Ventress, grabbing her from behind and lifting her off her feet, but she broke free of his grasp before knocking him into a pillar. Winded like the rest of his men, Wolffe was unable to prevent the pair of fugitives from escaping, though he notified Koon that Ventress had been involved with Tano's getaway.[43]
Wolffe and his team caught up with Tano at an abandoned munitions warehouse on Level 1315, finding her in a lower storage room. Although Tano pleaded with Wolffe to let her explain, he stunned her unconscious before she could utter another word, just as Koon and Skywalker arrived on the scene. To Skywalker's alarm, Wolffe's inspection of the crates revealed that they contained nano-droid explosives, of the same model that had been used to bomb the Jedi Temple. Wolffe and Rex brought the still-stunned Tano onto one of the police gunships with Koon and Skywalker, who reported to Masters Yoda and Mace Windu during the flight back to the Jedi Temple.[43] With the evidence stacked against her, Tano was expelled from the Jedi Order and put to trial for her alleged part in the bombing of the Temple. Though it was discovered that fellow Jedi Barriss Offee was the true culprit, having worked with Turmond and then framed Tano for her crimes, Tano chose not to rejoin the Order when the High Council offered her readmittance.[45]
Discovery on the Oba Diah moon
- "The hull shows substantial scoring and wear. Whenever it crashed, it wasn't recently. General Plo, the scans check out. It's a T-6 shuttle, all right, serial number 775519."
"I want the entire area cleared. We're taking everything back to Coruscant."
"Everything?"
"Everything!" - ―Wolffe and Plo Koon, as the latter comes across Sifo-Dyas's lightsaber in the wreckage of the shuttle

Koon and Wolffe examine the wreckage of Sifo-Dyas's T-6 shuttle on the Oba Diah moon.
Later in the war, the Jedi Temple received a distress signal emanating from a ship that was last recorded to be in the possession of the late Jedi Master Sifo-Dyas, who had gone missing over a decade prior. Wolffe and the 104th Battalion accompanied Koon aboard a Star Destroyer to investigate the signal's origin:[46] a desert moon of the planet Oba Diah.[47] After being outfitted with sand-proof gear, Wolffe and his fellow 104th troopers proceeded to the moon's surface with a number of AT-TE walkers and HAVw A6 Juggernauts. While Comet and other troopers embarked into the rising sandstorm, Wolffe and Koon remained inside one of the Juggernauts, monitoring their troops' findings. Though Comet voiced skepticism after three failed scans that their purported ship was on the moon, Wolffe asserted that their information pinpointed it was nearby. Presently, a clone trooper who was monitoring their Juggernaut's scanners verified Wolffe's claim, showing Wolffe and Koon a faint trace of a crash site just up ahead of their search party. Koon verified the discovery and moved in with Wolffe for a closer look.[46]
As Comet issued the order to halt all vehicles, Wolffe and Koon entered the churning sands outside and found the crash site. They entered the wreckage of the ship: a T-6 shuttle, with Wolffe identifying its serial number as 775519. He also noted the substantial scoring along the shuttle's hull, theorizing that the ship must have crashed on the moon a long time ago. When Koon came across Sifo-Dyas's lightsaber buried in some sand in the cockpit, he ordered Wolffe and their team to excavate the entire wreckage for transport back to Coruscant. Upon receiving Koon's initial report of the discovery, the Jedi High Council reopened the investigation into the death of Sifo-Dyas, who—as the Kaminoans had revealed to Obi-Wan Kenobi, just prior to the Battle of Geonosis—was responsible for commissioning the creation of the clone troopers.[46]
Personality and traits
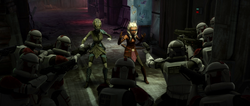
- "W-we surrender! Tell her we surrender!"
"Tell her yourself, sir." - ―Kendal Ozzel and Wolffe, on the approaching Asajj Ventress
A veteran of the Clone Wars,[6] CC-3636 was a practical strategist[8][15] and harbored a natural ability for problem-solving and strategy.[6] A seasoned trooper[48] and a brilliant leader,[49] he used his extensive battlefield experience to lead his men through the challenges of combat.[48] He was perceptive, as displayed by his observation of Eeth Koth's hidden hand signals over a holotransmission.[21] As a man of action, he was tireless in his efforts against the Separatists and took his cue from Jedi General Plo Koon's ferocity in battle, as did the rest of the Wolfpack.[2] Serving with Koon throughout the war, Wolffe became acquainted with the Jedi Master,[8] whose curious manner drew the clone's interest.[5] Wolffe's manner was such that Koon came to place a great amount of trust in his instincts and abilities.[1] He earned his men's trust to the point that they were willing to do anything under his leadership.[49] Wolffe witnessed and endured some of the worst experiences that the war had to offer, particularly the loss of his entire Wolfpack command during the Battle of Abregado.[1] He was frustrated when he was unable to assist his comrades Sinker and Boost in helping Koon confront the pod hunters, as he lacked the proper space-proof equipment due to his out-of-armor rotation.[2] Even when injured, Wolffe retained his perception; when the lights in the Twilight's cargo hold went out, he deduced that the power had been shut down and was determined to reach the freighter's bridge in spite of his condition. He was also grateful to Skywalker and Tano for rescuing him and his squad.[8] The experienced ultimately hardened him, making him into something of a curmudgeon.[11]
Wolffe worked closely on the battlefield with his Jedi General, Plo Koon, during the war.
Despite the losses at Abregado, Wolffe fought on under Koon's command, proudly brandishing his battle scars and inspiring loyalty among his men.[1] In honor of his deceased comrades, he had his unit's original colors changed to remember the men who perished at Abregado.[10] In several missions, Wolffe worked closely with Koon's fleet officer, Admiral Coburn, to coordinate assignments for maximum effectiveness on the battiefield.[34] During the Battle of Khorm, Wolffe's dedication and loyalty to the Jedi often put him at odds with the ambitious Major Kendal Ozzel, who—unlike Wolffe—operated separately from the Jedi and disobeyed their orders to promote his own reputation. While under interrogation by Asajj Ventress, Wolffe told Ozzel not to reveal the Jedi's whereabouts; however, Ozzel betrayed the Jedi's mission to the enemy commander to protect his own life.[5] Wolffe proved to be more focused than Ozzel, taking command and protecting Ozzel when the major himself panicked.[14][15] Though Wolffe often scorned Ozzel and his frequent faltering,[14] he followed the chain of command and obeyed the major's orders.[15] He opted not to take credit for the successful defense of the Republic base when Ozzel—who had, in fact, done nothing but panic—claimed it for himself.[14]
Wolffe favored military service over more tedious assignments, and his patience was tested during the supply mission to Aleen by C-3PO, whose overly loquacious manner irked him. Although he recognized the importance of delivering relief supplies to the needy Aleena, Wolffe was anxious to return to the front lines with Koon. He disregarded the Aleena's eccentric customs, including their frequent ceremonial chants, and was eager to end his stay on Aleen as soon as possible. Strictly adhering to his orders, he could not understand King Manchucho's odd calls for peace with Aleena's underworld people and dismissed such entreaties as nonsense. In the absence of C-3PO's translation services, Wolffe did not pay much attention to Manchucho's concerns. Following their departure from Aleen, Wolffe was determined to offload C-3PO as soon as the opportunity presented itself, a desire that his men shared.[29]
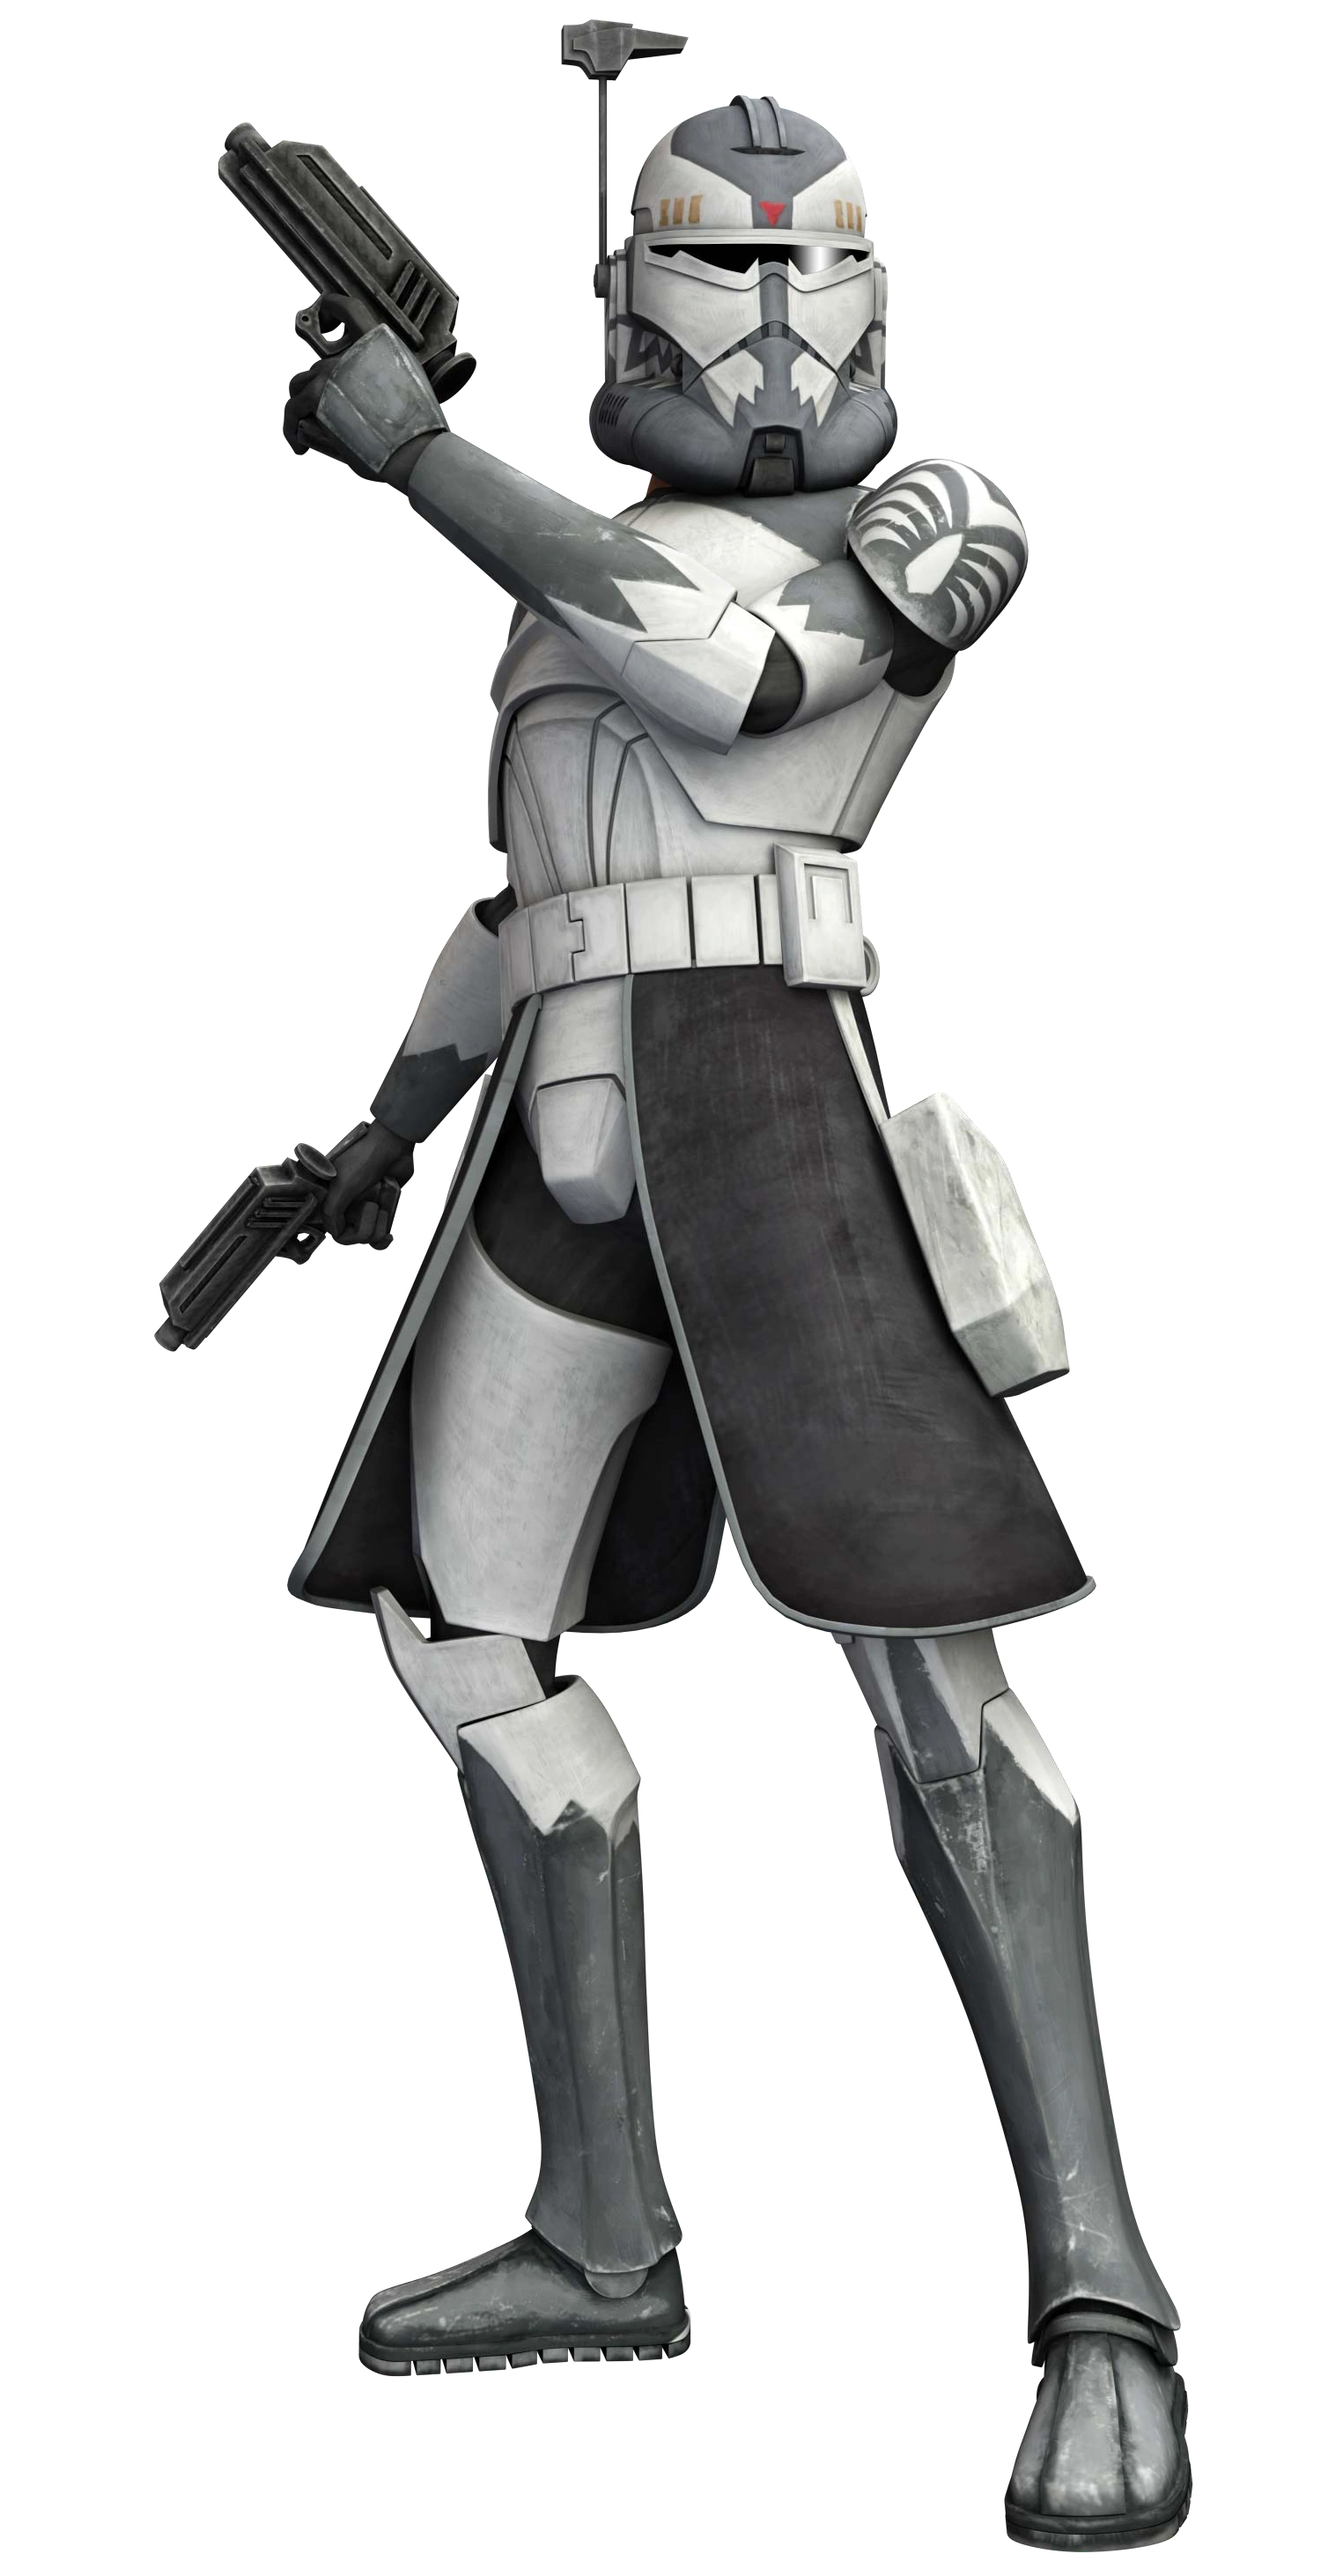
A Human clone, Wolffe spoke Galactic Basic Standard,[8] and he was talented in military strategy and leadership skills. He was trained in combat[2]—including blaster combat—and was skilled in the use of a jetpack.[24] He stood 1.83 meters tall[1] and had tan-colored skin, black hair, and brown eyes,[8] the right one of which[2] was gouged out by Ventress during the Battle of Khorm.[15] Besides bearing a facial scar from the injury, Wolffe was forced to wear a silver cybernetic replacement for his lost eye.[10]
Equipment

Wolffe's fourth armor set was his upgrade to Phase II.
Wolffe's battle-worn[2] Phase I clone trooper armor initially sported maroon colors and the wolf design of the Wolfpack. However, after the loss of the Wolfpack at the Battle of Abregado, he had his armor changed to honor his fallen comrades.[10] This new version displayed dark blue colors and a helmet with a redesigned wolf design[12] and unit markings,[50] and his own armor was specifically equipped with a scope, a silver visor,[12] and a traditional kama half-kilt to repel shrapnel.[50] Much of his armor was painted with dark blue stripes that matched the wolf symbol on his helmet. His right shoulder plate was also decorated with a wolf insignia, and his left plate sported a striped symbol.[12] On Khorm, Wolffe donned a suit of blue-marked cold assault armor,[5] complete with a thermal suit and a rebreather hood,[51] to protect himself from the planet's cold climate.[5]
Following Wolffe's post–Battle of Abregado adjustments, the Wolfpack's armor was modified a second time prior to the Second Battle of Felucia. The unit adopted black markings instead of their dark blue ones, and Wolffe redesigned his helmet with plainer stripes in place of the wolf symbol.[24] He developed a set of cold assault armor based on his new black-accented armor[52] and utilized it on Iceberg III.[3] Prior to the relief mission to Aleen, Wolffe had the 104th Battalion's armor updated to the Phase II set of clone trooper armor.[29] His custom suit, which maintained his intimidating look, included an upgraded helmet decorated once more with his wolf design.[53] He donned a suit of heavy sand-proof armor for the assignment on Oba Diah's desert moon.[46]
In combat, Wolffe mainly utilized DC-17 hand blasters[24] and thermal detonators as needed,[1] though he also used a DC-15S[2] on Khorm.[5] In addition, he was capable in the use of a jetpack and used one alongside his troops during the Second Battle of Felucia.[24]
Behind the scenes
Portrayal
The character of Wolffe was created for the Star Wars: The Clone Wars television series. First given a short entry in the 2008 Star Wars: The Clone Wars: The Visual Guide publication,[6] Wolffe made his debut in the episode "Rising Malevolence," which aired in the series' October 2, 2008 premiere. Like all clone troopers throughout the series, he was voiced by Dee Bradley Baker.[9] In the episode's script, Wolffe was originally not named; his character's name was developed in subsequent source material.[54] Wolffe was later given a role in the Summer 2009 In Service of the Republic story arc of the Star Wars: The Clone Wars comic series, published by Dark Horse Comics. His clone designation was revealed in the first installment of the story arc.[5] "Wolffe" is a cheat code for the online game Live Fire that gives the player a 60-100% accuracy rating. The code is second most powerful in the game, bested only by "Droidbait," which boosts the rating to 80-100%.[55]
Wolffe's first appearance in the television series with his cybernetic eye was in the episode "Holocron Heist,"[1] which aired in October 2009 as the premiere for the series' second season."[56] He was additionally given brief roles in the Spring 2010 episodes "Grievous Intrigue"[57] and "R2 Come Home,"[58] and he was later given entries in the Star Wars: The Clone Wars Character Encyclopedia[2] and the Star Wars: The Clone Wars: New Battlefronts: The Visual Guide publications.[50] His blue-marked armor in the second season was used as the basis for his LEGO minifigure, which was released in 2011.[59]
In Spring 2011, Wolffe continued his recurring role in the television series with appearances in the third season episodes "Citadel Rescue"[60] and "Padawan Lost."[24] After being featured in the "Mission on Iceberg Three" campaign of the Star Wars: Clone Wars Adventures video game,[3] he was debuted in Phase II clone trooper armor in the fourth season episodes "Mercy Mission"[30] and "Nomad Droids,"[61] which were released in October 2011.[30][61] Series Supervising Director Dave Filoni personally designed Wolffe's Phase II armor for the episode, basing his new helmet visor on that of Clone Commander Neyo in the film Star Wars: Episode III Revenge of the Sith.[30] As part of his appearance in the fourth season, Wolffe received an entry in the StarWars.com Encyclopedia.[1] Wolffe was again featured in the fourth season episode "Escape from Kadavo," which aired in January 2012. The episode was part of the television series' adaptation of the Slaves of the Republic story arc from The Clone Wars comic series,[62] which had not originally featured Wolffe.[63] He later appeared in the "Skirmish on Carlac" combat zone in Clone Wars Adventures,[36] as well as the fifth season episodes "Point of No Return" and "To Catch a Jedi" in 2013.[38][43]
In April 2013, following the announcement that the television series would be winding down, a clip featuring Wolffe from an unaired story arc was released through USAToday.com.[64] The scene turned out to be from the episode "The Lost One," which was released in March 2014 on Netflix as part of the series' sixth and final season.[47]
Inconsistencies
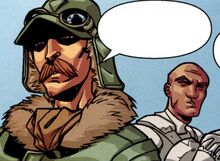
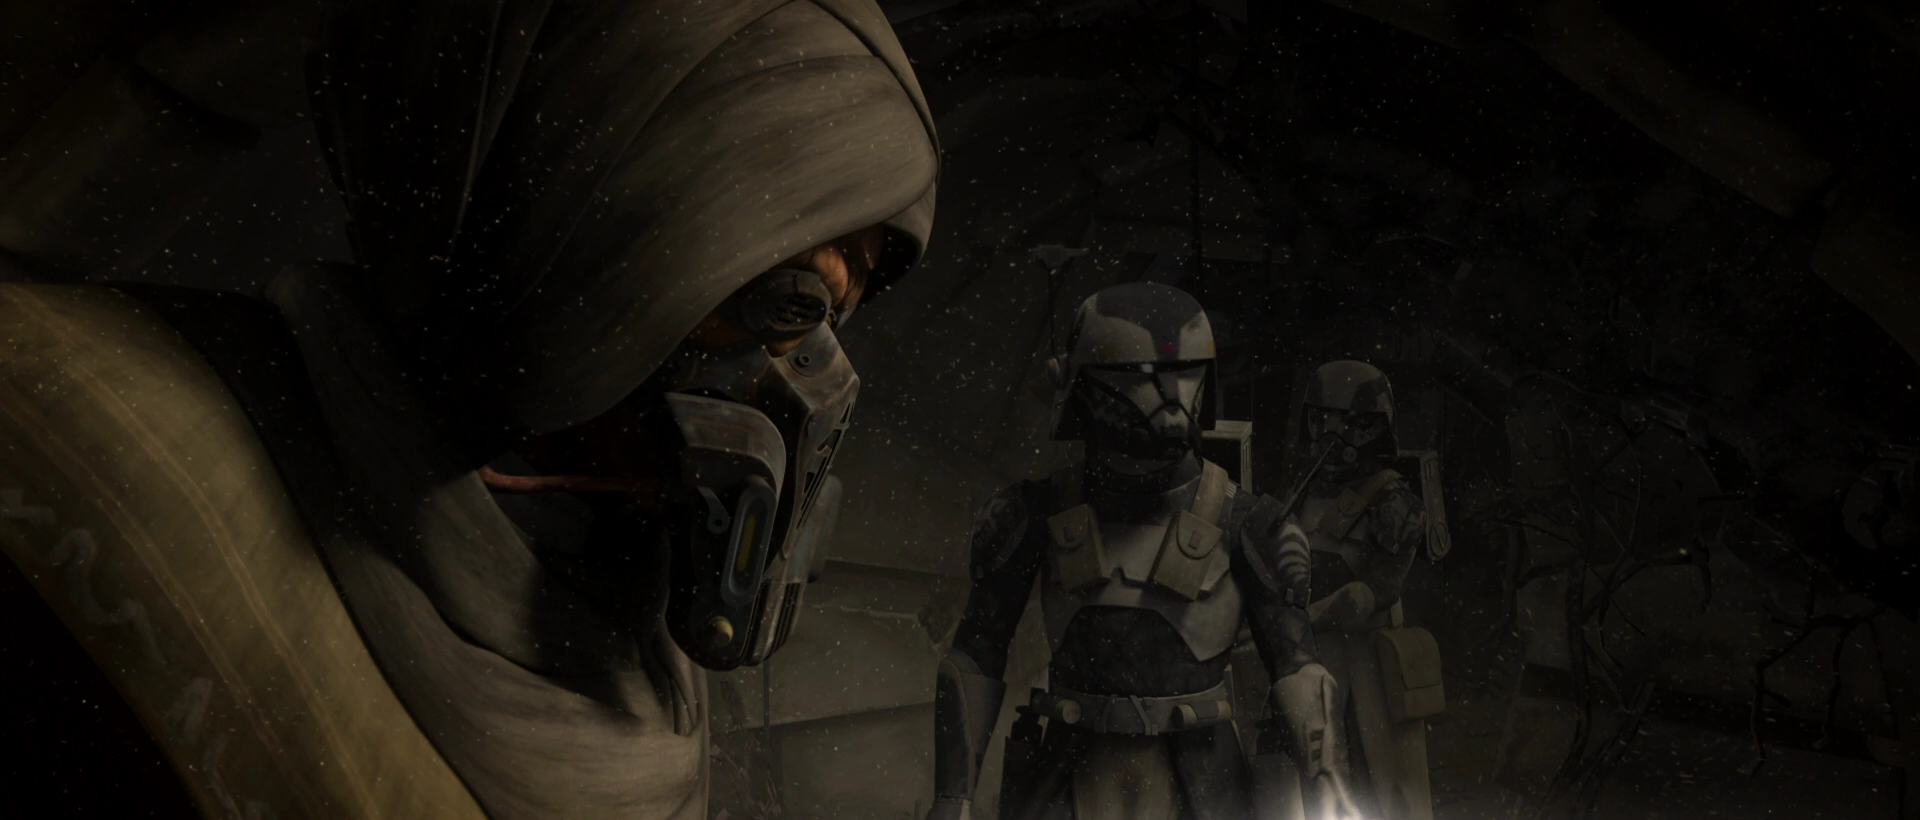
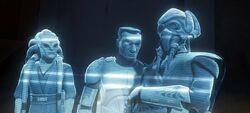
- "How did he lose that eye? He lost it in a fight with Asajj Ventress when she used her lightsaber to cut it right off his head. If it wasn't for Plo Koon and Kit Fisto being nearby, Commander Wolffe might not be with us anymore. So that's a pretty deadly secret that he kinda keeps to himself."
- ―Series Director Dave Filoni clarifies the inconsistency with Wolffe's cybernetic eye

Wolffe's debut with his cybernetic eye in the second season initially caused an inconsistency.
An inconsistency arose between the third issue of In Service of the Republic and Wolffe's appearance in The Clone Wars series' second season. Although the comic book portrayed Wolffe's left eye as being the one gouged out by Asajj Ventress,[15] the episode "Grievous Intrigue" made his right eye the cybernetic one,[21] leaving some question as to whether the cybernetic replacement could be attributed to his injury during the In Service to the Republic issue because of the eye difference. The trade paperback version of In Service of the Republic, released after "Grievous Intrigue," corrected this inconsistency by portraying Wolffe's right eye to be the one that Ventress injured during the Battle of Khorm,[65] and Dave Filoni clarified the canonical correction, verifying that Wolffe's cybernetic eye came from his injury from Ventress[10] despite the eye difference.[15][21]
Wolffe's appearance in 2009's "Holocron Heist" was not confirmed until the publication of his Encyclopedia entry in September 2011.[1] A "Commander Wolffe" card in the Clone Wars Adventures "Card Assault" mini-game incorrectly depicted another Wolfpack trooper instead of Wolffe.[66]
Appearances
Sources
Notes and references
External links
- Template:CWAWiki