mNo edit summary |
mNo edit summary |
||
| (36 intermediate revisions by 21 users not shown) | |||
| Line 1: | Line 1: | ||
| − | {{ |
+ | {{Eras|new|real|title=''{{PAGENAME}}''}} |
| − | {{Eras|new|real}} |
||
{{Youmay|the series|the issue [[Dark Empire 2: Devastator of Worlds]]}} |
{{Youmay|the series|the issue [[Dark Empire 2: Devastator of Worlds]]}} |
||
| + | {{Comic_series |
||
| − | {{Infobox Comic Series |
||
| − | |image=[[File:De2_1.jpg |
+ | |image=[[File:De2_1.jpg]] |
|title=Dark Empire II |
|title=Dark Empire II |
||
|writer=[[Tom Veitch]] |
|writer=[[Tom Veitch]] |
||
|penciller=[[Cam Kennedy]] |
|penciller=[[Cam Kennedy]] |
||
| − | |inker= |
+ | |inker=Cam Kennedy |
|letterer=[[Todd Klein]] |
|letterer=[[Todd Klein]] |
||
| − | |colorist= |
+ | |colorist=Cam Kennedy |
|cover artist=[[Dave Dorman]] |
|cover artist=[[Dave Dorman]] |
||
|editor= |
|editor= |
||
| Line 17: | Line 16: | ||
|issues=6 |
|issues=6 |
||
|era=[[New Republic era]] |
|era=[[New Republic era]] |
||
| − | |timeline=[[10 ABY]] |
+ | |timeline=[[10 ABY]]<ref name="SWTCC">''[[Star Wars: The Comics Companion]]''</ref> |
}} |
}} |
||
| Line 25: | Line 24: | ||
''The [[Galactic Empire|Empire]] in retreat, [[Luke Skywalker]] is on a quest to rebuild the [[Jedi]]. But before he can revive that elite corps of protectors, he must first rebuild himself! He has spent time as the [[Palpatine|Emperor]]'s thrall, and the taint of the [[dark side of the Force|dark side]] still tugs at his subconscious. Can he pull together the Jedi, can he pull himself together, before the [[New Republic]] loses the upper hand, or will the Empire take root once more?'' |
''The [[Galactic Empire|Empire]] in retreat, [[Luke Skywalker]] is on a quest to rebuild the [[Jedi]]. But before he can revive that elite corps of protectors, he must first rebuild himself! He has spent time as the [[Palpatine|Emperor]]'s thrall, and the taint of the [[dark side of the Force|dark side]] still tugs at his subconscious. Can he pull together the Jedi, can he pull himself together, before the [[New Republic]] loses the upper hand, or will the Empire take root once more?'' |
||
| − | == |
+ | ==Opening crawl== |
| + | {{Opening crawl |
||
| ⚫ | With the defeat and "death" of |
||
| ⚫ | |||
| + | |text=Luke Skywalker's bold attempt to learn the secrets of the reborn Emperor Palpatine's power nearly ended in disaster for himself and the Alliance. But now, with the aid of information gleaned from a Jedi Holocron, Skywalker is prepared to search for Jedi who may still survive - and who can aid him in his quest to destroy the Empire once and for all. |
||
| + | |||
| + | But even as hope seems to be rising, the Empire is extending its grasp beyond the boundaries of the Galactic Core...}} |
||
| + | |||
| + | ==Plot Summary== |
||
| ⚫ | With the defeat and "death" of Emperor [[Palpatine]], and with the demise of [[Operation Shadow Hand]], the Empire has retreated and lies quiescent. In this period of relative peace, Luke Skywalker has begun the preliminary operations to restore the [[Jedi Order]]. With the recently redeemed Dark Jedi [[Kam Solusar]], Luke returns to [[Pinnacle Base]]. |
||
[[File:Battle of Balmorra.jpg|thumb|250px|left|Imperial forces land on Balmorra.]] |
[[File:Battle of Balmorra.jpg|thumb|250px|left|Imperial forces land on Balmorra.]] |
||
| − | However, the Empire's new leading general, [[Executor Sedriss]], leads an attack force on [[Balmorra]]. Balmorra had been independent after the [[Battle of Endor]], but following Palpatine's reappearance had become the Empire's main producer of [[AT-ST]]s. Now with the Emperor's apparent death, they rebelled. |
+ | However, the Empire's new leading general, [[Executor (Imperial rank)|Executor]] [[Sedriss QL|Sedriss]], leads an attack force on [[Balmorra]]. Balmorra had been independent after the [[Battle of Endor]], but following Palpatine's reappearance had become the Empire's main producer of [[AT-ST]]s. Now with the Emperor's apparent death, they have rebelled. |
| − | In order to |
+ | In order to salvage Balmorra's factories, Sedriss lands AT-STs, [[stormtrooper]]s and [[Umak Leth]]'s [[SD-9-series battle droid|SD-9]]s on the planet. [[Governor]] [[Beltane]] sends out [[SD-10]]s with all the SD-9s' attack strategies in their databanks. In response, Sedriss unleashes [[Shadow Droid]]s, starfighters with the brains of fallen Imperial aces empowered by the [[Dark Side of the Force]]. After the SD-10s are destroyed, Beltane sends out his hidden project, the [[X-1 Viper Automadon]]: droids with the molecular shield capable of absorbing enemy fire and redirecting it through the droid's [[turbolaser]]s. |
| − | At Pinnacle Base, |
+ | At Pinnacle Base, [[Mon Mothma]] holds a meeting and reveals that Beltane has arranged for the [[Alliance to Restore the Republic|Rebel Alliance]] to intercept the shipment of his droids en route to [[Byss]]. [[Wedge]] suggests that the shipment go through to Byss, but controlled by Rebels, while Luke advises that the droids be used to liberate worlds controlled by the Empire. Everyone decides to go with Wedge's plan. Mothma tells Luke to focus on restoring the Jedi Knights while the Alliance deals with the Empire. Luke's [[Holocron]] reveals the location of [[Ossus]], a world where Jedi artifacts may be found. [[Han Solo|Solo]] and [[Leia Organa Solo|Leia]] depart for [[Nar Shaddaa]], where they hope to track down [[Vima-Da-Boda]] and draw upon her ancient knowledge. |
[[File:Drakulalpatine.jpg|thumb|right|Palpatine reborn again.]] |
[[File:Drakulalpatine.jpg|thumb|right|Palpatine reborn again.]] |
||
| − | On Byss, the Executor Sedriss |
+ | On Byss, the Executor Sedriss discovers that Dark Side adepts [[Nefta]] and [[Sa-Di]] are killing the remaining clones of Palpatine and plan to seize control of the Empire for themselves. Slaying them for their [[treason]], Sedriss discovers that Palpatine is already reborn, exceeding everyone's expectations. Upon his return, the Emperor ordered Operation Shadow Hand re-commenced. |
| − | On Nar Shaddaa, Salla Zend, Han's former girlfriend, managed to guide the ''[[Millennium Falcon]]'' through the Duro sector in order to escape |
+ | On Nar Shaddaa, Salla Zend, Han's former girlfriend, managed to guide the ''[[Millennium Falcon]]'' through the Duro sector in order to escape an [[Imperial Star Destroyer]]. Meanwhile, [[Boba Fett]] escapes from two [[Dark Side Elite]], [[Zasm Katth]] and [[Baddon Fass]]. As the ''Falcon'' arrives, [[Shug Ninx|Shug]] and Salla's hidden repair center, ran by [[Shug Ninx]], is overrun by Stormtroopers. |
| − | After an intense fight, one of Shug's 'prized cruisers' was destroyed. With only a space truck left, Salla and Shrug plan to head off to Byss to recover the ''[[Starlight Intruder]]''. After being confronted by an array of bounty hunters, including a clan of [[Gank]] killers, and the news that the [[Hutt]] clans had doubled the bounty on them, they had little choice but to head into the lowest levels of the city where Vima-Da-Boda lived. When they arrive back at the garage, they discover a brigade of stormtroopers on the ''Falcon'' and a droid message telling them Salla and Shrug have "left the moon for good". Using the garage's secret access chute, the ''Falcon'' flies down to the heart of the city, unfortunately where Boba Fett had patiently waited for the ''[[Millennium Falcon]]'' to take off. In the ensuing battle, Han managed to shatter a stabilizer on ''[[Slave I]]'', causing Fett to veer out of control. |
+ | After an intense fight, one of Shug's 'prized cruisers' was destroyed. With only a [[Salvager Three|space truck]] left, Salla and Shrug plan to head off to Byss to recover the ''[[Starlight Intruder]]''. After being confronted by an array of bounty hunters, including a clan of [[Gank]] killers, and the news that the [[Hutt]] clans had doubled the bounty on them, they had little choice but to head into the lowest levels of the city where Vima-Da-Boda lived. When they arrive back at the garage, they discover a brigade of stormtroopers on the ''Falcon'' and a droid message telling them Salla and Shrug have "left the moon for good". Using the garage's secret access chute, the ''Falcon'' flies down to the heart of the city, unfortunately where Boba Fett had patiently waited for the ''[[Millennium Falcon]]'' to take off. In the ensuing battle, Han managed to shatter a stabilizer on ''[[Slave I]]'', causing Fett to veer out of control. |
After an hour and seven wrong turns, their second attempt at penetrating the depths had greater luck; they had just found Vima-Da-Boda when Fett attacked again. His assault was defeated when [[Chewbacca]] ignited his jet-pack (a repeat of Fett's earlier undoing), and the Falcon soon took off again. However, their immediate departure was sabotaged by [[Mako Spince]] who from his perch in the Traffic Control spire forwarded their location to the waiting darksiders aboard the Star Destroyer. The Destroyer locked on with a tractor beam, and the ''Millennium Falcon'' was about to be caught in its firm grip. Taunted by Spince, Han figured out a clever dodge: he piloted the Falcon under the spire and the beams inexorably ripped off the spire and pulled it into the Star Destroyer itself, killing Spince and destroying the engines and engineers of the ISD. Lacking engineers, and in a decaying orbit, the Destroyer plunged into the surface of Nar Shaddaa, killing all hands aboard, as well as millions of Nar Shaddaa residents. |
After an hour and seven wrong turns, their second attempt at penetrating the depths had greater luck; they had just found Vima-Da-Boda when Fett attacked again. His assault was defeated when [[Chewbacca]] ignited his jet-pack (a repeat of Fett's earlier undoing), and the Falcon soon took off again. However, their immediate departure was sabotaged by [[Mako Spince]] who from his perch in the Traffic Control spire forwarded their location to the waiting darksiders aboard the Star Destroyer. The Destroyer locked on with a tractor beam, and the ''Millennium Falcon'' was about to be caught in its firm grip. Taunted by Spince, Han figured out a clever dodge: he piloted the Falcon under the spire and the beams inexorably ripped off the spire and pulled it into the Star Destroyer itself, killing Spince and destroying the engines and engineers of the ISD. Lacking engineers, and in a decaying orbit, the Destroyer plunged into the surface of Nar Shaddaa, killing all hands aboard, as well as millions of Nar Shaddaa residents. |
||
| Line 67: | Line 73: | ||
[[File:AurilSystemNespisVIIIBase.jpg|thumb|250px|right|The space stations above [[Nespis VIII]].]] |
[[File:AurilSystemNespisVIIIBase.jpg|thumb|250px|right|The space stations above [[Nespis VIII]].]] |
||
| − | Meanwhile, three other darksiders were kidnapping Leia's twins. Luckily, Brand, Kam and Rayf were on the scene and engaged them. After the fighting was over, Jem joined the Force as Rayf cried over her lost form. Suddenly, a bunch of [[AT- |
+ | Meanwhile, three other darksiders were kidnapping Leia's twins. Luckily, Brand, Kam and Rayf were on the scene and engaged them. After the fighting was over, Jem joined the Force as Rayf cried over her lost form. Suddenly, a bunch of [[All Terrain Armored Transport|AT-ATs]] attacked and began destroying the settlement. Thankfully, Han arrived with Salla, Shug and an X-wing battle group based in a nearby system. Destroying the AT-ATs and evacuating the village, the four freighters and three [[X-wings]] jumped into hyperspace. The Rebels had relocated to the [[Space City|space stations above Nespis VIII]], where Luke and Kam have their confrontation and find out that the Alliance evacuated Pinnacle Base before it was destroyed. There [[Anakin Solo]] is born and the Alliance plots to bring about the final destruction of the Empire. |
==Behind the scenes== |
==Behind the scenes== |
||
| Line 73: | Line 79: | ||
==Issues== |
==Issues== |
||
| + | {| {{Prettytable}} |
||
| ⚫ | |||
| + | |style="background-color:#FFBB60;" width="33%" align="center"|Collected (TPB) issue |
||
| − | *''[[Dark Empire II 2: Duel on Nar Shaddaa]]'' |
||
| + | |style="background-color:#40CC40;" width="33%" align="center"|Released issue |
||
| − | *''[[Dark Empire II 3: World of the Ancient Sith]]'' |
||
| + | |style="background-color:#FFFF80;" width="33%" align="center"|Future issue |
||
| − | *''[[Dark Empire II 4: Battle on Byss]]'' |
||
| + | |} |
||
| − | *''[[Dark Empire II 5: The Galaxy Weapon]]'' |
||
| + | {| {{Prettytable}} |
||
| − | *''[[Dark Empire II 6: Hand of Darkness]]'' |
||
| + | ! Issue||Title||Publication date||Trade paperback||TPB pub date |
||
| + | |- |
||
| + | |colspan="3"|''[[Dark Empire II|Dark Empire II]]''||rowspan="7"|''[[Dark Empire II (TPB)|Dark Empire II]]'' <br />''[[Dark Empire II Second Edition|Dark Empire II Second Edition]]'' <br />''[[Star Wars: Dark Empire Trilogy|Dark Empire Trilogy]]''||rowspan="7"|[[September 5]], [[1995]]'' <br />''[[September 13]], [[2006]]'' <br />''[[September 15]], [[2010]] |
||
| + | |- |
||
| + | |style="background-color:#FFBB60;"|1||''[[Dark Empire II 1: Operation Shadow Hand|Dark Empire II 1: Operation Shadow Hand]]''||[[December 20]], [[1994]] |
||
| + | |- |
||
| + | |style="background-color:#FFBB60;"|2||''[[Dark Empire II 2: Duel on Nar Shaddaa|Dark Empire II 2: Duel on Nar Shaddaa]]''||[[January 24]], [[1995]] |
||
| + | |- |
||
| + | |style="background-color:#FFBB60;"|3||''[[Dark Empire II 3: World of the Ancient Sith|Dark Empire II 3: World of the Ancient Sith]]''||[[February 21]], [[1995]] |
||
| + | |- |
||
| + | |style="background-color:#FFBB60;"|4||''[[Dark Empire II 4: Battle on Byss|Dark Empire II 4: Battle on Byss]]''||[[March 21]], [[1995]] |
||
| + | |- |
||
| + | |style="background-color:#FFBB60;"|5||''[[Dark Empire II 5: The Galaxy Weapon|Dark Empire II 5: The Galaxy Weapon]]''||[[April 18]], [[1995]] |
||
| + | |- |
||
| + | |style="background-color:#FFBB60;"|6||''[[Dark Empire II 6: Hand of Darkness|Dark Empire II 6: Hand of Darkness]]''||[[May 23]], [[1995]] |
||
| + | |} |
||
| − | == |
+ | ==Bibliography== |
| − | *''[[ |
+ | *''[[The Secrets of Star Wars: Shadows of the Empire]]'' |
| − | *''[[Dark Empire II Second Edition]]'' |
||
==See also== |
==See also== |
||
*[[Dark Empire II (audio)|''Dark Empire II'' audio drama]] |
*[[Dark Empire II (audio)|''Dark Empire II'' audio drama]] |
||
| ⚫ | |||
| + | |||
| + | ==Notes and references== |
||
| + | {{Reflist}} |
||
| + | |||
| + | {{Template:DE}} |
||
==External links== |
==External links== |
||
| − | *{{ |
+ | *{{WP|Dark Empire II}} |
| + | *{{SWArchive|url=eu/lit/comics/f20000405/index.html|text=The Dark Empire Saga}} |
||
| + | {{Interlang |
||
| ⚫ | |||
| ⚫ | |||
| ⚫ | |||
| + | |ja=ダーク・エンパイアII |
||
| + | |pl=Mroczne Imperium II |
||
| + | |ru=Тёмная империя II |
||
| + | |fi=Dark Empire II |
||
| + | }} |
||
| + | [[Category:Dark Empire| 02]] |
||
| ⚫ | |||
| ⚫ | |||
Revision as of 19:18, 29 January 2015
Warning: This infobox has missing parameters: end date, start date and unrecognized parameters: era
Dark Empire II was a series of comic books written by Tom Veitch and Cam Kennedy, the sequel to Dark Empire. It was originally released by Dark Horse Comics in 1994 and 1995 as a 6-issue monthly series, then in August 1995 as a trade paperback. In 1995, Time Warner Audio Publishing presented an audio dramatization of the comics known as the Dark Empire II audio drama on cassette. Like the old NPR radio dramas, it featured a full cast of actors, parts of John Williams' classic score and authentic stereo sound effects.
Publisher's summary
The Empire in retreat, Luke Skywalker is on a quest to rebuild the Jedi. But before he can revive that elite corps of protectors, he must first rebuild himself! He has spent time as the Emperor's thrall, and the taint of the dark side still tugs at his subconscious. Can he pull together the Jedi, can he pull himself together, before the New Republic loses the upper hand, or will the Empire take root once more?
Opening crawl
| Dark Empire II |
|---|
Plot Summary
With the defeat and "death" of Emperor Palpatine, and with the demise of Operation Shadow Hand, the Empire has retreated and lies quiescent. In this period of relative peace, Luke Skywalker has begun the preliminary operations to restore the Jedi Order. With the recently redeemed Dark Jedi Kam Solusar, Luke returns to Pinnacle Base.

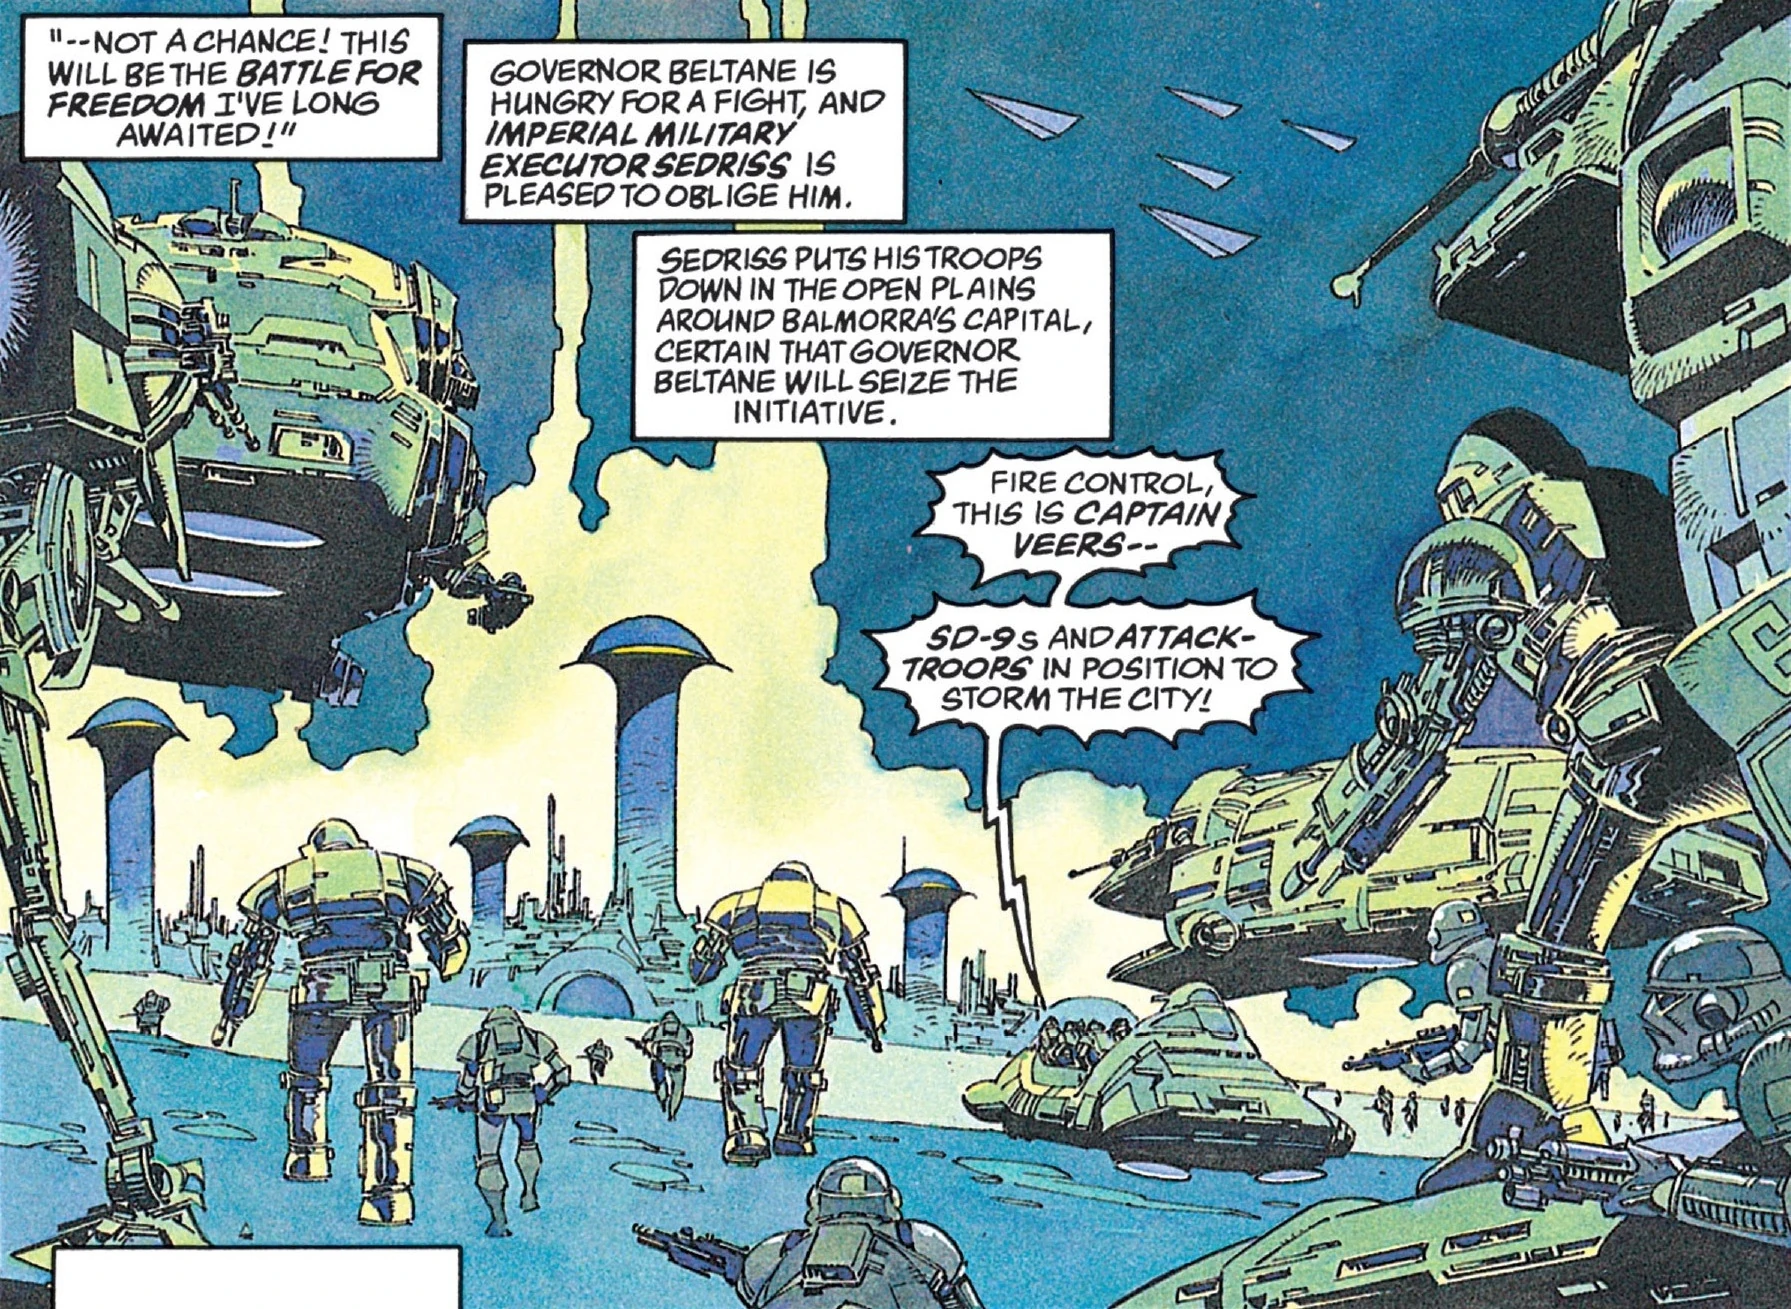
Imperial forces land on Balmorra.
However, the Empire's new leading general, Executor Sedriss, leads an attack force on Balmorra. Balmorra had been independent after the Battle of Endor, but following Palpatine's reappearance had become the Empire's main producer of AT-STs. Now with the Emperor's apparent death, they have rebelled.
In order to salvage Balmorra's factories, Sedriss lands AT-STs, stormtroopers and Umak Leth's SD-9s on the planet. Governor Beltane sends out SD-10s with all the SD-9s' attack strategies in their databanks. In response, Sedriss unleashes Shadow Droids, starfighters with the brains of fallen Imperial aces empowered by the Dark Side of the Force. After the SD-10s are destroyed, Beltane sends out his hidden project, the X-1 Viper Automadon: droids with the molecular shield capable of absorbing enemy fire and redirecting it through the droid's turbolasers.
At Pinnacle Base, Mon Mothma holds a meeting and reveals that Beltane has arranged for the Rebel Alliance to intercept the shipment of his droids en route to Byss. Wedge suggests that the shipment go through to Byss, but controlled by Rebels, while Luke advises that the droids be used to liberate worlds controlled by the Empire. Everyone decides to go with Wedge's plan. Mothma tells Luke to focus on restoring the Jedi Knights while the Alliance deals with the Empire. Luke's Holocron reveals the location of Ossus, a world where Jedi artifacts may be found. Solo and Leia depart for Nar Shaddaa, where they hope to track down Vima-Da-Boda and draw upon her ancient knowledge.

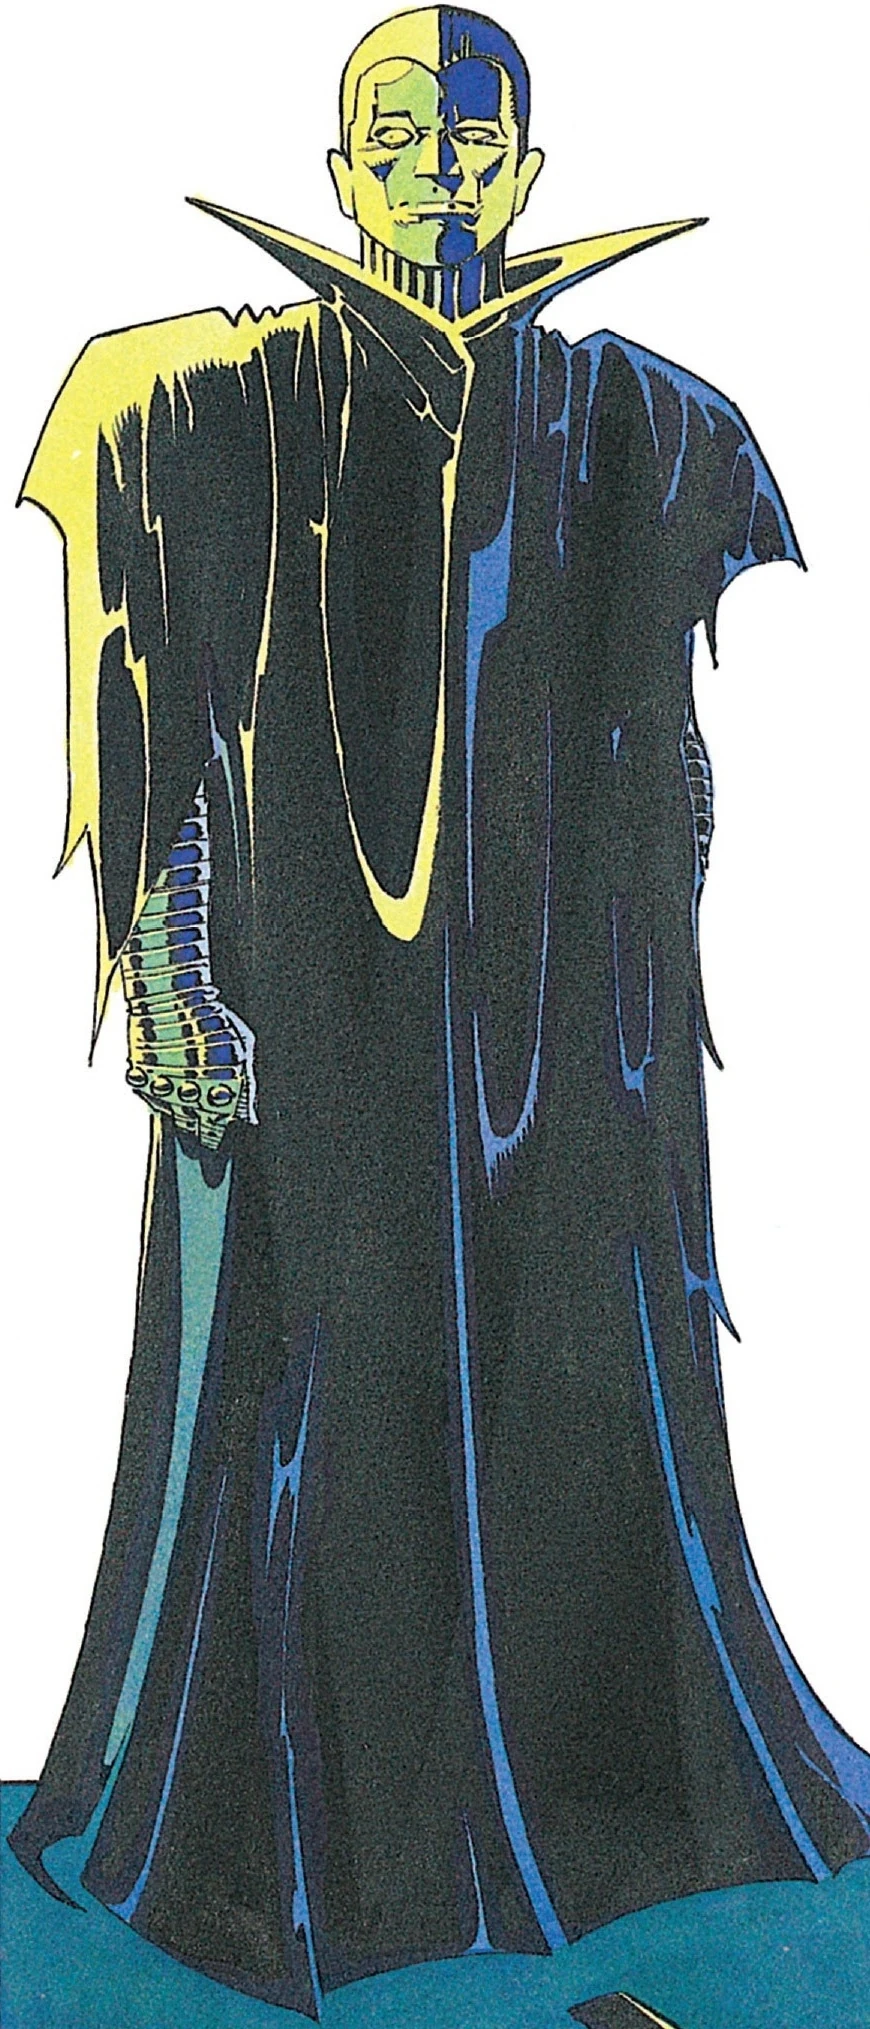
Palpatine reborn again.
On Byss, the Executor Sedriss discovers that Dark Side adepts Nefta and Sa-Di are killing the remaining clones of Palpatine and plan to seize control of the Empire for themselves. Slaying them for their treason, Sedriss discovers that Palpatine is already reborn, exceeding everyone's expectations. Upon his return, the Emperor ordered Operation Shadow Hand re-commenced.
On Nar Shaddaa, Salla Zend, Han's former girlfriend, managed to guide the Millennium Falcon through the Duro sector in order to escape an Imperial Star Destroyer. Meanwhile, Boba Fett escapes from two Dark Side Elite, Zasm Katth and Baddon Fass. As the Falcon arrives, Shug and Salla's hidden repair center, ran by Shug Ninx, is overrun by Stormtroopers.
After an intense fight, one of Shug's 'prized cruisers' was destroyed. With only a space truck left, Salla and Shrug plan to head off to Byss to recover the Starlight Intruder. After being confronted by an array of bounty hunters, including a clan of Gank killers, and the news that the Hutt clans had doubled the bounty on them, they had little choice but to head into the lowest levels of the city where Vima-Da-Boda lived. When they arrive back at the garage, they discover a brigade of stormtroopers on the Falcon and a droid message telling them Salla and Shrug have "left the moon for good". Using the garage's secret access chute, the Falcon flies down to the heart of the city, unfortunately where Boba Fett had patiently waited for the Millennium Falcon to take off. In the ensuing battle, Han managed to shatter a stabilizer on Slave I, causing Fett to veer out of control.
After an hour and seven wrong turns, their second attempt at penetrating the depths had greater luck; they had just found Vima-Da-Boda when Fett attacked again. His assault was defeated when Chewbacca ignited his jet-pack (a repeat of Fett's earlier undoing), and the Falcon soon took off again. However, their immediate departure was sabotaged by Mako Spince who from his perch in the Traffic Control spire forwarded their location to the waiting darksiders aboard the Star Destroyer. The Destroyer locked on with a tractor beam, and the Millennium Falcon was about to be caught in its firm grip. Taunted by Spince, Han figured out a clever dodge: he piloted the Falcon under the spire and the beams inexorably ripped off the spire and pulled it into the Star Destroyer itself, killing Spince and destroying the engines and engineers of the ISD. Lacking engineers, and in a decaying orbit, the Destroyer plunged into the surface of Nar Shaddaa, killing all hands aboard, as well as millions of Nar Shaddaa residents.
Palpatine dispatches Sedriss and Vill Goir to capture Skywalker and Solusar, who had journeyed to Ossus in a search for ancient Jedi artifacts. There, they found two young Force-sensitive children, Rayf and Jem Ysanna, tied to a tree. When Luke sets them free, the youths continue to think that Luke plans to kill them and run to the rest of their tribe. The Ysanna use concussion arrows and the Force in an attempt to defeat the two Jedi, but their inexperienced and clumsy attacks proved easy for the Jedi to hold off. Seeing they've met their match, the Ysanna Chief Okko gives Luke a 'Ysanna bear hug'.
The death of Ood Bnar and Executor Sedriss.
Suddenly, an Imperial Long-range hunter lands and dispatches Stormtroopers led by Goir and Sedriss. Solusar quickly kills Goir, but Sedriss, outmatched by Skywalker, takes Jem hostage, backing against a tree. When he felt her trying to use the Force against him, he plans to make a darksider out of her. To all the combatants' immense surprise, the tree turned out to be a millennium-old Jedi Master named Ood Bnar. Sedriss and Bnar faced off. The two perished in the ensuing explosion of Force energy which Bnar created. However, even in his death, Bnar had protected his cache of ancient lightsabers—a gift to the would-be Jedi and a future Neti in his place. With the aid of the Ysanna, Luke discovered precisely what he had hoped for: an intact Jedi library.
Elsewhere, Lando Calrissian and a team of Rebel commandos were hiding aboard a shipment of War Droids space-bound for Byss. Meanwhile, the Emperor was impressed by the new superweapon at his disposal, the Galaxy Gun. This weapon, kept near the protection of Byss could allow him to obliterate anything in the galaxy. When he received word of Sedriss' and Goir's deaths, he replaced them with Xecr Nist and Tedryn-Sha, empowering the two with the Dark Side of the Force.
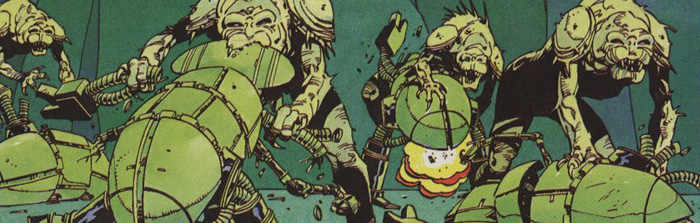
The Rebel attack force destroyed by the Chrysalide Rancors.
However, the War Droid shipment arrives, and the Rebel commandos use them to attack the Emperor's Citadel. Initially, the Rebel assault is successful, as the droids prove to be superior to the Citadel defenses, but their success is halted when Palpatine unleashes the Chrysalides; Rancors mutated by Sith alchemy into crazed, nigh-invulnerable dervishes of destruction. The Rebel force is decimated, and only rescued at the last moment by a force of smugglers led by Salla Zend and Shug Ninx.
They were allowed to escape by the Emperor, who was secretly tracking them, planning to destroy their destination with the now ready Galaxy Gun. Da Soocha V was ultimately destroyed by the weapon. Luke Skywalker and the other Jedi in Luke's Jedi Explorer narrowly avoided being killed, as they would have landed had they not seen the projectile.
The Millennium Falcon equipped with the Lightning gun.
Meanwhile, the Millennium Falcon was still trying to escape the bounty hunters. Unable to effectively fight back, as Boba Fett destroyed one of the Falcon's missile launchers, the Falcon flies through a radioactive gas cloud, stumbling upon the forgotten and nebula-hidden world of Ganath. There, they meet its ruler, a Jedi Knight named Empatojayos Brand. There, they repair the Millennium Falcon, equipping it with an antique weapon called the Lightning gun, hopefully sufficient to defeat Slave I which still lurked outside the cloud.
The Lightning Gun proves to be enough, and they defeat Fett yet again, who tumbled into the gas cloud and faked his death. Han Solo and Princess Leia then take refuge with their infant twins on the planet New Alderaan. There, Luke explains about a great Jedi power known as battle meditation. They plan to regroup with Lando and Wedge...if they were still alive. Han and Chewbacca left the planet to search for them. During the night, Luke had a terrible nightmare that he and Darth Vader were one. Little did he know that robotic bugs were injecting poison into his veins. He woke up and saw two darksiders ready to kill him. Jem Ysanna and Leia defeated the two darksiders but Jem was killed. Vima saw what happened and saved Luke.


The space stations above Nespis VIII.
Meanwhile, three other darksiders were kidnapping Leia's twins. Luckily, Brand, Kam and Rayf were on the scene and engaged them. After the fighting was over, Jem joined the Force as Rayf cried over her lost form. Suddenly, a bunch of AT-ATs attacked and began destroying the settlement. Thankfully, Han arrived with Salla, Shug and an X-wing battle group based in a nearby system. Destroying the AT-ATs and evacuating the village, the four freighters and three X-wings jumped into hyperspace. The Rebels had relocated to the space stations above Nespis VIII, where Luke and Kam have their confrontation and find out that the Alliance evacuated Pinnacle Base before it was destroyed. There Anakin Solo is born and the Alliance plots to bring about the final destruction of the Empire.
Behind the scenes
No mention of the New Republic exists in this entire series, the writers still calling it the Rebel Alliance, even though it disbanded approximately 7 years before.
Issues
| Collected (TPB) issue | Released issue | Future issue |
| Issue | Title | Publication date | Trade paperback | TPB pub date |
|---|---|---|---|---|
| Dark Empire II | Dark Empire II Dark Empire II Second Edition Dark Empire Trilogy |
September 5, 1995 September 13, 2006 September 15, 2010 | ||
| 1 | Dark Empire II 1: Operation Shadow Hand | December 20, 1994 | ||
| 2 | Dark Empire II 2: Duel on Nar Shaddaa | January 24, 1995 | ||
| 3 | Dark Empire II 3: World of the Ancient Sith | February 21, 1995 | ||
| 4 | Dark Empire II 4: Battle on Byss | March 21, 1995 | ||
| 5 | Dark Empire II 5: The Galaxy Weapon | April 18, 1995 | ||
| 6 | Dark Empire II 6: Hand of Darkness | May 23, 1995 | ||
Bibliography
See also
Notes and references
External links
 Dark Empire II on Wikipedia
- The Dark Empire Saga on StarWars.com (content now obsolete; backup link)