Warning: This infobox has missing parameters: prev, date and unrecognized parameters: previous
- "Back in the early days, before the Rebellion formally existed, a lot of guerrillas got their hands dirty doing things no one else wanted to do—or even think about. The Alliance would never have existed without them, Princess. Those men and women were my mentors—I've spent my entire career trying to live up to their example."
- ―Major Lokmarcha to Leia Organa
After the Clone Wars and before the Galactic Civil War, an early rebellion against the Galactic Empire was waged by a collection of rebel cells that ultimately formed the Alliance to Restore the Republic. These militant cells were covertly organized by Senator Bail Organa of Alderaan and quietly given political support in the Imperial Senate by such senators as Mon Mothma of Chandrila and Leia Organa of Alderaan. Major rebel cells included the Massassi Group led by General Jan Dodonna, Phoenix Squadron led by Commander Jun Sato, the Spectres led by Captain Hera Syndulla, and the Partisans led by resistance fighter Saw Gerrera. They were often supported by agents known as Fulcrum, including Commander Ahsoka Tano and former Imperial Security Bureau Agent Kallus.
The early rebellion against the Empire originated in the last days of the Galactic Republic, when Senator Organa and other members of the Galactic Senate convened in secret to discuss ways to counter the executive power amassed by Supreme Chancellor Sheev Palpatine. When the Clone Wars, a pretext for Palpatine to amass power, came to an end in 19 BBY, the Republic was transformed into the Galactic Empire and Organa began organizing armed resistance against the Imperial regime. By 4 BBY, many resistance cells began working together after they aided in the rescue of the captive Jedi Kanan Jarrus over Mustafar. The cells continued amassing strength, though they were dealt a devastating blow by Grand Admiral Thrawn during the battle of Atollon.
The cells, which joined together under the leader of Mon Mothma to form the Rebel Alliance, headquartered themselves on Yavin 4. From there, they continued their early operations against the Empire, but whether to declare open war remained a source of debate amongst the Alliance High Command. The question was settled in 0 BBY during the Battle of Scarif, when Sergeant Jyn Erso and Captain Cassian Andor led a team, Rogue One, to capture the plans to the Empire's planet-killing superweapon, the Death Star. The battle marked the outbreak of the Galactic Civil War, in which the Alliance ultimately triumphed over the Empire and formed the New Republic.
Prelude
- "We cannot let a thousand years of democracy disappear without a fight."
- ―Senator Bail Organa, during the last days of the Galactic Republic
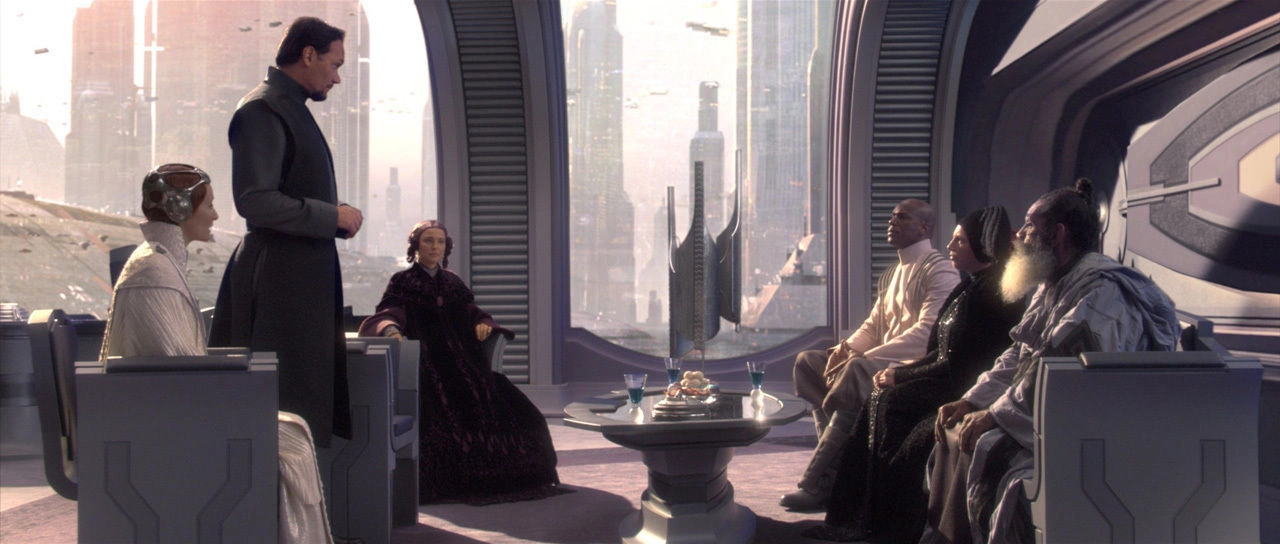
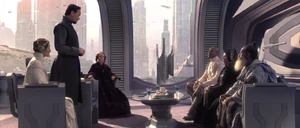
In 22 BBY, in response to the growing threat that the Confederacy of Independent Systems represented to the stability of the Galactic Republic, the Galactic Senate granted Supreme Chancellor Sheev Palpatine emergency executive power to raise the Grand Army of the Republic and wage the Clone Wars against the Separatists.[26] Palpatine, secretly a Sith Lord using the conflict as a pretext for galactic domination, amassed almost total-power during the three-year conflict.[25] Numerous senators, including Bail Organa of Alderaan and Mon Mothma of Chandrila, were alarmed by the increasingly-dictatorial moves of the Supreme Chancellor and began meeting in secret to discuss how to counter centralized power.[27] At the end of the war, in the name of peace and security, Palpatine declared himself Emperor and transformed the Republic into the Galactic Empire.[25]
Senators Bail Organa and Mon Mothma began laying the foundations for rebellion during the Clone Wars.
In the years after the Clone Wars, disconnected resistance movements began to crop up throughout the galaxy to combat the Empire. Berch Teller, a former Republic Intelligence captain and defected member of the Imperial Military, led a cell that stole the Carrion Spike, the personal starship of Moff Wilhuff Tarkin. Their actions targeted operations related to the secret construction of the Death Star, an Imperial superweapon capable of destroying entire planets, and were in response to the Empire's actions during the Antar Atrocity a few years earlier.[1] Another resistance cell, the Free Ryloth movement, was led by General Cham Syndulla on Ryloth. The cell, focused only on liberating Ryloth, attempted to kill Emperor Palpatine and his apprentice, Darth Vader, by attacking the Star Destroyer Perilous.[28] Neither the actions of Teller or Syndulla succeeded in achieving their goals, but they represented some of the first attempts to combat Imperial rule.[1][28]
History
Early campaigns
- "I want to take your recruits and find missions for them. I want to be the one who listens to what people need, who finds out what people can do and then helps them do it."
- ―Ahsoka Tano to Bail Organa


Organa recruited Commander Ahsoka Tano to lead rebel intelligence, and she operated under the codename "Fulcrum."
In the earliest days of the rebellion, Senator Organa worked with members of the Alderaan guard to identify resistance movements across the galaxy and find Jedi who might have survived the fall of the Jedi Order at the end of the war. In 18 BBY, Organa heard of an uprising on Raada in the Outer Rim Territories that was rumored to have been led by a Jedi. Organa discovered that the Jedi in question was Commander Ahsoka Tano, a former Padawan who left the Jedi Order during the war after she was falsely accused of bombing the Jedi Temple.[8]
After locating the former Padawan, Organa asked Tano to join his growing rebel movement, and she agreed on two conditions: that Organa help her discover the mysterious Imperial agents who were hunting Force-sensitive children, and that he help rescue her friends in the Raada resistance. Organa made good on his promise and sent his ship, the Tantive IV, and RZ-1 A-wing interceptors to evacuate her friends on Raada. Tano and the resistance members joined the rebellion, and Tano took on the role of finding missions for recruits. She became the leader of Organa's rebel intelligence and began operating under the codename "Fulcrum."[8]
Various rebel cells joined Organa's rebellion, dubbed as the "Alliance" by Mon Mothma by 5 BBY, over the years. Phoenix Squadron, led by Commander Jun Sato, had a fleet of its own, along with a number of A-wing starfighters.[14] The Massassi Group, led by General Jan Dodonna, also had a large fleet and operated out of the Great Temple on Yavin 4.[5] Saw Gerrera, a resistance fighter trained by Jedi such as Commander Tano during the Clone Wars, led the Partisans in a number of campaigns.[29] The different cells had different ways of conducting themselves. Gerrera, for example, was more militant than other cells and was willing to take any action necessary in order to free the galaxy from the Empire. This put him at odds with leaders such as Organa[30] and Mothma,[2] and allowed members of the Empire to view rebel activities in a negative light. Agent Kallus of the Imperial Security Bureau recalled that one of his earliest missions was an attempt to pacify Onderon but he encountered brutal resistance from Gerrera and his rebels.[31]
Prior to 4 BBY, rebel cells generally did not work together or even know of one another's existence. This protocol ensured that if any cell was compromised by the Empire, the identities and locations of other cells would not be put into jeopardy.[11] Tano coordinated many of the activities and missions of several rebel cells under her Fulcrum codename, providing them with Imperial targets and supply opportunities.[32] One early example of coordinated activities was a joint operation between the Commenor Underground and the Partisans, around 10 BBY.[33]
Rebellion on Lothal
- "Why did you come here?"
"Because of you, and your apprentice. Many in this system and beyond have heard your message. You gave them hope in their darkest times. We didn't want that hope to die." - ―Kanan Jarrus and Ahsoka Tano
By 5 BBY, a growing rebellion on the planet Lothal, a vital production center for the Empire's expansion in the Outer Rim, was led by Captain Hera Syndulla of the Ghost and her Jedi companion Kanan Jarrus. Together, they organized a crew that included the Mandalorian warrior Sabine Wren, Lasat soldier Garazeb Orrelios, and the astromech droid Chopper. The crew grew to include Ezra Bridger, a Force-sensitive youth whom Jarrus took on as his apprentice. Their actions came under increased Imperial scrutiny when they rescued Wookiee slaves from the spice mines of Kessel. They were pursued by Agent Kallus, and the actions of the Jedi drew the attention of the Grand Inquisitor as he hunted down surviving Jedi.[13]


Organa learns about the Ghost crew.
Organa's droids, astromech droid R2-D2 and protocol droid C-3PO, encountered the Ghost crew on Garel as the rebels stole illegal weapons from the Empire. Artoo monitored the activities of these rebels and reported back to Organa, who took an interest in the growing rebellion on Lothal.[23] Captain Syndulla, who became aware of the protocols of the growing rebellion, began receiving missions from Fulcrum. This caused some tension within the Ghost ranks, as Wren questioned who Fulcrum was and wondered why they were taking orders from a mysterious stranger. Per rebel protocol, they remained unaware of the existence of a larger rebellion against the Empire.[32]
The rebellion on Lothal became enough of a problem for the Empire that now-Grand Moff Tarkin, Governor of the Outer Rim, personally traveled to Lothal to oversee an operation aimed at eliminating the Ghost crew once and for all. Tarkin was particularly concerned that the presence of the Jedi could inspire the people of Lothal to put their faith in something other than the strength of the Empire. The rebels undertook an operation to infiltrate the Imperial Communications Center on Lothal and broadcast a message to the planet's citizens to bring the people hope. Tarkin and the Empire were ready for the rebel incursion and captured Jarrus, but the rebels were able to broadcast a message of hope and tell the people of Lothal that the rebels were fighting for the freedom of all the people.[24]


Phoenix Squadron arrives at Mustafar to help the Ghost crew escape from the Empire.
The Ghost crew wanted to find a way to rescue Jarrus, but Tano ordered Syndulla to lay low. In defiance of Fulcrum and Syndulla, Bridger led the other rebels in discovering that Jarrus was being taken to Mustafar, a volcanic planet that Jarrus had once told Syndulla was a place where Jedi were taken to die.[34] The rebels mounted a rescue mission, one in which Jarrus and Bridger faced off against the Grand Inquisitor aboard Tarkin's Star Destroyer, the Sovereign. Jarrus defeated the Grand Inquisitor, who fell to his death during their battle, and the rebels fled from the Sovereign. They were nearly killed before the timely arrival of Tano and Phoenix Squadron, who were inspired by the message the rebels sent to Lothal and surrounding star systems and decided to help rescue Jarrus. The Ghost crew finally met another cell and Tano face to face, and Tano told them that the protocol had changed: the cells were beginning to work together as a rebellion.[11]
The loss at Mustafar, including the destruction of the Sovereign, was an embarrassing defeat for Grand Moff Tarkin. The Emperor dispatched Darth Vader to Lothal to quell the rebel activities, and Vader began working with Agent Kallus, the planetary government, and in consultation with Tarkin. Meanwhile, the Ghost crew joined Phoenix Squadron and the two cells began working together as one. One operation that the Ghost crew undertook as part of Phoenix Squadron was to rescue Minister Maketh Tua of Lothal, who feared for her life after she was unable to deal with the rebel insurgency. This, however, was a trap laid by Vader and Kallus during the Siege of Lothal; Tua was killed as a pawn, and Vader pursued the rebels across Lothal. Vader allowed them to flee in order to discover the location of Phoenix Squadron, and he single-handedly attacked the fleet using a TIE Advanced x1 starfighter. During the battle, in which Phoenix Squadron escaped despite losing its command ship, Vader discovered that Tano was still alive. This was the first encounter between Vader, who trained Tano as his Padawan when he was known as Jedi Knight Anakin Skywalker, and his former apprentice since the fall of the Republic. Vader and the Emperor both believed that they could use Tano to find other surviving Jedi.[14]
With Lothal under siege, the Ghost crew decided that, for the time being, they would have to leave Lothal. Their activities had increased the Imperial occupation on the planet, and the Empire knew that Lothal was important enough to them that it could be used as bait to lure them and the planet's citizens into dangerous traps. The crew was unwilling to subject Lothal to that type of treatment.[14]
Gathering forces
Captain Rex joined the rebellion to offer his tactical knowledge and help find bases.
In the wake of Vader's attack against their fleet, Phoenix Squadron set out to locate new bases for the rebel cause. Tano sent the Ghost crew to make contact with Clone Captain Rex, an old friend whom she spent years fighting alongside during the Clone Wars. The rebels traveled to the planet Seelos where they made contact with the former clone trooper, along with Clone Commanders Gregor and Wolffe.[35] The Empire discovered their location and Agent Kallus led a mission to destroy the clones and the rebels, but they were able to work together to fend of the Imperial assault. In the battle's aftermath, Rex agreed to join Phoenix Squadron and help the rebels find a base and offer his tactical knowledge and experience.[36] Using Rex's information, the rebels gained access to a list of abandoned Republic military bases and facilities. During a mission to salvage medical supplies from an abandoned Republic station, three of the Ghost rebels—Bridger, Wren, and Orrelios—were confronted by two Inquisitors, the Seventh Sister and the Fifth Brother, who were tasked by Darth Vader with destroying the Jedi and locating Tano's whereabouts. The rebels were able to escape, but the Inquisitors continued their search.[37]
During the Empire's blockade of Ibaar, Phoenix Squadron attempted to deliver food supplies. However, they were unable to break through ISB agent Kallus's blockade line. After their first attempt, Captain Rex suggested that they should approach Mon Calamari ship builder Quarrie and use his prototype blockade buster to break through the blockade. Captain Syndulla was able to convince Quarrie to give them the Blade wing prototype. With it Syndulla was able to break through the blockade and Phoenix Squadron was able to deliver the supplies. Senator Organa also arranged for a shipyard to continue Project Shantipole under Quarrie's guidance.[38]
Phoenix squadron then learned about the Empire's new Interdictor-class Star Destroyer when a rebel patrol was captured. However, they were able to destroy the Interdictor.[39]The Jedi of Phoenix Squadron also made sure that force-sensitive children were protected from the Inquisitorious.[40]
Setback at Garel


Princess Leia and a disguised Kanan and Ezra (left)
The Empire then learned from the Inquisitorious that Phoenix Squadron were on Garel. When the Imperial fleet arrived, Phoenix Squadron was forced to abandon their base. However, they took heavy losses.[15] Senator Organa, after hearing of their losses, sent his aide and adopted daughter, Princess Leia Organa to deliver several Hammerhead corvettes to them under the guise of delivering supplies to Lothal. With the Spectres' help, Leia was able to deliver the corvettes to Phoenix Squadron by having them stolen from Jalath's Depot.[16]
The Phoenix Squadron later sent a diplomatic mission led by Phoenix Leader Syndulla to the Concord Dawn system. However, they were attacked by Fenn Rau and his Journeyman Protectors, who were aligned with the Empire. In retaliation, Sabine and Kanan tracked down and attacked the Protectors Camp on the third moon of Concord Dawn. Following a failed negotiation attempt by Kanan, Sabine destroyed the Protectors' Fang fighters and took Rau hostage. Under duress, Rau allowed the Phoenix Squadron save passage through the Concord Dawn system.[41]
Acting on a tip from the pirate Hondo Ohnaka, the Spectres rescued the Lasat refugees Gron and Chava the Wise from the Empire on Nixus Hub 218. With the aid of the Force, Zeb then steered the Ghost through an imploded star cluster and discovered the original Lasat homeworld of Lira San. While the refugees settled to their new home, Zeb returned.[42] Later, the Spectres raided and destroyed a Mining Guild refinery with the help of a herd of purrgil, hyperspace-traveling creatures that subsisted on Clouzon-36 gas.[43]
With the Phoenix Squadron losing A-wings to the Empire, the Spectres hijacked and stole a Quasar Fire-class cruiser-carrier with the help of Hera's father Cham Syndulla's Free Ryloth movement. As a result, Hera reconciled with her father and the Spectres gained a new ally.[7]
While investigating a mysterious Imperial project above Geonosis, the Spectres and Rex were ambushed by Agent Kallus. The rebels managed to escape but Zeb was separated and found himself in the same escape pod with Kallus. After crashlanding on Bahryn, Zeb and Kallus joined forces to ward off the bonzami predators. As a result, the two foes reconciled with Kallus becoming a rebel sympathizer.[31]
Searching for a base
Phoenix Squadron discovers Atollon
For the next several months, Kanan and Ezra searched for a world to establish a new rebel base but were harried by the Seventh Sister and the Fifth Brother. In desperation, the two traveled to Lothal with Ahsoka Tano to commune with the Force in the Lothal Jedi Temple. There, Kanan completed his Jedi trials and became a Jedi Knight while Tano learned that Darth Vader was indeed her former mentor Anakin Skywalker.[44]
While undertaking a fuel supply run on Horizon Base, Chopper was separated from the Spectres. After boarding an Imperial Class four container transport, Chopper befriended the RA-7 protocol droid AP-5 and convinced him to help seize control of the ship. Meanwhile, Admiral Konstantine led an attack on the Phoenix Squadron. The Ghost returned just in time to deliver fuel to the Phoenix flagship Phoenix Nest. The rebels were about to jump into hyperspace to the Yost system but AP-5 convinced the Phoenix Squadron to flee to Atollon, an uncharted world. As a result, the Phoenix Squadron were able to find a remote world to establish their base.[45]
In honor of Chopper's services, the new base was named Chopper Base. However, the rebels encountered opposition from krykna spiders, which devoured Lieutenant Dicer and captured Rex. Following a skirmish between the Spectres, Rex, and the krykna, Hera convinced the Phoenix Squadron to erect sensor markers to deter the creatures. Shortly later, Kanan and Ezra departed with Tano on a mission to Malachor to destroy the Sith.[46]
On Malachor, the rebels and Ahsoka encountered an Inquisitor known as the Eighth Brother. Ezra was separated from Kanan and Ahsoka, and encountered the former Sith Lord Maul. Maul convinced Ezra to help him access the Malachor Sith temple and steal a Sith holocron which purportedly contained the knowledge the rebels needed to destroy the Sith. Maul joined forces with the rebels in fighting off the Eighth Brother, the Seventh Sister, and the Fifth Brother.[6]
Under the pretext of gaining the Sith knowledge, Maul tricked Ezra into reactivating the Sith temple, which turned out to be an ancient superweapon. Maul meanwhile blinded Kanan but was driven away by the Jedi. Ezra was then ambushed by Darth Vader, who had come to acquire the Sith knowledge for the Empire. Ahsoka managed to fight Vader long enough for Ezra and Kanan to escape with Chopper aboard the Phantom with the Sith holocron. The Sith temple imploded and Ahsoka was presumed dead by her rebel comrades on Atollon.[6]
The shadow of Thrawn and Maul


Grand Admiral Thrawn led the Imperial counter-insurgency efforts
By 2 BBY, growing rebel activity in the Lothal sector led Governor Arihnda Pryce to request the services of Grand Admiral Thrawn's Seventh Fleet. Recently promoted for his victory on Batonn, Thrawn had developed a reputation as a skilled tactician who studied the history, philosophy, and art of his enemies. While Admiral Konstantine believed that the rebels were a local problem that did not constitute a Galactic-wide insurgency, Thrawn recognized that it would not remain this way. Meanwhile, the Spectres freed Hondo from Naraka prison. In return, Hondo provided the rebels with information about Y-wing starfighters being scrapped at Reklam Station. With the rebels needing ships, Hera authorized a reconnaissance mission to Reklam Station.[17]
Under the influence of the Sith holocron, an overconfident Ezra disobeyed Hera's orders and instead led a recovery mission. The Spectres, Rex, and Hondo freed several Ugnaught slave laborers and managed to refuel the Y-wings despite resistance from Commander Brom Titus. Despite the loss of the Phantom, the rebels managed to evacuate the Y-wings aboard Phoenix Home. Kanan, who had been reinvigorated by a mysterious being known as Bendu, rescued Ezra and the two reconciled. Realizing that the Phoenix Squadron was not the entire rebel fleet, Grand Admiral Thrawn allowed the rebels to escape with their "meager gains." Phoenix Squadron shipped these Y-wings to General Jan Dodonna's Massassi Group.[17]
Seeking to gain access to both the Sith holocron and Kanan's Jedi holocron, Maul ambushed a Hammerhead corvette and lured the crew of the Ghost into a trap. After capturing Hera, Zeb, Sabine, and Chopper, Maul issued an ultimatum to Kanan and Ezra. After conferring with Bendu, Kanan and Ezra reluctantly met with Maul to deliver the holocrons. While Ezra and Maul went to combine the holocrons, Maul ordered his repurposed tour guide droids to execute the prisoners. Kanan however freed the other Spectres and they managed to interrupt Maul's ritual. However, Maul fled with the knowledge that his old adversary still lived.[47]
Later, a rebel aid convoy was annihilated by the TIE Interceptor Captain Vult Skerris. In response, several disillusioned Imperial cadets at the Skystrike Academy contacted the Phoenix Squadron with the help of the rebel spy network Fulcrum. As a former cadet, Sabine undertook an undercover mission into the Skystrike Academy where she encountered future rebel pilots Wedge Antilles, Derek Klivian, and their friend Rake Gahree. During the first attempt, Rake was killed while Sabine and the rogue cadets were captured. However, they managed to escape with the help of Agent Kallus, who had become the rebel operative Fulcrum.[48]
On Ryloth, Grand Admiral Thrawn led a successful campaign against the Free Ryloth movement which saw the capture of Tann province. Seeking to recover a priceless family heirloom called the Kalikori, Hera along with Ezra and Chopper infiltrated the Syndulla residence. However, Thrawn captured Hera and Ezra. His subordinate Captain Slavin offered to trade Hera's life in return for Cham Syndulla's surrender. With the help of Chopper, Hera and Ezra managed to escape without Cham's capture by planting explosives in the Syndulla residence. Respecting his foes, Thrawn allowed the Spectres and Cham to escape to fight another day.[49]
New allies and old friends
Ezra meeting other rebels on Lothal
The Spectres and Rex later traveled to salvage supplies from a wrecked Separatist supply ship on the planet Agamar. However, they were taken prisoner by the super tactical droid General Kalani, who was still determined to end the Clone Wars as a Separatist victory. Ezra managed to convince Kalani to let them go and give them the proton bombs if they won the war game. Following the war match, Ezra managed to convince Rex and Kalani to make peace. The rebels and Separatist droids then joined forces to escape Imperial forces before parting ways. The Spectres also gained a Neimoidian shuttle which was refurbished as Phantom II.[50]
When the Imperial Viceroy of Mandalore Gar Saxon learnt that the Journeyman Protectors were allowing the rebels safe passage through the Concord Dawn system, he and his Imperial Super Commandos attacked their camp and exterminated them. After losing contact with the Protectors, Fenn Rau along with Sabine, Ezra, and Chopper returned to the third moon of Concord Dawn. There, the Spectres and Rau discovered Saxon's massacre and joined forces to escape the Imperial Super Commandos. As a result, Rau made peace with the rebels and decided to join the Rebellion.[51]
The Phoenix Squadron later evacuated rebel sympathizers on the planet Mykapo. The Spectres also encountered the young rebel Matt Martin and his Iron Squadron, an independent rebel group. Despite Hera's pleas, Matt and his followers refused to evacuate Mykapo. When Imperial reinforcements under Admiral Konstantine arrived, the Spectres managed to escape with Matt's crew but Matt was left stranded in his starship Sato's Hammer. Konstantine then planted a magno-mine on Matt's ship in an attempt to trap his rebel rescuers. Hera however outsmarted Konstantine and managed to rescue Mattin with the help of his uncle Commander Sato, the leader of Phoenix Squadron.[20]
With the help of Hondo and the Ugnaught laborer Melch, the Spectres obtained a cargo of proton bombs from a derelict Imperial cargo transport above the stormy world of Wynkahthu.[52] The Phoenix Squadron then turned its attention to the Imperial Armory Complex on Lothal, where Thrawn was overseeing the development of the Empire's new TIE/D Defender initiative. Ryder Azadi's Lothal resistance group had been sabotaging the factory's weapons and vehicles. With the help of Ryder, Kanan, Ezra, and Chopper infiltrated the factory. The rebels managed to obtain the fighter's blueprints and escape with the help of Kallus but lost their local comrade Morad Sumar. In addition, Thrawn realized that the Empire had a mole among its ranks.[21]
As the rebels began planning a reconnaissance mission to Lothal in preparation for their planned attack on the Imperial factories, Ezra was haunted by Maul. After confronting Maul, Ezra reluctantly agreed to accompany Maul to Dathomir in order to retrieve their shared memories from the earlier holocron ritual. Kanan and Sabine followed behind. After a clash with undead Nightsister spirits, Ezra learned that the Jedi Knight Kenobi was alive on a planet with twin suns. In addition, Sabine obtained the Darksaber, an ancient Mandalorian symbol of power and leadership.[53]
Rising stakes

Saw Gerrera, leader of the Partisans and a difficult ally
To maintain the secrecy of the Death Star project, the Empire exterminated the Geonosian species. At the request of Rebel Command, Saw Gerrera and his Partisans undertook a mission to investigate the disappearance of the Geonosians. However, his group was ambushed and slaughtered by the Geonosian Klik-Klak, who believed the outsides to be a threat. After losing contact with Saw, Senator Organa dispatched the Spectres and Rex to Geonosis to investigate the matter. On Geonosis, the Spectres and Rex encountered Saw, whose aggressive methods clashed with the more principled mainstream Rebellion.[30]
Working together, the rebels managed to capture Klik-Klak and learned that he was protecting the last Geonosian egg. A violent dispute soon broke out between the Spectres and Rex, who believed that Klik-Klak belonged on Geonosis, and Saw, who wanted to interrogate the Geonosian offworld. When Captain Brunson arrived in an Imperial light cruiser, the rebels were forced to descend aboard the Ghost into the depths of Geonosis. There, they discovered evidence that the Empire had deployed bioweapons against the Geonosians. Satisfied, Saw released Klik-Klak and the egg. The rebels then managed to escape Brunson's cruiser.[30]
In an effort to ferret out Phantom Squadron's base, Grand Admiral Thrawn deployed swarms of E-XD infiltrator droids across the Lothal sector. One of these droids managed to infiltrate Chopper Base in the guise of an inventory droid. However, Agent Kallus in his guise as Fulcrum alerted the rebels. With most of Phantom Squadron away on a training exercise, Zeb along with Chopper and AP-5 were forced to defend the base. Following a pursuit, they managed to subdue and reprogram EXD-9 to destroy an Imperial Star Destroyer. Despite this setback, Thrawn managed to narrow down the search for the rebel base from a thousand to 94 systems.[54]
After mastering the Darksaber[55], Sabine agreed to lead a mission to Krownest to convince Clan Wren to side with the Rebellion. Fenn Rau and Kanan hoped that Sabine could use the Darksaber to rally the Mandalorians under the rebel banner. Sabine received a frosty reception from her mother Ursa Wren, who was unwilling to endanger their father Alrich Wren, a captive of Governor Saxon. Ursa alerted Saxon to the rebel emissaries but Saxon turned on them and ordered Clan Wren's destruction. The Spectres and Rau then joined forces with Clan Wren to defeat Saxon's forces. Saxon's death at the hands of Ursa plunged Mandalore into another civil war.[56]
In response to Thrawn's search for the Imperial mole, the Spectres undertook a mission to rescue Agent Kallus which involved Ezra allowing himself to be captured by the Empire. The mission was complicated when Thrawn summoned Kallus and Lieutenant Yogar Lyste for an audience aboard the Imperial Star Destroyer Chimaera. The rebels managed to escape with the help of Kallus, who framed Lyste as "Fulcrum." Kallus ultimately elected to stay behind to continue aiding the Rebellion. However, Thrawn deduced that Kallus was the true Fulcrum and decided to set a trap for the rebels.[57]
Birth of the Rebel Alliance

Mon Mothma, founder and leader of the Rebel Alliance
Meanwhile, the dissident Senator Mon Mothma realized that it was impossible to reform the Empire through the Imperial Senate. After denouncing the Emperor, Mothma was forced to flee into hiding. Mothma and her followers rendezvoused with the Spectres in deep space. Pursued by Imperial forces commanded by Commander Skerris in his TIE/D Defender, the rebel convoy traveled through the dangerous Archeon Nebula. Despite losing Skerris, the rebels found a pair of Star Destroyers commanded by Governor Pryce and Admiral Kallus waiting on the other side. Hera managed to facilitate Mothma's escape by firing proton torpedoes into the nebula. The various rebel forces then amassed above Dantooine where Mon Mothma gave a hologram speech announcing the formation of the Alliance to Restore the Republic.[12]
While undertaking a mission on Killun Station to obtain clearance codes for the planned raid on Lothal, Chopper was remotely reprogrammed by a team of Imperial Information Office slicers and analysts led by LT-319. Desiring glory and victory, LT-319 embarked on an ambitious plan to use Chopper to download the coordinates of Chopper Base. LT-319's plot was foiled by the combined efforts of the Spectres, Wedge Antilles, and AP-5. In retaliation for harming her droid, Hera transmitted a data surge back to the Imperial team's Gozanti-class cruiser, destroying the vessel and keeping the secret of Chopper Base's location.[58]
Following the death of Maul on Tatooine at the hands of Kenobi[59], Grand Admiral Thrawn obtained intelligence that the Phoenix Squadron was rendezvousing with General Jan Dodonna's Massassi Group for a combined attack on Lothal's factories. Thrawn trapped Agent Kallus and used his communications to determine the location of Chopper Base. Thrawn's Seventh Fleet blockaded Atollon and wiped out much of the two rebel factions. However, Thrawn was denied full victory when Commander Sato rammed Admiral Konstantine's Interdictor cruiser. This created a temporary gap that allowed Ezra and Chopper to escape with news of the siege of Atollon.[5]
Unable to get help from Mon Mothma, Ezra and Chopper appealed to Sabine and Clan Wren for aid. Ursa allowed Sabine and Fenn Rau to bring a Mandalorian strike force to Atollon to aid the rebels. Meanwhile, the surviving rebels retreated to Chopper Base as Thrawn launched a withering orbital assault. As Imperial ground forces stormed the base, Kanan appealed to Bendu for help. However, this enraged the Bendu who went on a rampage. Back in space, Ezra, Chopper, and their Mandalorian allies managed to destroy Thrawn's second Interdictor cruiser. This allowed the surviving remnants of Phoenix Squadron to retreat to Yavin 4 along with the defector Kallus where they merged into the rebel forces there. Despite this defeat, the Rebel Alliance strengthened their alliance with Clan Wren and the other Mandalorian clans opposed to the Imperial–backed Clan Saxon.[5]
Beyond Atollon

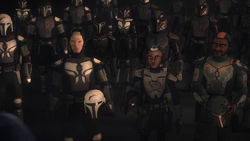
The Rebel Alliance's Mandalorian allies
In 1 BBY, out of gratitude for the Mandalorian assistance on Atollon, Hera managed to convince Rebel Command to allow the Spectres to assist Clan Wren and its allies on Mandalore. The Spectres helped their Mandalorian allies to rescue Sabine's father Alrich Wren from execution. In response, Governor Saxon's brother and successor Tiber Saxon deployed the "Duchess", a superweapon capable of incinerating Mandalorian warriors by turning their vaunted armor against them. To atone for her role in creating the weapon, Sabine led a successful strike operation which destroyed the weapon and Tiber Saxon's Star Destroyer. Following the operation, Lady Bo-Katan Kryze accepted the Darksaber and the mantle of Mandalorian leadership; allowing Sabine to rejoin her rebel comrades.[60]
Later, the Rebel Alliance received intelligence from Saw Gerrera that the Empire was using a relay station on Jalindi to disrupt rebel supply runs. At the advice of Kallus, Rebel Command dispatched the Spectres on a mission to plant a spike on the relay station to monitor Imperial transmissions. Thought the mission was disrupted by the arrival of Commander Titus' light cruiser Marauder, the Spectres were aided by the arrival of Saw's U-wing. Saw rescued the strike team members Ezra, Sabine, and Chopper before bombing both the Jalindi relay and the Marauder. Saw then recruited the three rebels for his quest to investigate why the Empire had exterminated the Geonosians.[61]
Saw and the three Spectres then traveled to Faos Station where they infiltrated the Imperial Freighter 2716, which was transporting a large Kyber crystal to the Tonnis sector. Aboard the ship, the rebels freed several technicians who had been conscripted for an unknown project. While Ezra and Sabine wanted to evacuate the civilians, Saw was determined to find out what the Empire was building at any cost. Saw was disappointed when the freighter emerged in empty space and was intercepted by Captain Slavin's Star Destroyer. Unwilling to concede defeat, Saw ignited the kyber crystal, leading to an explosion that consumed both ships. Saw escaped aboard his U-wing while the Spectres and technicians fled aboard a shuttle. Despite failing to uncover the Empire's secret project, the Alliance gained new recruits from the technicians.[61]
Return to Lothal
The Rebel Alliance took an interest in the Empire's new TIE Defender Elite
The Empire launched a crackdown on Lothal that claimed the life of Lothal resistance member Jho. Despite this crackdown, Ryder Azadi managed to warn Rebel Command about the TIE/D Defender Elite project on Lothal. Mon Mothma dispatched the Spectres on a mission to acquire information about the prototype fighter. With the help of the crime lord Cikatro Vizago, the Spectres managed to infiltrate Lothal. After splitting up, Ezra and Sabine visited Jho's former bar and learnt that it had been taken over by the Empire. There, they reunited with an old rebel contact Jai Kell. Despite being pursued by Imperial forces, the rebels managed to escape through the sewers and link up with Azadi's group.[18]
With the help of Ryder, the Spectres made their way to a remote Imperial testing facility where the TIE/D Defender Elite was stored. The rebel heist coincided with a visit by Grand Admiral Thrawn and Governor Pryce. Prior to the test demonstration, Ezra and Sabine managed to steal the ship and fought with several TIE Interceptors. Thrawn took advantage of the heist to test the TIE/D Defender Elite's combat capabilities. Following a crash-landing, Ezra and Sabine managed to escape with the craft's flight data recorder to Yavin 4. After getting lost in the wilderness, they encountered a loth-wolf which brought them to Ryder's camp.[62]
The following day, Ezra, Zeb, and Jai Kell returned to the crash site to retrieve the TIE/D Defender Elite's hyperdrive; which Sabine hoped to install on Ryder's U-wing. While Governor Pryce insisted on leading the manhunt, Thrawn dispatched his Noghri tracker Rukh to hunt the rebels. Despite being pursued by Rukh and scout troopers, the rebels managed to return to the camp in stolen vehicles. While Hera and Chopper departed with the flight data recorder aboard the refitted U-wing, the other Spectres, Jai, and Ryder fled into a series of tunnels. There, they encountered a pack of loth-wolves which guided them to Lothal's southern hemisphere.[63]
After setting up base in the caves, the Spectres encountered a Mining Guild ore crawler Crawler 413-24 that was extracting minerals from Lothal's surface. The crawler was staffed by several prisoners including Vizago, who had been convicted of aiding the rebels. The rebels freed the prisoners, killed the Trandoshan overseer Proach, and imprisoned the captain Seevor. The rebels narrowly avoided detection by an Imperial search party. Ezra later killed Seevor when he tried to retake the crawler. The rebels subsequently received news from Hera that Rebel Command had authorized a strike on Lothal to take out the Empire's TIE factories. The rebels and liberated prisoners were designated as the air raid's ground support team.[64]
Captain Syndulla led a squadron of T-65B X-wing starfighters on the planned raid on Lothal's factories while the rebel ground team sabotage the Imperial artillery defenses. However, they were intercepted by Thrawn's fleet and suffered heavy casualties. Hera, Chopper, and Mart Mattin survived the rough landing but were pursued by Imperial forces including Rukh. While Mart and Chopper managed to flee into Lothal's sewers, Hera was captured by Rukh, who handed her over to Governor Pryce. Due to the failure of the air raid, Kanan and the ground team were forced to retreat from Capital City.[19]
Road to Civil War
The Death Star in its final stages of construction
Uncovering the Death Star
By 0 BBY, the Galactic Empire was close to completing its Death Star superweapon, which had the power to destroy worlds. Under the management of Director Orson Callan Krennic, the Death Star project had consumed vast amounts of resources and labour including any kyber crystals[2] and Wookiee slaves.[65] Various worlds including Ilum[66] and the moon Jedha were mined for their kyber crystals.[2] To ensure the secrecy of the Death Star, the Empire had also exterminated the Geonosian species.[30] Despite these massive, leading Imperial officials like Grand Moff Wilhuff Tarkin believed that the Death Star would enable the Empire to force the galaxy into submission.[67]
One of the Death Star's architects, albeit unwillingly, was the scientist Galen Walton Erso. Fearing that the Empire would use his skills and knowledge for malevolent motives, Galen and his family had fled into exile on the planet Lah'mu. However, Director Krennic managed to locate Erso and killed his wife Lyra Erso. With little choice, Galen yielded to Krennic and agreed to work on the Death Star project. In secret, Galen secretly incorporated a flaw into the superweapon's design. Meanwhile, his daughter Jyn Erso was adopted by the Partisan leader Saw Gerrera. Over the years, Jyn became a hardened guerrilla fighter and criminal who eluded both the Empire and the Rebel Alliance.[2]
Shortly before the destruction of Alderaan, Galen entrusted the Imperial supply pilot Bodhi Rook with information about the Death Star. Under Galen's instruction, Rook defected and sought out the Partisan leader Saw Gerrera on the moon Jedha. However, Saw distrusted Rook and took him captive, torturing him with a Bor Gullet. Meanwhile, the Rebel Alliance operative Cassian Jeron Andor learned about Rook's defection while undertaking a mission to the Ring of Kafrene to investigate why the Empire was shipping large quantities of kyber crystals.[33]
Operation Fracture
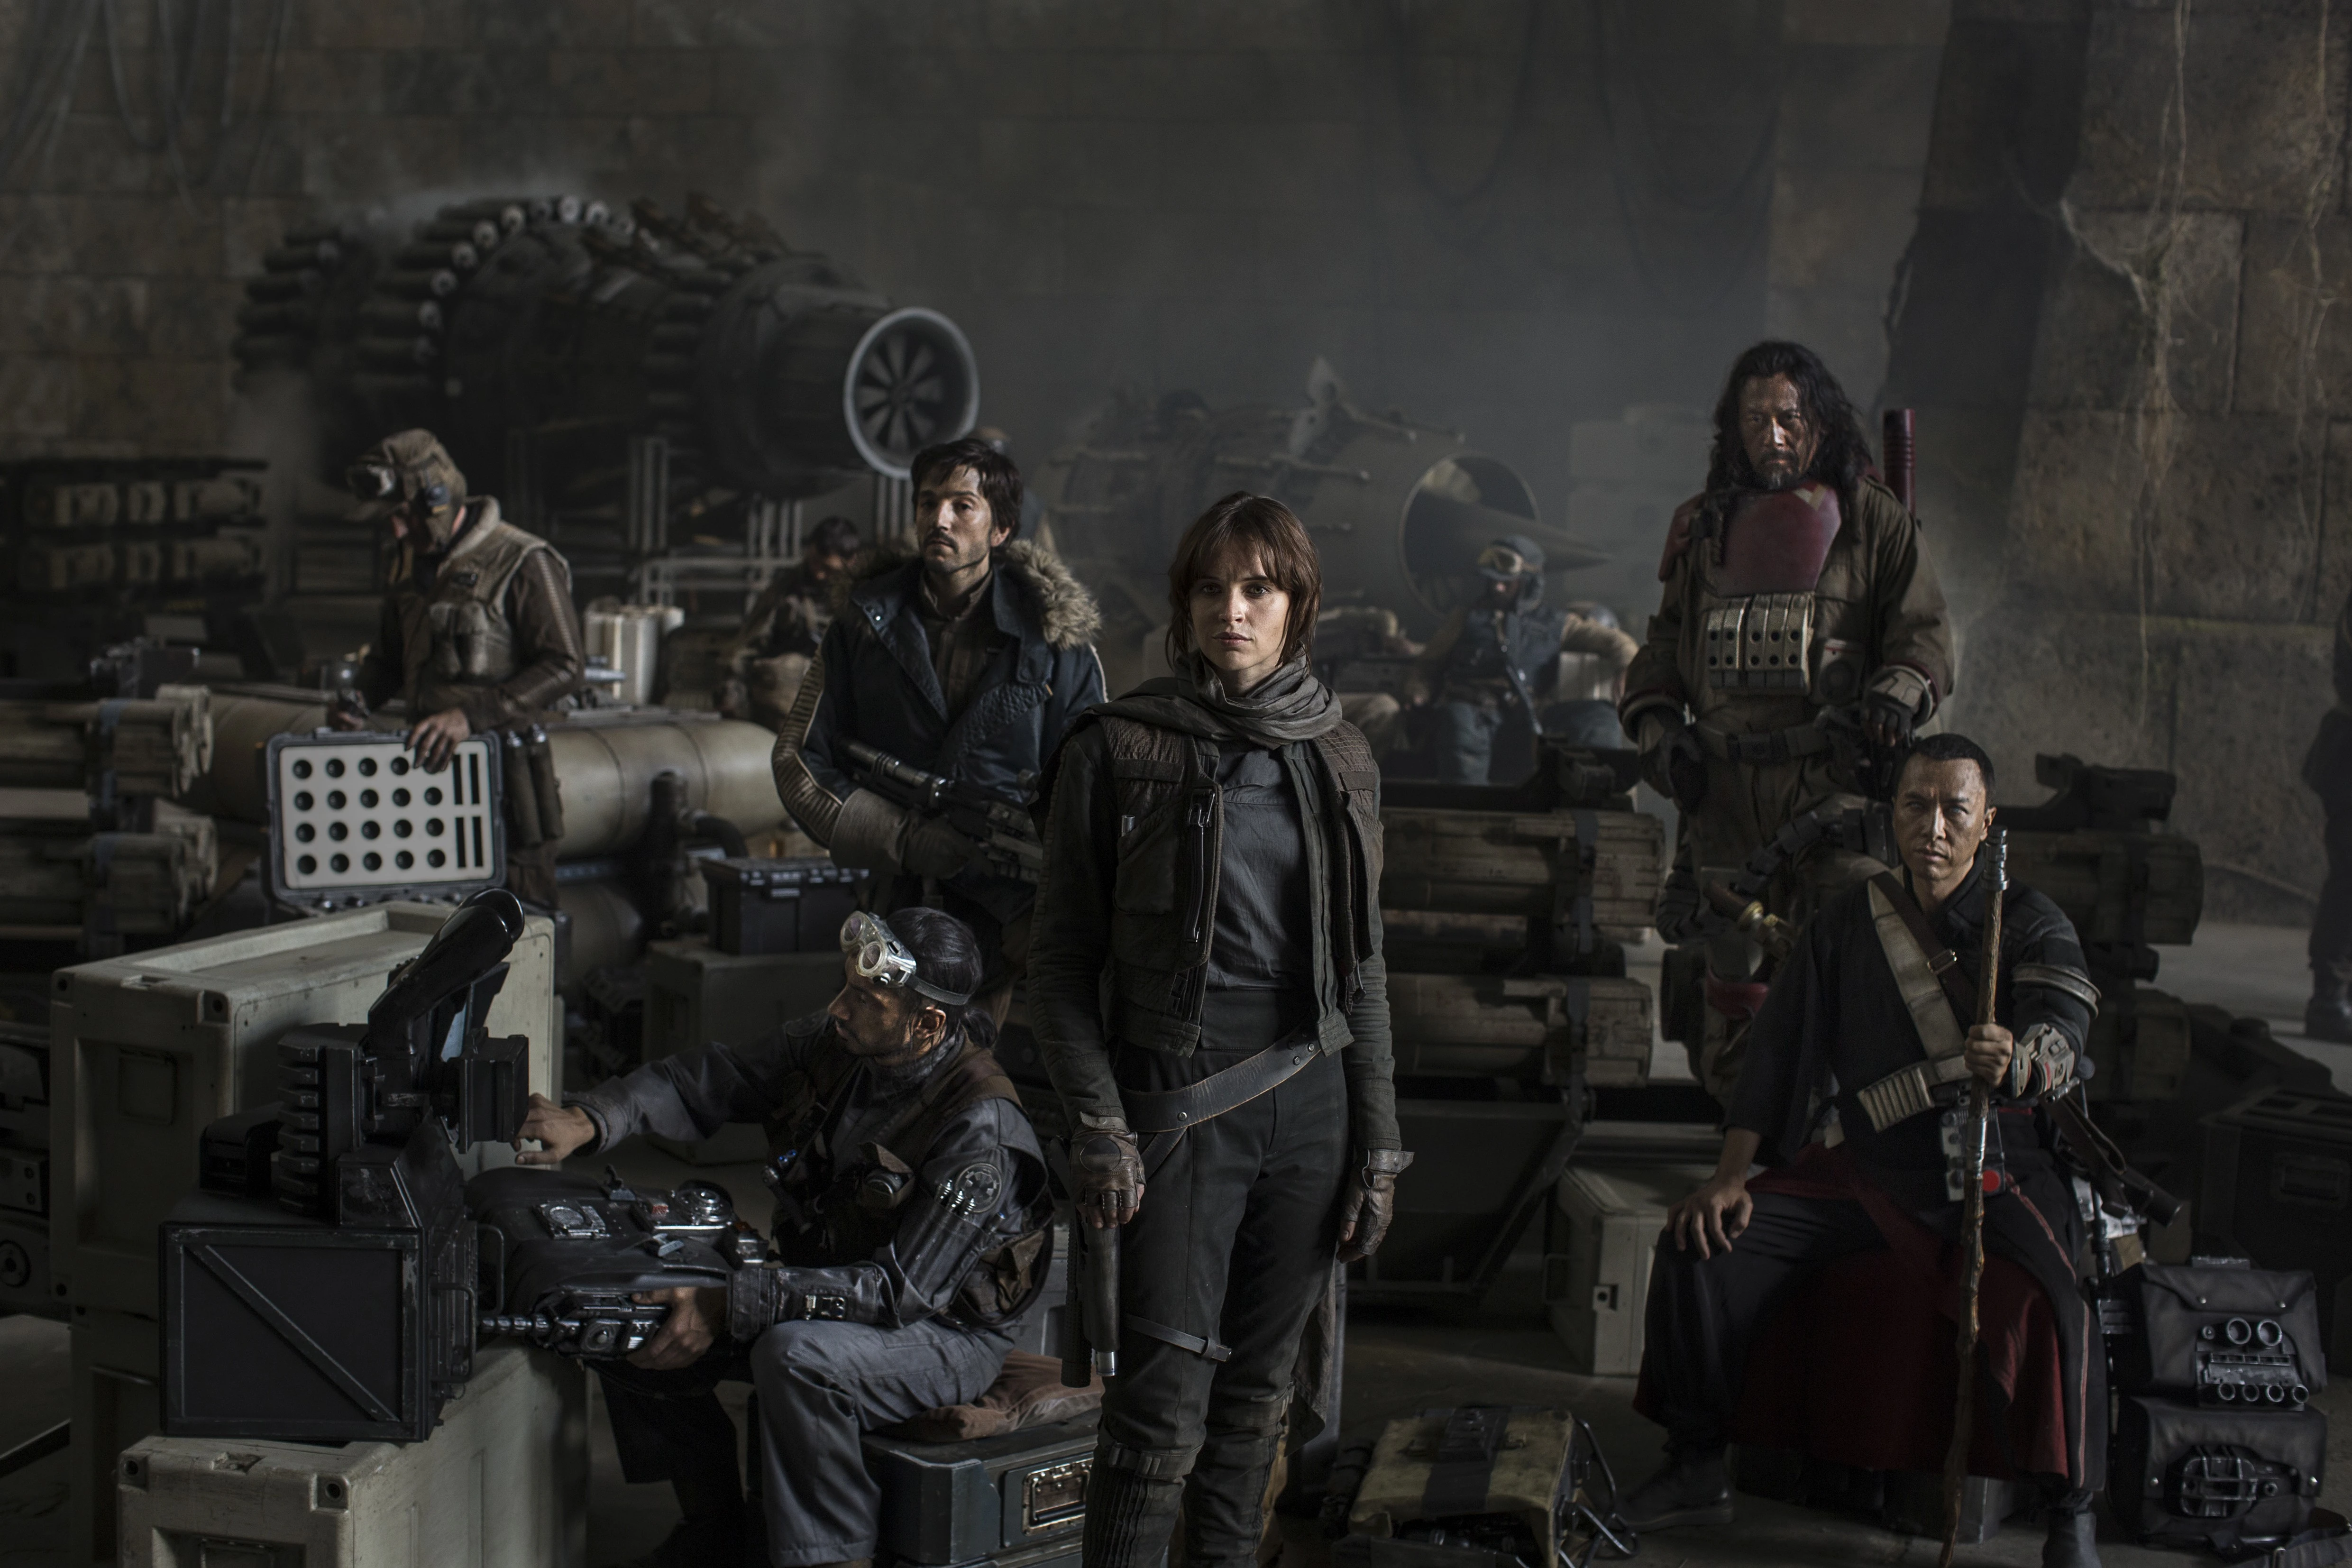
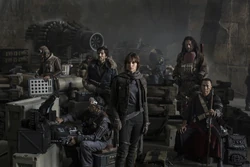
Members of Rogue One, the rebel strike team that stole the Death Star plans
Acting on this information, the Alliance leadership mounted Operation Fracture, a two-stage operation which involved: first, contacting Saw's partisans with the help of Galen's daughter Jyn in order to question Rook; second, extracting Galen Erso so that he could testify about the Death Star's existence to the Imperial Senate. As part of Operation Fracture, the Alliance rescued Jyn from the Imperial penal colony of Wobani.[33] After extracting Jyn, the Alliance leadership convinced her to help them secure an audience with Saw in return for receiving a clean slate.In secret, General Davits Draven ordered Cassian to ignore his initial orders and assassinate Galen. In response to Rook's defection, Grand Moff Tarkin ordered Director Krennic to speed up completion of the Death Star.[2]
On Jedha, Cassian and Jyn were taken by the Partisans following a skirmish with local Imperial forces. At Saw's headquarters in the Catacombs of Cadera, Saw gave Jyn a hologram message from her father Galen revealing that he had incorporated a flaw into the Death Star's design. He also told her that the Death Star's structural plants were at a high-security Imperial data bank on the planet Scarif. Meanwhile, Tarkin ordered Krennic to destroy Jedha City and its environs as a test demonstration of the Death Star's power. Jyn along with Cassian, Bodhi, K-2SO, and the Guardians of the Whills Chirrut Îmwe and Baze Malbus managed to escape offworld as the Death Star's superlaser destroyed the Catacombs.[2]
Following the Death Star's successful test demonstration, Grand Moff Tarkin took control of the superweapon and blamed Director Krennic for the leak. After learning that the leak had originated at the Empire's research facility on Eadu, Krennic traveled there with a squad of Death troopers to confront Galen. Moving onto the second phase of Operation Fracture, Cassian and his companions traveled to Eadu. After learning of Cassian's true mission, Jyn managed to stop Galen from assassinating her father. However, Krennic arrived shortly later and executed Galen and his team of scientists. These visits coincided with an air raid by Alliance X-wings, which had been dispatched by Rebel Command to destroy the facility after losing contact with Cassian's U-wing starship.[2]
Showdown on Scarif


The Battle of Scarif, the first battle of the Galactic Civil War
Returning to Yavin 4, Jyn addressed the Alliance leadership and told them about Galen's design flaw and the Death Star plans on Scarif. News of the Death Star's existence created panic and division among the Rebel Alliance. While some wanted to continue the fight, others were intimidated by the Empire's new superweapon. Lacking consensus, Mon Mothma was unable to authorize a strike on Scarif to recover the Death Star plans. Unperturbed, Jyn and her companions organized a strike team called Rogue One to infiltrate Scarif and obtain these plans. After failing to convince Darth Vader to secure him an audience with Emperor Palpatine, Krennic traveled to Scarif to investigate the Station's rumored vulnerability[2]
Using a stolen Zeta-class cargo shuttle, the rebel strike team managed to bypass the orbital Shield Gate and land at the Imperial security complex. Disguised as Imperial personnel, Jyn, Cassion and K-2S0 infiltrated the Citadel Tower, where the Death Star plans were stored. Meanwhile, the other Rogue One members staged diversionary attacks on the Imperial garrison. Without consulting the Alliance leadership, Admiral Raddus brought the Alliance Fleet including General Syndulla's ship Ghost to Scarif.[2] The Battle of Scarif marked the start of the Galactic Civil War with rebel forces clashing with the Empire on both land and space.[9]
After navigating their way through the Citadel Tower, Jyn and Cassian managed to secure the Death Star plans but were attacked by Krennic. With the shield gate's deflector shield preventing the strike team from transmitting the plans, Rook told Raddus to destroy the shield gate. Under Admiral Raddus' orders, the Hammerhead corvette Lightmaker rammed into one of the disabled Imperial Star Destroyers. This created a domino effect when the Star Destroyer collided with another Destroyer and crashed into the Shield Gate, disabling the deflector shield. This allowed Jyn to transmit the Death Star plans to Raddus' flagship Profundity.[2]
In response to the rebel attack, Grand Moff Tarkin and Darth Vader traveled to Scarif aboard the Death Star and the Star Destroyer Devastator. In an attempt to prevent the rebels from gaining the Death Star plans, Tarkin used the Death Star to obliterate the area around the Imperial complex; killing numerous Imperial and Rebel belligerents. As the Alliance fleet retreated, Vader's Star Destroyer Devastator emerged from hyperspace and disabled the Profundity. Despite Darth Vader storming the ship, rebel troopers managed to flee with the plans aboard Princess Leia Organa's CR90 corvette Tantive IV; setting the stage for the events of the Battle of Yavin.[2]
Legacy


The theft of the Death Star plans led to the rebel victory at Yavin
The Battle of Scarif marked the beginning of the Galactic Civil War, a five–year conflict between the Galactic Empire and the Alliance to Restore the Republic.[9] The Battle of Scarif marked the Alliance's first victory of this Civil War. Seeking to recover the Death Star plans, Darth Vader pursued Princess Leia to the planet Tatooine. Despite her capture, Leia managed to hide the plans in the astromech droid R2-D2. Unveiling the Death Star's full power, Grand Moff Tarkin destroyed the planet Alderaan to punish its leaders for aiding the Rebellion. Preferring to rule by fear and terror, Emperor Palpatine dissolved the Imperial Senate and delegated power to regional governors. Instead of frightening the galaxy into submission, the destruction of Alderaan only fanned the flames of rebellion.[67]
After R2-D2 delivered the plans to Kenobi, the Jedi Knight joined forces with Luke Skywalker, the protocol droid C-3PO, the smuggler Han Solo, and the Wookiee co-pilot Chewbacca to rescue Princess Leia from the Death Star. They then delivered the Death Star plans to the Rebel Alliance base on Yavin 4. Seeking to crush the Rebellion once and for all, Grand Moff Tarkin brought the Death Star to Yavin 4. However, the Alliance discovered that the Death Star's flaw was an exposed thermal exhaust port. Following a fierce space battle, Skywalker fired a missile down the thermal exhaust port. The destruction of the Death Star marked an important victory for the Rebel Alliance.[67]


The rebels fought to restore the Republic
For the next five years, the Empire and Alliance battled for control of the galaxy. Despite victories such as the Battle of Hoth, the Empire failed to crush the Rebellion.[68] Undeterred by the loss of the Death Star, the Emperor commissioned the creation of a second Death Star over the Forest Moon of Endor. Seeking to crush the Rebel Alliance once and for all, the Emperor lured the Alliance fleet into a trap at Endor in 4 ABY. However, rebel ground forces and their local Ewok allies destroyed the planetary shield generator; allowing the Alliance to destroy the superweapon. To save his son Luke, Darth Vader killed the Emperor, thus restoring balance to the Force.[69]
Following the Battle of Endor, the Rebel Alliance reorganized itself into the New Republic. The Emperor and Lord Vader's death triggered the collapse of the Empire and the new government quickly consolidated control over large areas of the galaxy.[65] While a powerless Grand Vizier Mas Amedda officially ruled the Empire from Coruscant, much of the Empire was actually in the hands of Fleet Admiral Gallius Rax. As the Emperor's designated successor, Rax implemented the Emperor's posthumous Contingency plan to tear down the Empire and to bring a worthy elect into the Unknown Regions to start afresh.[66] Following feigned peace talks on Chandrila[70], Rax orchestrated the Battle of Jakku as the final showdown between the Empire and the New Republic.[66]
Rax intended to implode the planet Jakku with Sith relics in order to destroyed the massed Imperial and New Republic fleets. However, he was stopped by Grand Admiral Rae Sloane with the help of New Republic operatives. With the Empire defeated, Sloane and other Imperial officers fled into the Unknown Regions to regroup. Meanwhile, the New Republic signed the Galactic Concordance with Grand Vizier Amedda, formally ending the Galactic Civil War. [66] While the New Republic turned its attention to reshaping the galactic order, the Imperial remnants consolidated themselves as the First Order, a military junta that was dedicated to restoring the Galactic Empire.[71] In 34 ABY, Cold war tensions between the New Republic, the allied Resistance paramilitary outfit, and the First Order culminated in the First Order–Resistance war.[72]
Appearances
Non-canon appearances
 LEGO Star Wars: Droid Tales — "Mission to Mos Eisley" (In flashback(s))
- Rogue One: Recon A Star Wars 360 Experience
Sources
Notes and references