Warning: This infobox has missing parameters: parents, pronouns, children, siblings, partners, families, feathers and unrecognized parameters: era
- "…how we choose to fight is just as important as what we fight for."
- ―Ezra Bridger
Ezra Bridger was a human male Jedi Padawan who became a rebel fighter and revolutionary leader in the early rebellion against the Galactic Empire. He was born to Ephraim and Mira Bridger, whose public criticism of the Empire led to their imprisonment, leaving Bridger an orphan on the planet Lothal as a child. He joined the rebel crew of the Ghost in 5 BBY and became the Jedi apprentice of Kanan Jarrus. Bridger's abilities grew quickly, and a message of hope he broadcasted in the Lothal sector inspired a number of rebel cells to begin working together to fight the Empire.
In 4 BBY, Bridger learned that his parents were killed attempting to escape from prison. The young Jedi, already having struggled with his dark side, became more conflicted, coming to a head on the ancient Sith world of Malachor where he recovered a Sith holocron in the hopes of destroying the Sith. He also encountered Darth Maul, who hoped to make Bridger his apprentice—particularly once Bridger used the dark side to open the holocron. This briefly strained his apprenticeship with Jarrus, who was blinded by Maul on Malachor, but the two repaired their relationship and continued to progress as Jedi.
With his powers growing stronger, Bridger took on more leadership roles in the rebellion, including helping Clone Captain and rebel mentor CT-7567 ("Rex") and a surviving battalion of Separatist Alliance battle droids make peace and bring a sense of closure to the unresolved Clone Wars. Bridger also came into conflict with Grand Admiral Thrawn, helped fellow crewmate Sabine Wren in her quest to reunite the Mandalorian people, and sought to find Jedi Master Obi-Wan Kenobi, whom Bridger believed was key to destroying the Sith.
Biography
Childhood
- "I've been on my own since I was seven, okay? If I'd let myself believe my folks were alive, if I let myself believe they'd come back and save me, I'd never have learned how to survive."
- ―Ezra Bridger
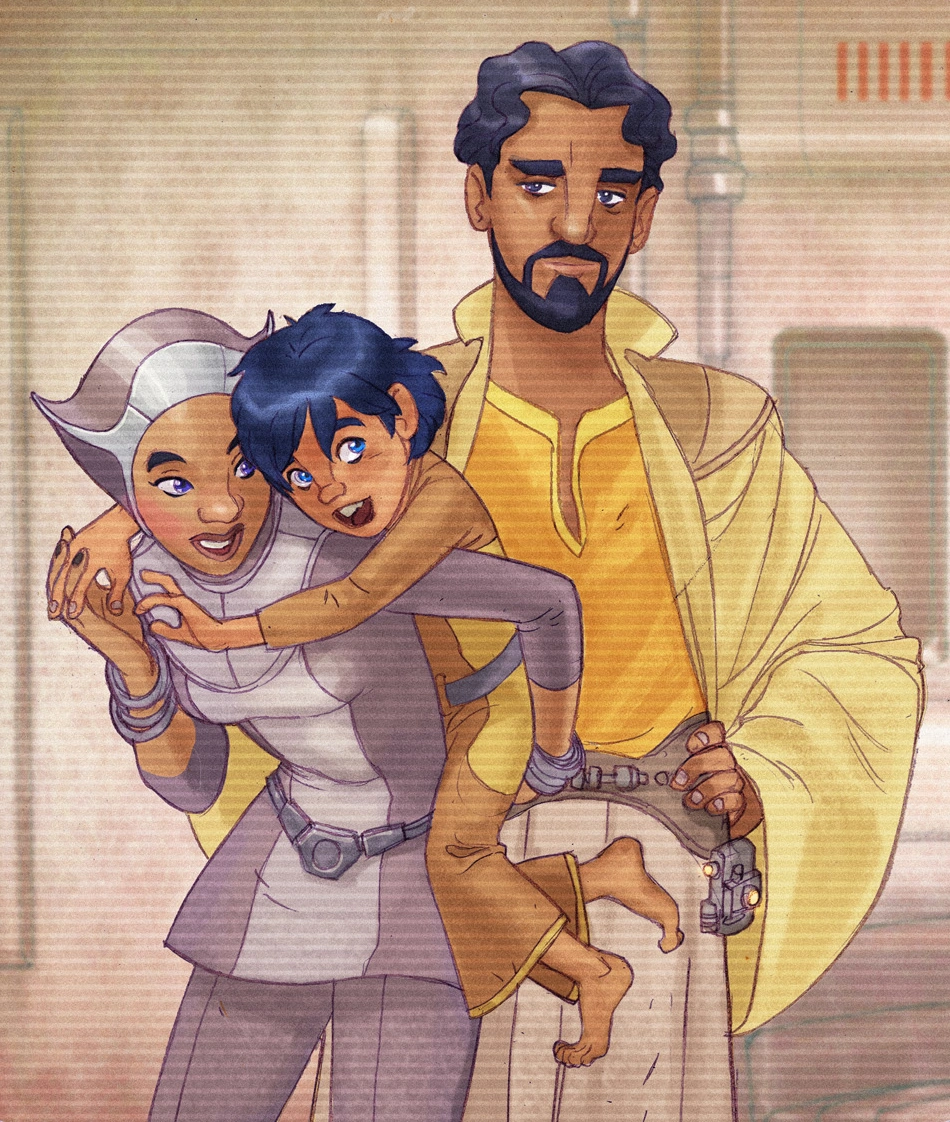

A young Ezra with his parents.
Ezra Bridger was born in 3258 LY,[1] on the day of the inception of the Galactic Empire,[16][3] and grew up on the planet Lothal in the Outer Rim Territories. Hoping to make the galaxy a better place for him, his parents Mira and Ephraim Bridger set up public broadcasting transmissions to speak out against the Empire's harsh rule[1] in 14 BBY,[17] however this would cost them their own lives. By 12 BBY, his parents were found and taken away by the Empire,[1] leaving Ezra to live largely on his own for the next eight years and find work as a con artist and thief, stealing technology and reselling it on the black market, while unknowingly using the Force to occasionally get himself out of tough situations.[16][18] Eventually, he would come to live in the abandoned LothalNet comm tower E-272, where he would keep a collection of stormtrooper helmets.[18][19][20]
Bridger would later be apprenticed to a Xexto, Ferpil Wallaway, owner of a pawn shop in Lothal, and skilled pickpocket who had various underworld connections. The Xexto taught the boy everything he knew, and they would try to pick each other clean for fun. The boy worked for him, doing jobs like scanning wealthy-looking tourists and trick them and selling them stuff. Bridger would also befriend Moreena Krai, a girl of the same age as him, who knew of his under-handed skills.[20]
Gladiator Night
- "I hate to say so, Mr. Bossk, but I have a bad feeling about this."
- ―Ezra Bridger


Ezra as a pickpocket on Lothal
One day at Capital City's spaceport, Bridger was selling tickets for a Gladiator Night between a Houk and Feeorin when Krai told him her family and her were leaving for Alderaan to live with her grandmother due to the Empire, and bade farewell to the boy. Later that day, Bridger caught sight of the Hound's Tooth and met Trandoshan bounty hunter Bossk, who hired him as a guide to Ake's Tavern. As they reached their destination, Bossk sent Bridger instead to lure his prey, Gronson "Shifty" Takkaro, out; soon enough, however, a confrontation between Bossk and the assassins Angrigo and the Kratchell twins ensued, in which Bridger stunned Takkaro, and Bossk killed the assassins, only for Imperial authorities to surround them. Aware of a likely set-up by Lieutenant Herdringer, Bossk was forced to leave Takkaro and follow Bridger, and the two escaped from the Imperials on a speeder bike. During their escape, however, Bossk was injured and convinced Bridger to help him by offering the boy all the content of his strongbox onboard the Tooth.[20]
In the course of an hour, Bridger took the Trandoshan to his tower and tended to his wounds, before the bounty hunter woke up, "disguised" himself as a blind Trandoshan and almost immediately prompted Bridger into leading him to a posting agency at the spaceport, where he accessed the Imperial Enforcement DataCore to check records on Herdringer. However, they discovered Herdringer had been dead for months, and Bossk surmised that his replacement, Jenkes, had been the one to set him up, now also aware that he and Takkaro had worked together in gladiator arena in Nyriaan years before. Their search, though, attracted Jenkes' attention, who sent troopers to attack them, but Bridger and Bossk managed to slip away again, and they went to Wallaway's pawn shop, where they saw from afar as Jenkes shot Wallaway and took his money.[20]
Once Jenkes left the shop, Bridger and Bossk entered the place, only for Wallaway to die on Bridger's arms. Convinced by Bossk, he accompanied the Trandoshan to Monad Outpost during Gladiator Night, where they faced Jenkes. During the confrontation, Bridger used his stolen Imperial comlink to alert Jenkes' superiors, while Bossk told everyone on the arena of Jenkes' actions. Bridger, then, proceeded to stun the Imperial before he could flee the arena, just before Imperial forces arrived and swarmed the arena. The next morning, as promised, Bossk gave Bridger the contents of his strongbox, which turned out to be just seventy-five credits, and the Trandoshan bade him farewell.[20]
On his way home, Bridger was walking through the fields around his tower when a freighter shot down a TIE fighter, which crashed not far from him. As Ezra tried to help Baron Valen Rudor, he was rebuked for touching the starfighter. After successfully opening the top of the cockpit, Brdiger hopped inside and managed to trick the unlucky pilot into thinking he was helping get his armor unstuck, when in fact, he was actually stealing bits of equipment. After grabbing Rudor's helmet for his collection, Bridger quickly left the wreckage, while revealing his thievish intentions. Rudor, not meaning to be outsmarted by a kid, attempted to kill him with his fighter's lasers, but the boy's latent Force-sensitivity alerted him to a laser blast from the vengeful pilot. While the pilot was bewildered at how Bridger managed to survive the shot, the boy knocked him out with his energy slingshot, and strutted away with his prize.[18][20]
Joining the Spectres
Early encounters with the Spectres
- "Who is that kid?"
- ―Kanan Jarrus, on Ezra Bridger
In 3272 LY,[1] after a Star Destroyer flew over in Lothal's Capital City, Bridger went to the city and prevented a merchant from being imprisoned by Imperials, just before witnessing Kanan Jarrus and his team executing a heist, and intervening to steal one of the crate-carrying speeder bikes they were after. As he fled with the stolen goods, he met Sabine Wren, who proceeded to recover one of the crates.[19]
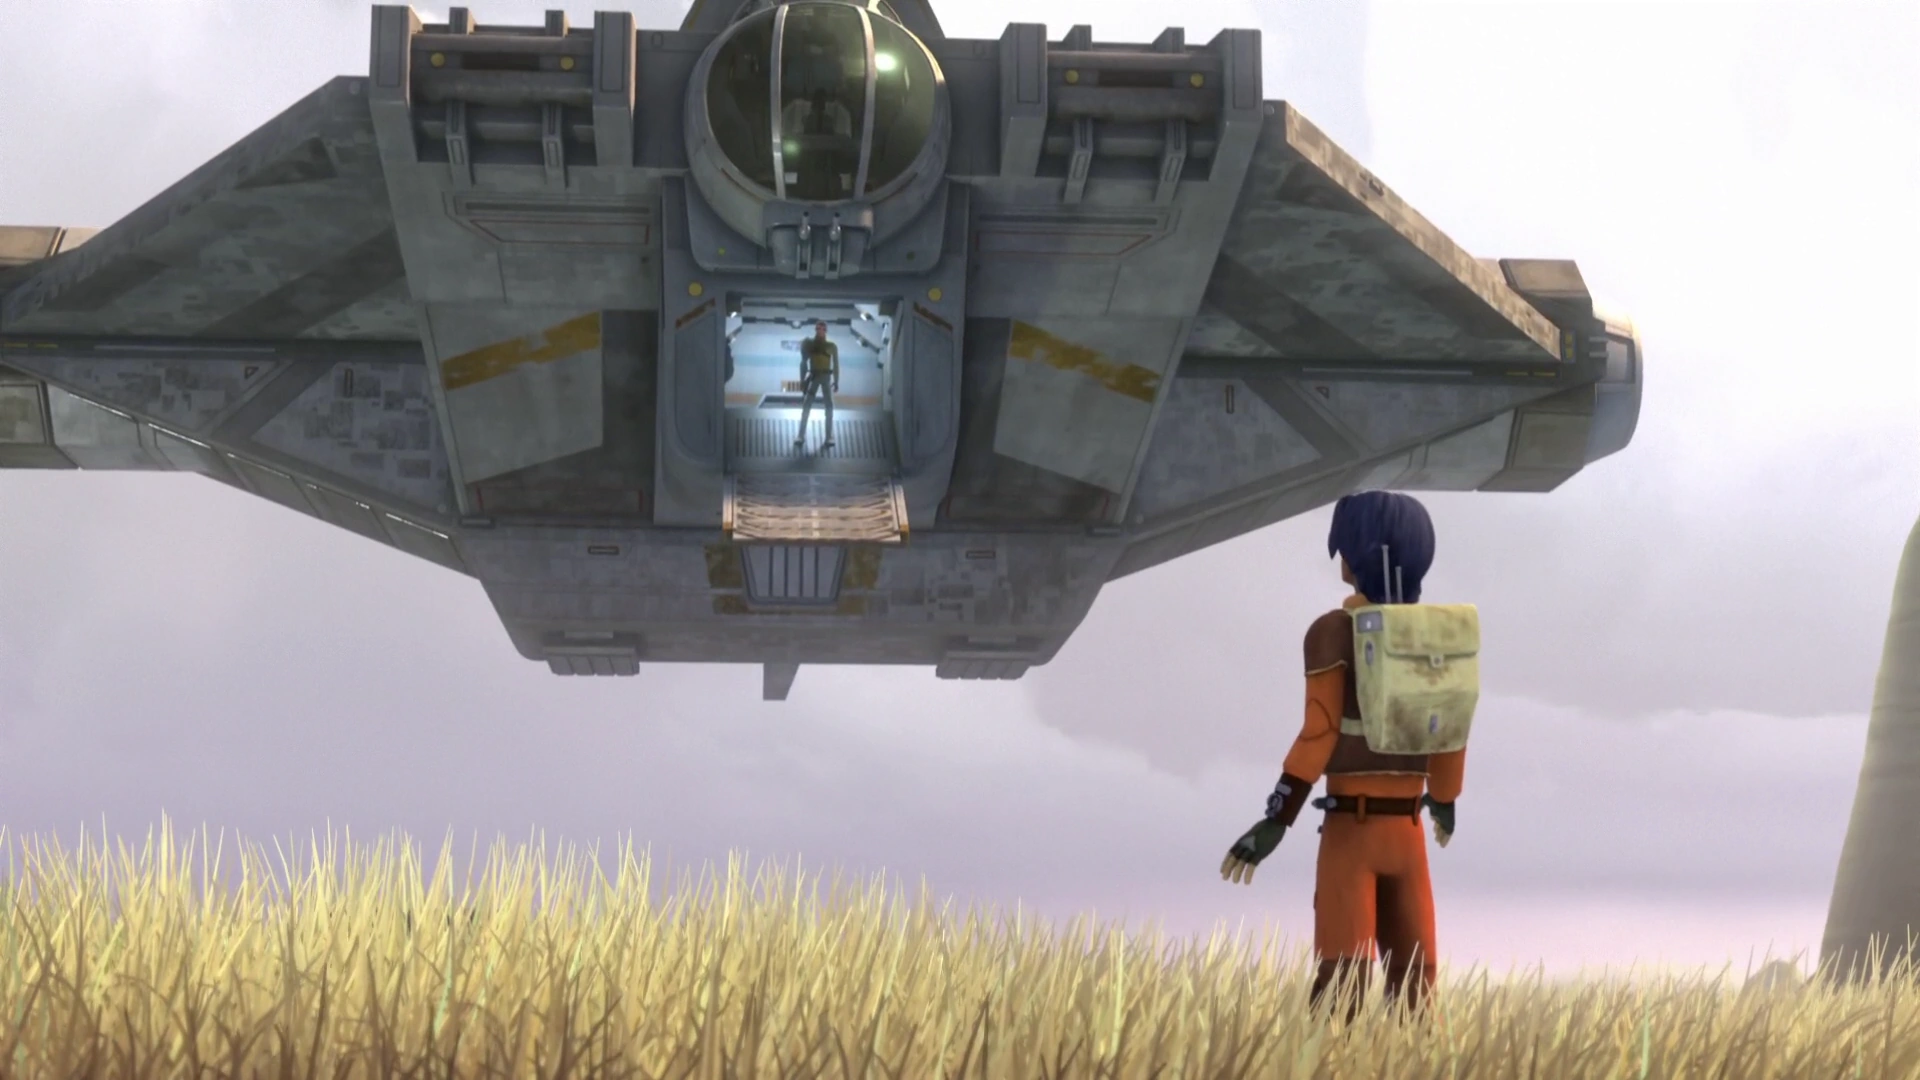
Jarrus offering Bridger an escape route.
Chased through the streets and a roadway out of the city, Bridger had to board the Ghost as a TIE fighter closed-in on him. As the boy unknowingly used the Force to leap into the hovering ship with his crate, Jarrus was made aware of his Force-sensitivity. Inside the ship, he met Garazeb "Zeb" Orrelios and Hera Syndulla. Forced to remain with them for a while longer, Bridger was taken to Tarkintown, where he helped deliver the stolen crates. Later, he returned to the Ghost and entered Kanan's quarters where he stole the former Jedi's lightsaber and holocron. Bridger returned the lightsaber, but kept the holocron to himself, thinking Jarrus hadn't noticed.[19]
During the team's operation to free Wookiees, he stayed behind with Syndulla but was convinced to board a Gozanti-class cruiser to alert Kanan, Sabine, Zeb and Chopper of an incoming Star Destroyer. However, he was captured by Agent Kallus and abandoned by Orrelios. In his cell, he was able to open Jarrus' holocron and see Jedi Master Obi-Wan Kenobi's message, before escaping from his prison and learning of the Wookiees' location.[19]
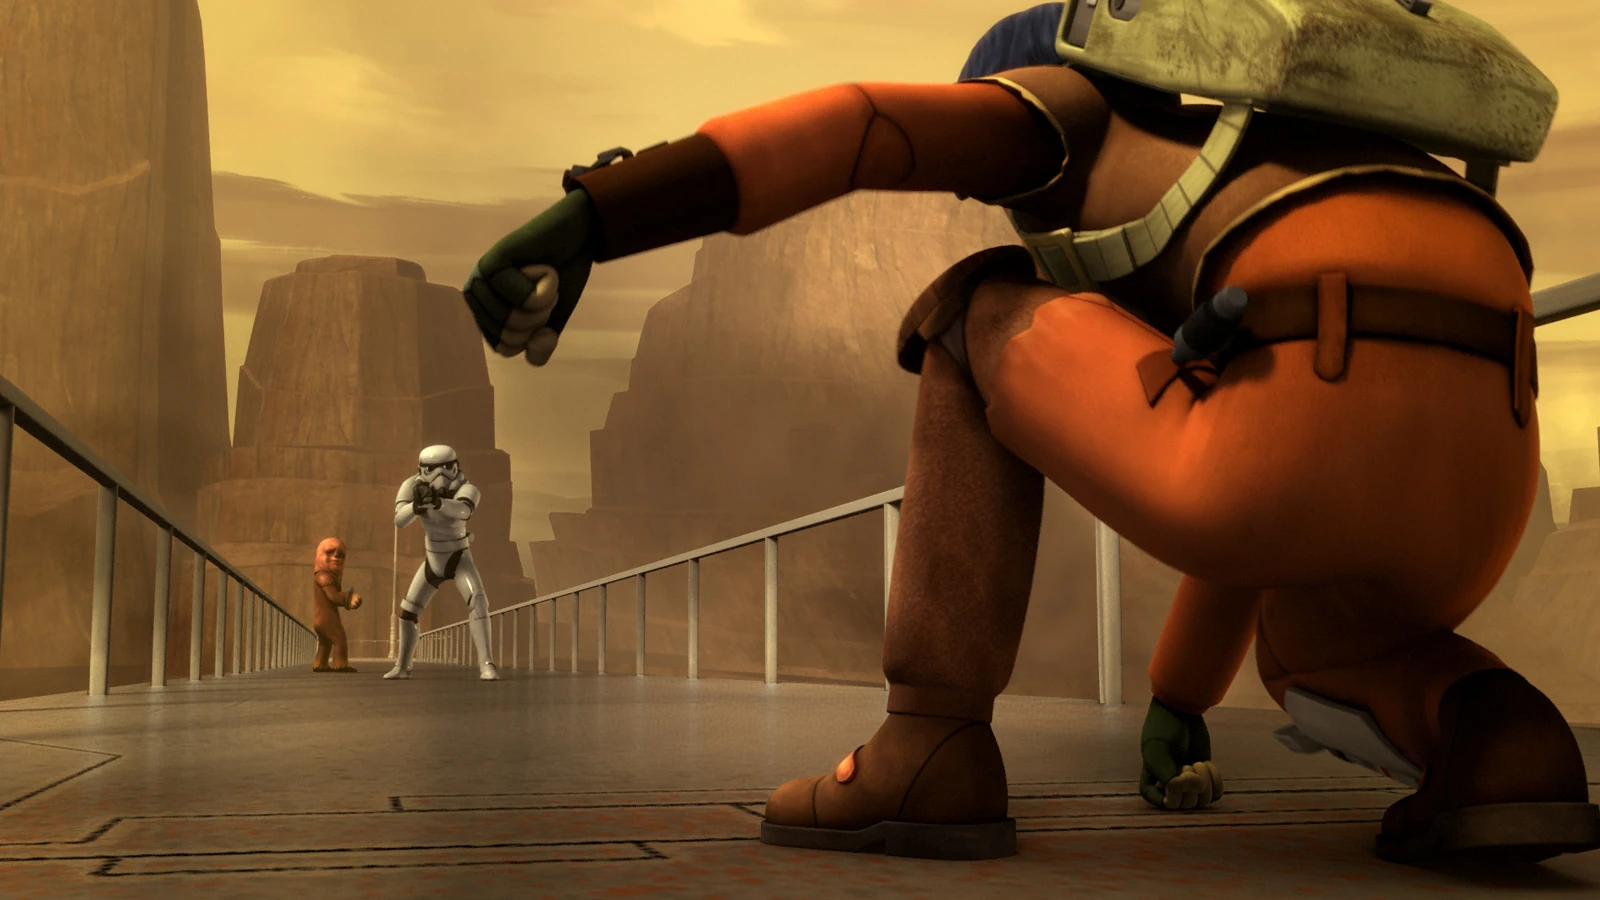

Ezra in an attempt to save Kitwarr's life from a Stormtrooper.
Once the Ghost returned, he boarded the ship along with everyone and revealed what he had learned, prompting the rebels to go to the spice mines of Kessel. There, while the others kept the stormtroopers busy, he freed the Wookiees and watched as Jarrus publicly revealed himself to be a Jedi. He rescued Kitwarr, only to be saved from Kallus by Jarrus' sudden appearance on the Ghost.[19]
After sending the Wookiees on their way, Ezra stole Kanan's lightsaber once again, but returned the holocron before departing to his tower. Shortly after entering his room, Jarrus gave him two choices—to keep the lightsaber and remain on Lothal, or return to the ship and become his Padawan and a member of the Ghost’s crew. After taking some time to think on the offer, Ezra returned the lightsaber to Kanan, and became his apprentice.[19]
Mission to steal the Imperial disruptors
His traning, however, only began after a heist to steal Imperial disruptors on the nearby planet of Garel, involving the droids C-3PO and R2-D2. During the mission, Bridger—along with Jarrus, Orelios, Wren and Chopper—boarded the same star commuter shuttle where Amda Wabo and Minister Maketh Tua negotiated their agreement while on their way to Garel. Once there, Bridger infiltrated Bay Seven to open the door to the rest of the team, who managed to steal the T-7 ion disruptor rifles, and returned to Lothal. There, Syndulla told the boy of Lasan's fall. During the unsuccessful transaction with Cikatro Vizago due to Kallus' arrival, Ezra saved Zeb after his duel with the ISB Agent. His use of the Force prompted Jarrus to begin his training the following day.[21]
The meiloorun hunt

Sabine Wren's depiction of Chopper's prank.
Some time later, Bridger accidentally angered Orrelios due to Chopper's actions and ended up making a mess in the cargo hold. Exasperated, Syndulla sent them both to town for a supply run, with a list that included the rare meiloorun fruit. The boy and the Lasat went to Kothal, where they resolved to steal the fruit from an Imperial convoy. However, Bridger and Orrelios were forced to split up, with the Lasat stealing a TIE fighter to escape and save Bridger. Once aboard, the two contacted Syndulla and Jarrus, who ordered them to destroy the fighter and proceed to a rendezvous point.
Before doing so, Bridger asked Orrelios to check out a rising column of smoke on the horizon, which they discovered to be Morad Sumar's freshly-destroyed farm. The pair decided to help the farmers, who were being held as prisoners aboard an Imperial Troop Transport. After a small confrontation, the pair managed to save Sumar and two other prisoners from Yogar Lyste, and retrieve a meiloorun fruit. Afterwards, they hid the stolen TIE fighter,[7] but claimed to have destroyed it, to Jarrus and Syndulla's approval. Back aboard the Ghost, Wren showed them her new work of art, depicting Chopper's prank.[22]
Stygeon Prime
- "I don't want to dump you. Look, I just wanted you to have the best teacher."
"Well, I don't want the best teacher! I want you." - ―Kanan and Ezra

Ezra training on the top of the Ghost.
After struggling with his Jedi training under a master full of self-doubt, Bridger saw one of Senator Gall Trayvis's broadcasts for the first time, and was upset to hear that Jarrus wanted the imprisoned Jedi Master Luminara Unduli to teach Bridger and willing to free the Mirialan from the Spire on Stygeon Prime. Nevertheless, the boy took part of the operation and accompanied Jarrus to Unduli's cell, only to discover that she had been dead for years and was being used by the Grand Inquisitor as bait to lure any surviving Jedi to their end. Bridger tried to help Jarrus on his duel against the Pau'an, who tried to lure the boy to the dark side. After a difficult escape and their return to Lothal, Kanan promised him he would no longer try to teach Ezra, but to do with newfound resolve.[23]
The Imperial Academy
Sometime later, Kanan sent Ezra on mission to steal a decoder containing the location of a kyber crystal at Lothal's Imperial Academy. Ezra was also supported by Chopper, Sabine and Zeb. Chopper infiltrated the Academy disguised as an Imperial astromech droid while Sabine and Zeb waited outside the Academy in a landspeeder to pick Ezra up. Meanwhile, Kanan and Hera waited in space on the Ghost to launch their strike on the Imperial convoy carrying the kyber crystal.[10]
For this mission, Bridger posed as "Dev Morgan", a transfer Cadet from the Pretor Flats Academy on the far side of Lothal. Upon arriving, Dev was assigned to Unit Aurek, a four-member unit in Squad LRC077. While Dev quickly befriended Jai Kell, he was disliked by Nazhros Oleg and Zare Leonis. The latter disliked Dev's braggadocio and carefree attitude and suspected that he was a spy or part of the plot that ensnared his sister Dhara Leonis. Unknown to Ezra, Leonis was a rebel sympathizer who had infiltrated the Academy to find his sister.[24]
Bridger's arrival coincided with Squad LRC077 participating in a series of assessments run by Commandant Cumberlayne Aresko and Taskmaster Myles Grint. Due to his Force powers, Ezra was able to win five consecutive assessments over a period of two days. This caught the attention of not only the Imperial authorities at the Academy but Zare himself, who noted that Dev always seemed to be "in the right place at the right time." During the sixth exercise, Dev and the other cadets had to leap onto floating repulsorlift platforms in order to climb out of the Well. After struggling with Oleg, Bridger was the first to reach the top, followed by Kell and Leonis respectively. As a reward, the three Cadets were assigned to work as aides at the Imperial Complex on Lothal.[24]
While working in the Imperial Complex, Ezra infiltrated Agent Kallus' office and stole the decoder. Before he could leave, he was intercepted by Leonis, who shoved Bridger back into the room. To Bridger's surprise, Zare helped him by revealing that the device had a built-in sensor which would cause the facility to go into lockdown if it was illegally taken out of the room. Later that night, Zare asked Dev why he needed the decoder. While not revealing his true identity, Ezra revealed that his friends needed it to stop an Imperial shipment. When Ezra asked Leonis how he knew about the sensors, Zare told him about his missing older sister Dhara. While the Empire claimed that she had run away, he believed that the Empire was not telling the truth.[24]
During their meeting, the two boys reached an agreement that Zare would help Dev to steal the decoder from Kallus' office. After Dev and his rebel associates had finished using the decoder, they would provide it to Leonis' girlfriend Merei Spanjaf, a hacker who was trying to access classified Imperial files about Dhara. In order to work in the Imperial Complex, both boys resolved to win the next assessment in the Well. This time, the assessment involved the Cadets using E-11 rifles to shoot targets in order to activate the panels necessary to climb out. During the exercise, Ezra was forced to shove Jai in the back in order to maintain his place. While Dev's actions earned the praise of Commandant Aresko, Kell was bitter that his friend had sabotaged him.[24]
With Merei's help, Dev and Leonis managed to forge a fake requisition order for podracer spareparts. While Leonis distracted Kallus with the fake order, Ezra crept into the ISB agent's room through the ceiling and used the Force to levitate the decoder. However, Ezra also discovered that Commandant Aresko had taken an interest in himself and Jai Kell, who met the Grand Inquisitor's "special criteria". The Inquisitor responded that he would visit the Academy the following day to assess the two Cadets and take them into custody. When pressed by Zare, Dev admitted that he was Force-sensitive. Both resolved to prevent Kell from meeting the same fate as Dhara.[24]
Ezra managed to pass the stolen decoder to Chopper and also recorded a message for Sabine and Zeb. In that message, he told his fellow rebels that he had to stay in the Academy to protect Kell from being kidnapped by the Inquisitor. He also told Chopper, Sabine, and Zeb to attack the Academy in the morning in order to create a diversion for them to escape.[10] That night, Dev and Leonis woke up Kell and convinced him to escape with them. While Kell was initially distrustful, Leonis managed to reason with him by telling him about his sister. The three Cadets then resolved to escape the Academy by winning the next training exercise in the Well so that they could ride on the AT-DP walker.[24]
The following day, their plan encountered an unexpected setback when Ezra was knocked down by a blast fired by Oleg. Thus, Kell, Leonis, and Oleg were designated as the winners and allowed to ride on the AT-DP walker. Despite this problem, Dev told his fellow Cadets to stick to the plan. As part of the escape plan, Chopper planted a detonator on a nearby AT-DP walker, causing it to crash to the ground. This gave the signal for Jai to stun the walker's Imperial combat driver and Oleg with his blaster. The hijacked AT-DP walker then exchanged fire with an Imperial Troop Transport. During the chaos, Ezra used his Force abilities to climb onto the walker under the ruse of fighting the hijackers.[24]
With much difficulty, the AT-DP walker managed to exit the Academy's gates. There, Ezra and Kell were picked up by the other rebels. However, Leonis opted to stay behind in order to find out about his sister and told him they would stay in touch. After Syndulla and Jarrus' return to Lothal, the rebels agreed to help Kell and his mother hide from the Empire. Following the rebel attack on the Academy, the Inquisitor quickly realized upon examining a picture of "Dev Morgan" that he had encountered Ezra and his Master before.[10]
Disaster at Fort Anaxes
Later on, Bridger accompanied Syndulla and Wren aboard the Phantom for an assault on a Imperial convoy, but the damage done to the shuttle had to be repaired. Assigned along with Orrelios and Chopper to repair it, they never finished due to another of their scuffles, thus leaving Wren and Syndulla temporarily trapped on their mission to Fort Anaxes. After rescuing them, the boy and the Lasat apologized.[25]
Empire Day
- "I am ready. Wait. Ready for what?"
"For a test, a real challenge one that could determine if you're meant to be a Jedi or not." - ―Bridger and Kanan Jarrus
On Bridger's fifthteenth birthday, Jarrus began training Bridger to use the Force to influence animals, but they soon went to Old Jho's Pit Stop to learn of the Empire's search for an old friend of Bridger's parents, the Rodian Tseebo. Wanting to be alone for a while, Bridger returned to his tower only to meet up with Jarrus, Wren and Orrelios after they ruined the Imperial parade by detonating a bomb in the recently-unveiled TIE Advanced v1.[3]
During their escape, Bridger guided Jarrus and Wren into his old residence, where they found Tseebo and the boy told them of his past. Considering the valuable information the Rodian possessed, the three rebels decided to smuggle him out of Capital City in a stolen Imperial Troop Transport, and later aboard the Ghost.[3] Despite being pursued by both Kallus and the Inquisitor, the ship managed to jump into hyperspace after Tseebo transmitted the hyperspace coordinates to the Ghost's hyperdrive. Later, when the crew were discussing what to do with Tseebo, Ezra expressed hostility and indifference since Tseebo had not helped his parents when the Empire came after them.[26]
Ezra briefly recounted how he had been living on the streets of Lothal for the past eight years until he encountered the crew of the Ghost. Kanan warned his apprentice that he could not move forward if he was unable to let go of his past. In the middle of the meeting, Tseebo detected the presence of a tracking beacon, which Chopper quickly deduced was located on the Phantom's hull. Sensing that the Inquisitor was pursuing them, Kanan decided that he and Ezra would depart on the Phantom in order to lure the Imperials away from the Ghost. Prior to departing, Ezra was still unable to forgive Tseebo.[26]
After exiting hyperspace, Ezra and Kanan took the shuttle to PM-1203, the asteroid which hosted the former Republic base Fort Anaxes. Earlier, Hera and Sabine had been stranded on Fort Anaxes and accosted by the local fyrnocks after the Phantom experienced a fuel leak. Once in there, Jarrus prompted Bridger to let go of his fear, so that he could connect with the fyrnocks. After accepting his fear and forgiving Tseebo, Bridger learned how to influence the creatures. When the Inquisitor and his stormtroopers arrived on the asteroid, Ezra unleashed the fyrnocks on them. As Jarrus dueled the darksider, Bridger commanded the fyrnocks to attack the remaining stormtroopers.[26]

Ezra briefly gives into the dark side of the Force.
However, as the Pau'an managed to knock out Jarrus and cornered Bridger, the boy tapped into the dark side and controlled an enormous fyrnock that attacked the Inquisitor. However, this momentarily knocked Bridger out, forcing his master to carry him to the Phantom. On their return to the Ghost, Jarrus explained to him what happened and apologized for not teaching him what he needed to know. Then, Bridger spent some time alone until Wren gave him a birthday gift—a disk containing a picture of Bridger and his parents together—, and proceeded to stare at the picture for a while. Unknown to Ezra, Hera had a brief conversation with Tseebo prior to him departing into hiding with the mysterious rebel leader known as Fulcrum. He revealed the true fate of Ezra's parents and Hera promised to tell Ezra the truth when he was ready.[26]
Jedi Trials

Yoda appears to Bridger as a guiding light.
Some time after his dangerous connection with the Dark Side on Fort Anaxes, Bridger missed training for showing Wren the TIE fighter he had stolen during an earlier adventure with Orrelios.[7] Kanan then decided to put his apprentice through a challenge to determine if he was worthy of being a Jedi. To do so, he instructed Bridger to locate a Jedi Temple, which to their surprise was on Lothal. Once inside the temple, Bridger continued alone and was faced with several illusions.[27]
Firstly, he saw the Inquisitor striking Jarrus down. Secondly, he heard the rest of crew speaking about Bridger as if they had little faith in him, only for them to be killed by the Inquisitor. Thirdly, Ezra was forced to confront the Inquisitor alone. However, the boy managed to see through the illusions and overcome his fear. After passing through his trials, Ezra heard the voice of the Jedi Master Yoda. The Jedi Master guided him through the ancient temple and asked him a series of questions. When asked why he wanted to become a Jedi, Bridger admitted that he desired revenge against the Empire. When corrected by Yoda, Ezra expressed his desire to protect others. Pleased by Ezra's answers, Yoda gifted him a kyber crystal and wished Ezra well in his Jedi path.[27]
Returning to entryway and meeting up with Jarrus, his master explained that the small crystal he had received could be used to build a lightsaber. Over the course of several weeks, Bridger built a lightsaber with the help of the crew. Jarrus gave him spare lightsaber parts that he had found over the previous fifteen years, Wren donated modulation circuits and an energy gate, Chopper donated a power cell and Syndulla likewise provided additional technology based on Bridger's specifications[1]. With all of the rebels assembled, the boy presented the finished weapon to Jarrus, who thought the design fit his apprentice. When he returned it, Bridger ignited the lightsaber for the first time.[27]
Dealing with Lando
After Orrelios and Jarrus lost Chopper in game of sabacc to Lando Calrissian, they reluctantly struck a deal to help him smuggle goods to Lothal. During their job run for Calrissian, Bridger quickly took a dislike for Calrissian after the "galactic entrepreneur" flirted with the young Mandalorian. After the smuggler received a puffer pig from Azmorigan and Syndulla returned to the Ghost, Bridger and Orrelios scared the pig, cuasing the creature to inflate. This left Hera and the rest of the crew trapped outside the bridge. In the meantime, Kanan was force to take the helm of the Ghost.[28]
To make matters worse, Bridger climbed over the puffer pig, causing the animal to inflate even more and accidentally pushing Orrelios to deactivate the Ghost's signature mask. The Ghost was then pursued by several TIE fighters but Kanan managed to loose them following a brief dog-fight. Upon landing at Calrissian's farm, the rebels were immediately accosted by Azmorigan and his henchmen, who had come for retribution against Calrissian. However, the rebels fought them off and drove them away. During the fight, Ezra used his lightsaber to fire shots at Azmorigan's henchmen. After saving Lando, the crew departed on the Ghost with Chopper stealing Calrissian's fuel canisters as compensation for their risky job.[28]
The false rebel

Bridger and Jarrus attempting to protect Trayvis from Imperial forces.
After a training session on deflecting blasters, Ezra experienced a vision that involved Gall Trayvis. Later, he and his comrades saw Trayvis's broadcast inviting the rebels to meet him at the Old Republic Senate Building in Lothal's Capital City. Despite his eagerness, Jarrus' suspicions made Bridger verify some intel with his old friend Zare Leonis, who then informed him know that he was being transferred to Officer's Academy in Arkanis. Feeling guilty, Bridger then revealed "Morgan" was an alias, but as stormtroopers interrupted their meeting, he was unable to tell Leonis his real name.[29]
Later, Bridger rejoined the rest of the team and met Trayvis at the Senate Building, only to be cornered by Agent Kallus and Minister Maketh Tua. Escaping through the sewers, the rebels split into two groups. Kanan along with Sabine and Zeb departed in one direction. Meanwhile Bridger, Syndulla and Trayvis reached a dead end, blocked by a fan. At this opportune moment, the Senator revealed his true colors as an Imperial agent. Syndulla, however, knocked him out just as they were rejoined by Wren, Orrelios and Jarrus. They then linked up with Chopper and fled aboard the Ghost. After escaping, Bridger was very disappointed for interpreting his vision incorrectly, which Jarrus said was because of his emotions, but Syndulla encouraged the boy to have hope.[29]
Confronting Tarkin
- "Stand up together. Because that's when we're strongest—as one."
- ―Ezra Bridger
After a raid near Jalath, the turncoat Senator Trayvis gave a public broadcast on HoloNet reaffirming his loyalty to the Empire and condemning the Spectres. In response, Kanan decided to hijack the Imperial Communications Center near Jalath to broadcast their own counter-propaganda. Bridger participated in this mission and accompanied Jarrus, Wren, Zeb, and Chopper on their mission to infiltrate the tower. Despite destroying a dwarf probe droid, Grand Moff Wilhuff Tarkin was alerted to their presence and ordered the Inquisitor and Agent Kallus to launch their trap. Tarkin had arrived on Lothal to implement a permanent solution to the Lothal rebel presence.[30]
Despite Ezra's concerns, he took part in the mission to secure the tower. Chopper uploaded a data spike which allowed the rebels to control the tower. When the rebels were cornered by Imperial forces, Kanan ordered Bridger and the other rebels to escape up the lift to the top of the tower while he confront the Imperials alone. After destroying an Imperial patrol transport, Ezra and his companions reluctantly escaped with Hera aboard the Phantom; leaving Kanan behind. Following Kanan's capture, Bridger spoke to the people of Lothal at sunrise, encouraging them to stand up against the Empire. He finished his message just as Tarkin ordered his patrol transports to destroy the tower.[30]
Determined to rescue Jarrus, Bridger disobeyed Syndulla's orders to stop searching for the former Jedi and enlisted Chopper, Wren and Orrelios' help to escape on the Phantom. While Chopper kept Hera preoccupied, Ezra along with Wren and Orrelios met up with the Devaronian crime lord Vizago. After revealing to his Force powers to Vizago, the crime lord revealed that the Imperials were using courier droids to transport classified information in the light of the comm tower's destruction. With Syndulla's approval, he conceived a plan and they sent a disguised Chopper to retrieve Jarrus' location, only to learn at the droid's return that Jarrus was being held aboard Tarkin's Star Destroyer Sovereign, which was due to travel to the Mustafar system.[31]
To approach the Sovereign, the rebels stole an Imperial transport ship and used their stolen TIE fighter to infiltrate the Star Destroyer. Once inside, Bridger separated from the others and rescued Jarrus from his cell, helping him walk to the reactor core where they were confronted by the Inquisitor. Though he tried to assist Jarrus in his duel with the Pau'an, Bridger was quickly overpowered by the darksider and fell onto another platform—his apparent death prompting Jarrus to lose his fear and fight with renewed resolve.[7]
After receiving a message from Syndulla, Bridger reunited with his master, who had just defeated the Inquisitor once and for all. The two, then, told Syndulla to part with Orrelios and Wren while they took the Inquisitor's TIE to join them. However, the rebels could escape only when Chopper and a fleet of blockade runners jumped from hyperspace and attacked the pursuing TIE fighters. Afterwards, the rebels docked with the Ghost and escaped the Mustafar system, Syndulla revealed that their cell was part of a wider rebel network. They were also greeted by a hologram of Senator Bail Organa and Fulcrum, who revealed herself as the Jedi Padawan Ahsoka Tano. She then informed them that Bridger's message had given people hope and that a new chapter in the boy's life was about to begin.[7]
The Rebellion
Raid on Area Null


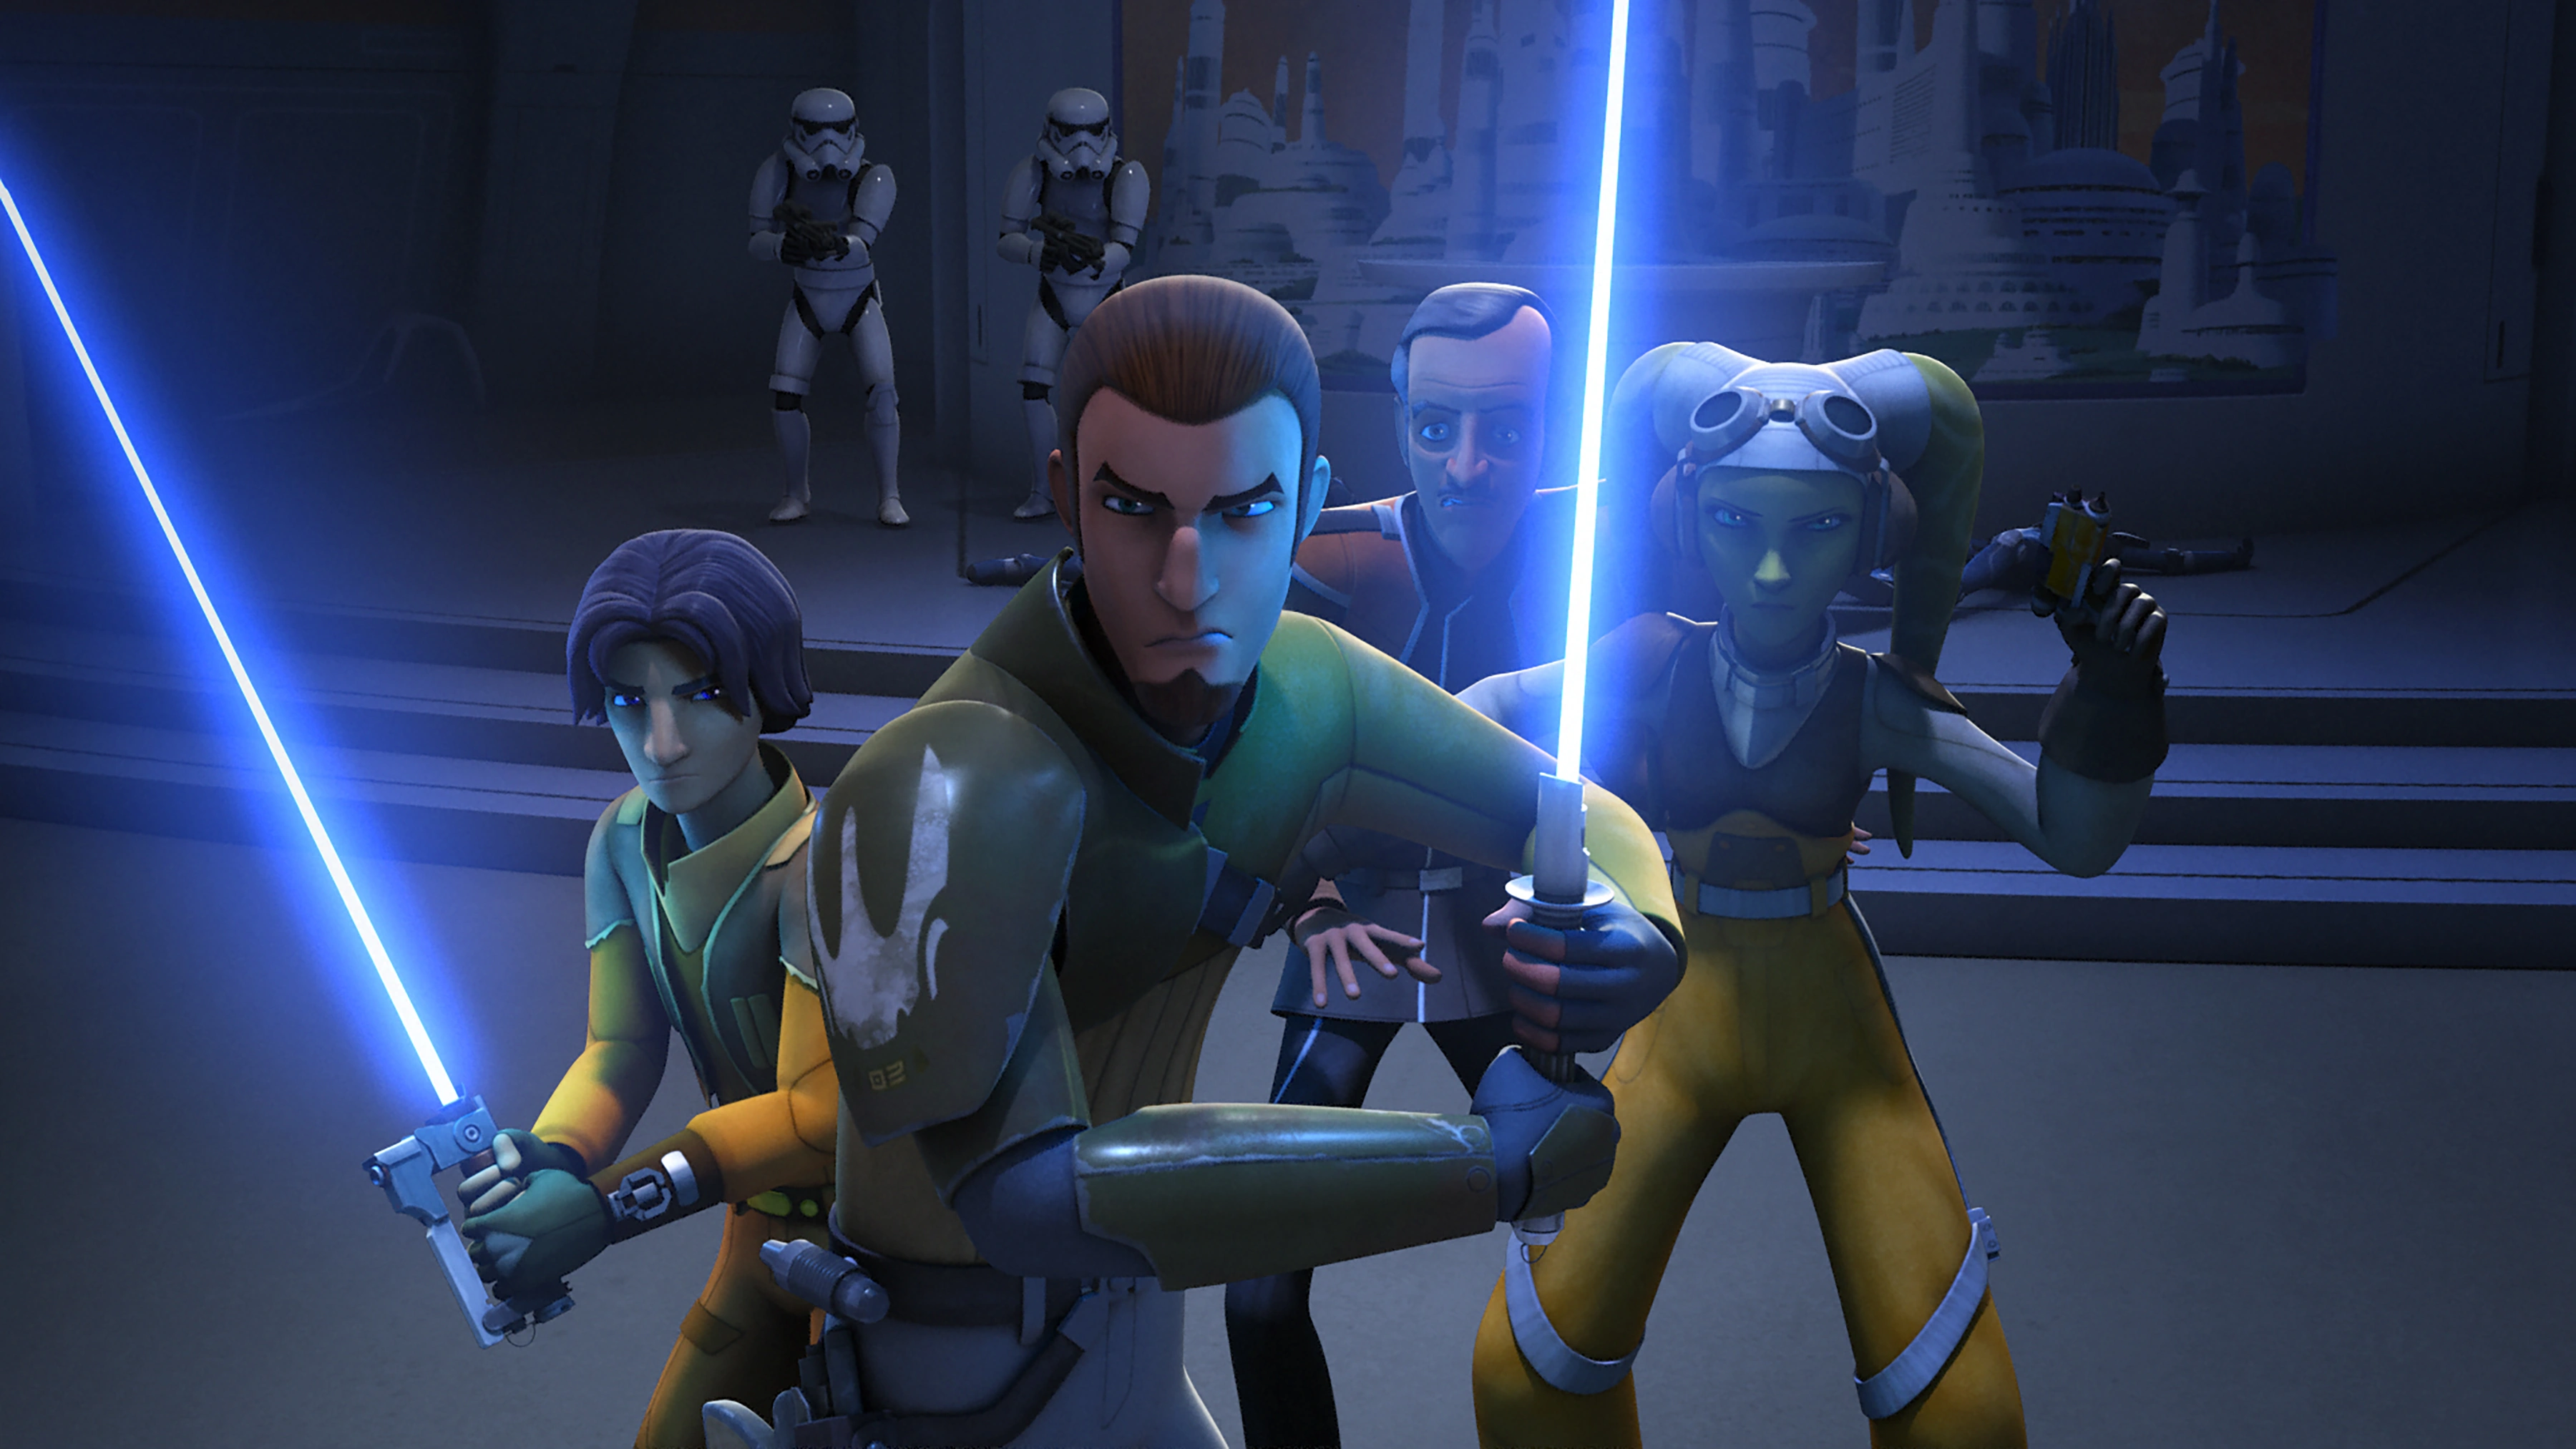
Bridger and his fellow Spectres storming Area Null
Following Kanan's rescue, Ezra Bridger and two of his fellow rebels Zeb and Sabine participated in a mission to rescue Zare Leonis, a cadet at the Lothal Imperial Academy that Ezra had befriended during a mission to steal a decoder from Agent Kallus. Earlier, Ezra's companions had picked up several fugitives including Zare's girlfriend Merei Spanjaf, a slicer who had managed to hack into the Imperial data network on Lothal. Merei also discovered that Zare had been exposed as a traitor while training at the Arkanis Academy and was scheduled to be tried before a military tribunal. Merei convinced Ezra and her companions to help her.[32]
Together with Merei and her mother Jessa Spanjaf, Ezra, Zeb, and Sabine traveled to the planet Arkanis on the Ghost, which they had borrowed from Hera without seeking her permission. After learning that Zare was being held at a secret Imperial facility known as Area Null, Ezra and his companions landed the Ghost on the facility's rooftop. Making their way downstairs, they encountered Zare and another prisoner named Beck Ollet, who had already succeeded in freeing themselves and had planed to free Zare's sister Dhara, who had been forcibly inducted into Project Harvester. While Ezra guarded the rooftop, his companions rescued Dhara and locked Imperial reinforcements out of the facility. After achieving their objectives, they returned to Garel and reunited Zare and Dhara with their parents, who had also fled into hiding.[32]
Rescuing a defector
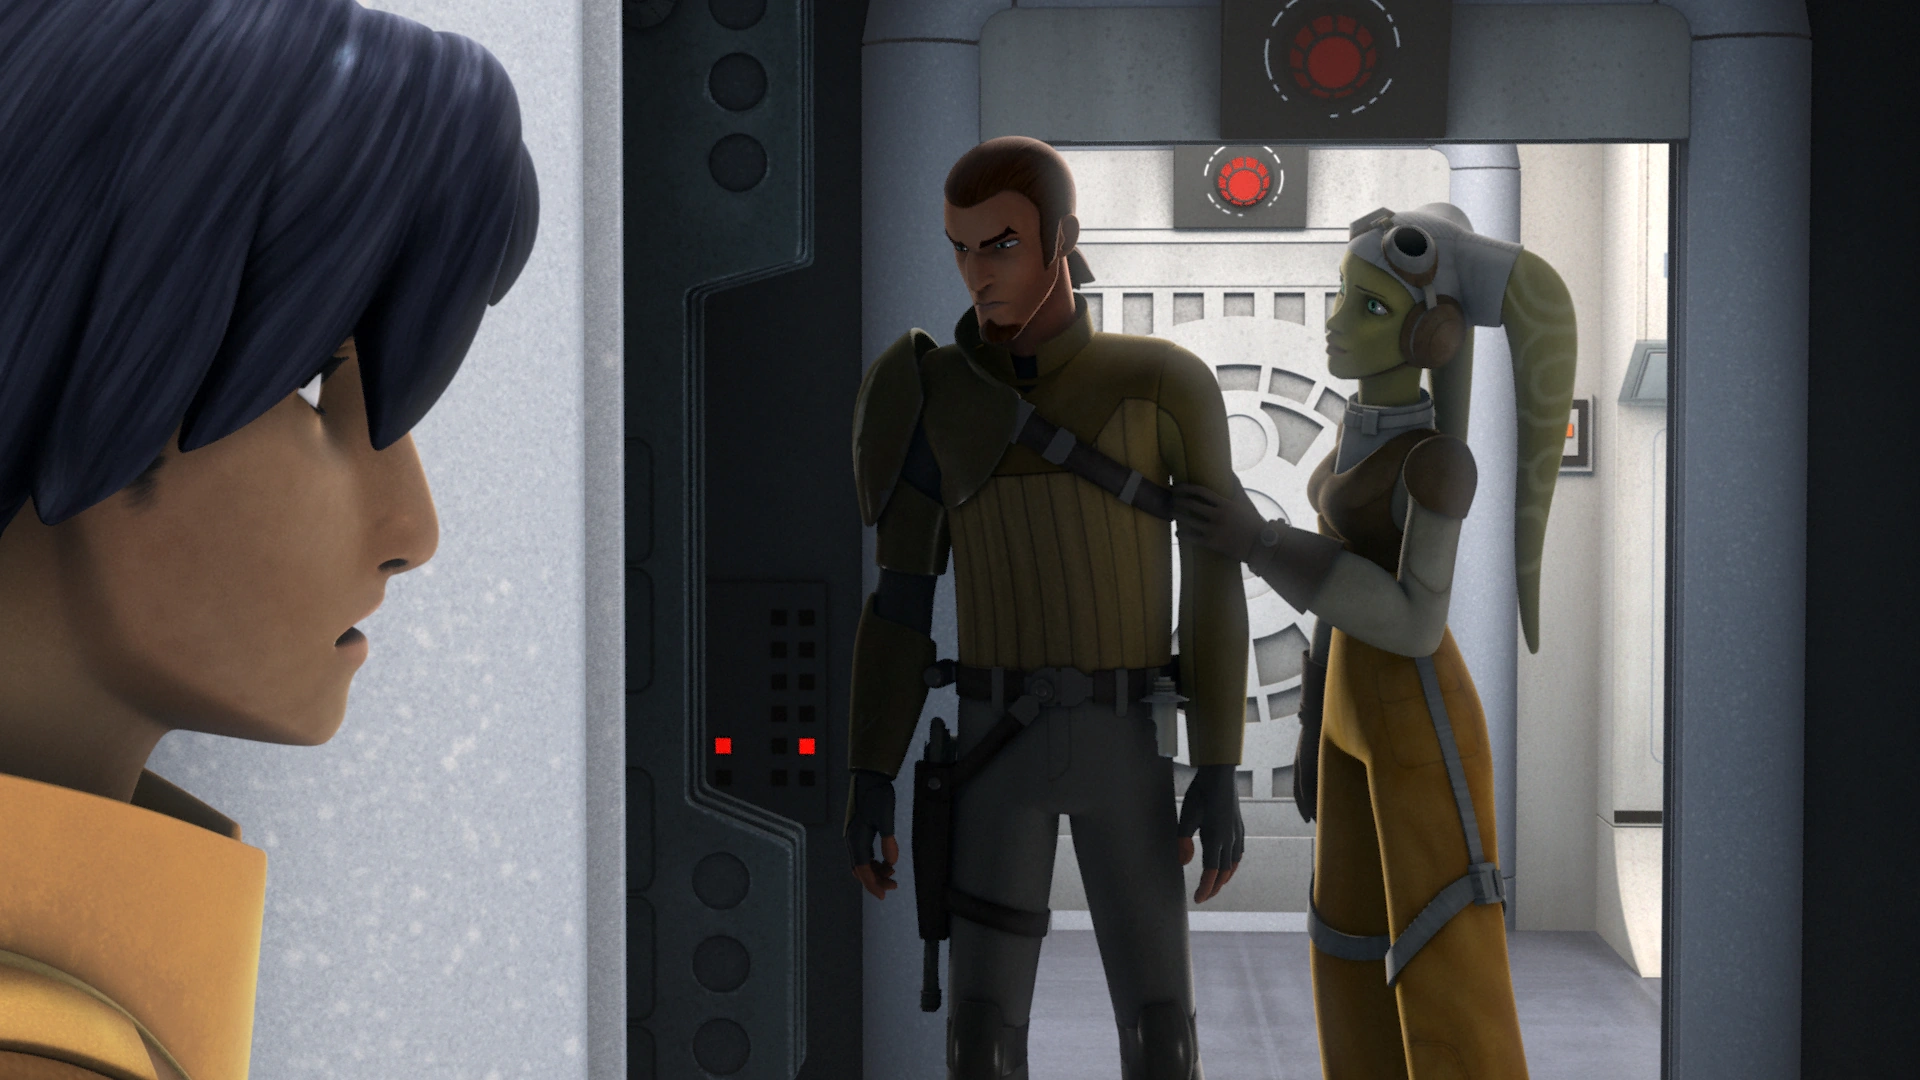
Ezra watches as Kanan and Hera discuss their differences.
Following the rescue of Kanan, Ezra learnt that his rebel cell was part of a larger rebellion against the Galactic Empire. Ezra and the other crew of the Ghost joined the Phoenix Squadron fleet and took part in a mission to steal shield generators from the Empire to help defend the fleet. The rebels ambushed a group of Imperial freighters and stole several fuel supplies from one of the vessels. After the Ghost secured the cargo, the rebels fled into hyperspace before the arrival of several Imperial light cruisers. In response to the increased rebel activity around the Lothal system, the Emperor dispatched his apprentice Darth Vader to stamp out this threat.[9]
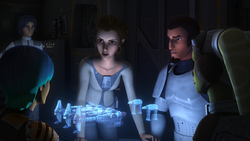
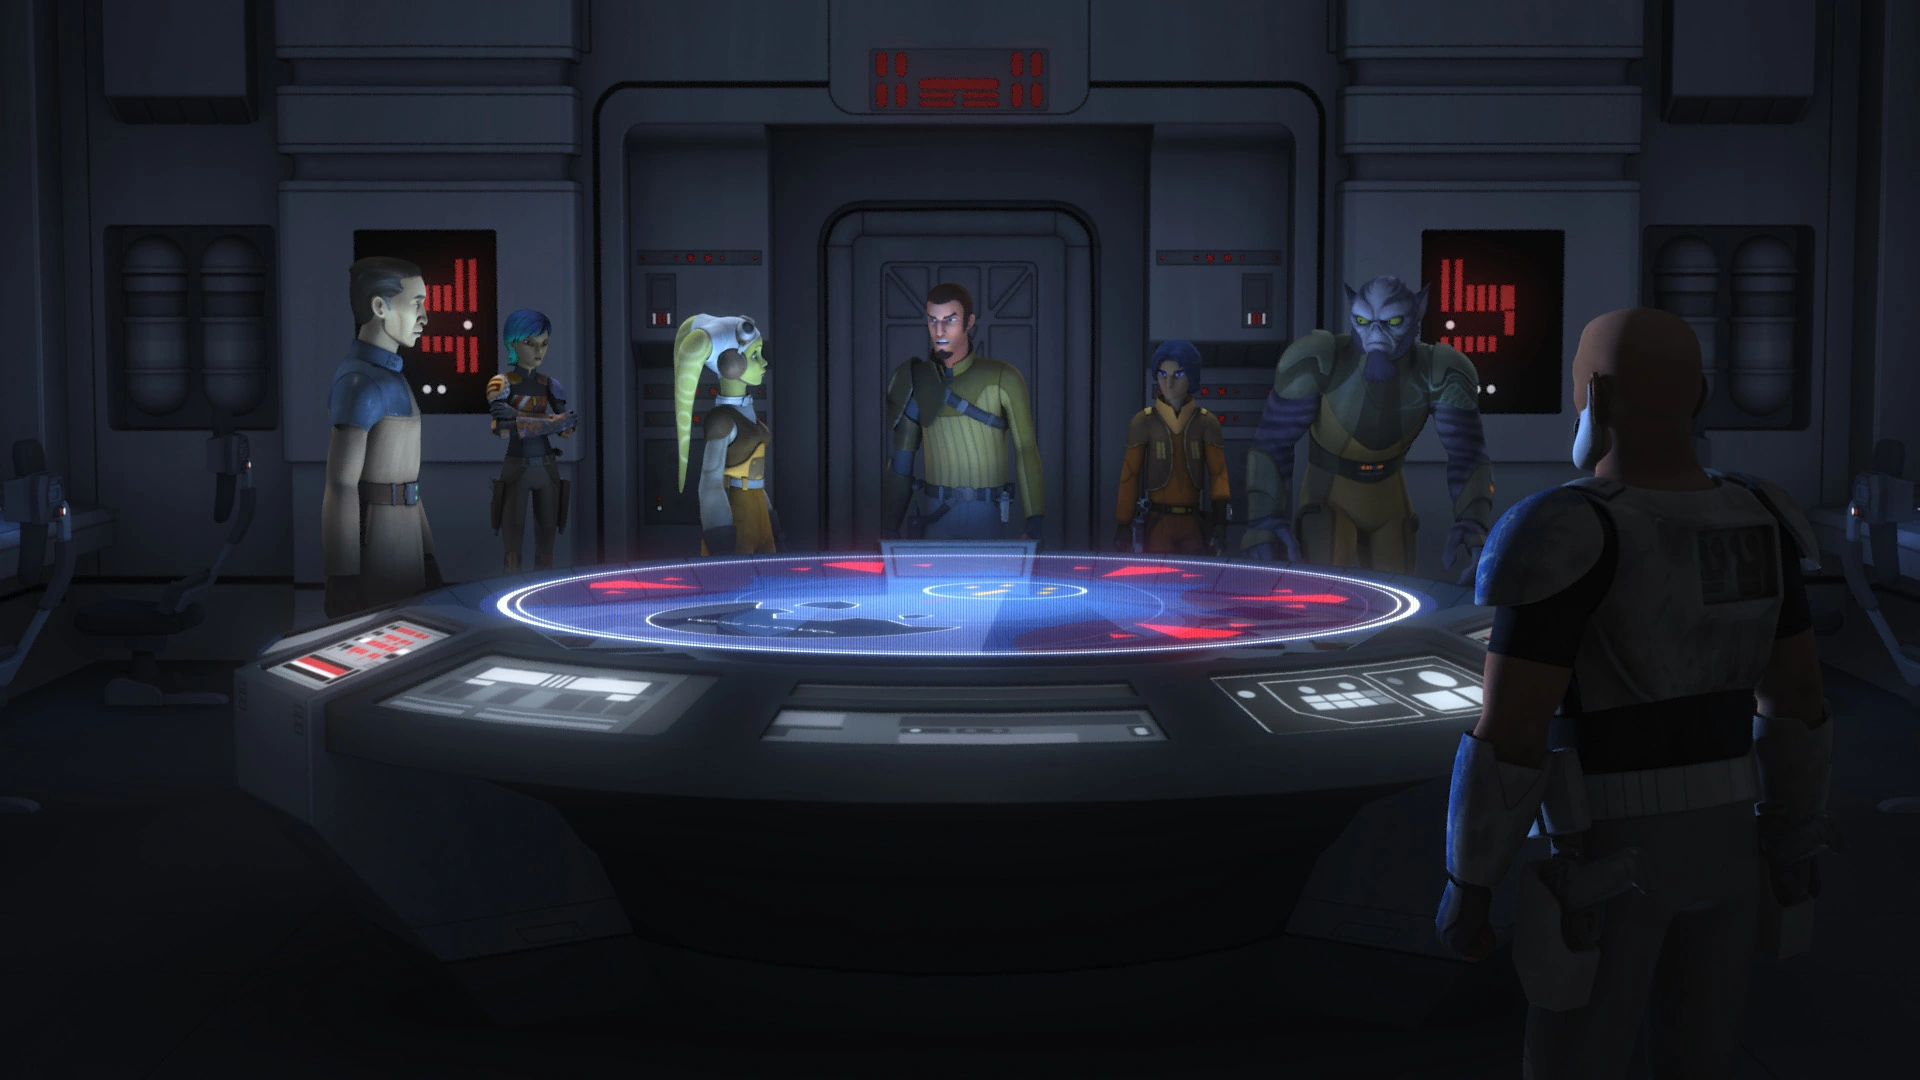
Later, Ezra was present on the bridge of the rebel command ship Phoenix Home when the Phoenix rebel leadership received a holographic transmission from the disillusioned Imperial Minister Maketh Tua, who wanted to defect from the Empire. In exchange for asking the rebels for help, she offered to reveal vital Imperial information—including the names of rebel sympathizers on Lothal and nearby star systems, as well as intelligence regarding the Empire's true mission on Lothal. During the ensuing discussion, Ezra successfully convinced his rebel comrades that they had an obligation to help her. In the end Kanan, Hera, Ahsoka, and the Phoenix cell leader Commander Sato approved the mission. Ezra was also aware of a disagreement between Hera and Kanan. While Hera supported the rebellion, Kanan was reluctant to involve the crew of the Ghost in a military operation and wanted them to return to their previous mission of robbing from the Empire and giving to the needy.[9]
As part of their mission, the crew of the Ghost infiltrated Lothal on a Star Commuter 2000 shuttle. While passing through the Imperial security cordon around Lothal, Ezra noted the increased presence of Imperial Star Destroyers above Capital City. While Zeb and Chopper stayed behind to man the shuttle, Ezra and the other rebels headed to their pre-arranged rendezvous point to pick up Minister Tua. The Imperial Minister had arranged for them to meet at a landing bay where an Imperial shuttle was waiting to take her for a private audience with Grand Moff Tarkin. Ezra, Sabine, and Hera hid among the rooftops while Kanan infiltrated the facility disguised as a stormtrooper commander. Unknown to the rebels however, Agent Kallus had set a trap for them and arranged for Minister Tua to be killed in a shuttle explosion. The rebels were blamed for the bombing and were forced to flee.[9]
Ezra and his fellow rebels attempted to escape on their Star Commuter shuttle but it was shot down by an AT-DP walker. In response, Darth Vader ordered the Imperial forces on Lothal to place the planet on lockdown and to hunt down the rebel cell. The Spectres sought shelter in Ezra's former family home but Imperial stormtroopers quickly caught up with them and the rebels barely managed to escape with their lives. During the ensuing flight, Ezra's former home was destroyed by an Imperial thermal detonator. With Imperial forces spread out throughout Lothal, the rebels decided to infiltrate the Imperial headquarters in Capital City and escape offworld. While Ezra and Kanan posed as an Imperial cadet and stormtrooper, the other rebels hid in crates. Their ruse worked and they managed to infiltrate the Imperial headquarters.[9]
Escaping Darth Vader
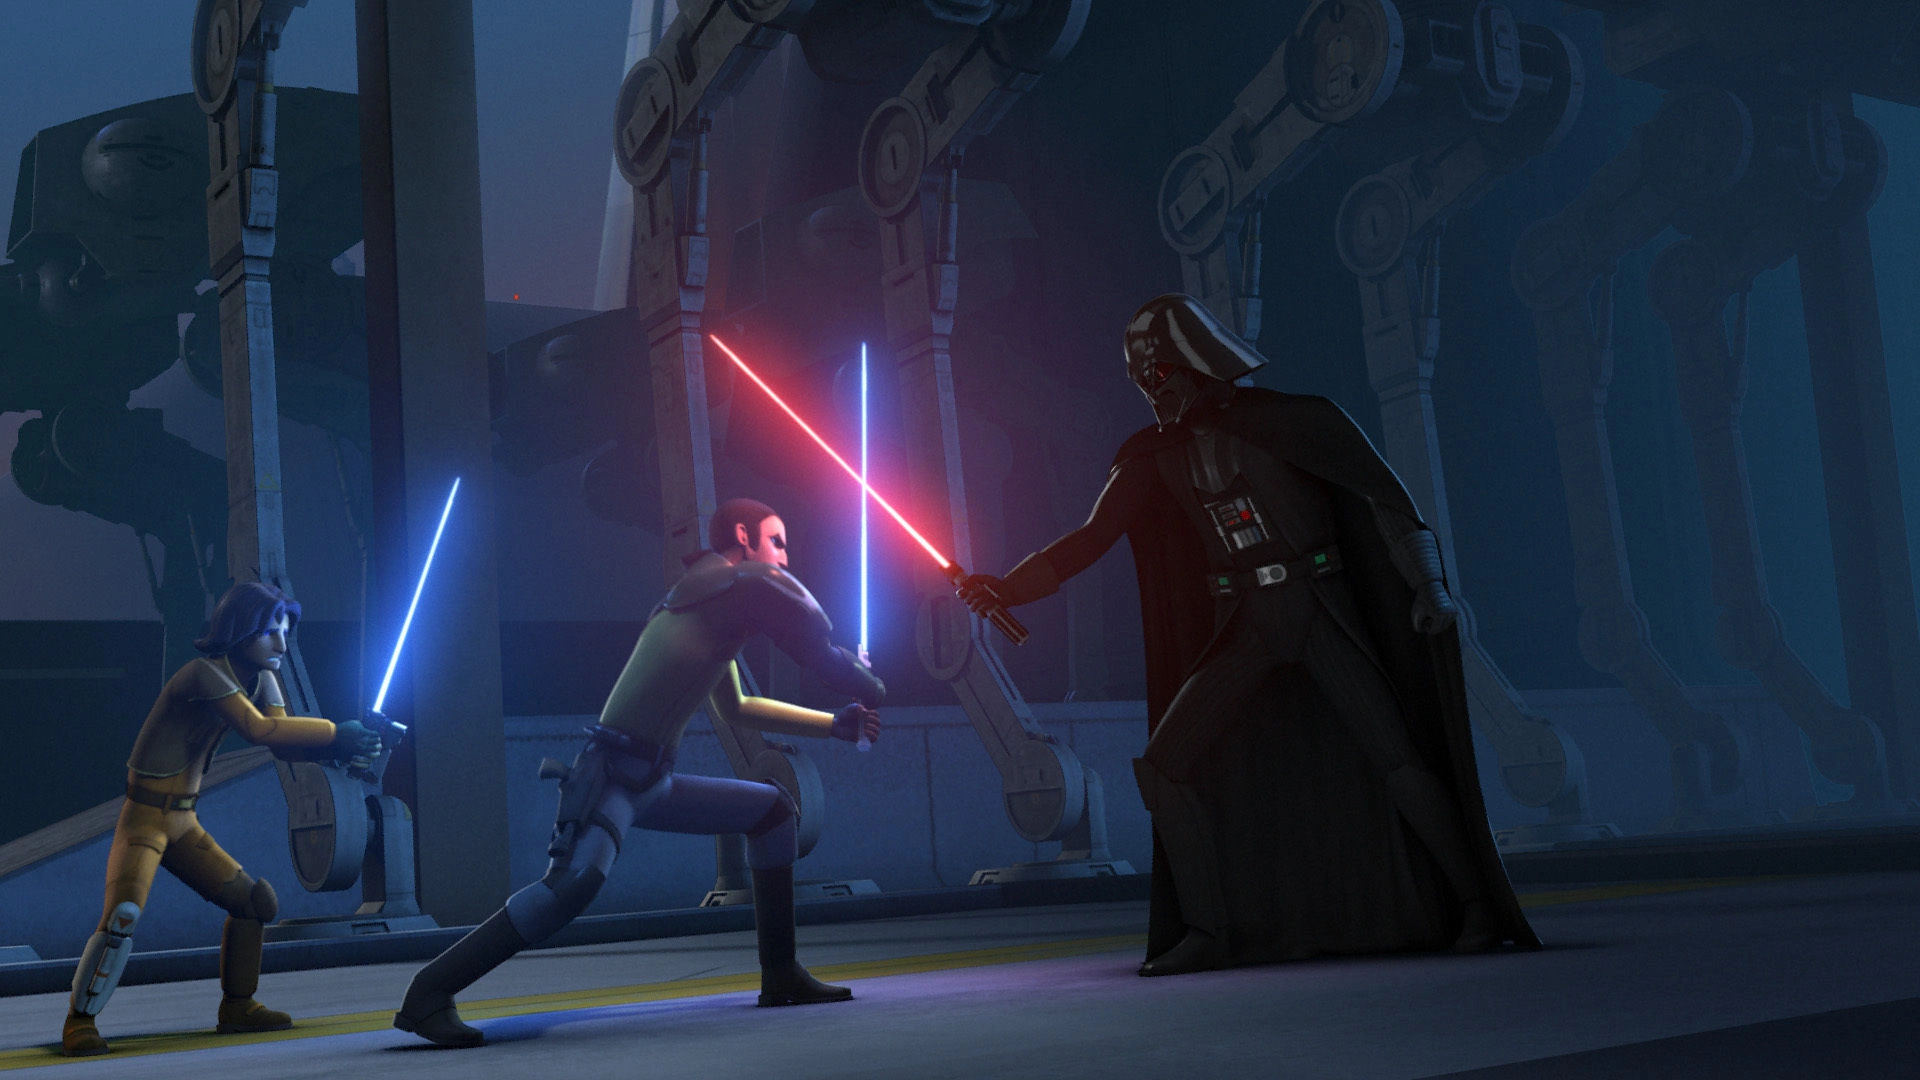

Ezra and Kanan confront Vader on Lothal.
The rebels managed to steal several shield generators and began loading them onto an Imperial shuttle. However, they were then cornered by Darth Vader who was accompanied by several stormtroopers. Ezra and his Master sensed the strong presence of the Dark Side around their new adversary. They attempted to engage the Sith Lord in lightsaber combat but found themselves outmatched by Vader, who even used the Force to summon Ezra's lightsaber towards the Padawan's neck. Only the timely intervention of Kanan saved Ezra's life. After a protracted skirmish, Ezra and his fellow rebels managed to escape the Imperial headquarters in their stolen shuttle. Following their encounter with Darth Vader, Ezra and his master Kanan conceded that this Sith Lord was much more powerful than the Inquisitor they had previously encountered and that they were lucky to escape with their lives.[9]
Knowing that Darth Vader had a blockade in orbit waiting for them, the Spectres decided to smuggle themselves offworld with the help of an old acquaintance: Lando Calrissian. Calrissian, who was offworld at the time, agreed to help them in exchange for obtaining three of their shield generators and instructed the rebels to visit his farm where his droid W1-LE would assist their escape arrangements. Shortly after arriving at Calrissian's farm, Ezra noticed smoke coming from the nearby settlement of Tarkintown and went to investigate. Upon arriving, Ezra discovered that the Imperials had rounded up the settlement's population as punishment for accepting assistance from the Spectres. Shortly later, Ezra was joined by his master Kanan who surmised that Tarkintown had been destroyed to spread fear on Lothal. Both Jedi agreed that things were getting worse in the galaxy but disagreed over whether they could make any difference.[9]
Back on Calrissian's farm, Sabine and W1-LE managed to improvised several sensor buoys that would replicate the shuttle's signal and scatter the Imperial forces trying to track them down. The rebels also resolved not to return to Lothal in order to avoid bringing further danger to its people. This ploy worked and the rebels managed to escape offworld undetected. However, Darth Vader had secretly planted a tracking device on their shuttle with the aim of tracking down the Phoenix rebel fleet. Shortly after rejoining the rebel fleet, the rebels were attacked by a lone TIE Advanced x1 starfighter piloted by Vader himself. The Sith Lord proceeded to wreck havoc among the rebel ships and inflicted heavy damage on the flagship Phoenix Home. During the space battle, Ezra sensed Vader's presence. Tano also sensed the Dark Lord's presence and quickly discovered that he was none other than the former Jedi Knight Anakin Skywalker. Vader was then joined by two Star Destroyers but the Ghost and the surviving Phoenix rebels managed to flee into hyperspace.[9]
Following the battle, Ezra and Kanan related their earlier confrontation with Darth Vader to Ahsoka Tano. When Ezra questioned her about whether she knew who the Sith Lord was, Tano feigned ignorance due to the sensitive nature of the topic. Despite the odds against them, the three Jedi resolved to fight against Vader and anyone else seeking to destroy them.[9]
Meeting the lost commanders
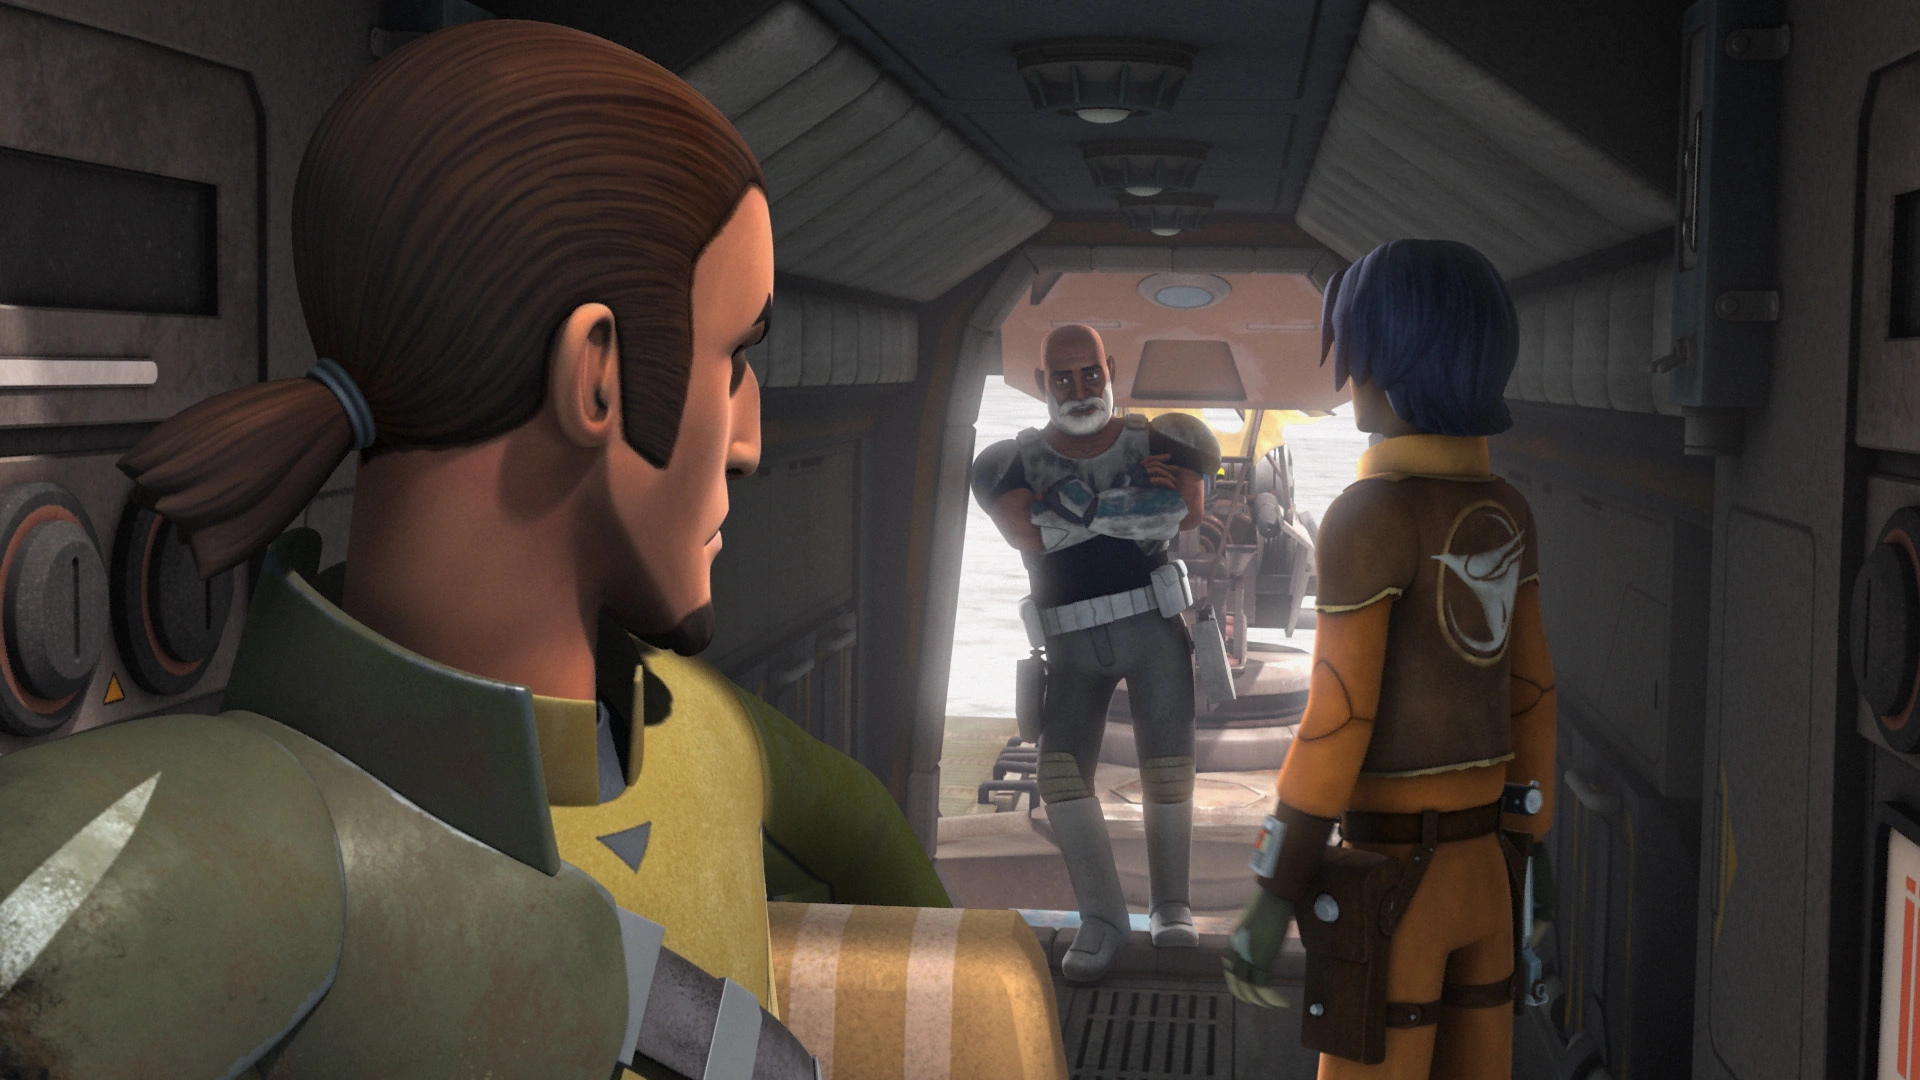
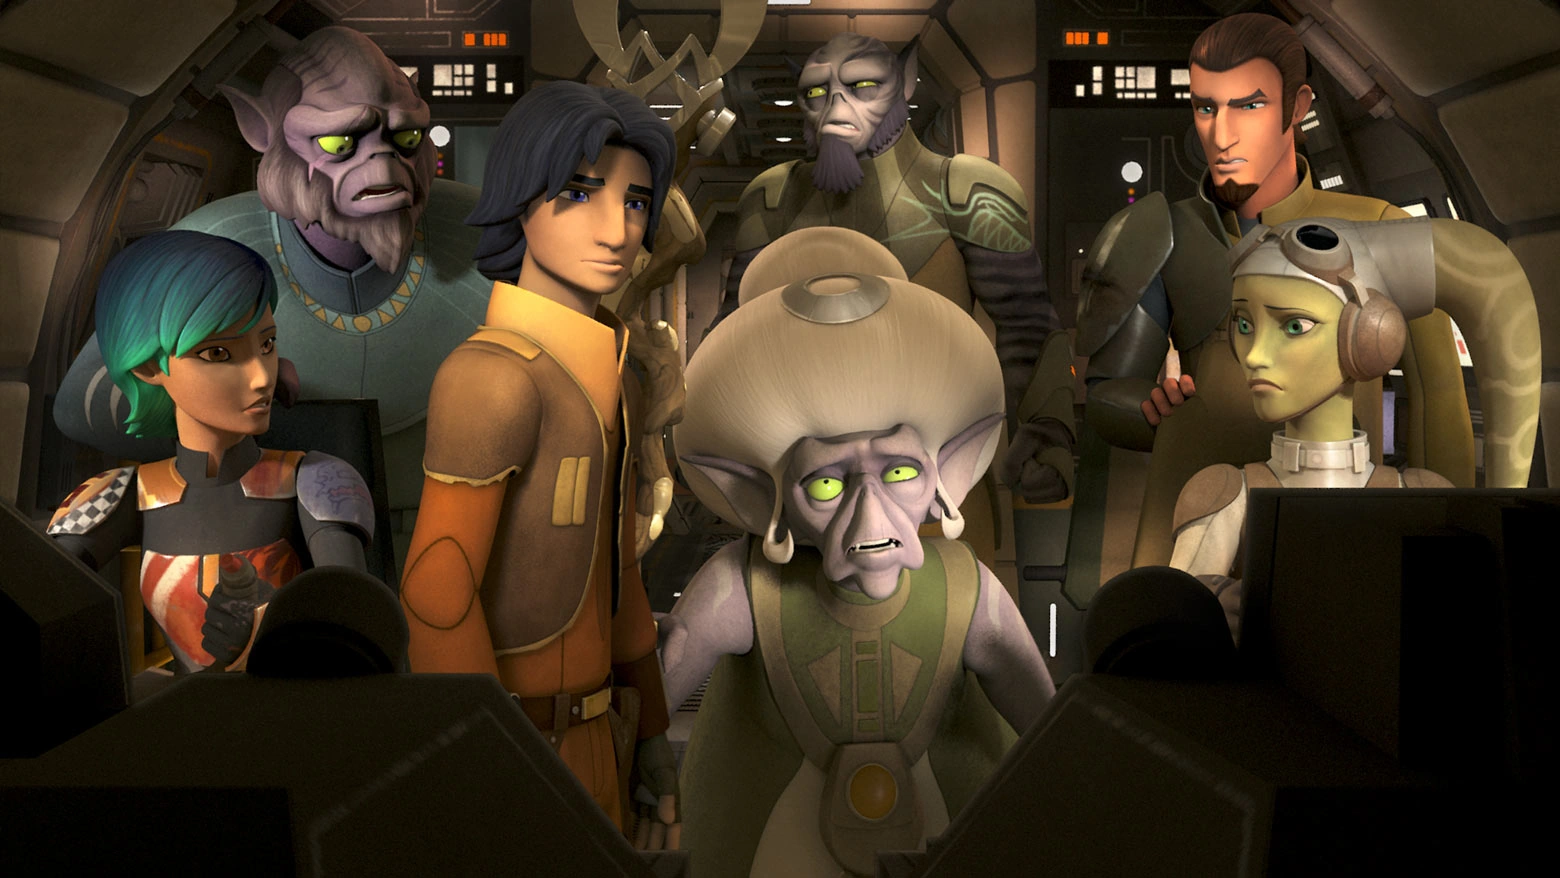
In the wake of the destruction of the Phoenix Home, the rebellion faced a shortage of bases and facilities. When Ezra suggested that the Phoenix Squadron seek shelter on a remote system, Ahsoka counseled Ezra and his companions to seek out an old friend, the former Clone Captain Rex. Ezra and the crew of the Ghost traveled to the desert world of Seelos to seek out Ahsoka's friend. Upon exiting hyperspace, the Ghost was damaged. While Hera and Chopper stayed behind to repair the freighter, Ezra and the other rebels traveled down to Seelos on the Phantom.[33]
After traveling for some distance, the rebels spotted an antiquated AT-TE walker in the distance. After disembarking from the Phantom, Ezra and his fellow rebels went to meet the occupants of the walker, whom they discovered were Clone commanders. Following a near conflict sparked by Kanan's distrust of Clone troopers, they were greeted by Rex who promptly broke up the fight. After Ezra mentioned that he and his companions had been sent by Ahsoka to look for Rex, Rex welcomed them as friends and introduced his companions, Wolffe and Gregor. While Rex and Gregor were friendly, Wolffe remained hostile to the rebels.[33]
Inside the walker, Ezra tried to convince the Clone commanders to join their fight against the Empire. Rex refused, stating that his life as a soldier was over. Kanan then asked the Clones whether he knew about any abandoned bases and facilities that the rebellion could use. Gregor offered to supply them with the information in return that the rebels participated in a hunt for joopas. While Kanan remained aloof and distrustful of the clones, Ezra advised his master to trust them. When Kanan recounted the Jedi Purge, Rex assured the two Jedi that he and his fellow clones had removed their brain control chips, which allowed them to ignore Order 66.[33]

Ezra watches as Rex confronts Kanan about the Jedi Purge.
After a dangerous but successful hunt for a joopa, the rebels reluctantly stayed for dinner. Sabine then discovered that Wolffe had secretly contacted the Empire and hidden Ahsoka's communications with the clones. Wolffe had acted on a mistaken belief that he was protected his fellow clones from Imperial retribution. Rex confronted Wolffe and convinced him that the rebels were their friends. Shortly later, an Imperial probe droid damaged the Phantom before Rex managed to destroy it. With the Empire now alerted to their presence on Seelos, the rebels made preparations to leave.[33]
As agreed, Rex supplied the rebels with a data chip listing Republic bases in the Outer Rim. While Ezra tried to convince the clones to accompany them on the Phantom, Rex and his comrades insisted on staying behind to hold back the Empire. Shortly later, Agent Kallus arrived with three AT-AT walkers, which outgunned and outnumbered the clone's lone AT-TE walker. This assault coincided with the arrival of a sandstorm, which prevented the rebels from departing.[34]
While the clones and Imperials were blinded by the sandstorm, Ezra and Kanan could still see through the Force. While Kanan guided the clones in their AT-TE walker, Ezra used the walker's main cannon to destroy one of the AT-AT walkers with one blast to the neck. After the dust-storm had cleared, the rebels left on the Phantom. However, Ezra persuaded Kanan to return and help the clone commanders, arguing that the clones would fight to the death. While Sabine flew the Phantom, Ezra along with Kanan and Zeb commandeered one of the AT-AT walkers and used it to damage Kallus' walker, which was trapping the clones' AT-TE walker. Kallus and the surviving Imperials were to forced to retreat. Out of gratitude, Rex and the clones saluted Ezra and Kanan and agreed to join the Rebellion. Ezra was present during Rex's reunion with Ahsoka.[34]
Encountering double trouble
Bridger and Wren hold off an Inquisitor attack.
Following their adventure on Seelos, Ezra continued his Jedi instruction under Kanan. During one lesson, he was instructed to levitate Chopper with the Force. However, Chopper and Sabine had decided to play a trick on the young Jedi by locking Chopper's feet to the Ghost's metallic floor. Despite Ezra's best efforts, he was unable to lift the astromech droid. In frustration, Ezra gave up only for Rex to expose Chopper and Sabine's prank. When Ezra called the trick unfair, Kanan reminded him that a fight is never fair. While Kanan and Rex argued about how to best instruct Ezra, the young Padawan sneaked off with Sabine, Chopper, and Zeb on a mission to salvage medical supplies from an abandoned Republic medical station in space.[35]
The rebels had gained access to intelligence on Old Republic military installations provided by Rex. The four rebels departed on the Phantom for the abandoned station. After Chopper powered up the station, Ezra, Sabine, and Zeb searched for the supplies while Chopper stayed behind in the command center. Unknown to the four rebels, their presence on the station had attracted the attention of two Inquisitors known as the Seventh Sister and the Fifth Brother. After the Sister's ID9 seeker droids incapacitated Chopper, the Seventh Sister lured Ezra and Sabine into a hallway.[35]
At first, Ezra mistook the Sister for a bounty hunter but quickly realized she was an Inquisitor when she ignited her twin-bladed lightsaber. Bridger took on the Seventh Sister but proved no match for the Dark Sider. While fleeing, the two Jedi bumped into the Fifth Brother, who joined the fight. After opening a shut door, Ezra was captured by the Sister's seeker droids. To protect Sabine, he shut the door after she had fled. The Fifth Brother wanted to kill Ezra but the Seventh Sister convinced her companion to use him as a bait to capture the others.[35]
While the Fifth Brother hunted for Sabine and Zeb, the Seventh Sister interrogated the young Jedi. The Inquisitor attempted to flatter Bridger by praising his skills as Jedi and offering to teach him more. She added that his Master Kanan had never attained the rank of Jedi Knight and was thus unqualified to instruct a Padawan. When Bridger mentioned that Kanan had defeated The Grand Inquisitor, the Sister remarked that this setback presented the other Inquisitors with "new opportunities." The Seventh Sister then interrogated Ezra about the rebel fleet and Ahsoka Tano but Ezra refused to cooperated and feigned ignorance.[35]
Before the Sister could continue with her interrogation, the Fifth Brother turned up with a captured Sabine in two. The Seventh Sister then tried to coerce Ezra into contacting his fellow rebels but he refused. Meanwhile, Zeb succeeded in rescuing Chopper and retrieving the medical supplies. The Lasat concocted a plan to rescue Ezra and Sabine. Posing as "Commander Meiloorun", Zeb contacted Ezra, offering them support. To avoid endangering Zeb, Ezra refused to reply. However, the Fifth Brother threatened to behead Sabine and he reluctantly complied.[35]
Ezra and Sabine were herded into hangar bay six by their Inquisitor captors. Upon arriving there, Bridger and Wren spotted Zeb in the Phantom, which was hanging upside down on the ceiling. When one of the Seventh Sister's seeker droids spotted the Lasat, Zeb created a commotion that enable Ezra and Sabine to break free of their captors' clutches and board the attack shuttle. Following a brief struggle, the four rebels managed to escape with the medical supplies back to the rebel fleet. Upon returning to the Ghost, they informed Kanan, Hera, and Rex about their encounter with the two Inquisitors. This news came as a shock to Kanan who was unaware that there was more than one Inquisitor.[35]
Working with a pirate
Later, the crew of the Ghost and Rex set up base on Garel. On one occasion, Ezra skipped one of his Jedi lessons with Kanan to attend a blaster training session taught by Rex. During the lesson, Ezra used a stormtrooper helmet held up by Chopper as a target but constantly missed. Shortly later, Kanan interrupted the lesson and reprimanded his apprentice for missing his Jedi lesson. When Rex and Kanan argued about whether Ezra's future lay as a soldier or Jedi, Ezra responded that he may not wish to be either. At that point, Sabine announced that the rebels were convening a meeting on the Ghost.[36]
During the meeting, Hera announced that the rebels would be embarking on a mission to supply power fuel cells to the frozen planet of Rinn, which was experiencing an energy crisis. The other Ghost crew would search Garel for the fuel cells but Ezra and Chopper were ordered by Hera to stay behind to clean up the Ghost. While cleaning the ship, Ezra complained about his new responsibilities and yearned for the days when he was living on the streets. At that point, Ezra and Chopper received a distress call from the Devaronian crime lord Cikatro Vizago. Seeing this as an opportunity to skip chores and to return Vizago a favor, Ezra and Chopper departed on the Phantom.[36]
Following a rough take-off, Ezra and Chopper managed to locate Vizago's ship, the Broken Horn, in space. After docking the Phantom in the Broken Horn's hangar bay, the two rebels parted and explored the ship. While Chopper found several power generators, Ezra headed to the bridge where he encountered the Weequay pirate Hondo Ohnaka. Ohnaka claimed that he had won the Broken Horn from Vizago during a game of sabacc. In reality, Ohnaka had incapacitated the Devaronian with a stun blaster and locked him in one of the ship's holding cells.[36]
Distrusting Ohnaka, Ezra claimed to be "Lando Calrissian", which delighted Ohnaka. Shortly later, an Imperial ship attacked the Broken Horn. Ezra managed to power up the engines while Chopper managed to make the ship jump into hyperspace. After escaping the Imperials, Ezra agreed to help Ohnaka sell several power generators to a buyer on the frigid planet of Nixus in return for obtaining two of the generators and sharing half of the proceeds. Unknown to Ohnaka, Ezra also stole the controller for Vizago's droids and handed it to Chopper for safekeeping.[36]

Bridger and Hondo Ohnaka working together.
Upon arriving at Nixus, Ezra and Hondo quickly discovered that the buyer was an old enemy, Azmorigan, who had been expecting Vizago instead. Seeking to settle scores with both his foes, the Jablogian crime lord had them loaded into a loading dolly with the intention of firing them into space. Ezra contacted Chopper for helped. Before Azmorigan could carry out his plan, Chopper came to the rescue and toppled one of the generators over several of Azmorigan's men. During the commotion, Ezra managed to free himself and used his lightsaber to deflect Azmorigan's blaster shots. The young Padawan also used the Force to save Ohnaka from being fired into space, revealing his identity as a Jedi.[36]
After escaping Azmorigan, Ezra, Chopper and Hondo departed Nixus on the Broken Horn and traveled back to Garel. On the way, Bridger revealed his true identity as a Jedi and rebel to Hondo and confided his anxieties about his new responsibilities. In response, Ohnaka suggested that Ezra becoming a "pirate Jedi". Shortly later, Ezra and Chopper ventured into the ship's brig where they discovered that Vizago was locked inside one of his cells. After revealing the truth about Ohnaka's takeover, the two rebels freed Vizago and together confronted Ohnaka on the bridge.[36]
Ezra proposed a deal between the two criminals: him taking the generators and the two criminals sharing the proceeds among themselves. However, Vizago had secretly taken back his droid controller and used it to summon his droids to attack the three intruders. During the fighting, Ohnaka escaped aboard the Phantom and fled into space with the stolen proceeds. After reclaiming his ship, Vizago dispatched Ezra and Chopper back to Garel on an escape pod. Upon returning to the Ghost, Ezra and Chopper found Ohnaka among the rebels and discovered that the Phantom's autopilot had been programmed to return to its mother ship. The rebels allowed Ohnaka to keep his proceeds but took the power generators. After bidding the pirate farewell, Ezra rejoined his rebel companions.[36]
Mission to Ibaar
Later, Ezra and his fellow rebels participated in a mission to transport relief supplies to the planet Ibaar, which was blockaded by an Imperial fleet commanded by Agent Kallus. Following the failure of the first attempt which resulted in the destruction of a rebel transport and the death of the Phoenix Leader, the crew of the Ghost embarked on a mission to contact the Mon Calamari engineer Quarrie, who lived on the planet Shantipole, which was inaccessible for many spacers. Quarrie had developed a prototype starfighter known as the Blade Wing, which could break the blockade. While Hera, Sabine, and Zeb traveled down to Shantipole on the Phantom, Ezra along with Kanan and Chopper rendezvoused with a transport ship to pick up supplies for their second attempt to break the Imperial blockade at Ibaar.[37]
Bridger and his comrades with Quarrie after the blockade run on Ibaar.
While picking up supplies, Kanan told Ezra that in the event that Hera did not return, the Ghost would be used to transport the supplies. This alarmed Ezra since it would make the Ghost a target for the Empire. Despite the dangers, Kanan argued that the people of Ibaar was counting on them and they could not give up. Despite Kanan comming Hera, there was still no sign of her and the other crew when the Ghost and the rest of the Phoenix fleet converged on Ibaar. Fortunately for Ezra and the other Ghost crew, they were quickly joined by the Phoenix, which was carrying the Blade on its back. Using the Blade Wing, Hera destroyed an Arquitens-class light cruiser. This enabled the Ghost to travel through the gap in the Imperial blockade and drop its supplies down to the Ibaarians. Following the successful relief of Ibaar, Hera was promoted as the new Phoenix Leader at the recommendation of Kanan.[37]
Mishap at Garel City
Later, Hera assigned Ezra to accompany Sabine and Chopper on a mission to pick up a courier carrying sensitive information at Garel City's spaceport. While they did not know how the courier looked like, the rebels were told that the individual would respond to the code phrase: "It's a long way to Alderaan." They were ordered to deliver the courier to a place called Havoc Outpost. On the way to the spaceport, Bridger voiced his views about Sabine's personal habits to her. He noted that she seemed to be a loner because she usually handled her missions alone and stayed in her room a lot. She also preferred to eat alone. However, Sabine did not respond since she was preoccupied with the mission. Sabine also noticed a strange but familiar symbol on the spaceport's wall.[38]
For the next few hours, Ezra and Sabine greeted several disembarking passengers with the phrase "It's a long way to Alderaan" only to be met with blank stares. At the eleventh hour, Ezra discovered that the courier was a GNK-series power droid named EG-86, who had come with the cargo. However, the three rebels were then cornered by the bounty hunter Ketsu Onyo, a former friend of Sabine, who helped her escape the Imperial Academy on Mandalore and had fallen out with Sabine. Ketsu was now working for the crime syndicate Black Sun and had come to collect EG-86.[38]
Bridger and Syndulla greet Wren and Chopper as they return with Ketsu Onyo.
However, Sabine was unwilling to allow Ketsu to take EG-86. Before a showdown could take place, the two parties were visited by a squad of stormtroopers. A three-way battle broke out and the rebels managed to board a shuttle with EG-86. While taking-off, Ezra was hit by laser fire and fell out of the shuttle's side door. While Sabine and Chopper continued the mission and managed to reach a truce with Ketsu, Ezra managed to escape the stormtroopers and make his way back to the Ghost. After Sabine and Chopper completed the mission with Ketsu's help, Ezra and Hera were present to greet them at their Garel base. When Ezra tried to make conversation with both Sabine and Ketsu, the two girls indicated that they wanted to talk in a clique and kept Ezra out of the conversation.[38]
Escaping the Imperial Interdictor
Following the disappearance of a rebel patrol in the Del Zennis system, Ezra accompanied Commander Jun Sato on a mission to find the lost patrol. Sato had brought Bridger along after Hera Syndulla suggested that his Jedi powers would be of help to the mission. While traveling through hyperspace, Bridger sensed a sudden disturbance in the Force. Shortly later, Sato's CR90 corvette Liberator was pulled out of hyperspace by an Imperial Interdictor, a prototype warship equipped with four gravity well projectors. Commander Sato managed to send a distress signal before the corvette lost all power.[39]
The CR90 corvette was then dragged into the ventral hangar of the Imperial Interdictor and boarded by Imperial forces, who took them prisoner. Bridger and Commander Sato were then escorted by stormtroopers to the Interdictor's command bridge where they encountered the ship's commanding officer, Admiral Brom Titus. While Sato protested that they were members of the Corporate Alliance, Titus was not fooled and quickly recognized him as Commander Sato. When Titus turned his attention to Bridger, the young rebel claimed that he was Jabba the Hutt. However, Titus recognized him as Ezra Bridger and informed Agent Kallus of his catch.[39]
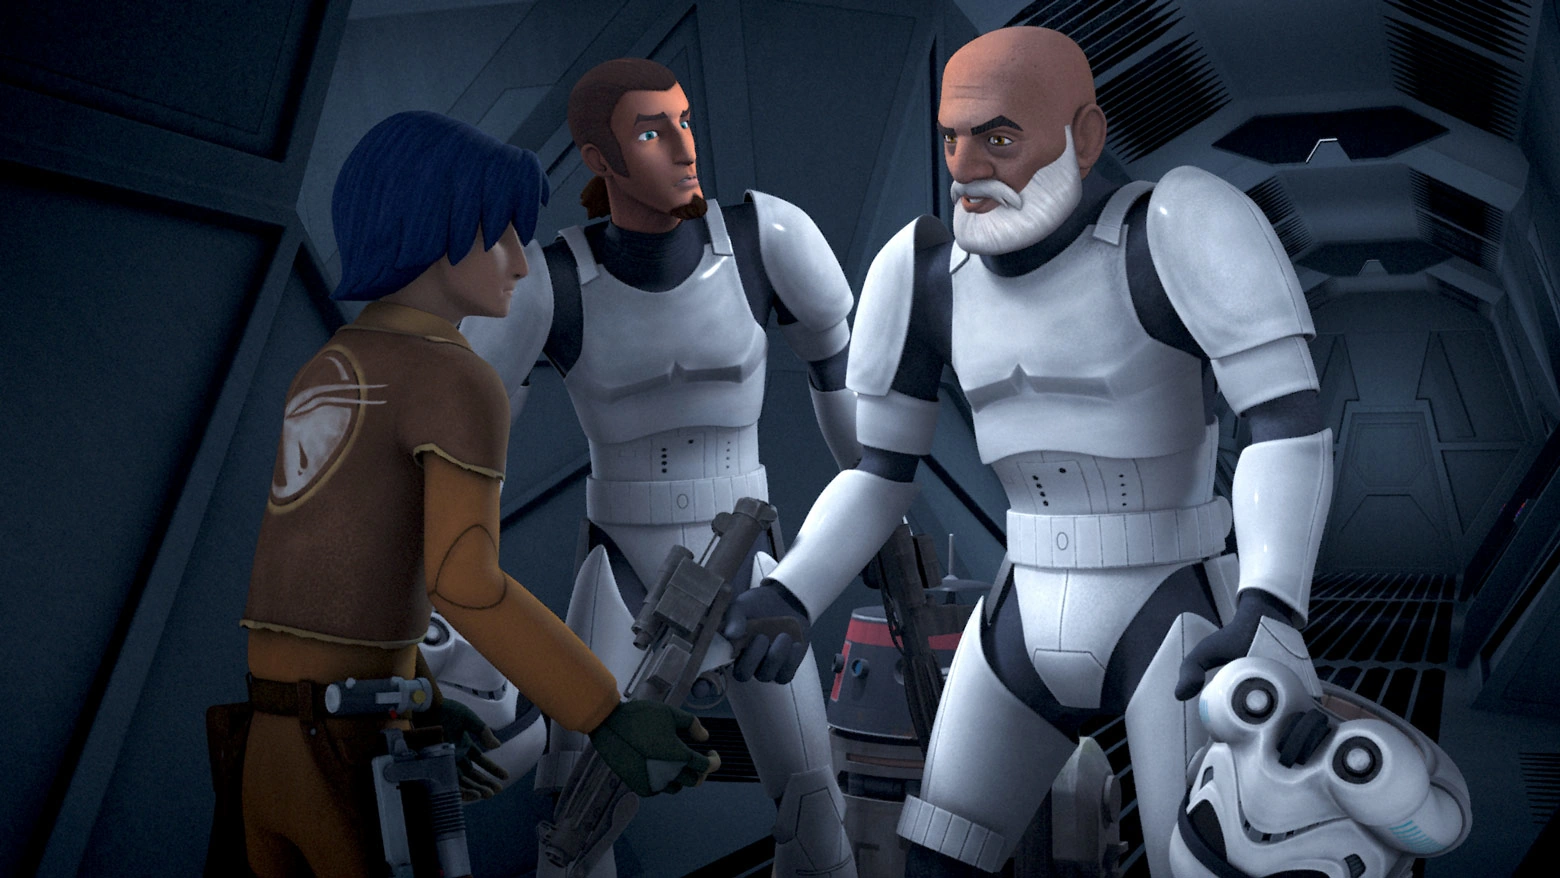
Kanan and Rex reveal themselves to Ezra.
Despite Kallus' warnings not to underestimate the teenage Jedi, Admiral Titus was skeptical that Ezra could pose a threat to his ship and crew. However, he ordered three stormtroopers to escort Bridger to a secure cell. On the way, Bridger managed to free himself by using the Force to levitate his lightsaber-blaster from the leading stormtrooper's belt. After overpowering the stormtroopers, he locked them in his cell. Almost immediately, Ezra was approached by two stormtroopers and stunned them with his lightsaber-blaster. When Bridger spotted a disguised Chopper, he quickly realized that he had knocked out his master Kanan and the former Clone trooper Rex, who had been sent by Phoenix Leader Hera to rescue him, Sato, and Sato's crew.[39]
When Kanan and Rex awoke, Bridger attempted to save face by claiming that they had been knocked out in a massive fire fight. However, Chopper rebutted his story by playing a recording of Bridger shooting them. While Kanan was outraged that his apprentice had shot him, Rex laughed it off. When Kanan and Rex got into an argument about how to proceed with their rescue mission, Ezra left to accompany Chopper on his mission to sabotage the Imperial Interdictor's gravity well projectors. Together, Ezra and Chopper reached the reactor core for the gravity wells.[39]
Since the reactor core was being manned by several Imperial technicians, Chopper instructed Ezra to distract them. While Ezra grappled with the technicians, Chopper managed to access one of the terminals and turned off the gravity; preventing the technicians from firing on Ezra. After Chopper had completed his handy work, the droid switched back the gravity. The technicians plummeted but Ezra managed to grab a platform. Despite having his hand run over by Chopper's wheel, Ezra managed to keep up with his fellow rebel. Together, the two droids rejoined Kanan, Sato, and the other crew. While Kanan went back to rescue Rex, Ezra, Chopper, and the other rebels returned to the Liberator.[39]
On Kanan's instructions, Sato disengaged his corvette from the Imperial Interdictor. After being joined by Kanan and Rex, the rebels prepared to jump into hyperspace. However, Admiral Brom ordered his crew to activate the Interdictor's gravity well projectors; pulling them out of hyperspace. When Ezra and the other rebels confronted Chopper, the astromech droid told them to wait. The Imperial Interdictor's gravity well projector then malfunctioned; causing two nearby Imperial light cruisers to collide with the warship and destroying them. Ezra and the rebels managed to avoid the ensuing explosion and fled into hyperspace. When Commander Sato thanked Kanan, Rex, and Ezra for saving him and his crew, Chopper pointed out that he had done most of the work. In response, Ezra mollified the astromech droid by telling him it was a team effort as well.[39]
Rescuing infants
Later, the Jedi Ahsoka Tano visited the crew of the Ghost on Garel. When she and Kanan withdrew to his private quarters, Ezra eavesdropped on their conversation. He learned that Ahsoka had been investigating the Inquisitors and had discovered that their secondary mission was to kidnap Force-sensitive infants. She had obtained two sets of coordinates. While she went to investigate the first, she assigned Kanan to look at the second set. Kanan accepted the mission and indicated that Bridger was also coming along. Ezra needed no briefing since he had been eavesdropping on Tano and Kanan's conversation.[40]
Along with Zeb and Chopper, Ezra and Kanan traveled on the Phantom to the planet Takobo. They quickly discovered that their coordinates led them to a housing unit in the settlement of Hammertown. While Ezra and Kanan went to investigate the housing unit, Zeb and Chopper stayed behind at the spaceport to search for any sign of the Inquisitors. Upon arriving there, they discovered that the housing unit was home to an Ithorian mother name Oora. Two Inquisitors known as the Fifth Brother and the Seventh Sister had ransacked her home but she had sent her infant son Pypey into hiding with a courier droid. Ezra vowed to bring back her son.[40]
After Kanan commed Zeb, the two Jedi learned that Zeb and Chopper had discovered the Inquisitors' TIE Advanced v1 starfighters and rescued another infant named Alora. While Chopper babysat Alora, Zeb went to intercept the courier droid before the Inquisitors could get their hands on Pypey. Zeb managed to recover Pypey but was then pursued by the Inquisitors. Zeb fled to an apartment block and contacted Kanan and Ezra, who quickly traveled there to rejoin their companion. Upon arriving, Ezra spotted one of the Seventh Sister's ID9 seeker droids hovering nearby.[40]
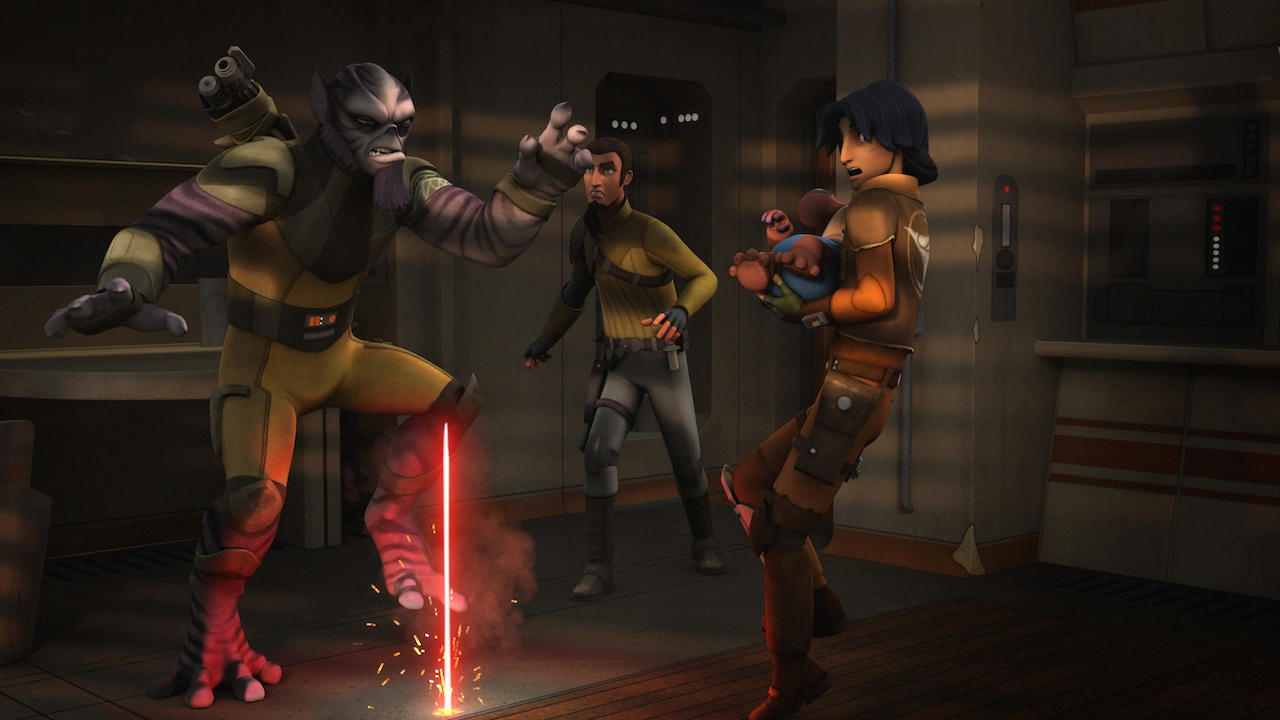
Bridger, Jarrus, Orrelios and Pypey being attacked by the Fifth Brother and Seventh Sister.
After evading the seeker droid and the Inquisitors, Bridger and Kanan manged to rendezvous with Zeb in an apartment room. However, Bridger's presence unsettled the child since he could sense the teenager's fear. Alerted to their presence, the Inquisitors poked their lightsabers through the floor of the apartment. As they fled to the next room, Ezra struggled to calm the baby. The rebels then decided to split up. While Kanan and Zeb went to confront the Seventh Sister and the Fifth Brother, Ezra climbed into the ventilation shaft with Pypey, who was still wailing. Ezra finally managed to calm the child by connecting with Pypey through the Force.[40]
However, the Inquisitors had by that stage pinpointed his location and attempted to flush him out with their lightsabers. Before the Inquisitors could finish off their work, Kanan and Zeb arrived and took on them; giving Ezra the opportunity to escape the building with Pypey. While exiting the apartment block, Ezra commented that the child was welcome to visit them on Garel. Unknown to Bridger, his comments were picked up by the Sister's seeker droid. Ezra managed to reunite with Kanan and Zeb at the spaceport. Despite comming Chopper, they were unable to open the gates.[40]
The Inquisitors then caught up with them and bested them in combat. Despite being outmatched, Ezra refused to give up Pypey. Before the Inquisitors could deal with him, Ahsoka exited the spaceport and bested the Inquisitors in a lightsaber duel. In the meantime, Ezra and his companions took the opportunity to flee aboard the Phantom. They then rescued Ahsoka from an Imperial patrol and fled into hyperspace. While in space, Ezra learnt from Tano that a similar attempt had been made to abduct children during the Clone Wars. Unknown to Ezra, the Inquisitors had learned through his offhand remark that the rebels were hiding on Garel.[40]
Return to Lothal
While sleeping on his bunk aboard the Ghost, Ezra experienced a Force vision of his parents Ephraim and Mira Bridger and of an impending Imperial attack on Garel. During the vision, he also saw a white loth-cat. After falling out of his bed, Ezra alerted Hera and Kanan. Hera finally agreed to disclose what Tseebo had told her about Ezra's parents: his parents were alive but were imprisoned within the vast network of Imperial prisons that spanned the galaxy. Despite calling every favor from smugglers, rebels, and their contacts, Hera had been unable to pinpoint the exact location of Ezra's parents. Ezra thanked Hera for sharing this information and returned to his bunk to view a hologram of his parents.[41]
Later that morning, Hera and Kanan received word from Commander Sato that there had been a breakout at the Imperial prison on Lothal. The rebels had also obtained a list of the prisoners at the facility. Believing that one of the prisoners could help them find Ezra's parents, Kanan instructed his apprentice to use the Force to probe the list. Ezra closed in on an inmate known as Prisoner X-10. After Sabine informed that that she had received intelligence that the Imperial fleet was withdrawing from Lothal, Ezra took it as a sign that he should go to Lothal. Kanan convinced Ezra to let the rest of the crew of the Ghost come with him.[41]
Sabine then commed the two remaining Spectres, Zeb and Chopper, to tell them to come aboard. Shortly later, Zeb and Chopper were pursued by several stormtroopers. This coincided with the appearance of an Imperial fleet above Garel City which had come to crush the rebel presence there. Ezra and Kanan helped Zeb and Chopper to board the Ghost by exchanging fire with their stormtrooper pursuers. When Agent Kallus arrived, Ezra used the Force to hurl Kallus and his men against the wall. At that point, the Seventh Sister and Fifth Brother arrived and goaded Ezra into attacking them. Before Ezra could strike them, Kanan used his blaster to shut the blast doors; separating the Inquisitors. This gave Ezra and his fellow Spectres the window they needed to escape aboard the Ghost.[41]
Once airborne, Ezra along with Kanan and Chopper entered the Phantom and detached from the Ghost. After spotting a gap in the Imperial fleet, the rebels took the chance to flee into hyperspace. After exiting hyperspace, Ezra and his companions land the Phantom in Lothal's Capital City. They visit his old home only to discover that the Empire had razed it to the ground. While meditating through the Force, Ezra sensed the presence of the white loth-cat he had seen in his vision. He approaches the cat but the animal leads him on a wild pursuit through the streets of Capital City. During the pursuit, Ezra uses the Force to leap over buildings. Before Ezra can corner the animal, it flees on the back of a speeder bike into the wilderness. However, Ezra manages to plant a locator on the speeder before it disappeared.[41]

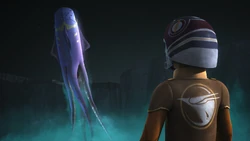
Ezra sees his recently deceased parents through the Force.
Using the locator, Ezra and his rebel companions track the speeder bike and the loth-cat to a cluster of large hives outside Capital City. Shortly later, a hooded man whom Ezra recognizes as Prisoner X-10 opens fire on him and Kanan. Ezra manages to placate the man by telling him that he is the son of Ephraim and Mira Bridger. The man reveals himself as Ryder Azadi, the former Governor of Lothal who had been imprisoned for supporting the Bridgers' anti-Imperial broadcasts. Azadi revealed that Ezra's parents had heard his broadcast and had been inspired by it to stage a prison breakout. However, they had died during the escape attempt. Later that night, Ezra experienced another Force vision where he is visited by both his parents, who commended him for his achievements and urged him to stay strong. When Ezra related his vision to Kanan, his mentor told him that the Jedi believed that life did not end with death, but merely changed form in the Force. He also consoled Ezra by telling him that his parents will always be with him.[41]
Following their encounter with Ryder Azadi, Ezra and his master Kanan received instructions that Senator Bail Organa was delivering three Hammerhead corvettes to reinforce the Phoenix rebels' depleted forces. Since the Alderaanians could not be seen directly supporting the rebels, Organa had sent his adopted daughter Princess Leia Organa to deliver the ships to the rebels on Lothal. As part of the plan, the crew of the Ghost would "steal" the ships while Leia was visiting Lothal under the pretext of carrying out a mercy mission. For this mission, Ezra disguised himself as an Imperial cadet while Kanan impersonated a stormtrooper.[42]
Ryder elected to stay behind with Chopper in order to avoid drawing attention to himself. Ezra and Kanan headed to the Imperial depot at Jalath where they mingled among the garrison. Their mission was further complicated when the Imperial Supply Master Yogar Lyste fitted the Hammerhead corvettes with gravity locks in an effort to deter thefts. Despite this unexpected setback, They managed to make contact with Leia and accompanied the Princess as she traveled on a rented Sentinel-class landing craft to carry out her relief mission. They then traveled back to Azadi's hiding place only to discover that several stormtroopers had arrested Ryder and Chopper.[42]
Shortly later, Ezra's fellow rebels Zeb and Sabine arrived on the Ghost and a skirmish broke out with Imperial forces. During the fighting, Ezra managed to signal Sabine and Zeb that he and Kanan were disguised as an Imperial cadet and stormtrooper; thus avoiding being killed by friendly fire. To perpetuate the ruse that Princess Leia was still a loyal Imperial citizen, Ezra and his rebel comrades arranged for Ryder to "kidnap" Leia. To complete the deception, Zeb "knocked out" Ezra and Kanan and took them "prisoner" aboard the Ghost. This development startled the Imperials who wondered whether the rebels had begun to take prisoners.[42]
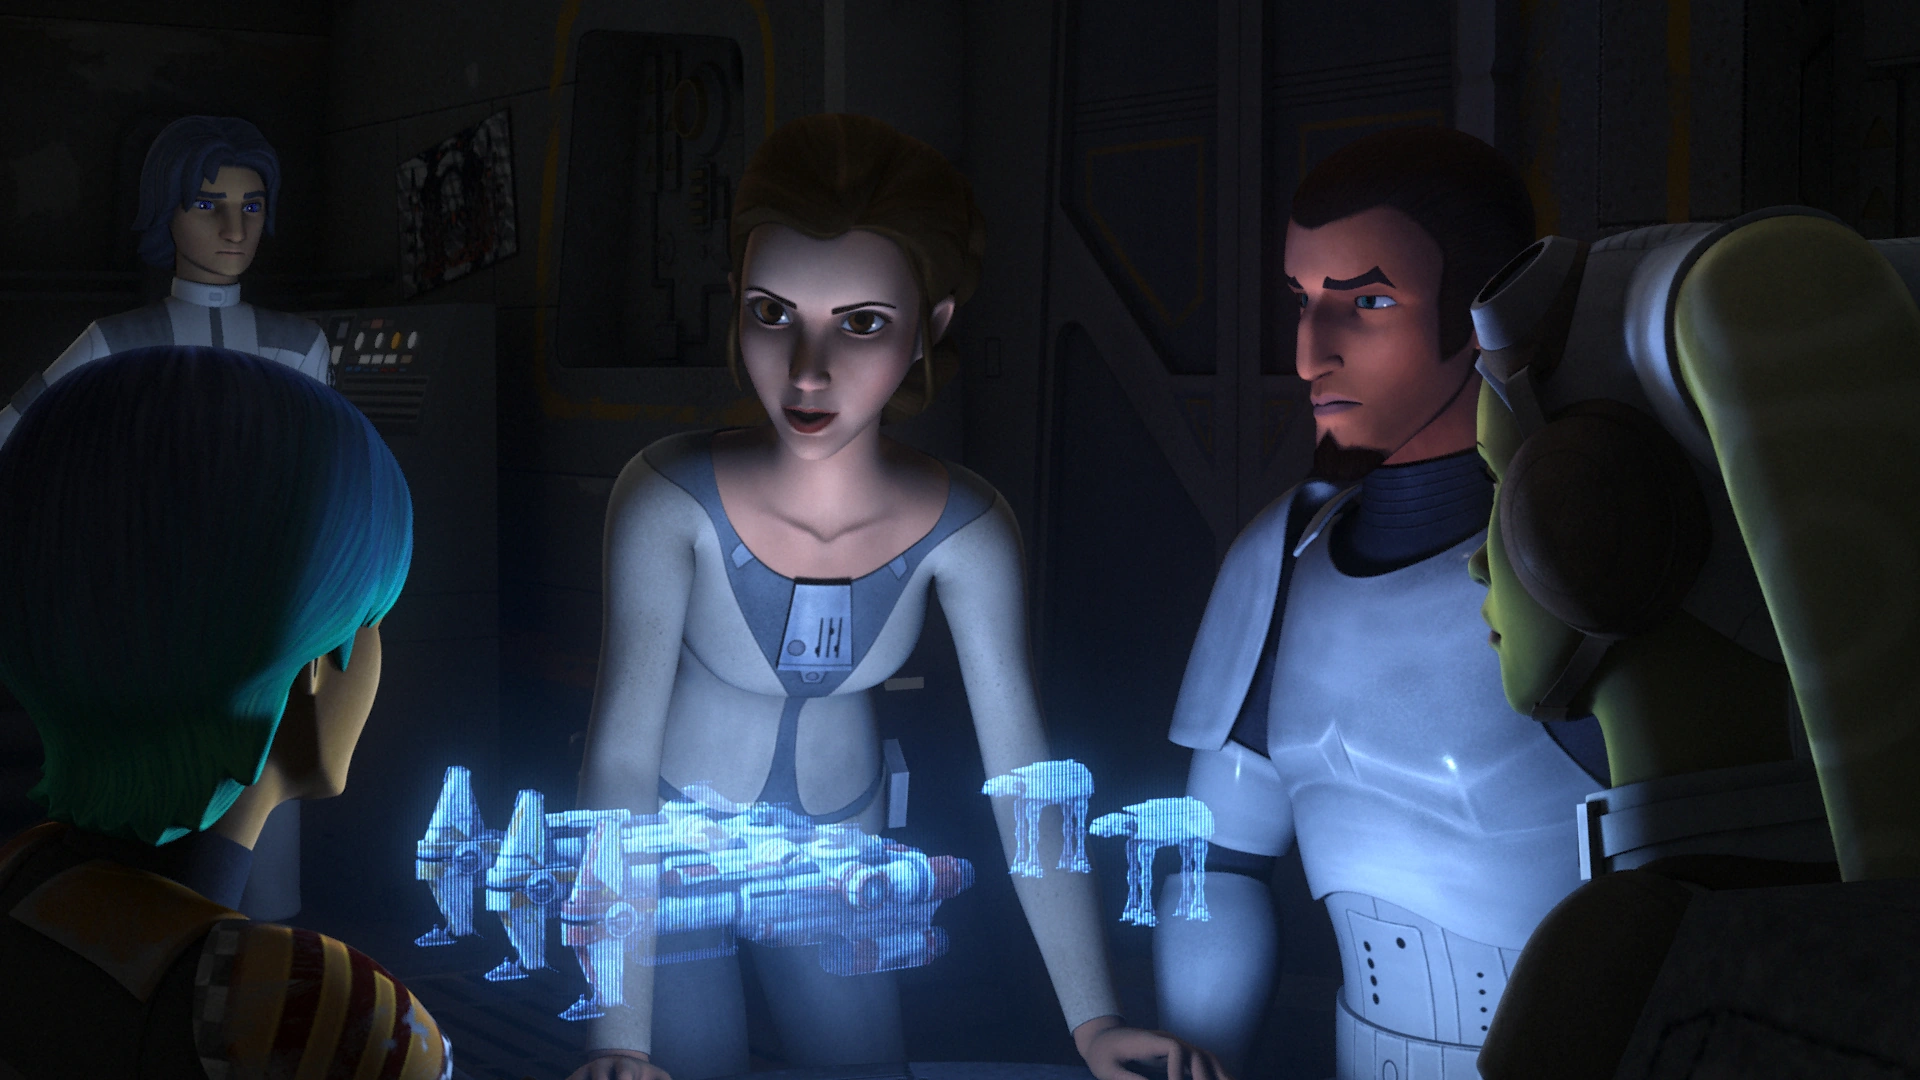
Bridger and the crew work alongside Princess Leia Organa.
Back aboard the Ghost, Ezra informed Hera, Sabine, and Zeb about the fate of his parents. While Ezra was gazing at a holographic image of his parents, Leia came and encouraged him by telling Ezra that she fought for those who could not fight. Galvanized by the princess' words, Ezra joined the other rebels in discussing their plan to "steal" the Hammerhead corvettes. Due to his expertise with gravity locks, Ryder agreed to assist with their operation. In order to infiltrate the Imperial depot, Ezra, Kanan, and Leia traveled there in the Phantom. Still wearing their Imperial disguises, Ezra and Kanan claimed that they had rescued Leia from the rebels. Leia then perpetuated the hoax by telling Lyste that Kanan had saved her life and recommended that he receive a medal.[42]
Meanwhile Chopper, Sabine, and Ryder sneaked out of the Phantom and began disabling the gravity lock on the first ship. After disabling the lock, Sabine departed on the ship; sparking a skirmish with the Imperial garrison. When Lyste and his Imperial troops spotted Chopper and Ryder, Ezra and Kanan used the Force to knock out the Imperials before they could fire on their comrades. This enabled Chopper and Ryder to unlock the second corvette; allowing Kanan to depart into space with the ship. Ezra protected Chopper while he was working on the third gravity lock by using the Force to snatch blasters from two stormtroopers. Leia then came to Ezra's aid by stunning the stormtroopers with her blaster. Ryder managed to depart on the third Hammerhead corvette.[42]
After "stealing" the Hammerhead corvettes, Ezra bid farewell to Leia and promised that they would see each other again. To hide her rebel connections, Leia instructed Ezra to stun her, which he complied with. Ezra and Chopper then departed aboard the Phantom where they rejoined the Phoenix fleet, whose ranks had also been augmented by Ryder, who had had decided to join the rebel cause for the sake of both Ezra and his parents.[42]
Trouble at Concord Dawn
Bridger present at the planning of the mission to Concord Dawn.
Ezra and Zeb were present in the command room of the Liberator when the crew of the Ghost received news of Hera and Sabine's failed mission to seek permission from the Mandalorian Protectors for safe passage through the Concord Dawn system. However, the Protectors' leader Fenn Rau had allied the Protectors with the Empire and had attacked Hera's mission, destroying several RZ-1 A-wing interceptors. Hera was badly wounded during the attack and had to be hospitalized.[43]
When Sabine suggested destroying the Protectors' Fang fighters on the third moon of Concord Dawn, Ezra and Zeb expressed interest in accompanying Kanan for that mission. However, Kanan insisted only with Chopper to avoid endangering the other rebels. While Ezra and Zeb were upset, they complied with Kanan's orders. Chopper grumbled at the mission and punched Ezra with one of his arms in protest. Despite Kanan's orders, Sabine came along. Ultimately, the mission was a success and the rebels succeeded in not only destroying the Protectors' starfighters but also capturing Rau.[43]
Rediscovery of Lira San

Ezra with his fellow rebels and their Lasat passengers Chava and Gron.
Later, Ezra received a tip from the pirate Hondo Ohnaka about two refugees arriving on Nixus Hub 218. Hondo had supplied Ezra with a transmitter in order to keep touch with his former "business partner." Ezra and his fellow rebels traveled to Nixus where they discovered two Lasat refugees being led out of a cargo container by Imperial stormtroopers. The crew of the Ghost quickly attacked the Imperials and freed the two Lasat, who turned out to be the female mystic Chava the Wise and the former Lasan High Honor Guardsman Gron; refugees who had survived the Siege of Lasan. The two Lasat recognized Zeb as a former captain in the Lasan Honor Guard; something that Ezra and his fellow rebels were unaware about. Shortly later, Hondo turned up and identified himself as Ezra's contact.[44]
With Imperial reinforcements bound to appear, Ezra and his rebel companions made their way back to the Ghost's hangar bay. When Ohnaka asked for the payment he was promised, Ezra refused; making Hondo "proud" of his young friend. While on their way to the Ghost, Ezra asked the two Lasat about their travels. Chava told him that she and Gron were traveling to Lira San, a legendary world described in an ancient prophecy as a safe system where the Lasat could start anew. Zeb scoffed at the prophecy and was despondent about his people's future. Ezra then received a message on his transmitter from Hondo warning him about Imperial stormtroopers. Shortly later, Ezra and his rebel companions were attacked by stormtroopers. The rebels fought back and managed to board the Ghost with the help of Ohnaka, who sealed several exits in order to delay the Imperials.[44]
The Ghost then jumped into hyperspace before an Arquitens-class command cruiser captained by Agent Kallus could intercept it. Once the Ghost was in hyperspace, Chava embarked on a ritual designed to reveal the location of Lira San, a fabled world which did not appear in any official star charts. Chava believed in an ancient Lasat prophecy that Lira San would only be revealed if the "child of prophecy" saved the "warrior" and the "fool". While Ezra was willing to participate in the ritual, Zeb would have none of it and retired to his quarters. Puzzled by his friend's reluctance, Bridger went to talk with Zeb, who confided his guilt in failing to protect his people and the Lasat royal family during the Fall of Lasan. Ezra comforted Zeb by telling him that he could still protect his people by helping Chava and Gron find Lira San.[44]
Due to Ezra's encouragement, Zeb reluctantly agreed to participate in the ritual. As part of the ritual, Chopper displayed a holographic projection of the galaxy. Chopper then activated his bo-rifle in the ancient Lasat style, causing it to fire a beam that interacted with Chava's staff. This beam created a surge of energy on Chopper's map that pinpointed to a set of coordinates in Wild Space, an uncharted region beyond the Outer Rim Territories. Ezra and his fellow crew then traveled to the coordinates only to find their path obstructed by a collapsed star cluster. Any starship approaching that maelstrom could be destroyed by the gravitational pull of the star cluster.[44]
The rebels' problems were further compounded when Agent Kallus' light cruiser resurfaced and issued an ultimatum that the rebels surrender or be destroyed. At that point, Zeb realized that it was his destiny to lead the way to Lira San. He used his bo-rifle to take control of the ship's controls and shepherd the Ghost through the maelstrom. Kallus sent two TIE fighters to pursue the Ghost but these were ripped apart by the gravitational tide of the star cluster. The Imperial light cruiser also opened fire on the Ghost but each of its blasts missed the rebel ship. Upon approaching the star cluster, the Ghost miraculously jumped into hyperspace. Ezra and his fellow crew were knocked unconscious by the bright blast of the cluster.[44]
Upon awakening, Ezra and his companions found themselves in unknown space but sighted Lira San in the horizon. Ezra was woken up by Chopper who rolled over his hand with one his wheel-legs. While Ezra and the other rebels stayed aboard the Ghost, Zeb along with Chava and Gron traveled to Lira San. There, they discovered that the planet was the original Lasat homeworld and that it was already home to millions of Lasat. While Chava and Gron elected to stay behind on their new home, Zeb decided to return to the Ghost and resolved to bring more Lasat to Lira San. Ezra and his companions then departed Lira San via a safe route that Hera had plotted through the star cluster.[44]
Joining forces with the purrgil

Ezra was able to bond with the purrgil through the Force.
Ezra and his fellow rebels traveled to a Mining Guild Asteroid Belt Gas Refinery to obtain fuel supplies for the Ghost and the Phoenix Squadron. While traveling to their destination, Ezra heard high-pitched cries around the Ghost. Ezra and his fellow crew quickly realized that the cries were coming from a herd of purrgil, space creatures that were capable of traveling through hyperspace. The purrgil surrounded the Ghost and unnerved Hera, who had a dislike for the space creatures. However, Ezra instead convinced Hera to travel in the same direction as the purrgil. This had the effect of calming the space creatures.[45]
Through the Force, Ezra sensed that the purrgil were sad and were trying to communicate with the crew. Shortly later, the Ghost's sensors picked up two Mining Guild TIE fighters which proceeded to attack the purrgil herd. At Kanan's insistence, the crew of the Ghost came to the aid of the purrgil. During a brief dogfight, Ezra managed to shoot down one of the TIEs while his master claimed another. After Sabine tracked down the TIEs to the asteroid gas refinery, Ezra and his fellow rebels quickly realized that the purrgil were also traveling to the same destination.[45]
In private, Hera confided with Ezra about her prejudices towards the purrgil. She disliked the purrgil because they endangered hyperspace travel by colliding into starships. Hera also told Ezra that she had lost more than one friend to them. In response, Ezra suggested that purrgil were ignorant of the damage they were causing. Shortly later, the crew of the Ghost arrived at an asteroid overlooking the gas refinery and parked there. Ezra also attended the briefing where Hera and Sabine outline their plans to infiltrate the facility and steal the gas canisters. The rebels would also destroy the facility by using detonators to ignite the volatile Clouzon-36 gas around the refinery in order to deny it to the Empire. Ezra was too distracted by the purrgil to concentrate on the briefing. Before leaving, he attempted to tell Hera that the purrgil were interested in the gas but the captain told him to focus on his mission.[45]
While at the Ghost's gangplank, Ezra asked how they were going to get down; prompting a reprimand from Sabine for not paying attention. Since they were jumping into a toxic atmosphere in the planetoid below, Ezra and the other rebels with the exception of Chopper had to don helmets. Together with Kanan, Chopper, and Sabine, Ezra jumped onto the refinery below. While the other rebels managed to land on the bridge, Ezra miscalculated and almost fell into the gassy atmosphere below. However, Kanan used the Force to pull him up and reprimanded his apprentice.[45]
Shortly later, Ezra and his fellow rebels were attacked by several Rodian Mining Guild guards. Under Kanan's orders, Sabine activated the detonators but was stopped by Ezra. As they made their way through the facility, Ezra uses the Force to throw down a Rodian gunner. When confronted by his comrades, Ezra told them that the purrgil were connected to the gas. Changing their plans, Kanan ordered Ezra to man the gun emplacement while the other rebels secured the landing zone. During the ensuing skirmish, Ezra used his cannon to knock out one of the other gun emplacements and to drive away the security guards. This enabled his fellow rebels to secure the landing platform and Hera and Zeb to land.[45]
While the other rebels were loading the gas canisters and recharging the Ghost, Ezra was hit by a laser blast and plummeted into the gassy atmosphere below. When he awoke he found himself in a toxic atmosphere. Ezra tried to reach for his helmet but it toppled into the abyss below. However, a tentacle grabbed it and Ezra discovered that he had been rescued by the Purrgil King. After donning his helmet, Ezra stared into the eyelid of the Purrgil King and was able to make a Force connection with it. Through this connection, Ezra learned that the purrgil depended on the Clouzon-36 gas to survive and to travel into hyperspace.[45]
Together with the purrgil herd, Ezra came to his fellow rebels' rescue and managed to defeat the Mining Guild security forces. Ezra's arrival was timely since the Mining Guild Boss Yushyn was on the verge of crushing the rebels. While riding on the Purrgil King, Ezra used his lightsaber to slash off the wing radiator of a TIE fighter, causing it to explode. After stealing the gas canisters, the crew of the Ghost destroyed the gas refinery and fled into space. Ezra and the purrgil herd later rejoined the rebels in space. He greeted his Master Kanan and informed of the bond that he managed to established with the purrgil. Once safely aboard the Ghost, Ezra and his fellow crew watched as the purrgil jumped into hyperspace. Since Hera had overcome her animosity towards the space creatures, she announced that the Ghost would travel with them.[45]
Mission to Ryloth


Ezra (second from the right) and his fellow rebels following the successful Ryloth heist.
Following the loss of the starfighter pilot Phoenix Two during a skirmish with Imperial forces, the Phoenix Squadron's leadership realized that it needed a safe place to land their starfighters. After Commander Jun Sato received intelligence that an Imperial fighter carrier was orbiting the Twi'lek homeworld of Ryloth, Ezra took part in a mission to steal the fighter carrier. For this operation, the Spectres teamed up with Cham Syndulla, the leader of the Ryloth rebels and Hera's father. Cham was also accompanied by two comrades Numa and Gobi Glie. The two rebel cells rendezvoused in space aboard the Ghost.[46]
Prior to the meeting, Ezra's master Kanan was tense about meeting Hera's father and took it out on Ezra. Kanan's initial anxieties were dispelled when Cham praised Ezra and his fellow rebels as a "fine group of fighters." Ezra later attended a briefing where Hera outlined her plan to steal the fighter carrier, which involved using a stolen TIE/sa bomber to infiltrate the starship. However, Cham urged the rebels to destroy the fighter carrier since it had been used to terrorize Ryloth and to demonstrate the Ryloth rebels' strength. In the end, Cham agreed to support Hera's plan after Hera pointed out that the two cells depended on each other for the mission to succeed.[46]
Following the briefing, Ezra asked Hera about her relationship with her father while she was repairing Chopper. Hera revealed that she and Cham had not spoken for years due to their differences about her joining the rebellion rather than fighting for Ryloth's freedom. She explained that Cham had spent his whole life fighting both the Separatists and the Galactic Empire. After her mother died, Cham devoted his whole life to freeing Ryloth from Imperial rule and neglected his own daughter. Their conversation was interrupted by the arrival of Cham, who informed the rebels that they should be getting ready for their mission. Ezra then exited the room but not before muttering that family was always more important.[46]
Later, as the two rebel groups traveled to Ryloth, Cham regaled Ezra and the other rebels with stories about his exploits during the Clone Wars. After exiting hyperspace, the rebels moved into their TIE bomber and flew towards the fighter carrier. As planned, two A-wing fighters emerged from hyperspace and attacked the rebel TIE bomber. Feigning distress, Hera was able to secure landing rights on the carrier. After they crash-landed on the hangar bay, Cham and his comrades turned on Ezra and the other rebels and stunned them. The Ryloth rebels then proceeded with their original plan to destroy the fighter carrier.[46]
After they awoke and managed to free themselves, Ezra and Sabine informed Hera that they had spotted the Twi'leks carrying a bag of detonators. The rebels then resolved to stop Cham and his associates from destroying the carrier. While Sabine and Zeb went to deal with Numa and Gobi, Ezra and the other rebels made their way to the command bridge after dodging several stormtroopers and blast doors. Having reached the command bridge, Ezra used a Jedi mind trick to force the Imperial commander to order a general evacuation of the ship. Meanwhile, Sabine and Zeb managed to subdue Numa and Gobi.[46]
Later, Ezra and his companions encountered Cham on the command bridge, who had sabotaged the ship's hyperdrive. Following a lengthy argument, Hera managed to win over her father by telling her that he had inspired her to join the rebellion. The two rebel groups subsequently abandoned their differences and joined forces to keep Imperial reinforcements from retaking the ship. While Chopper repaired the hyperdrive, Ezra and Cham headed to the hangar bay where they joined forces with Sabine to shove a TIE bomber into the direction of an approaching Imperial light cruiser. The bomber collided with the light cruiser's magazine section, causing the Imperial ship to explode. Meanwhile, the rebels escaped with the fighter carrier safely into hyperspace.[46]
After stealing the Imperial fighter carrier and bringing it into deep space, Ezra and the other rebels bid farewell to Cham and his Twi'lek rebels in the carrier's hangar bay. Hera and her father had reconciled and the two rebels had put aside their differences. As a result of their joint cooperation, the Spectres developed ties with the Ryloth resistance movement.[46]
Mission to Geonosis

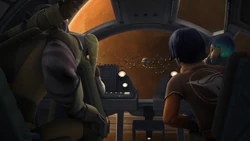
Ezra and the rest of the Ghosts crew arrive at the Geonosis construction field.
Later, Ezra and his fellow rebels along with Rex participated in a mission to Geonosis to investigate an Imperial construction module. After arriving in the system, Chopper picked up no life readings from Geonosis; a planet that was home to billions of Geonosians. Ezra then sensed through the Force that all life on Geonosis had somehow been extinguished. Upon landing in the seemingly abandoned station, Ezra along with Kanan, Zeb, and Sabine ventured inside while Hera, Rex, and Chopper stayed aboard the Ghost.[47]
Ezra and his fellow rebels quickly discovered that they had stumbled into an Imperial ambush set by Agent Kallus, a perennial foe of the Spectres. Following a skirmish, Ezra along with Kanan and Sabine managed to escape back aboard the Ghost due to the efforts of Chopper to unlock the blast doors. However, Zeb was separated and ended up with Kallus in an escape pod. Once in space, the Ghost led Imperial forces on a pursuit around Geonosis. After escaping the Imperials, Ezra told Chopper to scan Zeb's trajectory. When the astromech droid protested, Ezra slammed his metal head and told Chopper not to be a "sleemo."[47]
Later, Ezra flew with Kanan in the Phantom on a sweep of Geonosis but were unable to find any sign of Zeb. Meanwhile, Zeb and Kallus managed to land safely on the icy moon Bahryn where they struck up an unlikely friendship to survive the cold and several bonzami predators. After repairing his transponder, Zeb was detected by his fellow rebels who traveled to Bahryn to pick him up. Ezra and his fellow rebels greeted Zeb on the gangplank. When Bridger complained about the cold, Zeb responded that he had only been there for two seconds; prompting Ezra to respond that two seconds was already too long for him.[47]
Return to the Lothal temple
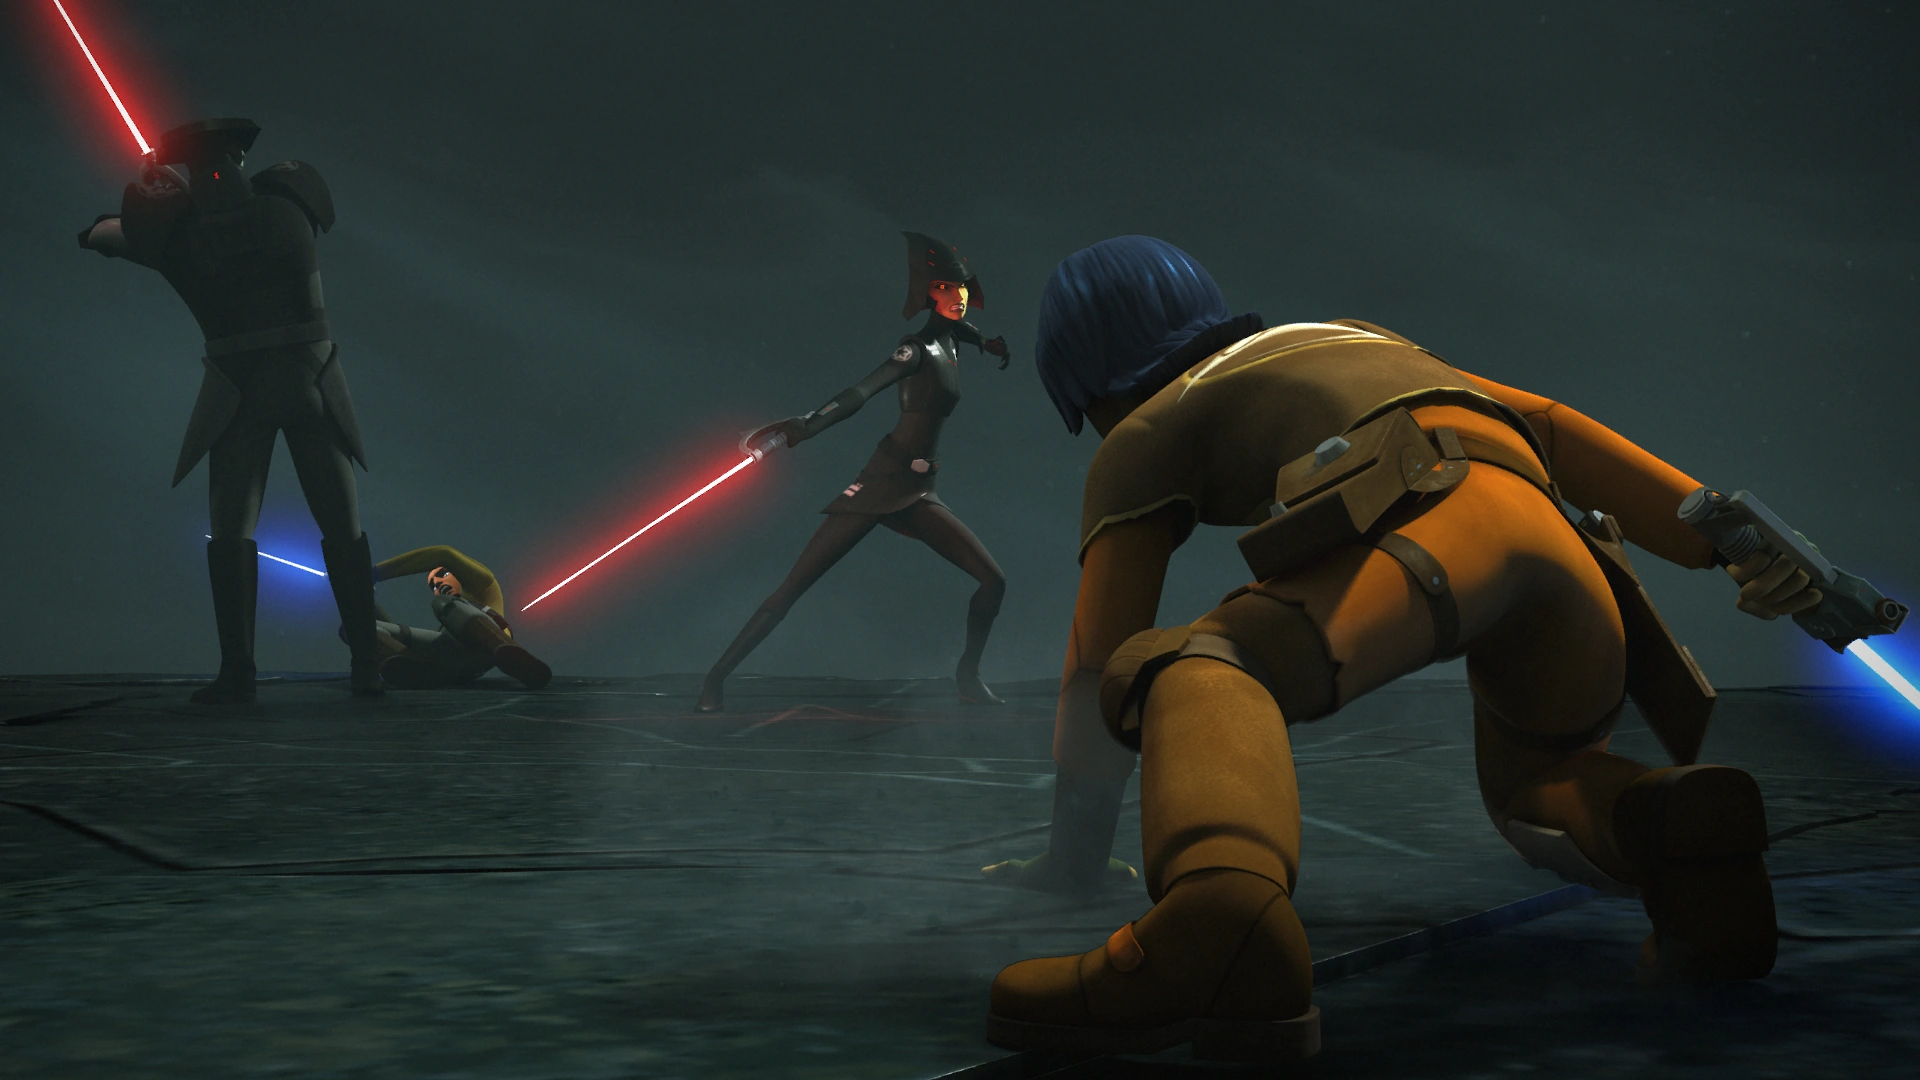

Ezra and Kanan duel the Fifth Brother and Seventh Sister on Oosalon.
Ezra along with Kanan and Chopper traveled to the stormy planet of Oosalon to scout for a permanent base that the rebellion could use. However, their mission was complicated by the arrival of the two Inquisitors known as the Fifth Brother and the Seventh Sister who clashed with them. During the duel, Ezra was knocked off the cliffside by the Fifth Brother but he managed to cling on to Kanan. The two Jedi managed to escape after Ezra used his Force powers to summon a tibidee which carried them to safety. Shortly later, Chopper arrived with the Phantom and picked them up.[15]
Once in space, Ezra and Kanan discussed the threat of the Inquisitors to their efforts to help the rebellion to establish a permanent base. To avoid endangering the Phoenix Squadron, Kanan arranged for the Ghost to rendezvous with the Phantom in deep space. After returning to the Ghost, Ezra met up with Ahsoka Tano in a cabin. Ahsoka showed Ezra a holographic recording of her late master Anakin Skywalker, who was skilled in lightsaber combat. Shortly later, Kanan entered the room and discussed the threat posed by the Inquisitors to the rebellion. After some discussion, Kanan and Ahsoka decided that they should visit the Jedi Temple on Lothal to seek answers.[15]
Upon arriving on Lothal, Ezra and the other Jedi made their way to the Jedi Temple while Chopper stayed behind to guard the Phantom. Ezra and Kanan used their Force powers to levitate the Temple open, causing it to reveal another entrance. Once inside the Temple, the three Jedi experienced different visions of the Force depending on their needs and circumstances. While Kanan encountered several spectral Jedi Temple Guards, Ezra asked Ahsoka about her recollections of the Jedi Master Yoda; he had heard Yoda's voice the last time but had never seen Yoda face to face. While they were speaking, Ezra disappeared and found himself in the same chamber where he had spoken to Yoda earlier.[15]
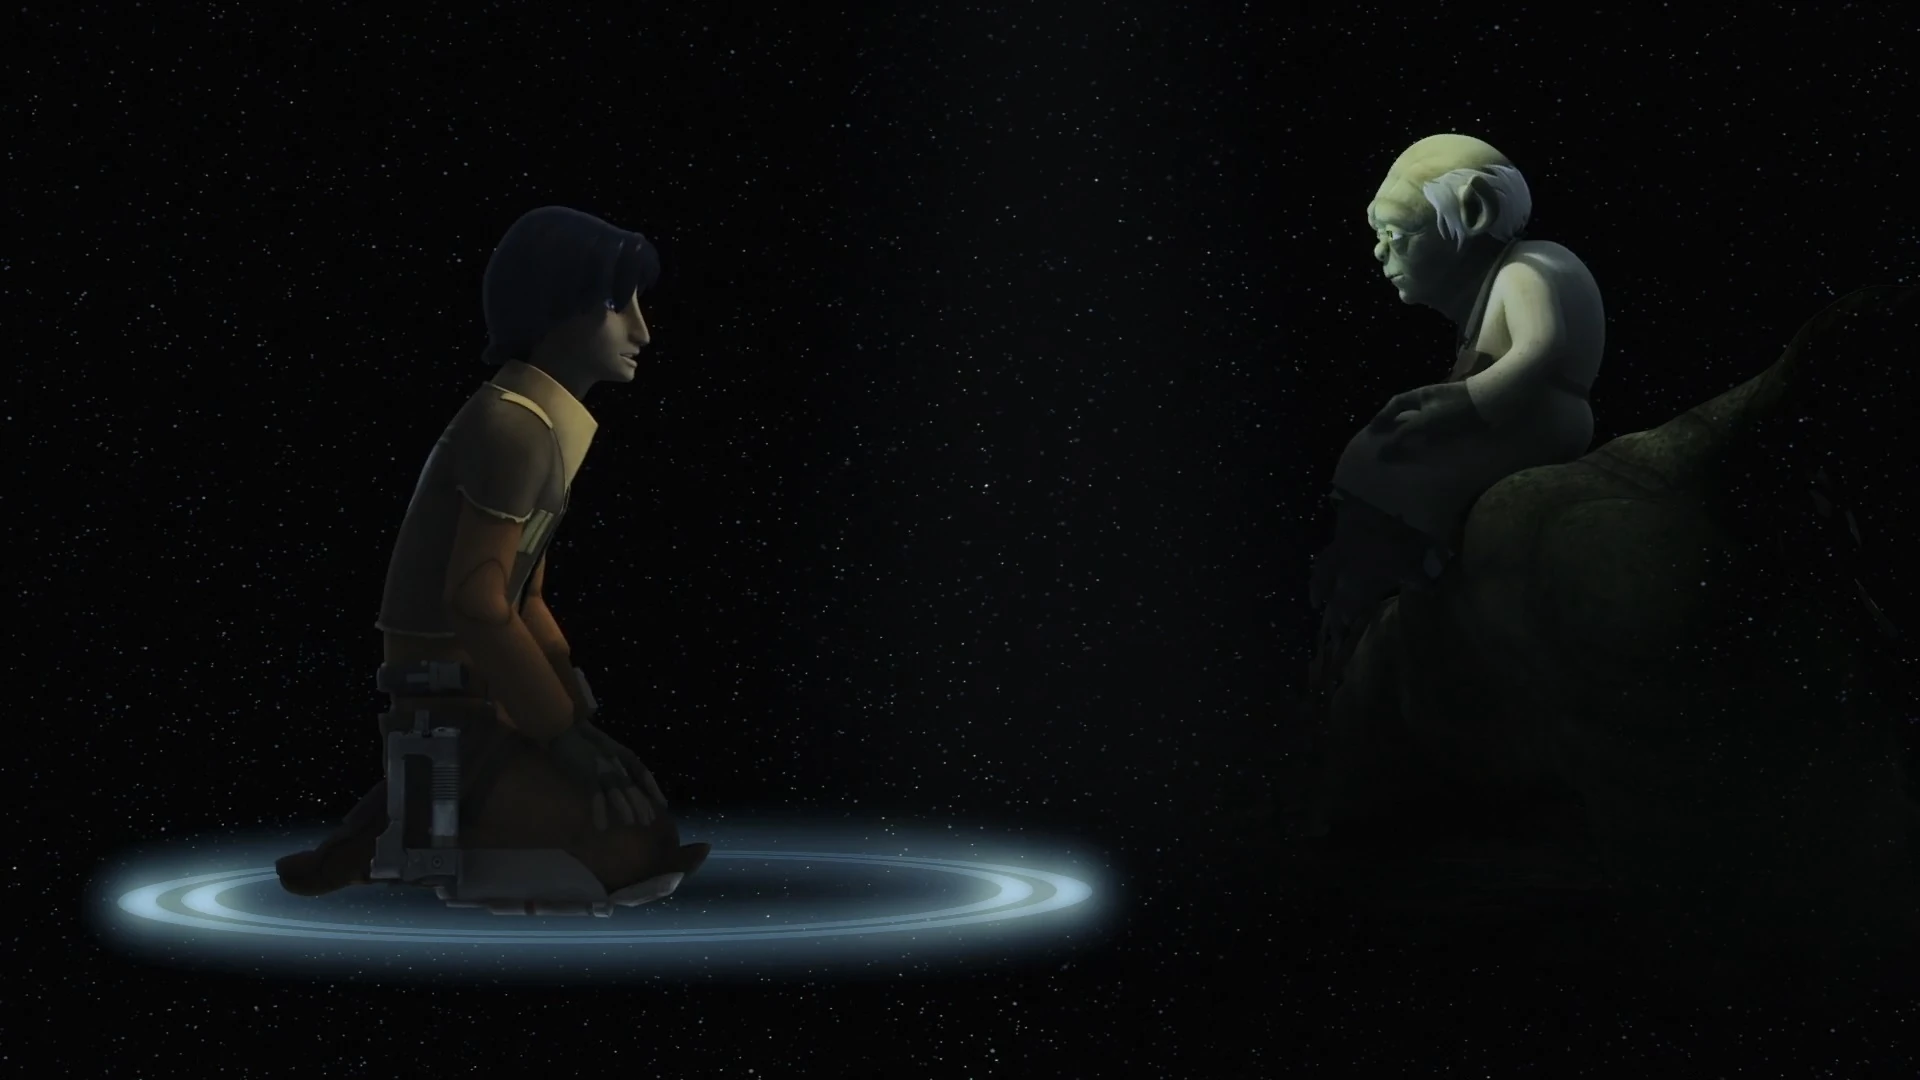

Ezra seeks guidance from Yoda.
Since his Force powers had grown, Ezra was able to see Yoda this time; recognizing him as a small, green-skinned alien. Yoda noted that Ezra's powers were growing but warned the young Padawan that it would also attract danger. When Ezra asked Yoda whether he had the power to destroy Vader and the Inquisitors, Yoda related how the Jedi Order's eagerness to participate in the Clone Wars had brought about its demise. When Ezra asked whether it was wrong for a Jedi to fight or to protect his friends, Yoda explained that he too had fought for many years but was consumed by fear. After Ezra expressed surprise that Yoda was once consumed by fear, Yoda counseled him that it was a lifelong challenge to prevent fear from bending into anger.[15]
Ezra's conversation with Master Yoda was interrupted by the arrival of the Inquisitors, who used their dark side powers to force the temple open. Before leaving, Ezra asked Yoda how the Jedi could expect to win if they do not fight back. Yoda responded that the real question was how a Jedi should choose to win, to which Ezra responded that they had already chosen to fight. Yoda then reluctantly told Ezra to find Malachor before leaving. After awakening from his vision, Ezra joined his companions in fleeing the Jedi Temple before the Inquisitors closed in on them. Fortunately for them, the Inquisitors were held back by several spectral Temple Guards.[15]
After escaping the Temple, Ezra and his fellow Jedi were picked up by Chopper in the Phantom. Once aboard the Ghost, Ezra told Kanan and Ahsoka that Master Yoda had told him to find Malachor and asked who Malachor was. Ahsoka responded by revealing that Malachor was not a person but rather a planet. Ezra and his companions' visit to Lothal attracted the attention of Darth Vader who vowed to stop the Jedi.[15]
Heist at Horizon Base
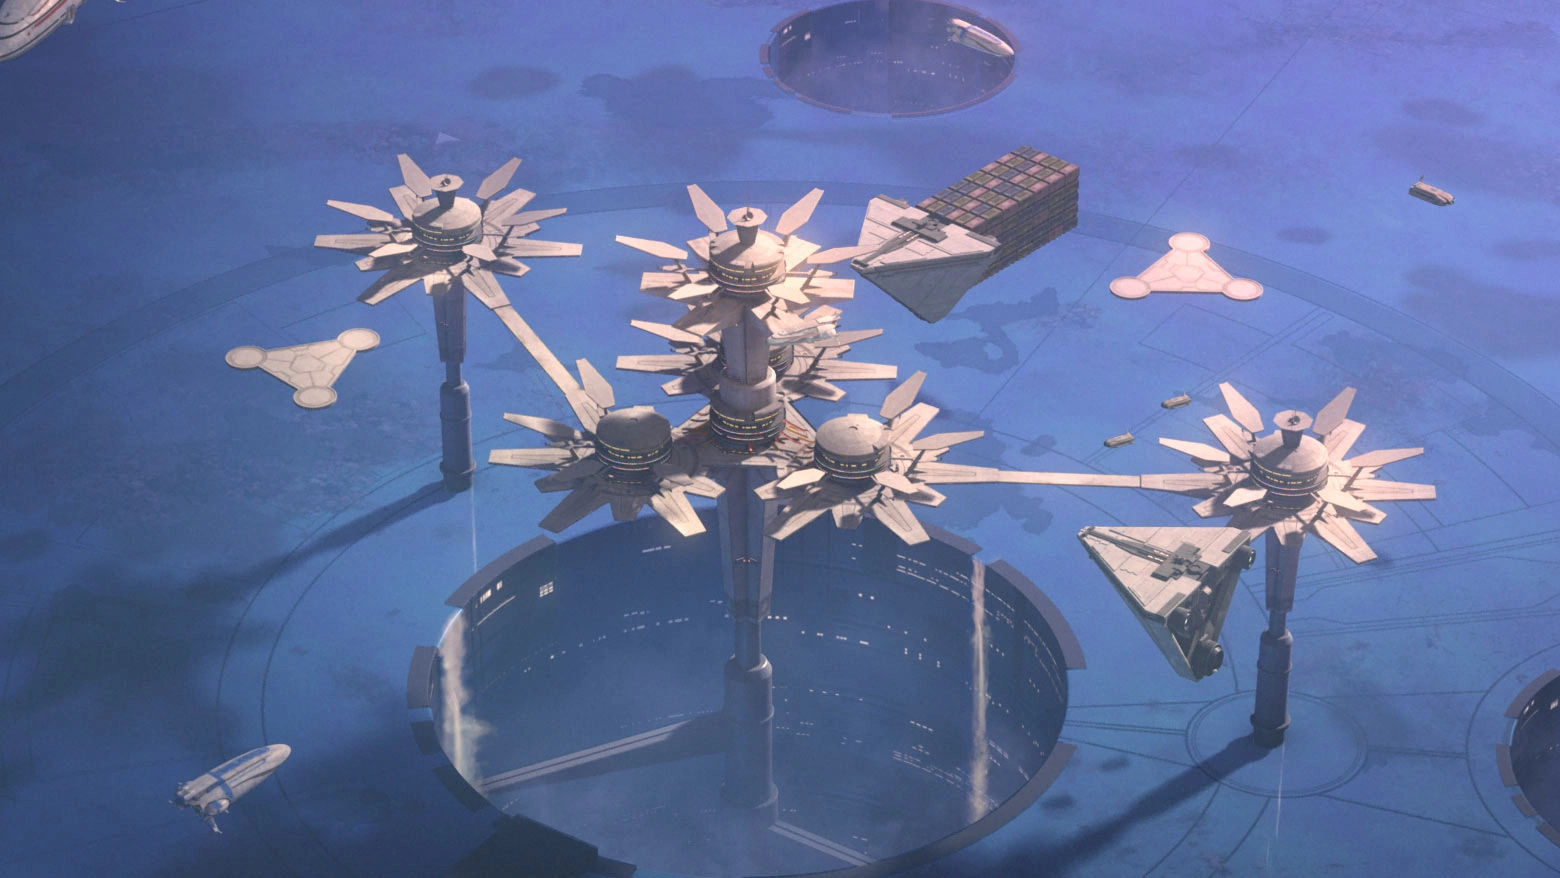

Ezra took part in a heist at Horizon Base
With the Phoenix Squadron's fighter-carrier lacking sufficient fuel to travel to the Yost system, Ezra and his fellow rebels took part in a mission to raid an Imperial depot at Horizon Base for fuel. Earlier, the rebel leadership had identified Berzite's moon in the Yost system as a prospective location for a rebel base. While Ezra and the other rebels made their way to the depot, Chopper was instructed to stay with the Ghost and keep any eye for Imperial activities. When Chopper coveted a droid leg on sale at a nearby stall, Ezra and Zeb taunted the droid; with Ezra making a snide remark about Chopper going "shopping."[48]
Ezra and the other rebels approached the depot and found it heavily guarded. Despite Kanan's orders to get the fuel "quietly with no complications", Ezra and his companions still managed to attract the attention of the local stormtrooper garrison. They managed to flee back to the Ghost with enough fuel supplies. However, Chopper was nowhere to be found since he was visiting the stall. With the Imperials closing in on them, Ezra and his companions were forced to leave Chopper behind.[48]
Despite his acrimonious relationship with Chopper, Ezra was still concerned enough to speak up for the astromech droid. While traveling through hyperspace, Ezra urged the crew to go back for Chopper. However, Hera ruled that out because she was angry with Chopper's selfishness and was more concerned about getting the fuel back to the fleet. Upon arriving, they discovered that the Phoenix rebel fleet was under attack by Imperial forces under Admiral Kassius Konstantine. Despite intense enemy fire, the Ghost managed to dock in the fighter-carrier with the help of Ketsu Onyo, Sabine's friend.[48]
After disembarking, Ezra and Zeb helped to unload the fuel canisters. Shortly later, Hera was contacted by Chopper, who had managed to befriend the Imperial inventory droid AP-5 and hijack an Imperial cargo ship. AP-5 managed to warn the rebels that the Empire had set a trap in the Yost system and instead gave them the coordinates for an alternative world called Atollon, which lacked an Imperial presence. Using this information, the rebel fleet was able to flee to Atollon. Ezra and his companions including Chopper were later present when Sabine finished her repairs to AP-5 by using spareparts from Chopper's stolen droid leg. Ezra also witnessed a brief verbal exchange between Chopper and AP-5.[48]
Establishing a new base
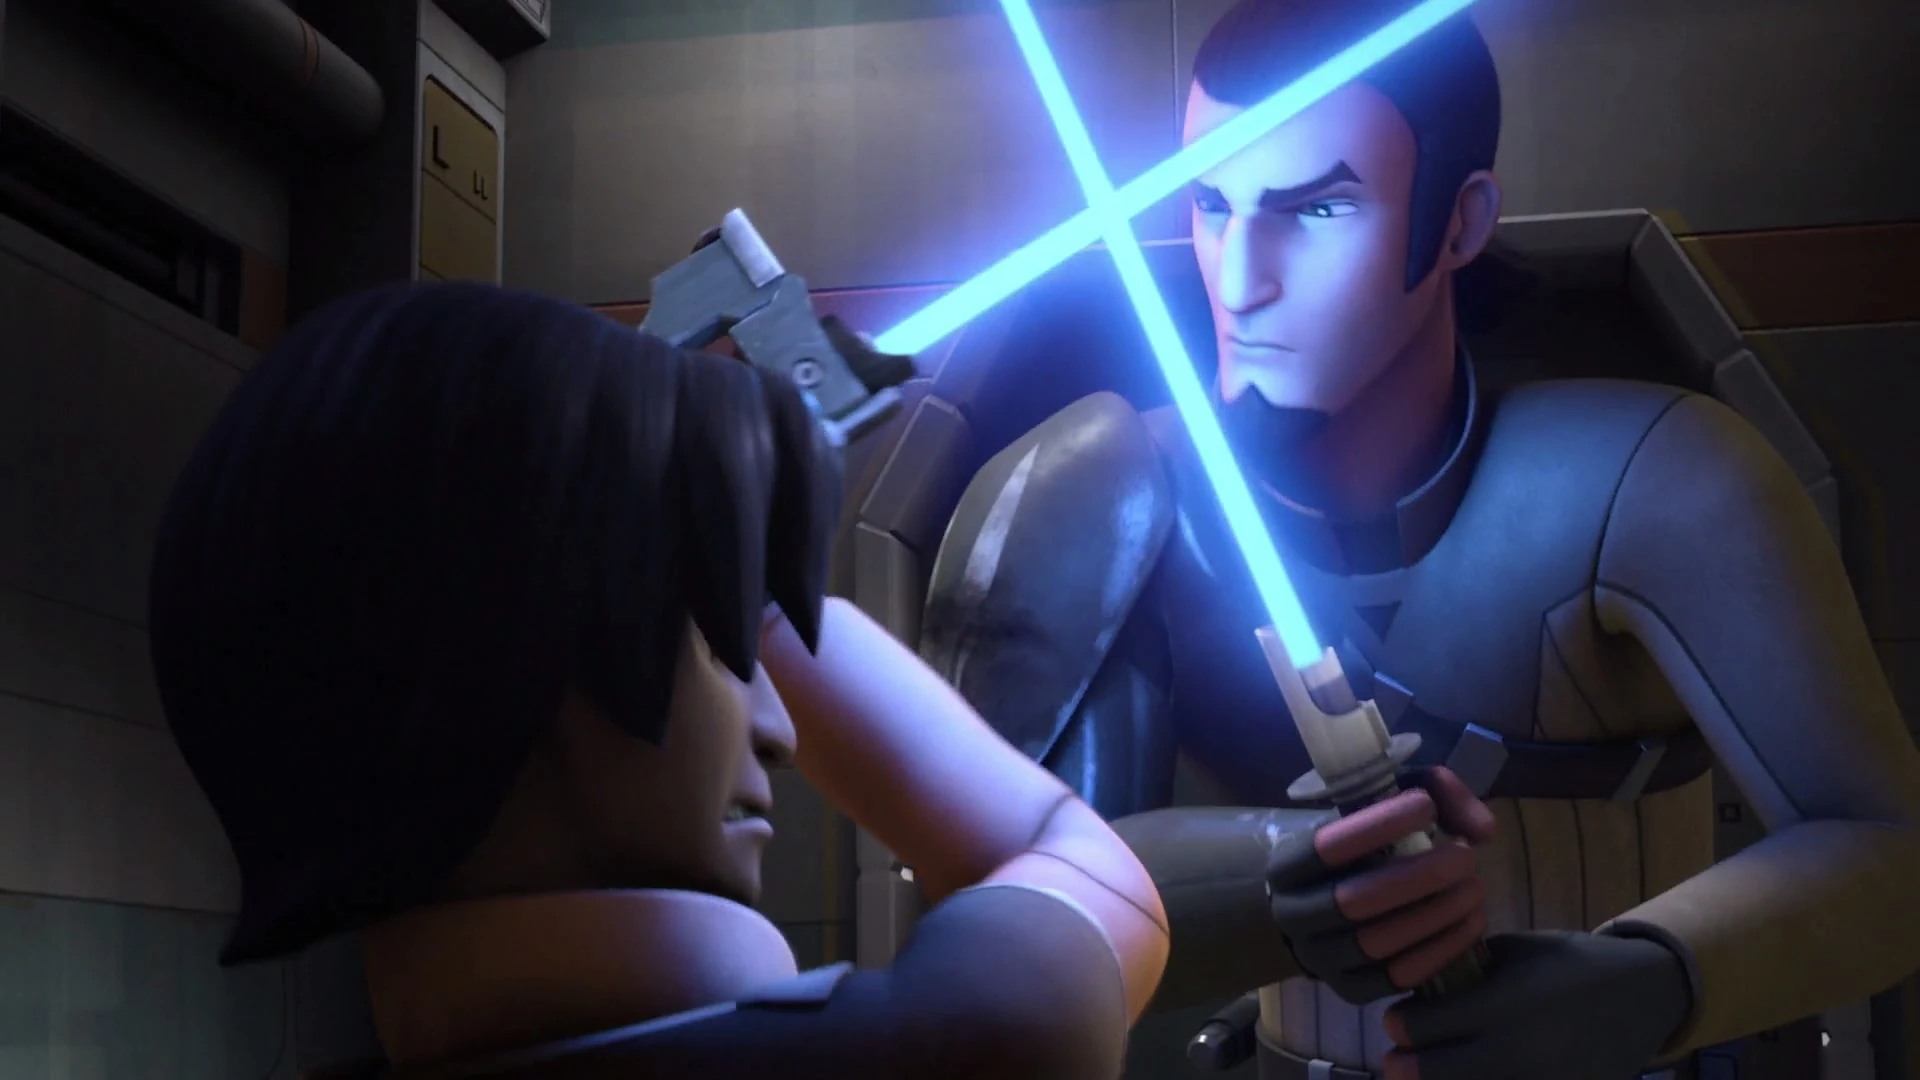

Ezra and Kanan practising with their lightsabers
Following the discovery of Atollon, the Phoenix Squadron established a rebel base on the planet called Chopper Base. Ezra and his fellow crew aided in the establishment of the base by ferrying power generators from the fleet down to the planet. While the Ghost was delivering power generators to Chopper Base, Ezra and his master Kanan took the opportunity to practice their lightsaber skills. The training session ended in a draw but his master reminded him there was no such thing in a real fight. When Ezra remarked that they won by killing Inquisitors, Kanan responded that they did so by staying alive.[49]
Ezra was annoyed when Sabine said that his lightsaber skills were getting better since it implied that he was still not good enough. Hera then reassured Ezra that he was good with the lightsaber. Kanan then interrupted the conversation to remind his apprentice not "to turn his back on the enemy." The two Jedi then returned to their lightsaber sparring session. After landing at Chopper Base, the Spectres delivered their power generators to AP-5, the former Imperial inventory droid who had now joined the rebellion.[49]
Later that day, Chopper bumped into Ezra on the Ghost, causing him to stumble. When Ezra asked where Zeb was, the astromech droid pointed in the direction of nearby cliff overlooking the desert. Upon arriving there, Ezra found Zeb relaxing and listening to some music while watching the sun setting. When Ezra told Zeb that he was about to leave and confided his fears that they would never meet again, Zeb reassured the young Jedi by joking that the rebels would have overthrown the Empire by the time that Kanan and Ezra had returned. He suggested that they could share war stories after their return.[49]
That evening, Ezra and his fellow rebels responded to a distress call from Sabine and Rex, who were checking the northern perimeter. Another rebel named Lieutenant Dicer had disappeared while planting a sensor beacon there and Sabine and Rex had gone to investigate. Upon arriving, the rebels had found themselves under attack from the krykna, large spidery creatures that inhabited the tunnels beneath the deserts of Atollon. Ezra and his companions managed to rescue Sabine but Rex was captured by the krykna.[49]
While exploring the tunnels, Ezra and Kanan split up from the other rebels to search for Rex. Ezra and his master quickly ran into a krykna. Ezra attempted to establish a Force connection with the creature but the creature attacked them; forcing Kanan to kill it. When Ezra protested, Kanan chastised his apprentice for lacking common sense. Ezra and Kanan managed to rejoin their companions who had managed to rescue Rex from the lair. After fighting off krykna pursuers, the rebels managed to escape back to the Ghost where they rejoined Chopper, who was guarding the ship.[49]
The rebels attempted to escape aboard the Ghost but they were held down by a large web woven by the krykna. As the spider-like creatures attempted to storm the ship, Ezra along with Kanan and Zeb used the ship's laser cannons to fight off the intruders. With the ship trapped under the krykna's webs, Ezra suggested venturing out of the ship to slice through it. When Zeb expressed a reluctance to face the krykna, Ezra angrily retorted that he did not want the last Jedi in the galaxy to end up in the belly of the creatures. After Sabine realized that the krykna avoided the sensor marker, the rebels came up with plan to distract the creatures while they escaped.[49]
Putting their plans into action, Ezra and Kanan used the Force to hurl Sabine towards the sensor marker. However, they over-calculated and the Mandalorian fell into a nearby pit. Despite falling into the pit, Sabine managed to return to the Ghost with the sensor marker. Ezra and his master then used their lightsabers to slice through the krykna webs. Their actions allowed the Ghost to break free of the web and return to the safety of Chopper base. Unwilling to give up the base, the rebels decided to fence off the northern perimeter with sensor markers to keep the krykna at bay.[49]
The following day, Ezra made a second attempt to make contact with the krykna but the Force had no effect on them. Shortly later, he was joined by Ahsoka, who explained that the Force became more mysterious as one learned more about it. After chatting, the two returned back to the camp to make preparations with Kanan for their journey to Malachor.[49]
Mission to Malachor
The "Old Master"
Together with Ahsoka, Kanan, and Chopper, Ezra traveled on the Phantom to the planet Malachor to seek knowledge on how to defeat the Sith. During the hyperspace journey, Ezra asked his master Kanan why their friend Rex was worried about them going to Malachor. Kanan and Ahsoka explained that Malachor was considered off-limits by the Jedi. When Ezra queried why Master Yoda would send them to such a place, Kanan suggested that Malachor might have something that would help them to stop the Inquisitors. Tano then added that they were seeking knowledge that would help them to defeat the Inquisitors' Sith masters.[50]
After descending into Malachor's atmosphere, Chopper reported the presence of another starship. As soon as the Phantom had passed through the clouds, Ezra spotted a circular stonehenge of monoliths in the distance. Upon landing, Ezra along with Kanan and Tano inspected the monoliths, which were inscribed with writings in an ancient tongue. Despite Ahsoka's warnings, Ezra touched one of the monoliths; causing the Jedi and Tano to slide into an underground cavern. There, the three travelers spotted a large pyramidal Sith temple in the distance. When Chopper issued a belated warning about the slip-in, Ezra sarcastically thanked the droid.[50]
Ezra, Kanan, and Ahsoka find the Sith temple.
While approaching the Sith temple, Ezra and his mentors stumbled upon an ancient battlefield from the Great Scourge of Malachor. The battlefield was littered with fallen lightsabers and the statue-like corpses of the belligerents. From Tano, Ezra learned that the Jedi and Sith had fought on Malachor a long time ago and that both sides had been destroyed. When Kanan hurried them, Ezra was about to make a snide remark about his master when he suddenly spotted one of the statues moving. This "statue" turned out to be the Inquisitor known as the Eighth Brother. The Inquisitor attacked Ezra and his companions.[50]
During the fighting, the Inquisitor fired several bolts with his Double-bladed spinning lightsaber; causing the ground beneath Ezra to cave in. Ezra was separated from his companions, who pursued the Eighth Brother. Once underground, Ezra encountered a mysterious elderly man who called himself the "Old Master". This Old Master was actually the former Sith apprentice Darth Maul, who had become stranded on Malachor several years earlier after his ship crashed. While Ezra initially distrusted the stranger, he agreed to let the Old Master leader him to the temple after he revealed that he was also after the same knowledge that would allow them to destroy the Sith.[50]
Ezra meets the "Old Master"
While traveling, Ezra befriend the Old Master, who described himself as an enemy of the Inquisitors and their Sith masters. Ezra was able to relate Maul's tragic experience with the Sith to his own experience with the Empire. Upon reaching the temple, the two Force-wielders used their Force powers to force its heavy stone doors open. At the urging of Maul, Ezra tapped into the dark side in order to force their way inside the Temple. One inside the temple's sanctum, Ezra and Maul teamed up to reach the Sith holocron, which was nestled on a high altar. After a challenging physical ordeal, the two managed to acquire the holocron. Ezra also came to trust Maul after the Force-wielder used his Force powers to levitate him to safety after he had jumped down from the altar.[50]
A brush with the dark side
After obtaining the holocron, Ezra and Maul encountered Kanan and Ahsoka fighting the Eighth Brother and two other Inquisitors known as the Fifth Brother and the Seventh Sister. Despite driving off the Inquisitors, Kanan and Tano were distrustful of Maul. However, Ezra defended Maul and argued they could trust him because he believed Maul's claim that he wanted to use the holocron's knowledge to destroy the Sith. Maul convinced the Jedi and Tano to join forces to bring the holocron to the top of the temple to access this knowledge and to fight Darth Vader, who had been alerted by the Inquisitors to the presence of the Jedi and Maul.[50]
While making their way to the top of the Sith temple, Kanan pulled Ezra aside at an opportune moment and warned his apprentice that Maul could not be trusted. In response, Ezra defended Maul for realizing his potential as a Force-wielder and accused Kanan of holding his Jedi training back. Shortly later, Ezra was attacked by the Eighth Brother who tried to obtain the Sith holocron. Maul drove off the Inquisitor and convinced the Jedi to split up so that they could delay their opponents. Despite Kanan's disapproval, Ezra agreed to accompany Maul to the top of the Sith temple.[50]
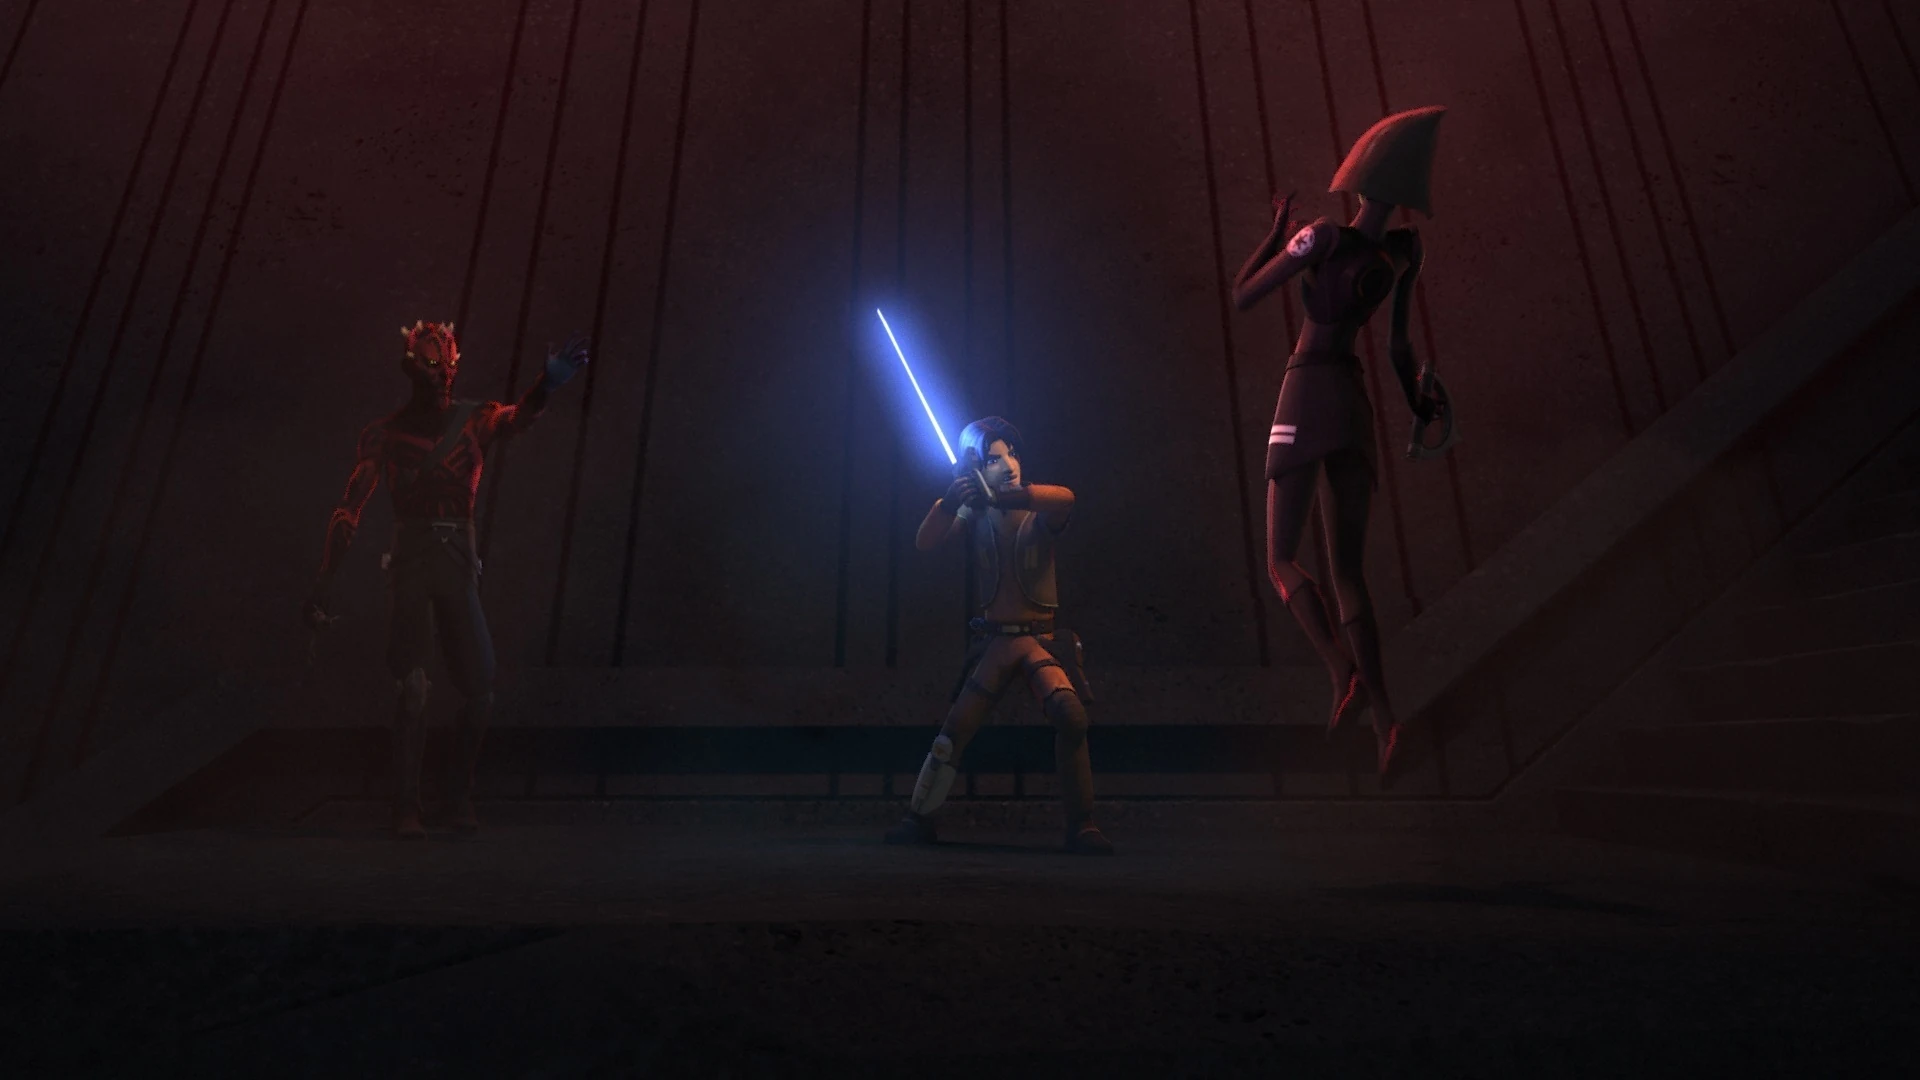

Maul commands Ezra to strike down the Seventh Sister.
During the journey, Maul tried to sow discord between Ezra and Kanan by telling the boy that he understood his potential. On the way, they were attacked by the Seventh Sister and her ID9 seeker droids. Ezra and Maul managed to defeat the Sister and her droids. Holding her in a Force-grip, Maul urged Ezra to strike the Inquisitor. When Ezra refused, the former Sith killed the Seventh Sister and then admonished Ezra for his hesitancy; warning him that it could cost him or his friends their lives next time. Maul then told Ezra to continue his journey to the temple's obelisk while he went to "help" Kanan and Ahsoka deal with the other Inquisitors.[50]
- "You have unlocked the secret of the temple. How did you accomplish this?"
"You're smart, figure it out!"
"No matter. The power within will soon serve the Emperor."
"I don't fear you."
"Then you will die braver than most." - ―Vader and Ezra
Ezra complied with Maul's instructions and managed to reach the top of the Sith temple. There, he planted the holocron into the obelisk and was greeted by a feminine entity known as the "Presence"; who told him that the Temple contained the power to destroy all life. When Ezra protested that this was not what he wanted, Presence told him that she would share the power with someone else more worthy. As Ezra attempted to flee, he was cornered by Darth Vader, who had arrived in his TIE Advanced x1 starfighter to access the Temple's knowledge on behalf of the Sith.[50]
Together, Ezra and Kanan remove the holocron from the obelisk, triggering a chain reaction.
Ezra briefly fought with Vader but was overpowered by the Sith Lord, who destroyed his lightsaber. Before Vader could finish Ezra off, he was joined by Ahsoka. Earlier, Maul had killed the Inquisitors but then betrayed Kanan by blinding him. Despite his blindness, Kanan managed to used his Force powers to push Maul into a chasm. Kanan also instructed Ahsoka to help Ezra. While Vader and Ahsoka fought with their lightsabers, Ezra and his blinded master Kanan worked together to remove the holocron from the temple's explosive; triggering a chain reaction that led to the Sith temple's implosion.[50]
As the Sith temple closed in on itself, Ezra and Kanan tried to reach Chopper and the Phantom but were held back by Vader. However, Ahsoka intervened and gave enough time for Ezra and his companions to escape on the Phantom. Ahsoka, however, was unable to join them and was trapped inside the temple with Vader. After the temple imploded, Ezra and Kanan assumed that Tano had perished. During the journey, Ezra wept, prompting Kanan to comfort him. Upon returning to Chopper Base, Ezra and Kanan greeted their fellow rebels including Rex who were saddened by the loss of Ahsoka. Later, after settling back on the Ghost, Ezra opened the Sith holocron in his room.[50]
Rescuing Hondo
Ezra led a mission to rescue Hondo
Two years before the Battle of Yavin,[51] Ezra Bridger led the Spectres on a mission to free his one-time partner, Hondo Ohnaka, from the Imperial prison on the planet Naraka. Hondo had promised to supply the rebels with valuable intelligence in return for his rescue. While Hera waited aboard the Ghost, Ezra and his team climbed under the bridge leading to the prison. After Ezra and Zeb dispatched two stormtroopers, he signaled for Chopper to join them and Sabine. To avoid triggering the Imperial sensor lights, Chopper threw himself down the cliff instead of activating his thruster. Ezra managed to levitate the droid above the light using the Force before letting him go and allowing Zeb to catch him.[52]
Together, the rebels made their way inside the prison and found Hondo's cell. Upon opening the cell, Ezra and his team learned that Hondo had an Ugnaught companion named Terba, who had been the original source of his information. After a brief exchange, the rebels were attacked by stormtroopers, prompting Ezra to contact Hera and tell her to bring the Ghost to the landing platform for a "44 scoop". The rebels soon fled down a turbolift, and after exiting, Ezra and Sabine shot down several stormtroopers. Ezra also used his new green lightsaber to cut down several stormtroopers who were blocking their way out. The rebels continued on to the exit but Terba broke away from the company and ran ahead. Exiting the building into the view of an AT-DP, the Ugnaught was struck dead by a blast from the walker's cannon.[52]
The rebels found themselves trapped between Imperial forces on both sides. While Sabine and Chopper dealt with the Imperials behind them, Ezra used the Force to control the AT-DP's pilot, forcing him to attack his own comrades and jump off the edge of the platform. When Sabine asked when Kanan had taught him that power, Ezra replied that he had not. In secret, he had been delving into the Sith holocron and learning the powers of the dark side. After Imperial reinforcements arrived from inside the prison, Ezra ordered his team to jump onto the Ghost's hull while it flew under the platform, allowing the group to escape the planet.[52]
Once safely aboard the Ghost, Ezra and Zeb met with Hera in the cockpit. Zeb told Hera indirectly that the youth had used a mind trick to manipulate the AT-DP pilot. When Hera chastised Ezra for losing Terba, Ezra responded that he was only responsible for the details that he knew and proceeded to storm out. Once inside his room, Ezra blamed Terba for causing his own death and that the operation would never have succeeded without him. Noticing the Sith holocron had activated, Ezra took it out of the Imperial cadet helmet he was hiding it in and held it in his hand. The entity Presence told him that his anger gave him strength, and Ezra exclaimed that he wanted to become stronger and more powerful so that nobody could hurt his friends again.[52]
Heist at Reklam Station
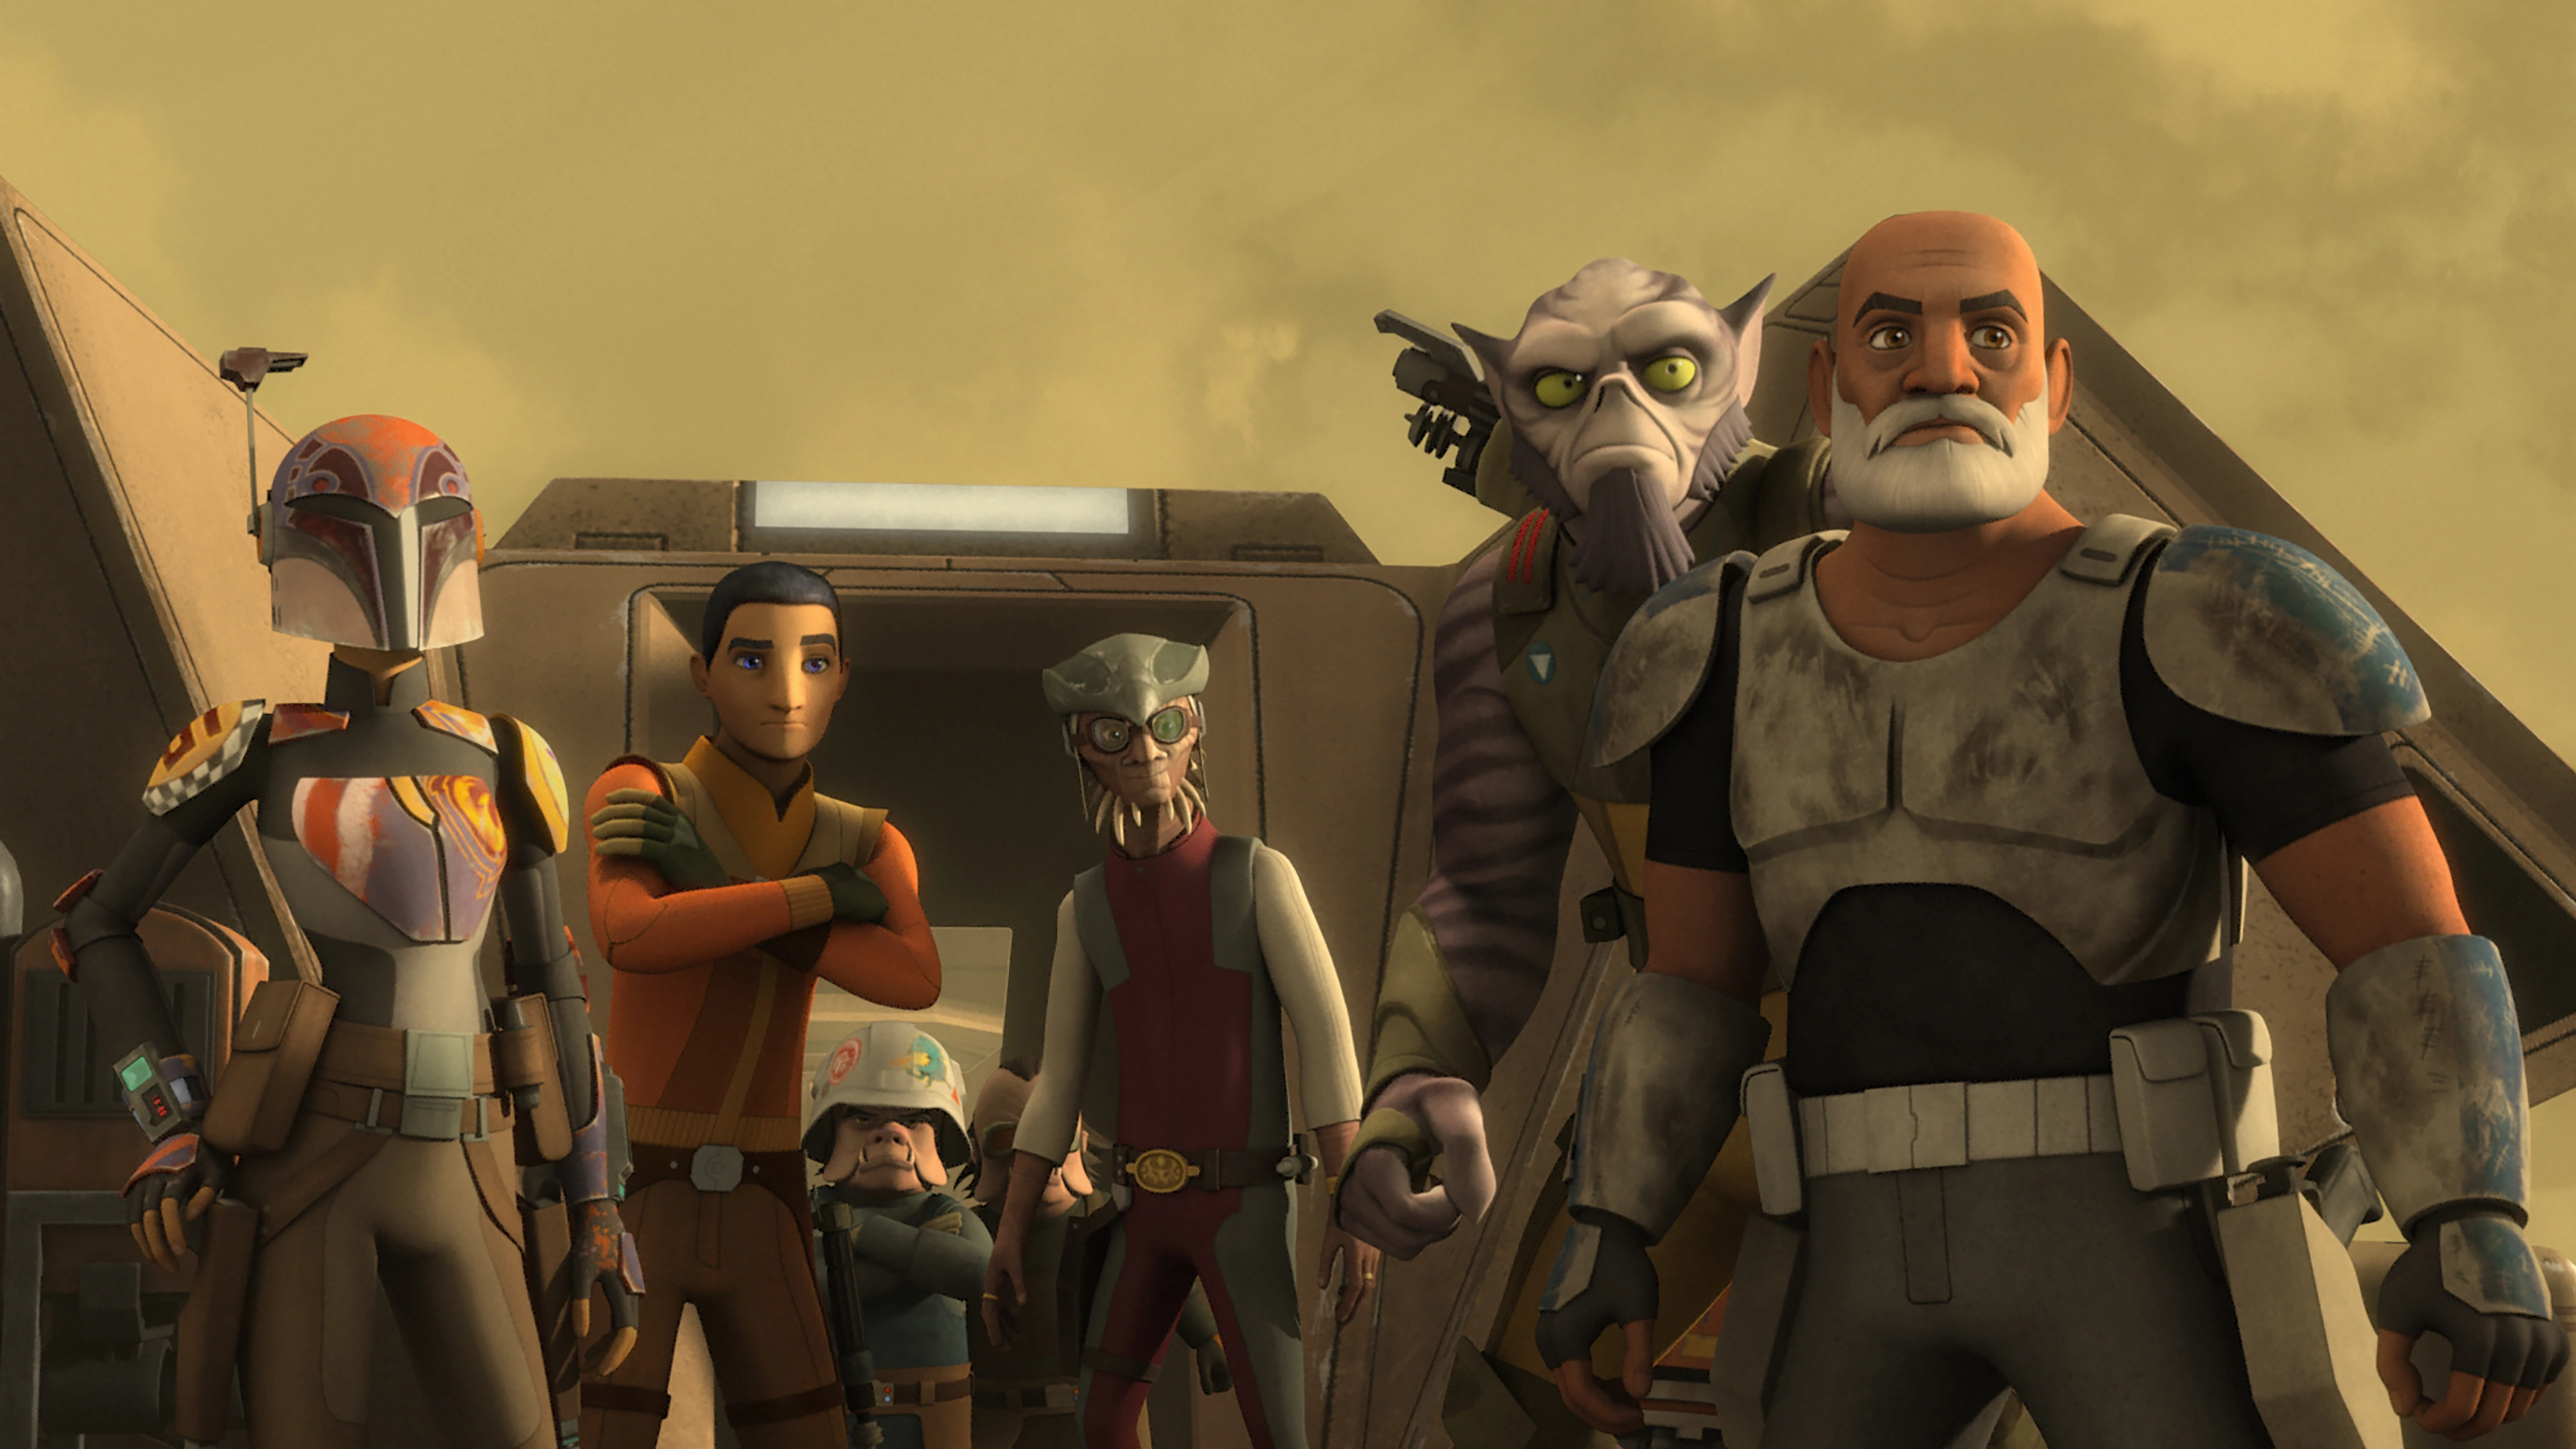
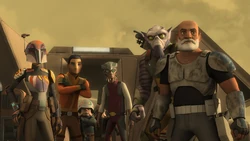
Ezra and his fellow rebels on Reklam Station
Stealing starfighters
After returning to Chopper Base, Ezra was present for a briefing where Hondo shared his information about an Imperial salvage yard called Reklam Station, which resided in the atmosphere of the planet Yarma, and that thousands of decommissioned Old Republic BTL Y-wing starfighters were being dismantled there. After Rex suggested that the Y-wings would be good starfighters for the rebellion, Ezra advocated going ahead with a recovery mission. As a compromise, Hera suggested sending a recon part to scout the station. Because of Ezra's success in rescuing Hondo, Commander Sato promoted the young rebel to Lieutenant Commander and put him in charge of the mission. With the meeting concluded, Hera assured Ezra that Kanan would be proud, to which Ezra told her it didn't seem that way considering his master's constant absence. Since his blinding, Kanan had become very detached, distancing himself from both his friends and the Force.[52]
Later, Ezra was in his bunk when Kanan entered. An argument quickly broke out between Padawan and Master when Kanan reprimanded his apprentice for dabbling with a Sith holocron, and proceeded to take the device. In a moment of anger, Ezra told his master that he did not need him or the Holocron.[52]
For the mission to Reklam Station, Ezra, accompanied by Sabine, Zeb, Chopper, Rex, and Hondo, traveled to Yarma in the Phantom. On the way, the rebels exited at Sereeda Waypoint where they were attacked by a Mining Guild patrol for failing to reduce their speed. When Ezra suggested destroying the entire patrol, Sabine disagreed and pointed out that the patrol would have already alerted the Empire. The rebels then continued their journey to Yarma. Once inside the planet's atmosphere, the rebels managed to find Reklam Station, but discovered there were few Y-wings that remained intact, a number that was reducing at an alarming rate. Seconds later, the rebels discovered that the Phantom was being pursued by two Imperial dismantler droids, which inflicted damage on the ship. Destroying the droids, Sabine manage to evade the station's scanners and park the ship under the floating scrapyard.[52]
After infiltrating Reklam Station, the rebels encountered several Ugnaught laborers. Ezra demanded they get out of their way, but Hondo managed to convince the workers to assist the rebels in stealing the Y-wings in exchange for their freedom. Having disabled the conveyor belts, Ezra ordered his team to get the Y-wings back to the rebellion. However, Sabine pointed out that the starfighters needed to be refueled first. The rebels had nearly finished refueling the fighters when they were spotted by a third dismantler droid. The station's Commander, Brom Titus, who Ezra had encountered earlier, reactivated the conveyor and engaged the magnetic locks on the Y-wings; preventing the bombers from getting airborne. In response, Ezra and Rex headed to the command tower to override the locks.[52]
When the third dismantler droid attacked Chopper, Sabine, and Zeb, Rex went back to rescue them. Ezra continued alone and defeated a squad of stormtroopers in the station's hangar bay. In the middle of the fight, he was contacted by Hera, who inquired about the progress of the "recon mission". Ezra claimed that things were going well but Hera quickly deduced he had disobeyed his orders. When Hondo arrived with the Ugnaughts, the pirate told Ezra that he would guard the Imperial landing craft there in case they needed a quick escape.[52]

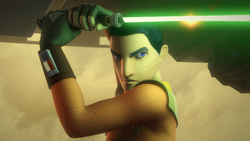
Ezra wielding his lightsaber on Reklam Station
Once inside the control tower, Ezra knocked down several stormtroopers with deflected blaster bolts before confronting Commander Titus. The two quickly recognized each other from their earlier encounter aboard the Imperial Interdictor. After a brief verbal exchange, Ezra demanded that Titus release the magnetic locks. When the commander revealed that he had sabotaged the control unit, Ezra decided to disable the station's power with his lightsaber despite the risks to everyone aboard. Ezra struck down the power unit with his lightsaber; freeing the starfighters but sending Reklam Station towards the surface of Yarma.[52]
Escaping Reklam Station
Noticing Hondo fleeing the salvage yard, Ezra contacted the pirate and jokingly asked him why he was leaving, realizing it was typical of the Weequay's behavior, to which Hondo replied he was making his quick escape, noting another successful adventure. Returning to the conveyor platform, Ezra commanded his rebel comrades to escape with the Y-wings while the young Jedi tried to reach the Phantom. However, Reklam Station had began falling apart and the starship was knocked off by a falling crane. Unable to escape offworld or establish communications with the rest of his group, Ezra called on his master for help through the Force. Meanwhile, the rebel Y-wings were intercepted by an Imperial Star Destroyer commanded by Governor Arihnda Pryce. Fortunately for Ezra and the rebels, the Phoenix fleet arrived with the Quasar Fire-class cruiser carrier Phoenix Home and the Ghost.[52]
While Phoenix Home evacuated the stolen Y-wings, Hera and Kanan traveled on the Ghost into the depths of Yarma's atmosphere. With Hera flying alongside the plummeting structure, Kanan managed to pluck Ezra to safety after convincing him to have trust in him and let go of the station. Once aboard the Ghost, Ezra tried to tell Hera about the Phantom but the captain was preoccupied with getting the ship to safety. The rebel ships managed to escaped into hyperspace after Grand Admiral Thrawn ordered Pryce to let them go. Back at Chopper Base, Hera reprimanded Ezra for disobeying his orders, endangering his team, and getting the Phantom destroyed. As punishment, his command was suspended.[52]
Later that night, Ezra apologized to Kanan for using the Sith holocron. When Ezra asked his master what he did with it, the older Jedi told him that it was safe. Ezra then thanked Kanan for saving him, to which his master told him that he would always come back, reconciling their relationship.[52]
The two holocrons
Ezra and Maul opening the holocrons
While traveling aboard a CR90 corvette through hyperspace, Ezra and his master Kanan stumbled on a derelict Hammerhead corvette, that was part of the Phoenix cell. The two discussed their disagreement about the Sith holocron and the significance of their mission to Malachor. Once aboard, the two encountered a wounded crew member who informed them that a red blade was after him and that the Ghost was in danger. Ezra and his master contacted the Ghost only to learn that Maul had taken Hera, Chopper, Zeb, and Sabine captive. Maul then demanded that the two Jedi hand him the Sith holocron and Kanan Jarrus' holocron in return for the safety of their friends. The Jedi reluctantly acceded to his demands and made preparations to retrieve the Sith holocron, which was in the care of Bendu; a powerful Force-wielder who had befriended Kanan.[53]
Returning to Atollon, Ezra and Kanan traveled on a speeder bike to the lair of Bendu, which lay in an outcrop of mesas. After hearing no responses, Ezra remarked that Kanan was hearing voices in his head. Suddenly, the two were surrounded by krykna spiders. While Kanan had made peace with the creatures, Ezra was still startled and ignited his lightsaber against his master's wishes. The krykna fled when Bendu finally stirred. When Bendu asked why they had come, Ezra explained their predicament with Maul and the Sith holocron. Bendu counselled the two Jedi that the convergence of the holocrons would be dangerous. From Bendu, Ezra learned that the holocrons were not merely libraries but that they also granted clarity. Bendu also warned that the convergence of holocrons could lead to chaos and that the Sith holocron was a source of imbalance between Ezra and his master.[53]
Bendu reluctantly allowed Ezra to reclaim the holocron but set a task for the apprentice. In order to reclaim the holocron, Ezra had to travel inside a cave that was inhabited by krykna spiders. At Kanan's request, Ezra left his lightsaber behind and kept in touch with his master via comlink. Ezra kept in touch with his master but soon lost contact after being surrounded by several krykna. As they ventured deeper, Ezra took the opportunity to apologize for the recent troubles but Kanan assured his apprentice that it was not his fault. After Ezra forgave himself, apprentice and master reconciled. They eventually found the Sith holocron inside a deep chamber inhabited by krykna. At Kanan's urging, Ezra stayed calmed as he used the Force to levitate the object towards them. Their presence did not startle the krykna.[53]
Upon emerging, Bendu expressed his pleasure that the imbalance between Ezra and his master had been fix but warned them that their true test had just begun. Since Maul was unable to open the Jedi holocron, Bendu warned them that it would fall to one of them. When Ezra suggested that they could wield the power of both holocrons, Bendu warned them that secrets could not been unknown once they had been discovered. Together, Kanan and his master traveled on an A-wing starfighter to rendezvous with Maul. When Maul asked Ezra to open the holocron, Ezra replied that he preferred to listen to his master. When Ezra asked Kanan what their plan was, Kanan replied that they would think by "ear." Kanan also counselled his apprentice not to give in to fear and despair.[53]
Their destination turned out to be the former Mandalorian asteroid colony, Vizsla Keep 09. Upon arriving, the two Jedi were greeted by Maul who asked Ezra if he found the Sith holocron illuminating. While Maul dealt with Kanan, Ezra was escorted by two repurposed tour guide droids to the command center. Despite promising to spare his friends, Maul ordered his droids to kill the captives and made a second attempt on Kanan's life. When Maul returned, the two opened the holocrons and brought them together. While Ezra wanted to destroy the Sith, Maul only sought hope. The two were quickly bathed in a bright pink blaze of light. Ezra experienced a vision of twin suns while Maul realized that his old enemy Obi-Wan Kenobi still lived. Before they could proceed further, Kanan arrived with the other rebels and convinced Ezra to let go. Ezra closed his eyes and the vision ended.[53]
Ezra was knocked unconscious due to the power of the holocrons. Maul took the opportunity to flee on his starfighter Nightbrother but left the holocrons behind. After coming round, Ezra told Kanan that he had experienced strange visions of the future but was not sure whether they were things that Maul wanted him to see. Kanan assured Ezra that they would find out together.[53]
Waiting for Sabine
Ezra and his fellow rebels attending a briefing
After Imperial forces destroyed a rebel convoy near Teralov, Ezra and his fellow rebels attended a briefing chaired by Commander Sato to discuss the recent losses. During the meeting, Ezra asked how many pilots survived and remarked that at this rate there would no pilots flying for the rebellion. When Sato informed the rebels that a source called Fulcrum had information on Imperial cadets wanting to defect from the elite Skystrike Academy, Ezra asked whether Ahsoka Tano was still alive. Hera then explained that Fulcrum was a codename for the rebellion's many undercover agents.[54]
When Hera assigned Sabine an undercover mission to infiltrate the Academy disguised as a cadet, Ezra asked why he was not involved in the mission. Sabine responded that she was once a real cadet while Hera added that Ezra was too well known to the Empire. Instead, he along with Kanan and Chopper were assigned to escort Sabine to the Academy and to evacuate her and the cadets when necessary.[54]
While waiting aboard a rebel CR90 corvette, Ezra and Kanan received word that Sabine had managed to infiltrate the Academy. Despite Kanan's efforts to reassure him that Sabine would be fine, Ezra still voiced his dislike for solo missions. After Sabine had managed to identify the defecting cadets Wedge Antilles, Hobbie, and Rake Gahree, Sabine contacted Ezra to rendezvous with them in space. The four cadets flew towards the corvette but Governor Arihnda Pryce deactivated their solar collectors; leaving them stranded in space. Ezra's corvette then came under heavy fire and was forced to retreat by Kanan.[54]
After Sabine along with Wedge and Hobbie escaped in a TIE bomber, Ezra's CR90 corvette flew into the planet's atmosphere and picked them up. They then managed to escape Captain Vult Skerris's TIE interceptor. Once inside the command bridge, Sabine asked Ezra why he not left. Ezra responded that he stuck around just in case. Having completed their mission, the rebels fled into hyperspace. Back at Chopper Base, Ezra was present when Commander Sato formally welcomed Wedge and Hobbie into the Rebellion.[54]
Return to Ryloth
Ezra disguised as a scout trooper on Ryloth
Later, Ezra and his fellow rebels returned to Ryloth to deliver supplies to Hera's father Cham Syndulla, the leader of the Free Ryloth movement. The Spectres rescued Cham and Numa from being pursued by Imperial forces and evacuated them and their Blurrg steeds aboard the Ghost. One of the pursuing scout troopers followed them but Zeb knocked him out. Ezra then took possession of his armor. Ezra and the other rebels then attended a briefing where Cham recounted the recent events on Ryloth; a new Imperial commander Grand Admiral Thrawn had occupied Tann province and the Syndulla residence.[55]
Ezra and the other rebels including Cham volunteered to help Hera recover her mother's Kalikori, a priceless heirloom, from the Syndulla residence. For the mission, Ezra disguised himself as a scout trooper. Together with Hera, they infiltrated the Twi'lek settlement in a stolen 614-AvA speeder bike. Meanwhile, the other rebels staged a diversionary attack in the Tulara Ravine. Ezra managed to bluff his way past the Imperial sentries by posing as a scout trooper taking a captured rebel into Imperial custody. At the Syndulla residence, they rendezvoused with Chopper, who was disguised as an Imperial astromech droid.[55]
The two rebels managed to find Cham's former office and recover the Kalikori. They tried to escape through the front door but found it blocked by stormtrooper sentries. The two rebels also had their first glimpse of Thrawn and his subordinate Captain Slavin with Ezra wondering who the "blue guy" was. Hera and Ezra then tried to escape through the basement but found that the Imperials had set up a command center. With Chopper's help, the two rebels tried to get pass the stormtrooper sentries at the front door. While Ezra covered for her behind the wall separaters and Chopper distracted the stormtroopers, Hera tried to sneak out through the front door.[55]
However, Hera was accosted by Slavin and Thrawn, with the latter wanting to question her. At Thrawn's orders, Ezra pretended to apprehend Hera and followed them to Thrawn's office. There, Thrawn examined the Kalikori and determined that Hera was Cham's daughter and a rebel operative. With Hera's cover blown, Ezra tried to shoot Thrawn. However, the Grand Admiral stunned him first. Ezra later awoke in a cell with Hera where Thrawn took the Kalikori into his possession and left Slavin to deal with the prisoners.[55]
Slavin then contacted Cham and offered to spare Hera and Ezra if he agreed to surrender by dawn. If he refused, Slavin threatened to execute the two prisoners. Cham accepted Slavin's offer. When Hera apologized for endangering her team, Ezra assured her that he would have done the same for her. Chopper then entered the cell to inform them of Cham's offer to surrender. Ezra then advocated escaping but Hera counseled against it because there were too many guards. Instead, she got Chopper to plant explosives all over the building to create a distraction; something that surprised Ezra.[55]
At dawn, Slavin took Ezra and Hera outside the Syndulla residence to facilitate the exchange. As expected, Cham arrived and disembarked from the Ghost. At that point, Chopper emerged and activated the explosives under Hera's orders. This created an explosion which disoriented the Imperials and enabled all of the rebels to escape aboard the Ghost. The rebels were allowed by Thrawn to escape as part of his "experiment." Later, Ezra joined the other Spectres and Cham's rebels aboard the Ghost in Ryloth's wilderness. While listening to Hera affirm her love for her father, Kanan, and her crew, Ezra was hugged by Zeb.[55]
Peacemaker on Agamar

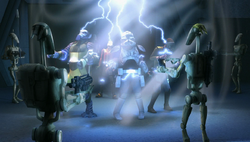
Ezra and his fellow rebels are trapped by Separatist droids
Following the events on Ryloth, Ezra accompanied Kanan, Zeb, Chopper, and Rex on a mission to salvage proton bombs from a wrecked Separatist supply ship on Agamar. From Rex, Ezra and the other rebels learned more about the Clone Wars. When Ezra picked up a B1 battle droid's head and opined that the droid did not look dangerous, Rex responded that those "clankers" killed many of his friends. Eventually, Ezra and his team found that the transport's munitions depot was still full of proton bombs. Ezra and his team soon found themselves trapped inside a ray shield and were captured by several battle droids led by B1-268. The battle droids stunned Ezra and his companions and took them captive.[56]
When Ezra and his companions awoke, they found themselves captives of the super tactical droid Kalani, who revealed that he had prevented the shut-down order that occurred after Order 66. Realizing that Rex was a Clone trooper, Kalani was determined to finish the Clone Wars as a victory for the Separatist Droid Army. Rex, Kanan, and Zeb refused to fight but Ezra saw an opportunity to obtain the proton bombs that the rebellion was after. In return for participating in the combat simulation, Ezra secured an agreement from Kalani to free Zeb, who had been designated as a hostage, and to give them the proton bombs if they won the match. Kalani accepted the deal and gave orders for his droids to assume position.[56]
Ezra, Kanan and Rex waited outside the hangar bay while Kalani briefed them that their objective was to reach the command bridge. Kalani dispatched a wave of battle droids. With Rex taking the lead, Ezra and Kanan utilized the Sword and Shield maneuver which involved deflecting blaster bolts and hurling grenades at the advancing droid columns. Working together, the rebels managed to scatter the first assault wave and reached the hangar. Once inside the hangar, the three rebels found themselves under attack by several droidekas. Unable to break through their deflector shields, Ezra proposed collapsing a catwalk on them. Rex agreed and ordered Ezra to carry out the task while he and Kanan provided covering fire. On the way, Ezra encountered Chopper, who had managed to send a distress signal and find a Neimoidian escort shuttle. Chopper wanted to leave but Ezra told him to get the shuttle ready while he fetched the others.[56]
Using his Force powers, Ezra managed to collapsed the catwalk on the droidekas. Despite his success in knocking out the droids, Ezra was reprimanded by Rex for taking too long and endangering the rest of the team. Kanan then reassured Ezra that Rex was still haunted by the Clone Wars. After knocking out another droideka, Ezra and the other rebels forced their way into the command bridge and declared victory. However, Kalani refused to accept victory on the grounds that the dilapidated state of his droid forces had prevented a fair fight. Before he could execute Zeb, Ezra managed to reason with Kalani and convince him that the clones and Separatists shared a common enemy in the form of the Galactic Empire; the successor to the Republic. Based on this logic, this made the rebels and Separatist droids allies. Ezra's arguments managed to sway Kalani after Imperial forces arrived and attacked a battle droid patrol led by B1-268.[56]
Working together, the rebels and Separatist droids decided to delay the advancing Imperial AT-AT and AT-DP walkers. At Kalani's direction, the battle droids fired their bolts at Ezra and Kanan, who deflected them at several proton bombs. These proton bombs were then thrown into the path of an advancing AT-AT walker and damaged its front legs. The rebels and droids then fled on three Neimoidian shuttles that had been prepared by Chopper. While one of the shuttles was shot down, the rebels' and Kalani's shuttles manage to reach space. Aboard the shuttle, Rex praised Ezra for ending the Clone Wars; something that had eluded the Galactic Senate, the Grand Army of the Republic and the Droid Army. Kalani agreed with Rex's sentiments but believed that the rebels had a poor chance of success against the Empire and departed for parts unknown. Shortly later, the rebels were contacted by Hera. Rex informed Hera that the rebels had not found new proton bombs but had found a new transport for the Ghost.[56]
Mission to Concord Dawn
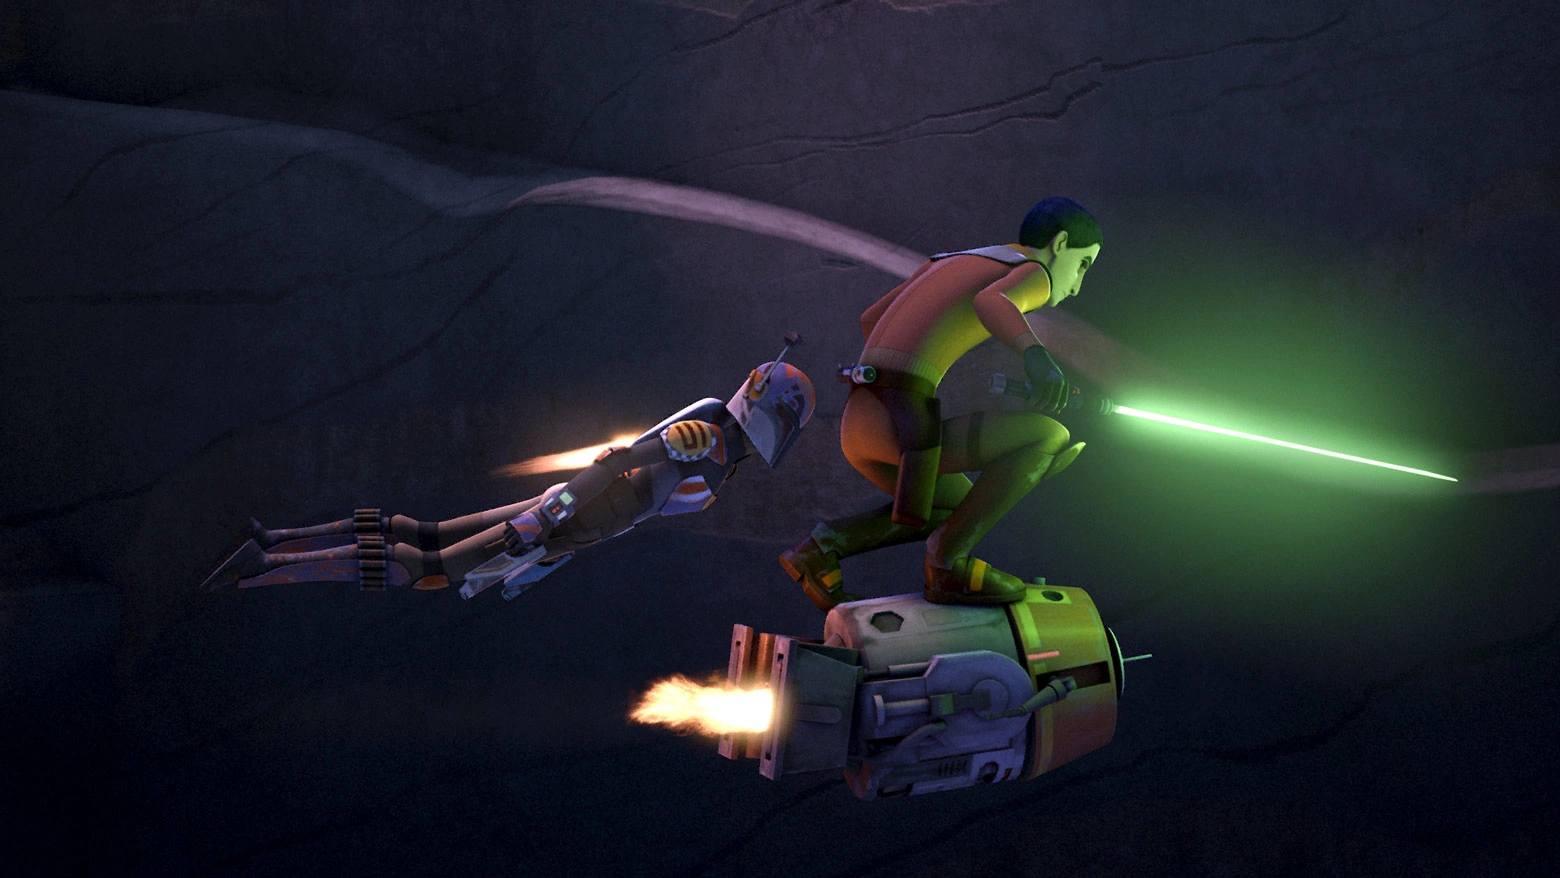
Ezra Bridger, Chopper, and Sabine fleeing the Imperial Super Commandos
After the Phoenix rebels lost contact with the Journeyman Protectors on the third moon of Concord Dawn, Hera assigned Ezra and Chopper to escort Sabine and Fenn Rau, the leader of the Protectors, on a recon probe of the moon. During the journey, the rebels travelled on the Phantom II. Sabine assigned Ezra with the task of watching over Rau, who was handcuffed. When Ezra saw the fractured planet of Concord Dawn for the first time, he asked Rau what happened to the planet. Rau told him that the Mandalorians had fought for centuries.[57]
While Ezra was distracted, Rau freed himself from his Magnetic binders and stunned Ezra and Sabine. Ezra was later woken up by Chopper, who slapped him out of unconsciousness. Chopper also freed Ezra and Sabine from their restraints. Upon exiting the shuttle, the rebels found Rau on top of a hill. Ezra used the Force to snatch Rau's pistol out of his hand. The rebels soon discovered that another Mandalorian faction had attacked the Protectors and slaughtered them. While Sabine and Rau argued, Chopper sensed that someone was coming.[57]
The rebels were then attacked by a Viper probe droid. Ezra tried to use the Force to grab it but Sabine managed to shoot down the droid. Rau wanted to bargain with the Empire, prompting an argument with Sabine. However, the visitors turned out to be a group of Mandalorian Imperial Super Commandos led by the Imperial Viceroy of Mandalore, Gar Saxon. Ezra and the others fled but he was quickly captured by Saxon and his men. Since Rau had taken his lightsaber, he was unable to fight back. The Imperials Super Commandos also captured Chopper and the Phantom II.[57]
When interrogated, Ezra tried to mislead his captors by claiming that he and Chopper were scavengers who worked for Hondo Ohnaka. However, Saxon did not believe Ezra and fired shots around Chopper to force his cooperation. Ezra then claimed that he was named Lando Calrissian. Unsatisfied, Saxon continued the interrogation and forced Ezra to reveal that Fenn Rau had sent him. When Ezra said that he did not know where Rau was, Saxon tried to shoot Chopper. Using his Force powers, Ezra managed to deflect the bolts twice. However, Saxon realized that he was a Jedi.[57]
Before Saxon could continue his interrogation, Sabine threw smoke grenades into the building. The three rebels then fled back to the Phantom II only to discover that Rau had stolen the ship. Ezra and his comrades were then surrounded by Saxon and his Super Commandos. Saxon attempted to force Sabine to yield to him but she used the Frequency 337 on her helmet to escape. Ezra and Sabine shared a jetpack with the youth clinging onto to Sabine for dear life. The three rebels fled into a canyon with the Super Commandos in pursuit.[57]
The Spectres decided to find Saxon's ship in order to get offworld. With a Super Commando closing in on them, Sabine was forced to fly low and Ezra narrowly avoided hitting a rock. Sabine then lowered Ezra on top of a rock and he then jumped onto the jet pack of another Mandalorian. Following a struggle, Ezra damaged the Commando's jet pack, causing him to fall to the ground. Using the Force, Ezra leapt towards Sabine and clung on to her. As they fled into a narrower part of the canyon, Sabine used grenades to block Saxon and his men. When Saxon and one of his men opened fire, Ezra lost his grip and was forced to ride on Chopper.[57]
The rebels eventually reached Saxon's ship but the Super Commandos closed in on them. Before they could kill the rebels, Rau arrived on the Phantom II and opened fire on Saxon's ship. Ezra and Chopper managed to escape aboard but Sabine struggled with Saxon, who was determined to kill her. Sabine managed to escape with Ezra's help. Once aboard, Rau expressed his new-found respect for Sabine's devotion to her friends and decided to join the rebellion. When Ezra opined that the Mandalorians were crazy, Rau joked that he was crazy enough to join the rebellion.[57]
Evacuation of Mykapo
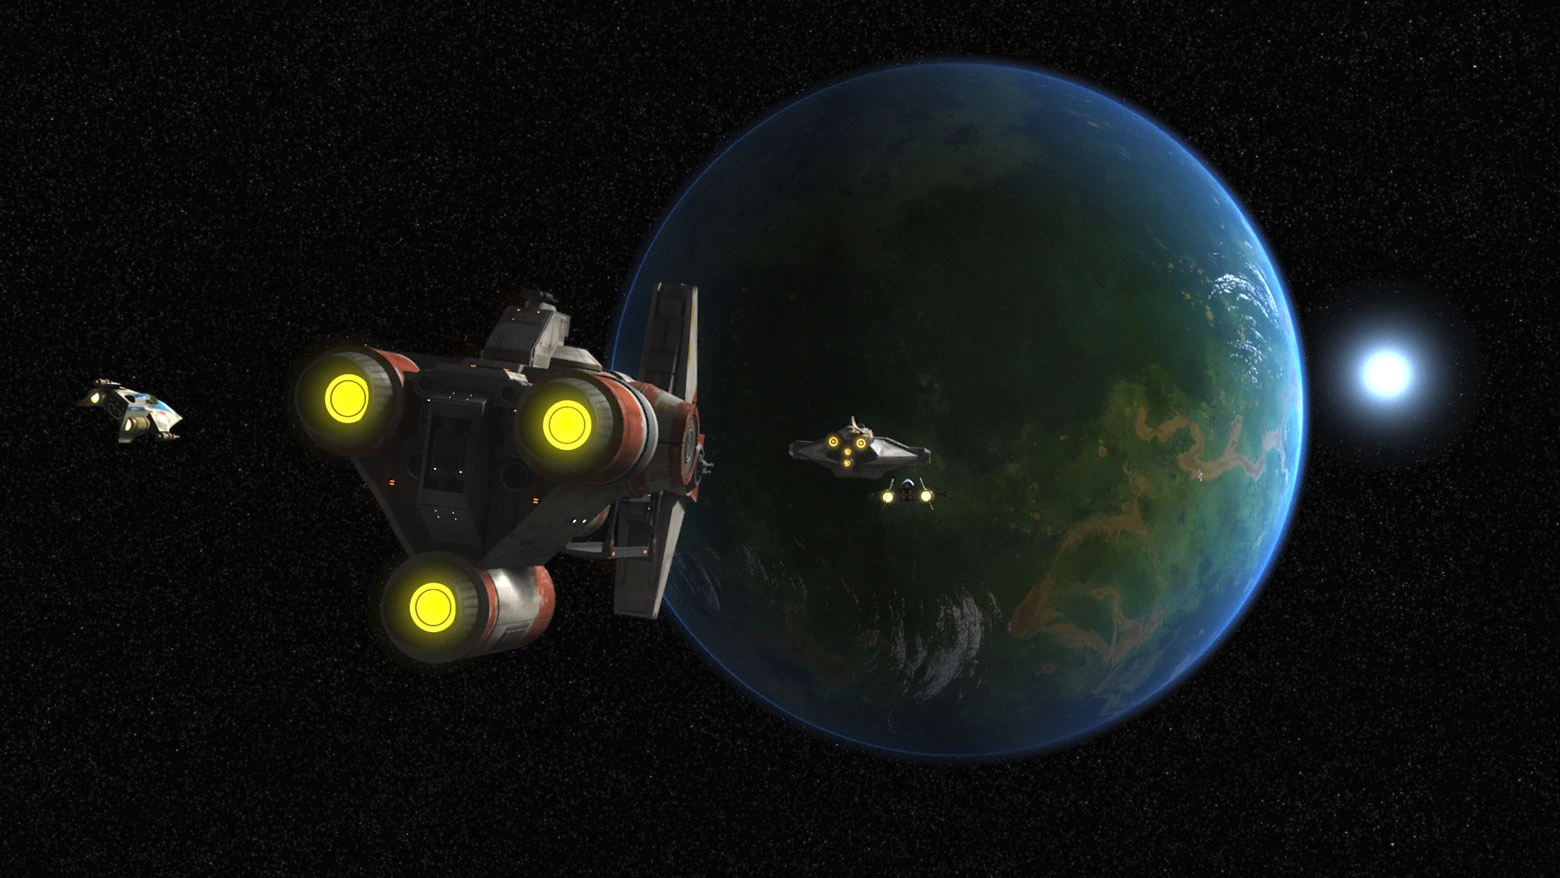

The Spectres and Phoenix Squadron were sent to the planet Mykapo to evacuate rebel sympathizers.
Later, Commander Sato dispatched the Spectres and Phoenix Squadron to the planet Mykapo to evacuate rebel sympathizers prior to an impending Imperial crackdown. Upon entering the system, Ezra and his fellow rebels came to the aid of a YT-2400 light freighter that was under attack from Imperial TIE fighters. Ezra opened fired on the TIEs with the Ghost's laser cannons. The freighter's captain identified his group as a local rebel cell called the Iron Squadron and destroyed an Imperial Gozanti-class cruiser.[58]
While Kanan and Zeb assisted with the evacuation efforts, Ezra along with Hera, Sabine, and Chopper docked with Iron Squadron's freighter Sato's Hammer. Once aboard, they were greeted by the Theelin crew member Gooti Terez and her human comrade Jonner Jin. When Sabine remarked that the ship was in a state of disarray, Ezra cautioned her to be careful not to upset the crew. He and Gooti also broke up a fight between Chopper and Iron Squadron's astromech droid R3-A3. Ezra along with Hera and Sabine tried unsuccessfully to convince the freighter's captain Mart Mattin to leave the system because the Empire was returning with reinforcements.[58]
Unable to reason with Iron Squadron, the Spectres returned to the Ghost. By then, Phoenix Squadron had completed the evacuation of rebel sympathizers on Mykapo. Before they could leave to rendezvous with the rebel fleet, Ezra convinced Hera to give him, Sabine, and Chopper another try at reasoning with Iron Squadron. Hera reluctantly complied but warned to leave on Phantom II if Imperial reinforcements arrived. Sabine and Chopper managed to gain the Squadron's trust by helping R3-A3 to repair the ship's hyperdrive.[58]
Despite repairing the hyperdrive, Sabine and Chopper's efforts came to naught when Mart redirected the ship's power to its laser cannons and deflector shields. Ezra and Sabine managed to convince Gooti and Jonner after Admiral Konstantine arrived with a light cruiser, two Gozanti cruisers and several TIE fighters. The Spectres, Gooti, Jonner, and R3-A3 managed to flee aboard the Phantom II but Mart wanted to stay behind and fight. However, the Sato's Hammer was damaged and stranded in space. Ezra and the other rebels were forced to flee into hyperspace. Before leaving, Ezra vowed to return for his friend.[58]
After returning to the fleet, Ezra attended a briefing with the other Spectres, Iron Squadron, and the holographic forms of Rex and Commander Sato. After receiving a distress call from Mart, Ezra and the other rebels joined forces to rescue Mart. They managed to remove a magno-mine that Admiral Konstantine had attached to the Sato's Hammer. During the skirmish, the rebels managed to damage Konstantine's cruiser. Commander Sato arrived with reinforcements and also destroyed Konstantine's TIE fighters and Gozanti cruisers. The rebels then escaped into hyperspace shortly after Grand Admiral Thrawn arrived on the Chimaera. Ezra was present with the other Spectres at Chopper Base when Mart embraced his uncle Sato and his crew.[58]
Mission to Wynkahthu
Ezra Bridger and Hondo Ohnaka recovered the cargo of a Class four container transport.
Later, Ezra was contacted by his pirate friend Hondo Ohnaka, who solicited the Spectres' assistance in recovering cargo from a stranded Imperial cargo ship in the upper atmosphere of the stormy planet of Wynkahthu. Ezra's rebel comrades particularly Hera and Sabine distrusted Hondo and his new business partner Azmorigan but Ezra reasoned that the pirate could be trusted since they had come out safely during their last mission to Reklam Station. The Spectres agreed to assist Hondo and Azmorigan recover their treasure in return for getting access to a shipment of proton bombs aboard the cargo ship.[59]
Since the Imperial cargo ship was stuck over a vortex, the rebels had to devise a plan to extract the cargo. Unhappy with Ezra's fraternization with Hondo, Hera assigned Zeb leadership of the recovery team. When Ezra protested, Hera countered that Hondo was untrustworthy; a stance shared by his master Kanan. Ezra resented this perceived demotion and made snide remarks towards Zeb. Zeb's plan involved the rebels, Hondo, and Azmorigan leaping from the Ghost's cargo bay into the upper hull of the cargo ship.[59]
Ezra and his fellow expeditionary members then accessed the ship through a hatch. Once inside, Zeb sent Chopper to restore power to the ship. Ezra openly questioned Zeb's decision in the presence of the other team members. Shortly later, the rebels encountered one of Hondo's Ugnaught crew members Melch, who had survived a failed earlier attempt to board the cargo ship. While Hondo's omission of these facts solidified Zeb's distrust of the pirate, Ezra insisted that they could still work with him.[59]
When the rebels reached the cargo bay, tensions between Ezra and Zeb resurfaced when the former insisted on using his lightsaber to breach the chamber against the latter's protests. After finding the treasure and bombs, the rebels opened the cargo bay's outer door. This allowed the Ghost to approach the bay. Since the ship could not land, grappling guns were used to fire magnetic cables onto the ship's hull. Under Zeb's orders, the recovery team began loading the proton bombs aboard the Ghost first. Ezra sided with Hondo when the pirate insisted on loading his treasure but Zeb was unwilling to back down.[59]
When Ezra noticed that Azmorigan had disappeared, Hondo was unconcerned since he wanted to keep a greater share of the treasure. As a result, Ezra realized that Hondo only care for himself. When Zeb went to look for him, Ezra insisted that he be the one to find Azmorigan but Zeb ordered Ezra to stay behind and load the cargo. After Ezra had loaded the fourth batch of proton bombs, a lightning bolt caused the cargo ship to list towards the vortex. Hera ordered Ezra and his team to evacuate but Ezra insisted on finding Azmorigan and Zeb, who had not returned. Ezra was soon contacted via comlink by Zeb, who revealed that he and Azmorigan had been locked in the ship's brig by a reactivated Imperial sentry droid.[59]
Ezra rushed to find the brig and encountered Chopper. Together, the two managed to free Zeb and Azmorigan. Before they could return to the cargo bay, they ran into the sentry droid. Despite Zeb's orders to stay hidden, Azmorigan destroyed the sentry droid. However, this activated the four other sentry droids which pursued the recovery team back to the cargo bay. While Ezra and Zeb exchanged fire with the sentry droids, Hondo and Azmorigan took the opportunity to flee back to the Ghost on their treasure chests. Chopper quickly followed suit.[59]
Unable to hold out anymore, the two rebels fled back to the Ghost on the magnetic cable system. However, the droids destroyed the grappling gun, causing Ezra and Zeb to fall. However, the two rebels managed to hold on to their rope and were pulled aboard the Ghost by Kanan. The rebels and their confederates then fled the cargo ship before the vortex ripped it apart. Once safely aboard the Ghost, the rebels examined their cargo and discovered that Melch had stowed aboard Hondo's treasure chest. Having accomplished their objectives, the Spectres and Hondo's party parted company.[59]
Undercover on Lothal
Reuniting with old friends
Morad Sumar, Jho, and Marida Sumar reunite with Ezra Bridger.
After the Phoenix Squadron received intelligence that the Empire was developing a new weapon at the Imperial Armory Complex, Ezra along with Kanan and Chopper traveled back to his homeworld of Lothal to enlist the support of Ryder Azadi's cell in taking out the factory. They managed to rendezvous with Ryder's landspeeder in the streets of Capital City but were attacked by an Imperial patrol. During the brief skirmish, Ezra and Kanan managed to use their lightsabers to topple an AT-DP walker. They then escaped two 614-AvA speeder bikes, which exploded due to faulty engines.[60]
Ezra and his team then traveled to a stone circle in Lothal's wilderness that served as Ryder's encampment. There, Ezra was reunited with several old friends including the farmer Morad Sumar, his wife Marida Sumar, and the Ithorian bartender Jho. Morad noted that Ezra had grown and complimented the young rebel for making his parents proud. Ezra and Kanan learnt that Ryder's cell was sabotaging vehicles produced by the Lothal Imperial factory. After discussing their mission with Ryder and Morad, the rebels learned that the Empire had a secret project housed inside the factory's Section A2. With the help of Morad, Ezra and his team managed to infiltrate the factory disguised as workers and Chopper disguised as an Imperial communication droid.[60]
Before they could proceed on their mission, Ezra and the other workers were summoned for an assembly by Grand Admiral Thrawn. Thrawn had been dispatched by Imperial High Command to investigate the high rate of defective vehicles produced by the Lothal Imperial factory. As a deterrent, Thrawn killed Morad by forcing him to ride a defective speeder bike, which exploded. When Thrawn ordered his subordinates to question the workers, Ezra and Kanan managed to slip away with the help of Chopper, who detonated another speeder bike.[60]
Ezra and Kanan then encountered a scout trooper and a stormtrooper, whom they knocked out and stole their uniforms. With Chopper, they headed to Section A2 only to discover that Thrawn had stationed sentries there. Chopper managed to gain admission by electrocuting an Imperial communication droid and stealing its clearance code. While awaiting Chopper's return, Ezra and Kanan were confronted by a stormtrooper corporal and his men, who noted they were outside their allocated area. Ezra and Kanan fled the stormtroopers when Chopper return and headed into a turbolift.[60]
From foe to friend
Agent Kallus reveals to Ezra and Kanan that he was a Fulcrum agent.
Inside the turbolift, the rebels encountered their perennial adversary Agent Kallus, who quickly recognized them. Ezra and Kanan attacked Kallus but the ISB agent managed to convince them that he was a Fulcrum operative by quoting the code-phrase "by the light of Lothal's moons". While Ezra and Kanan were suspicious of Kallus, the ISB agent managed to convince the rebels of his sincerity by recounting how he had aided Zeb and Sabine in their earlier encounters. Satisfied, Kanan enlisted Kallus' help in breaching a communications station so that they could contact Ryder.[60]
Ezra and Kanan stormed the com station with their lightsabers and blasters and managed to stun the station crew. After Kallus used the station port to transmit Kanan's signal to Ryder, the rebels learned that Ryder was launching a diversionary attack on the east gate. Kallus then told the rebels that they could escape through the hangar bay at the east gate. To convince Kallus' Imperial superiors that he had fought against the rebels, Ezra used the Force to fling him against a glass monitor screen. When Kanan chided Ezra for beating him to the game, Ezra reassured him that he would get another chance now that Kallus was working for them.[60]
Following Kallus' instructions, Ezra, Kanan, and Chopper commandeered an AT-DP walker and exited the east gate. However, the rebels' walker encountered two AT-AT walkers, that had been sent to counter Ryder's attack. Piloting the walker, Ezra claimed that he was a reinforcement that had been sent to aid the AT-ATs. However, Thrawn warned the pilots that Ezra's team had hijacked the AT-DP walker. Ezra's walker was attacked by the two AT-ATs, which proceeded to open fire on it. Ezra managed to maneuver his walker under one of the AT-ATs. However, the AT-AT proceeded to crush the smaller AT-DP walker.[60]
Ezra and Kanan managed to use their lightsabers to cut their way out of their doomed transport. Together with Chopper, they boarded the walker, took out the pilots, and escaped through the hatch. At that point, Marida fired a rocket at their hijacked AT-AT, which toppled to the ground. Ezra's team then escaped into the wilderness on Ryder's two landspeeders. During the journey, Ezra informed Marida that her husband had died during the mission. Ezra, Kanan, and Ryder then attended a hologram debriefing with Hera, Sabine, and Zeb. After decrypting the stolen Imperial plans, the rebels learned that Thrawn had developed a new starfighter initiative that threatened the rebellion.[60]
The Specter of Maul
Maul and Ezra fight the Nightsisters–possessed bodies of Kanan and Sabine
Using the information recovered by Ezra's team, Hera made plans to launch a strike on the Lothal Imperial factory. Ezra was assigned to carry out reconnaissance work on Imperial military movements there and was also made leader of the team. Before they could proceed with the mission, Ezra began seeing visions of Maul in the Chopper Base command center. After seeing a visage of Maul behind him, Ezra fainted and was tended to by Kanan and Zeb. When he awoke in his private quarters, Ezra insisted that he was fine and insisted on proceeding with the mission despite Hera and Kanan's misgivings.[61]
While helping Sabine load supplies aboard the Ghost, Ezra witnessed Maul and attacked a rebel soldier, whom he mistook for Maul. Kanan was forced to restrain him. When Ezra realized his actions, he was scared and confused. While Hera and the rest of the team departed for Lothal, Ezra, Kanan, and Sabine stayed behind. After Kanan got Sabine to track Ezra's wrist comm, Kanan and Ezra traveled into the wilderness to meet with Bendu. After Ezra related the details of his last encounter with Maul, Bendu surmised that the experience with the holocrons had a negative effect on Ezra.[61]
Despite Bendu's warning not to turn around, Kanan and Ezra turned to discover that Maul was watching them on a sand dune. When Ezra asked Maul how he had found them, Maul replied that Ezra's abrupt severance of the holocron connection had caused both to see fragments of each other's visions. Maul revealed that he had come to Atollon to retrieve the remaining message of his vision from Ezra's mind. When Kanan objected, Maul threatened to trigger a homing beacon that would alert the Empire to their presence. With little choice, Ezra complied and departed with Maul on his starship Nightbrother for Dathomir.[61]
After landing, Maul led Ezra through the site of the battle where his Nightsisters kin had been slaughtered by the Separatists. Maul led a reluctant Ezra into a cave within the Nightsister lair. There, Ezra discovered that Maul had been preparing for a ritual and had amassed a great deal of objects from his past including the Darksaber. When Ezra touched the Darksaber, Maul chastised the youth and told him that his Mandalorian friend could provide him with more information on the Darksaber's significance.[61]
As part of the ritual, Ezra and Maul had to drink glasses of magick water. Ezra insisted on Maul going ahead and the potion caused their eyes to turn green and shoot beams of light. As a result, Ezra learnt that the Jedi Master Obi-Wan Kenobi held the key to destroying the Sith while Maul learned that Kenobi was located on a planet with twin suns. After the ritual ended, the two were accosted by several fallen Nightsister spirits who demanded that they pay their price in flesh and blood. Before Ezra and Maul could escape, Kanan and Sabine entered the cave.[61]
Despite Ezra's warnings, Kanan and Sabine attacked the apparitions with their blasters and were possessed by the fallen spirits. Ezra tried to talk to Kanan and Sabine but his possessed friends attacked him and Maul. The two managed to escape by fleeing through the cave entrance, which the spirits could not cross since the altar was their source of power. Maul then attempted to recruit Ezra as his apprentice by claiming that their destiny was linked to the planet with the twin suns. However, Ezra refused to abandon his friends. Maul then rejected Ezra as a "disappointment" and left on his ship.[61]
Returning to the cave, Ezra decided to lure out Kanan and Sabine in order to exorcise the spirits. He was soon attacked by the possessed Sabine, who told him that the spirits desired his body. Using the Force, Ezra managed to throw Sabine out of the cave and the spirit was exorcised from her. After telling Sabine not to enter the cave again, Ezra went to find Kanan. He found a possessed Kanan sitting above the altar. Ezra managed to convince the spirits to leave Kanan if he sacrificed his flesh and blood. In return, the spirits demanded that Ezra fight Kanan to prove his worth.[61]
Following a fight, Ezra managed to beat Kanan and the Nightsister spirit left his body. After telling Kanan to leave, Ezra used his lightsaber and the Darksaber to destroy the altar, vanishing the spirits. Once the spirits had departed, Ezra briefed Kanan and Sabine about his encounter with Maul. Ezra was annoyed that Sabine had re-entered the cave but she replied that she had never listened to him before. Ezra then told Kanan and Sabine that Maul had discovered that Master Kenobi was still alive and that he was inhabiting a planet with twin suns. The three resolved to stop Maul from killing Kenobi who held the key to destroying the Sith.[61]
Mission on Geonosis
Ezra learned that not all of their allies shared the same values as him.
At the request of Senator Bail Organa and Rebel Command, Ezra, his fellow Spectres and Rex undertook a mission to find the rebel leader Saw Gerrera, who had disappeared while investigating the apparent disappearance of the Geonosian species. After landing on Geonosis, Ezra accompanied Rex, Kanan, and Chopper as they searched a Geonosian structure where Saw had last transmitted a signal to rebel command. There, Ezra discovered a hole which led to an underground labyrinth.[62]
While underground, Ezra and his comrades discovered sealed tunnels and the helmets of Saw's Partisans. His master Kanan and Chopper wanted to leave but Ezra and Rex convinced them to continue their mission to find Saw. Ezra and his comrades eventually reached a dead-end only to be cornered by several B1 battle droids and a droideka. Saw soon arrived and outflanked the battle droids. This allowed Ezra and Kanan to destroy the droideka with their lightsabers.[62]
Ezra and his comrades learned that Saw and his team had been attacked by a lone Geonosian warrior. The Geonosian had killed his comrades and Saw wanted to investigate whether the Geonosian knew why the Empire had exterminated the planet's population. The Spectres and Rex agreed to help Saw complete his mission. While contacting Hera at a large air shaft, the rebels found the Geonosian hiding on the other side. With the help of his master Kanan's Force powers, Ezra managed to Force jump onto the other side.[62]
He was soon followed by Chopper. Ezra and Chopper pursued the Geonosian through the labyrinth but were unable to keep up with him. Saw, Kanan, and Rex finally managed to corner the Geonosian and disable the remote controller he was using to control the droidekas on the surface. When Saw harshly questioned the Geonosian about what the Empire was doing on Geonosis, Ezra objected to his aggressive methods and befriended the Geonosian, whom he nicknamed Klik-Klak. After Chopper picked up an energy reading, Saw forced Klik-Klak to accompany them.[62]
When Saw dropped a compass-shaped device which contained a hologram of his late sister Steela Gerrera, Ezra returned it to Saw; who told the boy that this was all that he had of his late sister. Rex then explained that Saw was still grieving over the loss of his sister Steela and distrusted Geonosians due to their alliance with the Separatists during the Clone Wars. The rebels soon discovered that the source of the energy reading was Klik-Klak's nest, which hosted a transmitter and a workshop. Ezra protested when Saw began rummaging through Klik-Klak's home. Trusting Ezra, Klik-Klak revealed that he was the custodian of the last Geonosian queen egg.[62]
Ezra objected to Saw's plan to take Klik-Klak offworld for interrogation and insisted that the Geonosian belonged to his homeworld. Kanan managed to broker a truce whereby they would take Klik-Klak to Chopper Base for interrogation but return him to Geonosis once they had finished. The rebels then rendezvoused with Hera and the Ghost at the central air shaft. Once aboard, an argument broke out between the Spectres, Rex, and Saw. Ezra objected to Saw's plan to take Klik-Klak offworld on the Phantom II and his electrocution of the Geonosian with an electro-shock device. Ezra and Rex were also involved in a physical altercation with Saw. When Saw threatened to shoot the Geonosian queen egg, Ezra countered that doing so would help the Empire to exterminate the Geonosian species.[62]
The two asides put aside their differences to repel an Imperial boarding party of Jumptroopers from Captain Brunson's Arquitens-class command cruiser. During the fight, Ezra used the Force to hurl detonators at the jumptroopers. After repelling the boarding party, the rebels descended into the depths of Geonosis. While underground, the rebels and Saw discovered evidence in the form of poison canisters that the Empire had perpetrated genocide against the Geonosian species. Confronted with the evidence, Saw underwent a change of heart and freed Klik-Klak and the Geonosian queen egg; who disappeared farther underground.[62]
The rebels then managed to escape Brunson's light cruiser by badly damaging the ship with proton bombs. In the process, they lost several of the poison canisters they had carried away as evidence. During the briefing, Ezra reassured his fellow rebels, Senator Organa, and Commander Sato that they had given the Geonosian species another chance to survive. After Saw left the room, Kanan told Ezra that not all of their allies shared the same values and motives for fighting against the Empire.[62]
Training exercise
Ezra, Wedge, Hobbie and other members of the Phoenix Squadron went to a training exercise.
Later, Ezra accompanied Hera, Kanan, Sabine, Wedge, Hobbie and other members of the Phoenix Squadron on a training exercise. Their friend Zeb was despondent because he could not come along and had to stay behind with Chopper and AP-5. Ezra and Sabine told Zeb to cheer up before leaving aboard the Ghost. The following day, Ezra and the other Spectres returned after Zeb contacted them to report an incident the previous night. Ezra and his comrades were present when the rebel source Fulcrum praised the rebels for reprogramming the E-XD infiltrator droid EXD-9 into an improvised bomb. Ezra and the other Spectres listened as AP-5 began to recount the incident before Zeb playfully muzzled him.[63]
Sabine's trials
Ezra helped Sabine in her training.
Ezra was present with the other Spectres when Kanan, Fenn Rau, and Hera convened a meeting aboard the Ghost to discuss the matter of training Sabine how to wield the Darksaber, an ancient Mandalorian symbol of power that was. Kanan, Fenn, and Hera wanted Sabine to use the Darksaber to rally her people to the rebel cause. Due to her estranged relationship with her family, Sabine was reluctant to assume this responsibility. When Kanan suggested that it was no coincidence that Sabine found the Darksaber, Ezra voiced his opinion that Sabine might not be able to master the weapon given the difficulty he had learning how to master the Force and the lightsaber. After some discussion, Sabine reluctantly decided to learn how to wield the Darksaber.[64]
Later, Ezra accompanied Kanan and Sabine on a landspeeder into Atollon's wilderness. During the journey, Ezra explained that going into the wilderness would allow them to avoid the distractions at Chopper Base. Sabine then responded that she would damage him if he did not shut up. After setting up camp, Ezra watched as Kanan and Sabine parried with sticks. Judging Sabine's skills to be wanting, Kanan instructed Sabine to practise with Ezra. For the next two days, Ezra taught Sabine the basics of stick fighting. Kanan did not want Sabine to train with the Darksaber yet because he feared that she would hurt herself.[64]
Fenn later arrived at the camp with supplies and outfitted Sabine with a Mandalorian vambrace. Sabine used the vambrace to gain an advantage over Ezra during a training session. However, Kanan intervened and managed to outsmart Sabine. He took the opportunity to lecture her that discipline and training not tricks would keep her alive in the long run. Frustrated with Kanan's training methods, Sabine stormed off in rage to spend some time alone at a cave.[64]
Taking pity on Sabine, Ezra encouraged her to persevere with her training. He told Sabine that while Kanan was not the easiest teacher, he still meant well. When Sabine responded that she did not want the baggage that came with the Darksaber, Ezra asked her about her family. Sabine explained that her family regarded her as a traitor. When Ezra said that wasn't true, Sabine told him that he did not know her and opined that she would be unable to lead her people if she did not resolve her family problems. Ezra reminded Sabine that at least she had a family to go back to, unlike him. Sabine realized that Ezra was right and went to clear her thoughts in the wilderness.[64]
Later that night, Ezra chatted with Fenn by a campfire. When Ezra asked Rau when Sabine would returned, he cautioned patience. When Ezra opined that Sabine needed more time, Rau responded that time was not a luxury the galaxy could afford. At that point, Sabine returned to the camp. Kanan apologized for holding her training back while Sabine apologized for her attitude. Ezra and Fenn watched as Sabine parried with the Darksaber against Kanan in a training exercise.[64]
The exercise proved to be an opportunity for Sabine to come to terms with her decision to leave her family. Ezra and the others learned that Sabine had spoken out against the Empire for using weapons to enslave Mandalore. As a result, her parents had cast her away. As the duel got more intense, Ezra wanted to intervene but Fenn held him back. After besting Kanan in the duel, Sabine broke down and wept. Following the sparring session, Ezra joined Kanan and Rau in pledging to help Sabine to fulfill her goals of repairing her relationship with her family and reuniting the Mandalorians.[64]
Mission to Krownest
Ezra believed that Sabine could repair her relationship with her family.
After Sabine had completed her training, Ezra along with Kanan, Fenn Rau, and Chopper accompanied Sabine on a mission to the planet Krownest, the home of Clan Wren. While Ezra was optimistic that Sabine's family would welcome her, Sabine disagreed because she knew that her mother Countess Ursa Wren still resented her for abandoning the Empire. Despite Sabine sending a transmission to her family, their ship Phantom II was still attacked by a squad of Mandalorian warriors led by Sabine's brother Tristan Wren.[65]
The Phantom II sustained damage to its main thrusters but Sabine managed to land the ship in the snow. While Fenn and Chopper stayed inside the ship, Ezra along with Sabine and Kanan confronted the Clan Wren warriors. Ezra's decision to ignite his green lightsaber sparked a gun battle with the Mandalorian warriors. The skirmish ended when the warriors' leader Tristan recognized Sabine's voice and ordered his men to ceasefire. Ezra and his comrades then accompanied the Mandalorians to the Wren Stronghold nearby.[65]
At the stronghold, Ezra and his fellow rebels received a cold reception from Ursa, who was displeased to see her daughter in the company of rebels. Still, Ursa reluctantly granted them an audience in her throne room but ordered the visitors to surrender their weapons including Sabine's Darksaber. Ezra and Kanan listened as Sabine had a tense discussion with her mother about the Empire, Fenn Rau's Protectors, and Gar Saxon. While Sabine and Ursa withdrew for a private conversation, Ezra and Kanan remained behind in the throne room under guard.[65]
Ezra tried to make conversation with Tristan but Kanan insisted on letting him deal with the negotiations. Kanan then sought an audience with Countess Ursa, who agreed to meet the Jedi. Unknown to both Jedi, Ursa had alerted Viceroy Gar Saxon to their presence and had agreed to trade the Jedi and the Darksaber in return for clemency towards her daughter. During the meeting, Ursa accused the Jedi of not understanding her daughter. Ezra responded by asking Ursa why Clan Wren was siding with the Empire. When Ursa chastised him for his perceived naivety, Ezra revealed that Sabine had fought Saxon on Concord Dawn. Ursa then apologized to the Jedi for what she would have to do next would be unfortunate.[65]
Shortly later, Saxon and his Super Commandos entered the Wren stronghold and apprehended Ezra and Kanan. Saxon also took possession of the Darksaber. Saxon then reneged on his earlier agreement with Ursa and ordered his men to destroy Clan Wren. At that point, Fenn Rau entered the throne room and handed Ezra and Kanan back their weapons. The Jedi then helped the Wrens and Fenn Rau to defeat Saxon's Super Commandos. Saxon then fought with Sabine and Ezra lent her his green lightsaber.[65]
Ezra and the others watched Sabine fighting Saxon outside from the stronghold's balcony. When Ezra tried to intervene, Ursa warned him that Mandalorian custom and law dictated that nobody could interfere in a duel. Following a fierce duel, Sabine managed to recover the Darksaber and defeat Saxon. However, she decided to spare the Viceroy's life. When Saxon tried to kill her, Ursa executed the Viceroy. Following the skirmish, Sabine and Fenn decided to stay behind to help her family reunify the Mandalorians while Ezra and Kanan departed with Chopper aboard the Phantom II. Before leaving, Sabine thanked Ezra and Kanan for helping her return to her family.[65]
Rescuing Agent Kallus
Ezra Bridger allowed himself to be captured in order to rescue Kallus.
Later, the rebellion obtained intelligence that Grand Admiral Thrawn was monitoring Agent Kallus' Fulcrum transmissions. Ezra along with the droids Chopper and AP-5 took part in a mission to extricate Kallus before Thrawn exposed his identity. For the mission, Ezra and the droids stole a Star Commuter 2000 shuttle from Lothal's Capital City spaceport and allowed themselves to be captured by Lieutenant Yogar Lyste's Imperial light cruiser, where Agent Kallus was stationed. For the second phase, Kanan and Rex, who were disguised as stormtroopers, would pick up the rebels and Kallus in the stolen Imperial Shuttle TY992.[66]
At first, the mission proceeded according to plan. Ezra was arrested and locked in the light cruiser's brig. There, he informed Kallus of the rebel plan to rescue him. However, the mission was complicated when Grand Admiral Thrawn requested a meeting with Lieutenant Lyste and Agent Kallus aboard the Star Destroyer Chimaera. Seeking to atone for the debacle involving Princess Leia Organa, Lyste brought Ezra, whom Kallus claimed was a rogue bounty hunter, aboard the Chimaera.[66]
Once aboard, Ezra was locked in Detention Block B7. Chopper and AP-5 managed to inform Rex and Kanan about the change in plans but were unable to obtain a new set of clearance codes. After attending to Thrawn and sending Lyste on a faux diversionary mission, Kallus freed Ezra from his cell. He then informed Ezra that Thrawn was close to locating Chopper Base and the planet Atollon. When Kallus requested the location of Atollon so he could delete the planet from Thrawn's star chart, Ezra was reluctant to expose the rebel base's location. However, AP-5 managed to convince Ezra to work with Kallus because they could only obtain a new set of clearance codes from Thawn's Office.[66]
In an attempt to mislead Thrawn, Kallus decided to frame Lyste as Fulcrum. He used Lyste's stolen code cylinder to enter the prison block and obtained Ezra a set of Imperial uniforms. Since Ezra superficially resembled Lyste, Kallus decided to use him to fool the Imperials into thinking he was Lyste. Working with Kallus, Ezra used a Jedi mind trick to convince one of Thrawn's sentries that he was Lieutenant Lyste and that he wanted to meet with Thrawn. Inside the office, Ezra was tempted to recover Hera's Kalikori but was rebuked by Agent Kallus, who reminded him they were not there to steal art. After Kallus had deleted Atollon from Thrawn's database and Chopper had transmitted a new set of codes to the Kanan and Rex, the rebels and Kallus prepared to leave.[66]
However, Thrawn returned to his office and the rebels were forced to hide. Ezra and AP-5 managed to hide behind Thrawn's artifacts and furniture. Kallus then reprogrammed the Grand Admiral's Imperial sentry droids into assassins. While Thrawn struggled with the droids, Ezra and Chopper fled. Thrawn caught a glimpse of Ezra and mistook him for Lyste. Ezra and his comrades managed to reach the hangar just as Rex and Kanan were fighting off Governor Pryce. The rebels received unexpected help from Lieutenant Lyste, who stunned Pryce under the assumption that she was Fulcrum.[66]
Lieutenant Lyste then caught a glimpse of the impostor Ezra and the droids fleeing aboard Shuttle TY992 with Kanan and Rex before being knocked unconscious by Kallus. Kallus then changed his mind and decided to stay behind to continue leaking information to the rebels. After Ezra and his comrades had left, Kallus framed Lyste as Fulcrum. While Governor Pryce and others believed Kanan's account, Thrawn and the ISB Colonel Wullf Yularen soon realized that Kallus was the real Fulcrum. Their suspicions were confirmed when Thrawn examined Ezra's bounty hunter helmet and deduced that Kallus had concealed Ezra's identity because he was colluding with the rebels. However, they allowed Kallus to continue operating so that he could lead them to Chopper Base.[66]
Ferrying Mon Mothma
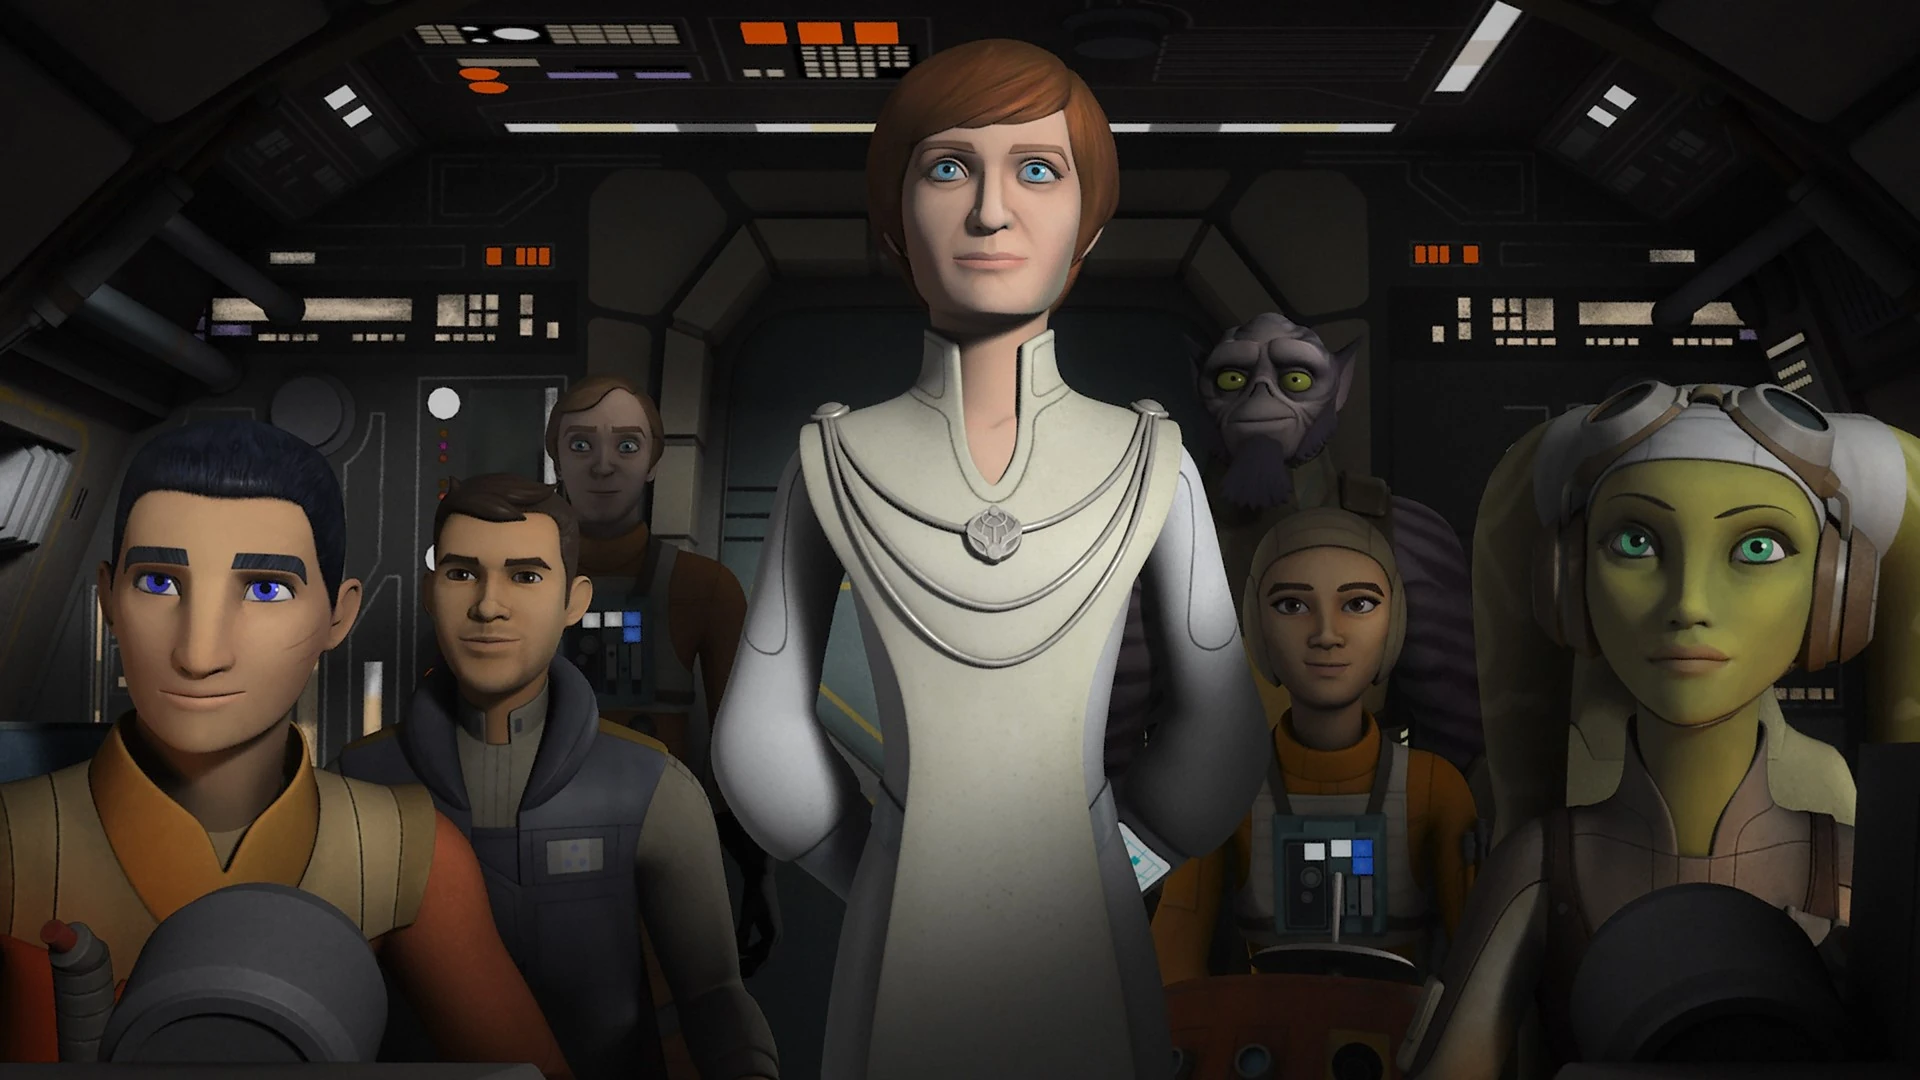

Ezra helped Mon Mothma getting to Dantooine.
At the request of Senator Bail Organa, Ezra and his fellow rebels waited in deep space aboard the Ghost to rendezvous with another rebel group. This rebel group turned out to be the rebel leader Mon Mothma and Gold Squadron. While bidding their time, Ezra and his rebel comrades listened to a propaganda HoloNet broadcast by Alton Kastle and learned that Mothma was wanted by the Empire for denouncing the Ghorman Massacre. Shortly later, the Ghost was discovered by a tactical infiltration pod piloted by an E-XD infiltrator droid; which Zeb and Chopper had encountered earlier.[8]
Ezra managed to destroy the Imperial probe with the Ghost's frontal cannons but was unable to stop the droid from contacting the Empire. Shortly later, Mothma's shuttle Chandrila Mistress exited hyperspace with Gold Squadron. After meeting with Mothma's senatorial attache Erskin Semaj and Gold Leader Captain Jon Vander, the Spectres began refueling Gold Squadron's Y-wings. While refueling, Ezra and Zeb argued with the pilot Gold Two and Vander over the Spectres's reckless tactics and Gold Squadron's high level of secrecy.[8]
The argument was interrupted by the arrival of an Imperial light cruiser and Gozanti-class cruiser, which dispatched several TIE fighters. After Gold Two was wounded, Ezra volunteered to fly her Y-wing starfighter into combat as part of Gold Squadron. Under Vander's instructions, Ezra and his fellow fliers fired their ion cannons at the light cruiser and bombed it. This allowed Gold Squadron, Mothma and her crew, and the Spectres to flee into hyperspace aboard the Ghost and their Y-wing starfighters. Mothma was forced to abandon her stricken freighter.[8]
While traveling through hyperspace aboard Gold Two's Y-wing, Ezra corresponded with his fellow Spectres and Mothma via intercom. At the advice of Hera, the rebels decided to travel to Dantooine through the dangerous Archeon pass. Mothma wanted to travel to Dantooine in order to rally the rebel cells into an Alliance to Restore the Republic. While traveling through the Archeon nebula, Ezra became friendly with Jon Vander. When Vander expressed concerns about the danger of the Archeon Nebula, Ezra reassured him that Hera was a good pilot who knew what she was doing.[8]
During the journey, the rebel convoy was attacked by a prototype TIE Defender flown by Commander Vult Skerris and two TIE Interceptors. Knowing the TIE Defender from a previous undercover mission on Lothal, Ezra tried to warn his fellow Gold Squadron fliers but Jon Vander ignored his warning and sent Gold Three and Gold Four to engage the enemy fighter. The TIE Defender was protected by deflector shields and easily destroyed the two rebel fighters.[8]
Hera ordered the remaining Gold Squadron fighters to travel deeper into the Archeon pass. Another pilot Gold Five was killed while she was trying to protect the Ghost. The rebels managed to lose two of the pursuing TIE Interceptors to the intense heat of the nebula but were unable to outrun Skerris' Defender fighter. To save Senator Mothma, Ezra convinced Hera to let him and Vander stay behind the TIE Defender while the Ghost exited the Nebula first. Following a brief dogfight, Vander managed to temporarily disable Skerris' TIE Defender.[8]
The two rebel pilots then rejoined the Ghost outside the Archeon Nebula. There, they found the Ghost being drawn by a tractor beam into one of Governor Pryce's Star Destroyers. At Hera's request, Ezra and Jon fired proton torpedoes into the nebula. This created an explosion which damaged both Star Destroyers and allowed them to jump into hyperspace. Above Dantooine, Ezra met with his fellow rebels and Mothma's team aboard the Ghost. Gold Two praised Ezra for his skills as a pilot. The rebels then watched Mothma give a speech announcing the formation of the Rebel Alliance. Shortly later, they were joined by the rebel fleet.[8]
Alliance to Restore the Republic
Saving Chopper from himself
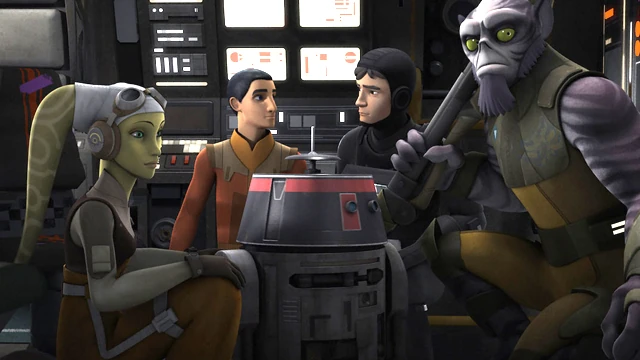
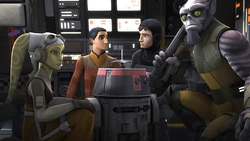
Ezra helped getting Chopper back to normal after being reprogrammed
Ezra and Zeb waited with Hera aboard the Ghost while Wedge departed with AP-5 and Chopper on a mission to steal clearance codes for Lothal from the Imperial Security Bureau station on Killun 71. Ezra and Zeb exchanged jokes about the droids giving Antilles trouble. However, Hera reassured them that she had the best team for the job. While AP-5 succeeded in obtaining the clearance codes, Chopper was remotely reprogammed by the listener crew of an Imperial Gozanti-class cruiser after connecting to a network terminal at the base. When Wedge and AP-5 returned, Ezra and Zeb were playing a game of dejarik aboard the Ghost.[13]
When AP-5 voiced suspicions about Chopper's change in behavior and Wedge joked about the two droids playing spy games, Ezra and Zeb laughed. However, Hera listened to AP-5's warning and narrowly stopped Chopper from downloading the ship's hyperspace logs. Hera then warned Ezra and the others about Chopper's suspicious behaviour. When the rebels went to find Chopper in the engine room, Ezra chided AP-5 for questioning the idea of staying together during their search. AP-5's warning proved right when the Imperial-controlled Chopper sealed the Spectres, Wedge, and AP-5 in the cargo hold and attempted to expose them to zero gravity space. After Hera managed to manually seal the hatch, the rebels sent AP-5 to open the doors to the cargo bay from outside the ship.[13]
While Chopper tangled with AP-5, Ezra and the other Spectres made their way to the cockpit. While Zeb stunned Chopper with his bo-rifle, Ezra removed the data spike that the Imperial-controlled Chopper had inserted into the navigation computer; sabotaging the Imperial download. While Zeb tended to Chopper and plugged him into the Ghost's systems, Ezra noted Hera's anger at the Imperials who had sliced into Chopper's systems. Ezra and the other rebels watched as Hera confronted the Imperials using Chopper's visual processor and transmitted a heavy data feed which overwhelmed the Gozanti cruiser's systems and destroyed the ship. Despite their dislike for Chopper, he and Ezra were visibly sad when a distraught Hera pleaded with Chopper's programming to come back. Shortly later, Chopper rebooted and returned to his former programming.[13]
Ezra, Zeb, Wedge, and an apologetic Chopper later greeted AP-5 at the Ghost's cargo hold. The rebels had rescued AP-5 from space. However, AP-5 was unhappy at his moment of solitude being disturbed and took the opportunity to argue with Chopper. Ezra watched as Chopper whacked AP-5 in frustration and accidentally struck Wedge.[13]
Mission to Tatooine
The Holocron fragments guided Ezra to Tatooine.
While Ezra was sleeping, he was awoken by Kanan's Jedi holocron, which began playing back Kenobi's recording instructing the Jedi to avoid the Jedi Temple following the Jedi Purge. After entering Kanan's quarters, Ezra saw the Malachor Sith holocron glow with a visage of Maul. Ezra related the incident to Kanan, Hera, Rex, Commander Sato, and Chopper. Kanan was unsure while Rex believed that Kenobi had perished. Meanwhile, Hera counselled Ezra to ignore the incident with the holocrons and focus on his upcoming mission to Lothal. Ezra publicly agreed but resolved to find Kenobi on the desert planet of Tatooine.[11]
The following day, Ezra distracted a rebel trooper manning Chopper Base's airfield with a faux munitions order and stole an RZ-1T trainer. He then traveled to Tatooine and found that Chopper had stowed aboard. Using the Jedi and Sith holocrons, Ezra instructed Chopper to fly to what he believed was Kenobi's coordinates. Upon arriving, Ezra discovered that the source of the transmission was a fragment of the Sith holocron. Before they could leave, the two were attacked by Tusken Raiders, who destroyed the RZ-1T. Maul resurfaced and then killed the Tuskens before retreating.[11]
Stranded on Tatooine, Ezra and Chopper traveled through the canyon which led to a vast desert. While Chopper proposed traveling along the ridge to find a settlement, Ezra was led by Maul to travel into the desert. While traveling through the desert, Ezra and Chopper were buffeted by a sandstorm and the scorching heat. Ezra was also tormented by apparitions of Maul. After Chopper broke down, Ezra regretted not heeding Hera's instructions. Overcome by heat, Ezra saw a mirage of Maul and tried to attack it before falling unconscious. Fortunately for them, the two rebels were rescued by Master Kenobi.[11]
Master Kenobi charged up Chopper and gave Ezra a blanket to lie upon. That night, Ezra awoke to find himself in the presence of Kenobi, who told the young Jedi that he was in the wrong place because Maul had used the holocrons to lead him here. When Ezra proposed pooling their resources together to fight Maul, Kenobi reassured him that he was more than capable of handling the Dark Sider. He told Ezra to return to Atollon to be with the rebellion. Shortly later, Maul turned up to settle his score with Kenobi.[11]
Kenobi instructed Ezra and Chopper to take his dewback and head north where Maul's starship Nightbrother was waiting. While Ezra and Chopper took the Nightbrother back to Chopper Base, Master Kenobi defeated and killed Maul in single combat, ending the threat of the Dark Sider to the rebels. Meanwhile, Ezra and Chopper returned to Atollon where they were greeted by their fellow Spectres. When Zeb asked if "this means what I want it to mean", Ezra reassured him that Maul would no longer be troubling them. Ezra then apologized to Hera and Kanan for running away and expressed his recognition that his place was with his adoptive family. Ezra and his fellow rebels then reconciled.[11]
Siege of Atollon
Ezra helped Sabine and the Mandalorians destroying the Interdictor cruiser.
Prior to the rebels' planned attack on the TIE Defender factories on Lothal, his master Kanan complimented Ezra for his contributions to the Rebellion. In return, Ezra reassured Kanan that he was a good mentor who had taught him about life and how to be a better person. Ezra and Kanan then attended a briefing at the command center with Hera and the other rebel commanders Commander Sato and General Jan Dodonna, whose Massassi group had traveled to the Atollon system in order to aid Phoenix Squadron's strike against Lothal.[12]
Before the rebels could launch their attack on Lothal, they received a garbled transmission from Agent Kallus that Thrawn "knew". Recalling their previous experience on Garel, Ezra believed that Thrawn had discovered the location of Chopper Base and successful convinced Hera to order the rebel ships to assume battle station mode. Ezra's warning proved timely as Thrawn's Seventh Fleet entered the Atollon system. The Imperial fleet cut of all escape by deploying an interdictor cruiser to prevent any jumps into hyperspace.[12]
Trapped, Hera devised a plan for the rebels to attack the blockade so that they could find an opening big enough to send one ship into hyperspace to bring reinforcements. Hera assigned Ezra and Kanan to the mission because she believed that the Jedi had a greater chance of success. For the mission, she assigned Ezra, Kanan, and Chopper to fly the Nightbrother through the blockade. After Kanan turned down the mission in order to warn Bendu, Hera assigned the mission to Ezra and Chopper. During the space battle, Ezra flew his Gauntlet as the Ghost and the rebel fleet launched an attack on Thrawn's fleet in order to find an opening. Due to the tightly packed Imperial formation and the TIE fighter swarms, the rebels sustained heavy casualties. However, Ezra and Chopper managed to escape after Commander Sato rammed his flagship Phoenix Home into Admiral Konstantine's interdictor cruiser.[12]
After fleeing into hyperspace, Ezra tried to solicit Mon Mothma's help but the rebel leader refused because she was unwilling to expose the Rebel Alliance's true strength to Thrawn. Desperate, Ezra traveled to Krownest in order to petition Sabine for help. Sabine's mother Ursa Wren, brother Tristan Wren, and Fenn Rau were reluctant to intervene because Clan Wren was bogged down in a civil war against Clan Saxon. Assuming their final answer was "no", Ezra stated that he and Chopper would go back alone. However, Sabine replied she would follow them. This convinced Ursa to relent and she allowed the rebels to recruit Mandalorian volunteers and starships for the Battle of Atollon. Ezra's reinforcements included several Mandalorian warriors and a squadron of Fang fighters led by Fenn Rau.[12]
Ezra and Sabine traveled back to Atollon on the Nightbrother. While Chopper manned the ship, Ezra, Sabine, and several Mandalorian warriors equipped with jetpacks landed on Thrawn's second interdictor cruiser. They proceeded to blow up the ship's gravity well projectors. Despite opposition from Jumptroopers, the rebels managed to destroy the cruiser and disable the interdiction field. This allowed the surviving rebel ships led by Hera to flee into hyperspace. After returning to the Ghost, Kanan met Ezra in the rear turret and commended his apprentice for helping Sabine to save the day. When Ezra expressed despondence about the defeat, Kanan reassured his apprentice that they were still alive to fight for the galaxy's freedom. The rebels then traveled to Yavin 4.[12]
Personality and traits


Ezra Bridger wielding his unique lightsaber/blaster combo
- "Come on. You know how I grew up. I'm not used to all these rules. Kanan, I want to become the Jedi you see in me, the one I don't always see in myself."
- ―Ezra Bridger
A Force-sensitive human male, Ezra Bridger had tan skin and untamed black hair.[5] He later obtained scars on his left cheek after the battle aboard the Imperial Star Destroyer. Bridger grew up on his own and worked as a small-time thief and con artist, using his street smarts to steal technology and goods from the forces of the Galactic Empire, though he felt no loyalty to others.[16] By 2 BBY, Ezra had adopted a shorter hairstyle with short back and sides.[52]
Initially, Ezra only saw the crew of the Ghost as a means to an end, stealing any valuables from the ship he could find, but he soon befriended and developed a strong bond with the crew members.[19] Ezra's rough upbringing taught him not to trust others, let alone help them. Sometime after meeting the crew of the Ghost, Ezra became a bit more trusting. Ezra was also very charismatic, which helped him get by during his early years. He was thievish, yet easy going and upbeat, and liked to play pranks and make jokes. He flirted with Sabine and pranked Zeb, but with his jokey attitude he hid from the others what he really felt about his parents, as he didn't trust people easily.[3]
During the mission to Malachor, Ezra encountered the former Sith apprentice, Maul, who taught him the basic philosophy of the Sith and encouraged Bridger to use his anger to strengthen him.[50] After the loss of Ahsoka Tano and the blinding of his master, Ezra was determined to never allow his friends to be harmed again. Due to this and influence from the Sith holocron, Bridger started to fight more aggressively, such as killing stormtroopers rather than stunning them. Bridger's use of the Sith holocron strained relations with his master Kanan. In addition, Bridger was a headstrong young man who was willing to circumvent orders. Ezra began to repair his relationship with Kanan after his master rescued him during a dangerous mission at Reklam Station.[52]
Ezra also sought to discover the key to destroying the Sith.[53] Despite being tempted by the dark side and Maul, Ezra ultimately chose to remain loyal to his master Kanan and friend Sabine. His selflessness put him at odds with Maul, who failed to understand Ezra's loyalty to his friends.[61] Ezra also had a great deal of respect for the lives of other sentient beings. This led him to object to Saw Gerrera's harsh treatment of the Geonosian Klik-Klak and his threat to destroy the last Geonosian queen egg. Ezra also had a friendly and kind demeanor which allowed him to gain Klik-Klak's trust.[62]
Ezra was a loyal and sympathetic friend to Sabine Wren. While Sabine was training to wield the Darksaber, he patiently taught her lightsaber strokes. When Sabine wanted to give up, Ezra urged her to persevere and reassured her that Kanan meant well. As he matured, Ezra was able to impart wisdom to his peers. When Sabine told him about her estranged relationship with her family who had supported the Empire, Ezra counselled her that at least she had a family to return to unlike himself.[64]
Ezra was a good actor and was able to pretend to be a bounty hunter during a mission to rescue Kallus. During the course of that mission, he learned to trust the rogue ISB agent and rebel sympathizer with keeping Chopper Base a secret.[66] Due to his youth, Ezra at times could be impulsive. His emotional concern for Kenobi also made him susceptible to the Dark Sider Maul's machinations. Ezra's belief that Kenobi held the key to destroying the Sith led him to embark on an errant mission to find Kenobi. Ezra soon found that Kenobi was more than capable of fending for himself and that his real place was with his adoptive rebel family.[11]
As he grew older, Ezra came to appreciate his master Kanan for teaching him to be a better person. Ezra's devotion to the rebel cause motivated him not to give up when it seemed impossible to solicit reinforcements for the besieged rebel forces at Atollon. His courage and devotion won him the admiration and respect of Mon Mothma and Ursa Wren. Ezra was despondent about the rebel defeat at Atollon but Kanan reassured him that they were still alive to fight another day.[12]
Powers and abilities
- "I feel as if his abilities are growing faster than I can teach him."
- ―Kanan Jarrus
Force abilities
Bridger possessed a strong connection to the Force, which prompted Jarrus to offer him the chance to train under him. He had ease to perform Force-enhanced jumps even without proper training,[19][21][22] and could sense things through the Force, such as when he sensed Kanan Jarrus's presence for the first time, or when he was drawn to the former Jedi's lightsaber and holocron.[19] When Valen Rudor tried to kill him with his TIE fighter's laser cannons from behind, Bridger sensed the danger and dodged the shot.[18] He also had an affinity in the use of telekinesis, such as when he instinctively pushed Agent Kallus several feet away to save Garazeb "Zeb" Orrelios.[21]
Under Jarrus' training, Bridger's Force abilities became more refined. He learned how to tame a horde of fyrnocks; on the same day, however, he made a connection to the dark side and this power was amplified to the point of being able to summon a giant fyrnock.[26] Bridger was also known to have Force visions.[29] After building his own lightsaber, Bridger initially struggled in learning how to use Form V, but later proved to have enough proficiency to deflect blaster fire.[29]During a mission to Takobo, Ezra was able to use his Force connection to calm the wailing Ithorian infant Pypey.[40] On a latter occasion, he also managed to communicate with the Purrgil King and convince them to help the Spectres. Later, he used a Jedi mind trick to force the Imperial commander of a fighter carrier to order an evacuation of his ship.[46] Ezra also used a Jedi mind trick to convince a stormtrooper that he was Lieutenant Lyste.[66] After training with the Sith Holocron, Ezra learned to completely control a person's mind rather than influence them such as when he forced an Imperial walker pilot to turn on his comrades and commit suicide.[52]
Lightsaber skills
As Ezra's Jedi training continued under Kanan, his lightsaber skills improved over time. Due to his role in the rebellion, Ezra had several opportunities to put his lightsaber skills into action. During an escape from an Imperial Interdictor, Ezra used his lightsaber to deflect blaster bolts and clear a hallway for escape.[39] By the following year, Ezra had begun to study Form IV through a recording of the former Jedi Knight Anakin Skywalker found in Kanan's holocron.[15] By the time the rebellion had discovered Atollon, Ezra was able to fight his master Kanan to a draw in a training exercise.[49] After training with the Sith Holocron, Ezra utilized a more brutal and aggressive fighting style.[52] Ezra ended his brief flirtation with the dark side after a meeting with the mysterious entity known as Bendu.[53]As Ezra's Jedi training and skills improved, he was able to impart his knowledge to Sabine. Ezra proved to be a patient teacher and taught Sabine to practise with stick fighting as a preparation for wielding the Darksaber.[64]
Other abillities
After multiple training exercises with Hera, Ezra had grown enough as a pilot to lead Jon Vander in disabling the TIE Defender piloted by Vult Skerris. Ezra was also a competent gunner and managed to shoot down a tactical infiltration pod.[8] Due to his compassion and understanding of others, Ezra often served as the unoffical diplomat of the Ghost crew on many occasions.[62]
Equipment
Bridger utilized an old R-series manipulator to pick electronic locks. Before his training at the Lothal Jedi Temple, Bridger was also equipped with an energy slingshot that he often used to stun his opponents.[67] Bridger's equipment included a blaster, and he frequently stole helmets and technology from the Empire, including a custom-painted stormtrooper cadet helmet to intercept short-range transmissions.[16]
After his mission within the Lothal Jedi Temple where he received a Kyber crystal, Ezra assembled his own lightsaber. This lightsaber had a blue colored blade and had a guard extending from the top to the bottom of the hilt that protected the main handle of the blade. Ezra's was a unique hybrid that featured a fully functional blaster pistol built into the handle.[1] Darth Vader later destroyed this lightsaber on Malachor.[50]
Six months after the encounter on Malachor, Ezra constructed a green bladed lightsaber and also acquired a DL-44 heavy blaster pistol.[68] After the second mission to Ryloth, Ezra stole a scout trooper's helmet and gave it to Sabine to customize.[62] While in the factory on Lothal, Ezra donned a Scout Trooper's to get the schematics for the TIE Defender. Ezra also knew how to fight with sticks well enough to train Sabine .[64] During an undercover mission to rescue Kallus, Ezra donned an Imperial uniform in order to assume Lieutenant Lyste's identity.[66] On another occasion, Ezra donned a spacesuit during a joint mission with Clan Wren to destroy an Imperial interdictor cruiser.[12]
Behind the scenes


Ezra Bridger LEGO minifigure
Ezra Bridger was first revealed as a character from the forthcoming animated series Star Wars Rebels at the January 2014 Nuremberg International Toy Fair, where Bridger appeared on the packaging for the LEGO Star Wars Rebels Phantom model.[69] On February 14, 2014, as part of a Lucasfilm promotional campaign to introduce the series' characters, TV Guide ran an online story featuring an exclusive first look at Bridger's character and announcing that he would be voiced by actor Taylor Gray. The story included a Lucasfilm production video revealing that Bridger was the first character created for Star Wars Rebels.[70]
In the episode of the animated television series Star Wars Rebels Empire Day, it was confirmed that Ezra was born during the first Empire Day. According to the StarWars.com blogger James Burns, Ezra Bridger was named after the Old Testament character Ezra. Simon Kinberg and Dave Filoni also confirmed that Ezra and several characters in the television series were named after historical and Biblical characters in order to imbued their names with a sense of meaning and purpose that would fit their characters.[71]
Non-canon history
Ezra Bridger appears in Angry Birds Star Wars II. At one point, Ezra Bridger sneaked into an Imperial base to steal a stormtrooper helmet. He was chased by Imperial troops, but was rescued by the mysterious warriors Sabine Wren and Hera Syndulla. They escaped from Agent Kallus, and Syndulla let him join her crew aboard the Ghost.[72]
In the LEGO Star Wars Rebels Movie Shorts, Ezra was on a mission with Chopper in the Phantom when they came under attack from a Star Destroyer. Jarrus, Syndulla, and Orrelios rescued them aboard the Ghost. Bridger suggested they charge the Star Destroyer's bridge and hide behind it, and eventually the warship jumped to hyperspace.[73] At another time, the Ghost was damaged by a Star Destroyer, forcing it to go to a space station for repairs. Bridger was aboard the Phantom and rescued Orrelios and Jarrus from the planet in time to finish repairs to their starship.[74]
Appearances


Non-canon appearances
- Disney Infinity 3.0
- Angry Birds Star Wars II
- LEGO Star Wars Movie Short (Rebels: Saving the Phantom)
- LEGO Star Wars Movie Short (Rebels Ghost Story)
 LEGO Star Wars: Droid Tales — "Mission to Mos Eisley"
- Star Wars: Galaxy of Heroes