| | |


- "By the time we landed on Yavin, whatever shock we'd felt at the destruction of the Death Star had been replaced by anger. For months we'd treated the Rebellion like a disobedient child, only to be repaid for our tolerance with treachery on an unimaginable scale. Frankly, I don't remember much of the fighting. I guess we won."
- ―A 501st trooper's entry in a journal
The Yavin blockade, also known as the blockade of Yavin or the Blockade of Yavin 4, was a military action conducted by the Galactic Empire after the destruction of the Death Star in 0 ABY.
History[]
The siege[]
- "Afterwards, those of us that survived hooked up with a nearby Imperial fleet making a retaliatory strike on the Rebel's base on Yavin IV. It wasn't the best thought out plan, but we were cut off from our leaders, tired, and operating on instinct."
- ―A 501st trooper's entry in a journal
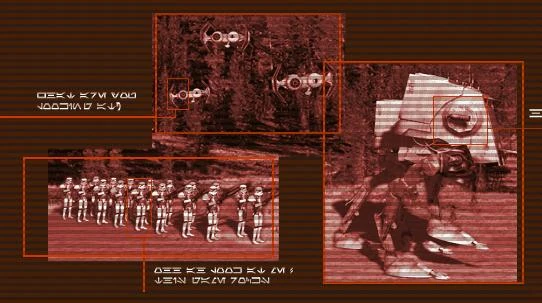
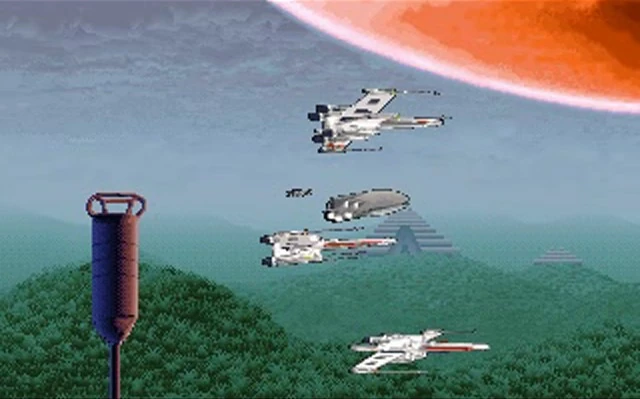
Imperial troops on Yavin.
After the destruction of the first Death Star, the Rebel Alliance prepared to evacuate the jungle moon, fearing Imperial reprisals. Fortunately, most of the Rebel fleet, including the Mon Calamari Star Cruisers under Gial Ackbar and the refugee ships containing the Alliance government, had not been present during the battle and were scattered throughout the galaxy.
General Dodonna began organizing the evacuation of the Yavin base almost immediately after the Death Star's destruction. However, before the base staff could be evacuated, an armada of Imperial ships including Immobilizer 418 cruisers appeared in the Yavin system. Instead of attacking, the Imperial ships formed a blockade that prevented the Rebels from escaping into hyperspace.
In fact, this blockade had been ordered by Darth Vader himself, who wanted to capture leading Rebels. The blockade was so extensive, it surrounded the entire Gordian Reach Sector. Though it was a large blockade, smaller ships could escape, while the large transports and capital ships were prevented from leaving. The blockade was more political than military, because the Empire didn't want the galaxy to know that an enemy was threatening it. Luke Skywalker, Princess Leia Organa, and Han Solo managed to escape the blockade multiple times. Once to the Wheel[46], to Hoth[47], Drexel,[10] Aduba-3,[7] Akuria II[48], Keeper's World[6] and other planets. The blockade itself lasted six months, with many other events happening across the galaxy during the siege. Sometime during that time, Tyber Zann searched the debris of the first Death Star, locating several jettisoned pods that contained secret plans to the Eclipse and other plans. His forces were able to escape successfully before the Imperials arrived in force to eliminate them.[23]
Meanwhile, the Super Star Destroyer Executor was nearing completion at the shipyards of Fondor. This mighty ship could take on an entire armada of smaller vessels and would serve as Vader's flagship. In retaliation for the destruction of the first Death Star, Vader wanted to use the Executor against the Rebels.
House of Tagge intrigues[]
The original commander for the blockade was General Ulric Tagge and was assisted by his family's company, led by Baron Orman Tagge. Several Tagge battlecruisers helped take part in the blockade. It was Orman Tagge's goal to gain favor with the Emperor, by creating a rivalry with Darth Vader, and humiliating him. Orman Tagge used his vast resources of TaggeCo to develop weapons to defeat the Alliance at Yavin.
The first was a station in the planet of Yavin that carried a turbine to allow fighters through the turbulent atmosphere, called the Achtnak Turbine Station. TIE/LN starfighters used this station as a depot to allow them to maintain a continuous siege of Yavin 4. This station was eventually destroyed by Luke Skywalker, who along with Princess Leia was ambushed by the TIE fighters while returning from another assignment.
The second attempt used a new freezing bomb weapon, the Omega Frost. Han Solo led a Rebel fleet through an unknown gap of the Imperial fleet. Luke Skywalker managed to destroy the firing mechanism, and the Alliance fleet attacked Orman Tagge's fleet and led to his defeat. After this failure, Vader held Orman and Silas Tagge prisoner, and thus had leverage over Ulric Tagge, who believed his brothers dead, assumed the title Baron Tagge and retired from the military.
Admiral Griff's involvement[]
Imperial forces assault Yavin Base.
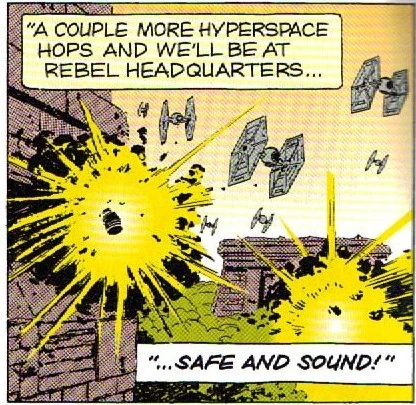
At the same time, Darth Vader was being pressured by Imperial commanders to strike, having lost patience in the blockade and its failure to contain Luke Skywalker and other Rebels. A group of Admirals secretly revealed the existence of the Super Star Destroyer being built at Fondor to the Rebels. Skywalker led a team to sabotage the completion of the Executor, though they were betrayed and most of the task force was killed. Admiral Amise Griff, one of the treasonous admirals, was actually a spy for the Sith Lord. Vader killed the admirals for their betrayal.[49] Vader rewarded Griff by placing him in command of the blockade. Griff launched stunning raids on the Massassi base on Yavin IV. His TIE fighters were slowly winning the battle of attrition. During another mission, Luke discovered the arctic planet of Hoth. After returning, he suggested to the Alliance that they evacuate to Hoth and set up another base there.[47] A third mission was the Mission to Dantooine, where Tycho Celchu defected to the Alliance.[50]
Around the same time, Princess Leia had attended a conference of uncommitted systems on Kabal, where she met with Silver Fyre, leader of the Aquaris Freeholders and convinced her to bring their considerable fleet of small ships over to the side of the Rebels. Leia also sent Han Solo on a quest for a near-fabled power gem, in an attempt to use it against the Executor. Fortunately for the Rebellion, the Princess and Fyre's fleet ran the blockade and defeated the TIE fighters.[51] The Empire continued to besiege the base, launching several raids to destroy transports and kill leaders.
Evacuation[]
When the Super Star Destroyer Executor was finished, Vader led a final strike on the base with his new flagship. At the advice of Luke Skywalker to relocate to Hoth, the Alliance evacuated the last of the base, and attempted to delay the arrival of the Super Star Destroyer. The first attempt failed, and its commander, Vrad Dodonna, fled the battle, damaging his own ship to appear he barely escaped. Luke Skywalker caught Vrad from escaping, but did not want to hurt General Dodonna's feelings for his son. Vrad and Luke then volunteered on a mission to use a power gem to weaken the Executor's shields. Vrad, however, left Luke behind to escape on his own and sell the power gem. Attacked by the Executor, Vrad was forced to change course and rammed the ship. As the Executor redirected all power to its forward shields, the Millennium Falcon damaged the ship's rear. Unable to strike the Rebel Base, Darth Vader called upon Admiral Griff at Jovan Station to use the blockade force. Admiral Griff responded by sending a TIE/sa bomber fleet to destroy the base. However, General Dodonna detonated the temple—the blast destroyed the bomber fleet. This allowed the last Alliance transport to escape.
In preparations for the evacuation, X2 and Shara were assigned to locate a transponder containing recognition codes to bypass the blockade located within the wreckage of the Death Star. Amidst the debris field, the two Rebel pilots fought a number of TIE Fighters over the transponder. The Rebels emerged victorious and managed to reclaim the device.
Final actions[]
Despite successfully evacuating the base, the Rebels were still faced with escaping from the Imperial blockade. Rebel-aligned Admiral Gial Ackbar and his Mon Calamari forces attacked the Vallusk Cluster and two other locations along the blockade as a diversion. This allowed a gap in the blockade for the Alliance to escape. Admiral Griff was not fooled, and sent his three Star Destroyers to a nearby star to hide and wait to ambush the Rebel fleet. Luckily, Luke Skywalker discovered the Star Destroyers and warned them.
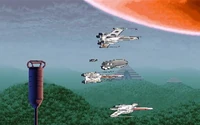
Rebels evacuate Yavin.
Instead, Princess Leia led the fleet through a stellar flare around the star, with Skywalker guiding them through the Force. Meanwhile, with the repairs complete, Darth Vader and the Executor awaited on the other side of the star to ambush the fleet. Darth Vader had used Griff to draw the Alliance near him, and exhaust them. But the ambitious Griff, foolishly miscalculated a hyperspace leap to catch the Alliance, and his three Star Destroyers collided into the Executor. Admiral Griff was killed, but fortunately for Vader, the Executor's shields protected him from the collision. This event allowed the Alliance to escape. The Alliance finally escaped the Imperial blockade and spent a year relocating to Hoth and building Echo Base.
Appearances[]
|
Sources[]
- Star Wars: The Roleplaying Game, Second Edition, Revised and Expanded
- Star Wars: Rebellion: Prima's Official Strategy Guide
- Star Wars Encyclopedia (First identified as Blockade of Yavin 4)
- Anakin Skywalker: The Story of Darth Vader
- C-3PO: Tales of the Golden Droid
- The Essential Chronology
- The Official Star Wars Fact File 94 (YAV14, The Evacuation of Yavin)
- Geonosis and the Outer Rim Worlds (First identified as Yavin blockade)
- The New Essential Chronology
- The Complete Star Wars Encyclopedia
- Star Wars: The Official Starships & Vehicles Collection 8
- Star Wars: The Official Starships & Vehicles Collection 10
- Star Wars: The Official Starships & Vehicles Collection 12 (Droids, Aliens & Creatures: General Jan Dodonna)
- Star Wars: The Official Starships & Vehicles Collection 14
- The Essential Atlas (First identified as the blockade of Yavin)
- The Essential Guide to Warfare
- Strongholds of Resistance