| | |

- "I'd do any of those things if it would help defeat the Empire, but what I really want is to watch Imperial ships blow up in front of my gunsights. It's something I need to do."
- ―Keyan Farlander
Keyan Farlander, nicknamed "Lucky", was an Agamarian male Jedi Knight who served in the Alliance to Restore the Republic and New Republic military. A native of the small town of Tondatha, Farlander joined the Agamar Resistance after his hometown was destroyed in an attack by forces of the Galactic Empire, leaving his mother and father dead and sister badly burned. After attending a recruitment rally by Rebel leader Mon Mothma, Farlander decided to join the fledgling Rebel Alliance and became a pilot in the Alliance Starfighter Corps, serving in Red Squadron aboard the Mon Calamari Star Cruiser Independence.
Farlander participated in many of the early battles of the Galactic Civil War, including the attack on the Death Star I at the Battle of Yavin. He would later survive the Imperial attack on Echo Base and fight in the Battle of Endor, which saw the death of Emperor Palpatine.
His skill as a pilot was aided by his Force sensitivity but, as he became aware of his potential, he struggled with the dark side and found himself increasingly isolated. Farlander resolved to stop using the Force until a meeting with Luke Skywalker helped him begin to understand his abilities. He later trained as a Jedi at Skywalker's Jedi Praxeum, combining his life in the New Jedi Order with his life as a military commander for the New Republic. By the Yuuzhan Vong War, he had been promoted to general and served as one of the Republic's senior commanders, leading their forces in several battles including the Battle of Ebaq and the Recapture of Coruscant.
Biography[]
Galactic Civil War[]
Recruitment[]
The Human male Keyan Farlander grew up in Tondatha, a small town on Agamar, an agricultural world[3] in the Lahara sector of the Outer Rim Territories.[8] He lived with his mother, father and sister, Kitha,[3] on his family's struggling mugruebe ranch.[9] He never had any objections to Imperial rule and, as a child, had watched landing vessels from a passing Imperial fleet pass over Tondatha and decided he wanted to join the Imperial Navy. This all changed however when the Empire, alleging that the residents of Tondatha had been plotting against Emperor Palpatine, destroyed the town with an orbital bombardment. At the time of the attack, Farlander was traveling through a binka forest in his T-16 skyhopper, on his way home from Calna Muun after running an errand for his father. Upon seeing the Imperial assault ship descending on Tondatha, he pushed the airspeeder to its limits trying to get back home. By the time he reached Tondatha, the Imperial attack had begun. Farlander raced to his home to find his family but, shortly after entering, it was struck by a blaster bolt and the roof collapsed around him. Although Farlander survived with only minor burns, his parents were killed, and his sister was badly burned.[3]

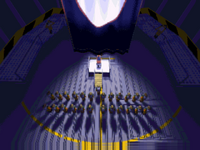
A registration protocol droid introduced Farlander to the Independence.
Farlander sent his sister to live with their aunt Mimya and uncle Trinn on Oorn Tchis, where she might receive treatment. Three months after the attack, Farlander moved to Calna Muun and, over the course of several months, began to seek out those who had reason to despise the Empire, eventually becoming involved in the Agamar Resistance.[3] In 1 BBY,[10] just one month after joining the Resistance, Farlander attended a secret rally held by Alliance to Restore the Republic Chief of State Mon Mothma to encourage the Agamar Resistance to become part of the Alliance.[1]
Inspired by Mon Mothma's speech, Farlander decided to join the Rebellion as a starfighter pilot.[1] Soon after the rally was concluded, Farlander boarded the shuttle to the waiting Mon Calamari Star Cruiser Independence along with fellow Agamarian recruits 'Ndranth Poussan, Sunnar Jan-lo and Breth Gart, and several members of the ship's crew, including Mon Mothma's aide, Lynia Delline. Farlander had met Delline just after Mon Mothma's speech and the two chatted aboard the shuttle, with Delline suggesting that he could serve the Alliance in a less dangerous role. Farlander, however, was determined to become a pilot and Delline respected his decision. After arriving aboard the Independence, Farlander was shown to his quarters and introduced to Lieutenant Hamo Blastwell, who would serve as his liaison officer in Red Squadron.[3]
Farlander's training began the following day. Under Blastwell's supervision, Farlander spent two days practicing in the pilot proving grounds, an obstacle course designed to familiarize pilots with the basic functions of a starfighter. After passing his basic training, Farlander was sent to Commander Wex "TIE-Die" Dafid for tactical combat training which comprised a series of simulated recreations of historical combat scenarios. During his early training, Farlander met the legendary Rebel pilot Halley Kadorto, who gave the younger pilot some combat advice.[3]
First mission[]
- "Just keep your wits about you. You're a natural, you know."
- ―Hamo Blastwell to Keyan Farlander
Farlander was still undergoing combat training, having just completed the final A-wing historical training mission[3] when he was picked for his first mission.[11] After only thirteen days of training, a shortage of pilots forced the Alliance to make use of the rookie in a mission to retrieve information stored on the Imperial CR90 corvette Talon.[1] Farlander would fly a T-65 X-wing starfighter as part of Red Squadron, assisting the Nebulon-B frigate Liberator in engaging TIE Fighter escorts while Y-wings from Gold Squadron would disable Talon. Storm Unit would then board the ship and retrieve the information. The strike force would then retreat into hyperspace before Imperial reinforcements could arrive.[11]
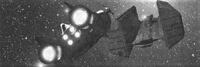
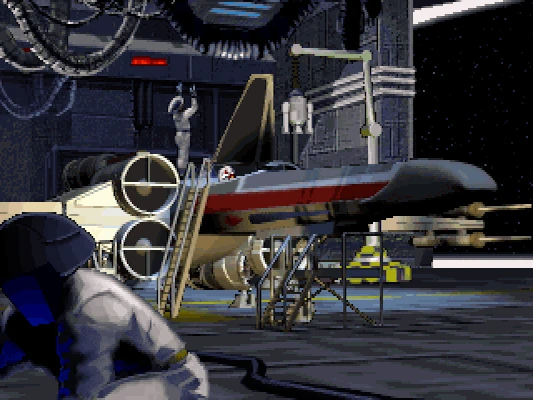
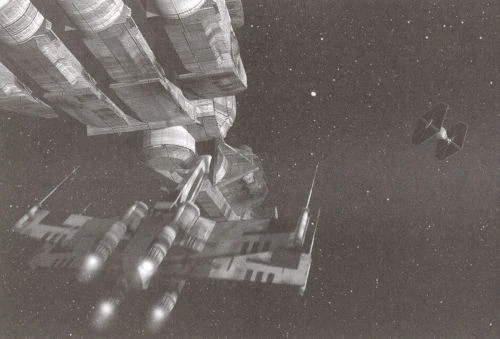
Keyan Farlander's X-wing approaches the Talon.
Red Squadron emerged from hyperspace and began engaging TIE Fighter escorts. However, a call from Storm Unit needing an R2 unit caused Farlander to break off and dock with Talon. While Storm Unit fought against defending stormtroopers, Farlander and his R2 unit worked their way to the bridge where they deactivated any remaining turbolaser batteries and began downloading data from the ship's computer. He also relieved the Imperial commanding officer of some disks which he was attempting to destroy, killing the officer in the process, before returning to Independence.[1]
The information recovered included a copy of the top secret Imperial document, Technical Specifications: Spacecraft of the Imperium and the Rebel Alliance, detailing specifications of both Imperial and Rebel spacecraft and providing the Rebels with insight into the enemy's strengths and weaknesses. Farlander's actions earned him a promotion to lieutenant, and the nickname Lucky.[1] The mission was later entered into the historical missions database for training of new pilots[11] and Rebel historians documented Farlander's actions in a file intended to inspire new recruits.[1] Impressed by Farlander's performance in his first mission and his near perfect scores in the simulators, General Jan Dodonna requested that he enter active duty as soon as possible.[3]
Operation Strike Fear[]
- "Just remember everything you've learned here, and don't take this hero business too seriously. Heroes who fly starfighters most often meet with a quick end."
- ―Wex Dafid to Keyan Farlander
Farlander was instrumental in the Rebellion's actions over the coming months. The day after completing his last combat simulation, Farlander was officially assigned to Red Squadron and attended a briefing on the Alliance's plan to defeat a massive Imperial offensive known as Operation Strike Fear.[3] An opportunity to learn more about the Empire's plans soon arose when the crew of the Imperial CR90 corvette Bixby announced their intention to defect to the Alliance. Farlander was assigned as Blastwell's wingmate on a mission to destroy a convoy under escort from the Bixby, while the corvette was secured for the Alliance. Captain Nogdra of the Bixby brought intelligence of an Imperial staging point near Dellalt and Farlander was selected to conduct a reconnaissance flight in a lone R-22 Spearhead, confirming the presence of a large Imperial force led by the Imperial-class Star Destroyer Invincible.[3]

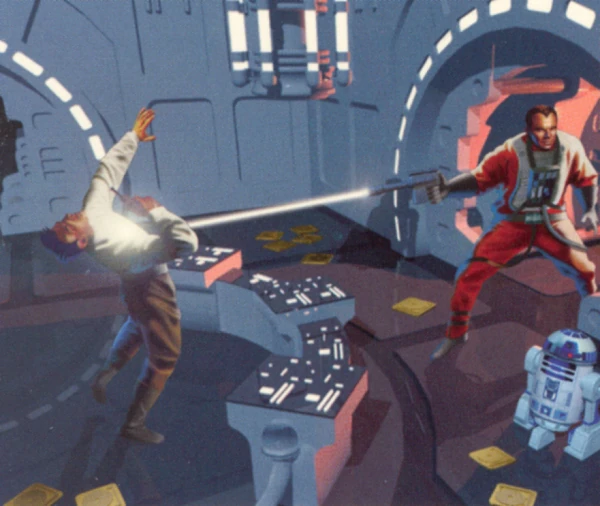
Keyan Farlander shoots the commander of the Talon.
Several days after his solo mission, Farlander attended a briefing by General Dodonna. The general had already been planning to evacuate the Rebel base on Brigia, but recent intelligence indicated that the base was to be the first target of Operation Strike Fear, forcing the Alliance to act sooner than planned. Farlander was assigned to provide cover for the senior staff shuttles during the evacuation, his flight arriving in the system shortly before the Invincible. Though Rebel losses in the subsequent battle were heavy, Farlander helped ensure that all senior staff shuttles escaped to hyperspace. He had little time to relax, however—shortly after returning to the Independence, Farlander was sent to defend the medical frigate Redemption, which was receiving wounded from the battle. When the Redemption came under attack from the Imperial Nebulon-B frigate Warspite, Farlander helped cover the transfer of wounded until all ships were safely away.[3] This mission too was recreated as a training scenario and later used by the elite Rogue Squadron.[12]
The following day, Farlander participated in a raid on an Imperial convoy, aimed at disrupting the Empire's resupply efforts ahead of planned attack on Rudrig. He was joined on the raid by fellow Agamarian Sunnar Jan-lo, who would become a close friend within Red Squadron.[3] Around this time, Ordnance and Supply Command reported a major shortage of astromech droids for use with the X-wing and Y-wing starfighters. When an A-wing flight reported that the Imperial BFF-1 bulk freighter Ars Opus had broken down near Rudrig with a shipment of the droids,[11] Farlander helped provide cover for a recovery operation. Shortly after the mission, however, the Rebels learned that the stolen droids had been tampered with—the R2 units hijacked three X-wings, including one flown by Blastwell, and were attempting to deliver them to the Invincible. The Rebels promptly dispatched the Mon Calamari Star Cruiser Maximus to retrieve the X-wings, while Farlander helped provide cover.[3]

Farlander attends an award ceremony.
Shortly after rescuing his friend, Farlander and Blastwell were called to a private briefing with Commander H. S'man, who informed them of a plan to rescue Sullustan prisoners being transferred from their homeworld to the Imperial capital Coruscant. Alliance High Command planned a low-key raid to rescue the prisoners, hoping to gain the support of the Sullustans against the Empire. Due to Farlander's ability to assess a situation and react under pressure, he was selected to fly a lone Y-wing in the mission.[3] The rescue was a success and negotiations between Sullustan rebels and the Alliance soon began.[11] Both Farlander and Blastwell were assigned to fly patrol for a summit meeting between the two resistance groups. When the Invincible attacked the meeting, Farlander helped to fend off Imperial TIEs until the diplomatic ships escaped. However, they soon learned that the Imperial attack had been a diversion while the Empire kidnapped the Sullustan leader and Farlander was again called into action during the subsequent rescue.[3]
Farlander was promoted to captain upon his return to the Independence. Following his debriefing, he celebrated his promotion with several of his friends aboard the ship, including Blastwell, Jan-lo and Lynia Delline, recently returned to the ship following an extended trip with Mon Mothma. He soon began to develop a romantic interest in Delline, although she was frequently off-ship and the two found it hard to find time together.[3]
Soon after Farlander's promotion, Sullustan technicians worked with General Crix Madine to devise a plan to put an end to Operation Strike Fear by destroying the Invincible. The first part of the plan involved capturing some of the design staff from Cygnus Spaceworks, who would be needed to help modify a shuttle for the operation. Intelligence reports led the Rebels to a Cygnus test facility where the Alpha-class Xg-1 Star Wing was undergoing trials[11] and Farlander and Jan-lo were dispatched to provide cover for the capture operation. Farlander was also involved in the next stage of the operation, the capture of an Imperial explosive device en route to Celanon.[3] The captured explosive was loaded aboard a modified shuttle and delivered to the Invincible. The Imperial command ship was destroyed by the subsequent explosion, putting an end to Operation Strike Fear. Farlander was later presented with the Corellian Cross for his role in ending the operation.[11]
Search for the Death Star[]
- "It's the war. You can't stay young for long. The young die young."
- ―Keyan Farlander

Farlander's A-wing during the rescue from Stars' End.
Shortly after the end of Operation Strike Fear, the Alliance began to hear rumors that the Empire was developing a new superweapon and began to search for information regarding the nature of the threat.[3] Early in the search, a group of captured Rebel pilots escaped from Stars' End prison aboard a freighter bound for Kashyyyk.[11] Farlander flew an A-wing during a mission to rescue the pilots, in which he was accompanied by Lieutenant Cardacs, a new transfer to Red Squadron and a friend of one of the captured pilots, Captain Samuel Raider. Though the rescue was a success, Cardacs was killed during the mission and Raider held Farlander responsible, angrily confronting him the following day. However, after the two worked together on a mission to rescue Wookiee slaves being transferred to a major Imperial construction project, Raider apologized to Farlander and the two began to develop a friendship.[3]
During his next mission, an attack on an Imperial weapons convoy near Orron III, Farlander made a mistake by calling on his wingmen, Tan'tro and Ahsmar, to assist him in destroying a freighter, causing them to turn tail on attacking assault gunboats. Both pilots were killed and Farlander's briefing officer, Commander Lagrane, suspended him from operations pending an official inquest regarding the incident. Farlander had the support of his wingmates, including Blastwell and Raider, during his suspension, and was eventually returned to active duty with a warning and a compulsory visit to the flight simulators for some brushing up.[3]
His next two missions were flown without wingmen;[3] a raid to capture a freighter carrying Imperial communications satellites, followed by covering a rendezvous between the captured freighter Phoenix and the cruiser Maximus.[11] Around this time, Mon Mothma visited the Independence—Farlander was excited to see Delline with her and the two dined together in the ship's executive dining room before Delline's duties once more took her off the ship. The captured satellites were to be used to eavesdrop on Imperial transmissions in the Cron Drift. However, when the freighter Ojai came under attack while transferring the satellites to the corvette Jeffrey, Farlander was once more called into action to defend the rendezvous.[3]
The captured satellites were deployed by the Jeffrey and soon picked up an Imperial signal containing plans for their new weapon—the Death Star battlestation.[11] The plans were to be transferred to the Liberty by Rebel pilot Biggs Darklighter. However, when his X-wing broke down and came under attack from Imperial forces, Farlander led an A-wing flight to protect the recovery of the X-wing and the data it contained. Darklighter later joined Farlander and Raider in the pilots' lounge, and the three shared their experiences.[3]

Farlander participates in the attack on the Intrepid.
Soon after, the Alliance learned that the Star Destroyer Intrepid had been damaged and was awaiting repairs. They soon launched a series of operations aimed at the destruction of the Star Destroyer.[11] Farlander participated in the first of these raids, destroying a freighter carrying a replacement hyperdrive. However, the pressure of battle combined with losing so many friends was starting to have an effect on him. Also, although he was not yet aware of it, Farlander was Force-sensitive, which started to manifest itself in his dreams and was affecting his concentration. Following the Intrepid mission, Farlander informed Commander Lagrane about his dreams and was told to consult the ship's medical crew. Although a medical droid was concerned about Farlander's condition, the pilot unknowingly used the Force to persuade a doctor to let him remain on duty with a course of sedatives to aid his sleep.[3]
Farlander returned from the medical bay just in time to get his next assignment, an assault on the Intrepid's escort ships which would leave it virtually defenseless. Less than an hour after returning to the Independence, he took part in the final assault on the Intrepid, a combined X-wing, Y-wing and A-wing attack. Farlander and Jan-lo quickly brought down the Star Destroyer's shields with their X-wings, allowing the Y-wings' proton torpedo barrage to eliminate the vessel,[3] the first time the Rebels destroyed a Star Destroyer in a frontal attack.[11] After returning to the Independence, Farlander visited Jan-lo, who had been injured in the battle, as she received bacta treatment.[3]
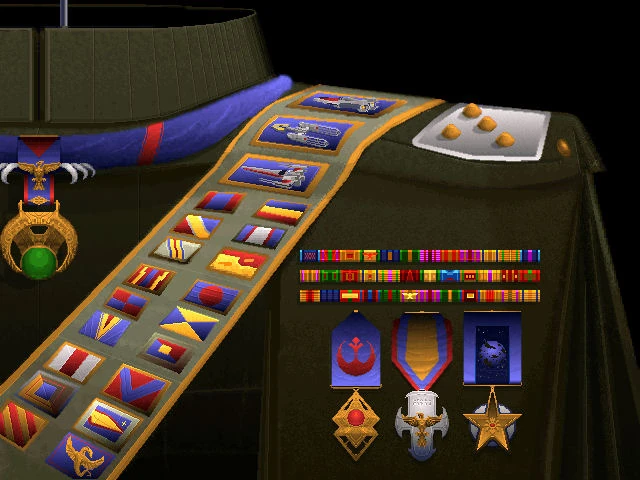
Though the destruction of the Intrepid was a huge victory for the Alliance, they had little time to celebrate.[3] The Death Star plans were to be transported to Bail Organa on Alderaan by his adopted daughter, Senator Leia Organa.[13] Just a few days after the Intrepid mission, Farlander flew protection for the transfer of the plans to Organa's ship, the Tantive IV, and was called on again when the ship came under attack from the Star Destroyer Immortal. Despite his efforts, Farlander soon learned that the Tantive IV had once more come under attack and the fate of both Organa and the Death Star plans was unknown. Nonetheless, he was presented with the Mantooine Medallion for his role in capturing the plans and delivering them to Organa.[11]
The gathering storm[]
- "The Force is the ultimate power. With it, you can destroy your enemies. Just open yourself to it, let it guide you, and you'll be unbeatable."
- ―Keyan Farlander
Shortly after Organa's disappearance[3] in 0 BBY,[14] High Command organized a briefing during which General Dodonna outlined their plan to delay the completion of the Death Star and Farlander was awarded a medal for one of his recent missions. Immediately after the briefing, Farlander was back in action with a mission to guard a weapons transfer between the recently captured freighter Sidral II and the corvette Frazier.[3] Part of the shipment of military hardware aboard the Sidral II had passed through an Imperial repair yard near Coruscant and the Alliance believed that an attack on the facility would cripple the infrastructure that serviced ships involved in the Death Star project.[11] Farlander flew a Y-wing in a raid which eliminated the facility and saw combat again while overseeing the capture of a Delta-class DX-9 stormtrooper transport carrying military advisors working on the Death Star,[3] after it was sabotaged by Alliance Special Forces.[11]
Around this time, Farlander became a liaison to Breth Gart, a young Agamarian who joined the Alliance at the same time as Farlander but had only recently been accepted as a pilot. Due to their shared Agamarian background, the two pilots quickly became friends and Farlander took Gart with him on a temporary assignment to the Mon Calamari Star Cruiser Defiance, during which the pair defended it from the Star Destroyer Immortal. After returning to the Independence, Farlander was approached by Blastwell, recently promoted to commander, about a mission to capture members of the Death Star design team. While Blue Squadron engaged its defenses, Farlander's Y-wing disabled the corvette Godar as it headed for a rendezvous with the Immortal, allowing the designers to be captured by a Rebel shuttle.[3]
Gart was later killed flying with Farlander in a freak collision with the Imperial frigate Priam during an attack on the Imperial base at Kalla VII. Farlander found it difficult to cope with Gart's death, and his failure to turn up for his mission debriefing led Commander Lagrane to recommend him for a psychological evaluation. That night, Farlander's dreams returned and he heard voices telling him that Gart was weak and that only power would defeat the Empire and end the war. His superiors, concerned about his mental state, planned to ground him until Farlander used the Force to persuade them to let him stay active. Returning to combat, Farlander participated in two raids against the Priam, the first to destroy its escort, and the second to assist in the capture of the frigate itself.[3]

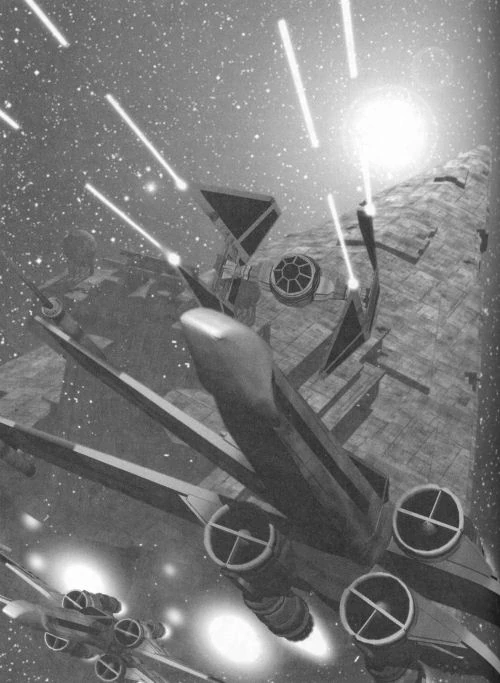
Keyan Farlander's X-wing is destroyed.
Farlander's first experiences with the Force were untrained, and he was influenced by spirits from both the dark and light sides of the Force, leading him dangerously close to the dark side before he finally discovered that the Force was more than just a source of power. He discovered that he could touch the minds of enemy pilots, almost being able to steer them right into his sights. Hoping to produce an unstoppable squadron of pilots guided by the Force, he took on a group of young pilots to instruct, promoting aggression and a sense of invulnerability in them. Although the rookie pilots looked up to him and believed what he had to say, his unusual behavior started to alienate the more experienced pilots.[3]
Farlander was assigned to cover the recapture of the Corellian corvettes Ethar I and II.[11] He decided to show that he was right by taking two of his followers, Casal Marskan and Horodi, with him. Although the mission was successful, both of his wingmen were killed and, for the first time in his career, Farlander's ship was destroyed, though he safely ejected.[3]
Back on the Independence, Farlander was confronted by Casal's older brother, Captain Ernek Marskan of Blue Squadron, who blamed him for his brother's death. Farlander used the Force to choke Marskan but released him before it was too late. Farlander was appalled by the thought that he almost killed Marskan but was convinced that his wingmen had been unworthy of the Force and others would have more success. He found several more young pilots willing to listen, though he was no longer considered welcome by those he had previously called friends, including Marskan, Raider and Speedy.[3]
When he was confronted by Blastwell, upon returning from guard duty at a Rebel supply depot, Farlander felt suddenly disoriented and lost consciousness, hearing a voice warning him to turn away from the dark side before he was consumed by it. When he awoke moments later, Farlander declined Blastwell's offer to take him to a doctor, instead choosing to return to his cabin so he could try and work out what was happening to him. He was still in his quarters several hours later when the Independence came under attack from the Immortal while on its way to Yavin 4. Farlander scrambled to his X-wing and helped defend the ship. During the battle, Farlander once more felt the call of the dark side, at one point causing him to lower his shields, rendering him momentarily helpless. However, the light side spirits won out, and he turned his back on the other, darker voices, regaining control of his fighter. Neither voice returned after the battle and Farlander decided not to use the Force again until he better understood it.[3]
The Battle of Yavin[]
- "This was a do-or-die mission. We all knew it. For most of us, it was die."
- ―Keyan Farlander on the Battle of Yavin


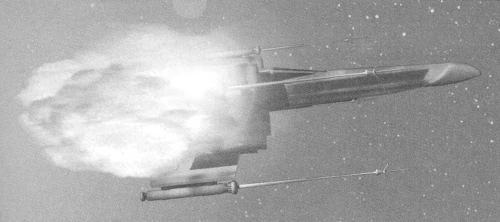
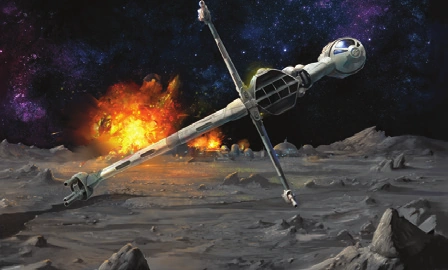
Farlander's Y-wing escapes the Death Star moments before its destruction.
Shortly after arriving at Yavin 4, Farlander was one of several pilots transferred to Yavin Base to help in the upcoming battle against the Death Star. It was there that he met Luke Skywalker. The two began talking and Farlander introduced him to the basics of flying an X-wing. Skywalker passed on some of what Obi-Wan Kenobi had taught him about the Force, and, though Farlander still did not feel ready to use it, he was relieved to meet somebody who understood what he was going through and hoped one day to master the Force and become a Jedi.[3]
While the Rebels waited for the Death Star to arrive, they planned some actions against its support fleet. Farlander flew some preliminary missions to disrupt communications and defenses around the thermal exhaust port.[11] For the main attack on the Death Star, Farlander was temporarily reassigned to Gold Squadron and flew a Y-wing in the battle,[3] under the call sign Gold Seven. His role was to provide tactical support[15] and to hold off enemy fighters while others made a trench run.[3]
Despite heavy Rebel losses, the Battle of Yavin was a victory, with Skywalker firing the shots that destroyed the battlestation. Farlander was one of the few pilots to survive the attack[3]—and the only member of Gold Squadron[15]—and was promoted to commander after the battle before attending a medal ceremony for Skywalker, Han Solo and Chewbacca. Farlander was unable to enjoy the victory as much as many at Yavin Base, however—Hamo Blastwell, his closest friend and the only pilot who had stood by him recently, had apparently been killed during the battle and he still faced a tough fight to redeem himself in the eyes of the other pilots. One of his friends did continue to keep faith in him and Lynia Delline promised to spend more time with him in the coming months.[3]
Imperial pursuit[]
Despite the destruction of the Death Star, the Alliance did not have long to celebrate—the location of Yavin Base was compromised and they were forced to evacuate. Farlander provided cover for the evacuation of corvette group Crescent as they made their jump to hyperspace, using his A-wing to hold off starfighters from the frigate Red Wind, and was soon dispatched again to guard a transit point for more fleeing Rebel ships, helping to save many Alliance personnel. He would encounter the Red Wind again during a later mission to escort a convoy carrying equipment for a new Rebel base while the Alliance searched for a suitable location. The Alliance eventually planned a retaliatory strike against the frigate, in which Farlander participated.[16]
The Rebels suffered a major loss when the Maximus's task force came under attack, forcing the evacuation of the cruiser. Farlander led a pair of X-wings sent to assist the cruiser's A-wings while they covered the evacuation, and helped ensure the survival of the ship's crew. He later joined Rebel fighters in defending the frigate Anvil as it was resupplied by the corvette Lauhu. Though the Anvil survived an assault from Imperial frigate Firelance, it was heavily damaged and the crew were forced to abandon ship soon after. Farlander was once more called upon to aid in the evacuation.[16]
Despite Farlander's efforts during the evacuation of Yavin, the Alliance lost several ships carrying food supplies, leaving them with critically low stocks. It was vital that the Rebels protect their remaining supplies, so Farlander was sent to guard the damaged grain freighter Op Mus, while the transport Jaamn conducted repairs. In a subsequent mission, Farlander guarded the freighter Trips while it recovered a container of grain which had been dropped by a Rebel ship in the Lesser Plooriod Cluster while evading an Imperial attack. Having secured their remaining supplies, the Rebels began searching for new sources and dispatched Farlander in a Y-wing to identify and disable an Imperial convoy ship carrying food for capture by the transport Raider.[16]

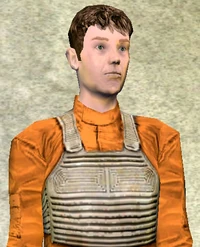
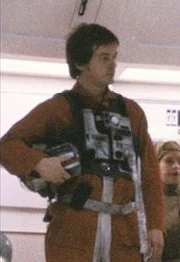
Keyan Farlander's uniform just after the Battle of Yavin.
A solution to the food shortage soon appeared possible when Imperial Overlord Ghorin of the Greater Plooriod Cluster claimed to have grown sympathetic to the Rebellion and entered negotiations to supply them with grain. An initial shipment was arranged and Farlander was sent to clear a mine field in the area ahead of the delivery, and to conduct a diversionary raid on a listening station near Saheelindeel to draw away Imperial forces. He later provided cover for the transfer of the grain. However, tests on the delivery showed that Ghorin had betrayed the Alliance by supplying them with poisoned grain and, seeking an alternate source, Farlander was sent to assist in a raid on an Imperial storage facility. With a grain supply secured, Alliance High Command developed a plan to get revenge on Ghorin. Farlander was instrumental in the operation, helping to capture some of Ghorin's Y-wings, and using them in raids on a supply storage area in the Hollan D1 sector and an Imperial convoy en route to the Geedon system. Finally, Farlander helped assault a convoy delivering grain from Ghorin to an Imperial base. Swapping the grain aboard the convoy craft for the tainted grain acquired from Ghorin, the Rebels made it appear that the overlord had betrayed the Empire. Farlander later confirmed the success of the plan with a reconnaissance flight to check that a poisoned grain delivery arrived at the frigate Elite. The tainted grain delivery convinced the Emperor that Ghorin was a traitor and he was soon executed by Darth Vader.[16]
When Alliance Intelligence learned that the Empire was testing the new TIE Avenger at a secret base, Farlander led a raid on the facility, destroying the static defenses and enabling the freighter Ashanti to capture one of the fighters. After a later mission to defend a Leafar convoy as it came under attack from Imperial forces, the Leafar provided information that the TIE Avenger's new shield technology was being adapted for larger vessels, with a Corellian corvette reportedly next to receive the technology. The Rebels planned to capture the test ship by using assault gunboats to sneak into the area and Farlander participated in a raid to capture three of the starfighters. In a subsequent mission, the captured gunboats escorted Farlander's Y-wing into the Imperial test facility, claiming that he was a defecting Rebel pilot. Farlander located and disabled the prototype, the corvette Blade 5, then helped protect Storm Unit as they captured the ship. In his next mission, he helped guard the Blade 5, now renamed the Ram's Head, as it rendezvoused with the corvette Libra ahead of a major operation codenamed Operation Ram's Head. The Ram's Head was later used to ram the bridges of several Star Destroyers at Imperial Drydock IV. His efforts during the period between the evacuation of Yavin to the protection of the Ram's Head earned Farlander the Shield of Yavin.[16]
Battles of the Galactic Civil War[]

Keyan Farlander during the Galactic Civil War
Sometime following the Battle of Yavin, and his recruitment into the Rebel Alliance, Farlander partook in a skirmish against at least one Imperial pilot. Farlander was defeated in the fight, but managed to escape alive in his crippled T-65 X-wing starfighter. Farlander also participated in battles between Rebel and Imperial forces in the Naboo, Tatoo, Corellian, Dantooine, and Karthakk systems during the Galactic Civil War. These battles involved an Imperial Lancer-class frigate being pitted against a Rebel Nebulon-B escort frigate, with numerous starfighters aiding in the defense or offense of the system.[17]
The B-wing project[]
- "Lieutenant Farlander, do you have the B-wings combat-ready?"
"Yes Commander Skywalker, they will be a powerful new weapon against the Empire."
"Good work, Lieutenant." - ―Luke Skywalker and Keyan Farlander
After a short leave following the Ram's Head operation, Farlander returned to duty to assist in the final stages of the B-wing starfighter project,[18] a new bomber designed by Admiral Gial Ackbar with the aid of Slayn & Korpil, a Verpine starfighter manufacturer operating in the Roche asteroids.[19] Working with other pilots from Red and Gold Squadrons, Farlander provided cover for a makeshift assembly area for the new starfighter. After defeating an initial Imperial raid on the facility, the Rebels were forced to evacuate. The attack was witnessed by a Habassan ship and the Habassa agreed to help with the evacuation by sending the corvette Habatok 2 to assist. Farlander was sent as part of a four ship group of X-wings to cover the evacuation, fending off an attack by the Star Destroyer Relentless until assembly area's crew, and all B-wings, escaped to hyperspace. The Rebels soon began to deploy the new B-wings to the Alliance Fleet, and Farlander worked with Luke Skywalker to get the new fighters operational, starting by replacing the aging Y-wings of Blue Squadron aboard the Mon Calamari Star Cruiser Maria, and later helping to ensure their safe delivery to the cruiser Cathleen.[18]

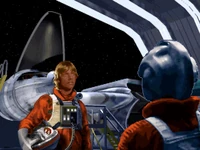
Keyan Farlander and Luke Skywalker discuss the B-wing project.
Following simulator training on the B-wing, Farlander got to use the new bomber in combat for the first time in an attack on a TIE staging area near Yunkor IX. He was later one of four handpicked pilots for a mission to destroy an Imperial weapons research facility that was attempting to recreate the Ram's Head's shield technology. Since the base was lightly defended, the Rebels decided to test the tactical effectiveness of their four main starfighters. Farlander flew a B-wing in the mission, pairing with an A-wing, while a second pair consisted of an X-wing and a Y-wing.[18]
The Habassa had had little contact with the Empire and were initially skeptical to Rebel claims. Nevertheless, the Alliance hoped to convince them to join the Rebellion. When Alliance Intelligence learned that a number of Habassan prisoners were being transported by the Empire for use as slave laborers, the Rebels realized that this was their chance to make the Habassan leaders see the threat posed by the Empire and planned a rescue. Farlander participated in a raid on the Imperial convoy transporting the prisoners as it awaited the frigate Mayhem near Cificap VIII and later took part in a mission to rescue a Habassan convoy from Imperial attack. The Alliance's intervention convinced the Habassan leaders to join the Alliance and a formal declaration was arranged aboard the Independence. The Habassa were impressed by Red Squadron's performance in previous operations and requested that the squadron provide cover for the meeting. Farlander was one of the pilots selected and flew an A-wing to rendezvous with the Habassan transport Bardictol, escorting it to the Independence before helping to defeat an Imperial attack by the frigates Riptide and Havok. After joining the Alliance, the Habassa made a delivery of foodstuffs to Rebel forces and Farlander helped to oversee the transfer. Later, when a Habassan convoy came under attack in the Pii system, Farlander was once again sent to assist, his group of four B-wings saving the convoy from a superior number of assault gunboats.[18]
The Alliance soon discovered that the Relentless was coordinating the Empire's efforts to locate the Alliance Fleet. To aid in its efforts, the Empire was distributing probes throughout the sector out of a cargo transfer area near Bofa II. The Rebels devised a plan to disguise their movements by capturing Imperial probes and modifying them to submit false reports. Farlander participated in the operation, flying a B-wing to escort Storm Unit during the capture of the probe-carrying freighter Libom. In order for the modified probes to be effective, the Rebels also had to neutralize the squadrons of corvettes and assault gunboats conducting patrols of nearby systems. To this end, Farlander flew one of three B-wings involved in assaults on recon bases in the Farfeld and Feenicks systems. Despite several skirmishes with the Relentless's task force, the Alliance was still uncertain of its size and composition. In order to ascertain this, Farlander participated in a raid on the Imperial frigate Mayhem designed to capture personnel with knowledge of the Imperial forces. Interrogation of the captured officers revealed that Rebel attacks had reduced the task force's frigates to a single ship—the Juvaini. Farlander's A-wing provided escort for Blue Squadron's B-wings as they led an assault that destroyed the frigate.[18]

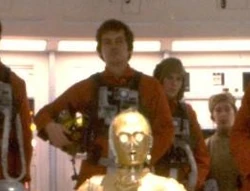
Farlander attends a briefing before the Battle of Endor.
The Habassa provided the Rebels with data on a number of planets and moons suitable for building a new main base. However, before establishing a base, the Rebels needed to shake off their Imperial pursuers. They therefore launched a series of operations designed to culminate in the destruction of the Relentless. The first stage was to eliminate a new series of probes undergoing calibration tests. Farlander then participated in an attack on a convoy delivering replacement starfighters to the Relentless, leaving the ship as vulnerable as possible. Finally, Farlander flew a B-wing in an assault on the Relentless itself. Entering the area first, Farlander and his wingmate were charged with eliminating the Star Destroyer's shield generators prior to the arrival of Blue Squadron's main assault force. The mission was a success, severely reducing the Empire's ability to track Rebel movements.[18]
The Habassan information led the Rebels to establish Echo Base on the remote ice world of Hoth. In order to ensure a safe flight to the new base, the Rebels conducted simultaneous attacks on all remaining Imperial probes in the sector. Farlander flew a lone B-wing against one such probe. Although most of the Alliance Fleet was able to make the journey to Hoth without incident, Farlander was again called into action to rescue the cruisers Cathleen, Yali and Maria from Imperial attack, helping to destroy an Imperial strike force consisting of several frigates in the process. For his efforts, Farlander was awarded with the Talons of Hoth.[18] In 3 ABY,[14] Imperial forces under the command of Darth Vader located the Rebel base on Hoth. The Imperials launched a major assault[20] but Farlander's Force-sensitivity helped him to survive the subsequent evacuation.[6]
The Battle of Endor[]
In 4 ABY,[14] the Alliance learned that the Empire was constructing a second Death Star in orbit of the forest moon of Endor and that Emperor Palpatine would be personally overseeing the final stages of construction.[21] Farlander attended a briefing aboard the Mon Calamari Star Cruiser Home One,[22] during which Mon Mothma, Admiral Ackbar and General Madine outlined a plan to attack the battlestation before it became operational.[21] Farlander flew a B-wing under the call sign Blue Nine[23][4] during the Battle of Endor,[22] engaging enemy fighters[2] while Wedge Antilles and Lando Calrissian destroyed the battlestation.[21]
New Jedi Order[]
- "I hope that we may once more operate together against our common enemy. I will cooperate with you to the utmost of my power, and if the Hapes Cluster is again attacked, I hope you will feel free to call for my assistance. But I can't speak for my superiors, and I may be superseded at any time."
- ―General Farlander to Queen Mother Tenel Ka Djo

Farlander boards an X-wing.
After the death of the Emperor at Endor,[21] the Rebel Alliance established a New Republic and reclaimed much of the territory formerly held by the Empire.[14] Luke Skywalker became a Jedi Master and established a New Jedi Order.[6] Recognizing Farlander's skills, Skywalker tested his Force potential. The results of the test were positive[8] and, despite his previous poor experience with the Force,[3] Farlander accepted Skywalker's invitation to return to Yavin 4 to undergo training at the Jedi Praxeum. After years of training, he became a Jedi Knight himself,[8] and continued to assist Skywalker in training others, often working as a Jedi piloting instructor.[6]
In 25 ABY, the extra-galactic Yuuzhan Vong began an invasion of the New Republic. The war soon turned against the New Republic and the Yuuzhan Vong won a string of victories, culminating in the capture of the New Republic capital world of Coruscant in 27 ABY.[14] Farlander served in the New Republic Defense Force during the war and was stationed aboard the Bothan Assault Cruiser Ralroost, the flagship of the Bothan Admiral Traest Kre'fey, following the fall of Coruscant.[8]
Second Battle of Obroa-skai[]
- "One capital ship lost, another disabled. Nearly a hundred starfighters lost, with only forty percent of the crews rescued—all in an unauthorized action to chase an enemy Supreme Commander who wasn't even there, and following an operational plan devised by a junior lieutenant."
"Yes, sir."
"And a stunning victory. Seven enemy capital ships destroyed, a pair of transports holding thousands of warriors, and a Supreme Commander killed along with his flagship. My warmest congratulations to the both of you. I wish my other subordinates demonstrated this kind of initiative." - ―Traest Kre'fey and Keyan Farlander, on the victory at Obroa-skai
By early 28 ABY,[14] Farlander held the rank of general and was in command of the MC80B Star Cruiser Mon Adapyne, under the immediate command of Kre'fey. Following the death of New Republic Chief of State Borsk Fey'lya during the fall of Coruscant, Admiral Kre'fey was recalled to Bothawui for the official period of mourning, leaving Farlander to act without instructions from his superiors. When Farlander learned through New Republic Intelligence that the flagship of Yuuzhan Vong Supreme Overlord Shimrra Jamaane would be passing through the Obroa system, the general decided to enact a plan devised by Jedi Knight Jaina Solo in the hopes of destroying Shimrra's ship and ending the war.[5]
Farlander commanded a task force of two MC80B Star Cruisers, four Corellian gunships, three Republic-class cruisers, a Lancer-class frigate and several squadrons of starfighters, waiting just four light-hours away from Obroa-skai for a signal from Major Solo, commanding the captured Yuuzhan Vong frigate Trickster to inform them that Shimrra's fleet had arrived. A Hapan fleet under Queen Mother Tenel Ka were to wait to enter the battle until either victory was assured or reinforcements were needed to cover a retreat.[5]
The Trickster entered the Obroa system first, masquerading as a damaged Yuuzhan Vong vessel. Upon receiving the signal from Solo, Farlander's fleet made the short jump to Obroa-skai, emerging behind the Trickster as if in pursuit of the ship. The Yuuzhan Vong vessels moved to engage the newcomers and to protect their damaged ship, allowing Solo to maneuver close to the enemy flagship. Key to the battle plan were the yammosk jammers that could interfere with the yammosks used by the Yuuzhan Vong to coordinate their forces. With the jammer deployed, Farlander attempted to take his forces through the enemy lines, but the Yuuzhan Vong countered his maneuvers. Just as it appeared that the jammer had been unsuccessful, Solo realized that the enemy were using two yammosks, one aboard the flagship and one on Obroa-skai. Quickly deploying a second jammer, the New Republic forces began to take control of the battle while the Trickster finished moving into position. On Farlander's command, Solo opened fire on the Yuuzhan Vong flagship. As the defenders turned back to attack the Trickster, Farlander called in the Hapan fleet. Caught between the New Republic and Hapan forces, the remaining Yuuzhan Vong forces were quickly destroyed.[5]
Only after the conclusion of the battle did Farlander learn from New Republic Intelligence that the Yuuzhan Vong fleet had, in fact, been under the command of Supreme Commander Komm Karsh. After attending to damage and casualties, Farlander moved his forces to Kashyyyk from where they could respond to threats against both the Hapes Consortium and the Mid Rim. When Kre'fey returned from Bothawui, he debriefed Farlander and Solo aboard the Ralroost. The admiral was impressed by their initiative, as well as the victory and recommended them both for commendations.[5] While based at Kashyyyk, Farlander participated in the planning of the raid on Ylesia, though he was not involved in the battle itself.[24]
Battle of Ebaq[]
Later that year, retired New Republic Supreme Commander Admiral Ackbar formulated a plan to lure the Yuuzhan Vong Warmaster, Tsavong Lah, into a trap. The Yuuzhan Vong were led to believe that Chief of State Cal Omas had taken refuge at Ebaq 9 in the Deep Core, under the protection of several Jedi. As anticipated, the Yuuzhan Vong saw this as an opportunity to kill both the Chief of State and his Jedi guardians; Lah assembled a fleet, comprising five battle groups and prepared for a major assault. While Kre'fey led the majority of his forces in a series of diversionary raids against the enemy, Farlander was given command of a squadron of forty capital ships and sent straight to Ebaq 9 to begin preparations.[5]


Keyan Farlander
Upon exiting hyperspace, Lah ordered Yun-Yammka group to engage Farlander's force directly, with Yun-Txiin and Yun-Q'aah groups moving to flank the New Republic ships and the remaining two groups waiting in reserve. Vastly outnumbered, Farlander appeared to move cautiously at first but, as he approached Yun-Yammka, he ordered a change of formation from an extended line into a compact, pointed blade and opened fire at Yun-Yammka's extended line. The tactic worked, the concentrated fire leaving eight of the largest Yuuzhan Vong ships disabled or dead. Farlander then swung his squadron around to punch through the enemy battle group again before the flanking battle groups could concentrate against him.[5]
The Yuuzhan Vong adjusted their tactics in response to Farlander's maneuver and the New Republic forces seemed about to be overwhelmed by superior numbers when Admiral Kre'fey's forces entered the system. Ackbar's plan was to force Lah to commit his forces before springing the full trap. Consequently Kre'fey's fleet gave the impression of escorting a supply convoy which promptly returned to hyperspace. The new arrivals forced a change of strategy from Lah, who ordered Yun-Txiin to disengage from Farlander's squadron and move to engage Kre'fey along with one of his reserve groups. With a sudden Solo Slingshot, Farlander was able to disengage his forces and approach Yun-Txiin from behind, trapping them between the two Republic squadrons and inflicting heavy damage on the enemy.[5]
In order to prevent Farlander an Kre'fey being overwhelmed, they were soon reinforced by a Smugglers' Alliance fleet commanded by Han Solo. Lah, assuming that the small, heterogeneous fleet had been summoned by a distress call, dispatched Yun-Q'aah group to engage. Meanwhile, a small Republic force positioned mines along the Yuuzhan Vong's escape vector, placing an interdiction field to pull them out of hyperspace into the mines when they tried to flee. Once this was complete, Kre'fey called for the main New Republic Fleet, under the command of General Garm Bel Iblis. Realizing that the battle was lost, Lah ordered the majority of his fleet to retreat while leading his own battle group in a last ditch attack on Ebaq 9 itself, in the hopes of killing as many Jedi as possible.[5]
Farlander, together with the other commanding officers turned their forces towards Ebaq 9 in pursuit, wiping out the remainder of Yun-Yuuzhan. The ten thousand Yuuzhan Vong troops who had landed on the moon, including Tsavong Lah, were killed due to the actions of the Jedi Vergere and Jaina Solo, while many of the fleeing Yuuzhan Vong ships were destroyed by the Republic mine field.[5] The battle was a major victory for the New Republic and a turning point in the war.[14]
Road to Coruscant[]
After the victory at Ebaq 9, Chief of State Omas restructured the New Republic into the Galactic Federation of Free Alliances.[14] Working with its allies, including the Imperial Remnant and the Chiss Ascendancy, the Galactic Alliance won a string of victories that convinced Farlander and many other senior commanders that the war would turn into a simple mopping-up operation. However, the Yuuzhan Vong found ways to counter the tactics used by the Alliance and the war dragged on for another year.[7]
In 29 ABY, the Alliance learned that the Yuuzhan Vong were planning a massive assault on its provisional capital of Mon Calamari and Farlander was one of several high-ranking officers called to a meeting on Admiral Kre'fey's flagship. The Alliance commanders decided to take advantage of the situation by committing only half of their fleet to the defense of Mon Calamari, while moving the remainder to a staging area near Contruum to prepare for their own strike to retake the former Republic capital, Coruscant. Farlander was assigned to this latter group. When Warmaster Nas Choka engaged Alliance forces near Mon Calamari, the Alliance commanders were surprised by the sudden withdrawal of part of the Yuuzhan Vong fleet along a vector that would lead back to Coruscant. Concerned that they would be caught between Coruscant's defenses and the returning flotilla, Farlander, along with Generals Airen Cracken and Eldo Davip, contacted Admiral Kre'fey, who was leading the defense of Mon Calamari. Kre'fey instructed them to delay the attack until they could determine what the enemy had planned.[7]
The Yuuzhan Vong ultimately withdrew from Mon Calamari and the Alliance regrouped at Contruum. From there, Farlander was sent to Corulag in an attempt to liberate the planet and secure a key world close to Coruscant. Upon arriving, the Mon Adapyne and its starfighters moved to engage the Yuuzhan Vong defenders, assisted by General Tycho Celchu aboard the Elegos A'Kla. The Yuuzhan Vong ships took up defensive positions around their yammosk and the two generals had the enemy boxed in by the time General Bel Iblis moved in with the Harbinger, catching the Yuuzhan Vong in a crossfire between the Galactic Alliance ships. Once the battle was over, Farlander, Celchu and General Wedge Antilles were instructed to proceed straight to Muscave in the Coruscant system to rendezvous with the Galactic Alliance Second Fleet.[7]
Recapture of Coruscant[]
In response to the arrival of the living world Zonama Sekot in the Coruscant system, the Yuuzhan Vong had amassed a large fleet in the system. The Second Fleet positioned themselves between Coruscant and Zonama Sekot, luring Nas Choka's fleet away from Coruscant and allowing the Alliance to land forces on the former capital. The fighting near Muscave soon deteriorated into a brawl, with heavy losses on both sides, but the Second Fleet held out until Admiral Kre'fey arrived with forty ships from the First Fleet to relieve them.[7]
Despite the Second Fleet's efforts, Yuuzhan Vong forces had managed to reach Zonama Sekot and had engaged the Jedi, Hapan and Smugglers' Alliance ships defending the world. As the fighting near Zonama Sekot intensified, three Yuuzhan Vong battle groups moved from Muscave to strengthen their forces. Seeing the threat, Farlander and Antilles decided to withdraw elements of the Second Fleet from Muscave in pursuit, acting without the approval of either Kre'fey or Supreme Commander Sien Sovv.[7]
As the battle raged throughout the system, Luke Skywalker led a mission to the surface of Coruscant, confronting and killing Supreme Overlord Shimrra. As news of Shimmra's death spread, Nas Choka realized that the battle was lost and the Yuuzhan Vong surrendered, bringing the war to an end. In the aftermath of the battle, Farlander and Bel Iblis were appointed as Coruscant's occupation commanders by Admiral Sovv and Farlander was among the senior Alliance figures who attended the formal surrender of Nas Choka aboard the Ralroost. Continuing his joint service to the Galactic Alliance and the Jedi, Farlander attended a conclave of the Jedi called by Luke Skywalker on Zonama Sekot a few weeks after the liberation of Coruscant to discuss the future of their order.[7]
Personality and traits[]

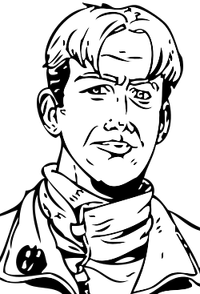
Keyan Farlander
As a young man, Farlander was a typical resident of a quiet Outer Rim world. He had little interest in galactic politics, considering himself to be a loyal subject of the Empire. All that changed with the death of his parents at the hands of the Empire. His desire for revenge drove him to first the Agamar Resistance and then the Rebel Alliance.[3]
His natural piloting abilities enabled him to quickly enter combat but as he lost more and more friends to the war he lost the youthful enthusiasm and quickly grew in maturity. Through this he relied on his friends, developing a good relationship with his wingmates and getting involved in practical jokes, particularly after Puck Naeco joined the squadron. When he was suspended after the deaths of Tan'tro and Ahsmar, it was the support of Hamo Blastwell and Sam Raider that helped him through.[3]
However, eventually the loss of so many friends caught up with him. The death of Breth Gart left Farlander feeling alone and unsure of himself. It was this that ultimately led him towards the dark side, his desire to prevent more deaths fueling his desire to hurt the Empire. Those who were not up to the fight were unworthy of him. He overcame his internal conflict, with help from Blastwell, but many of his friendships had been damaged.[3]
By the start of the Yuuzhan Vong War, Farlander had developed into a talented military strategist, serving as one of the leading commanders for the New Republic during the war. At the Battle of Ebaq, where his job was essentially to keep the Yuuzhan Vong occupied until the rest of the fleet arrived to spring the trap, he not only achieved this but managed to destroy several Yuuzhan Vong ships in the process. He was also capable of improvising and acting without orders, as demonstrated by his decision to go after Supreme Commander Shimrra's forces at Obroa-skai[5] and the Second Fleet's withdrawal from Muscave to reinforce Zonama Sekot without authorization from his and General Antilles's superiors.[7]
While taking his duties to the Republic seriously, Farlander did not lose sight of his responsibility to those who served under him, showing concern for his subordinates and a willingness to bend the rules on occasions, such as granting Jagged Fel permission to visit the off-limits Zonama Sekot to see Jaina Solo in the aftermath of the Liberation of Coruscant.[7]
Powers and abilities[]
- "The Force isn't as I described. You've got to understand this. It's not about powers. It's about knowledge. It's not about controlling. It's about trusting."
- ―Keyan Farlander
Before the Battle of Endor
Farlander's Force-sensitivity first manifested itself in his subconscious while he slept. Taking the form of a dream in which he was in a large, glowing sphere, Farlander described hearing two opposite voices and not knowing which he should listen to. As the dreams started to disrupt his sleep, affecting his concentration, Commander Lagrane suggested he seek medical advice. It was while consulting with a doctor that Farlander experienced the Force for the first time, using the Force to persuade the doctor that there was nothing wrong with him.[3]
After the death of Breth Gart, Farlander started to find one of the voices in his dream helped ease the pain. It assured him that he could seize control of his life, and use his power to help others. It was this that led him on a path toward the dark side.[3]
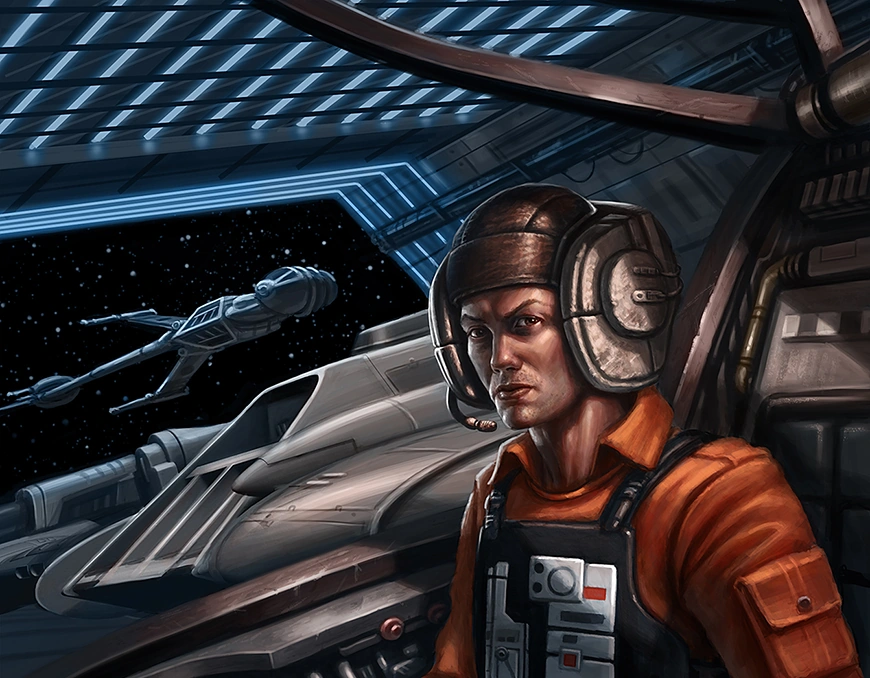

Farlander in the cockpit of a B-wing starfighter
Despite his lack of formal training in the use of the Force, Farlander quickly developed an ability to control the minds of others, though he found it difficult to control at times. His behavior caused Lagrane to order him for a psychiatric evaluation by one of the ship's medical droids, the results of which almost led to him being grounded. Only Farlander's use of the mind trick on Commanders Lagrane and S'man convinced them to let him remain active. Farlander even found that he could almost control the mind of enemy pilots, forcing them into his sights.[3]
Farlander also developed other abilities, using Force choke on Ernek Marskan and Force Push on Sam Raider, before turning his back on the dark side and deciding not to pursue his abilities further.[3] He did eventually accept formal training at Luke Skywalker's Jedi Praxeum, ultimately becoming a Jedi Knight[8] and instructor in his own right.[6]
Behind the scenes[]


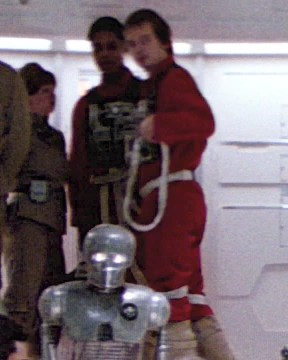
Keyan Farlander in a bacta tank in a non-canon cutscene
Keyan Farlander was created for the 1993 LucasArts video game Star Wars: X-Wing in which his first mission features as a training scenario.[11] The story of how Farlander came to join the Rebel Alliance and the events surrounding his first mission was told in The Farlander Papers, a novella by Rusel DeMaria which was included with limited edition early copies of the game.[1] DeMaria further expanded Farlander's story and established him as the game's player character in X-Wing: The Official Strategy Guide, released that same year.[3] Farlander can be seen briefly in cutscenes shown if the player's ship is destroyed. If Farlander ejects safely, he is either rescued and shown receiving bacta treatment or captured and tortured by Darth Vader. If the auto ejection system fails, a cutscene depicts Farlander's funeral. The after-action reports in X-Wing: The Official Strategy Guide, which describe how each mission plays out, confirm that none of these events occur.[3][11] Farlander makes an on-screen appearance in a cutscene in the B-Wing expansion pack for X-Wing (1994), although only the back of his head is shown and the actor who provided his voice is not credited.[18] There is an inconsistency in the character's rank between the B-Wing cut-scene and the story as told in X-Wing: The Official Strategy Guide. In the B-Wing cut-scene, Luke Skywalker refers to Farlander as a lieutenant, but X-Wing: The Official Strategy Guide established that Farlander was promoted to commander after the Battle of Yavin, before the events of B-Wing.[3][18]
Although Farlander was mentioned in reference books, including The Essential Guide to Planets and Moons and an entry in Star Wars Encyclopedia, both released in 1998,[9][25] the character did not appear again until the New Jedi Order, a series of novels which began in 2000. Farlander was mentioned in The New Jedi Order: Dark Tide I: Onslaught by Michael A. Stackpole and subsequently appeared in The New Jedi Order: Destiny's Way by Walter Jon Williams and The New Jedi Order: The Unifying Force by James Luceno, along with the short story The New Jedi Order: Ylesia, also by Walter John Williams.[5][7][24][26] Daniel Wallace's 2001 Star Wars Insider 57 article "Who's Who in the New Jedi Order" established that Farlander had become a Jedi by the time of the New Jedi Order series, having first been identified as Force-sensitive in The Farlander Papers.[1][6] However, when Walter Jon Williams wrote him into Destiny's Way, he was not aware Farlander was a Jedi and his characterization reflected this, with Farlander ignorant of how the Jedi meld worked.[5][27] In the downloadable e-book of Ylesia, Farlander is referred to as "general", a rank which he also holds in Destiny's Way and The Unifying Force.[5][7][24] When Ylesia was reprinted as a bonus included with Dark Nest I: The Joiner King, his rank was changed to "commodore."[24][28]
Farlander was later retconned into Star Wars: Episode IV A New Hope.[29] A New Hope culminates in the Battle of Yavin, in which Luke Skywalker destroys the Death Star.[13] In X-Wing, the Battle of Yavin comprises three missions; the first two are preliminary missions which take place while the Death Star plans are being analyzed and the third is the trench run itself. Although in X-Wing it seems like the player/Farlander destroys the Death Star,[11] X-Wing: The Official Strategy Guide established that Farlander was assigned a Y-wing and flew with Gold Squadron, while the player takes the role of Skywalker in the final mission.[3] Following the Battle of Yavin in A New Hope, a lone Y-wing can be seen fleeing the Death Star's destruction.[13] The "Star Wars Q&A" section in Star Wars Insider 63 (2002) identified Farlander as the pilot of this Y-wing, as did the Questions & Answers section on StarWars.com.[29][30] This was later repeated in the "Ask Lobot" feature in Star Wars Insider 125 in 2011.[22] In April 2014, Lucasfilm announced that existing Expanded Universe material was no longer considered part of Star Wars canon and that all future material would form part of a new continuity.[31] In the new canon, the identity of the Y-wing pilot was changed to Evaan Verlaine.[32][33]

Farlander on Home One
The character was also retconned into Star Wars: Episode VI Return of the Jedi when his name was given to a previously unidentified B-wing pilot attending the briefing prior to the Battle of Endor. The retcon was revealed in the "Ask Lobot" feature in Star Wars Insider 125 and Leland Chee later identified the specific B-wing pilot on Facebook.[22][34] Following the decision to identify the B-wing pilot as Farlander,[22] a Farlander action figure was included in a 2008 "Evolutions" three-pack of Rebel pilots as part of Hasbro's Star Wars: The Legacy Collection. Both the figure and box art portray him as a B-wing pilot during the Battle of Endor.[2] A minifigure representing a B-wing pilot flying the Battle of Endor in a 2013 LEGO set was later identified as Farlander in a display at the 2014 San Diego Comic-Con.[23][4]
An image of Keyan Farlander by Keith Carter appeared in the 1995 Topps Star Wars Galaxy Series 3 trading cards, released by Topps in 1995.[35] There is a clear discrepancy between his appearance in the trading card image and the later images of him found in The Essential Guide to Planets and Moons and Who's Who in the New Jedi Order which was discussed by Lucasfilm's Leland Chee in his blog on StarWars.com in 2007.[6][9][35][36] Farlander's entry in the 2008 reference book The Complete Star Wars Encyclopedia incorrectly names his ship during the Second Battle of Obroa-skai as the Adapyne instead of the Mon Adapyne as it appears in Destiny's Way.[5][8]

Farlander flying a B-wing
In the 2003 MMORPG Star Wars Galaxies: An Empire Divided, Keyan Farlander was added to the game as a non-player character (NPC) in Game Update 20. Imperial players who requested Tier 7 Duty Missions from certain space stations had a chance to battle an elite Rebel pilot during the mission's boss stage. One of these pilots could be Keyan Farlander. If the player defeated Farlander, the Rebel was not destroyed. Instead, a message was displayed to the player, indicating that they successfully defeated the pilot. The player then received a collection icon which added up to award a badge if they succeeded in destroying all ten of the elite Rebel pilots. However, elite Rebel pilots could also be found flying in various space battles, which took place in the Naboo, Tatoo, Corellian, Dantooine, and Karthakk systems. Because Farlander only appeared in the space portion of Star Wars Galaxies, originally added with the Jump to Lightspeed expansion pack, he could normally only be seen inside his respective T-65 X-wing starfighter. However, a comm display could appear during the battle, displaying Farlander's face. In addition, the collection icon depicted Farlander's physical appearance. Although players could choose not to participate in any of the battles or collections connected to Farlander, this article assumes 100% game completion.[17]
Appearances[]
Sources[]
Notes and references[]
- ↑ 1.00 1.01 1.02 1.03 1.04 1.05 1.06 1.07 1.08 1.09 1.10 1.11 1.12 1.13 The Farlander Papers
- ↑ 2.0 2.1 2.2 2.3
 Star Wars: The Legacy Collection (Pack: Rebel Pilot Legacy II) (backup link)
- ↑ 3.00 3.01 3.02 3.03 3.04 3.05 3.06 3.07 3.08 3.09 3.10 3.11 3.12 3.13 3.14 3.15 3.16 3.17 3.18 3.19 3.20 3.21 3.22 3.23 3.24 3.25 3.26 3.27 3.28 3.29 3.30 3.31 3.32 3.33 3.34 3.35 3.36 3.37 3.38 3.39 3.40 3.41 3.42 3.43 3.44 3.45 3.46 3.47 3.48 3.49 3.50 3.51 3.52 3.53 3.54 3.55 X-Wing Collector's CD-ROM: The Official Strategy Guide
- ↑ 4.0 4.1 4.2 SDCC - The LEGO Star Wars Minifigure Gallery at FBTB.net on www.fbtb.net (archived from the original on September 29, 2020)
- ↑ 5.00 5.01 5.02 5.03 5.04 5.05 5.06 5.07 5.08 5.09 5.10 5.11 5.12 5.13 5.14 5.15 5.16 The New Jedi Order: Destiny's Way
- ↑ 6.0 6.1 6.2 6.3 6.4 6.5 6.6 6.7
 "Who's Who in the New Jedi Order" — Star Wars Insider 57
- ↑ 7.00 7.01 7.02 7.03 7.04 7.05 7.06 7.07 7.08 7.09 7.10 The New Jedi Order: The Unifying Force
- ↑ 8.0 8.1 8.2 8.3 8.4 8.5 The Complete Star Wars Encyclopedia, Vol. I, p. 255 ("Farlander, Keyan")
- ↑ 9.0 9.1 9.2 The Essential Guide to Planets and Moons
- ↑ 10.0 10.1 10.2 10.3 10.4 10.5 X-Wing: The Official Strategy Guide begins after the X-wing starfighter entered service with the Alliance to Restore the Republic, which The Essential Guide to Warfare places in 1 BBY. X-Wing: The Official Strategy Guide establishes that the capture of Leia Organa occurs at the end of Star Wars: X-Wing's second tour of duty. Organa's capture takes place on 35:3:3 under the Great ReSynchronization dating system, placing it at the beginning of 0 BBY according to the following explanation. Events in X-Wing: The Official Strategy Guide before the end of the second tour of duty therefore take place in 1 BBY.
- ↑ 11.00 11.01 11.02 11.03 11.04 11.05 11.06 11.07 11.08 11.09 11.10 11.11 11.12 11.13 11.14 11.15 11.16 11.17 11.18 11.19 11.20 Star Wars: X-Wing
- ↑ X-Wing: Rogue Squadron
- ↑ 13.0 13.1 13.2 Star Wars: Episode IV A New Hope
- ↑ 14.0 14.1 14.2 14.3 14.4 14.5 14.6 14.7 The New Essential Chronology
- ↑ 15.0 15.1 Star Wars Blueprints: Rebel Edition
- ↑ 16.0 16.1 16.2 16.3 16.4 Star Wars: X-Wing Tour of Duty: Imperial Pursuit
- ↑ 17.0 17.1 Star Wars Galaxies: An Empire Divided
- ↑ 18.0 18.1 18.2 18.3 18.4 18.5 18.6 18.7 18.8 Star Wars: X-Wing Tour of Duty: B-Wing
- ↑ The New Essential Guide to Vehicles and Vessels
- ↑ Star Wars: Episode V The Empire Strikes Back
- ↑ 21.0 21.1 21.2 21.3 Star Wars: Episode VI Return of the Jedi
- ↑ 22.0 22.1 22.2 22.3 22.4 "Ask Lobot" — Star Wars Insider 125
- ↑ 23.0 23.1 LEGO Classic Star Wars (Set: 75010 B-wing Starfighter & Planet Endor) (Retcon)
- ↑ 24.0 24.1 24.2 24.3 The New Jedi Order: Ylesia
- ↑ Star Wars Encyclopedia, p. 98 ("Farlander, Keyan")
- ↑ The New Jedi Order: Dark Tide I: Onslaught
- ↑ The Official Walter Jon Williams Discussion Thread on the Jedi Council Forums (Authors and Artists board; posted by Walterjon on Oct 22, 2002 at 5:36 PM; accessed January 26, 2013) (backup link)
- ↑ Dark Nest I: The Joiner King
- ↑ 29.0 29.1 "Star Wars Q&A" — Star Wars Insider 63
- ↑ Star Wars Questions & Answers on StarWars.com (content now obsolete; backup link)
- ↑ The Legendary Star Wars Expanded Universe Turns a New Page on StarWars.com (backup link)
- ↑ Princess Leia 1
- ↑ Star Wars: Galactic Atlas
- ↑ Leland Chee on Facebook: Fan photos from Keeper of the Holocron (August 4, 2011) (content obsolete and backup link not available)
- ↑ 35.0 35.1 1995 Topps Star Wars Galaxy Series 3 (Card: Keith Carter (L10)) (backup link)
- ↑ "Visual Discrepancies in the EU" — Keeper of the Holocron's Blog — Leland Chee's StarWars.com Blog (backup link)
External links[]
- Legacy Collection Rebel Pilot Legacy Series II on the Star Wars Merchandise Wiki
- Star Wars Questions & Answers on StarWars.com (content now obsolete; backup link)
- Yavin 4 Rebels: Guardians of the Hidden Fortress on StarWars.com (backup link)