- "Not my finest performance, but serviceable."
- ―Watcher One, on his deception
In 3643 BBY, during the Sith Lord Darth Angral's campaign of vengeance against the Galactic Republic for the death of his son, Tarnis, a battle occurred in one of the brilliant Doctor Nasan Godera's laboratories on the planet Taris. A young Jedi Knight attacked the Imperial soldiers occupying the facility in an effort to locate Godera and extract him from Taris, but an elaborate ploy by Watcher One of Imperial Intelligence allowed the Imperial operative to escape with Godera while the Knight battled the remaining Imperials. While Watcher One ferried Godera away to his base, his operatives tried to deceive the Jedi into believing that Godera was dead, but Godera's droid assistant RE-M0 proved otherwise. Their ruse exposed, the Imperials attacked the Jedi Knight, and, after the battle, Watcher One made a deal with the victorious Jedi to secure time to interrogate Godera for his scientific knowledge.
Prelude[]
- "Watcher One reprogrammed this facility's tracking relays. He traced Doctor Godera's encrypted bioscan to its present location."
- ―RE-M0
In 3643 BBY,[4] during the Cold War between the Sith Empire and the Galactic Republic, the Sith Lord Darth Angral declared a personal war on the Republic for the death of his son, Tarnis, at the hands of a young Jedi Knight. Seizing control of a number of Republic superweapons, Angral also dispatched Watcher One, an operative of Imperial Intelligence, to the planet Taris to capture Doctor Nasan Godera, a Republic scientist who had gone into exile there. When Watcher One learned that the same Jedi Knight who had killed Tarnis had arrived on the planet in search of Godera, he was forced to accelerate his efforts: using the equipment at one of Godera's laboratories, Watcher One tracked the doctor's bioscan to another lab in the region known as the Brell Sediment. Watcher One then destroyed the facility's computer to prevent the Knight from doing the same, and he left a group of Imperial soldiers behind as he departed for the Brell Sediment to capture Godera.[1]
The battle[]
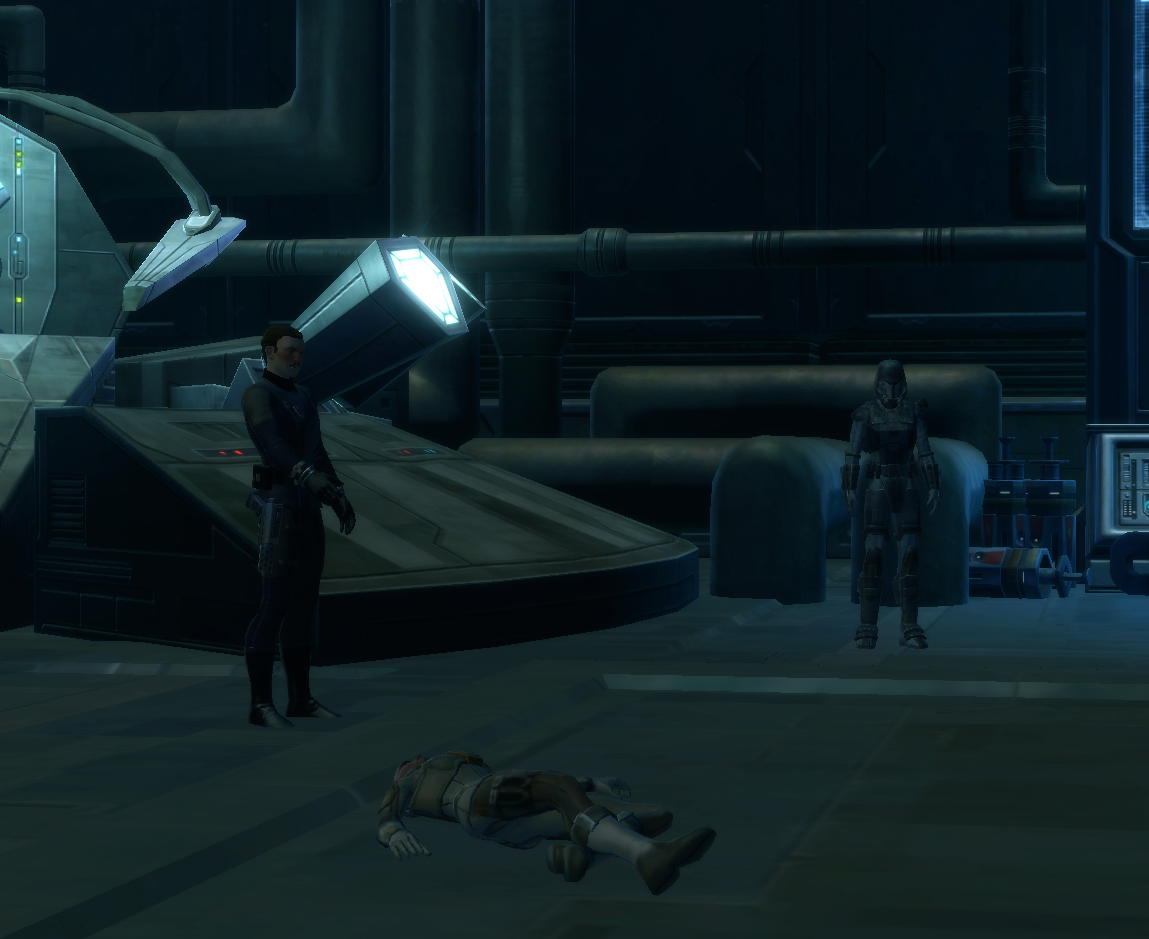
- "Stand down, Jedi. I'm afraid we both lose this contest. Doctor Godera killed himself rather than be captured. It's a tragic loss."
- ―"Watcher One"

"Watcher One" tries to barter with the Knight.
A contingent of troops under Watcher One's command attacked the laboratory in the Brell Sediment, securing the facility, and they captured Godera in the facility's main chamber and knocked him unconscious. At the same time, the Jedi—with the help of Godera's droid assistant RE-M0—repaired the first lab's computer and tracking relays, allowing the Knight and a companion to locate Godera at the Brell Sediment lab. Watcher One was preparing to extract the scientist and return to his base when he was alerted to the impending arrival of the Jedi, so he set up a trap: an Imperial Shadow Captain, donning a holoprojector to appear as Watcher One, and a squad of stealth Shadow Commandos waited in the main lab with a corpse that was disguised as Godera. Captain Gerrard's forces secured the rest of the facility while Watcher One donned a holoprojector that disguised him as a Rodian.[3]
Watcher One and an unconscious Godera met the Knight at the facility's entrance, where the operative—posing as "Kulaa"—claimed that he and the other man were two of Godera's assistants. Stating that his fellow assistant had been injured in the Imperial attack on the facility, Watcher One deceived the Knight into letting him leave with the unconscious scientist. The Knight and a companion, meanwhile, headed deeper into the facility and fought through the Imperial soldiers within to reach the main chamber. However, the Knight was dismayed to find "Doctor Godera" lying dead at the feet of two Imperial commandos and "Watcher One," who claimed that the scientist had killed himself rather than face interrogation.[3]
"Watcher One" offered a cessation of hostilities and promised to leave Taris, but his conversation with the Knight was interrupted by the arrival of RE-M0: The droid had run a second trace on Godera's location not long after the Knight had left for the Brell Sediment lab, and his trace had confirmed that Godera was still alive and elsewhere. The ruse exposed, the Shadow Captain cursed and shot RE-M0 with his blaster pistol before he deactivated the holoprojector, and his commandos opened fire on the Knight. In the resultant fight, the Jedi and the Knight's companion emerged victorious, and Watcher One—who had reached his base in the ruins of an old transport station—contacted the Jedi via the facility's communications terminal.[3]
Aftermath[]

The real Watcher One removes his disguise.
- "Give me time to administer truth serum to Doctor Godera. Once he reveals his secrets, he's yours. We'll both have what we want."
- ―Watcher One
Explaining the deception, the operative forestalled any response by the Knight by informing the Jedi of a more pressing threat: a Sith assassin was on her way to eliminate a nearby Republic colony. In exchange for time to interrogate the scientist, Watcher One gave the Knight the location of the colony, and the Jedi was able to stop the assassin from killing the colonists.[2] The Knight then tracked down Watcher One and rescued Godera, but the operative was able to interrogate the scientist on his knowledge of superweapon technology and send his intelligence to Darth Angral.[6]
Behind the scenes[]
The battle in the Brell Sediment facility first appeared in the Jedi Knight-class mission "Catching Up With Watcher One" in Star Wars: The Old Republic, a video game released by BioWare in 2011. The mission ends with Watcher One making a deal for time with the player,[3] which depends on the player's alignment. Light-side players are told about the assassin, while dark-side players are informed about a deal for Jedi artifacts that is being conducted between a Sith and pirates nearby. Players can also ignore Watcher One's offer for opposite alignment points,[2] but as the Jedi Knight is a light-side player, the Knight is assumed to have rescued the colonists.[7]
Appearances[]
- Star Wars: The Old Republic (First appearance)
Notes and references[]
- ↑ 1.0 1.1
 Star Wars: The Old Republic — Jedi Knight Mission: "The Architect of Annihilation" on Taris
- ↑ 2.0 2.1 2.2 Star Wars: The Old Republic — Jedi Knight Mission: "A More Immediate Concern" on Taris
- ↑ 3.00 3.01 3.02 3.03 3.04 3.05 3.06 3.07 3.08 3.09 3.10 3.11 3.12 3.13 3.14 3.15 3.16 3.17 3.18 3.19 3.20 3.21 3.22 3.23 3.24
 Star Wars: The Old Republic — Jedi Knight Mission: "Catching Up With Watcher One" on Taris
- ↑ 4.0 4.1
STAR WARS: The Old Republic - Question ! :) - Page 3 on The Old Republic's official website (backup link) places Star Wars: The Old Republic about ten to twelve years after the signing of the Treaty of Coruscant, which is dated to 3653 BBY by Star Wars: The Old Republic Encyclopedia. The Old Republic—The Lost Suns 2 takes place ten years after the treaty, one week after the mission to Nar Shaddaa, and around the time of the SpecForce Incident. Since the mission and the incident are respectively part of Act I of the Jedi Knight and Republic Trooper's storylines, and the Trooper's Act I occurs concurrent to Act I of the Smuggler storyline, the general events of the Prologue and Act I for all classes can be assumed to occur in 3643 BBY.
- ↑ Star Wars: The Old Republic — Jedi Knight Mission: "Catching Up With Watcher ONe" on Taris can be completed with either Kira Carsen or T7-O1 as the active companion.
- ↑ Star Wars: The Old Republic — Jedi Knight Mission: "The Rescue" on Taris
- ↑ Republic-class characters in Star Wars: The Old Republic are assumed to follow the light-side alignment.