| | |
- "According to Imperial records, Master Rahm Kota was a respected general in the Clone Wars."
- ―PROXY
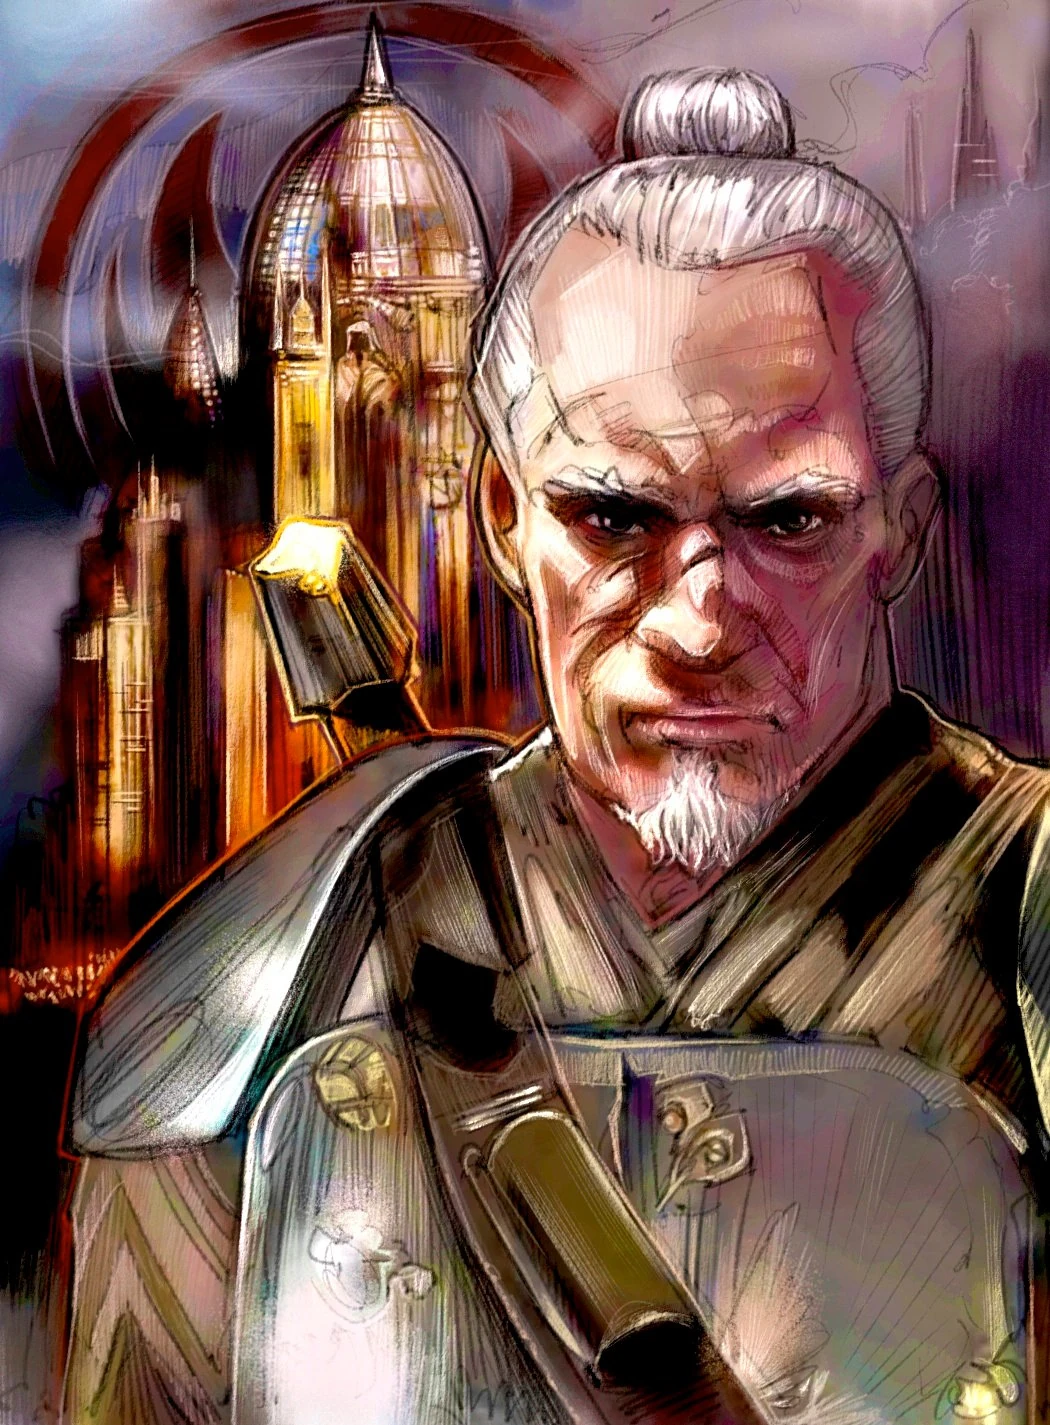
Rahm Kota was a Human male who served as a Jedi Master and General during the Clone Wars. Born on a war-torn world, Kota fought in the trenches during the planet's internal conflicts from the age of ten. At the age of eighteen, Kota met the Jedi Mace Windu, who had been dispatched to the planet to end the conflict peacefully. Discovering Kota's Force-sensitivity, Windu took Kota back to the Jedi Temple on Coruscant to be trained as a Jedi. Despite being well over the traditional age of acceptance, Kota was schooled in the Force by Master Yoda. He took Falon Grey as his Padawan sometime before the Clone Wars, training him to Knighthood. During the Clone Wars, Kota was made a general in the Grand Army of the Republic. He did not believe that clone troopers were fit for battle, however, and refused to lead them. Instead, he commanded his own militia, comprised of volunteers. In 19 BBY, when Order 66 was issued—an emergency contingency that ordered the clone forces to terminate their Jedi commanders, who had been deemed a threat to the Republic—Kota survived the slaughter of his fellow Jedi since there were no clone troopers serving with him.
Going into hiding with his militia, Kota allied himself with Alderaanian Senator Bail Organa. Kota began striking at Imperial targets, taking interest in the Dark Lord of the Sith Darth Vader and hoping to draw him into a confrontation. This culminated in a mission to seize a TIE Fighter Construction Facility in orbit of Nar Shaddaa. Kota believed that he could draw Vader out with the strike but was instead confronted by the Dark Lord's secret apprentice. The two dueled in the facility's command center; Kota was beaten and blinded but managed to escape the confrontation. With his confidence shaken—and his connection to the Force seemingly gone—Kota turned to drinking and went into hiding in Cloud City on Bespin. He was discovered by the apprentice he had dueled on Nar Shaddaa, who wanted his help in fighting the Empire. The apprentice—who had been tasked by Vader to create a rebellion with which to oppose Emperor Palpatine—wanted Kota to instruct him in the Force. Kota suspected that the young man before him was the same man who had blinded him, but—through the Force—Kota sensed a bright spot within him that gave him hope that the apprentice could be turned away from the dark side. Kota agreed to help the apprentice and assisted him in making contact with Senator Organa, Senator Mon Mothma of Chandrila, and Senator Garm Bel Iblis of Corellia, through a series of missions. Together, they pledged to form the Alliance to Restore the Republic to fight against the Empire. During this time, Kota recovered much of his former self and restored his connection to the Force.
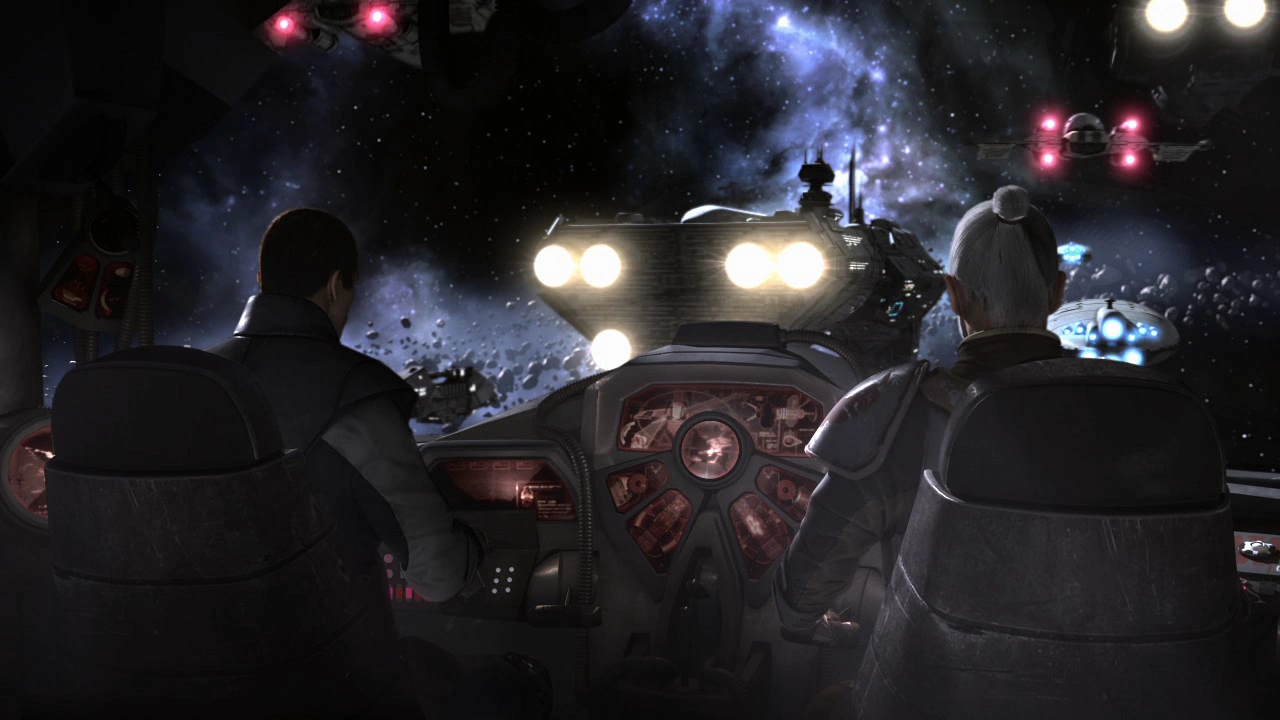
During the subsequent meeting of the Corellian Treaty to formally create the Rebellion against the Empire, Vader attacked the assemblage with Imperial forces. The apprentice—who had come to renounce his ties to Vader and the Empire—had attempted to keep the meeting secret but had been discovered. Kota was captured, along with the gathered senators, and taken to the Death Star battlestation under construction in the Horuz system. Kota was to be interrogated and executed by the Emperor himself. The apprentice—who had been left for dead on Corellia—infiltrated the superweapon and fought his way to the prisoners. After engaging and beating Vader in a duel, the apprentice rescued Kota from a Force lightning attack by the Emperor. While the apprentice held off the Emperor, Kota and the senators escaped the Death Star aboard the apprentice's ship, the Rogue Shadow. Regrouping on Kashyyyk, Kota joined in the Declaration of Rebellion, an official proclamation of the group's intent to oppose the Empire's rule.
Over the next year, Kota served as a general in the new Alliance, using his own squad of commandos to assault Imperial targets. Captured during a mission to Cato Neimoidia, he was forced to fight in gladiatorial combat for the amusement of the world's ruler, Baron Merillion Tarko. Kota was eventually rescued by Starkiller, a clone of the apprentice. Although Starkiller was more interested in finding Juno Eclipse—who had been captured by the bounty hunter Boba Fett and taken to Vader—than in fighting the Empire, he provided Kota with coordinates and schematics for the cloning facilities located at Timira City on the planet Kamino. Kota led the Alliance Fleet to the water world, engaging an Imperial fleet in battle. With Starkiller's aid, the Alliance claimed victory at Kamino, rescuing Eclipse and capturing Vader. Kota was later responsible for the recruitment of X2, a Force-sensitive clone of his former Padawan, Falon Grey, into the Rebel Alliance.
Biography[]
Early life[]
Born and raised on a war-ravaged planet, Rahm Kota fought in the brutal trench warfare that devastated his homeworld from before the age of ten. Eventually, the Jedi Mace Windu was dispatched to the planet to negotiate a peaceful resolution to the conflict. Windu met and befriended Kota, now aged eighteen, and found that he was strong in the Force. After completing his mission, Windu sought to have Kota return with him to the Jedi Temple on Coruscant to train in the Jedi arts. Despite the fact that he was well past the traditional age of acceptance for new apprentices, Kota was inducted into the Jedi Order and trained under Jedi Master Yoda himself. During his training, his gruff and forthright personality earned him few friends. After attaining the rank of Jedi Knight, Kota often questioned the Jedi High Council's decisions and voiced his opinion that the Order should adopt a more forceful approach when dealing with criminals or negotiating treaties. Yet, no one doubted Kota's commitment and loyalty to both the Republic and the Jedi, or his courage, as he always chose the most dangerous and hazardous assignments.[1]
At some point, Kota took Falon Grey as his Padawan and trained him as a Jedi. Grey was badly injured sometime prior to 22 BBY, and Kota landed on the planet Kamino for medical assistance. The native Kaminoans healed Grey but took a genetic sample from him[6] without his knowledge or consent.[7] Unbeknownst to Kota and Grey, the Kaminoans—who were renowned cloners—used the sample to create two clones, designated X1 and X2.[4]
The Clone Wars[]
- "Master Kota was a military genius, but felt the clone soldiers were unfit for battle. Instead, he relied on his own militia."
- ―PROXY

Rahm Kota
By the beginning of the Clone Wars in 22 BBY, Kota was a Jedi Master and was appointed as a Jedi General in the Grand Army of the Republic alongside his contemporaries. However, Kota believed that the clone troopers produced by the Kaminoans were not fit to be soldiers and refused to lead them into combat.[8] He did not believe that clones could be as creative or as intelligent in the field as non-clones.[1] Instead, he organized and trained his own militia, comprising dedicated beings from across the galaxy,[8] which included members of local planetary militias, mercenary groups, and even Separatist prisoners-of-war.[1] Kota and his militia served with distinction, fighting as both a regular unit and a special operations force[8] on several fronts, including several successful offensives in the Outer Rim Territories.[1] Kota began to grow weary of watching his troopers and friends killed in the war and firmly believed that the conflict would eventually see the destruction of both the Jedi and the Republic and the rise of Supreme Chancellor Palpatine.[8]
Three years after the start of the war, Palpatine issued Order 66 to all clone units, which stated that the Jedi had become a threat to the Republic and thus had to be eliminated. Palpatine was actually a Sith Lord operating under the name Darth Sidious, and the entire war was part of an elaborate plan to destroy the Jedi Order and have the Sith rule the galaxy. Palpatine named himself Emperor and reorganized the Republic into the Galactic Empire.[9] Kota's decision to lead his own troops spared him the fate that befell most of the Jedi commanders in the Grand Army by the simple fact that he had no clones under his command. A squad of Antarian Rangers serving with Kota learned of the order and immediately took him and his troops into hiding.[8] Stealing a Republic cruiser, Kota and his forces disappeared into the Outer Rim,[1] his fears having become reality.[8] Following his disappearance, Kota was officially listed as dead in Imperial records, although Lord Darth Vader, Palpatine's new Sith apprentice, was aware that he had survived.[2]
The Dark Times[]
Striking back at the Empire[]

Kota, with members of his militia
Kota fled to the Outer Rim Territories, where he decided to dedicate his life to opposing the new Galactic Empire. After Kota established a number of small bases, new recruits flocked to his banner as the Empire tightened its grip on the galaxy. Kota and his militia remained hidden, emerging only to strike at Imperial targets in well-executed and carefully planned raids.[8] Kota allied himself with Senator Bail Organa of Alderaan, who was fomenting rebellion within the halls of the Imperial Senate and secretly assisting fugitive Jedi who had escaped Order 66. Organa began feeding Kota data on Imperial targets, allowing the General to strike deep at the Empire's war machine. Through Organa, Kota was able to maintain communications with other Jedi, including Ylenic It'kla, who was serving as the Senator's aide; Shaak Ti, who was in hiding on Felucia; and Kazdan Paratus, who had taken refuge on Raxus Prime.[2] While conducting his rebellion, Kota took an intense interest in Darth Vader himself, attacking targets that appeared to have some level of importance to the Dark Lord, such as assaulting a factory that he had recently visited and stealing a shuttle that Vader had used as a personal transport.[8] Kota's main aim was to finally draw Vader into a confrontation with himself so that the Sith Lord could be eliminated once and for all.[2]
Drawing out the Dark Lord[]
- "A boy? Months of attacking Imperial targets, and Vader sends a boy to fight me?"
- ―Rahm Kota, to Darth Vader's secret apprentice
In 3 BBY, using information gained from Organa, Kota struck at a TIE Fighter Construction Facility in orbit over Nar Shaddaa, hoping that the bold action would finally force Vader to face him. Kota and his militia boarded the station, engaging its stormtrooper complement and placing explosive charges throughout the facility at strategic points. As Kota's Militia secured the command center, a vessel was detected on approach to the facility. Kota believed that the ship was bringing Darth Vader to face him and ordered the containment field on hangar twelve to be lowered so that the Dark Lord could board the facility.[2]

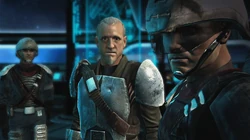
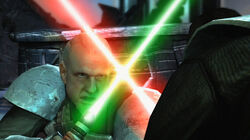
Kota dueling with the secret apprentice.
Kota waited in the facility's command center for Vader but was surprised to find that the intruder was not the Dark Lord of the Sith, but rather a young man who was Vader's own secret apprentice. Despite his shock, Kota engaged the apprentice in a lightsaber duel and found the boy stronger in the Force than he had thought.[2] Unwilling to let the apprentice live, Kota used the Force to detach the command center from the construction facility, continuing to battle the darksider as it plummeted toward the surface of Nar Shaddaa.[3] The two continued to duel, but the apprentice was stronger, and Kota began to tire, taking several hits that reduced his robe to a smoking ruin and caused one of his shoulder pads to glow red hot. Kota was caught in a chokehold by the apprentice and battered with flying debris until he was knocked to the ground. Vader's apprentice brought his lightsaber blade down, engaging the General in a saber lock. Kota received a glimpse of the apprentice's future as the combatant's blades were forced closer to his face, sensing that Vader would not always be his opponent's master and that he had not been turned fully to the dark side of the Force. He was also astonished to see that the apprentice's future included himself. In that moment, the apprentice pushed the locked blades toward Kota's eyes, blinding the General.[2]
In agony, Kota sent out a wave of Force energy that shattered the viewports of the command center, dropping his lightsaber in the process. Wind howled through the command center as debris was sucked out due to the drastic change of pressure, and Kota followed, dropping spread-eagle into the Vertical City below. Vader's apprentice retrieved Kota's lightsaber, taking it as a trophy of his victory.[2]
Fall from grace[]
Although blinded, Kota survived the fall from the command center, landing on a transport,[10] and went into hiding on Nar Shaddaa. Falling into despair, the General found his connection to the Force severely diminished and believed that he had lost the connection completely. In response, he turned to alcohol to ease the loss. He also used a bandage to cover his blinded eyes. Several weeks after the incident, he was found by Bail Organa, who wanted to recruit Kota in a mission to rescue his adopted daughter, Princess Leia Organa. The Princess had been sent to the Wookiee homeworld of Kashyyyk, ostensibly as a Senatorial Observer and the guest of Imperial Captain Ozzik Sturn, who was supervising the construction of a skyhook above the planet. In reality, Leia Organa was being held as a hostage to stop her father from speaking out against the Empire in the Senate. Kota refused to help Organa, feeling that his condition made him useless for such a task. The Senator arranged transportation for Kota to Cloud City on Bespin via Ziost, informing him that he intended to seek help from Master Shaak Ti on Felucia instead. Although Kota warned him against that course of action, Organa went anyway.[2]
Birth of the Rebellion[]
An unlikely apprentice[]
- "We need to rally the Emperor's enemies. And I need to find someone who can teach me the things that Vader couldn't…"
"Sounds like we're still hunting Jedi."
"And I know one that might still be alive."
"General Kota?"
"Yes. When I fought him, he said he'd be part of my future. Well, let's hope he was right. Head to Nar Shaddaa." - ―Galen Marek and Juno Eclipse
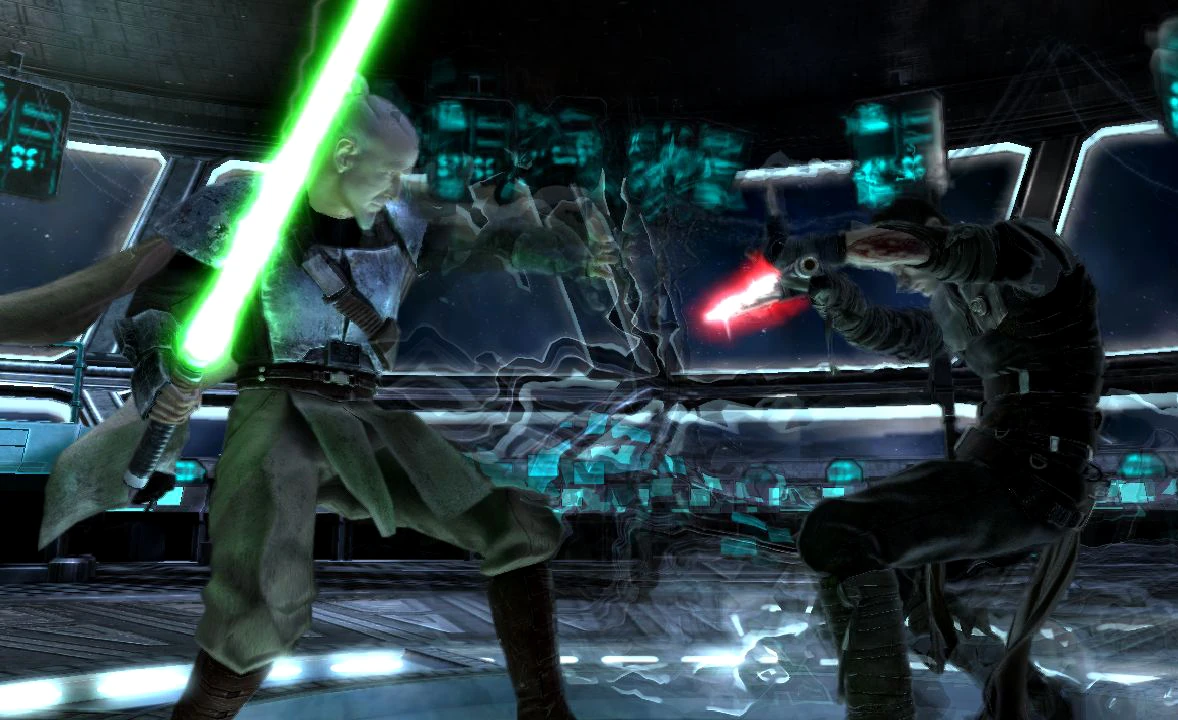
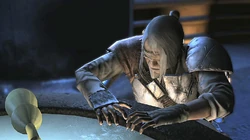
Kota, drunk in the Vapor Room
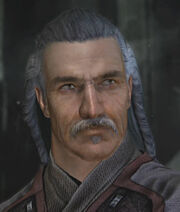
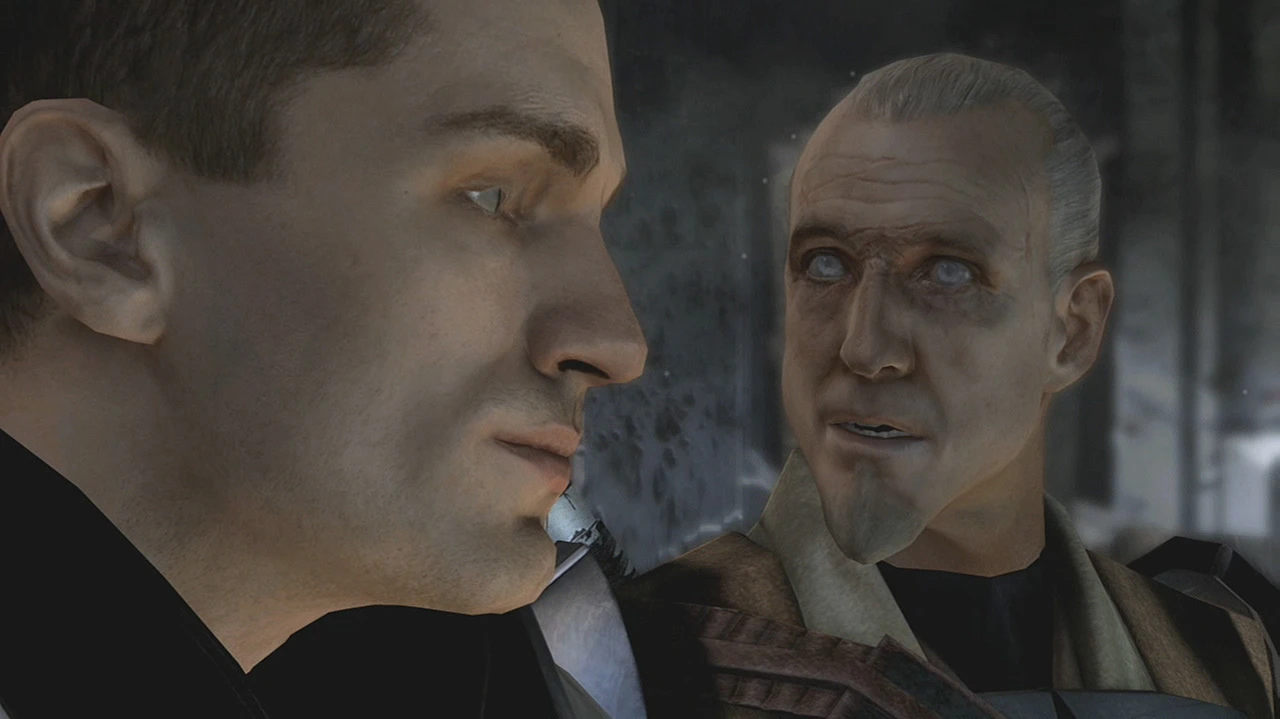
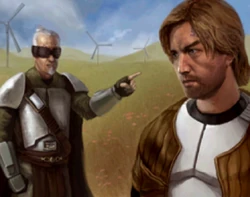
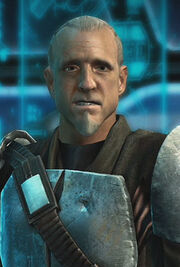
On Cloud City, Kota took refuge in the Vapor Room, a bar that catered to Ugnaught miners, paying for exclusive use of a table. Ignoring the galaxy at large, Kota let his appearance degrade; his hair became greasy and ill-kept, and his robes were loose-fitting and stained. Despite Kota's attempts to keep a low profile, word of the presence of a blind man who could nevertheless pour a glass of Corellian brandy without spilling a drop reached the ears of the Empire.[2]
Months after his encounter with Vader's apprentice over Nar Shaddaa, Kota was woken from a drunken stupor by a Force-sensitive individual requesting his help. Kota pointed out that he was of no use due to his injuries, although the young man countered by informing him that he needed his mind and experience in fighting the Empire, not his eyes. Through his weak connection with the Force, Kota suspected that the individual in front of him was the same man who had dueled and blinded him over Nar Shaddaa. Feeling that Vader had not turned the man completely to the dark side, Kota found something within the apprentice—a single bright spot that burned within him, that gave him hope and to which he clung. The apprentice, however, was still in league with Vader, who had mandated him to create a rebellion through which the two of them could depose the Emperor.[2]
At that moment, Imperial forces, tipped off to Kota's presence by a local informant, raided the Vapor Room. The apprentice fought his way out of the bar, covering Kota while the blind and drunk Jedi Master attempted to navigate his way out of the watering hole. During the ensuing battle, Kota became separated from the apprentice, making his own way to the balloon dock, where the young man had arranged a rendezvous with his ship. Despite having come to believe that the Empire was unbeatable and nothing that they could do would ever defeat it, Kota agreed to help the apprentice, noting that he had a friend in the Senate who could use his lightsaber. When he asked the young man if he had a name, the apprentice told him that he had none.[2]
Gathering allies[]
- "It's a fool's errand, boy. The Empire's army is infinite. You'll eventually be killed…or worse. And nothing will have changed."
"Wouldn't you rather die on your feet than drown in some cantina?"
"I don't know. But I do have a contact in the Senate who could use your lightsaber." - ―Rahm Kota, to Galen Marek on Cloud City
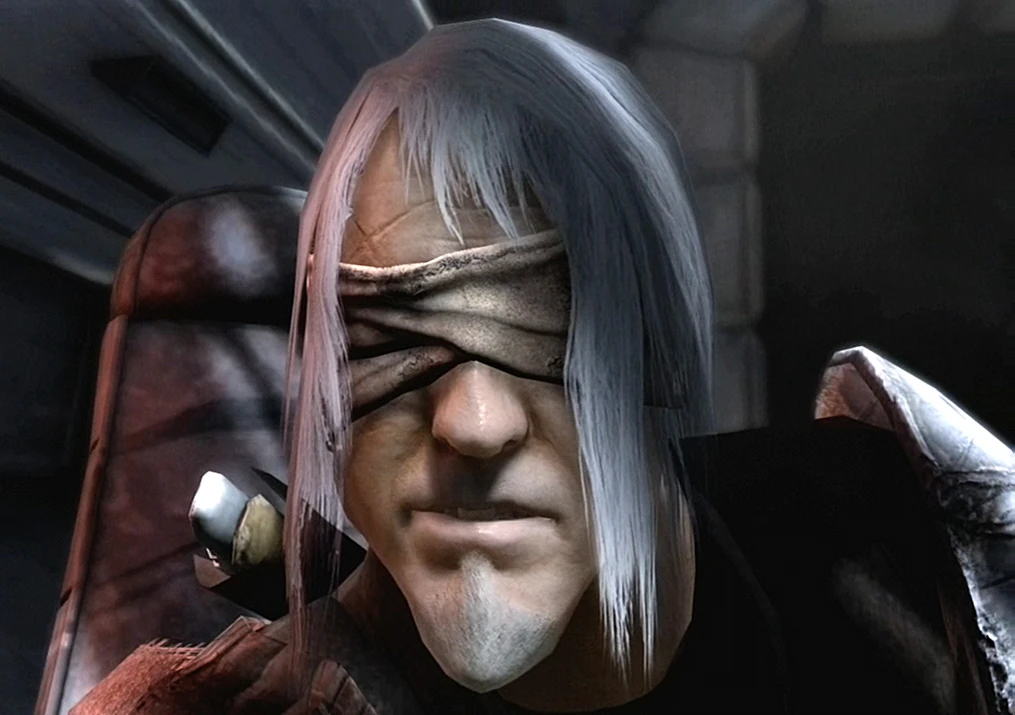
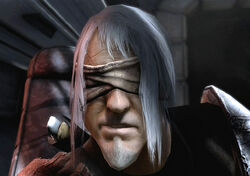
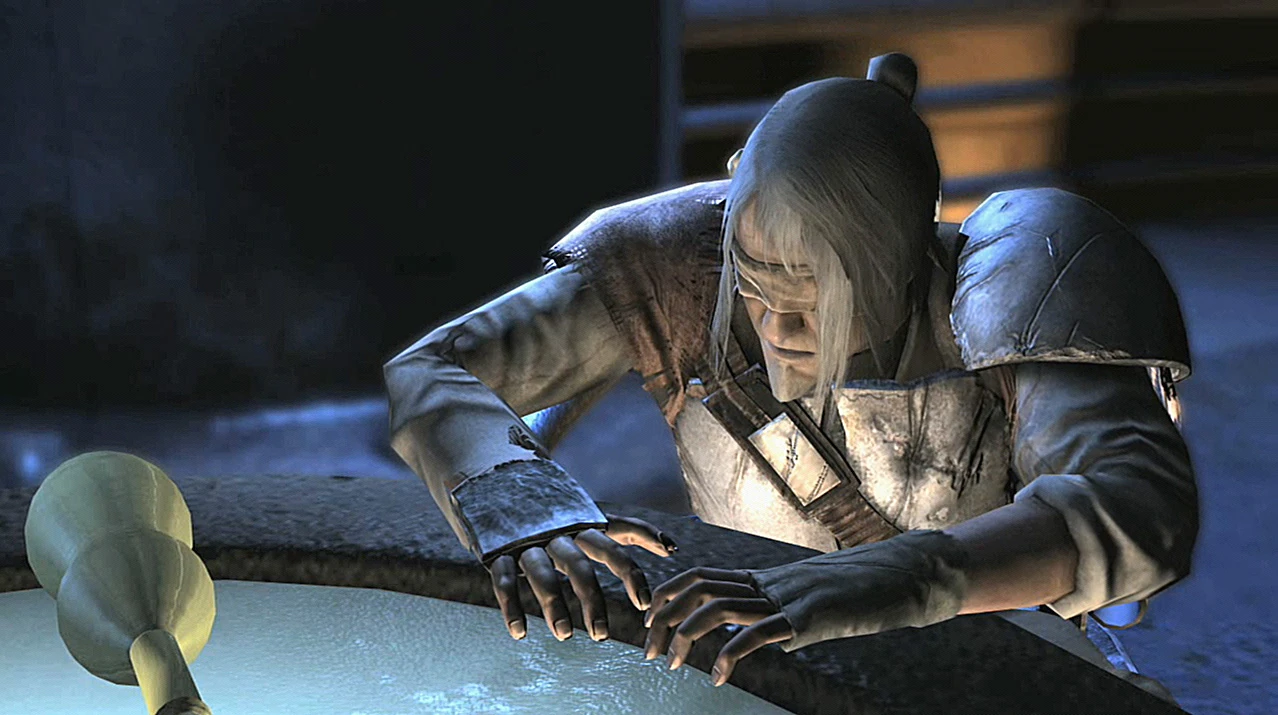
Kota, with bandages covering his ruined eyes
Once aboard the Rogue Shadow, the apprentice's vessel, Kota met with the other members of the crew—the pilot, Captain Juno Eclipse, and the droid PROXY. Given access to a communications console, Kota attempted to contact Bail Organa but failed to do so. Remembering that Organa had attempted to recruit him to rescue his daughter, Leia, he reasoned that extracting her from Kashyyyk might make the Senator more liable to listen to the mysterious young man. Kota directed the ship to Kashyyyk, telling his new companions that there was something of value to the Senator on the surface and that retrieving it would be in their best interests, although he neglected to mention that it was Organa's daughter. On approach to the Wookiee homeworld, Kota questioned Eclipse over the vessel they were in; the former Imperial pilot told them it was stolen and tried to forestall any further conversation in case she gave away that the ship was the same one that had ferried the apprentice—whom she knew by the codename "Starkiller"—and herself to Nar Shaddaa. Kota told her not to worry, as they were all fugitives. Kota stated that he was not about to turn Eclipse in to the Empire.[2]
While the apprentice fought his way through Imperial forces on Kashyyyk, Kota continued to refuse to tell him exactly what he was looking for, telling him that he would know it when he found it. When the apprentice did eventually find the Princess, she refused to go with him, telling him that she could not leave until the skyhook that was being constructed in orbit was destroyed. The apprentice agreed to attempt to destroy it so that the Princess would take her shuttle and leave planet. En route to the tractor beam mooring that kept the skyhook in orbit, the apprentice stumbled across a hut that he was drawn to and asked Kota for advice. Kota warned him off from entering it, telling him that there were some things that he was not ready to learn, and that if he entered, he had to face whatever was inside alone. The apprentice ignored Kota and entered. Through his weak connection to the Force, Kota felt something of the apprentice's experience, causing him to sag against the control panels. The hut had been the apprentice's former home, where he had lived with his father when he was a child, and the young man received a vision of his father's death at the hands of Darth Vader.[2]
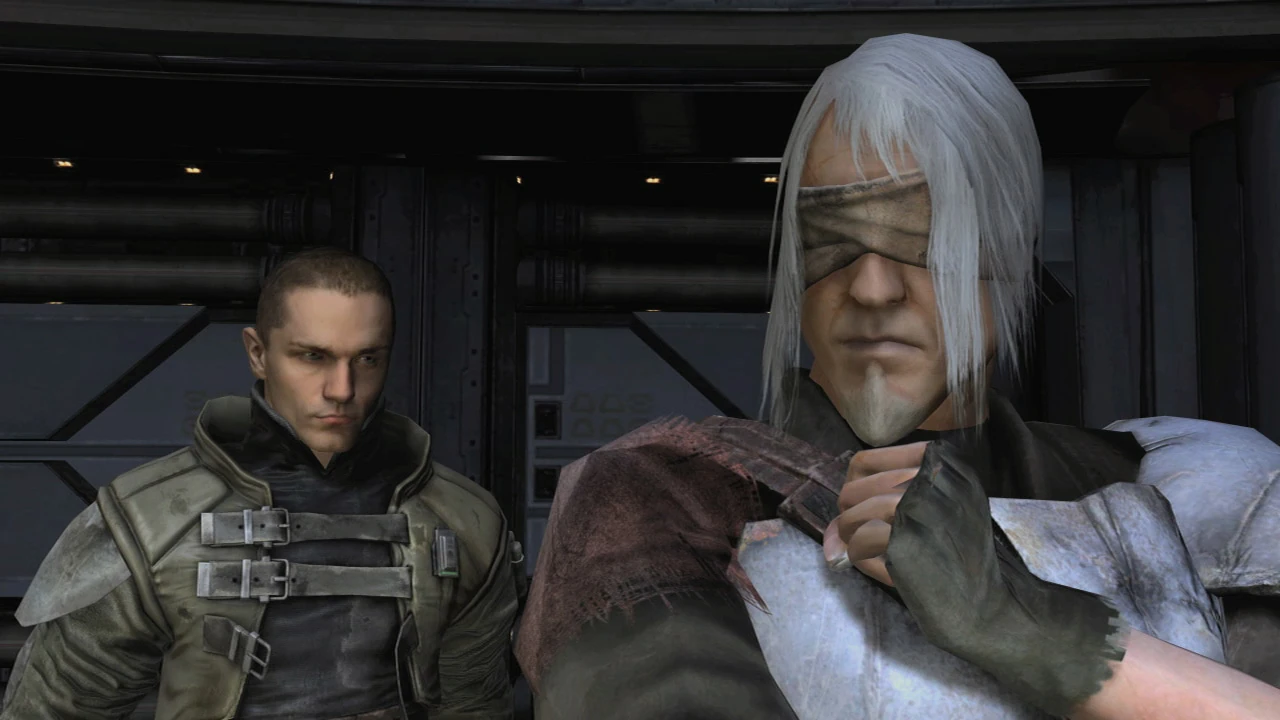

The secret apprentice confers with Kota.
Eventually, the apprentice destroyed the skyhook and returned to the Rogue Shadow, where he demanded to know the identity of the woman he had just rescued. Kota filled him in on her identity and that of her father, and the apprentice demanded to speak with Organa. Kota admitted that he had been unable to reach Organa since they left Bespin and that Organa had gone to find Shaak Ti. Before Kota could reveal that Felucia was their destination, the apprentice revealed it himself. Kota commented that he must have been strong in the Force in order to read his thoughts, although the truth was that the apprentice had been to the planet previously and killed Shaak Ti.[2] Before heading to Felucia, however, Kota accompanied the apprentice to Coruscant, the Imperial capital, so that the young man could infiltrate the ruins of the Jedi Temple and find information on his father and the vision he had on Kashyyyk. Kota guided the apprentice through the ruins by comlink. The apprentice found what he was looking for and returned to the ship.[11]
On Felucia, Kota refused the apprentice's offer to join him in retrieving Organa, stating that he was basically useless in his current condition. The young man succeeded in his mission, defeating Shaak Ti's corrupted apprentice, Maris Brood, in the process, which led to a reunion between Kota and Organa. Organa revealed that Shaak Ti was dead, and Kota commented that her killer was probably the same individual who had blinded him. In return, he revealed to Organa that he could not contact Kazdan Paratus on Raxus Prime and feared the worst. In a conversation between them and the apprentice, the young man brought up the concept of open rebellion against the Empire. Kota commented that they would need a victory—a big target—to convince potential allies that they were not just talking but were prepared to take action. The apprentice told them that he would meditate on the matter and eventually returned to Kota with a target in mind—a new Imperial shipyard that was producing Star Destroyers that had been established in orbit over Raxus Prime. In truth, however, the target had been suggested to the apprentice by Vader himself.[2]
On the way to Raxus Prime, Kota sensed that Eclipse—who had discovered that the apprentice was still in contact with Vader and the two were conspiring to bring down the Emperor—was troubled about something. In addition, he almost discovered that she and the apprentice had been to Raxus Prime before when she slipped up, sarcastically mentioning that it was good to see the planet again. She covered it by claiming to have made dumping runs to the planet in the past. In reality, she had ferried the apprentice to the planet to kill Paratus, a task at which he had succeeded. As Eclipse laid out a plan to destroy the shipyard—by commandeering the ore cannon on the surface of the planet and using it to destabilize the facility's orbit—Kota inquired if there had been any word from Paratus since they arrived, only to be told that there was no sign of him.[2]
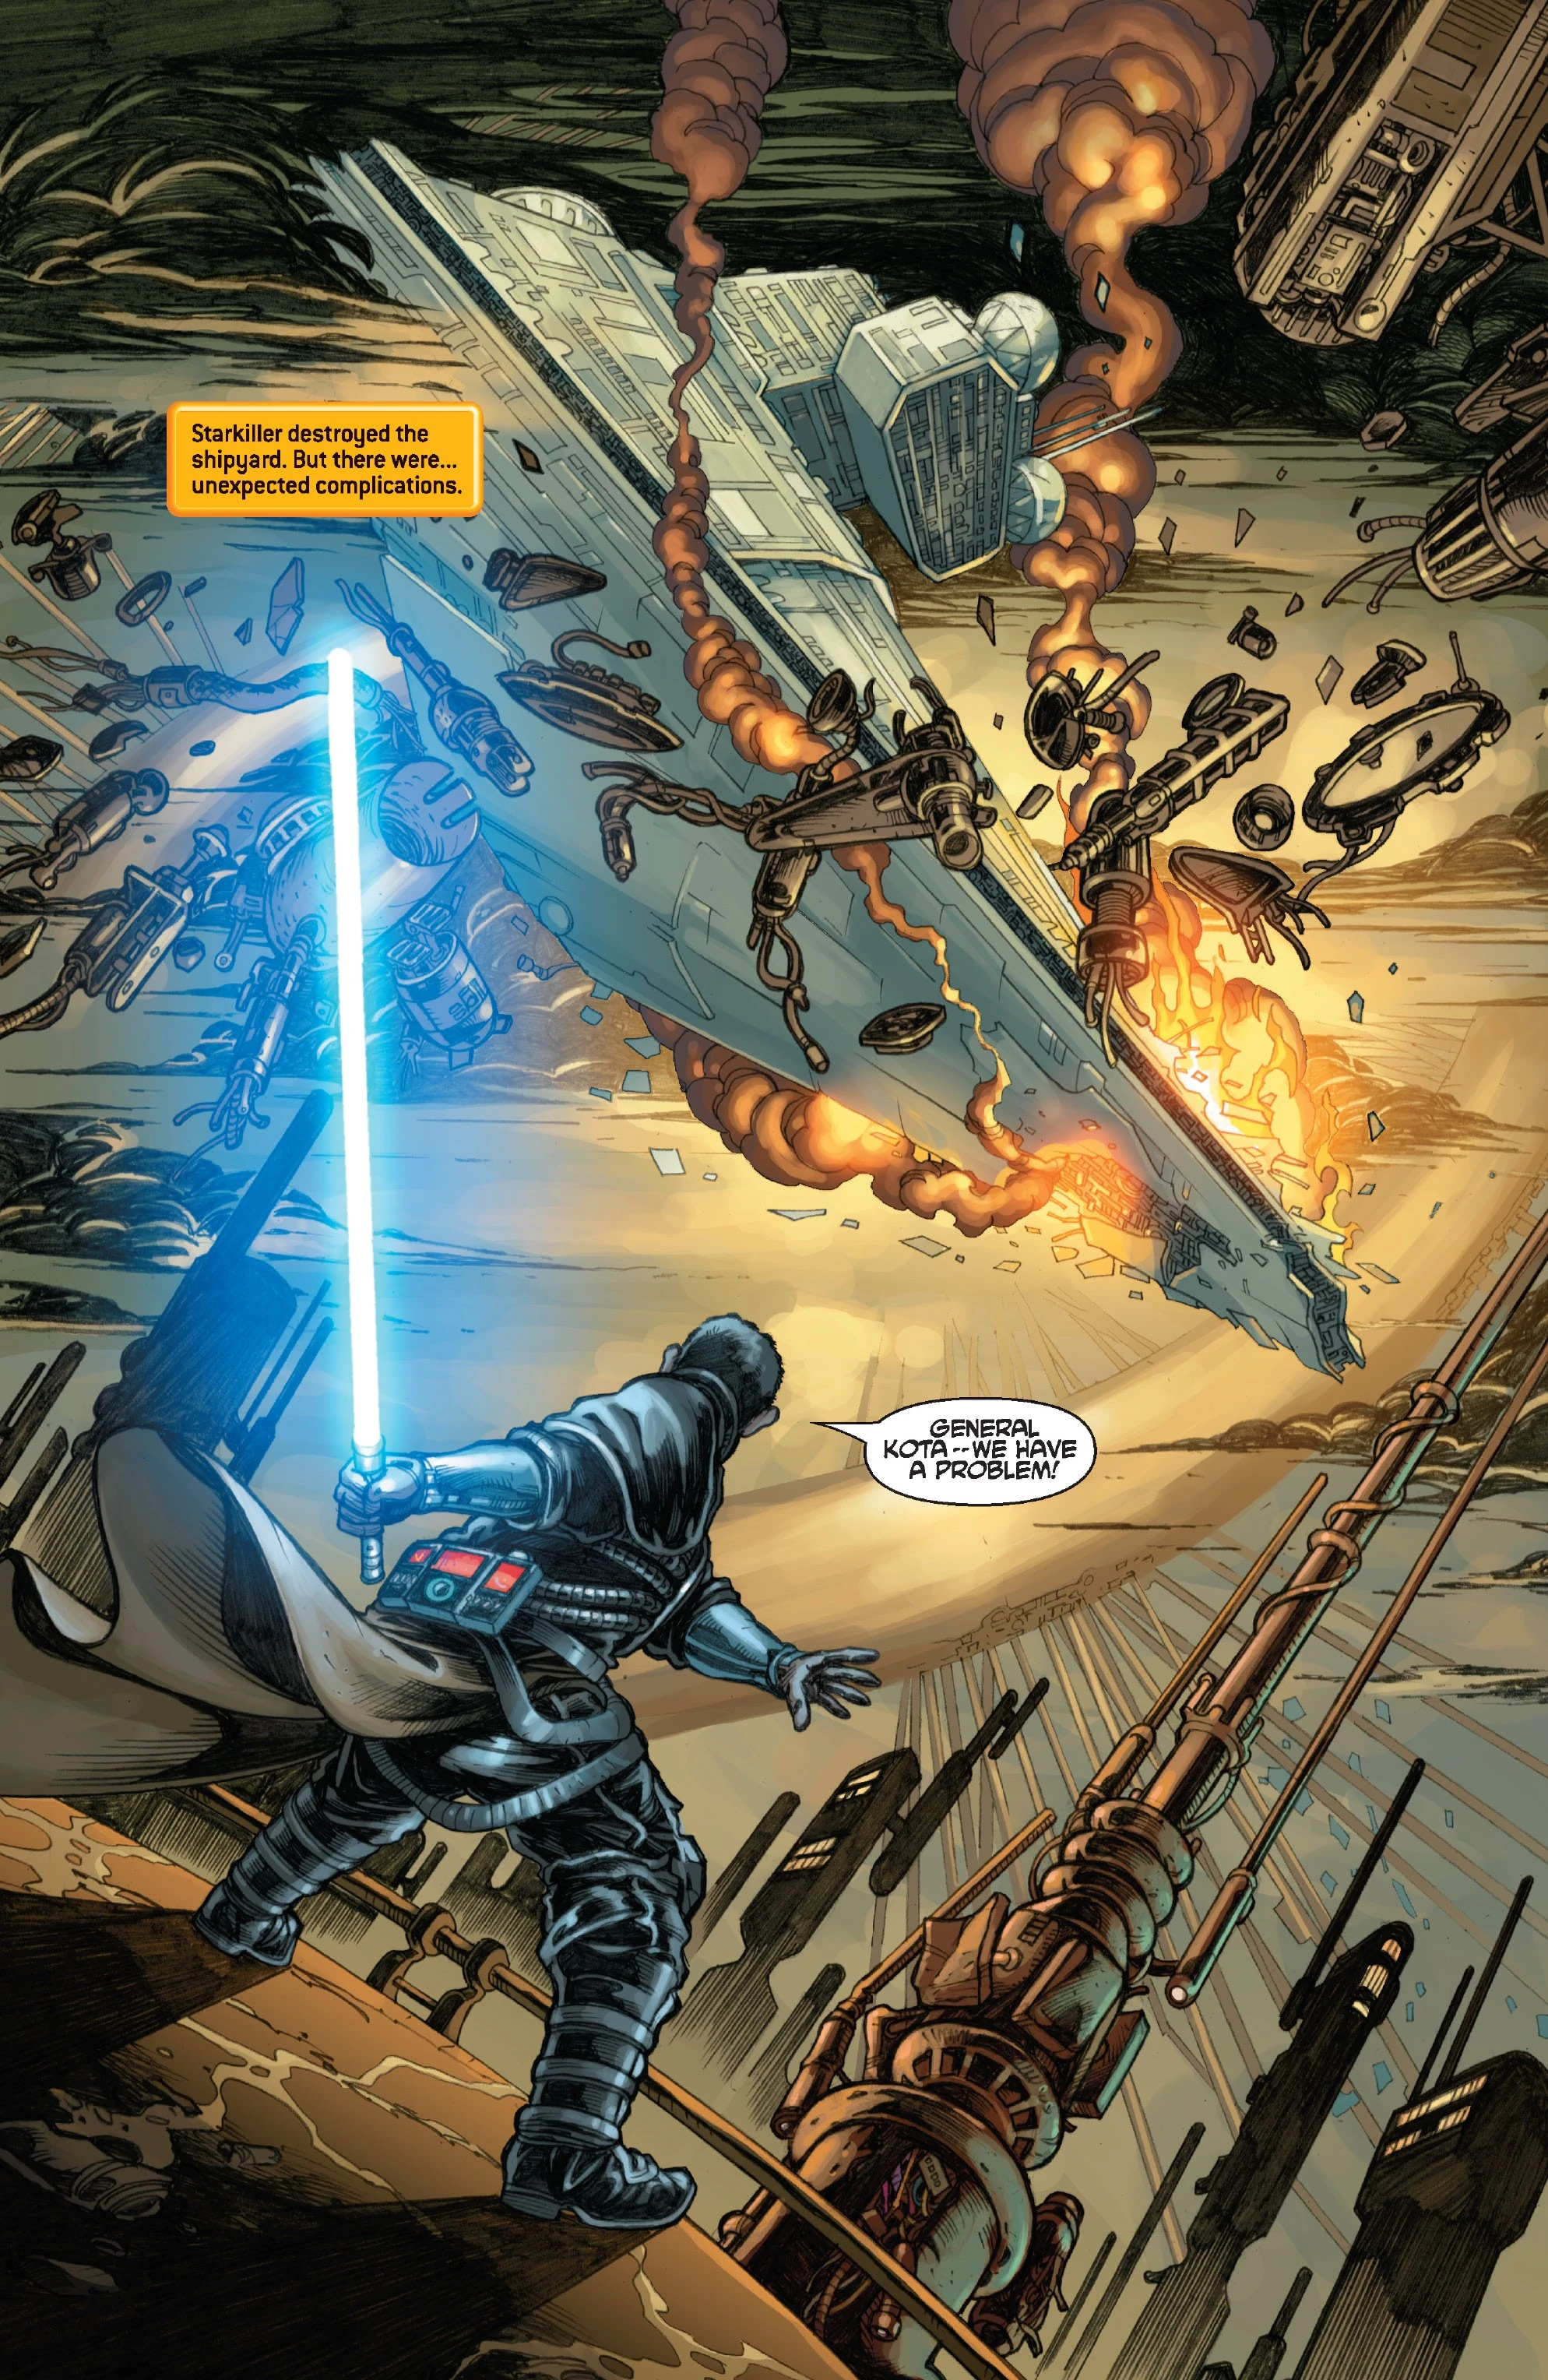

A crippled Star Destroyer plunges toward Raxus Prime.
As the apprentice made his way across the surface of the planet toward the ore cannon, Kota retired to the cargo bay of the Rogue Shadow. While he was sequestered away, PROXY, who was attempting to slice into the planet's Core computer so that he could assist the apprentice in adjusting the aim of the ore cannon, was infected by the supercomputer's intelligence. The Core convinced the droid to carry out his primary programming—attempting to kill his master—while the apprentice was engaged with the mission. To this end, PROXY temporarily incapacitated Eclipse, overrode the Rogue Shadow's launch codes, and left the ship.[2]
Shortly after reprogramming the ore cannon and firing three shots at the orbiting shipyard, the apprentice became aware that one of the Star Destroyers that was under construction was falling out of orbit toward the planet. Contacting the Rogue Shadow, the apprentice frantically ordered Eclipse to take off immediately. Instead, he got Kota, who had discovered PROXY's actions. With no option to fly the ship out of danger, Kota told the apprentice that he would have to use the Force to pull the Star Destroyer into the cannon itself. When the apprentice expressed disbelief, Kota told him that size did not matter to a Jedi. As he told the apprentice what he had to do to save them all, the drunken slur in his voice disappeared, and he recovered some of the confidence and bearing of the seasoned general that he had once been.[2]
As the apprentice used the Force to grip the Star Destroyer and bring it down into the cannon itself, the resulting impact sent shockwaves through the planet's massed trash heaps. The waves rocked the Rogue Shadow, forcing Kota to hang onto the co-pilot's seat as the ship bucked underneath him. As the waves stopped, the General called for the apprentice over comlink, desperate to make sure he was still alive. Finally assured that he was, Kota told the young man that PROXY had incapacitated them and left the ship to go after him. While Eclipse and the apprentice were worried about PROXY's state of mind, Kota reminded them that the droid had been infected by an Imperial computer and that the droid had been carrying all the plans for the forthcoming rebellion. PROXY was a security risk that had to be taken care of, one way or the other. The apprentice dealt with the droid, defeating him in lightsaber combat, and returned him to the ship.[2]

Senator Garm Bel Iblis
As the apprentice recovered from pulling the Star Destroyer down, Kota informed him that he had set up a meeting with Corellian Senator Garm Bel Iblis on Cloud City. Traveling there in the Rogue Shadow, Kota told the young man to find Lobot, the city's cyborg administrator, who was able to give him Bel Iblis' current location. The apprentice learned that Bel Iblis had been captured by the bounty hunter Kleef, who was working for Chop'aa Notimo, a Mandalorian in turn working for the Black Sun crime syndicate who was attempting a takeover of Cloud City. The apprentice managed to rescue Bel Iblis, who agreed to join the rebellion and suggested that they meet further with Bail Organa.[12]
Following the apprentice's rescue of Bel Iblis, the Senator joined with Organa and Mothma in a series of meetings in Organa's Cantham House residence. While the three dissident Senators hashed out the basic plans for an Alliance to Restore the Republic, Kota, Eclipse, and the apprentice went to ground on the planet Rhommamool. Located in the Outer Rim, Rhommamool's location close to the Corellian Trade Spine meant that HoloNet transmissions were readily available, but its remoteness ensured a low level of Imperial activity.[2]
During their enforced wait, Kota attempted to learn more about the apprentice; specifically, who had taught him in the ways of the Force and of the lightsaber. Kota was unable to recognize the style and told the apprentice that if he knew who his original teacher was, it would help him to understand him better. The apprentice asked who needed to understand him; Kota replied that Bel Iblis definitely would need to. To Bel Iblis, the apprentice was an unknown quantity, and that made him a possible military threat. The apprentice was evasive in his answers but related his experience with Maris Brood on Felucia. When Kota inquired if his original master had suffered the same fate as Brood, the apprentice refused to answer. Frustrated, Kota returned to his private musings. After eight days at Rhommamool, Kota received word from Organa that the meeting to formalize the creation of a rebellion against the Empire was planned to take place on Corellia. Eclipse set a course for the planet, and the Rogue Shadow left orbit.[2]
Forging an Alliance[]
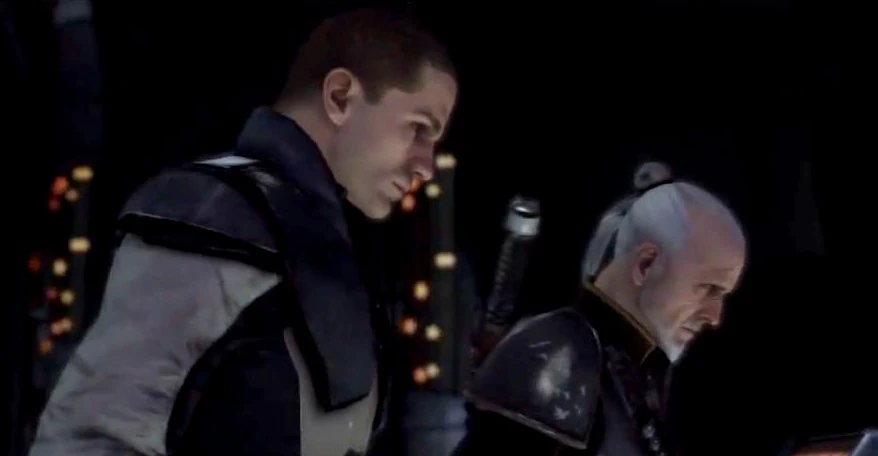
- "I will join his rebellion, too, if I'm welcome."
"I thought you were still passed out in the cargo hold."
"I finally came to." - ―Rahm Kota and the apprentice, at the meeting on Corellia
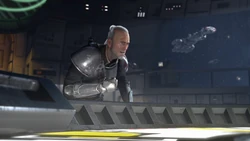
Kota, now sober, joins the fledgling group of Rebels on Corellia.
En route to Corellia, Kota continued the transformation back into the seasoned general he once was, a process that had truly begun when instructing the apprentice in his Force usage on Raxus Prime. Kota spent the time polishing his boots, cleaning his robes, and generally tidying his appearance. He even discarded the cloth that covered his eyes. The apprentice believed that Kota was still in a depressed mood, especially when the General did not join them in attending the meeting between the Senators inside a ruined building in Corellia's arctic wastes. As the meeting progressed, Kota made his entrance, declaring his intent to join the fledgling rebellion. The apprentice was surprised at his appearance, commenting that he thought Kota had been passed out drunk in the cargo hold of the Rogue Shadow. Kota replied that he had finally come to his senses.[2]
As the assembled Senators pledged their commitment to create a rebellion against the Empire, Imperial troops, under the command of Darth Vader himself, attacked the congregation. As Imperial soldiers battled against the security forces that each Senator had brought, Kota used the Force to take the apprentice's lightsaber and launched himself against Vader. The Dark Lord telekinetically caught Kota with the Force, choking him until he offered no more resistance, then tossed him toward a group of waiting stormtroopers to be taken prisoner.[2]
With Kota down, Vader turned his attention to the apprentice. It became clear to the Senators that the Dark Lord and the young man knew each other, although they believed that the two were in league to expose their rebellion. While that had been their original plan, the apprentice's experiences and time with Eclipse and Kota had changed his mind about his allegiance to Vader. He had come to love Eclipse—although he was not aware of it for some time—and Kota had shown him that the dark side of the Force was not necessarily more powerful that the light, and that anger and hatred did not have to rule his life. Vader attempted to kill the apprentice but was interrupted by the droid PROXY, who took on the holographic form of Obi-Wan Kenobi, a Jedi Knight from the Clone Wars. Although Vader defeated the droid easily, it gave the apprentice time to escape the confrontation.[2]
Prisoner[]
- "He's beaten. Let it go…"
"It's a trick! He's more powerful than you know. And he deserves to die for what he's done to me."
"Maybe so. But if you kill him now, out of hatred, then you'll be back right where you began." - ―Rahm Kota and the apprentice, regarding Palpatine
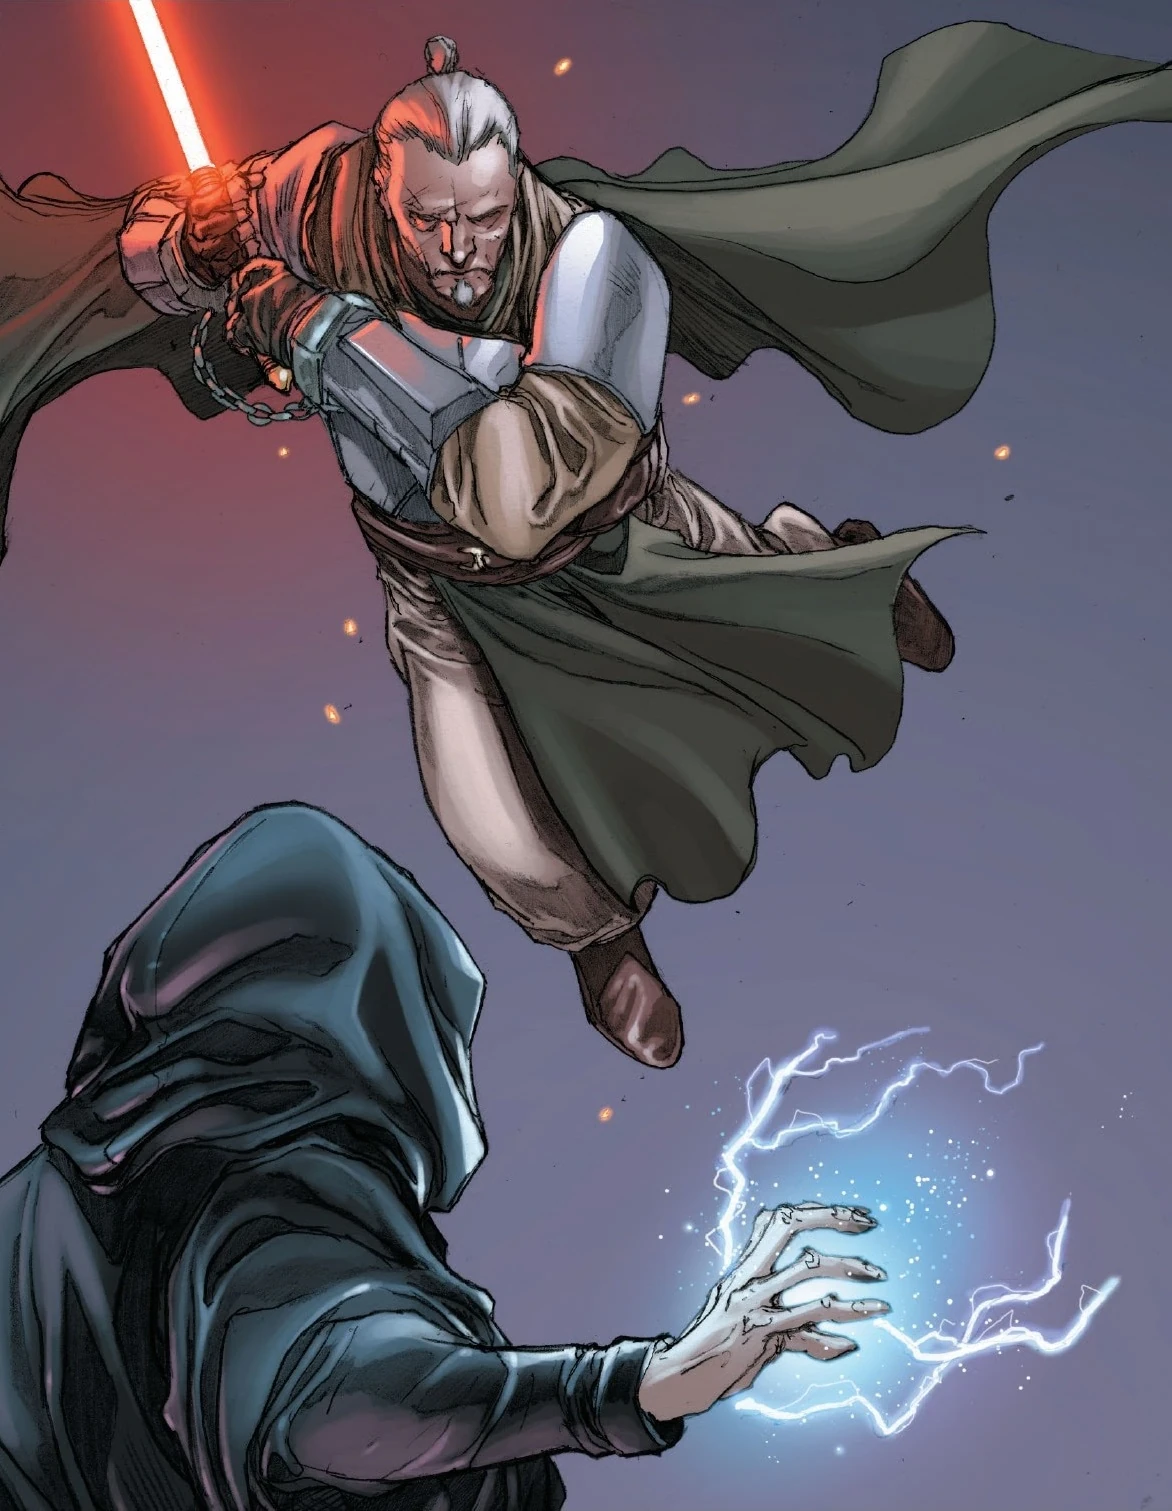
Kota attacks Palpatine with the Sith Lord's own lightsaber.
Captured by Imperial forces, Kota was taken to the Death Star, an enormous battlestation being built over the planet Despayre in the Horuz system. Along with Organa, Mothma, and Bel Iblis, Kota was taken before Emperor Palpatine himself for interrogation and eventual execution. Before the Emperor could enact his plan, the apprentice—who had infiltrated and fought his way through the Death Star after being recovered from Corellia by Eclipse—came to their rescue. After the apprentice dueled and defeated Vader, Palpatine attempted to sway the apprentice back to the dark side, telling him to kill Vader and take his place at the Emperor's side. Kota used the Force to grab Palpatine's lightsaber from his belt,[2] killing two of the Emperor's Royal Guards who were standing watch over the prisoners,[10] then lunged at the Emperor. Palpatine responded by electrocuting Kota with Force lightning. Organa pleaded with the apprentice to help Kota rather than slay Vader, who had been wounded in the duel. Using the Force, the apprentice sent a wave of transparisteel and debris toward the Emperor, forcing him to cease his lightning attack on the General.[2]
As the apprentice stood over the defeated Emperor, Kota knew that the young man wanted to kill Palpatine for all he had done to him. Kota told him that if he surrendered to the dark side now, all the good work he had done would be lost, and he would be right back where he had started. Although he hesitated, the apprentice stood down and prepared to leave with the Senators on the Rogue Shadow. The Emperor, however, was not prepared to let them escape and unleashed more Force lightning at Kota, striking him in the back and knocking him to the ground. The apprentice moved to block the attack, taking the Emperor's lightning into his own body and then redirecting it back at Palpatine. Locked together, the apprentice told Kota and the Senators to get out. Kota and the Senators boarded the Rogue Shadow,[3] although the General hesitated, watching the conflict between the Emperor and the apprentice before being urged to board by Organa.[10] As Imperial reinforcements arrived, the apprentice opened himself fully to the Force, releasing a massive wave of energy that resulted in an explosion that destroyed much of the Death Star's observation deck, injured Vader and the Emperor, and killed the apprentice himself. The Rogue Shadow escaped the Death Star just prior to the explosion, ferrying Kota and the Senators to safety.[3]
A declaration of Rebellion[]
- "You always knew who he was, didn't you?"
"I suspected, yes."
"Then why did you help him? After all the things he had done?"
"When he came to me in the bar, among all his dark thoughts, I glimpsed one bright spot. One beautiful thing he held onto, even at the end."
"What?"
"You." - ―Juno Eclipse and Rahm Kota, discussing Galen Marek
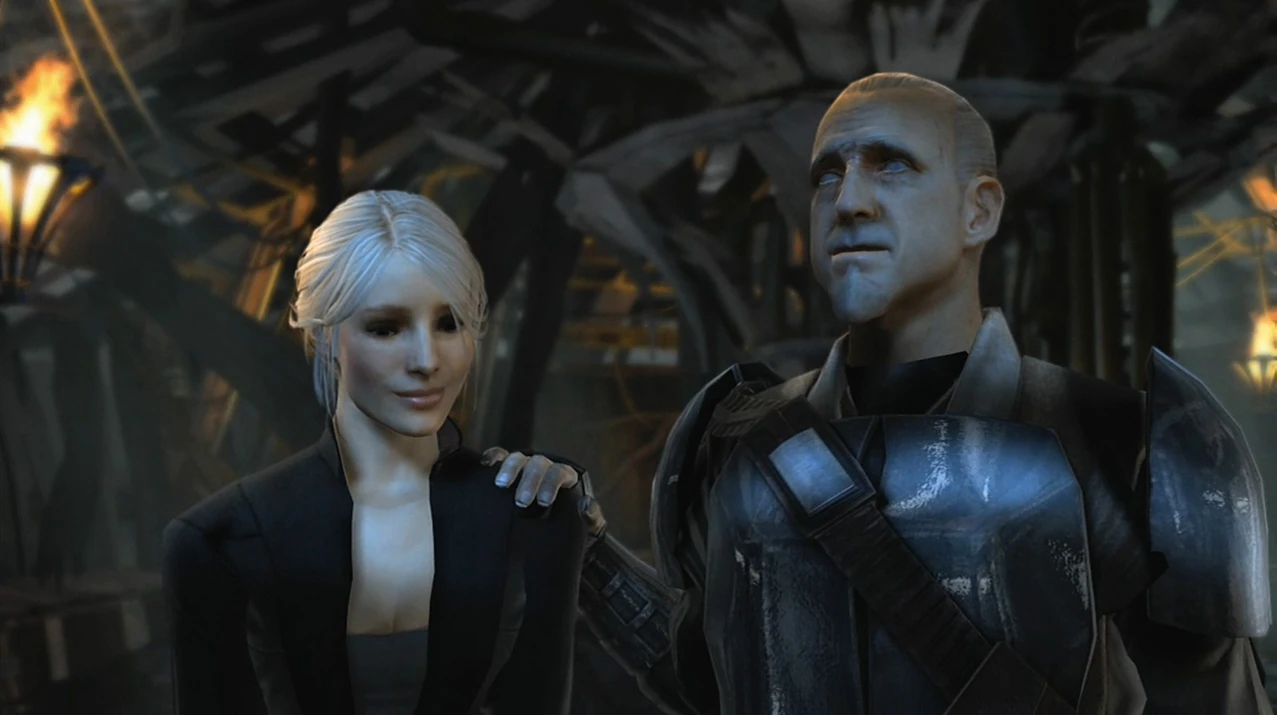
Juno Eclipse with Kota on Kashyyyk
Aboard the Rogue Shadow, Kota reiterated the events of the apprentice's death to Eclipse, telling her that he had willingly sacrificed his own life to allow the General and Senators to escape.[3] At his insistence, Eclipse set a course for Kashyyyk. On the Wookiee homeworld, Kota finally learned the name of the young man—Galen Marek—after Organa did a thorough search through all available records. He was the son of two Jedi and had been born and raised on Kashyyyk until Vader had kidnapped him as a boy after slaying his father, Kento Marek.[2] At a later meeting in the hut where the Marek family had lived, Senator Organa, his daughter, Bel Iblis, Mon Mothma, Eclipse, and Kota formally formed the Alliance to Restore the Republic. The Marek family crest was taken as their own symbol, honoring Galen Marek's sacrifice.[3] Following the meeting, Eclipse confronted Kota, asking him if he had always known that Marek had been the one who had blinded him. Kota told her that he had indeed suspected as much. When Eclipse asked him why he had helped them, knowing what Marek had done, Kota told her of the bright spot burning within the young man that he had felt in the bar on Cloud City—and that it was her.[3]
The Galactic Civil War[]
A general rebel becomes a Rebel General[]
- "But you are aware, no doubt, that the general's actions are not always sanctioned by the Alliance."
- ―Mon Mothma, to Juno Eclipse
Rahm Kota, Rebel Alliance general
Along with Senator Organa and Eclipse, Kota travelled to Corellia, where Eclipse turned control of the Rogue Shadow over to the Jedi General. As the nascent resistance movement coalesced into the Rebel Alliance, they adopted the uniform that had been used by Kota's Militia. Although the Alliance began to grow—acquiring ships, soldiers, and supplies—Alliance High Command held the opinion that resources were more important than small victories. Assets were not to be risked for minimal gains, and, although small scale training missions were authorized, large scale military engagements were prohibited. Kota, however, disagreed with this position, advocating that tactical strikes made by small forces against critical targets could effectively disrupt Imperial forces throughout an entire region. To this end, he formed his own squad of commandos and—using the Rogue Shadow—struck at Imperial targets on several worlds, including Druckenwell, Selonia, and Kuat, against the orders of Alliance High Command. He was assisted by Eclipse, who had been given command of the EF76 Nebulon-B escort frigate Salvation. Eclipse supported his unsanctioned operations to ensure that the Alliance did not lose Kota and to keep him in check; she considered the General to be both a friend and an asset vital to the Rebellion. His missions were nonetheless considered victories for the Alliance, which in turn convinced Kota that his actions were correct and justified.[5] The General also acquired a new green-bladed lightsaber that was virtually identical to his previous one.[13] At some point, the 22nd infantry division—a new unit of Rebel troopers that had just finished their training at a hidden base in the Outer Rim—came to Kota's attention. He noted that the troops had never seen combat before and were afraid, but that they hated the Empire with a vengeance. Kota planned to use that need for revenge and turn it against the Empire.[14]
Cato Neimoidia[]
- "Blackout to Blackguard. Respond, please."
"I don't have time to talk."
"Bad luck. This is taking too long. You need to pull out."
"Negative, Blackout. Leave if you want to. I'm staying to finish the job." - ―Juno Eclipse, to Rahm Kota, during the raid on Cato Neimoidia
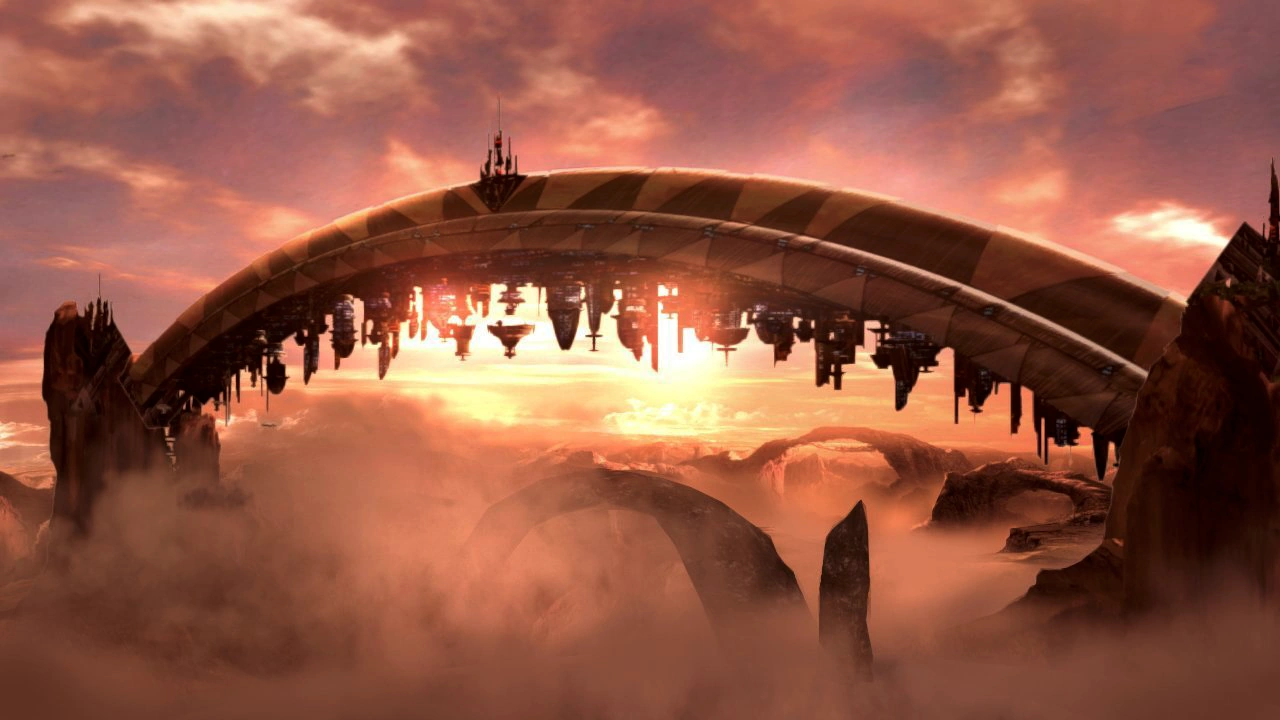

The city of Tarko-se on Cato Neimoidia.
One year after the death of Galen Marek aboard the Death Star, Kota was informed by Eclipse that she had been assigned to take the Salvation on a training mission to the planet Cato Neimoidia. There, she would test her frigate's crew by having them engage the Imperial force assigned to protect the planet. Cato Neimoidia was a hub for the transportation and redistribution of slaves throughout the Empire, and was ruled by Baron Merillion Tarko. Tarko had amassed a lot of wealth by taking bribes from other officers keen to acquire the best "stock" for their facilities, as well as selling the slaves on the black market to criminals and the Hutt cartels. Eclipse's orders were simple; engage the Imperial forces and test the Baron's defenses. At the same time, the mission would serve as combat experience for her crew. Under no circumstances was Eclipse to risk her ship unnecessarily.[5]
Baron Merillion Tarko.
Kota seized the opportunity, deciding to take the Rogue Shadow and his squad to Cato Neimoidia in an effort to take out Tarko and disrupt his slaving operation. Kota felt that a successful strike against the Baron's base would disrupt Imperial facilitates across the galaxy that relied on slaves for their operations. Kota used the Rogue Shadow's cloaking device to close with the Baron's seat of power,[5] the sinkhole-spanning bridge city of Tarko-se,[14] strafing its turbolaser defenses and ground facilities. In orbit, Eclipse engaged Tarko's defenses. She passed off Kota's ground assault as a local insurrection to her crew, who were unaware of Kota's presence in the system. BTL Y-wing starfighters from the Salvation dueled with defending TIE fighters, while the frigate's turbolasers targeted the city itself. Kota piloted the Rogue Shadow through the battle, looking for a landing zone to put the ship down on to unload his commandos.[5]
As the battle progressed, both Kota and Eclipse realized that Cato Neimoidia was better defended than the data acquired by Alliance Intelligence had indicated. Additional TIE fighters had launched from the facility, and Kota suspected that the structure identified as a barracks complex was used for some other purpose, and he intended to destroy it. Eclipse contacted Kota, breaking communications silence between the two, tell him that he was taking too long, and that they needed to pull out. Her starfighter force was evenly matched, and her standing orders were to retreat and not risk the frigate. Kota understood her position and told her to leave; he, however, intended to remain and finish the job. As Eclipse began to argue her point, a massive explosion near the city removed the Rogue Shadow from the Salvation's sensors. Unable to reestablish communication with Kota, she believed that he had died in the detonation. With the arrival of an Imperial fleet led by the Star Destroyer Adjudicator in-system, Eclipse ordered the Salvation to retreat. Upon returning to the Alliance Fleet, Eclipse relayed her belief that Kota had perished on Cato Neimoidia to Mon Mothma, Garm Bel Iblis, and Leia Organa.[5]
Fighting for survival[]
- "Why don't you sit this one out, General?"
"Never. I've got a score to settle." - ―Starkiller and Rahm Kota

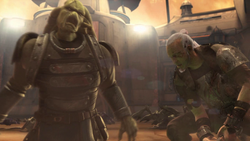
Kota kills a Feeorin gladiator.
Kota, however, had not died, managing to land in the city with his squad. Captured by Tarko's forces, the rest of his squad was executed by the Baron. Kota was taken to the structure that Alliance Intelligence had designated as a barracks; in actuality, the structure housed a large gladiatorial arena, where the Baron entertained thousands of beings with gladiator matches. The arena was suspended from the bottom of Tarko-se itself, above the sinkhole that the city spanned. Kota, using his lightsaber, was forced to fight against waves of opponents for seven days.[5] His first challenge was a krayt dragon, a fearsome beast native to the planet Tatooine.[14] Other opponents included Corellian razor hounds,[5] Corellian slice hounds, an acklay, a Feeorin gladiator,[13] and stormtroopers. Fatigued, Kota was fully aware that he would eventually make a mistake but kept fighting regardless. Surly and defiant, the General made a point of noting to the Baron that he would soon be running out of executioners. On the seventh day of his captivity, the Rebel General had just killed a wave of stormtrooper opponents when a new arrival entered the arena.[5]
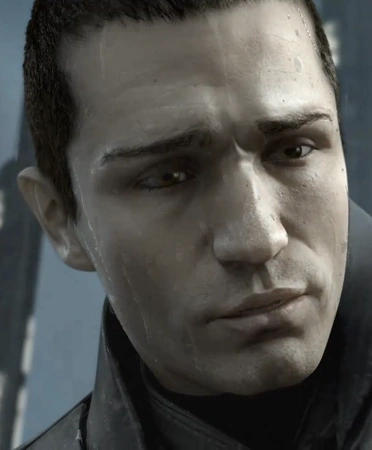
To Kota's astonishment, the new arrival appeared to be Galen Marek, whom the General had seen die on the Death Star a year previously. However, the man before him only knew himself to be "Starkiller," a clone of the original Marek who had been bred and raised on the water world of Kamino and trained to be Darth Vader's secret apprentice, as his predecessor had originally been. Starkiller had learned of the General's capture from Vader, and the Dark Lord had directed his apprentice to kill Kota as part of his training. Starkiller, however, had also been given the memories of the original apprentice through flash training techniques. Plagued by memories of Marek's life before his death on the Death Star—especially his love for Juno Eclipse—Starkiller had rejected Vader's mastery and fled Kamino in an effort to find Eclipse. Since he knew that Kota could lead him to her, he had resolved to rescue the General from Imperial captivity.[5]

Starkiller, the clone of Galen Marek
Although stunned by the reappearance of the young man, Kota did not have time to question Starkiller as Tarko released an immense beast known as a gorog into the arena to kill them. While Starkiller engaged the creature with his twin lightsabers, Kota charged through the arena's seating area, heading for the skybox from where Tarko was watching the proceedings. Refusing to let the Baron escape, Kota slew anyone foolish enough to stand in his way, and, upon reaching the skybox, the Jedi killed a half dozen of Tarko's Neimoidian aides. As the General advanced on Tarko, the Baron pulled a blaster on him. At that moment, Starkiller arrived in the skybox after cutting a hole in the ceiling. Starkiller had maneuvered the gorog into destroying the supports that attached the arena to the hanging city above; the intent was to send both the arena and the beast into the sinkhole below. The majority of the arena fell into the sinkhole, but the skybox survived, as it was directly connected to the city by its own support.[5]
Kota and Starkiller used their lightsabers to deflect several blaster bolts fired by stormtroopers guarding the Baron, before Starkiller killed them using Force lightning.[13] As Kota was about to kill Tarko, the entire skybox lurched. The gorog, in an effort to save itself, had taken hold of the skybox to arrest its fall. The sudden movement caused Tarko to fall out of the skybox's window into the beast's open mouth. However, the gorog could not save itself and began to lose its grip on the skybox. Just before the gorog fell, the creature scooped Kota up in one of its hands, then plummeted into the sinkhole below. Trapped in the gorog's massive hand, Kota began slashing at the beast's fingers with his lightsaber in an effort to stop the creature from crushing him alive. Starkiller dived after them, using the Force to catch up to the gorog, landing on its back. Using Force lightning, Starkiller managed to kill the beast before it crushed Kota. The pair clutched to the dead creature as it plummeted into the sinkhole; taking hold of Kota, Starkiller jumped off the gorog and began freefalling, using the Force to slow their descent. Taking a comlink off Starkiller, Kota used it to call the Rogue Shadow, which had followed its programming and gone into hiding when the General had been captured. Reactivated by Kota's remote command, and flying on autopilot, the ship caught up to the pair, swooping beneath them. Kota and Starkiller landed on the dorsal fuselage before entering the vessel using a topside hatch.[5]
Reunions and partings[]
- "But now you're back, and [Mon Mothma] will have to see what an opportunity this represents. We must capitalize on it immediately—a major strike to take the fight back to the Empire—"
"Wait. Don't you want to know where I came from?"
"Why? You're back; that's all that counts."
"But I'm not back. I'm not him." - ―Rahm Kota and Starkiller discuss his return from the dead

Kota confronts Starkiller about his priorities.
Aboard the Rogue Shadow, Starkiller was disappointed to find that Eclipse was not with the ship. Starkiller pressed Kota for information as to her whereabouts; the General explained that Eclipse captained the Salvation and that she could be anywhere in the Outer Rim, as the Alliance Fleet was constantly on the run from the Empire. Kota was more excited at Starkiller's reappearance, believing that his return would be the galvanizing force the Alliance needed to start taking the war to the Empire. When Starkiller tried to explain his origins, Kota told him that all that mattered was that he was back. The elder Jedi dismissed the young man's revelation that he was a clone—he could feel Starkiller's presence in the Force and recognized it as the young man he had known. Kota told Starkiller to head to the Athega system; it was the last rendezvous point he had for the Fleet, and it was possible that they were either still there, or had left some indication of their future destination.[5]
Upon arrival in the Athega system, the Rogue Shadow discovered an Imperial force that had apparently been tracking the Alliance Fleet but had failed to catch it. Evading capture and returning to hyperspace, Kota watched with impatience as Starkiller attempted to find Eclipse with the Force. Believing that Starkiller was wasting his time, Kota was also disappointed that the young man did not seem interested in aiding the Rebellion and was more concerned with personal matters. A heated discussion ensued, in which Starkiller admitted that he did consider finding Eclipse to be more important, but that he still believed in the Rebellion and what it stood for. He needed to find Eclipse to settle personal issues within himself and needed space to think about his own identity. Kota—angry and impatient—did not believe Starkiller's claims to be a clone, stating that it was impossible to clone Jedi,[5] and that the young man should not believe Vader's assertions as to his true nature.[13] The General was dismissive, asking the young man if he truly felt that he had time to think while the galaxy was at war. Starkiller could only say that finding Eclipse was important to him, but he promised Kota that he was no coward and would return to fight. Taking Starkiller at his word, Kota told him to take the ship, since it was his anyway, and to drop him off at a starport where he could recruit people who were willing to fight.[5]
Returning to the Rebellion[]
- "Stay on guard. A powerful glimpse of the future like you experienced is rarely wrong."
- ―Rahm Kota, to Starkiller, concerning the latter's vision of the Alliance Fleet under attack
Starkiller dropped Kota off on the planet Commenor.[5] At some point, the General was checked over by a medical examiner, who cataloged Kota's injuries sustained in combat in the arena. Kota had suffered seventeen fractured bones, fourteen Class II lacerations, six Class III lacerations, two Class IV lacerations, moderate abdominal hemorrhaging, a severe concussion, and five missing teeth. The examiner applied treatment but suspected that Kota was not in any danger, since he was in full command of his faculties during the procedures, and that the Force had aided his recovery significantly.[14] Following the medical examination, Kota obtained passage to Malastare, where he recruited a new squad from local mercenaries and citizens and made contact with a local Alliance agent, Berkelium Shyre. Shyre had the coordinates of the Alliance Fleet—which was now located near the Itani Nebula—and Kota intended to meet up with it as soon as possible. Before he could leave, however, Starkiller arrived on the planet and tracked Kota down. He had visited the planet Dagobah and had received several visions of the future, including one where the Alliance Fleet was attacked. He had also seen Eclipse with the Fleet and that she had been injured during the attack. Starkiller knew that he needed to get to the Fleet as soon as possible in order to save Eclipse. Kota agreed, and he gathered his new squad together to provide reinforcements. Starkiller balked at the delay and wanted to leave immediately, with or without the General. Kota reminded him that if he were to turn up alone, in the midst of the Alliance Fleet, then he would be treated with outright suspicion, since he was supposed to be dead. Also, only Kota had the recognition codes to be accepted by the Fleet.[5]
Prior to launching, Kota arranged a meeting between Starkiller and Ni-Ke-Vanz, a Cerean medic he had recruited for his squad. The Cerean related his experience with cloning—learned from a Khommite, a race of master cloners—and told him that Force-sensitivity got in the way of the cloning process, and that no one to his knowledge has successfully cloned a Force-sensitive being perfectly. Kota used these facts to back up his own assertion that Starkiller could not be a clone.[5]

Starkiller and Kota approach the Salvation.
The Rogue Shadow, accompanied by Kota's squad's ship, left Malastare and headed for Nordra to meet with the Alliance Fleet's outliers before moving on to the Fleet proper. During the trip, Kota gave Starkiller two blue lightsaber crystals to replace the crimson ones that currently resided in his lightsabers. After passing inspection at Nordra, the Rogue Shadow made a short hyperspace jump to the Fleet near the Itani Nebula. Starkiller, still unsure about his place in the Alliance, decided to give Kota full schematics and navigational coordinates to the cloning facilities he had escaped from, located at Timira City on Kamino. With the data, the Alliance could launch a major strike against the Empire. As the Rogue Shadow joined the Fleet, Kota transmitted his authorization codes, clearing them for entry. Starkiller was astonished to find that his family crest had been taken as a symbol of the Alliance; Kota told him that he was part of the Alliance whether he liked it or not.[5]
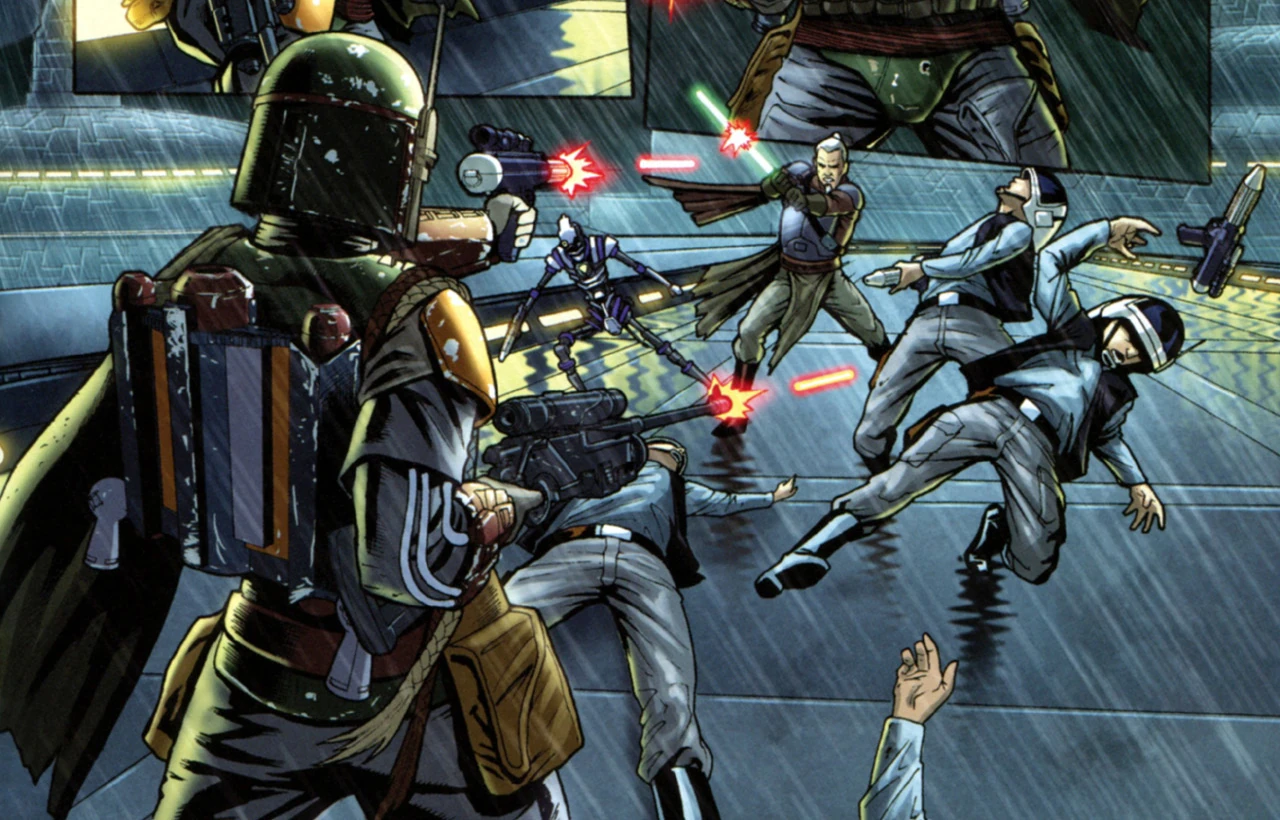
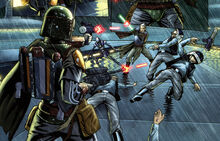
Salvation[]
- "The asteroids. That's where they were hiding."
"They must have been laying dormant ever since the fleet arrived." - ―Starkiller and Rahm Kota, discussing the source of the Imperial attack on the Alliance Fleet
Starkiller and Kota arrive on the Salvation.
Using their secured comm channel, Kota contacted Eclipse and sent her the intelligence data that Starkiller had given him regarding Kamino. When she asked the source of the information, Kota told her that it was better to see it for herself, not mentioning Starkiller or his apparent return from the dead. As the Rogue Shadow docked with the Salvation, the frigate fell under attacked by Imperial forces led by the bounty hunter Boba Fett. The attack force had been hidden in a nearby asteroid field, awaiting the perfect moment to strike. The Imperials were on a mission to capture Eclipse and take her to Kamino, thereby forcing Starkiller to return to the water world to rescue her. There, Darth Vader would attempt to return his apprentice to the dark side, or kill him. As Imperial soldiers boarded the Salvation—accompanied by the Empire's new Terror Troopers, who used personal camouflage systems to render themselves invisible—Kota and Starkiller fought their way to the bridge, encountering the new Imperial soldiers along the way. Reaching the command center, they found the crew dead and Eclipse missing. PROXY, who had been recovered from Corellia following his attack on Vader a year previously, had been reactivated by Eclipse and was serving alongside her. The droid informed Starkiller that Fett had taken Eclipse to the cargo bay on Deck Seven. As Starkiller raced off to rescue Eclipse, he told Kota to order the attack on Kamino.[5]
On the bridge of the Salvation, Kota relayed his plan to the Alliance. High Command agreed, having seen the need for a major and symbolic victory against the Empire after recruiting the Mon Calamari Resistance to their cause and began converging a fleet to assault Kamino. The General, assisted by his squad, coordinated the remaining crew of the frigate into taking back control of the ship from the Imperial intruders,[5] all the while guiding Starkiller to Deck Seven by comlink.[13] Eventually, the attacking ships started to retreat, and Kota discovered why when he was contacted by Starkiller, who told him that Fett had taken Eclipse off the Salvation. Having been told that members of the crew had repaired the hyperdrive, Kota ordered the ship to head for Kamino immediately to join the assault. As the ship leaped to hyperspace, PROXY informed him that red warning lights were showing on the status boards for the ship's lower levels. Starkiller also contacted the General, telling him that there was a large droid loose in the bowels of the ship, heading for the secondary reactor. On Starkiller's urging, Kota dispatched troops to defend the reactor. The troops he sent were quickly overwhelmed by the Terror Walker, but Starkiller arrived in time to battle and defeat the droid, saving the Salvation.[5]
The assault on Kamino[]
- "We're getting ripped apart up here! Order the retreat!"
"Hold your position, Antilles! Keep pressing the attack! We won't get another chance to take this target!" - ―Wedge Antilles and Rahm Kota, during the assault on Kamino

Kota, on the bridge of the Salvation.
After dispatching the Terror Walker droid, Starkiller joined Kota on the bridge just before the Salvation dropped out of hyperspace near Kamino. Around the frigate, a dozen Alliance ships, led by the MC80 Star Cruiser Solidarity, engaged several Star Destroyers in a fierce battle. Taking command of the Alliance forces, Kota directed the battle from the bridge of the Salvation. The frigate, already structurally weakened by the Imperial assault on it and the running battles that had occurred within it, took severe damage from enemy fire. Other vessels in the fleet began taking heavy damage, and Kamino's planetary shield precluded any ground assault. Kota had directed PROXY to attempt to deactivate the shields by slicing into the computer networks, but the droid noted that it would take too long, as the damage to the Salvation's systems hampered his work. As other commanders called for a retreat, Kota angrily told them to press the attack, knowing that they only had one chance to destroy the cloning facilities. As damage to the Salvation accumulated, Starkiller proposed a daring plan to take out the shields; he would guide the Salvation into the shield, using the Force to breach it. Then, he would use the ship as a fast moving missile to destroy the shield generators themselves. Kota agreed, ordering the crew of the Salvation to abandon ship before heading to the Rogue Shadow with PROXY.[5]
Starkiller succeeded in bringing down the shields, allowing the Rogue Shadow and Alliance ground forces to land, followed by fighter cover.[5] On the landing platform of Timira City, Kota led his troops toward the city, intent on destroying the cloning facilities. The General and his squad briefly engaged Boba Fett—who has been forced to stay on Kamino, as he would not receive payment for his services until Starkiller was dead—before the bounty hunter fled from the confrontation.[15] Entering the domed city, Kota and his forces headed toward a control center to try and open up the hangar doors, which would allow Alliance starfighters to enter the city interior and provide support to the ground troops, as well as countering patrolling Imperial fighters. Harried by sniper fire, Kota and his men were rescued by Starkiller, who had used the Force to survive the descent from orbit with the frigate. He took out the snipers[5] and destroyed two Imperial Dropship Transports that threatened the Alliance soldiers by using the Force to hurl TIE fighters into them,[13] before rejoining with the General. While Kota went to secure a command center to prevent the Imperials from locking down the city and preventing his forces from gaining ground, Starkiller opened the hangar doors using the Force. Guided by the Force, he proceeded to get to the top of the cloning spire, where Vader was holding Eclipse.[5] As the young man ascended the spire, Starkiller informed Kota that Vader had thousands of clones of Galen Marek maturing, and that he was building an army.[13]
Kota engages Boba Fett in battle.
Fighting through the city toward the cloning facilities, Kota and his troops eventually came upon Boba Fett once more. Fett, using a pair of macrobinoculars, was spying on a meeting between Starkiller and Vader and had his rifle ready to take a shot to kill Starkiller, thus earning his fee from Vader. Charging at the bounty hunter, Kota ordered his men to take Fett alive. Fett, however, had other ideas and killed the Alliance soldiers in a brief battle. With only Kota and PROXY left to face the bounty hunter, the General engaged Fett but was beaten back with the butt of the bounty hunter's rifle. Grounded, Kota then ordered PROXY to attack; the droid used his holographic systems to appear as Fett's father, Jango Fett. The appearance of his father distracted Fett, and PROXY made good use of the confusion, defeating him. As Kota stood over the downed bounty hunter, Fett triggered a sonic grenade. The resulting explosion disorientated Kota and scrambled PROXY's audio sensors, giving Fett an opportunity to make his escape.[15]
Two choices, one chance[]
- "You want him dead as much as I do."
"Yes, of course. But not yet. Not until he's told us the Empire's secrets."
"You want to take him prisoner?"
"To a hidden Rebel base where we can interrogate him, put him on trial for crimes against the true Republic. And then we'll execute him, to show the galaxy that we don't need to fear him any longer." - ―Starkiller and Rahm Kota discuss Vader's fate
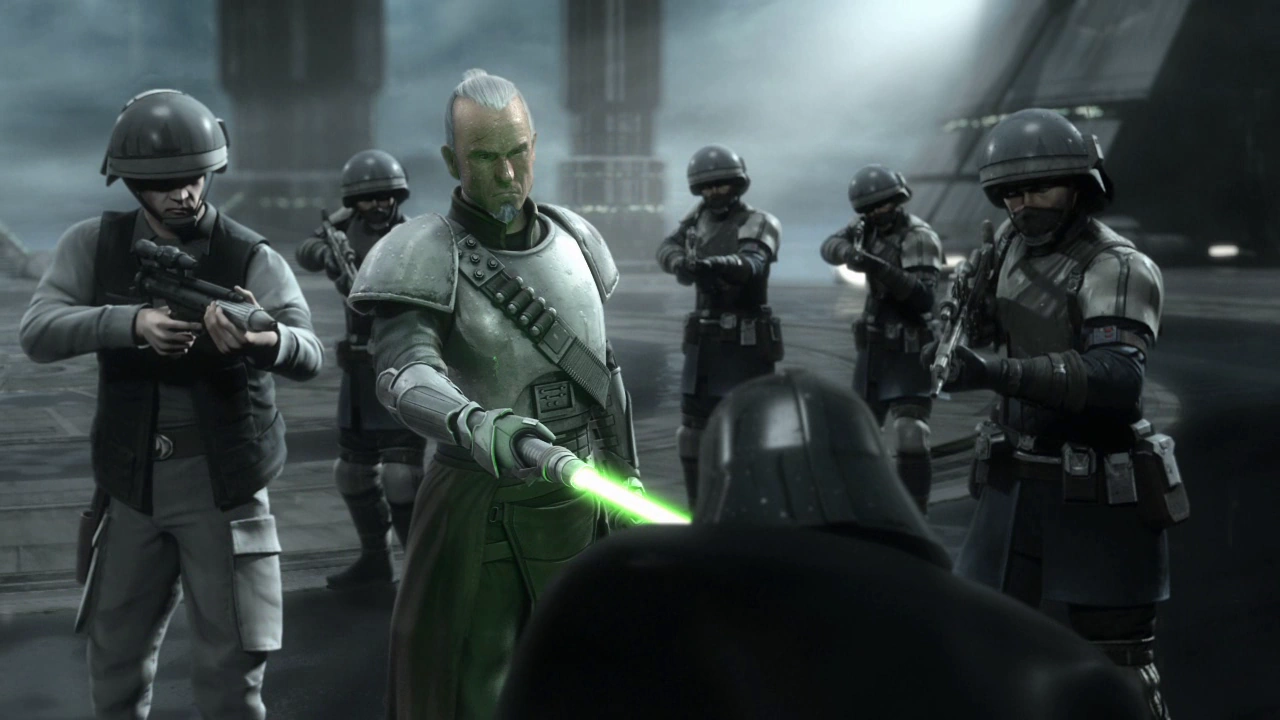
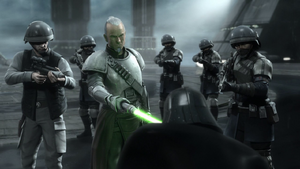
Kota stands guard over Darth Vader.
Accompanied by more Alliance troops, Kota and PROXY rejoined with Starkiller on one of Timira City's landing platforms. The young man had engaged Vader in a lengthy lightsaber duel and had beaten him. With the Dark Lord at his mercy, Starkiller was prepared to kill him for everything he had endured at Vader's hands. Kota counseled him not to; although the elder Jedi wanted him dead, he also wanted to take Vader prisoner and interrogate him until he revealed the Empire's secrets. Then, once they had learned everything of value, they would execute Vader to prove to the galaxy that there was no reason to fear him any longer. Starkiller, despite hating Vader and having believed that the Dark Lord had killed Eclipse during their duel, relented and spared his life. As Starkiller walked away to tend to Eclipse, Kota ignited his lightsaber and pointed it at Vader, keeping him under guard while Alliance soldiers bound him.[5]
With the Alliance victory at Kamino, Kota—along with Starkiller and Eclipse—prepared to transfer Vader to the Alliance's hidden base on the planet Dantooine. The General reported their achievements to Leia Organa, who told them to be proud of their accomplishment, and that the capture of Vader would be a turning point for the Alliance. The Rogue Shadow would be used to transport Vader to Dantooine, while a dozen other decoy freighters would travel to other locations to mask the Alliance's true intentions. The Rogue Shadow, with Kota and Starkiller acting as a security escort, left Kamino and entered hyperspace, on course for Dantooine.[5]
A new recruit[]
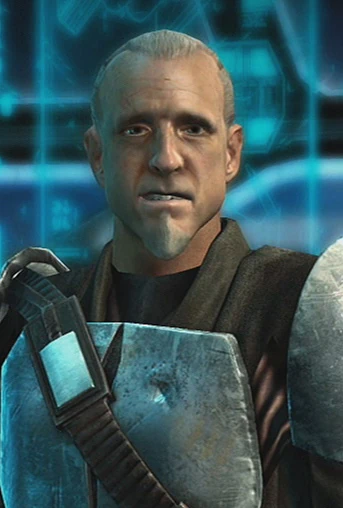
- "Who are you?"
"I am Kota, one of the few still bold enough to call themselves a Jedi. Look, clone, if you're even half the man that Falon was, the Rebel Alliance could use your help."
"And what makes you think I care about the Rebel Alliance?"
"The Force resonates in you. Yet here you are, 'tending the land,' while the entire galaxy suffers around you."
"…what do you want me to do?" - ―X2 and Rahm Kota meet for the first time

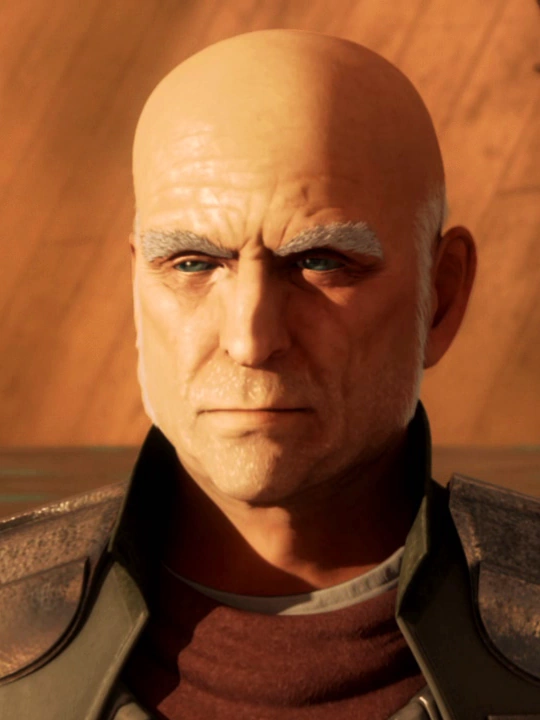
Kota meets X2 on Dantooine.
As a member of the Rebellion, Kota was tasked by Alliance High Command to travel to the planet Dantooine to recruit his former Padawan, Falon Grey, into the fledgling resistance. Arriving at the world in his starship, Kota discovered that Grey was dead, killed during the subsequent Jedi Purge that had followed Order 66. Instead, he found the clone X2, Grey's genetic "son," living as a simple farmer. Grey had been killed years earlier by X1, the other of Grey's "sons," and X2 had been wounded by his brother while attempting to save Grey. Grey's last act was to heal X2's wounds before dying. Kota was disappointed to find a clone who was a mere reflection of his former Padawan and told him that he was a fool for living as a farmer when the galaxy was suffering under the heel of the Empire. Despite this, Kota sensed that the Force was with X2[6] and felt that Grey would have wanted him to look after the young man.[7] As a result, Kota offered him a place in the Rebel Alliance, which X2 accepted.[6]
While X2 served as a Rebel agent, Kota watched over him, offering him guidance and assistance on the missions the clone undertook. To this end, Kota ordered X2 to infiltrate Desolation Station, an Imperial base where components of the Death Star were being created and then transported to the construction site. As the Alliance was aware of the existence of the battlestation, they had begun an active campaign to destroy the superweapon. During the mission—which resulted in the destruction of Desolation Station—Kota relayed intelligence to X2 regarding the location of Wookiee slaves on the station, then later sent several Incom Corporation T-65 X-wing starfighters to cover X2's extraction. Sometime later, Kota learned that a Rebel strike team had been captured on Geonosis while attempting to infiltrate an Imperial base on the planet. The Jedi Master planned to rescue them and contacted X2 to assist him in the effort. Kota left for Geonosis ahead of the clone, informing X2 that he would leave a speeder bike at the landing zone so that X2 could follow him. As the clone arrived in orbit around Geonosis, however, he encountered the bounty hunter Boba Fett, who had traveled to the planet to claim the bounty that the Empire had placed on Kota's head. The pair fought in the asteroid belt around Geonosis, and Fett intended to capture X2 and use him as bait to draw out Kota. Ultimately, X2 managed to best Fett and rendezvoused with Kota at the Imperial base. The pair liberated the imprisoned strike team; the individuals were grateful to X2 for their rescue and pledged to serve him as a military unit. On Kota's suggestion, the newly formed unit was christened as Grey Squadron in honor of Falon Grey.[6]
Death Star campaign[]
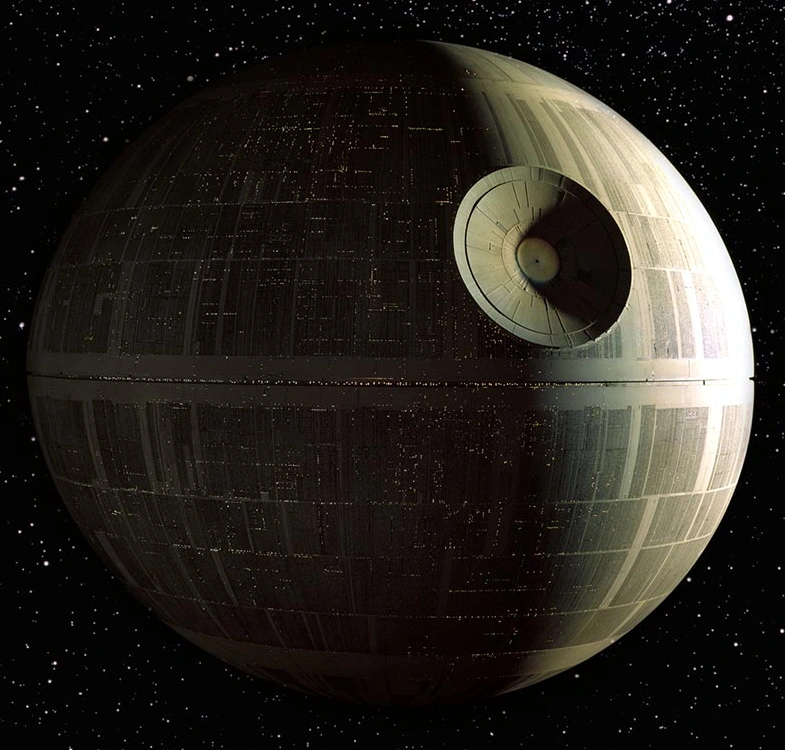
- "The Death Star is a fearsome invention indeed. We must find a way to destroy it!"
- ―Rahm Kota
The Death Star
Armed with the location of the Death Star, Kota's group organized a mission to infiltrate the superweapon with the intention of recovering intelligence on the station's capabilities and rescuing any prisoners held in its cells. X2 volunteered for the mission, and Kota assisted him, guiding the clone via comlink. During the mission, X2 first infiltrated a Star Destroyer guarding the station, using the ship's own weapons to destroy several defensive emplacements on the Death Star, which in turn allowed X2 to slip aboard the facility. Once onboard, X2 followed Kota's advice to use the Death Star's superlaser to destroy the Star Destroyer that was guarding the station. The General was amazed at the firepower that the station commanded and told the clone that it was vital that the information on the weapon reached Alliance High Command. X2 managed to rescue several prisoners and collect vital information on the station before withdrawing.[7]
X2 and Grey Squadron regrouped with Alliance High Command at the main Rebel base on the moon Yavin 4. While at the base, X2 received a recommendation from Kota that a bounty hunter named Shara would be a good addition to Grey Squadron. X2 concurred, trusting the veteran General's judgment.[6] Shortly thereafter, the Empire launched an attack on Yavin 4, and the Rebel Alliance was able to destroy the Death Star when Rebel pilot Luke Skywalker fired two proton torpedoes into a small thermal exhaust port that triggered a chain reaction, resulting in the station's destruction.[16]
Personality and traits[]
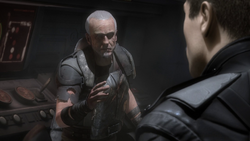
- "I'm no Jedi now. Not since this."
"I don't need your eyes, just your mind. And everything you know about fighting the Empire." - ―Rahm Kota and the apprentice on Cloud City
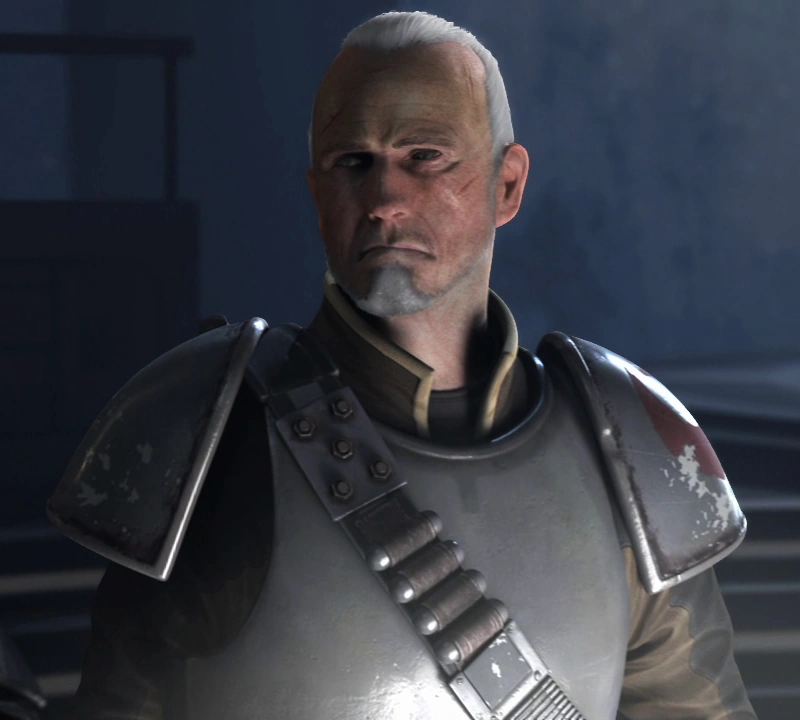
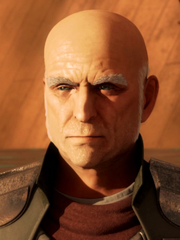
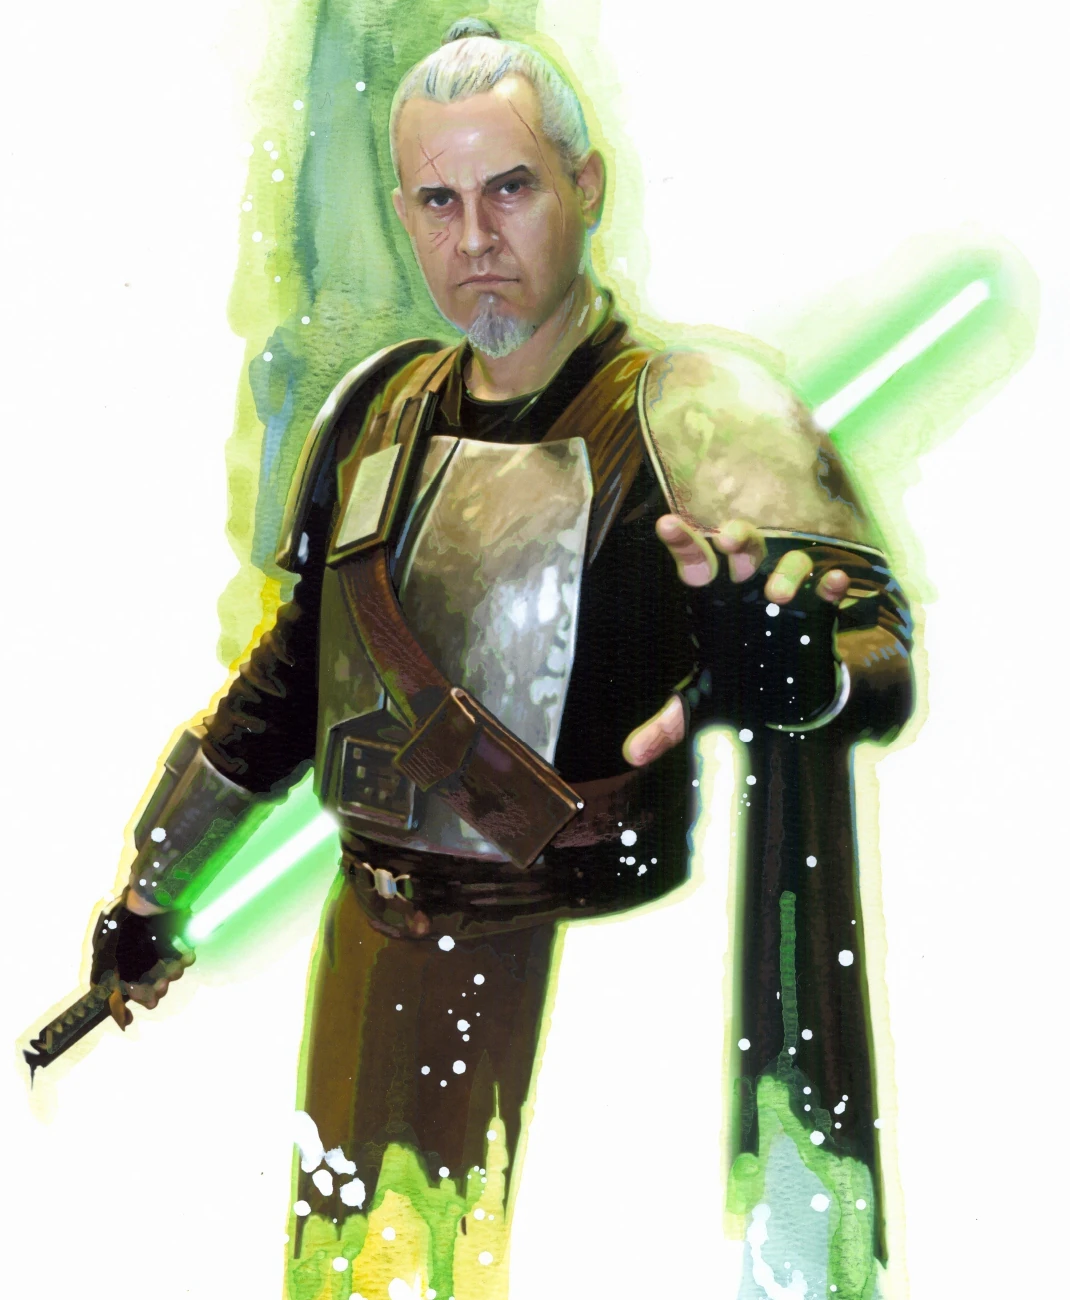
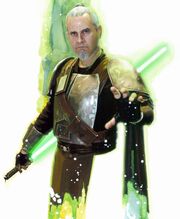
Rahm Kota
Rahm Kota was a hardened soldier who was noted as being an excellent tactician and combat commander. Regarded as cold and militant by his fellow Jedi, Kota always advocated the use of aggressive force in punishing those who disrupted law and order. Nevertheless, Kota was loyal to the Jedi Order—despite his disagreement with some of their policies—and was committed to the stability of the Galactic Republic. He gained a reputation for never abandoning those in need,[1] and, during the Clone Wars, his leadership style instilled confidence in his troops. Yet, as the war dragged on, Kota came to the belief that the conflict would see the end of both the Jedi and the Republic, and he grew weary of seeing soldiers and trusted friends killed in battle.[8]
During his enforced exile, Kota employed reckless tactics in an effort to draw out Darth Vader,[2] although the missions were always well-planned.[8] Confident of his own abilities and skills, Kota was certain that he could face the Dark Lord and defeat him in single combat. Cocky to the point of arrogance, he was humbled when he was beaten and his sight was taken from him during his duel with Vader's secret apprentice, Galen Marek, over Nar Shaddaa.[2]
Following the loss of his sight while dueling Marek, Kota became disillusioned in his planned attempts at defeating the Empire, coming to believe that challenging the Emperor's vast war machine was a "fool's errand." Adopting a defeatist attitude, the aging General began to see the conflict in terms of numbers, stating that it did not matter how many stormtroopers were killed because there were thousands more waiting to take their place. His defeat at the hands of a "boy" shook his confidence, and Kota came to see himself as useless without his sight. His connection to the Force was severely weakened, and the General believed that he had been cut off from it, although he continued to demonstrate some abilities—such as probing Marek's thoughts on Cloud City to determine his intentions, and feeling the aftermath of the young man's experiences in his former home on Kashyyyk.[2]
During his time on Cloud City, Kota turned to drink to ease the loss of his sight and his Force connection, wanting nothing more than to be left alone and forgotten. Kota allowed his appearance to fall into disrepair; his usually immaculate hair was allowed to hang loose, his robes became stained, and he left dirty the bandages that covered his sightless eyes. Even after being recruited by Marek to assist in building a rebellion against the Empire, Kota often requested alcohol and became disappointed and withdrawn, since there was none available to him.[2]

Kota battles the apprentice just prior to sensing the young man's future.
Kota's journeys with Marek—and witnessing the apprentices' attempts to forge an alliance to bring down the Empire—helped him to rediscover his fighting spirit and confidence. By the time of the mission to destroy the shipyard over Raxus Prime, Kota began to act more like his old self, issuing orders again like the seasoned general he once was, and counseling Marek on how to use the Force to pull a Star Destroyer out of the sky—an act that the General, in his previous defeatist frame of mind, would have previously considered impossible. When Marek met with the three Senators to form the Rebel Alliance on Corellia, Kota appeared at the meeting having laid his ghosts to rest, being neat, sober, and confident—and with his connection to the Force seemingly reestablished when he was able to confidently walk to the meeting table as if he were able to see clearly. In a conversation with the other members at the meeting, he revealed that he considered the apprentice to have saved him.[2]
Kota always suspected that Marek was, in fact, the darksider who had blinded him. Nevertheless, he sensed that the dark side did not hold sway over Marek as much as the boy thought. Resolving to help him, even if he felt he could offer no practical assistance to the young man, Kota was confident Marek would do the right thing. He supported the boy through the assembly of the dissident Senators and was sure that Marek's arrival on the Death Star signaled his intent to start the planned rebellion.[2]
During his travels with Marek, Kota became a surrogate father to the young man, which surprised the battle-hardened General.[17] These feelings resurfaced a year later, when it appeared that Marek had returned from the dead, although the young man insisted that he was a clone of the original. Through the Force, Kota felt that this individual—who knew himself only as "Starkiller"—had the same presence as the apprentice and did not believe that he was a clone. Despite Starkiller's origins, Kota trusted him implicitly, noting that he knew both the best and the worst that the apprentice had done, and that he was willing to take his chances supporting him. Later, when Starkiller asked Kota directly about his belief that the young man was not a clone, the General admitted that it really did not matter to him. He was back, and that was all there was to it.[5]
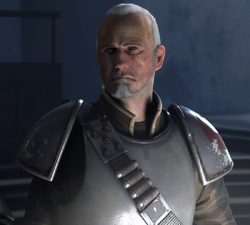
Rahm Kota, Jedi Master
Although the Jedi Order taught their members to let go of their hate and anger, for fear of being consumed by the dark side of the Force, Kota could not. His anger, hate, and impatience was often felt by other Force-users. Despite this, Kota never fell to the dark side, instead channelling his feelings to accomplish successes on the battlefield. The General was also perfectly willing to sacrifice forces to attain a strategic victory if the target was important enough.[5] He had no compunctions about using the raw hatred and desire for vengeance against the Empire of the troops under his command to his advantage. He knew that it would make his troops more effective in battle against the enemy, although he was accepting of the fact that using them in this manner would mean high casualties.[14]
Dedicated to the Alliance and focused on destroying the Empire, Kota believed that personal feelings and desires held no place in war. When he was rescued from Cato Neimoidia by Starkiller, the General's first instinct was to use the young man as a rallying point to galvanize the Alliance into making a major strike against the Empire.[5] In this way, Kota was not unlike Vader in one respect—they both saw Starkiller as a tool that they could use to further their own agendas, albeit for different motives.[18] When Starkiller placed finding Eclipse above helping the Rebellion, Kota became frustrated and reminded him that the galaxy was at war. Although he held little compassion,[5] Kota did have a gentler side, which he displayed by comforting Eclipse on Kashyyyk following Marek's death on the Death Star,[2] and by recognizing the fact that Starkiller loved Eclipse.[5] Despite this, he also sometimes made decisions based on practicality rather than morality, such as sparing Vader on Kamino. Kota's actions were prompted by the potential advantage of having Vader as a prisoner, and not because killing an unarmed opponent would have been morally wrong.[18]
As a member of the Rebellion, Kota returned to his role as a confident general, strongly believing that direct military action was necessary to keep the Alliance moving forward. He was dismissive of Mon Mothma's policy of developing the Alliance before striking and often assaulted Imperial targets without authorization from High Command. He kept his sightless eyes uncovered for the majority of the time[5] but did wear a black cloth across his eyes on occasion. He was bold and proud to call himself a Jedi, even during a time when admitting that fact was tantamount to admitting he was a Rebel and opposed the Empire. Kota recruited and guided X2, a Force-sensitive former clone trooper, after sensing that he was strong in the Force, despite his personal feelings about clones lacking the necessary skills to be effective soldiers. This was partially done out of respect for his former Padawan, Falon Grey—who was the genetic template for X2—and because Kota felt the Force within X2.[6]
Powers and abilities[]
- "Vader thinks he's turned you. But I can sense your future. And Vader won't always be your master. I sense only…me?"
- ―Rahm Kota sees a vision of the future
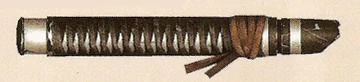
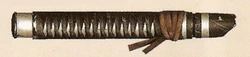
Rahm Kota's lightsaber
Kota was a skilled lightsaber duelist and was a practitioner of the lightsaber combat form Juyo. Despite being trained in the most aggressive of the seven forms of lightsaber combat,[8] Kota preferred to adopt a defensive stance in combat, using the Force to protect himself until he could launch a counterattack.[1] His prowess with the lightsaber also allowed him to block and redirect incoming blaster fire.[8]
Kota was physically fit and capable of feats of acrobatics. He could use these in conjunction with his Force powers in combat, allowing him to slip past an opponent's defenses to strike them. Kota also employed charging at the enemy and attacking them with quick, rapid strikes in combat. He could also enhance his combat abilities with the Force, as well as using the Force to increase his height and length of his jumps and his speed. Kota could use the Force to affect the mind of others.[8]
Kota's connection to the Force allowed him to control his fear, and he was immune to any attempts to instil fear in him.[8] He could also use the Force to enter a meditative trance before employing his Force abilities to hone his skill and increase the effectiveness of its outcome.[19]
Well-trained in the use of the Force, Kota was able to use telekinesis to move objects or deflect incoming attacks and projectiles,[8] and to throw his lightsaber with extreme accuracy.[1] He was also able to use the Force to snatch both Galen Marek and Darth Sidious' lightsabers from them during his encounter with Imperial forces on Corellia and on the Death Star, respectively.[2] He employed telekinesis to hurl objects at enemy combatants or repel them from his presence,[1] and had enough mastery to detach the command tower from the TIE Fighter Construction Facility over Nar Shaddaa and send it plummeting toward the planet.[3] He possessed training in farsight[8] and had received at least one vision of the future, during his duel with Marek, when he sensed his future and his opponent's would be intertwined. He was highly skilled in Force deflection, which he easily used to catch Force lightning and a Force push from Marek during their duel.[2]
Despite the loss of his sight, Kota's connection to the Force enabled him to function as if he had not lost it. He was able to move and fight as well as an able-bodied individual, fly starships, and command major battles from the bridge of a starship. He would often react to events as if he was able to see them with his eyes and could tell where people were in relation to himself so that he could speak directly to them.[5] Kota also possessed some skill in healing himself with the Force. After Kota's seven-day incarceration in the Tarko-se Arena on Cato Neimoidia, the medical examiner recorded that, despite several severe injuries, Kota was in no danger of dying and needed only quick treatment before returning to duty. The examiner also noted that Kota's body had evidence of many past injuries that had not been healed with conventional medical techniques.[14]
Kota's abilities were not limited to his connection with the Force. He was fluent in Basic, and was trained in the use of light armor so that wearing it during combat did not hinder his movements or affect his combat capabilities. While the lightsaber was his primary weapon, Kota was also proficiently trained in the use of simple weapons. He was also well trained in how to access secure computer information and to defeat security systems.[8]
Equipment[]
Kota wielded a green-bladed lightsaber in combat. The weapon was eventually taken from the general by Galen Marek after their duel at the TIE Fighter Construction Facility, who modified the weapon and used it as his own.[3] Kota eventually acquired another green-bladed lightsaber that was identical to his previous one and used it during his service to the Rebel Alliance.[13] Unlike most Jedi, who hung their lightsabers from their belts, Kota kept his in a sheath on his back.[3]
Kota wore a combination of Jedi robes and light combat armor.[8] Following the loss of his sight, Kota sometimes took to wearing a cloth strip across his eyes.[3] He carried a comlink,[8] and during his time with the Rebellion made use of a personal starship.[6]
Behind the scenes[]
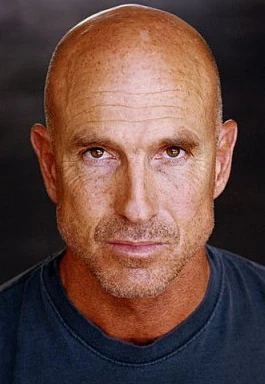

Cully Fredricksen
Rahm Kota was introduced in Star Wars: The Force Unleashed, a 2008 multimedia project created by LucasArts, in collaboration with Dark Horse Comics, Del Rey, LEGO, Hasbro Inc., and Palace Press. Kota was one of the main characters and featured in The Force Unleashed video game, novel, and comic. Kota later gained mentions in source material publications, including The Force Unleashed Campaign Guide and The Complete Star Wars Encyclopedia. A toy was also made of the character, released as part of The Force Unleashed toy line. In 2009, Kota was included in both the PSP and Nintendo DS versions of Star Wars Battlefront: Elite Squadron, and Star Wars: The Force Unleashed: Ultimate Sith Edition, which was a release of the original game with several newly-added levels. While the majority of the new content in the Ultimate Sith Edition was non-canon, the Jedi Temple level was first released as downloadable content and takes place within the storyline of The Force Unleashed. As there is nothing to suggest that the level is non-canon, unlike the Tatooine and Hoth levels, this article assumes it is part of the "proper" storyline. In 2010, a sequel to The Force Unleashed was released, and Kota was once again a main character. His role was expanded on in both the novelization and the comic.
Kota is voiced in The Force Unleashed video game and its sequel by actor Cully Fredricksen, whose likeness was also used as the basis for the character's appearance. Fredricksen was the first actor cast for the game. One of several actors who read for the part,[20] Fredricksen felt the audition was akin to a theatrical audition, as he was given a longer time to prepare for the role than he would have had if he were reading for a film part. LucasArts also provided Fredricksen with the script, character breakdown, and concept artwork of Kota before the audition.[17] Fredricksen approached the reading fully in-character, which initially made the casting director believe that the actor may be standoffish and difficult to work with. However, it was soon realized that Fredricksen was just being Kota.[20] Fredricksen, however, had a different take on the audition, believing that he had not "walked in as Kota." Impressed by the team at LucasArts and how seriously they took The Force Unleashed project, Fredricksen felt that the team wanted him to succeed, and their attitude made him comfortable during the process. The actor felt that the team was able to bring Kota out of him, remarking that "it was like the collaboration had already begun before I was ever given the part." Fredricksen later told his wife that the audition had been one of the most gratifying he had ever attended.[17]
Fredricksen's convincing audition, combined with the actor's physicality and his ability to produce a wide range of facial expressions, convinced the production team to hire him as the gruff General. Fredricksen was described as the "consummate professional," and "a lot of fun to work with."[20] Fredricksen enjoyed making the game, believing that the collaboration of the actors and crew was vital to the project, since they were all eager for it to succeed and to produce the best game they possibly could. One element that Fredricksen positively commented on was the fact that, during recording sessions, the entire cast for that scene would record their lines together, allowing them to act against one another. This was in contrast to other voice-over recording sessions Fredricksen had been involved in, where he had just delivered his lines by himself with the director reading for the other characters. This method allowed for more believable chemistry between the characters.[17]
Kota, as portrayed in the video game version of The Force Unleashed—both in-game and in promotional shots— has brown eyes.[3] In the novel of The Force Unleashed, however, his eyes are referenced as blue just prior to the apprentice blinding him with their locked sabers.[2]
Alternative storylines[]
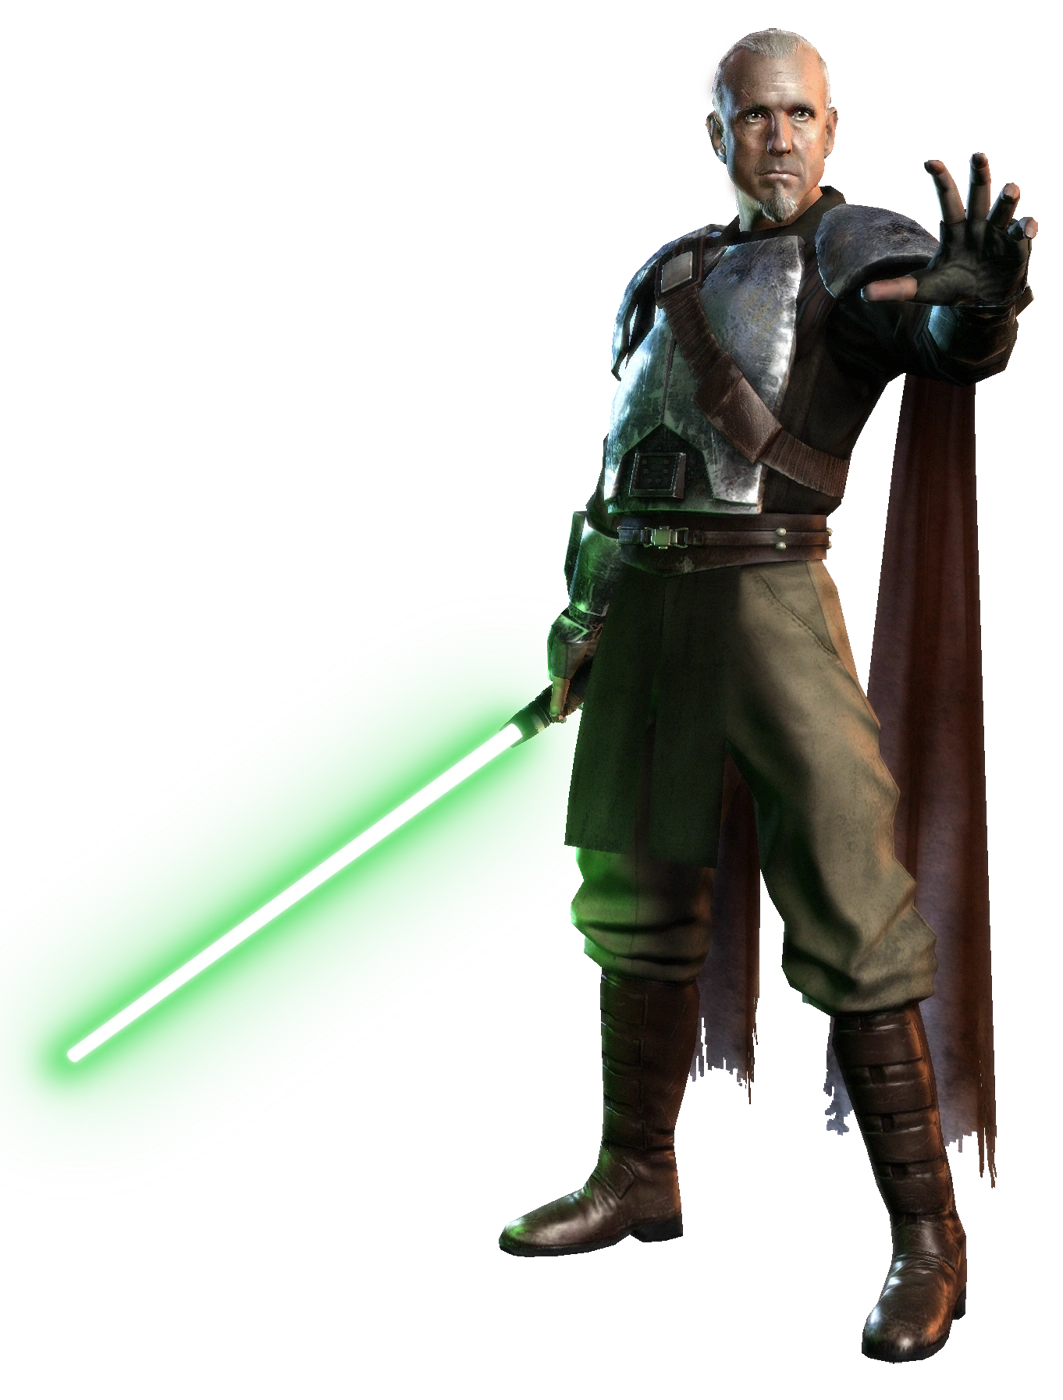
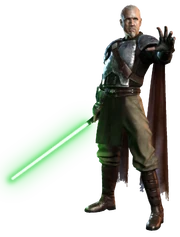
Rahm Kota
In the Nintendo Wii, PSP, and PlayStation 2 versions of The Force Unleashed, Kota is found in a bar on Nar Shaddaa instead of Cloud City. Also, as Marek receives the vision of his father following the completion of the Trial of Spirit in the ruins of the Jedi Temple on Coruscant rather than in his former home on Kashyyyk, he attempts to discuss his experience with Kota prior to the mission to the Wookiee homeworld. Kota is not interested in talking about it, however.[12] In the cell phone, N-Gage, and iPhone/iPod Touch versions of the game, Kota is killed by Marek during their encounter on the TIE Fighter Construction Facility. In the cell phone version, Marek states that Kota "fell into the chasm," although this is not shown in the cutscene. In the N-Gage/iPhone/iPod Touch versions, Marek Force-chokes Kota to death following their duel. The storyline then continues without Kota's involvement.
In the game, despite losing his lightsaber to Marek following their duel aboard the TIE Fighter Construction Facility, Kota still has one when he joins the apprentice on Cloud City. During the level, Kota can engage and fight Imperial soldiers while following the apprentice. He also has the lightsaber during the cutscene when Vader interrupts the Corellian meeting and uses it to try and fight the Dark Lord. In the novel, Kota loses his lightsaber during the duel on the TIE Fighter Construction Facility, and it becomes Marek's own. Part of the plot of the novel involves Marek further refining the weapon to become better attuned to himself. This article assumes that the novel version of events take precedence over the game events and that Kota did not have a lightsaber following his duel with Marek on Nar Shaddaa.
Due to the different depictions of Kota's actions during The Force Unleashed that are presented in the various console versions of the game, this article complies with the Lucasfilm statement that the novel is the definitive "true story."[21] This article presents a consolidated account wherein events in all versions of the game are incorporated as long as they do not conflict with the canon established in the novel.
Alternate dark side endings[]
At the conclusion of The Force Unleashed, the player has the option of two paths to follow to complete the adventure. The branch point comes directly after the duel with Darth Vader aboard the Death Star; there, the player has the choice to either face Vader again, killing him, or engage the Emperor in a duel to save Kota, who is being electrocuted with Force lightning. The canonical ending involves fighting the Emperor and saving Kota. If the player takes the option to kill Vader, however, the Emperor attempts to sway the apprentice back to the dark side by persuading him to kill Kota. The apprentice attempts to strike the Emperor down instead but is beaten back. With the apprentice down, the Emperor uses the Force to pull the Rogue Shadow into the observation dome in which they are located. The resulting explosions and debris kill all those present, including Kota.[3]
Like The Force Unleashed, the sequel game also offers a choice of endings. After Starkiller has beaten Vader on Timira City, the option is given to either spare Vader and take him prisoner, or to succumb to the dark side and kill him. If the dark side option is taken, Starkiller goes to strike Vader down, only to be impaled by a red lightsaber wielded by another clone of Galen Marek. This clone had succeeded in overcoming his emotions and becoming the apprentice that Vader desired. As Starkiller falls, Kota engages the Dark Apprentice in a brief lightsaber duel. The General is slashed during the fight, then lifted into the air and Force-choked. The Dark Apprentice then casts him back toward the Rebel troops who accompanied him, before he uses the Force to push them all off the platform and into the ocean below.[13]
Conception and creation[]
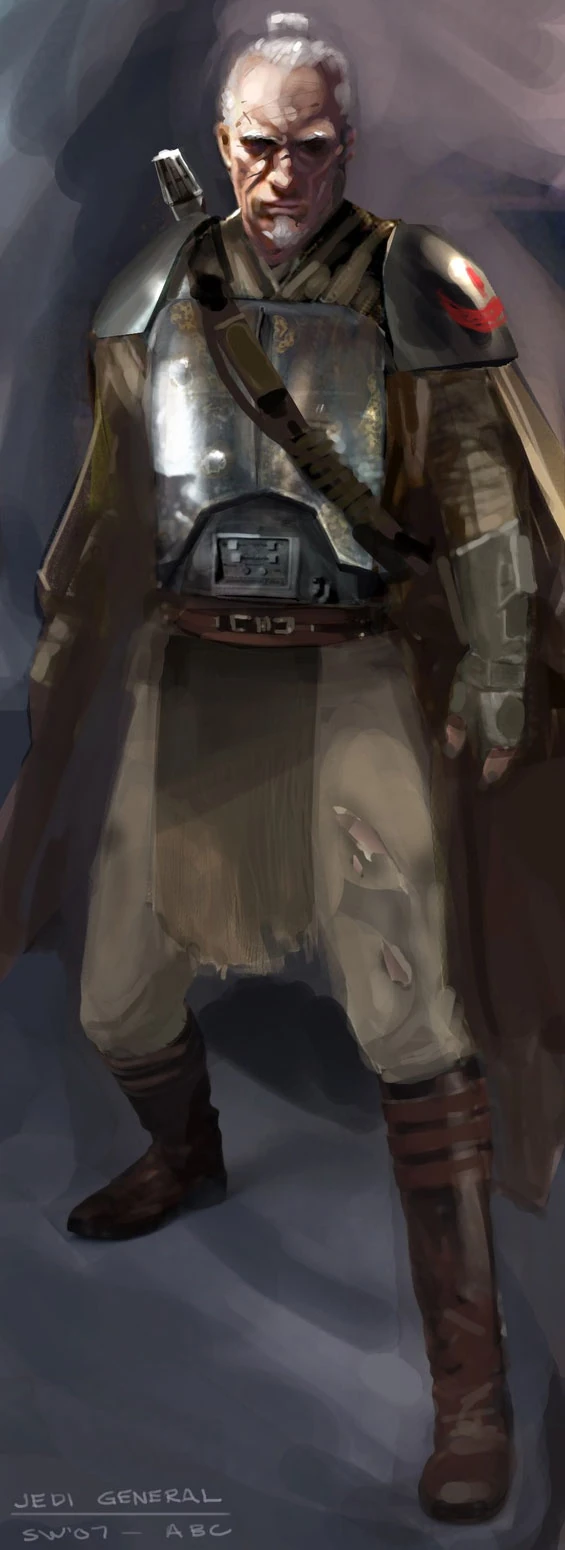

Concept art of Kota by Amy Beth Christenson
- "If anything Kota only became tougher because Cully Fredrickson [sic], who plays him, is so big and imposing, and he came in already in character."
- ―W. Haden Blackman
During the development of The Force Unleashed, once the concept of having the player control a character that was Darth Vader's secret apprentice was settled on, it was realized that Jedi opponents would be needed for him to go up against. Concept art for various Jedi was drawn up, including one that was described as a "Samurai Jedi." At the same time, the production team was looking to add a character who would act as a second mentor to the apprentice, one who could give him instruction in the Force that he could not receive from Vader. Originally, the concept called for the disembodied spirit of Qui-Gon Jinn, preserved in the Netherworld of the Force, to fulfill this role. However, George Lucas did not approve of this concept, since he wanted a completely new cast of characters for the game,[22] and a living mentor of flesh and blood.[23]
Ideas for the character were explored, including a hermit Jedi in the tradition of Yoda, and even bringing back the character of Darth Plagueis in some form. However, in order to streamline the process, it was decided that the mentor role would be filled by one of the Jedi opponents originally designed for the apprentice to face early on in the game. W. Haden Blackman, the project lead on the game, and the production team decided that they wanted a Jedi who was different from the established Jedi Master mentor characters already established in the Star Wars universe. Instead of the mystic Jinn, or the nurturing Obi-Wan Kenobi, the mentor was meant to be "less Gandalf and more Army General."[22]
Concept artists John Stafford and Richard Davis explored the character's appearance and possible background having in mind his survival through the Great Jedi Purge, coupled with his Samurai-like sense of honor. After years of hiding and surviving in isolation, the character would be "hard-boiled": bitter, betrayed, hardened, insensitive, scarred, traumatised, damaged or amputated; even a bit paranoid and verging towards the Dark Side. His experience would be reflected on his disheveled appearance, dented armor and tattered clothes.[23]
Artist Amy Beth Christenson returned to the original concepts and found the artwork of the Samurai Jedi. She redesigned the character, creating one who was armored, wore a topknot, and carried his lightsaber on his back. In addition, he was scarred from combat. The original concept art went through several revisions but did not evolve much from the original drawing.[22]
With the basic appearance of the character established, the script evolved and it was decided that he would be one of the Apprentice's adversaries from the start, allowing thus more development and character arc. John Stafford wanted the character to be wounded after this meeting[23] and a downfall was introduced. This played into the concept of the Ronin—a samurai who has lost everything that he once held dear, such as his master, his honor and duty, and sense of worth—and Kota was shown to be at his lowest point, becoming a drunkard, feeling worthless, and unable to use the Force. His experiences with the Apprentice help Kota to regain his pride and connection to the Force, in turn returning him to the path of the Jedi. When Fredricksen was cast in the role, Blackman noted that the character actually became tougher than originally scripted due to the actor's imposing physical stature.[22]
Rahm Kota's blindness was inspired by the Japanese fictional character Zatoichi, a blind masseur and samurai.[24]
Appearances[]
- The Force Unleashed novelization (First appearance)
- Star Wars: The Force Unleashed comic
- Star Wars: The Force Unleashed video game
- The Force Unleashed II novelization
- The Force Unleashed II audiobook
- Star Wars: The Force Unleashed II comic
- Star Wars: The Force Unleashed II
- Star Wars Battlefront: Elite Squadron
Non-canon appearances[]
- Star Wars: The Force Unleashed: Ultimate Sith Edition (Jedi Temple downloadable content level) (Voice only)
Sources[]
Notes and references[]
- ↑ 1.00 1.01 1.02 1.03 1.04 1.05 1.06 1.07 1.08 1.09 1.10 Star Wars: The Force Unleashed video game Databank
- ↑ 2.00 2.01 2.02 2.03 2.04 2.05 2.06 2.07 2.08 2.09 2.10 2.11 2.12 2.13 2.14 2.15 2.16 2.17 2.18 2.19 2.20 2.21 2.22 2.23 2.24 2.25 2.26 2.27 2.28 2.29 2.30 2.31 2.32 2.33 2.34 2.35 2.36 2.37 2.38 2.39 2.40 2.41 2.42 2.43 2.44 2.45 2.46 The Force Unleashed novelization
- ↑ 3.00 3.01 3.02 3.03 3.04 3.05 3.06 3.07 3.08 3.09 3.10 3.11 3.12 3.13 3.14 3.15 3.16 3.17 3.18 3.19 3.20 3.21 3.22 3.23 Star Wars: The Force Unleashed video game
- ↑ 4.0 4.1 4.2 4.3 Star Wars Battlefront: Elite Squadron
- ↑ 5.00 5.01 5.02 5.03 5.04 5.05 5.06 5.07 5.08 5.09 5.10 5.11 5.12 5.13 5.14 5.15 5.16 5.17 5.18 5.19 5.20 5.21 5.22 5.23 5.24 5.25 5.26 5.27 5.28 5.29 5.30 5.31 5.32 5.33 5.34 5.35 5.36 5.37 5.38 5.39 5.40 The Force Unleashed II novelization
- ↑ 6.0 6.1 6.2 6.3 6.4 6.5 6.6 Star Wars Battlefront: Elite Squadron—Nintendo DS version
- ↑ 7.0 7.1 7.2 Star Wars Battlefront: Elite Squadron—PSP version
- ↑ 8.00 8.01 8.02 8.03 8.04 8.05 8.06 8.07 8.08 8.09 8.10 8.11 8.12 8.13 8.14 8.15 8.16 8.17 8.18 The Force Unleashed Campaign Guide
- ↑ Star Wars: Episode III Revenge of the Sith
- ↑ 10.0 10.1 10.2 Star Wars: The Force Unleashed comic
- ↑ Star Wars: The Force Unleashed: Ultimate Sith Edition (Jedi Temple downloadable content level)
- ↑ 12.0 12.1 Star Wars: The Force Unleashed video game—Wii, PSP, and PS2 versions only
- ↑ 13.00 13.01 13.02 13.03 13.04 13.05 13.06 13.07 13.08 13.09 13.10 Star Wars: The Force Unleashed II
- ↑ 14.0 14.1 14.2 14.3 14.4 14.5 Star Wars: The Force Unleashed II Databank
- ↑ 15.0 15.1 Star Wars: The Force Unleashed II comic
- ↑ Star Wars: Episode IV A New Hope
- ↑ 17.0 17.1 17.2 17.3
 "Juno and the Jedi" — Star Wars Insider 120
- ↑ 18.0 18.1 Star Wars: The Force Unleashed II digital artbook
- ↑ In The Force Unleashed Campaign Guide, Kota is noted to have the ability "serenity" in his roleplaying game statistics. The Star Wars Roleplaying Game Saga Edition Core Rulebook explains the effects of this ability on page 220.
- ↑ 20.0 20.1 20.2
 Casting and Capturing Captivating Performances on StarWars.com (content now obsolete; backup link)
- ↑ The Force Unleashed on your Bookshelf on StarWars.com (content now obsolete; backup link)
- ↑ 22.0 22.1 22.2 22.3 22.4 The Force Unleashed: Co-Star Evolution on StarWars.com (content now obsolete; backup link)
- ↑ 23.0 23.1 23.2 The Art and Making of Star Wars: The Force Unleashed
- ↑ Pablo Hidalgo (@pablohidalgo) on Twitter: "Is Kanan now a reference to Rahm Kota? No, but they both owe a debt to Zatoichi, a character every SW fan should know about. #StarWarsRebels" (screenshot)