Template:Nominated Warning: This infobox has missing parameters: parents, pronouns, masters, apprentices, skin, children, siblings, type, partners, families, feathers, mass and unrecognized parameters: hidep, hidec, era, imageBG, hideb
Template:Qlisten
Harkov was an admiral who served in the Imperial Navy during the Galactic Civil War. Shortly after the Battle of Hoth, he was charged with bringing an end to the Sepan Civil War and succeeded in bringing order to the system. However, during the campaign, he also supplied Imperial arms to both sides. Harkov began negotiating his defection to the Alliance to Restore the Republic, promising to take the fleet under his command with him for a high enough price. When details of his dealings came to lights, Imperial investigators began to close in on the admiral, forcing him to complete his defection ahead of schedule. Nevertheless, Imperial forces, under the command of Darth Vader, were eventually able to capture him and he was interrogated and executed by the Dark Lord of the Sith.
Biography
Imperial officer
Harkov appeared to be like any other admiral in the Galactic Empire, commanding the Victory-class Star Destroyer Protector with a small fleet under his command, including the EF76 Nebulon-B escort frigate Akaga. However, all was not as it seemed. By 3 ABY the admiral had begun to take chances, selling Imperial weapons and equipment to any groups willing to pay. He also began to contemplate defecting to the Alliance to Restore the Republic provided he could get a suitably high price for his services.[1]


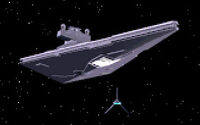
Harkov's shuttle travels to a meeting with the Rebel Alliance.
Harkov was almost exposed when a leak allowed Admiral Mordon to learn of his potential treachery. Harkov was aware that, if news of his deceit and possible defection were to get out, the Empire's retribution would be swift and deadly, so Harkov moved quickly against Mordon and had the admiral murdered. An investigation into Mordon's death was launched but the investigators were unable to identify the culprit and the cause of Mordon's death was officially declared to be natural causes.[2]
Shortly after the Battle of Hoth, Harkov had a secret rendezvous with leaders of the Alliance, including Mon Mothma, and announced his intention to defect, promising that his fleet would defect with him. Though the Rebels distrusted him, their need for experienced officers made them willing to take the risk and they agreed to enter negotiations over his price.[1]
Harkov meets with Mon Mothma.
Sepan Civil War
- "The civil war that has ravaged your planets is over. It is time to lay down your arms. Join us to rebuild all that was destroyed in this savage conflict. Even now the process of repairing your planets has begun."
- ―Harkov addresses the Sepan leaders
One of his last assignments as an Imperial admiral was to pacify the Sepan system, which was in the grips of a civil war between the inhabitants of Ripoblus and Dimok, and to prevent the conflict from spreading to neighboring systems. The Empire was unaware at the time that Harkov had been supplying both sides in the war with weapons and equipment but conflicting reports led the Secret Order of the Emperor to begin to question his handling of the situation.[1]
An hour after Harkov briefed his crew on the forthcoming campaign, the Protector jumped to hyperspace and arrived in the Sepan system in time to stop a Dimok attack on a Ripoblus convoy.[2] During the mission Maarek Stele, a newly transferred TIE pilot, acting on orders from the Secret Order, discovered Imperial armaments aboard one of the ships in the Ripoblus convoy and ships were quickly launched to retrieve the weapons. Soon after, the Protector moved to stop a Ripoblus reprisal raid on a Dimok scientific research installation. Again, the Secret Order instructed Stele to inspect the facility, leading to the discovery and subsequent recovery of further weapons.[1] Both discoveries threatened to lead the Secret Order back to Harkov and Stele was warned not to exceed his orders in the future.[2]
Harkov next led the Protector into action to rescue some Ripoblus scientists who were fleeing the war and seeking asylum. The Imperial forces had to fend off attacks from both Ripoblus and Dimok forces to secure the safety of the refugees. Following this, Imperial Intelligence learned of a rendezvous between the Ripoblus and Dimok leaders near Sepan 8 as the two factions looked to unite against the Empire, and the Imperials mounted an attack to capture them. The operation was a success but, as it turned out, the ships at the meeting were actually carrying the children of the Ripoblus and Dimok leaders, intended to be used as hostages to ensure that each side complied with their new treaty.[1]
During the mission to capture the Sepan leaders, Maarek Stele located further Imperial equipment aboard the cargo ferry Godendag and the Assassin-class corvette Runka, further evidence that somebody was selling arms to both sides.[1] After the battle Harkov was contacted on a priority comlink channel as the investigation into who was selling Imperial equipment continued. Discrepancies in the Protector's supply manifests had led the investigators to Harkov's flagship but Harkov attempted to deflect the investigator's questions to the ship's quartermaster.[2]
With both sides united against the Empire, the Imperials had no choice other than to force a resolution. To this end the Protector was to take a consignment of new TIE Avenger starfighters to replace the TIE Fighters and TIE Interceptors lost in the previous missions. The Protector traveled to Gerbaud 2 to rendezvous with the escort carrier Tropsobor. With an attack from Ripoblus and Dimok forces expected, several pilots were to fly cover for the transfer. The Secret Order had reason to suspect that another ship would be coming to the rendezvous location and instructed Stele to watch for anything unusual. Shortly after the enemy attack was repelled and the transfer was completed, Stele inspected the incoming shuttle Omlaut to discover that it carried a high ranking member of the Rebel Alliance. Harkov immediately disciplined Stele for his apparent inability to stick to orders and warned that his curiosity might get him into trouble.[1]

Harkov's flagship, the Protector.
The Omlaut docked with the Protector and the Rebel was taken immediately to Harkov's private ready room for a meeting with the admiral. The Secret Order concluded that Harkov was responsible for the chronic shortages of supplies and had been attempting to cover his black market dealings with both sides in the Sepan Civil War and, apparently the Rebel Alliance. A member of the Secret Order later presented their suspicions to Darth Vader who instructed them to bring him evidence before he moved against Harkov.[2]
After the Imperials inflicted heavy losses on both sides in the Sepan Civil War, the two factions had little choice other than to accept peace under Imperial rule. Leaders of both worlds were brought to the Protector where Harkov addressed them, declaring the war over and promising that cooperation with the Empire would bring peace and prosperity.[1][2]
Defection
- "It means we're at war with the Empire. And it means we didn't get anything from the cursed Alliance!"
- ―Harkov after his treachery is exposed
Shortly after the end of the Sepan Civil War the Secret Order had Stele transferred away from Harkov. However, as they closed the net on Harkov they later had Stele transferred back to the Protector to assist them. A few days after Stele's arrival Harkov met with his closest advisors. He feared that Stele may be a spy for Emperor Palpatine and that this could compromise his plans to defect to the Alliance, which he expected to be completed within a few days. Vondruln, one of Harkov's advisers, was instructed to ensure that Stele was eliminated and to make it look like an accident.[2]
Stele was instructed to show two rookie pilots how to clear a minefield in an unshielded craft. As Stele set about clearing the minefield Harkov personally gave the order for his wingmen, actually experienced pilots, to eliminate him. However, the Secret Order had anticipated Harkov's actions and had arranged for the Nebulon-B2 frigate Osprey to come to Stele's rescue. As Stele fled towards the Osprey, the Rebel MC40a light cruiser Margaret arrived to rendezvous with the Protector which quickly dispatched a shuttle carrying one of Harkov's officers. Stele was able to avoid pursuing TIE Avengers and Rebel X-wings and escaped on the Osprey.[2]
Harkov was furious about Stele's escape. His plan had been exposed and he was now at war with the Empire, leaving him with no choice other than to join the Alliance immediately and unable to get even a decicred for his defection. Harkov summarily executed Vondruln for his failure.[2] With the Protector now dependent on the Rebels for supplies, Harkov fled to the Rebel supply outpost DS 5.[1]
Imperial Assault Gunboat recon units were quickly dispatched to investigate several possible locations for the Rebel base in an effort to locate Harkov. The Emperor had dispatched Lord Vader to interrogate and execute Harkov, so the recon units were under instructions to locate him and report back. They were not to engage Harkov's forces, though they were to destroy any Rebel supply stores they encountered. It would be Stele's recon unit that eventually located DS 5 and with it, the Protector. The Imperials proceeded to cut off his supply lines, initially at the station by destroying the cargo containers.[1]
Within an hour of the recon flight's return, the Imperials launched again and destroyed a supply convoy, headed for DS 5, consisting of BFF-1 Bulk Freighter group Karflo, the Modular Conveyor group Sorosuub, the two Container Transports Morgath 1 and Morgath 5 and the CR90 corvette group Sundog. With Harkov cut off from supplies he was unable to conduct even limited operations and the Protector was effectively stranded. However, Harkov would not be given time to think and adjust his plans as the Empire launched another quick attack, weakening his starfighter corps with their own TIE Avengers.[2]
The Empire was planning an assault to board and capture the Protector. Harkov anticipated this attack and apparently attempted to throw them off his scent by abandoning ship and taking refuge on DS 5, ordering the Protector to jump into hyperspace. However, during the attack on his starfighters, Maarek Stele inspected Harkov's shuttle, the Toten, and discovered the admiral's subterfuge.[1]
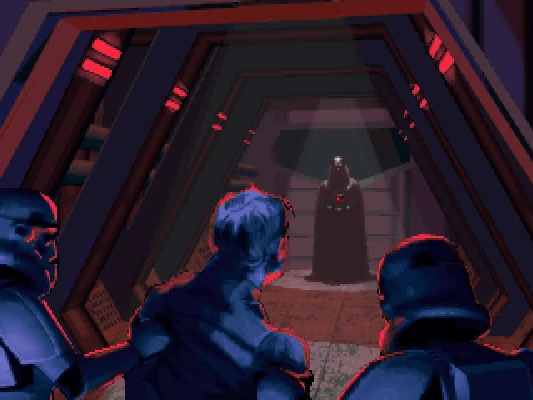
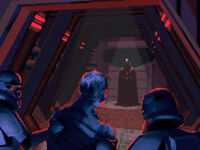
Harkov is taken before Darth Vader.
Capture
- "Welcome, Admiral Harkov. We have a matter to discuss. What is the location of your fleet?…Now you shall pay for your treachery."
- ―Darth Vader during Harkov's interrogation
With his location exposed, the Empire prevented Harkov's escape by using probe droids to watch for his escape while they planned their final attack.[2] The Rebels quickly laid a minefield and called for assistance from the frigate Olinor. However, before the frigate arrived, the Empire launched their attack. Assault Gunboats fought defending starfighters, while Gamma-class ATR-6 assault transports moved against the platform itself. Harkov made one final attempt to flee aboard the YT-1300 Geddawai but his ship was disabled by Maarek Stele.[1]

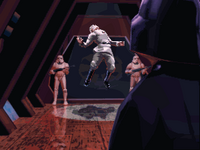
Darth Vader kills Harkov.
The Geddawai was boarded by a stormtrooper transport and, once captured delivered Harkov to the Imperial-class Star Destroyer Garret. On the Garret Harkov was taken, under stormtrooper guard, to Lord Vader. Bitter and defiant, Harkov attempted to resist Vader, refusing to answer any questions during his short interrogation. He was soon punished for his defiance as Vader used the Force to lift Harkov into the air and crush him.[1][2]
Legacy
Though Harkov was dead, the Protector and the Akaga were, with the help of Rebel forces, able to evade Imperial forces until, trapped by the Immobilizer 418 cruiser Harpax, they were finally destroyed by the Garret's forces. However, it was during this campaign that another high ranking Imperial officer turned on the Empire as Grand Admiral Demetrius Zaarin used the distraction to mount a coup against the Emperor.[1]
Personality and traits
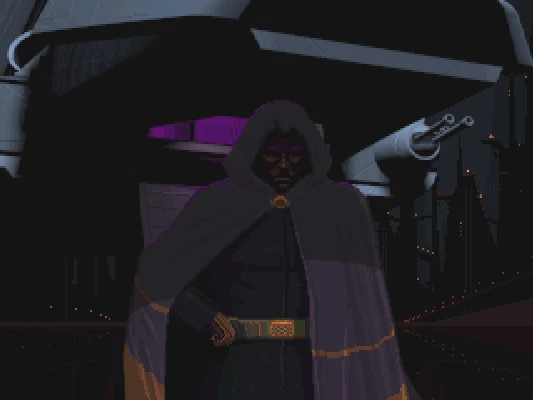
Harkov was a thin man who, upon first seeing him, Maarek Stele considered to look sleep-deprived and erratic. He had a strong voice which carried his authority as a senior Imperial officer but Stele found it edgy and his accent unpleasant. Harkov seemed to care little for any cause and was willing to sell equipment to anybody willing to pay for it. Likewise, his attempted defection to the Rebel Alliance was motivated out of desire for profit rather than any belief in the Rebel ideals.[2]
He could also be a difficult commander to work under. He maintained a high level of security and ran his ship very strictly, discouraging his subordinates from acting outside of their orders or asking unnecessary questions, all of which led to low morale on board. On one instance when Captain Trace made a joke during a briefing by Harkov, the admiral struck him. Trace would later advise Stele that he would be better off if he avoided the admiral's attention.[2]
Behind the scenes
Harkov was created for the game Star Wars: TIE Fighter, in which he was voiced by Nick Jameson. With the player in the role of Maarek Stele, Harkov features heavily in the early portions of the game, first as the player's commanding officer, and later as the main antagonist.[1] The character's story was later expanded in TIE Fighter: The Official Strategy Guide by Rusel DeMaria.
Harkov's Defection
- "Lord Vader has been foolish to underestimate me. He shall pay. My defection to the Rebellion will devastate the Empire."
- ―Harkov

Harkov.
Following the release of Star Wars: Galactic Battlegrounds, LucasArts ran a competition to design a level for the game. The "Harkov's Defection" scenario by Antonio Cusano was one of the grand prize winning levels and it, along with the other winning levels, was included as a with the Clone Campaigns expansion pack and made available for download on the LucasArts website.[3][4] The scenario expanded on Harkov's meeting with Mon Mothma during which he first discussed his defection. However, the scenario shows Darth Vader knowing of Harkov's defection from the start, contradicting events as portrayed in TIE Fighter and TIE Fighter: The Official Strategy Guide. In the scenario, Harkov is depicted with the same image used for his fellow Imperial officer, Darcc.[5]
Harkov starts the scenario with only two escorts and must reach Mon Mothma's base safely, fighting his way through Imperial forces, including dark troopers and Sith apprentices, sent by Vader to capture him. Harkov soon finds an abandoned transmitter, which he uses to signal the Alliance base. However, an Imperial attack has destroyed the bridge leading to the base so Harkov, joining forces with Rebel troops, must take the longer path through the forest. Along the way, he discovers two Imperial prisons which can be raided to rescue some Rebel troops and a captive Jedi. Harkov's forces eventually reach a small Rebel outpost, only to find it has been decimated by an Imperial attack. Proceeding on to Mon Mothma's main base, Harkov can locate and rescue several prisoners from the Rebel outpost and must fight his way past a pair of All Terrain Armored Transports with the help of Rebel T-47 airspeeders. After destroying the Imperials' own camp, Harkov is finally able to reach Mon Mothma and begin negotiations while the furious Vader vows revenge.[5]
Appearances
- Star Wars: Galactic Battlegrounds: Clone Campaigns
- Star Wars: TIE Fighter (First appearance)
Sources
- TIE Fighter: The Official Strategy Guide
- TIE Fighter Collector's CD-ROM: The Official Strategy Guide
Notes and references
- ↑ 1.00 1.01 1.02 1.03 1.04 1.05 1.06 1.07 1.08 1.09 1.10 1.11 1.12 1.13 1.14 Cite error: Invalid
<ref>tag; no text was provided for refs namedTF - ↑ 2.00 2.01 2.02 2.03 2.04 2.05 2.06 2.07 2.08 2.09 2.10 2.11 2.12 2.13 TIE Fighter: The Official Strategy Guide
- ↑
 Star Wars: Galactic Battlegrounds Downloads on LucasArts.com (content now obsolete; backup link) (archived at Internet Archive)
- ↑ Star Wars: Galactic Battlegrounds: Clone Campaigns on LucasArts.com (content now obsolete; backup link (products/battlegrounds/clonecampaigns/) not verified!) (archived at Internet Archive)
- ↑ 5.0 5.1 Star Wars: Galactic Battlegrounds: Clone Campaigns