| | |

Warning: This infobox has missing parameters: parents, pronouns, children, siblings, partners, families, feathers and unrecognized parameters: era
- "General Dodonna is known for his courage. He wouldn't be aboard the first vessel to flee."
- ―Grand Admiral Thrawn on Dodonna, during the battle of Atollon
Jan Dodonna was a male human military officer from Commenor who first served with the navy of the Galactic Republic during the Clone Wars, and later, as a general in the rebellion against the Galactic Empire during the Galactic Civil War. Commanding the Massassi Group, one of the largest cells in Senator Bail Organa's rebel network, elements of his cell were instrumental in the formation of the Alliance to Restore the Republic, and he would become part of the Alliance High Command, as well as the military leader of the Rebel Alliance's hidden fortress on Yavin 4. In this capacity, he formulated the plan that led to the successful Battle of Yavin and the destruction of the Death Star superweapon.
Following the Battle of Yavin, Dodonna along his fellow Rebels evacuated from Yavin 4 in search of a new base of operations. He then joined the Alliance Fleet and helped to rest of the High Command to oversee the war effort. One year after Yavin, Dodonna was stationed at the Mako-Ta Space Docks along the remainder of the High Command, where he was given the command of the MC80A star cruiser Republic. However, an attack ensued following Queen Trios' betrayal, which had devastating consequences for the Alliance. Not desiring to risk any more lives, Dodonna ordered the Republic to remain hidden, but Luke Skywalker convinced him to return to Mako-Ta and rescue them. Ultimately, Dodonna gave his life to ensure the survival of the remaining rebels when the Executor's turbolaser destroyed the Republic.
Jan Dodonna's death wasn't in vain, however. Thanks to his sacrifice, members of the High Command such as Mon Mothma, Gial Ackbar, Hera Syndulla and Leia Organa managed to survive, and they continued to fight for justice and to restore the Republic for the next four years, which saw the death of Emperor Palpatine at Endor and eventually the end of the Empire itself at Jakku.
Biography
Service in the Republic and the Empire
A human male from the planet Commenor,[1] Jan Dodonna served in the naval forces of the Galactic Republic during the conflict known as the Clone Wars, where he served as a bridge officer on a Venator-class Star Destroyer.[5] After the Republic's transition into the Galactic Empire, Dodonna continued his service into the Imperial Navy, where, for outstanding service, he became one of the first captains of an Imperial Star Destroyer.[6] However, as time went on, Dodonna would become disillusioned with the Empire, and, soon after, he defected to the growing rebellion.[5]
Early rebellion
- "We have orders to deliver these bombers to General Dodonna's unit. They're part of a wider rebellion we're working to build."
- ―Hera Syndulla, referring to the Y-wing bombers stolen by the Phoenix rebel cell
The rebellion in the early years of the Empire was made up of a loose collection of rebel cells secretly coordinated by Imperial Senator Bail Organa. By 5 BBY, Dodonna had risen to command one of these teams of rebels, the Massassi Group, in his fight against the Empire. Leevan Tenza was a member of this group, however an incident where he disobeyed orders and preemptively engaged an Imperial target led to his court-martial and defection to Saw Gerrera's Partisans.[5]
General Dodonna and Senator Organa listen to Mon Mothma's speech
By 2 BBY,[source?] Dodonna commanded one of the largest rebel cells in the entire rebellion, based on Yavin 4, the fourth moon of Yavin, in the Gordian Reach.[9] In this year, elements of Phoenix Cell, which also operated as part of the rebel network, managed to steal five antiquated BTL-A4 Y-wing assault starfighter/bombers from an Imperial salvage yard in order to deliver them to Dodonna and his unit.[7] The Y-wings eventually made their way to the group's starfighter auxiliary, Gold Squadron,[10][11] led by Captain Jon 'Dutch' Vander.[12]
Gold Squadron was later assigned to escort the fugitive Senator Mon Mothma, branded a traitor by the Empire and forced to flee from Chandrila, to a rendezvous at Dantooine. Later, General Dodonna along with Senator Bail Organa and several rebel personnel listened to a live HoloNet broadcast by the former Senator denouncing the Empire and urging the galaxy to rise up in rebellion, which eventually led to the formation of the Alliance to Restore the Republic.[12]
Atollon
- "This day has been a long time coming. Hopefully we can finally deal a blow to the Empire and show the rest of the galaxy what we're capable of."
- ―General Jan Dodonna, to Commander Jun Sato
Under the new Rebel Alliance, Dodonna and his Massassi Group were paired with Commander Jun Sato's Phoenix Squadron in preparation for a strike on the capital world of the Lothal sector, Lothal. However, before the attack could take place, the rebels were ambushed by the Seventh Fleet under Grand Admiral Mitth'raw'nuruodo, or Thrawn, a fearsome tactician responsible for the destruction of several rebel cells in the past, who was also intent on capturing Dodonna as well as the rest of the high-ranking rebels gathered on the planet.[9]
General Dodonna during Grand Admiral Thrawn's ambush on Atollon.
Thrawn, along with Admiral Kassius Konstantine and his Interdictor vessels, initially laid waste to both Dodonna's and Sato's forces, and the latter was forced to sacrifice himself in an attempt to enable Ezra Bridger and Chopper to escape on the Nightbrother and seek help. Sustaining heavy losses, Dodonna and the rest of the fleet were forced to withdraw back to Chopper Base, under the protection of a deflector shield. The deflector shield weathered Thrawn's orbital bombardment but the Grand Admiral launched a ground assault with AT-DP walkers, AT-AT walkers, and stormtroopers.[9]
While planning the defense of Chopper Base, General Dodonna predicted that Thrawn would deploy his forces through the narrow canyon leading to Chopper Base. The former Clone Captain Rex then proposed ambushing the Imperial forces along that route. Despite destroying several AT-DP walkers, the rebels were unable to stop Thrawn's AT-ATs and stormtroopers from storming the base. As the rebel ships depart, Dodonna, Syndulla's Spectres crew, and the RA-7 protocol droid AP-5 attempted to flee aboard the Ghost but were surrounded by Thrawn and his troops. Before Thrawn could captured them, a mysterious Force entity known as the Bendu attacked the base with lightning.[9]
Dodonna and the other rebels were able to flee aboard the Ghost. Weathering the thunderstorm, the rebel convoy reached space. By that stage, Ezra had arrived with Clan Wren reinforcements who destroyed the remaining Interdictor, allowing Dodonna and his remaining forces to escape. The rebel convoy then traveled to Yavin 4.[9]
Road to war
In 1 BBY, General Dodonna attended a briefing of the rebel leadership and the Spectres to discuss the Jalindi relay, which the Empire was using to disrupt Alliance supply runs. During the meeting, Dodonna admitted that the Partisan leader Saw Gerrera's intelligence had been right despite disapproving of the latter's ruthless methods. During the meeting, the Alliance leadership approved of a plan by the Spectres to travel aboard the Ghost to Jalindi and plant a spike on the relay for intelligence gathering. When Dodonna asked if the Ghost was suitable for the mission, Hera Syndulla replied that her ship was up to scratch.[13]
After Hera and Chopper returned from Lothal with the TIE/D Defender Elite's flight data recorder, Dodonna attended a high-level briefing with Hera, Mothma, Organa, and Erskin Semaj. After analyzing the data, Dodonna surmised that the Alliance's starfighters were no match for the TIE/D Defender Elite. While Dodanna and the others were debating why the Empire had activated Protocol 13 on Lothal, Hera interrupted the meeting and convinced Mothma to launch a strike against the TIE Defender factories on Lothal.[14]
Galactic Civil War
- "…man your ships, and may the Force be with you."
- ―General Dodonna, to the Rebel pilots, before the Battle of Yavin
Stealing the Death Star plans

Dodonna during Rogue One's mission to steal the Death Star plans.
By 0 BBY, the general commanded the Great Temple, which was the main rebel headquarters, considered its most important base and "hidden fortress" from the Empire.[3] By this point, Dodonna had been elevated to Alliance High Command, and was present at the headquarters as Operation Fracture confirmed the existence of an Imperial mobile battle station superweapon capable of destroying entire planets, known as the Death Star. Although High Command was divided in their response to the threat, the squad Rogue One launched an unauthorized mission to steal the plans in hope of discovering a weakness that would allow the Alliance to destroy the station. The resulting Battle of Scarif resulted in the outbreak of the Galactic Civil War and open warfare against the Empire, and the plans would be successfully retrieved from the Scarif Citadel Tower in an attempt to return them to Dodonna for analysis.[15]

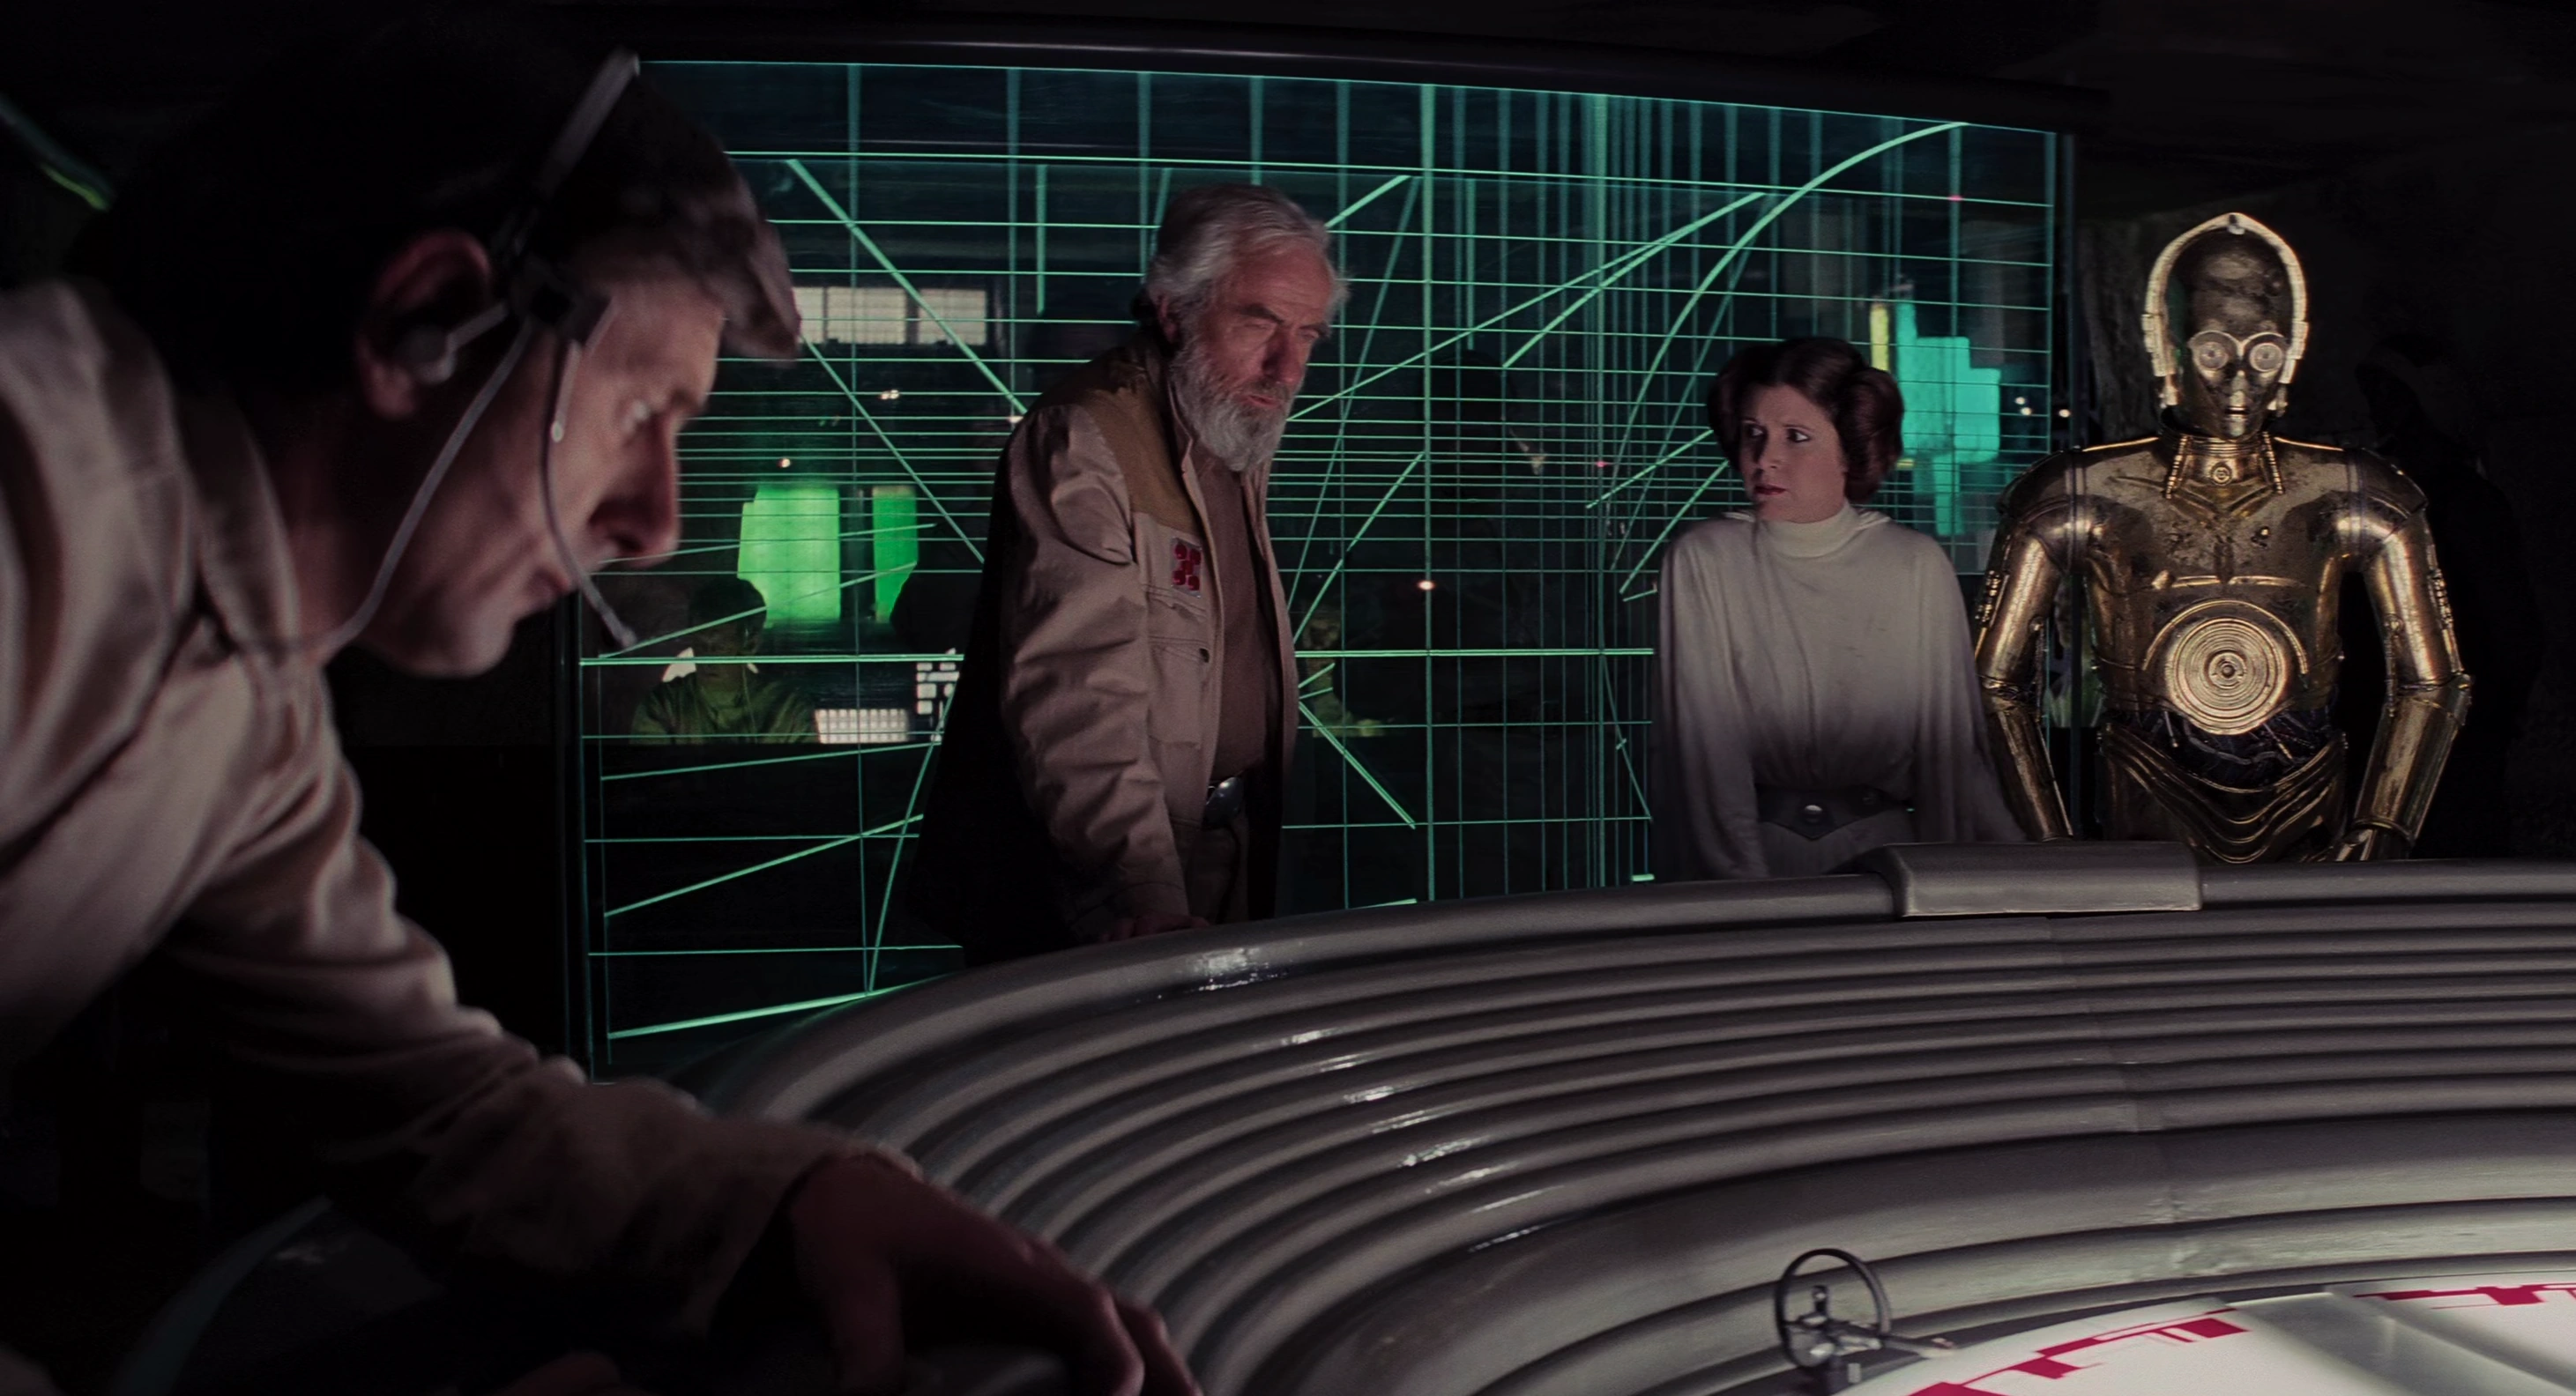
Dodonna directs the Rebel attack during the Battle of Yavin.
After the plans made their way to the headquarters and the weakness installed in the battle station by Galen Erso was found,[15] Dodonna designed an attack strategy that would set a group of starfighters into battle against the Death Star with the mission to fire proton torpedoes into the station's exhaust port and destroy it. This led to the Battle of Yavin, which Dodonna and other Rebel leaders monitored from Yavin 4. Just as the Death Star came into range to destroy Yavin 4, and Dodonna with it, the station was destroyed by Luke Skywalker.[4]
Evacuating Yavin
- "...The Empire now knows our location. Therefore our first priority is to find a base of operations. To that end, all rebel fleets have arrived to assist us in evacuating Yavin immediately."
- ―General Jan Dodonna, to Yavin personnel
The General was present at the Royal Award Ceremony commemorating the battle station's destruction,[4] announcing at the conclusion of the event that they would be evacuating Yavin 4, as the Empire now knew the location of their base. Dodonna immediately began screening new planets that would be suitable to establish a new base of operations, quickly dismissing Insk and Daxan Beta as candidates.[16]


Dodonna forbids Leia to leave Yavin 4.
Princess Leia spoke with General Dodonna, asking to assist with scouting for a new base. The General refused her offer, reporting that a bounty of 10,000,000 credits had been placed on her head by the Empire and reported rumors that the Imperials were seeking out surviving Alderaanians for reprisal. Dodonna demanded that the Princess not leave the system with anything less than a full military escort before dismissing her.[16]
Despite Dodonna's objections, Organa departed the jungle moon in a T-1 shuttle operated by R2-D2 and Evaan Verlaine, an Alderaanian pilot. Leia left a hologram explaining her actions in Dodonna's private quarters, which contained luxury furniture and a balcony overlooking the jungle canopy below. The General dispatched Luke Skywalker and Wedge Antilles in X-wing starfighters to retrieve the wayward princess; however, the shuttle jumped to hyperspace before Skywalker and Antilles could stop them.[16]
Later career
Following the evacuation of Yavin 4, Dodonna joined the Alliance Fleet and helped the rest of the Alliance's leaders oversee the war effort. Shortly after the assault on the Empire's Weapons Factory Alpha on Cymoon 1, Dodonna met with Princess Leia, Chancellor Mon Mothma, and Admiral Gial Ackbar to discuss the Alliance's next steps and the need to find a new base of operations.[17]
Several days later, the Rebel fleet received an distress call from R2-D2, Skywalker's astromech droid. The droid reported that Skywalker had been captured by Grakkus the Hutt, a powerful crime lord on Nar Shaddaa. Dodonna met with Mon Mothma and Ackbar to discuss the situation, and expressed his confusion as to why Skywalker had been on the crime-ridden moon of Nar Shaddaa in the first place. Ackbar proposed that they rescue the Rebel hero, but Mon Mothma noted that they could not make a move against the powerful Hutt Cartels, and that no one would be brave enough to volunteer for a covert rescue mission. The meeting was then interrupted by Chewbacca, and Dodonna noted that he seemed to be willing to do so alongside the protocol droid C-3PO.[18] Chewbacca successfully rescued Skywalker with the help of Princess Leia and Han Solo, who had learned of Skywalker's situation and went to his aid.[19]
Alliance High Command soon received word that the Rebel garrison on Vrogas Vas had engaged Darth Vader and shot his starfighter down after taking heavy casualties. Dodonna decided that Darth Vader represented a significant threat and target of opportunity, and dispatched a battalion to reinforce the Rebels on planet in their effort to kill the Sith Lord.[20]
One year after the Battle of Yavin and the destruction of the first Death Star, General Dodonna was stationed at the Mako-Ta Space Docks along with the remainder of Alliance High command. It was from this station that the Alliance orchestrated the Mutiny of Mon Cala. The newly strengthened Rebel fleet was gathered at Mako-Ta. Dodonna was given command of the MC80A star cruiser Republic.
Final Battle
The Alliance's safety at Mako-Ta was short-lived, as Queen Trios, who had been leaking information to both the Empire and the Rebels, revealed to Darth Vader the location of the Rebel's hidden base. The Empire arrived with three Imperial-class Star Destroyers and one Super Star Destroyer, the Executor, led by Vader himself. When the Rebels attempted to flee, it was discovered that the Shu-Torun technologies installed in the Mon Calamari cruisers rendered nearly all systems inoperable, including the hangar bays and hyperdrive generators. Without power or the ability to deploy fighters, the Imperial forces, vastly superior in numbers and firepower, quickly gained the upper hand in the attack.[2]
It was hypothesized by Leia Organa that a failsafe in the hangar bay doors would detect a transponder operating on rebel frequencies flying at the doors at high speed. This was confirmed when Skywalker, who was also stationed aboard Dodonna's cruiser, flew close to the Republic's hangar doors, despite General Dodonna's direct order to remain grounded. However, the doors opened, allowing the ship's contingent of X-wing fighters to be deployed.[2]
During the battle, rebel operatives led by General Davits Draven, were able to secure access codes that would allow the Shu-Torun technologies to be overridden. These codes were delivered to General Dodonna, who promptly ordered the Republic to escape into hyperspace. Not wishing to risk any more lives than were already lost in the devastating attack, General Dodonna ordered the Republic to stay hidden and wait to regroup with any survivors. He was convinced, however by Skywalker and Organa, that it would be best to return to Mako-Ta in order to rescue those who were stranded.[2]
Along with a handful of small transports escorted by Rogue Squadron, the Republic returned to Mako-Ta station and engaged the Executor. Dodonna's forces were able to hold the Empire at bay long enough to distribute the access codes to the other stranded Mon Calamari cruisers while the inhabitants of the space station were evacuated onto the transports. The Republic was shortly destroyed by turbolaser fire from the Executor. Jan Dodonna, General of the Rebel Alliance, was lost with his ship.[2]
Legacy
Though it cost him his life, Dodonna's actions during the attack on Mako-Ta were instrumental in saving the future of the Alliance. Mothma, Ackbar, Syndulla, and many others of Alliance High command were among those saved by the Republic's return to the battle.[2]
His leadership during the early days of a growing Rebellion, during the Battle of Yavin, and at his final stand during the ambush at Mako-Ta allowed the Alliance to thrive and eventually defeat the Emperor at the Battle of Endor nearly three years after his death.[source?]
Personality and traits
Jan Dodonna was a human man with white hair, blue eyes and light skin.[4] Prior to his career as General in the Alliance to Restore the Republic, Dodonna served in the Republic Navy during the Clone Wars. Though initially one of the first captains in the Imperial Navy and a veteran of the Clone Wars, Dodonna became disillusioned with the Galactic Empire and joined the growing rebellion, thereby becoming a firm believer of the rebel cause.[5]
An incisive and wise strategist with calm demeanor,[21] Dodonna came up with the attack strategy that eventually let Luke Skywalker destroy the Death Star and saving millions of lives.[4] After the Battle of Yavin, Dodonna became too concerned about Princess Leia Organa's safety to the point that he refused to let her assist in the scouting for a new base given the placed bounty on her head by the Empire, even leading him to dispatch Skywalker and Wedge Antilles to retrieve her.[16] By the time of the Battle of Vrogas Vas, Dodonna recognized the threat Darth Vader represent for the Alliance, reason for which he proposed more dramatic measures.[20]
During what became his last battle, Dodonna showed his concern on the lives of his fellow comrades, ordering his flagship the Republic to remain hidden to not risk any more lives and just regroup with any survivors from the devastating attack at the Mako-Ta Space Docks. However, after talking with Luke Skywalker, Dodonna opted to return and help and the ones stranded there and ultimately sacrificed his own life to ensure the Alliance's survival and allow his fellow rebels to live to fight another day.[2]
Behind the scenes
Jan Dodonna was played by Alex McCrindle in the 1977 Star Wars: Episode IV A New Hope, the first installment of the Star Wars original trilogy.[4] Dodonna later appeared in the 2016 Star Wars Anthology film Rogue One: A Star Wars Story, where he was portrayed by Ian McElhinney.[15] He was voiced by Michael Bell in four episodes of Star Wars Rebels.[9]
In George Lucas' first draft for A New Hope, a Sith knight character known as "Valorum" was renamed "Dodona", as Lucas considered, in that draft alone, renaming the Starkiller family to the "Valor" family, thus the names conflicted. "Dodona" was one of the few names in that draft that reappeared in the second draft, when it was definitively assigned to a Rebel general on Yavin 4, thus creating the character of Jan Dodonna.[22]
Originally, Dodonna was still alive post-Hoth as Star Wars: The Rebel Files had established.[8] Due to a degree of miscommunication, however, Dodonna was killed in the climax of Star Wars 55: Hope Dies, Part VI. Similarly to the situation with Davits Draven, the comic book's timeline of events takes priority, and the contradiction is planned to be fixed in later reprints of Star Wars: The Rebel Files.[23]
Appearances
Sources
Notes and references
- ↑ 1.0 1.1 Ultimate Star Wars
- ↑ 2.0 2.1 2.2 2.3 2.4 2.5 2.6 Star Wars 55: Hope Dies, Part VI
- ↑ 3.0 3.1 3.2
 General Dodonna in the Encyclopedia (content now obsolete; backup link)
- ↑ 4.0 4.1 4.2 4.3 4.4 4.5 4.6 4.7 4.8 4.9 Star Wars: Episode IV A New Hope
- ↑ 5.0 5.1 5.2 5.3 5.4 5.5 Star Wars: Rogue One: The Ultimate Visual Guide
- ↑ 6.0 6.1 A New Hope: The Princess, the Scoundrel, and the Farm Boy
- ↑ 7.0 7.1 Star Wars Rebels: Steps Into Shadow
- ↑ 8.0 8.1 Star Wars: The Rebel Files
- ↑ 9.0 9.1 9.2 9.3 9.4 9.5
 Star Wars Rebels — "Zero Hour"
- ↑ Steps Into Shadow Trivia Gallery on StarWars.com (backup link)
- ↑ In Star Wars Rebels: Steps Into Shadow it's said that the Y-wings liberated by Phoenix Squadron are for Jan Dodonna's unit. As such, Gold Squadron, who utilizes these Y-wings, must be part of Jan Dodonna's unit.
- ↑ 12.0 12.1 Star Wars Rebels — "Secret Cargo"
- ↑ Star Wars Rebels — "In the Name of the Rebellion"
- ↑ Star Wars Rebels — "Crawler Commandeers"
- ↑ 15.0 15.1 15.2 Rogue One: A Star Wars Story
- ↑ 16.0 16.1 16.2 16.3 Princess Leia, Part I
- ↑ Star Wars 4: Skywalker Strikes, Part IV
- ↑ Star Wars 9: Showdown on the Smuggler's Moon, Part II
- ↑ Star Wars 12: Showdown on the Smuggler's Moon, Part V
- ↑ 20.0 20.1 Vader Down, Part I
- ↑ General Dodonna in the Databank (backup link)
- ↑ The Making of Star Wars: The Definitive Story Behind the Original Film
- ↑ Matt Martin (@missingwords) on Twitter: "It’s on the list." (backup link (missingwords/status/1047511438259052544) not verified!)