Template:Majorspoiler Warning: This infobox has missing parameters: parents, pronouns, children, siblings, partners, families, feathers and unrecognized parameters: imageBG, era
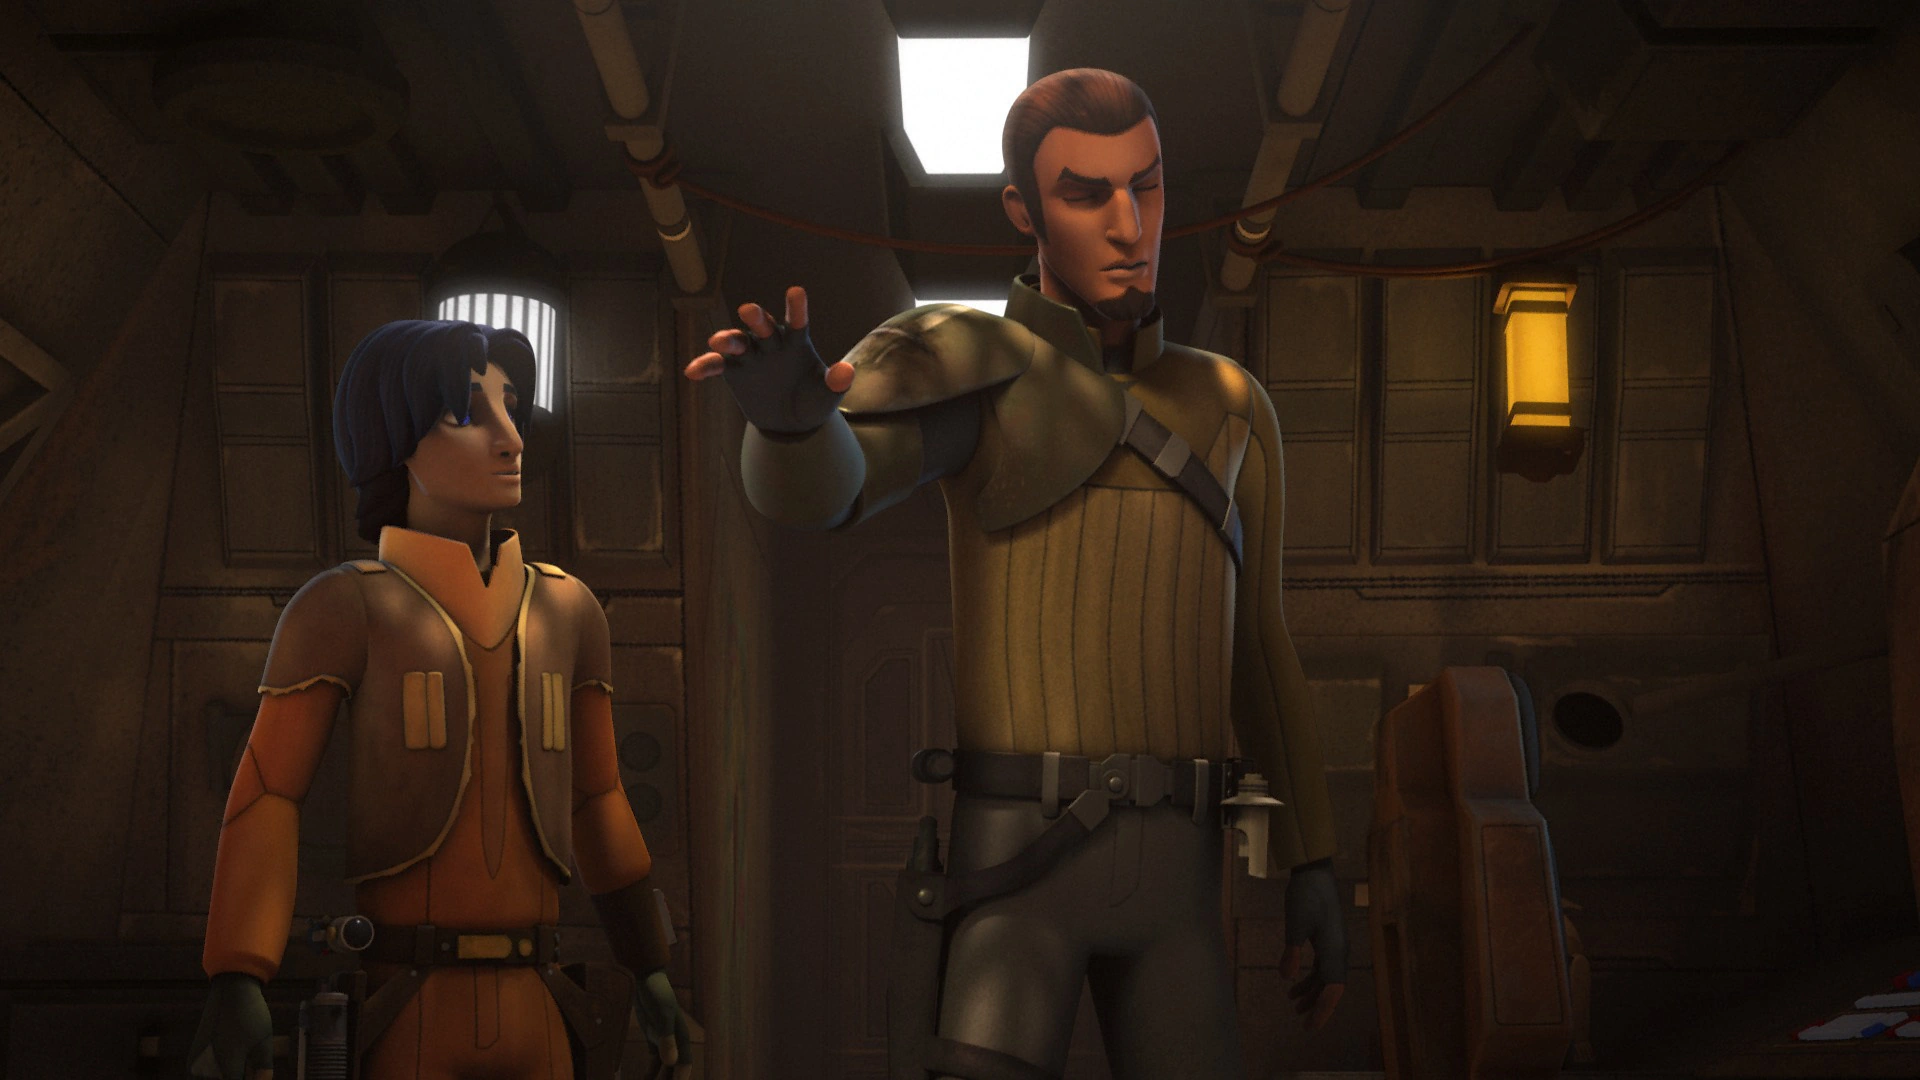
- "It was different for me, Ezra. Everything was different back then. All that remains now is the Force."
- ―Kanan Jarrus
Kanan Jarrus, born Caleb Dume, was a Force-sensitive human male Jedi Padawan who survived Order 66. Surviving thanks to the sacrifice of his master, Depa Billaba, on Kaller, he met the smuggler Janus Kasmir, who taught him how to survive as a fugitive. Going into hiding, he forsook the Jedi ways for some time, swapping his blue-bladed lightsaber for a blaster.
Eventually, Jarrus would wind up as a freighter pilot for the corporation Moonglow Polychemical in the Gorse system, piloting Moonglow-72. After getting caught up with a ragtag rebellious group consisting of Twi'lek pilot, Hera Syndulla, the conspiracy theorist Skelly, and the Sullustan shift leader Zaluna Myder, Kanan helped prevent Count Denetrius Vidian from destroying Cynda. During the conflict, Jarrus made the decision to accompany Syndulla on her VCX-100 light freighter, the Ghost—which he eventually would command alongside her.
While cocky and often sarcastic, Jarrus was eager to fight the Galactic Empire. Five years before the Battle of Yavin, Jarrus met Ezra Bridger, a fourteen-year-old Force-sensitive Human, whom he decided to mentor.
Biography
Early life
A human male, Caleb Dume was born during the waning years of the Galactic Republic. As he was integrated into the Jedi Order at a very young age,[2] he would never know his parents,[8] for he went straight from his homeworld to the Jedi Temple[9] on Coruscant, where he would be raised as a Jedi.[1]
As a youngling, Dume met Jedi Master Luminara Unduli once, remembering her as "brave, compassionate, disciplined."[10] He often heard Grand Master Yoda say "Do, or do not. There is no try," although he did not fully comprehend what Yoda meant[10] during his practice duels with fellow initiates such as Sammo Quid and Tai Uzuma.[7]
The Clone Wars
- "My young strategist has been thinking again. Any other questions?"
"Await orders. What if orders never come? I won't know what to do."
"Maybe you will."
"Maybe I won't."
"All right, maybe you won't. But anything is possible. Perhaps the answer will come to you in another form." - ―Depa Billaba and Caleb Dume
Bombing at the Jedi Temple

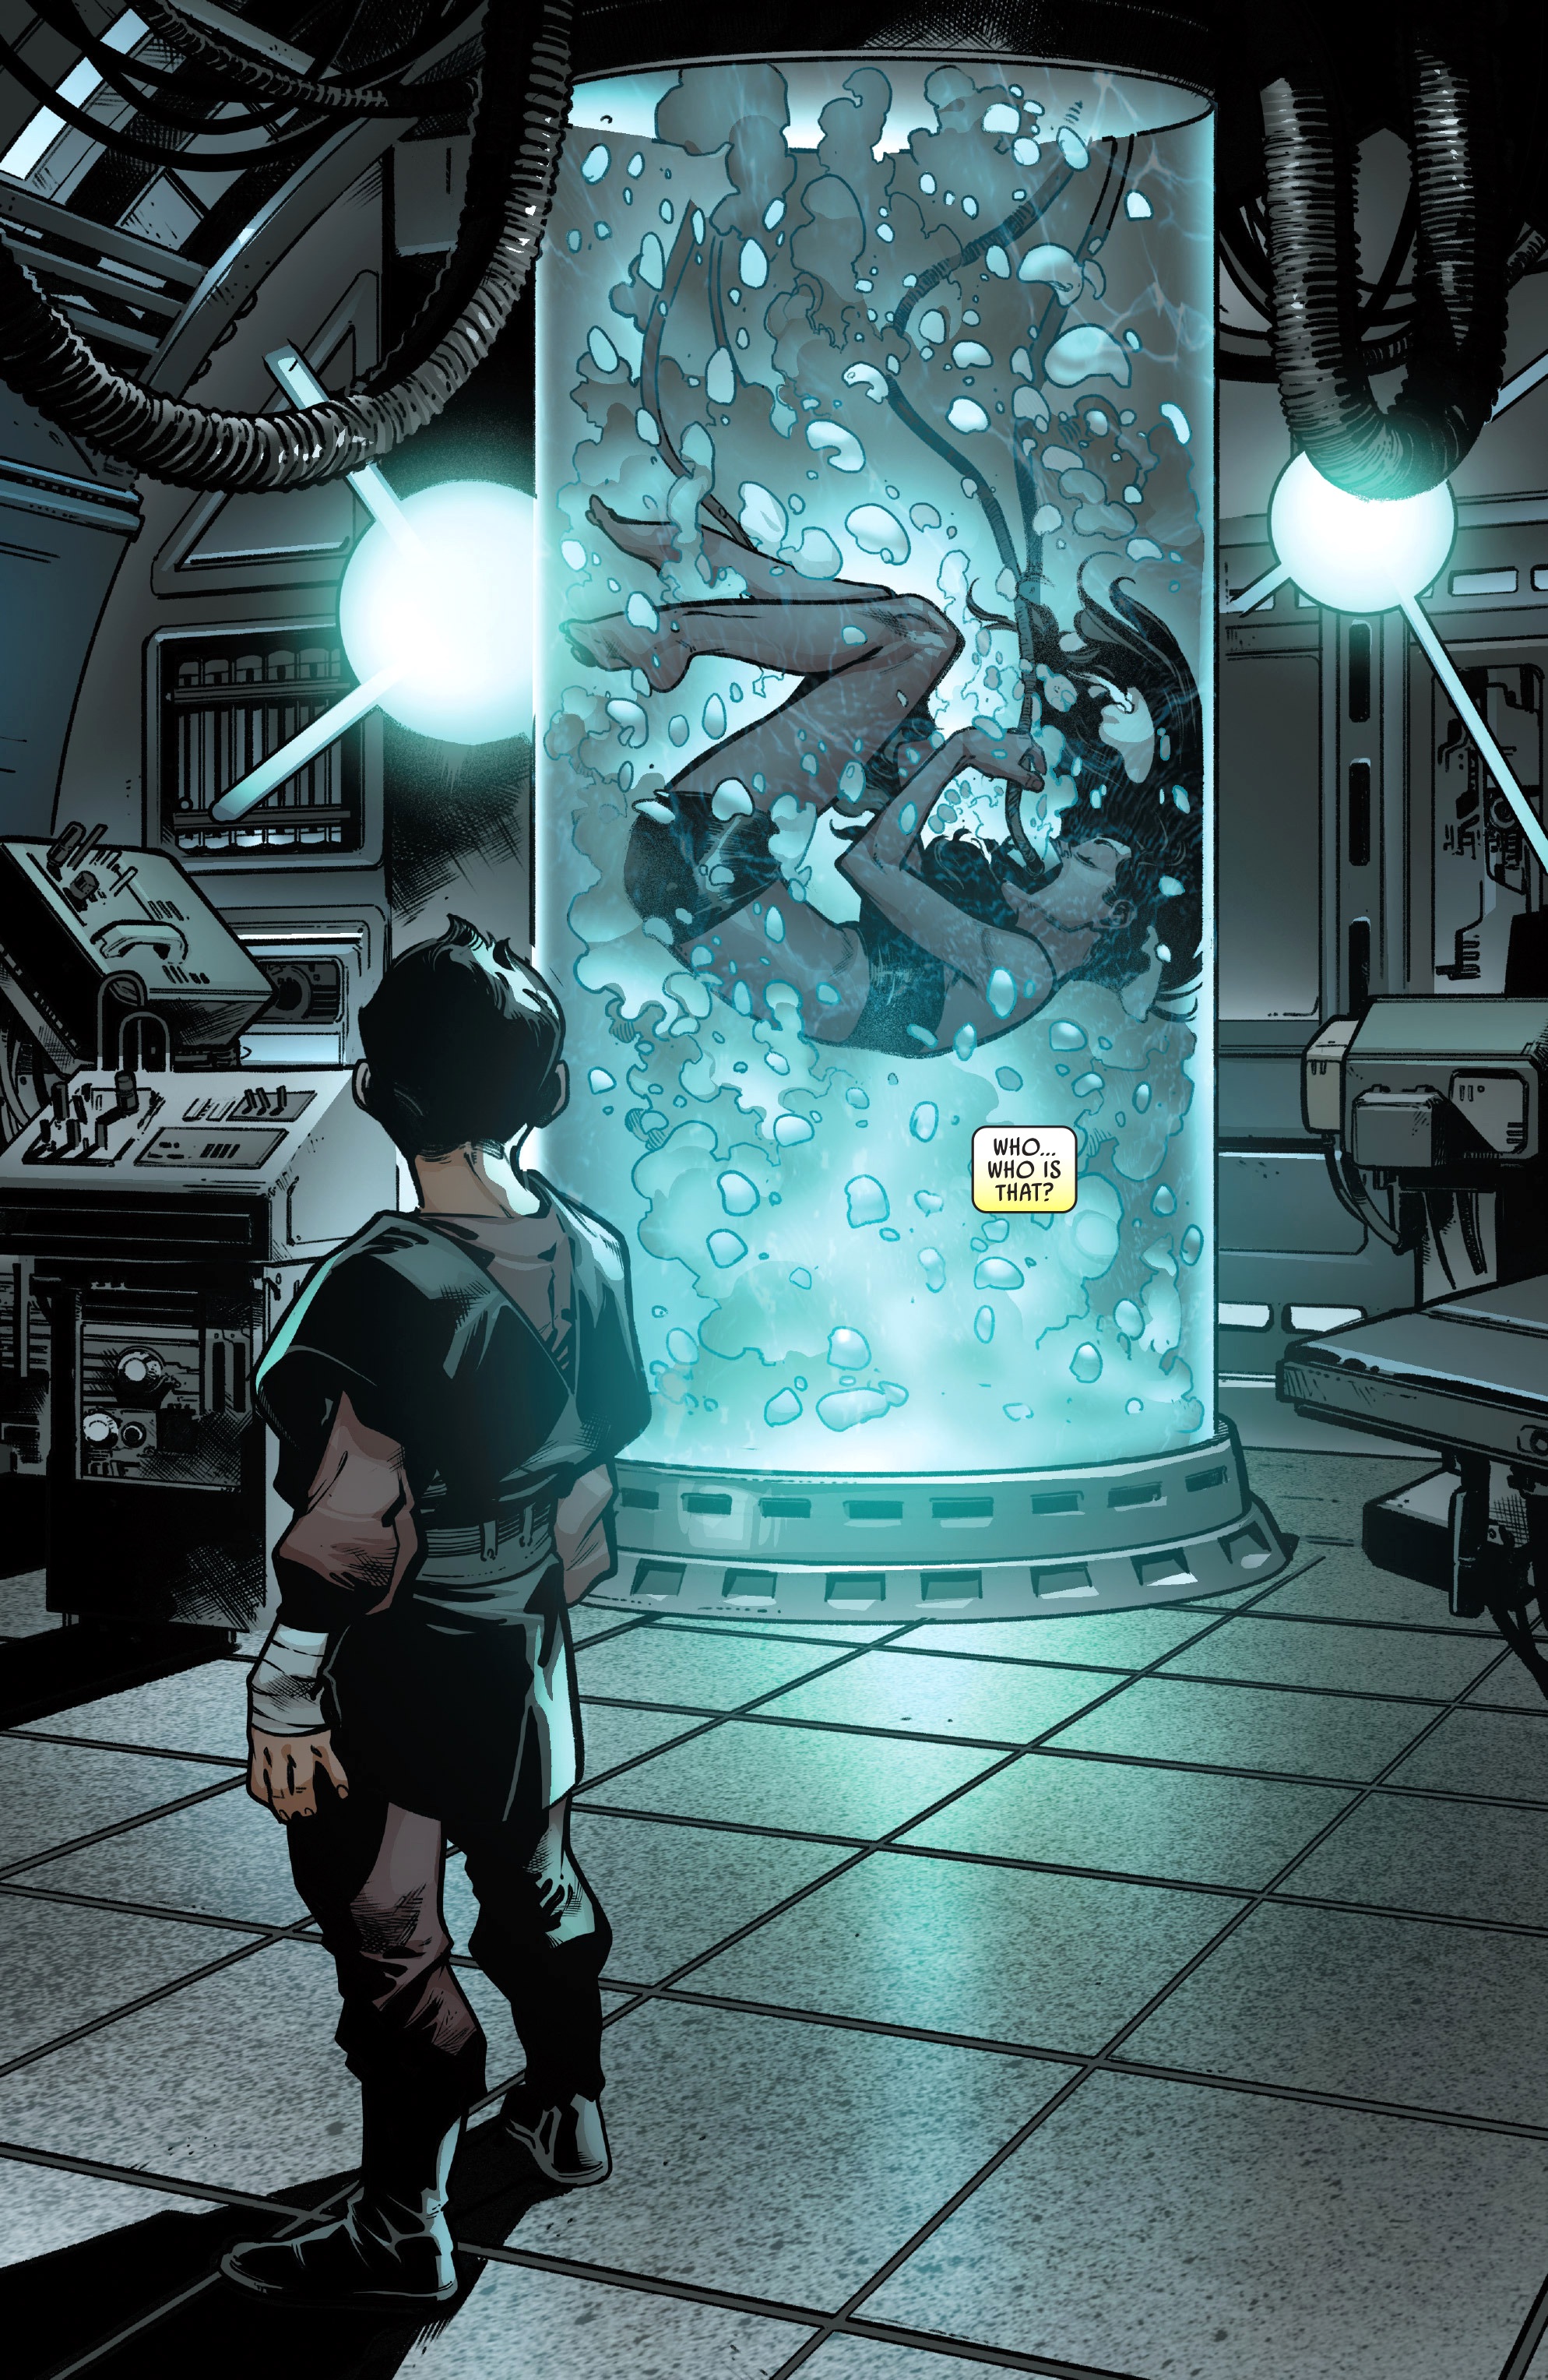
Dume feels a connection with the comatose Depa Billaba at the Jedi Temple's infirmary.
One day away from the Initiate Trials, Dume was in a practice duel with Uzuma and Quid under Yoda's instructions, when he tripped and hit his head against the floor, injuring himself in the process. The Grand Master then told him to go to the infirmary: by the time, he reached it he was no longer bleeding, and the 2-1B surgical droid told him to leave as the cut would heal on its own. It was then Dume saw Depa Billaba when she was recovering in a bacta tank and felt a connection with her. Just as he left, Billaba awoke.[7]
The next day, he underwent the trials and passed, much like Uzuma and Quid. He also attended a class by Madame Jocasta Nu on how Padawans were chosen by Jedi Knights, and Dume asked about how it came to be, much to Mace Windu's disapproval and Billaba's amusement.[7] In another occasion, he attended a lecture by Obi-Wan Kenobi in the Jedi Temple's central security station learning about the Jedi recall signal, during which he inadvertently gave Kenobi the idea to use the beacon to warn Jedi away.[2] Later on, Billaba herself would instruct them on Form III.[7]
After the lesson, and wishing Billaba would chose him, Dume checked if she had a Padawan (she didn't) and asked his two peers what they thought about it; Quid told him that word had it she was "damaged goods" after her disastrous defeat[7] on Haruun Kal.[11] As he didn't know what to think, Dume went to Billaba and asked about what had happened to her, and she saw his choice as not political, but wise.[7] Before they could finish the conversation, Dume and Billaba then heard an intruder at the Temple, Rackham Sear, a Captain of Confederacy of the Independent Systems who was setting bombs off at the Temple.[7] Dume was then saved by Billaba from the initial explosion. They then hid for Billaba wanted more information about the situation, but despite her hesitation, Dume followed the attacker to the roof and attempted to stop him.[12]
However, Sear subdued Dume and tried to kill him, but Billaba intervened and saved him. She also destroyed the timer with Sear's own bombs, prompting Sear to attack her in an escape attempt. However, when Sear saw that they would not let go of him, he committed suicide. Avoiding the explosion, Billaba then asked Dume to become her apprentice.[12] Five months before the end of the Clone Wars, at age 13,[1] Dume became Billaba's Padawan, and was taken by her to get a kyber crystal for his new lightsaber. Soon enough, Dume accompanied Billaba on her duty to lead the Grand Army of the Republic as General.[12]
Kardoa
Three weeks after the attack to the Temple, they went to planet Kardoa, for Dume's first mission, and where they were to rendezvous with Billaba's newly assigned battalion, led by the survivors of her last command.[12] Dume met Commander Grey and Captain Styles, as well as Sergeant Soot and Corporal Big-Mouth and others. As he and Billaba familiarized themselves with the new battalion, they were to do a simple reconnaissance mission to refute or confirm reports of a Separatist presence on the planet. The morning after their arrival, Billaba split the battalion into five squads to reconnoiter five canyons, with Dume accompanying Billaba. During the walk, Dume befriended CT-1157, who had not yet received a nickname. Unbeknownst to them, they were observed by a recon droid and promptly ambushed by the Separatist Droid Army, which destroyed their trail, leaving them no option but to resist before reinforcements arrived.[11]


Dume, saved by CT-1157 "Stance".
As their signal was jammed (leaving them unable to contact the other squads), Billaba left Dume and other troopers to keep the Separatist forces occupied, while she located the Separatist's ship. However, during the skirmish, Dume got too far out front and disobeyed a trooper's order that he pull back, and received two shots from the enemy droids. Left vulnerable to three B1 battle droids, CT-1157 went to his rescue and destroyed the three droids, for which he would earn the name "Stance". Fortunately for the two, General Coburn Sear ordered his troops to pull back to secure their ship, and Billaba managed to make them depart Kardoa. Their first battle being a success, Dume underwent bacta treatment for his injuries and, before long, the battalion received its next assignment: Mygeeto.[11]
Mygeeto
Dume then took part in the third battle on Mygeeto to take one of the mesas occupied by the Confederate forces. Dume, Billaba, Grey, and Stance were able to hold off the battle droids until Skull Squadron helped them.[13]
Kaller
During the last few days of the war, at age 14,[1] Dume took part of the battle of Kaller, in which Billaba led the Republic forces to victory during the last day of the Clone Wars against the Separatist forces under Devaronian General Kleeve, whose departure meant the end of the battle and the surrender of the planet to the Republic. Though the meeting with Gamut Key and other Kallerans and was marked by the discussion of Dume, Grey and Styles with Janus Kasmir who expressed little gratitude to the Jedi General, the three were silenced by Billaba, who moved her troops to rest in the field under the stars.[5]

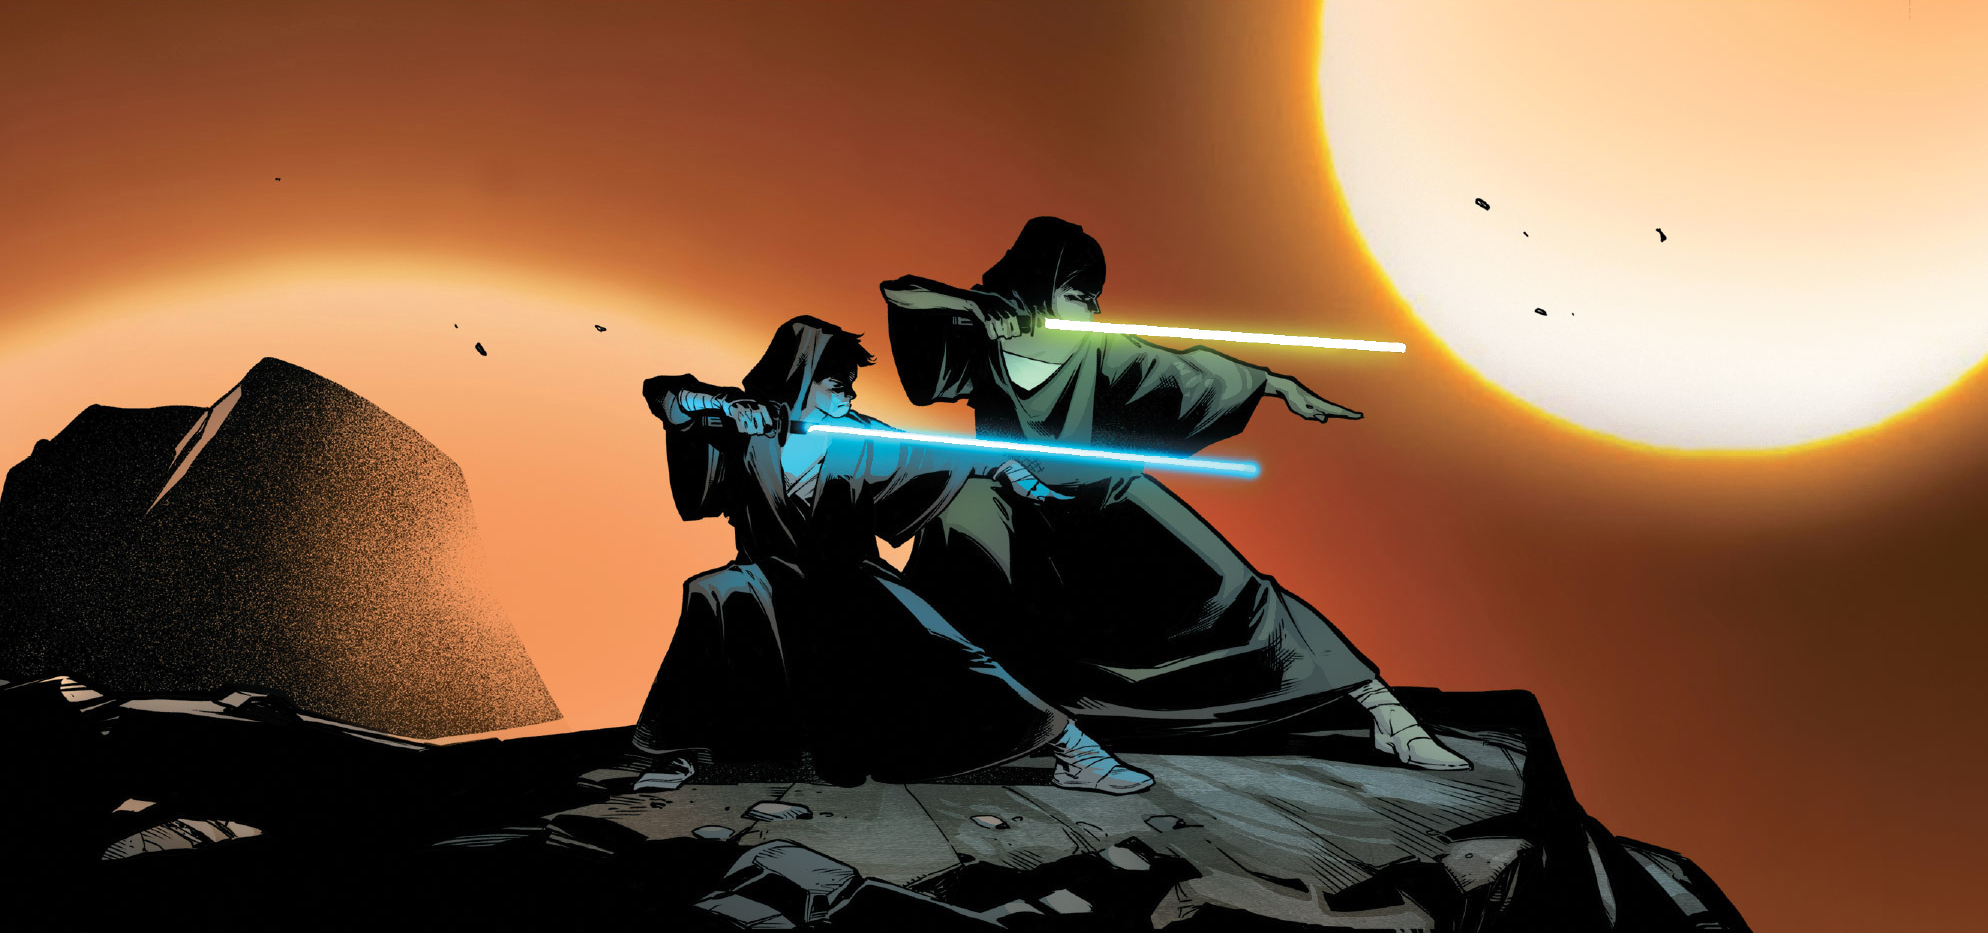
Dume training under his master, Billaba, on Kaller.
While the two were alone, Billaba told Dume she had been neglecting his training and the two went onto practising Form III until nighttime. She also asked Dume if he felt, and Dume told her that his heart was at peace, having found his place in the galaxy. Billaba told him, however, that he mustn't grow too attached with life as it was then, and though valuable, he had to learn to rule his emotions. Afterwards, he shared a moment of rapport with his master, Grey and Styles (with whom Dume had developed a sense of camaraderie) at a bonfire. Though they teased him about his inquisitive nature, Billaba gave him a holocron so that he could "study the role of questions" and "peaceful dissent" in the Order.[5]
Rise of the Empire
Order 66
- "Caleb, we cannot win this battle... you must run. Go. I'll be right behind you."
- ―Depa Billaba's last words to Caleb Dume
Moments later, Supreme Chancellor Sheev Palpatine issued Order 66, which branded all Jedi as traitors to the state and called for their immediate execution,[14] to Commander Grey.[5] As they felt the slaughter of the Jedi throughout the Force, Dume and his master were confronted by the once-friendly clone troopers. Aware of their disadvantage, Billaba ordered Dume to run, but he froze as he watched his master kill Kaylon, Remo and Mixx in self-defense until Billaba snapped him out of it. Dume himself took down Soot and Big-Mouth, until Styles and Grey ordered the battalion to surround them.[9]
Lying that she will go behind him, Billaba tells Dume to run.
Seeing that the clones would soon cut off any escape, Billaba told Dume to run and that she would be right behind him—the first lie she had ever told him. Dume, who knew she was lying, ran into the woods anyway. From afar, Dume saw his master be killed under Commander Grey's blaster fire to save him. Billaba's sacrifice gave him enough time to conceal himself and wait for the clones to pass by. Evading the battalion all night, by sunrise he reached an outlying public transport station with a transport going into Plateau City. When he got there, Dume spotted a clone using a holoimage of him and giving the order to kill on sight. So, for several days, Dume evaded clone patrols, could not sleep out of fear of being caught in one spot too long, and due to not having any credits, was forced to search dumpsters for food.[9]
Partner to Kasmir
- "You lie. You cheat. You steal. You survive. Didn't they teach you anything useful at that temple of yours?"
- ―Janus Kasmir's advice to Kanan Jarrus
Dume, however, was discovered by Kasmir, who tossed Dume some food, and was about to walk away when Dume begged for a safe spot to sleep. Kasmir gave in and allowed him to borrow the spare bunk in his ship, the Kasmiri. After a bath, Dume slept for a full planetary rotation, and Kasmir gave Dume some clothes so that he would not be running around in Jedi robes. Wondering what he should do, Kasmir told him he had to lie, cheat, steal, and survive, just before he received the Jedi emergency signal recalling him to the Temple.[9] Unaware of Emperor Palpatine's trap,[14] Dume pleaded with Kasmir to take him to Coruscant, but the Kalleran refused. He then told him to finish his meal and leave his ship when he did so.[9]
When Kasmir walked outside, Dume took the chance to steal the Kasmiri and jump into lightspeed to Coruscant. However, while in hyperspace,[9] he received Obi-Wan Kenobi's message in which he instructed all Jedi to go into hiding from the Empire,[1] only to come out in realspace above Coruscant's orbit and be surrounded by ARC-170 starfighters due to a HoloNet alert about the stolen ship.[9] Dume managed to find an opening and escaped back to Kaller, where upon landing, he was confronted by Kasmir, who wanted nothing to do with him.[15]
However, Dume continued to follow Kasmir around, watching him from afar for some time, until he rescued Kasmir from Tápusk and his colleagues, who ran away. Kasmir then brought Dume back to the Kasmiri, where he chastised him for ruining the negotiations to hire them for a job. So, he had Dume take their place and told him to abandon his Jedi apparel. Thus, Dume severed his Padawan braid, destroyed his Jedi comlink after uploading Kenobi's message into the holocron, and hid it and his lightsaber away. He put on different clothes and took a blaster, and realized from Kasmir that he needed a new name before accompanying Kasmir to steal IG-RM droids for sell on the black market. However, the pair were caught by the guards and Kasmir betrayed Dume in exchange of the IG-RM droids.[15] Imprisoned in a cell and awaiting his execution, Dume heard as Key contacted Grey and Styles to inform him of Dume's capture. However, he was rescued by Kasmir and an IG-RM droid before long, and they escaped from Kaller aboard the Kasmiri and formed a partnership.[16]


Dume and Kasmir working together.
Together, they pulled off many jobs, in which Dume learned how to be a thief and smuggler, and ultimately became friends with Kasmir, all the while they were tracked down to be eliminated by Grey and Styles,[16] faithful soldiers of the recently-established Galactic Empire.[14] Eventually, they would go to Lahn, where during a job, Dume would meet Kasmir's trading partner, Jondo—actually, the former Separatist general, Kleeve. At first, Dume threatened to kill him, but stood down when he accepted that the Clone Wars were truly over and went to meet up with Kasmir, who had been arrested by Styles and Grey. Instead of helping him, Dume abandoned Kasmir and met with Kleeve, whom he convinced to let him take it. Kleeve agreed and took him to the Escape, where the pair were captured by clone troopers.[16]
Grey and Styles placed the unconscious Dume aboard their Gozanti-class cruiser to return to Kaller, deciding what to do before they executed him. Despite Dume telling them that it was really Palpatine who had betrayed the Galactic Republic and not him and the Jedi Order, the clones were unconvinced. Pushing the two clones away, Dume then and put his trust in the Force one last time opened the airlock. Sucked into space, he was rescued by Kasmir and Kleeve (aboard the Kasmiri and the Escape, respectively), whose ships were unable to hold the Imperial for long. At the same time, Grey realised the mistake he had made earlier during the execution of Order 66 and destroyed their ship's controls, taking down its shields. In turn, Dume, Jasmir and Kleeve fired at the ship, destroying it and killing Grey, Styles and other troopers in the process. Afterwards, they landed on Kaller, where he suggested to Kasmir that he and Kleeve work together, while he would go away. Jasmir however knew he was protecting himself from suffering another loss, but Dume hit him to make his point come across. Taking his lightsaber and holocron with him aboard the Escape, Jasmir bid Dume farewell, as the former Padawan departed for Moraga, where he started to call himself "Kanan Jarrus".[17]
Forced to hide his Force-sensitivity, Jarrus kept his lightsaber locked away and forsook the Jedi ways for a long time,[3] disguising himself as a freighter pilot, a bounty hunter, and a frontier ranger.[1] Drinking away his problems and attempting to woo university girls, Kanan drifted from planet to planet in order to avoid the watchful eye of the Empire, never staying too long in any one place, and never distinguishing himself from others.[2] Over time, he also found and collected spare lightsaber parts.[18] Eventually, Jarrus emigrated to Gorse, where he met Okadiah Garson at his bar, The Asteroid Belt, when he broke up a brawl there. Through Garson, Jarrus got a job as freighter pilot carrying baradium bisulfate for Moonglow Polychemical between Gorse and its moon, Cynda. For five months, he lived in a flophouse next door to the cantina, worked as a bartender from time to time, drove Garson's hoverbus, and piloted Expedient with a flight clearance seven.[2]
Age of the Empire
Gorse
- "But—but you're—"
"Shh. Don't tell anyone." - ―Hera Syndulla
During one of his workshifts on Cynda, Jarrus met with Lal Grallik and Skelly, but refused to support Skelly's conspiracy theories over the Empire's mining operations on the moon. Later, he met Count Denetrius Vidian and convinced him to let Garson live after a tense meeting, scolding himself for standing up for others, thus possibly blowing his long-held cover. Jarrus, then, continued to Zone Forty-Two, where he was forced to use the Force to survive an explosion set up by Skelly, and save Yelkin's life. Afraid to have revealed his true nature, he decided to leave Cynda—and Gorse—at once. On his return in Expedient, he handed his stowaway, Skelly, to Gord Grallik in Gorse City.[2]
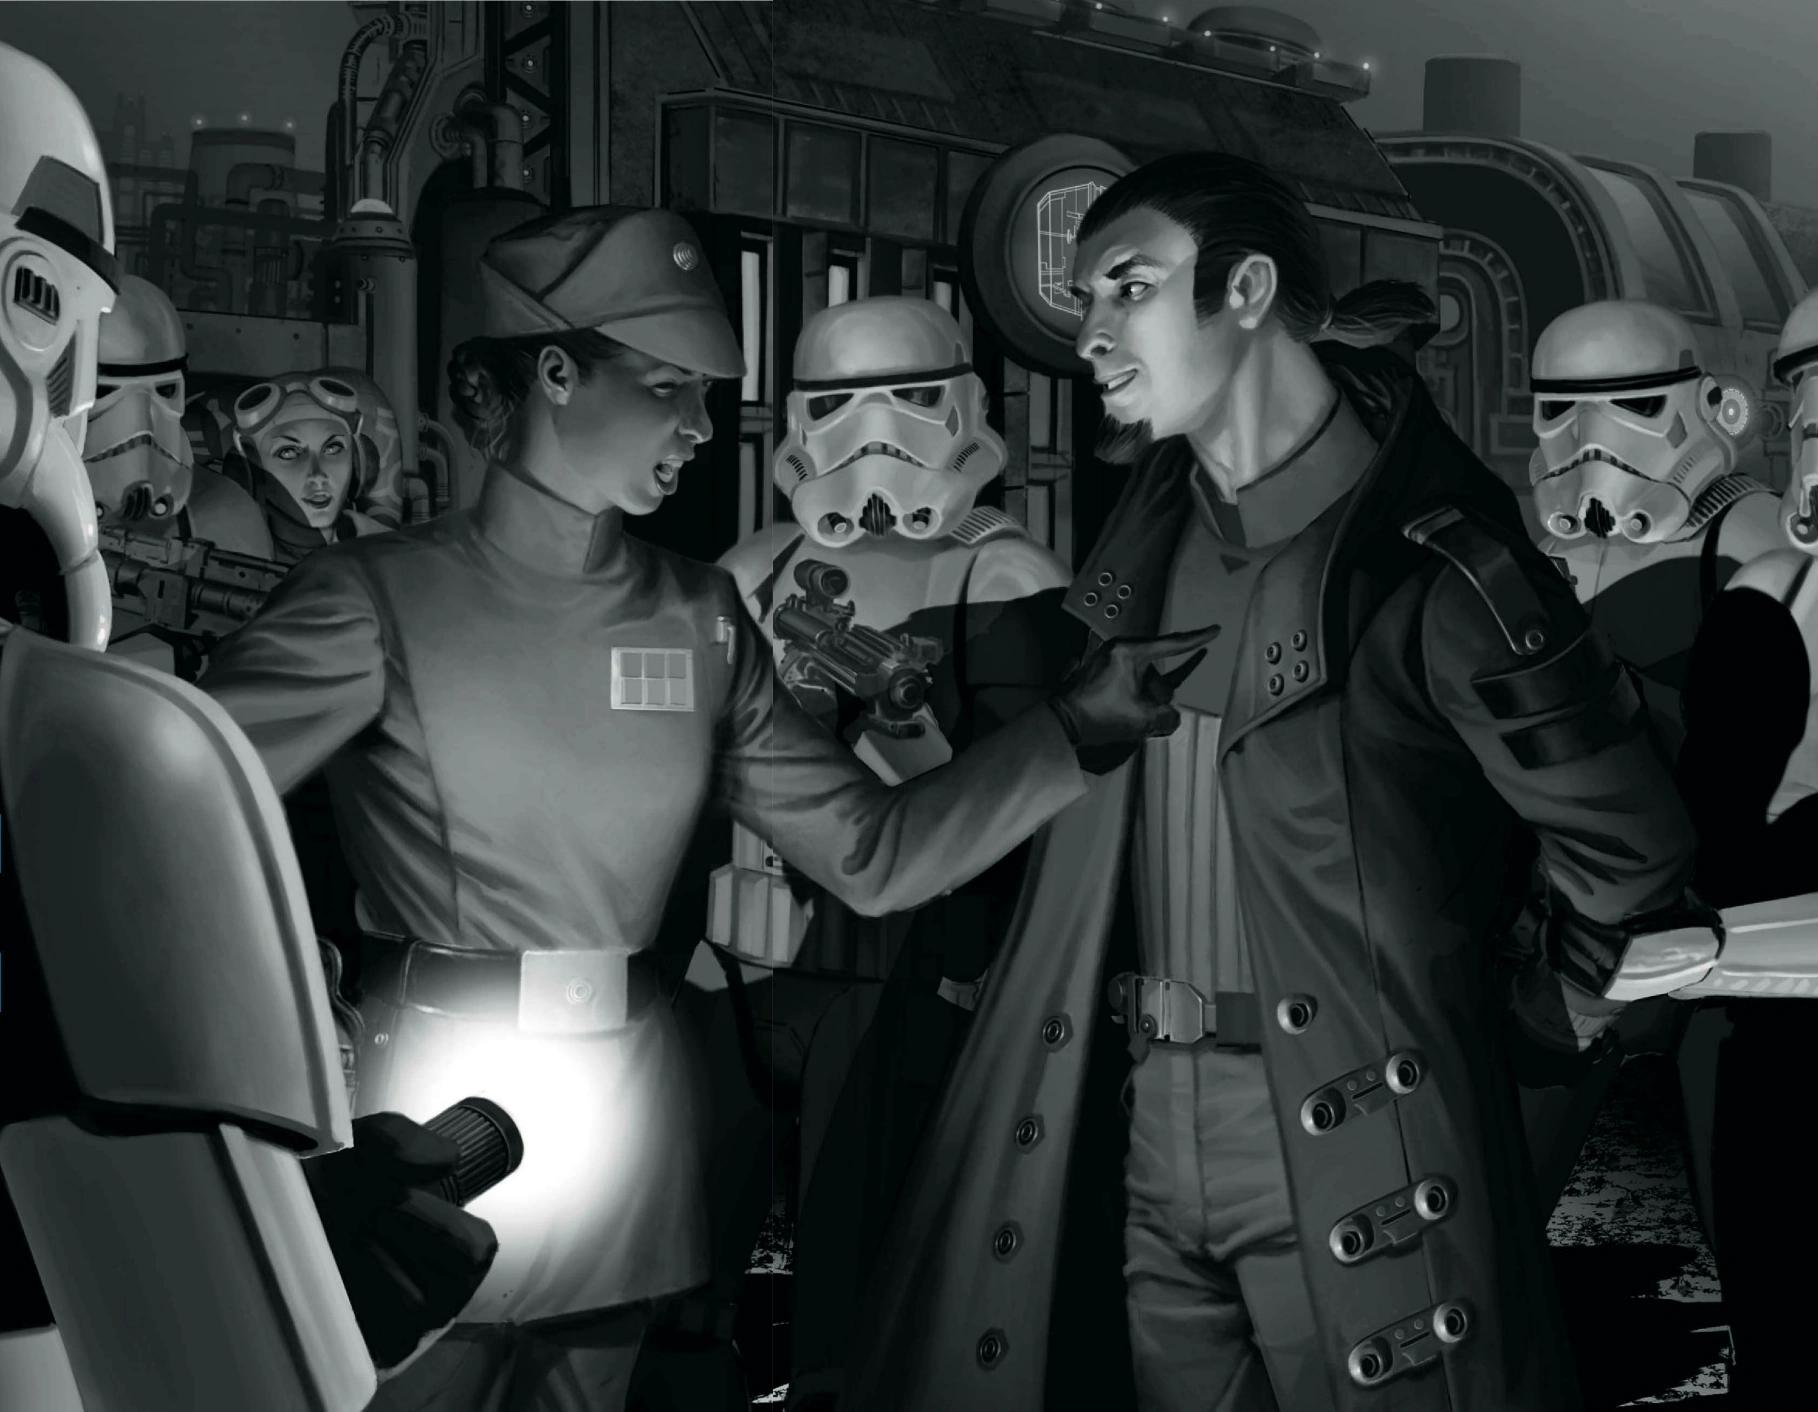

Jarrus and Rae Sloane meet face to face.
It was then that he met Hera Syndulla when they got involved in a street fight with Charko's gang, but she disappeared before he could find out more about her. He returned to The Asteroid Belt, where he met Zaluna Myder, and Jarrus took part of her secret reunion with Syndulla until Skelly's interruption, when the Twi'lek revealed she was investigating Count Vidian, hoping to know what he was doing on Gorse.[2]
On Syndulla's insistence, Jarrus agreed to take her to Moonglow in the next workshift, where he met Rae Sloane face to face during his search for the rebellious Twi'lek. However, the Imperial soon departed to their spaceport after another of Skelly's bombings. Their borrowing of Garson's bus, however, prompted Jarrus to chase after them. After recovering the bus, escaping with Syndulla and Skelly and finding Myder trapped in the restroom, they discarded the now-useless vessel in a junkyard.[2]
After some rest, Jarrus agreed to guide them through town only, unwilling to attract Imperial attention and wanting to leave the system once and for all. Nevertheless, the Imperial-provoked explosion on Cynda prompted him to take Expedient and ask Syndulla to retrieve Garson's team, who were on a workshift at the time—only to discover their demise. Willing to stop Vidian's machinations, Jarrus, Syndulla, Skelly and Myder headed to Calcoraan Depot, where the former Padawan had the idea to intercept Vidian's report to the Emperor. They infiltrated the cyborg's private room, and later confronted him; the Count's cybernetics allowing them to uncover most of his plans. On Jarrus' suggestion, they also warned Sloane about Vidian's plans, with Jarrus himself claiming to Sloane that he was an deep undercover agent for the Emperor.[2]
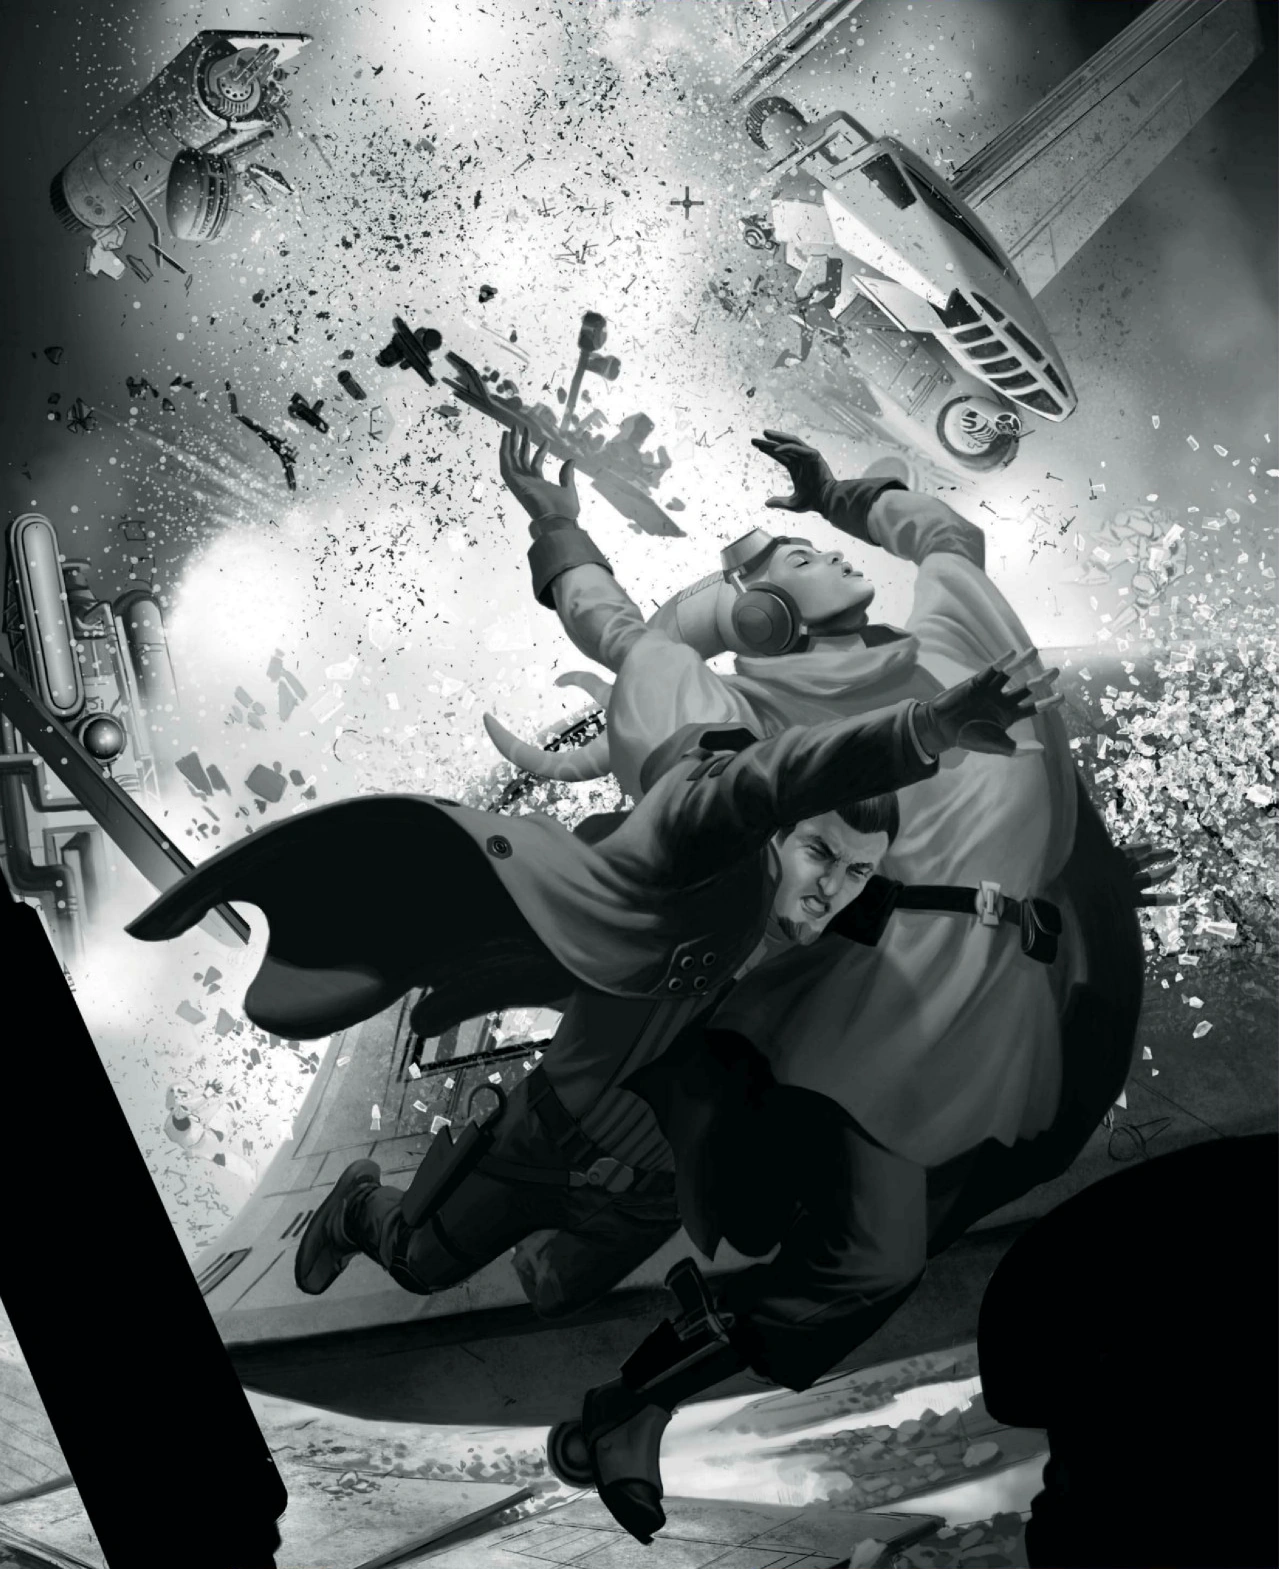
Jarrus saves Syndulla onboard the Forager.
Then, they headed back to the Gorse system, where they tried to delay Cynda's destruction by targetting the TIE/LN starfighters escorting baradium haulers, and later infiltrating Vidian's Forager so that Myder could tap into its Transcept systems and send a warning to Gorse. Once inside, Jarrus and Myder faced Count Vidian in his chamber, a few minutes before Sloane issued his arrest. Vidian's determination forced Sloane to order the destruction of Forager’s transmission tower.[2]
During the Ultimatum’s attack, Jarrus saved Syndulla, making use of the Force and revealing his true nature to her. They, along with Myder, escaped the ship's destruction in one of its life pods. Landing on Gorse, it allowed Jarrus time to leave a trail placing him on Gorse during the conflict. After they parted, Jarrus bade farewell to Myder in her new home, and Syndulla accepted his proposal to become a crew member of her ship, the Ghost.[2]
The rebellion
- "How about a little less attitude and a little more altitude?"
- ―Kanan Jarrus

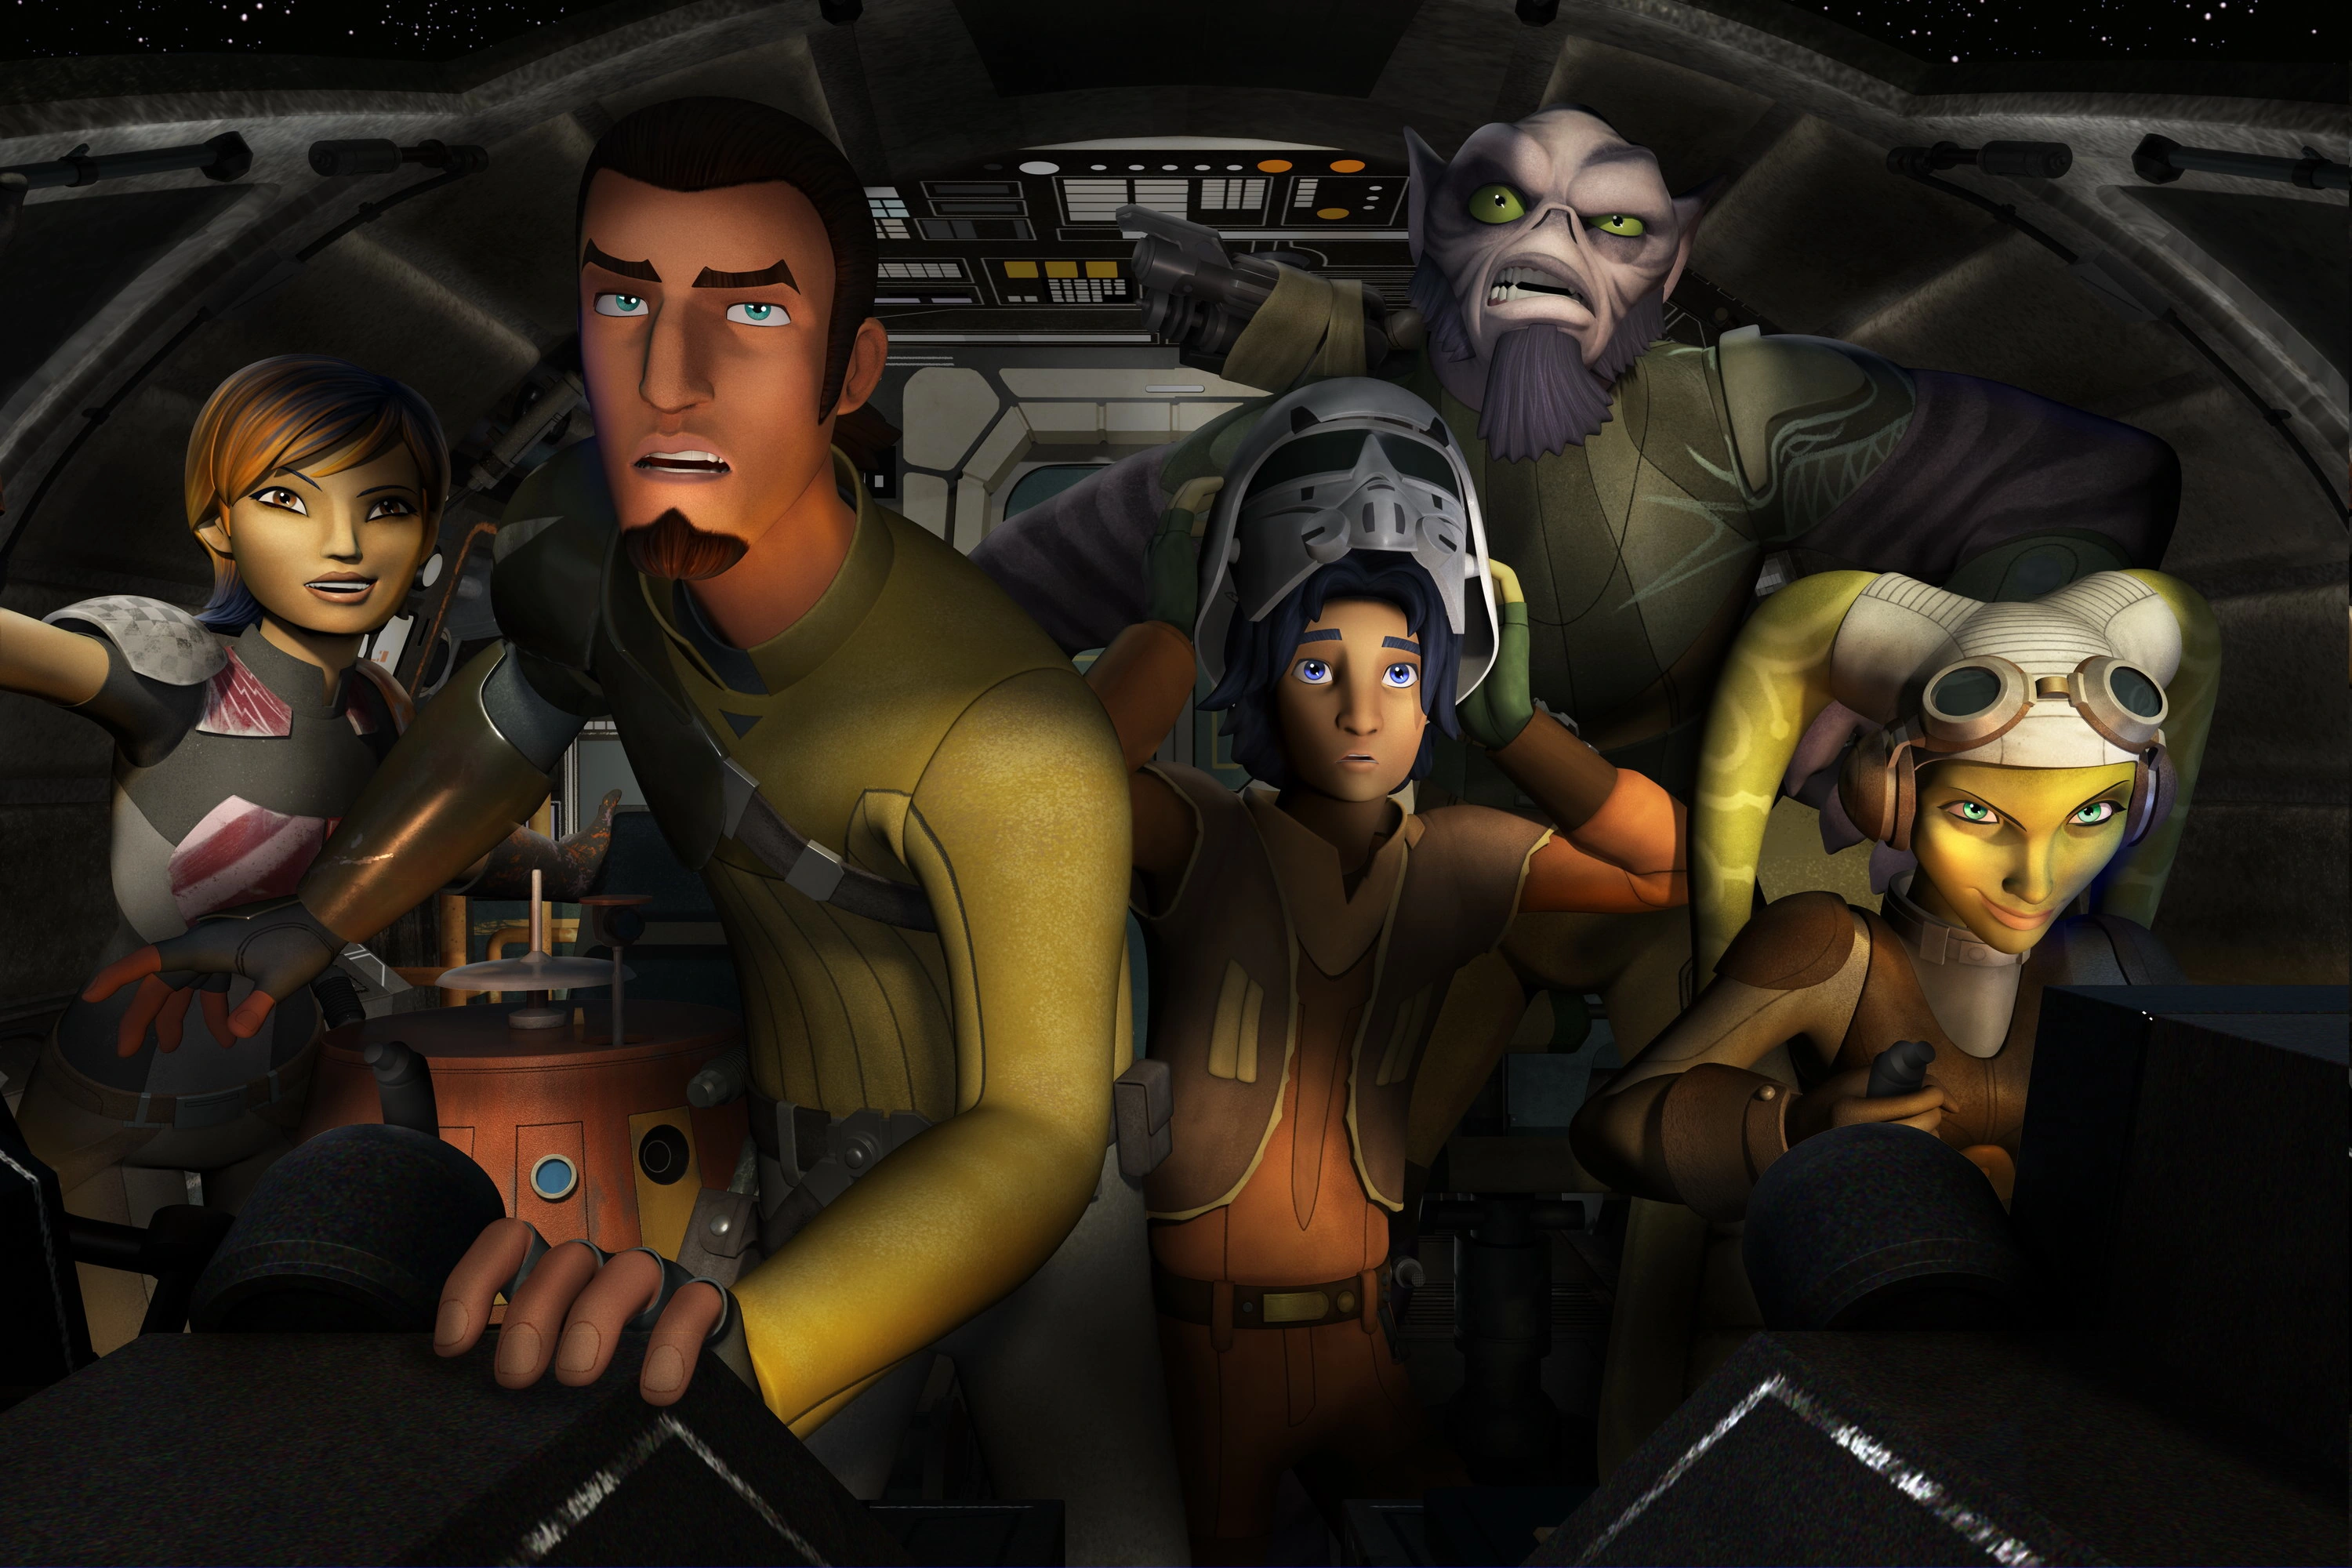
Kanan Jarrus served as the leader of the Lothal rebels.
By the age of 28,[1] Jarrus had become the leader of the motley crew of the Ghost,[3] whose members waged a war of resistance against the Empire. Besides Syndulla, his other companions included the astromech droid C1-10P (or "Chopper"), the former Lasat warrior Garazeb Orrelios, and the Mandalorian weapons expert and artist Sabine Wren.[19] Unknown to Kanan, this rebel cell was actually part of larger Rebel network that was fighting against the Galactic Empire.[6]
Known as the Lothal rebels, Kanan's rebel band launched numerous raids and incursions against Imperial forces around the Outer Rim planet of Lothal. One such stand was a raid on an Imperial supply convoy. After the raid, Jarrus, Syndulla, and Chopper found themselves under attack by Imperial TIE fighters. After the attack disabled both the Ghost’s shields and internal comm system, Jarrus and Syndulla began giving Chopper conflicting orders over which system to fix first. It was Chopper who ultimately destroyed the final TIE, and his efforts were recognized by the two organics before the ship blasted into hyperspace.[20]
On another occasion, Jarrus was supposed to rendezvous with Orrelios. The Lasat had shown up at the wrong alleyway and, against Jarrus' protestations via comlink, picked a fight with several stormtroopers, which culminated in the destruction of a TIE fighter. Jarrus was nevertheless pleased and set out to meet Orrelios.[21]
Finding a Padawan
- "You can keep the lightsaber you stole, let it become just another dusty souvenir, or you can give it back and come with us—come with me, and be trained in the ways of the Force. You can learn what it truly means to be a Jedi."
- ―Jarrus offers Bridger the opportunity to train as a Jedi
During an operation on Lothal's Capital City to steal several Imperial supply and blaster crates, Jarrus sensed the presence of a 14-year-old boy, Ezra Bridger, but continued his mission by intercepting the Imperial speeders, until Bridger stole one of the speeders. Forced to pursue him, Jarrus finally recovered the crate by offering the boy a chance to escape in the Ghost. Jarrus witnessed Bridger as he unknowingly used the Force to leap into the hovering ship with his crate. With Bridger safely on board, the Ghost left the planet and jumped into hyperspace, losing the TIE fighters pursuing them. Jarrus and Syndulla received their payment from Cikatro Vizago and information about a group of Wookiees enslaved by the Empire. Alerted by Chopper, Jarrus went into his quarters only to spot Bridger with his lightsaber in hand. He demanded that he hand over it, but knowingly allowed the boy to steal his holocron as a secret test.[22]
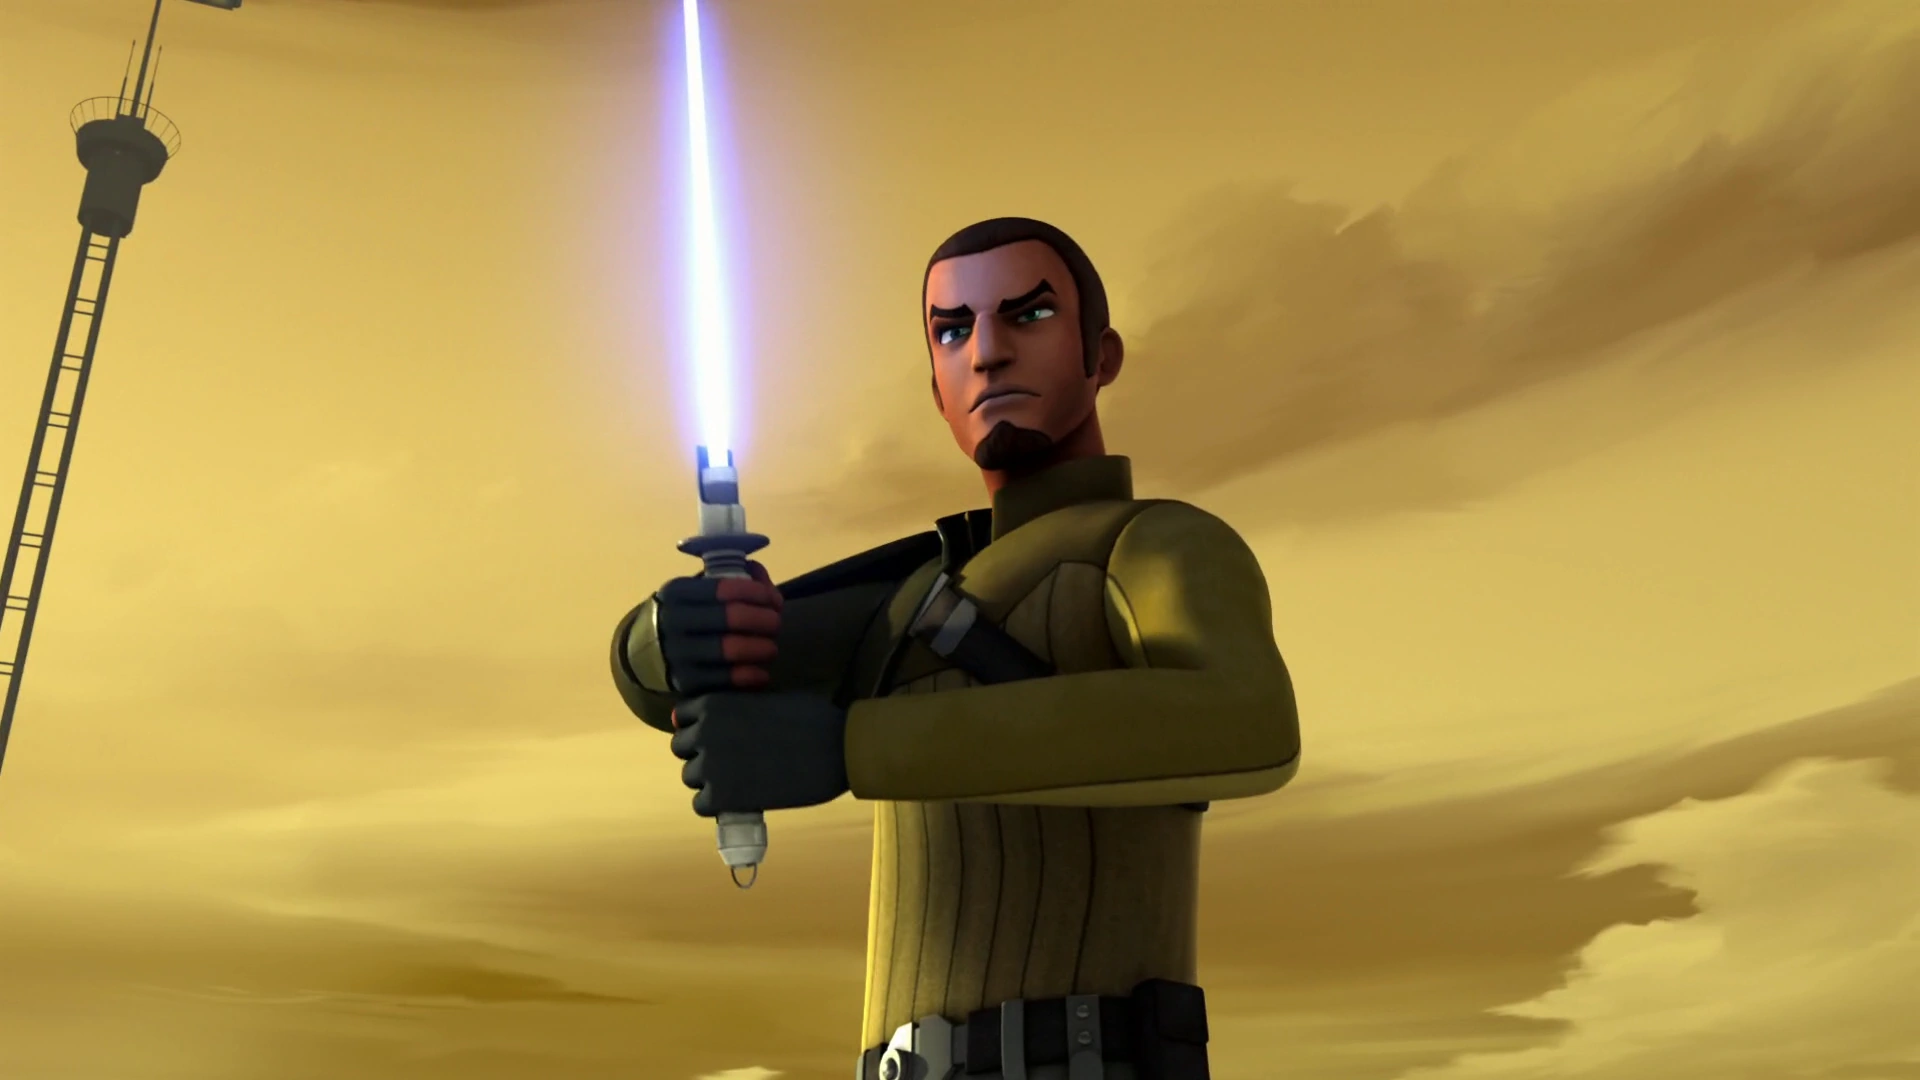

To save the rebels and the Wookiees, Jarrus revealed himself as a Jedi.
Determined to save the Wookiees, Jarrus, Wren, Orrelios and Chopper entered a Gozanti-class cruiser, but were soon driven off the ship by the arrival of Agent Kallus on the Lawbringer[23]. Bridger's resulting capture, however, led the crew to argue about whether to rescue the boy. Left as the deciding vote, Jarrus chose to mount a rescue—only to find Bridger waiting near the Star Destroyer's docking bay. Once inside the Ghost, Bridger revealed to them that he had learned of the Wookiees' location in the spice mines of Kessel. Soon enough, they reached the planet and fought stormtroopers so that Bridger could release the Wookiees from captivity. Cornered by Kallus and his men, Jarrus ignited his lightsaber and publicly revealed himself to be a Jedi, giving everyone time to escape. After being picked up via cargo container, Jarrus and the Ghost arrived in time to save Bridger and Kitwarr from Kallus and escaped from Kessel.[22]
Soon after the Wookiees' departure, Bridger stole Jarrus' lightsaber from his belt, and kept it until they returned to Lothal. During his farewell, however, the boy returned the holocron to the former Jedi. Jarrus, aware of his Force-sensitivity, met up with Bridger at his tower and gave the boy two choices—to keep the lightsaber as a useless relic and remain on Lothal, or return to the ship and become Jarrus' Padawan, and a member of the crew. Awaiting for his answer on the Ghost, Jarrus opened the holocron and played Obi-Wan Kenobi's full message. As it ended, Bridger returned the Jedi's lightsaber,[22] and Jarrus ended up taking the boy under his wing to teach him how to deal with his powers.[24]
Garel

Jarrus trying to sell an E-11 blaster rifle to Cikatro Vizago.
After taking on Ezra as his apprentice, Jarrus took part in a mission to steal Imperial disruptors from the planet Garel. The rebels were short of funds and planned to sell them to the crime lord Vizago. During the mission, Jarrus along with Wren, Bridger, Chopper, and Orrelios boarded the same star commuter shuttle carrying Amda Wabo, Minister Maketh Tua, and the droids R2-D2 and C-3PO to Garel. During the journey, Jarrus, Bridger, and Chopper staged an argument which got Chopper along with R2-D2 and C-3PO sent to the storage compartment. This enabled Sabine to offer her services as an Aqualish translator for Wabo and Tua.[25]
Wren discovered that the weapons were located in Bay 7. After arranging with Syndulla to rendezvous with them, the rebels stole the weapons and fought off Tua's stormtroopers. During the confusion, R2-D2 and C-3PO stowed aboard the Ghost; unknown to the rebels, the two droids were on a secret mission to prevent the Imperials from taking the weapons. Returning to Lothal, the rebels attempted to sell the T-7 ion disruptor rifles to Vizago, but before they could complete the transaction, the rebels were interrupted by the arrival of ISB Agent Kallus, who brought two AT-DP walkers and several stormtroopers. During the skirmish, Jarrus stopped a walker with a disruptor rifle and rescued Orrelios after his duel with Kallus. Meanwhile, R2-D2 helped Wren and the other rebels to destroy the remaining disruptors. After defeating the Imperials, Jarrus personally returned the droids to their rightful owner, Bail Organa. The Senator never revealed his identity, but paid Jarrus generously before he left on the Ghost.[25]
Later on Lothal, Bridger and Orrelios got into a fight aboard the Ghost. As punishment, Syndulla sent them to buy some groceries including a meiloorun fruit. However, the two rebels ran into trouble and stole a TIE fighter. After learning of their predicament, Jarrus ordered the two to destroy the vessel.[26] Despite this, Bridger and Orrelios refused, but kept it a secret so as to preserve it.[6]
Stygeon Prime
- "Luminara will teach you much better than I could."
- ―Kanan Jarrus
Due to his incomplete training, Jarrus had little confidence in his own ability to train Bridger, further compounded by the Bridger's lack of focus and discipline. On one occasion, Jarrus was forced to rescue Bridger during a training lesson above Lothal's atmosphere. Later, Jarrus learnt from one of Gall Trayvis's broadcasts that Jedi Master Luminara Unduli was still alive but imprisoned in the Stygeon system. Jarrus immediately resolved to rescue her, hoping to deliver Brdiger to a full-fledged Master for training. Together with the whole crew, Jarrus devised a plan to enter the Spire and rescue Unduli.[10]

Jarrus facing the Inquisitor on Stygeon Prime.
While Chopper waited aboard the Ghost, Jarrus and the other rebels descended to the Spire in the Phantom. After landing on the prison's landing platform, Jarrus along with Bridger, Wren, and Orrelios entered the prison complex. While latter two guarded the turbolift terminal, Jarrus and Bridger took a lift to reach the prisoner's cell. After using the Force to play mind tricks on the stormtroopers guarding her cell, the pair entered Unduli's cell only to discover her corpse, just before being cornered by the Grand Inquisitor, who revealed that he had used Undul's remains to lure Jedi survivors to their deaths. Confronted by the Jedi hunter, Jarrus was forced to engage in a lightsaber duel, which continued into the Spire's corridors. The Inquisitor proved more than a match for Jarrus and taunted him for being a "poor student." Jarrus and Bridger fled the Inquisitor and were rejoined by Wren and Orrelios to escape into a sealed hangar bay.[10]
With the Inquisitor temporarily held back, Jarrus convinced his apprentice to use the Force to unlock the outer hangar doors only to be surrounded by more stormtroopers. Fortunately for the rebels, Syndulla arrived in the Phantom accompanied by a large swarm of tibidees, which proceeded to harass the Imperials, and Jarrus's team took advantage of the chaos to flee. Following their adventure on Stygeon Prime, Bridger told Jarrus he didn't need to continue training him if he didn't want to, but Jarrus explained that he only wanted the best teacher for Bridger, and recalled Master Yoda's words and vowed to continue training Ezra with a newfound resolve. He explained to Bridger that he would stop trying to train him and would actually train him properly, and Bridger agreed to continue training under him.[10]
Further missions
During mission to destroy a massive kyber crystal in possession of the Empire, Jarrus sent Bridger into the Academy for Young Imperials on Lothal to steal a decoder containing information about their target. When Bridger, with the assistance of fellow Imperial cadet Zare Leonis, stole the decoder and got Wren to transmit the information to Jarrus and Syndulla, but he also opted to prolong his stay at the academy to rescue a Force-sensitive cadet named Jai Kell from being abducted by the Inquisitor. Despite his misgivings about Bridger's safety, Jarrus and Syndulla continued their mission and intercepted the Imperial convoy carrying the kyber crystal; using the Force, Jarrus located the crystal in the middle Gozanti-class cruiser. While Jarrus piloted the Phantom and distracted the escorting TIE fighters, Syndulla attacked the middle cruiser and successfully destroyed the crystal. The pair narrowly escaped a great explosion, which wiped out the rest of the convoy. They then returned to Lothal to rendezvous with Bridger and the other Spectres.[27]
On another mission, Jarrus piloted the Ghost to rescue Syndulla and Wren from Fort Anaxes, an abandoned Republic base on the asteroid PM-1203 that was infested with fyrnocks. Syndulla and Wren's predicament had arisen when Bridger, Orrelios, and Chopper neglected to check a fuel leak on the Phantom. Unable to escape, the two women contacted the Ghost for help. Jarrus was meditating in his chambers when he heard Bridger and Orrelios panicking outside. After reprimanding the two, Jarrus flew the Ghost to Fort Anaxes and rescued Syndulla and Wren.[28]
Sometime later, after a raid on an Imperial supply yard during which Jarrus had trouble to hit its TIE fighters, the crew was in need of parts to repair the Ghost and so, went to Osisis Station in the Regani sector. Hoping to obtain the parts from long-time-"associate" Galus Vez's black market operation, Jarrus and his team then met with the Besalisk. However, as the Empire had been doubling their inspections since their last visit, he refused to the transaction and challenged Syndulla to a race in Fool's Run, which much to Jarrus' dismay, Syndulla accepted. During the race, when Vez started to play unfair, Jarrus and Bridger noticed it and help Syndulla. By concentrating, they used the Force and pushed two asteroids to impede Vez's passage and help Syndulla win the race. When Vez was angered, he tried to retaliate by handing them over to the Empire, but Jarrus, Bridger and Syndulla resisted, and threatened to destroy Vez’s cargo ships. Forced to cooperate, Vez gave them the parts and the Ghost departed.[29]
During one of Bridger's lesson on telekinesis, his Padawan was frustrated with his slow learning, but Jarrus tried to teach him that patience was one of the most valuable skills a Jedi had to learn. The next day, he and Orrelios took the Phantom to destroy an Imperial transmission centre, during which the rest of the Ghost crew engaged Imperials in a skirmish near an ion storm.[30]
During a solo mission on the Phantom, he was fleeing from the Inquisitor's forces when he was attacked by TIE fighters. The VCX-series auxiliary starfighter was severely damaged while Jarrus was injured. Though he managed to land the craft mostly intact on Vyndal, he passed out and was rescued by a native and her son. The two brought to their home to protect him from the forest's night creatures, and when he awoke, the woman took him to see their village leader, Yeleb "the Protector". Jarrus realised almost immediately Yeleb's deception (posing as a Jedi and in possession of a lightsaber) and asked a private audience. After some initial animosity, Yeleb revealed how he had come to obtain the weapon, only for the Grand Inquisitor and his men to arrive at the village. Refusing to let the Imperials raze the village, both Jarrus and Yeleb fought the Inquisitor; during the skirmish, Yeleb was mortally wounded and Jarrus was forced to trick the Inquisitor into believing he had left the planet aboard one of their own ships. With the Imperials driven off, Jarrus returned and recognised Yeleb's courage before he died, and encouraged the villagers that they could defend themselves as they had done during the skirmish before leaving the planet.[31]
During a mission to swipe the Lothal Imperial Academy's new recruits, Wren let herself be captured and taken to the Zygerrian slaver MaDall, prompting Jarrus and the rest of the team to look for clues of her whereabouts. When they found one of her graffiti stencils leading them to the planet Oon, Jarrus and his team followed the clue and, upon their encounter, Jarrus chastised her for not warning them beforehand. Not wanting to bring themselves to her level, they let MaDall free and returned, with Wren, to the Ghost.[32]
When Briger left to practice his Jedi training alone and was captured by the bounty hunters Gowski and Fissol, Jarrus felt something was amiss and rode his personal Joben T-85 speeder bike to their encounter. To rescue his Padawan, Jarrus defeated the two bounty hunters and freed Bridger, and at the prospect of letting Gowski and Fissol with the knowledge of their existence, Jarrus did a mind trick on them so that they thought there were no Jedi on Lothal and duo left Lothal.[33]
Return to Kaller
- "What's the matter, luv? You miss me?"
"Always... and more that you'll ever know." - ―Hera Syndulla and Kanan Jarrus
Contacted by "Fulcrum", the Ghost crew was to pick up supplies on Kaller for the Tarkintown refugees,[5] which he had avoided for years,[34] where crates were ready and waiting for them.[5] Jarrus and his team arrived at the coordinates where the crates had been waiting for them, but found them empty. Furthermore, the provincial governor, Gamut Key, and his constabularies arrived at the scene, for they had received a tip that smugglers were using the area as a drop point and demanded that they let him search the ship. With nothing to hide, Syndulla allowed them; before long, Key and his men left them to their devices. Instead of leaving, much to Jarrus' reluctance, the team decided to track the ship themselves.[34]
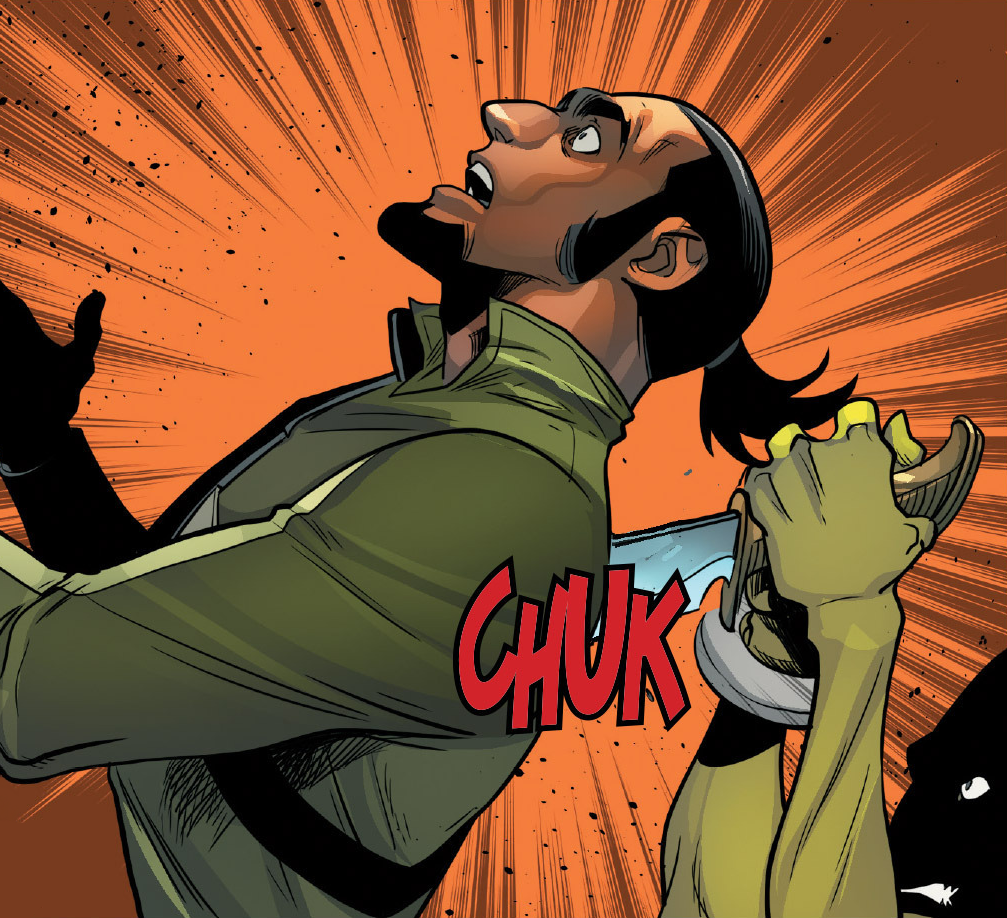
Jarrus being stabbed by Tápusk.
Once they reached Plateau City, Jarrus decided to split the team up to cover more ground, and refused to let Syndulla accompany him, saying he would go with Chopper. Eventually, he followed the intel he thought led to his old former friend and ex-partner, Janus Kasmir, but instead, he found Tápusk. Almost giving away his identity, he told the supplies that belong to his operation, but Tápusk refused to give them back, for which Jarrus started a confrontation with them, taking out all of Tápusk men singlehandedly and unarmed. Once he was finished, Jarrus contacted the team to tell them he had recovered the supplies. Then, although Chooper tried to alert him of Tápusk, Jarrus' senses were clouded by his memories of Kaller, and the Kalleran stabbed him in the back.[34]
Injured, Jarrus immediately knocked him out, and Gamut Key appeared to thank Jarrus for taking down Tápusk's operations and tell him that perhaps, the rebellion could use his help as an old politician on occasion, before leaving him alone. Not too long afterward, Jarrus passed out from blood loss.[34] The team arrived then and took him to a medcenter, where he was placed in a bacta tank, under the careful eye of his teammates,[7] who were told he needed to be in there for a few weeks or until he regained consciousness. However, Imperial forces surrounded the building to capture them.[12]
Empire Day
- "I am ready. Wait. Ready for what?"
"For a test, a real challenge one that could determine if you're meant to be a Jedi or not." - ―Ezra Bridger and Kanan Jarrus
During Empire Day, Jarrus began training Bridger to use the Force to influence animals, starting with a loth-cat, but they soon went to Old Jho's Pit Stop to learn of the Empire's search for a Rodian called Tseebo. Following Senator Trayvis's broadcast, the Lothal rebels ruined the Imperial parade by detonating a bomb in the recently-unveiled TIE Advanced v1. During their escape, Bridger guided Jarrus and Wren into his old residence, where they met Tseebo and found about Bridger's painful past.[35]
Considering the valuable information the Rodian possessed, the three rebels decided to smuggle him out of Lothal in a stolen Imperial Troop Transport. Despite Kallus's intervention, Jarrus managed to board the Ghost along with the rest of the crew. However, they were soon followed by the Inquisitor, who managed to place a XX-23 S-thread tracker in the Phantom. Aware of this, Jarrus devised a plan to lure the Inquisitor to Fort Anaxes by detaching the shuttle while the Ghost was still on hyperspace.[35]
Once there, he removed the tracking device off the Phantom and prompted Bridger to let go of his fear, so that he could connect with the fyrnocks. Both master and apprentice, then, awaited for the Inquisitor's coming, and Jarrus engaged in combat with the Pau'an once again. However, the Inquisitor managed to knock him out with a powerful Force push. He only regained consciousness just as Bridger tapped into the dark side of the Force and controlled an enormous fyrnock to attack the Inquisitor, who was also wielding Jarrus's lightsaber at the time. The creature kept the Inquisitor busy enough that Jarrus was able to bring the now-unconscious Bridger to the Phantom, recover his lightsaber and destroy the Imperial shuttle. As they returned to the Ghost, Jarrus told Bridger that he had made a dangerous connection to the Force, and apologized for not teaching him what he needed to know.[36]
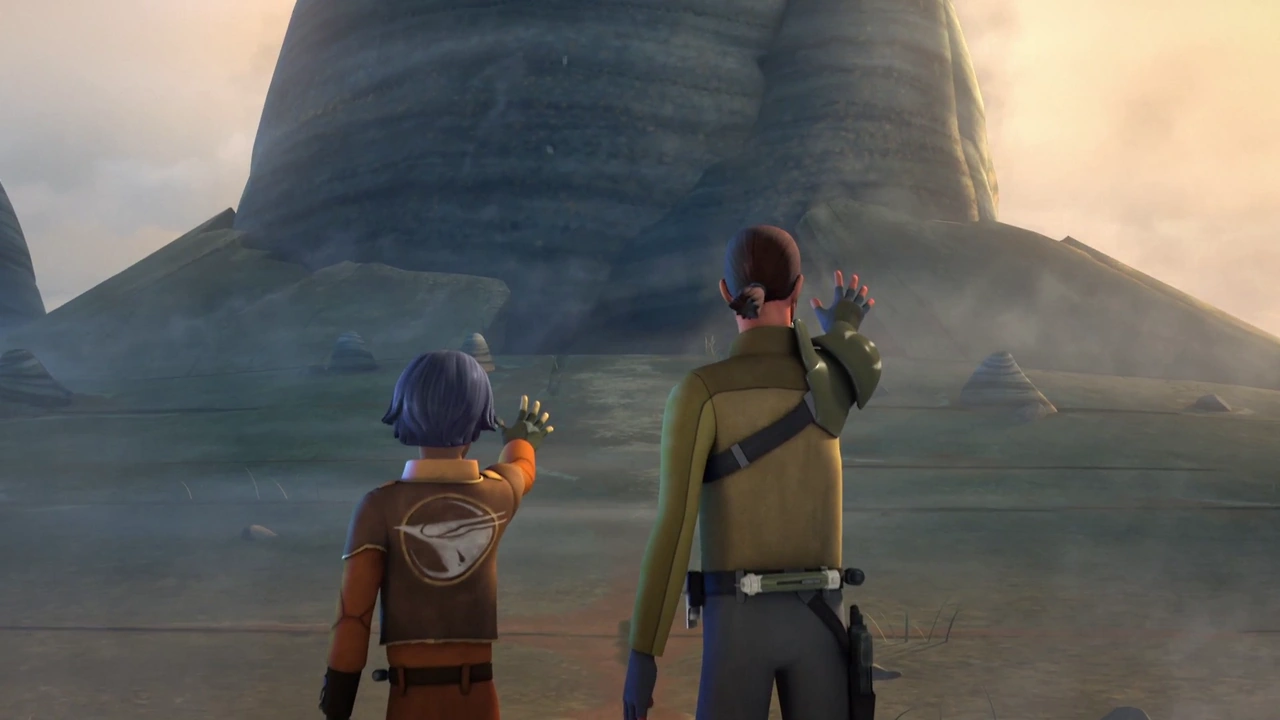

Master and apprentice opening a passage to the Jedi temple on Lothal.
A few days later, Jarrus decided to put Bridger through a test to determine if the boy was meant to be a Jedi or not. Consulting the star maps in his holocron, he located a temple on Lothal, but prompted his apprentice to locate the temple by himself. Once he did, they landed the Phantom and entered the temple. Inside, Jarrus remained behind, waiting for Bridger to come back to the entryway, his life depending on his apprentice's return. Though initially surprised, Jarrus conferred with Yoda about his insecurities as a master. Nevertheless, Bridger returned with a kyber crystal in hand, and Jarrus explained that they were used to construct lightsabers.[18]
Over the course of several weeks, he helped—along with the rest of the crew—Bridger to build his own lightsaber. Jarrus provided his Padawan with some of the spare lightsaber parts he had found during his years in hiding. With all of the rebels assembled, the boy presented the weapon to Jarrus, who thought the design fit his apprentice, and returned it so that Bridger could ignite his lightsaber for the first time.[18]
Other missions
Sometime later, Jarrus accompanied Orrelios and Chopper to Old Jho's Pit Stop, where the Lasat engaged Lando Calrissian in a game of sabacc. Believing Orrelios would win, Jarrus allowed him to bet the droid, only to see Calrissian win the game. Because of it, Jarrus made a deal with Calrissian to smuggle some cargo past the Imperial blockade of Lothal. Along with Syndulla, he escorted Calrissian to make a deal with Azmorigan aboard the Merchant One, where he reluctantly agreed with Syndulla's decision to stay on Azmorigan's ship. Once she returned, but unable to get past the puffer pig blocking her way to the cockpit, Jarrus had to pilot the Ghost through the Imperial blockade and land in Calrissian's estate. Following a confrontation with Azmorigan's forces, they bid farewell to Calrissian, who had returned Chopper to them.[37]
During a relief mission for Tarkintown, the Ghost delivered several crates of foodstuff to the settlers; unbeknownst to them, the food had been poisoned by Kallus, prompting those who had eaten to become ill, amongst them Mindiz, for whom Orrelios had a soft spot. Although they were planning to obtain the medicine from Capital City, Orrelios (thinking he had made a mistake) left on his own and prompted the others to go to his help at a medical facility. As they found Orrelios at Kallus' mercy, they intervened (after obtaining a antidote for the Tarkintown settlers) and engaged in a firefight with Kallus' men. When Kallus tried to attack the weakened Orrelios, Jarrus Force pushed him and help Orrelios board the Ghost. Afterwards, they distributed the medicine to the sick and saved them, including Mindiz.[38]


Jarrus, Bridger and Syndulla protecting Gall Trayvis.
Jarrus later instructed Bridger on Form V, an exercise during which the boy had a vision revolving around Senator Trayvis. Warning Bridger not to blindly trust his vision, he accompanied the rest of the crew to see the senator's transmission. Though Jarrus suspected something was amiss, he agreed to accompany the crew to the Old Republic Senate Building to meet with the senator. They were soon ambushed, however, and had to retreat to the sewers where they split off—Jarrus going with Orrelios and Wren, while Bridger, Syndulla and Trayvis going another way. Once they met up, Jarrus used the Force to stop the fan blocking their exit, and the rebels escaped from the Imperials as Trayvis (revealed to be an Imperial spy) regained consciousness. Once the rebels returned to the Ghost, Jarrus explained that Bridger interpreted his vision wrong by allowing his emotions to cloud it.[39] Jarrus than began to practise the first five lightsaber forms for a few weeks after the mission.[source?]
After Bridger had a vision of himself attacking Orrelios with his lightsaber three times, he came for advice to Jarrus, but he told him that he did not dwell too much on the vision. Then, Orrelios returned from a meeting with a contact to exchange information, and had learned that the Empire had put a bounty on their heads. However, Bridger soon discovered that a Clawdite had infiltrated the ship, prompting a small firefight against the intruder until being stunned by Bridger. In the end, they dropped off the Clawdite on a moon and left.[40]
Tarkin arrives
- "Whatever you want from me, you won't get it."
- ―Kanan Jarrus, to Wilhuff Tarkin
After a raid near Jalath, Jarrus, Wren and Bridger returned to the Ghost while Syndulla watched as Trayvis publically proclaimed his loyalty to the Empire on the HoloNet. This, however, gave Jarrus the idea of broadcasting messages through the Imperial main communications tower of Lothal. On their reconnaissance mission to the tower, Jarrus devised a plan with Wren's help, but unbeknownst to them, a Viper probe droid warned the recently-arrived Grand Moff Wilhuff Tarkin of their presence.[41]


Jarrus watching as Tarkin's orders to destroy the tower are carried out.
Though Bridger voiced his concerns, Jarrus told him he now understood what Billaba had once tried to teach him about sacrifice, and continued with their self-imposed operation. As the crew infiltrated the tower, Jarrus realized the reinforcements were already closing in and made contact with Syndulla to meet them at the top. Despite Bridger's initial refusal to follow Jarrus's orders, he complied when Jarrus told him he would right behind him, and locked the tower's door once both Agent Kallus and the Inquisitor appeared. At the prospect of losing his crew, Jarrus destroyed the entrance controls with his lightsaber and engaged in a duel with the Pau'an. Unable to reach the Phantom, he ordered Syndulla to leave without him, leading to his capture by Imperial forces. At sunrise, during his crew's broadcast, he met Tarkin and witnessed as the Empire destroyed the tower to end the rebels' message.[41]
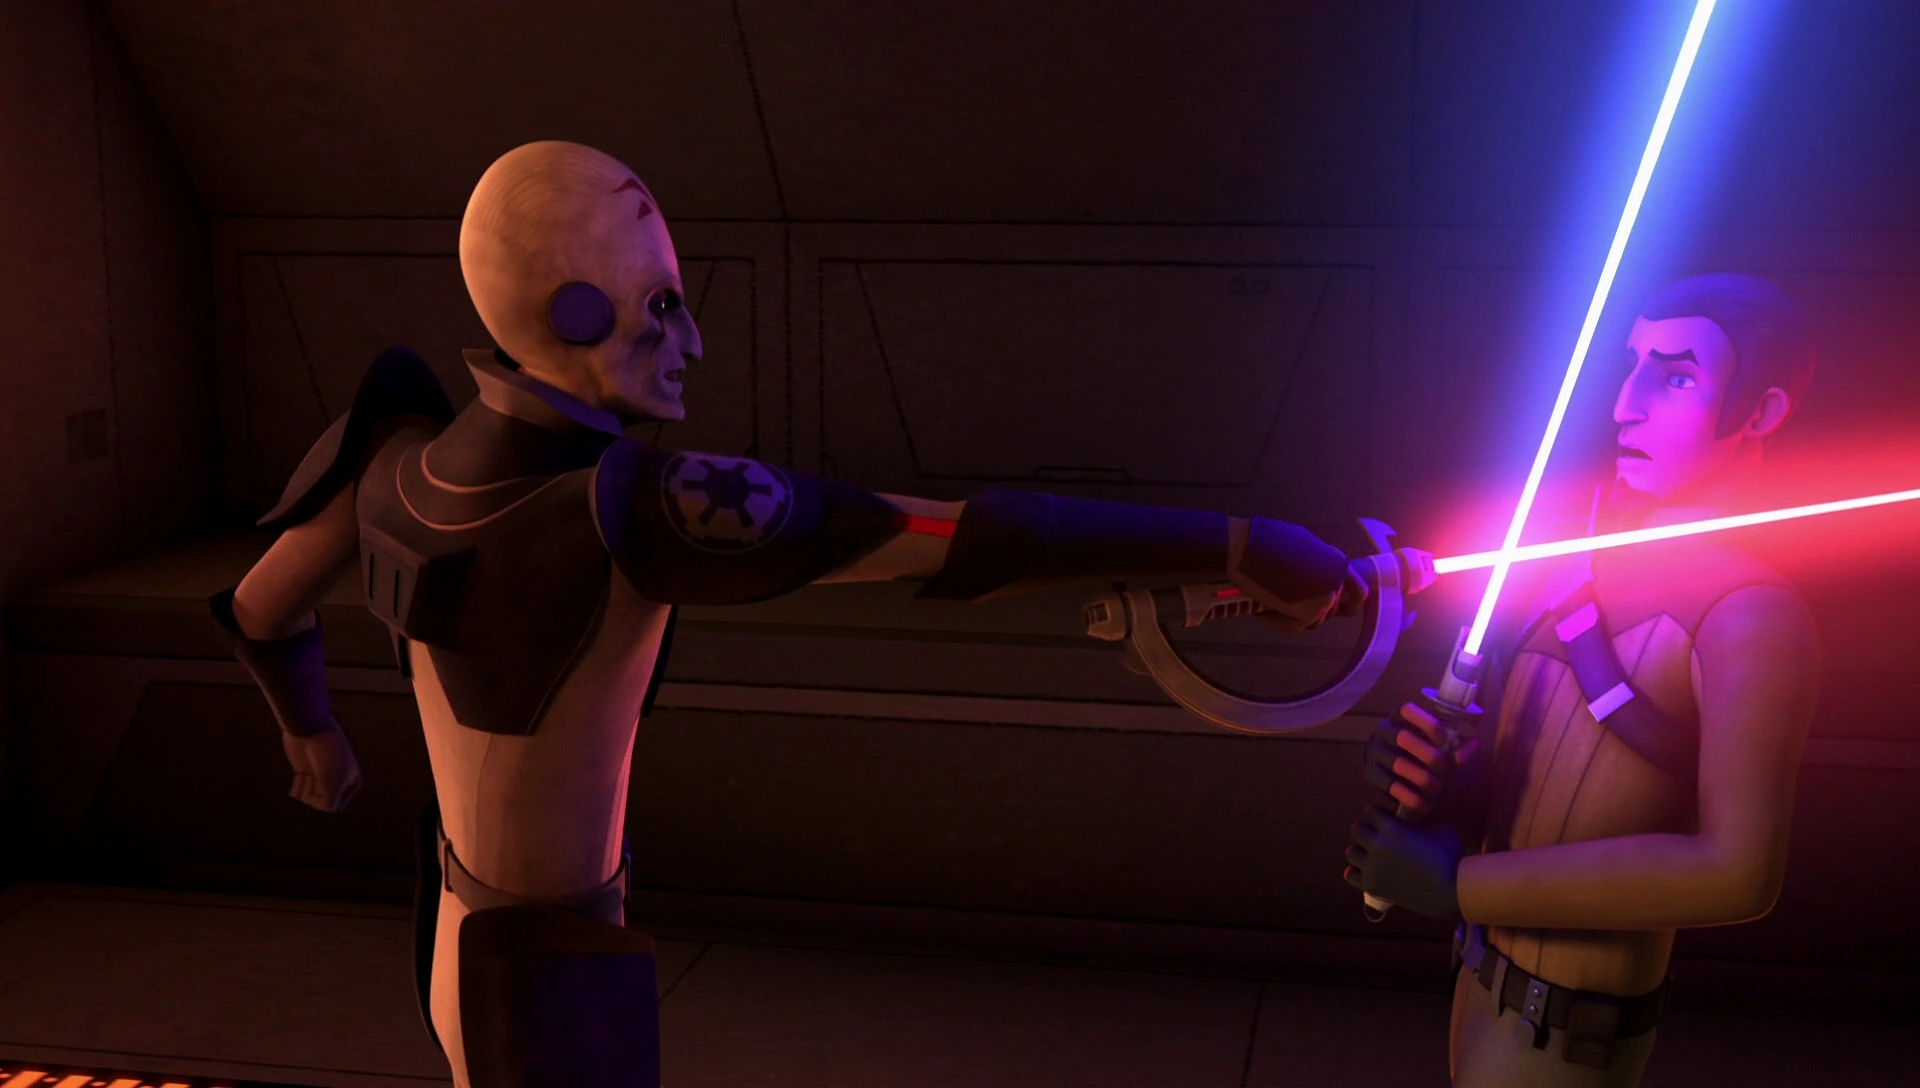
Jarrus was then taken to the Sovereign, where he endured the Inquisitor's torture[42][6], who desired to know the location of other Rebel cells and the real identity of "Fulcrum," but Jarrus revealed nothing before his crew rescued him. During the interrogation, the Inquisitor taunted Jarrus by asking him how he survived Order 66, and that Billaba had gave her life for his. When he asked him what his Master's last word was, Jarrus replied that she had told him to run. The Inquisitor then ignited Jarrus' lightsaber and told him that he had the right to be afraid, and that he would be unable to save his crew just as he couldn't save Billaba.[6]
Separated from the others, Bridger freed Jarrus from his cell and helped the former Jedi walk until they reached the Star Destroyer's reactor core, where the Inquisitor faced them. A fierce duel ensued, then, between Jarrus—who wielded Bridger's lightsaber—and the darksider. During one of their clashes, Bridger pulled Jarrus' lightsaber from the Inquisitor's belt and attempted to help, but his skill was no match for the Inquisitor's level. The Pau'an knocked the young apprentice off the platform, who then dropped his master's lightsaber.[6]


Jarrus and the Inquistor's duel onboard the Sovereign.
Initially shocked and dismayed, Jarrus quickly recovered and dueled the Inquisitor with renewed focus as he remembered his Jedi training and confronted his fear, using both his and Brigder's lightsaber. He managed to destroy the Grand Inquisitor's lightsaber, forcing him to hang on the ledge of the platform, while the pieces of the broken lightsaber fell into the reactor and irreparably damaged it. The darksider, then, warned Jarrus of things worse than death, before letting go and falling to the ship's exploding reactor. Relieved to discover that Bridger was still alive, the master-Padawan pair left Sovereign onboard the the Inquisitor's TIE fighter, which Jarrus used to shoot the Rebels TIE fighter's pursuers.[6]
In the ensuing space battle, the rebels had to wait for Chopper to appear with the Ghost and, to their surprise, a small fleet. Docking the TIE fighters with Chopper's transport, Jarrus and the others made the jump into hyperspace, escaping the Mustafar system and the Imperial fleet. Once inside the transport, Jarrus proceeded to embrace Syndulla, and together with the rest of the crew, board the Ghost. Syndulla then revealed Bail Organa's identity and the existence of other Rebel cells, just before "Fulcrum" identified herself as Ahsoka Tano, a former Padawan of the Jedi Order, and mentioned a change of protocol thanks to their message.[6]
More adventures
Jarrus, Syndulla and Bridger see as Senator Tural leaves.
After stealing food from an Imperial ship, Syndulla responded to a distress call and rescued Thrad Senator Nadea Tural and brought her aboard the Ghost to treat her injuries, much to Jarrus' dismay. Nevertheless, Jarrus did provide some help when Syndulla tried to make the senator see the truth about the Imperial Senate's ineffectiveness, but before long, they were attacked by TIE fighters that took out the Ghost’s shields and hyperdrive. They were promptly boarded by Commander Earll's forces, who intended to retrieve Senator Tural; they stunned Wren and Orrelios, and Earll herself took Bridger hostage. With no other option, Jarrus, Syndulla and Chopper surrendered, and Earll gave the order to execute them. Tural intervened and impeded Earll from executing them, giving Jarrus time to Force push the stormtroopers around them, knocking them out. While Chopper fixed the hyperdrive and Syndulla prepared to make the jump to lightspeed, Jarrus and Bridger cleared the ship from troopers. The Ghost escaped then and they managed to drop the Senator off at Camson.[43]
Siege of Lothal
- "We are fighting a bigger fight, but it's still the right fight."
"I survived one war. I'm not ready for another one. I saw what it did. "
"To the Jedi?"
"To everyone." - ―Hera Syndulla and Kanan Jarrus
Following the events over Mustafar, the Ghost crew joined the Phoenix rebel cell under Commander Jun Sato, which frequently raided Imperial shipping. However, due to his experiences with the Clone Wars and the Jedi Purge, Jarrus remained apprehensive and disdainful about their involvement with military; following a mission, he even allowed Chopper to relay a message to the Phoenix Home from the defecting Minister Tua, who offered Imperial secrets in exchange of passage off Lothal. Following some discussion, they agreed to rescue Tua. As he left the bridge, Syndulla confronted Jarrus about his breach of protocol earlier, but Jarrus expressed his concern with their involvement in a military operation and suggested that the crew leave the rebellion.[44]
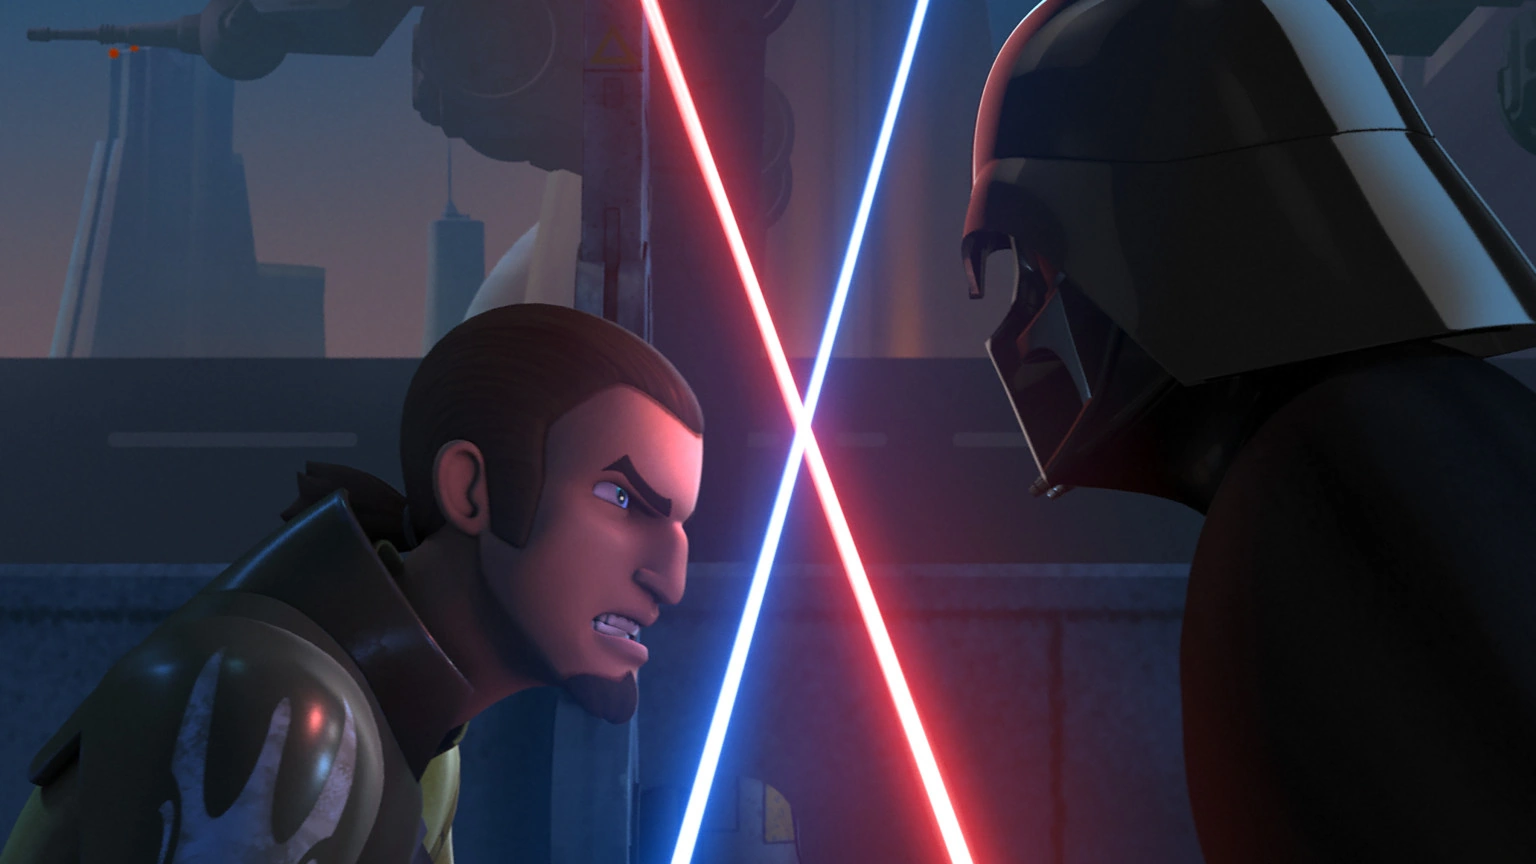

Jarrus confronting Darth Vader.
Afterwards, the Ghost crew travelled to Lothal in a Star Commuter 2000 to avoid detection and headed to rescue her before she boarded the Sentinel-class landing craft that would take her to Grand Moff Tarkin. While Chopper and Orrelios stayed with the commuter, which served as their get-away transport, Jarrus accosted a stormtrooper commander, stole his armor and infiltrated the Imperials, whereas Syndulla, Bridger and Wren hid to provide covering fire from the surroundings rooftops. As planned, Tua arrived in a landspeeder, but the Ghost crew was forced to a skirmish, during which they succeeded in freeing Minister Tua, who entered the Sentinel-class shuttle. However, as arranged by Kallus, the shuttle exploded, causing Tua's death, to be used against the rebels.[44]
With the failure of their mission (and their commuter being disabled by an AT-DP walker), the Ghost crew was forced to retreat into hiding in Bridger's former residence. When it was attacked by stormtroopers, they decided to go to the Imperial Complex where they deduced Imperial forces were stretched thin due to the manhunt. Jarrus and Bridger, using his disguise as Imperials, transported the other four on crates and infiltrated the Armory Complex. Before they could make their escape, Darth Vader and his forces attacked them, and Jarrus and Bridger were forced to duel him. The Sith Lord proved more than a match for the two and the rebels barely managed to escape the complex in the stolen shuttle (one which, unbeknownst to them had a tracking device implanted, per Vader's orders).[44]


Tarkintown destroyed
Unable to leave Lothal with the shuttle alone, they contacted Calrissian for help, and he agreed to help them in exchange of three of their stolen Colicoid 49-v99 Deflectors. When they reached his estate so that Calrissian's droid W1-LE could help them, Bridger and Jarrus visited Tarkintown, which had been burned and its settlers imprisoned on Vader's orders. When they returned, they found that Wren had programmed several masking transponders to replicate their stolen shuttle's signal and to pass through the blockade safely (a journey during which the crew decided to support the wider rebellion) and rendezvous with the Phoenix rebel fleet. However, Vader alone attacked with his TIE Advanced x1, causing extensive damage to Phoenix Squadron and the Phoenix Home, forcing Sato to abandon the ship.[44]
During the space battle, Tano—who accompanied the Ghost on its attack against Vader—sensed Vader's strength in the Force and asked Jarrus to help her in probing their opponent, but she passed out when she realized it could be her old master, Anakin Skywalker. With the fleet defeated, the Ghost made the jump into hyperspace and escaped,[44] to use the planet Garel as its new base of operations.
Seelos
- "It was at the end, the end of the war. Our fellow soldiers, the clones, the ones we Jedi fought side by side with, suddenly turned and betrayed us. I watched them kill my master. She fought beside them for years and they gunned her down in a second! They came for me. Later they said they had chips in their heads that made them do it. Said they had no choice."
- ―Kanan Jarrus to Ezra Bridger, on Order 66
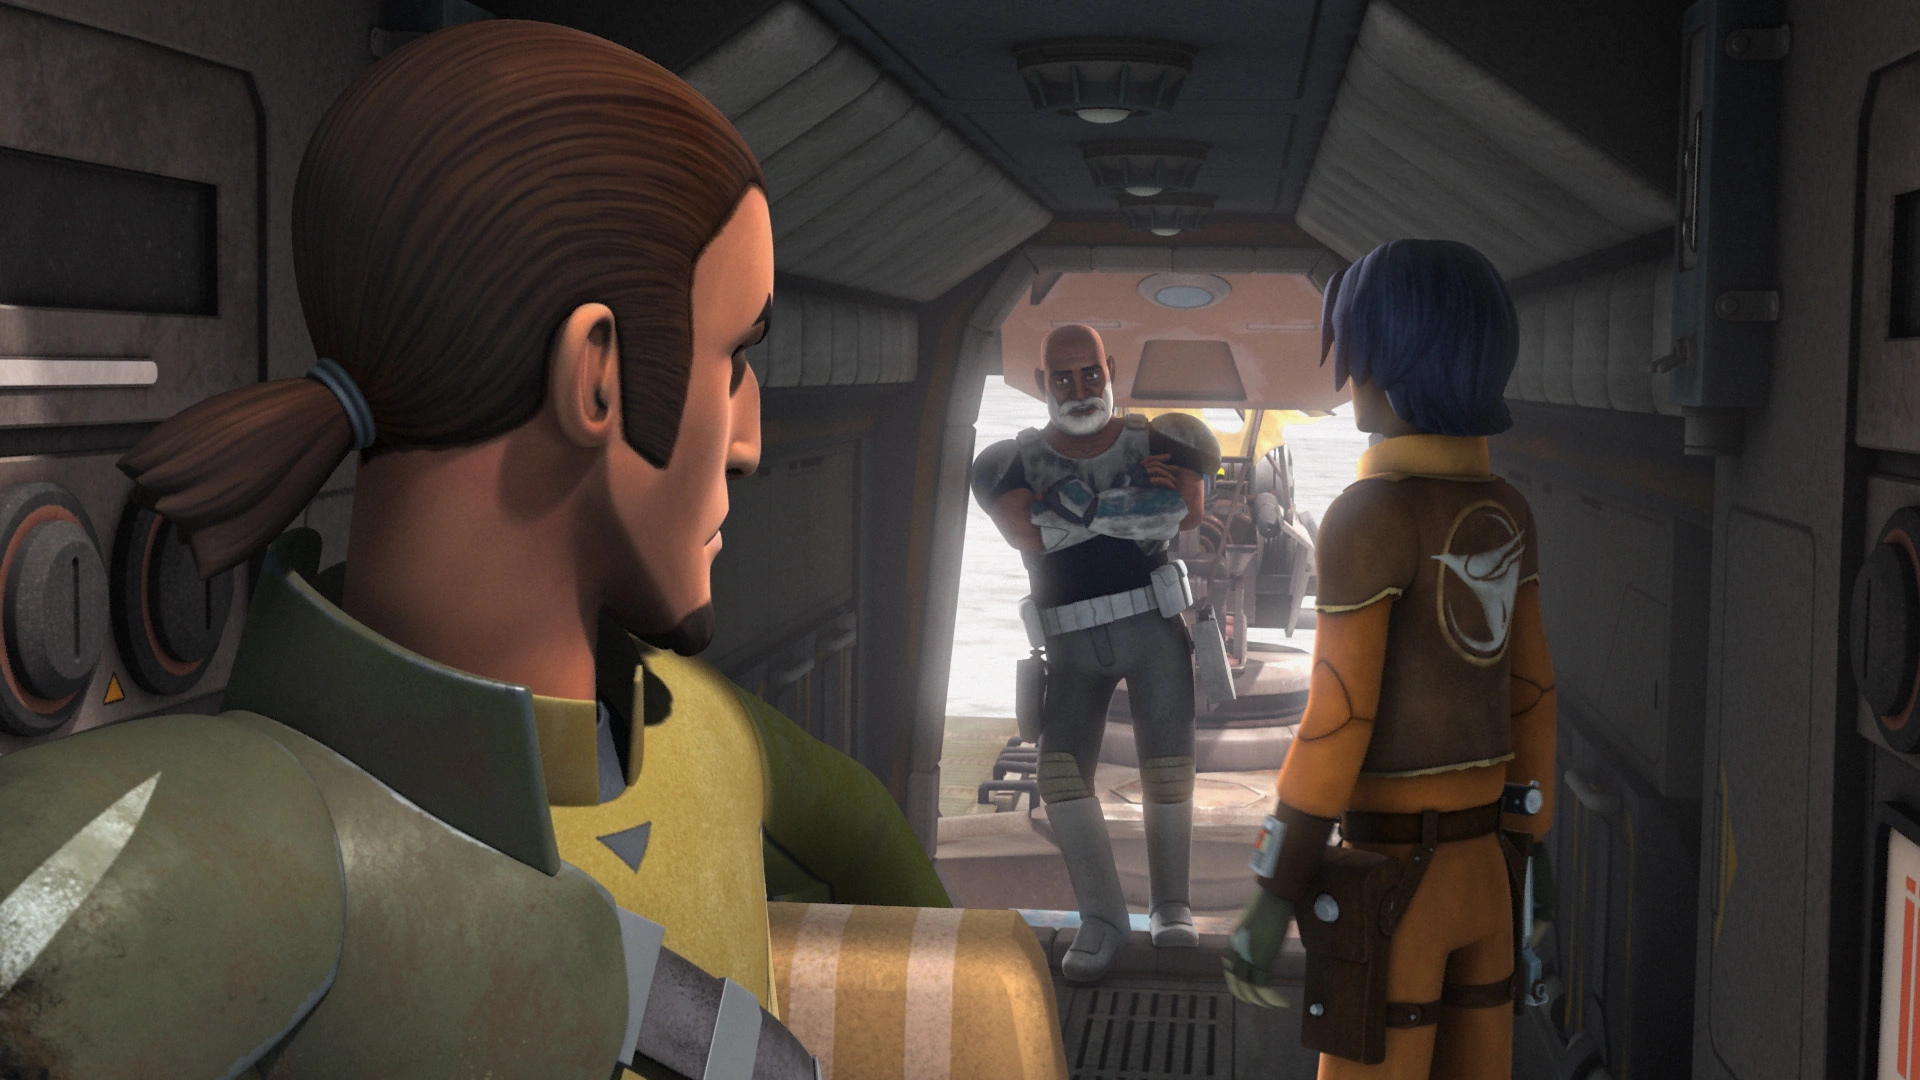

Rex tells a distrustful Jarrus that he didn't kill any Jedi.
When the Phoenix cell faced a shortage of bases and facilities, Tano suggested that they find an old friend who could have knowledge of abandoned bases left from the Clone Wars, a mission the Ghost crew accepted. Aboard their ship, they arrived in the Seelos system; while Syndulla and Chopper stayed behind to repair the freighter, while Jarrus and the others flew down on the Phantom to Seelos, where they spotted an antiquated AT-TE walker and approached it, from where they were greeted by three veteran Clone Commanders—Rex, Wolffe and Gregor. While Bridger told Rex that they had been sent by Tano, he was reluctant to join the fight against the Empire, but agreed to put together a list of coordinates of bases and facilities for the rebellion. Meanwhile, Gregor convinced the Ghost team to help in a joopa hunt. Before they did so, Bridger told him he thought they could trust the clones, but Jarrus told him of Order 66; however, Rex intervened and countered he and his fellow clones had removed their inhibitor chips and disobeyed the order.[45]
Afterwards, even though they captured "Big Bongo" as a team effort, Jarrus was still uncomfortable and contacted Syndulla to discuss his concerns; she encouraged him to give the clones a second chance, pointing out that they had saved millions of lives, including her own. However, Wren discovered that Wolffe had secretly alerted the Empire to their presence and hidden Tano's messages; when confronted, Wolffe admitted his wrongdoing and asserted that he had wanted to protect his fellow clones from the Empire. With the Imperials approaching, Jarrus ordered Wren to contact Syndulla to scan for incoming Imperial vessels. An Imperial probe droid also damaged the Phantom before being destroyed by Rex.[45]

Jarrus directs the clones through a sandstorm with the Force.
After Wren repaired the Phantom, and they had destroyed a TIE fighter during the Imperial assault, Jarrus and the others made preparations to leave, as Rex had supplied Bridger with the datachip he had promised them. However, three Imperial All Terrain Armored Transports led by Kallus threatened to shoot them down if the Phantom took flight and so, Rex directed their AT-TE into the approaching sandstorm—believing a Jedi would still able to see through it with the Force. Guided by Jarrus, the clones outmaneuvered the Imperial walkers, while Bridger managed to destroy one of them by shooting at his weak point, the neck, giving them an opening to escape Kallus and the sandstorm. Jarrus and his team then escaped, but Bridger convinced Jarrus to help the clones against the Imperials.[46]
While Wren handled the controls of the Phantom, Jarrus, Bridger, and Orrelios hijacked one of the AT-AT walkers and used it to immobilize Kallus's walker before it could deliver a final blow against the crippled AT-TE walker. After Kallus and the surviving Imperials fled, the three Commanders saluted the Jedi for saving them, whereas Rex agreed to join the rebellion and to accompany the rebels back to the Phoenix fleet (while Wolffe and Gregor stayed on Seelos and made the AT-AT their new home).[46]
Phoenix fleet
During a mission to steal intel on Sienar Fleet Systems' new bombs and updates to their most recent TIE prototypes, Jarrus and Orrelios traveled to the planet Absanz and infiltrated one of the company's factories. In the dark, they made their way through a hangar when Dron Ryall appeared and told them that security would arrive shortly, but Jarrus and Orrelios forced Ryall to accompany them. However, despite Syndulla's disagreement, they attempted to continue with the kidnapping. As they were attacked, Ryall attempted to escape, prompting Orrelios to grab him once again, while Jarrus cleared the path to an Imperial shuttle. Manning the controls, he took off, with Orrelios and Ryall barely making it to the boarding ramp, until a Gozanti cruiser attacked. In the ensuing attack, Orrelios was forced to let go of Ryall and had to return to the Ghost.[47]
However, Rex's presence would be the cause of many arguments between him and Jarrus, eventually becoming so frequent that the others would try to avoid the two when they happened. One such was when Jarrus attempted to give Bridger a lesson on how to levitate objects by using Chopper, but the astromech and Wren had decided to play a prank on Bridger by locking Chopper's feet to the Ghost’s metallic floor. The prank prompted the two to argue about discipline—for which Bridger sneaked with Wren, Chopper, and Orrelios on a mission—and to play a game of dejarik that Jarrus won just before they arrived and informed him about the two new Inquisitors sent to hunt them: the Seventh Sister and the Fifth Brother.[48]
On another occasion, Jarrus got into another argument with Captain Rex after Bridger had skipped a Jedi lesson to attend one of the Rex's blaster practice. When Jarrus and Rex began to argue about Bridger being a soldier or a Jedi, an exasperated Bridger then responded that he might not wish to be either, much to Jarrus' surprise. Before they could continue the conversation, Jarrus and the rest of the crew (except for Bridger and Chopper) participated in a mission to obtain fuel cells for the people of Rinn, who were experiencing an energy crisis. Later on, Jarrus met Hondo Ohnaka, after he had an adventure with Bridger, who told him he wasn't like Ohnaka anymore.[49]
Ibaar
- "We can't beat that blockade, not without a better ship, with better firepower, and the best pilot at the controls."
- ―Kanan Jarrus, to Hera Syndulla
When a mission to bring relief supplies to Ibaar, blockaded by an Imperial fleet commanded by Kallus, ended up on loss of a CR90 corvette and Phoenix Leader, Rex suggested that they contact with an Mon Calamari engineer, Quarrie, who lived on Shantipole and had developed a prototype blockade buster. During the conference, Jarrus volunteered Syndulla against her will for the mission. While Syndulla was gone with the Phantom, Jarrus would pick up the last of the supplies with the Ghost, but when she was delayed, Jarrus decided to pilot the freighter himself in the second attempt to break the Imperial blockade at Ibaar.[50]
Jarrus and his comrades with Quarrie following the blockade run on Ibaar
Helming the Ghost, Jarrus and the rest of the Phoenix fleet converged on Ibaar, where they were quickly joined by the Phantom, which carried the Prototype B6 to be piloted by Syndulla on its underside. Using the Blade Wing's composite-beam laser, Syndulla destroyed an Arquitens-class light cruiser. This enabled Jarrus to pilot the Ghost through the opening in the Imperial blockade and drop the supplies down to the Ibaarians. Following the successful relief of Ibaar, Syndulla was promoted as the new Phoenix Leader by Sato, at the recommendation of Jarrus.[50]
Interdictor infiltration
- "Well, nice to know you care."
"Don't ruin this." - ―Captain Rex and Kanan Jarrus
Following Bridger and Sato's capture by the Imperial Interdictor in the Del Zennis system, the Ghost received Sato's distress call; Syndulla then decided that Jarrus and Captain Rex infiltrate the Interdictor disguised as stormtroopers, with Chopper as company, while she and Phoenix Squadron would wait for their signal to help their escape. Aboard the stolen Shuttle S257, Rex used emergency protocols (much to Jarrus' annoyance) to trick the Interdictor's crew into letting their shuttle board, whereas Jarrus used a mind trick to let them further into the ship. When Chopper learned that Bridger was being transferred to a secure cell, Jarrus and Rex raced to his encounter.[51]
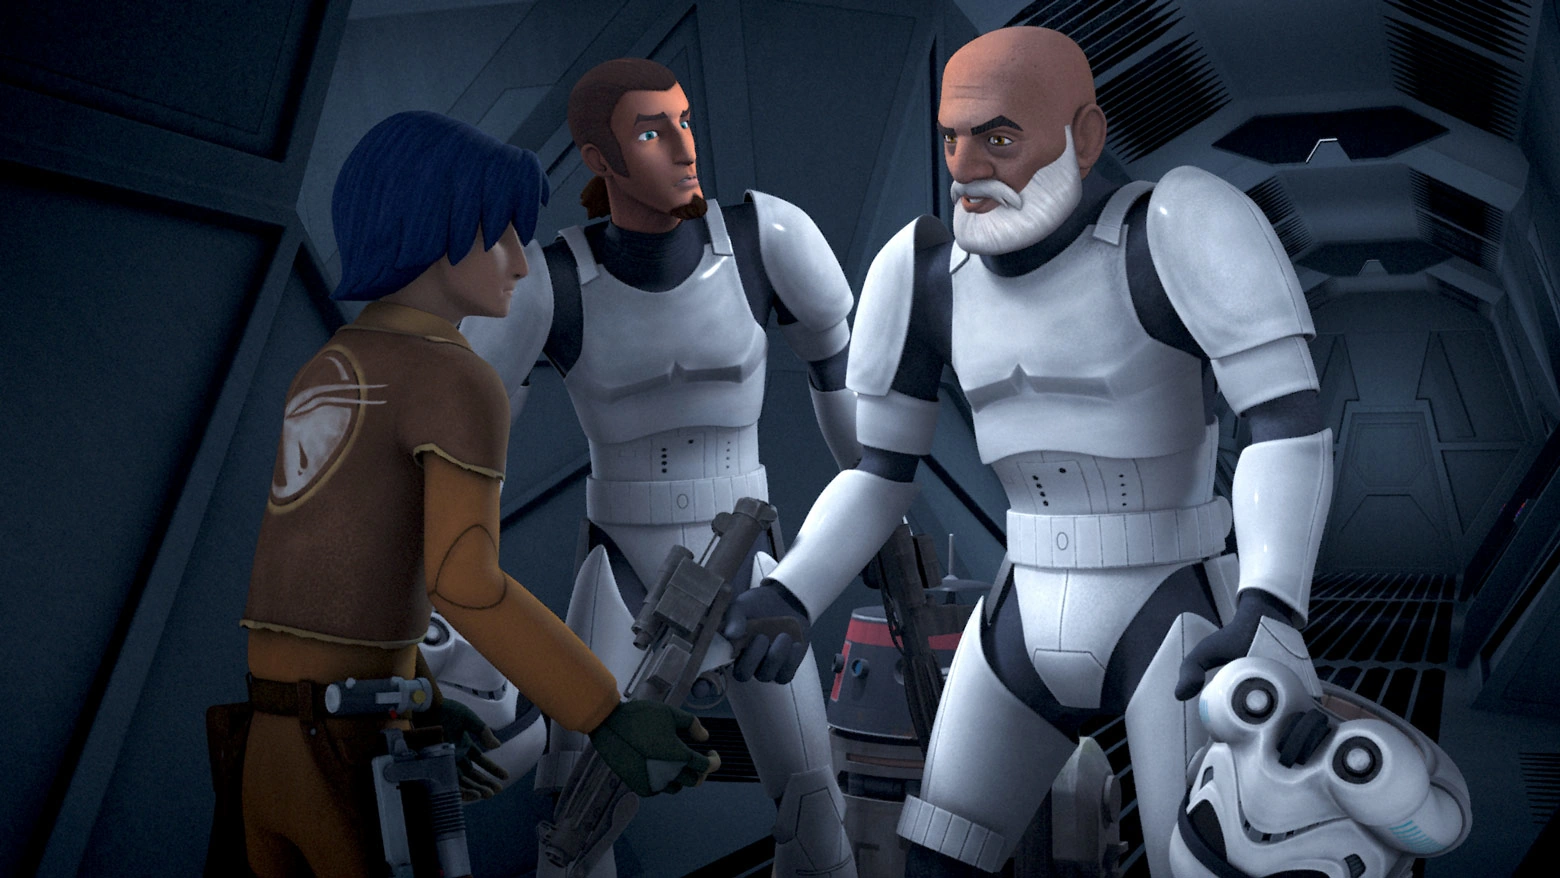

Jarrus and Rex, undercover as stormtroopers to rescue Bridger, Jun Sato and his crew.
When they arrived, Bridger mistook them for Stormtroopers and shot at them with his lightsaber, stunning Jarrus and Rex. When the two recovered, they broke into an argument over how to proceed with their mission, and an exasperated Bridger departed with Chopper to sabotage the ship's gravity well projectors. Jarrus and Rex, in turn, made it to the detention cell where Commander Sato and his crew were being held. While Rex held off their pursuers, Jarrus entered the cell and freed their comrades, and made their way to Sato's CR90 corvette Liberator. However, they were cornered by more stormtroopers. Despite Jarrus's opposition, Rex decided to hold back the Imperials while Jarrus and the other rebels escaped, and Rex was taken prisoner.[51]
Sensing Rex's distress, Jarrus realised he thought of the clone as a friend and instructed Bridger and Chopper to head back to the corvette while he went back and rescued Rex. Using his disguise, Jarrus infiltrated the Interdictor's command bridge and intervened in Rex's torture by Admiral Brom Titus. As Titus escaped, Jarrus and Rex fled the Interdictor aboard an escape pod and linked it to Sato's corvette. Before lond, the Imperial Interdictor's gravity well projectors began to malfunction due to Chopper's sabotage and began pull everything towards itself, including its two escort Imperial light cruisers. When the Imperial Interdictor and its escorts were destroyed in the ensuing explosion, the rebels managed to escape, and as a result of their joint mission, Jarrus had a newfound respect for Rex, who thanked the Jedi for rescuing him.[51]
Takobo
- "They're Force sensitive. I've seen this before. A Sith Lord attempted the same thing back in the Clone Wars, but the Jedi Order stopped him."
"And now there's no Jedi Order to protect them. Okay, I guess that task falls to us now." - ―Ahsoka Tano and Kanan Jarrus
Following the kidnapping of Alora over Chandel by the Fifth Brother and the Seventh Sister, Jarrus accepted a mission from Tano to help her investigate two sets of coordinates, saying they needed to obtain whatever the Inquisitors were after before them, and advising him to take Bridger and Orrelios. The three, plus Chopper, travelled on the Phantom to Takobo; there, their coordinates led them to a housing unit in the settlement of Hammertown. And, while Orrelios and Chopper scanned the spaceport for any sign of the Inquisitors, the master and Padawan traveled to the housing unit, where they an an Ithorian mother named Oora, whose home had been ransacked by the Inquisitors.[52]
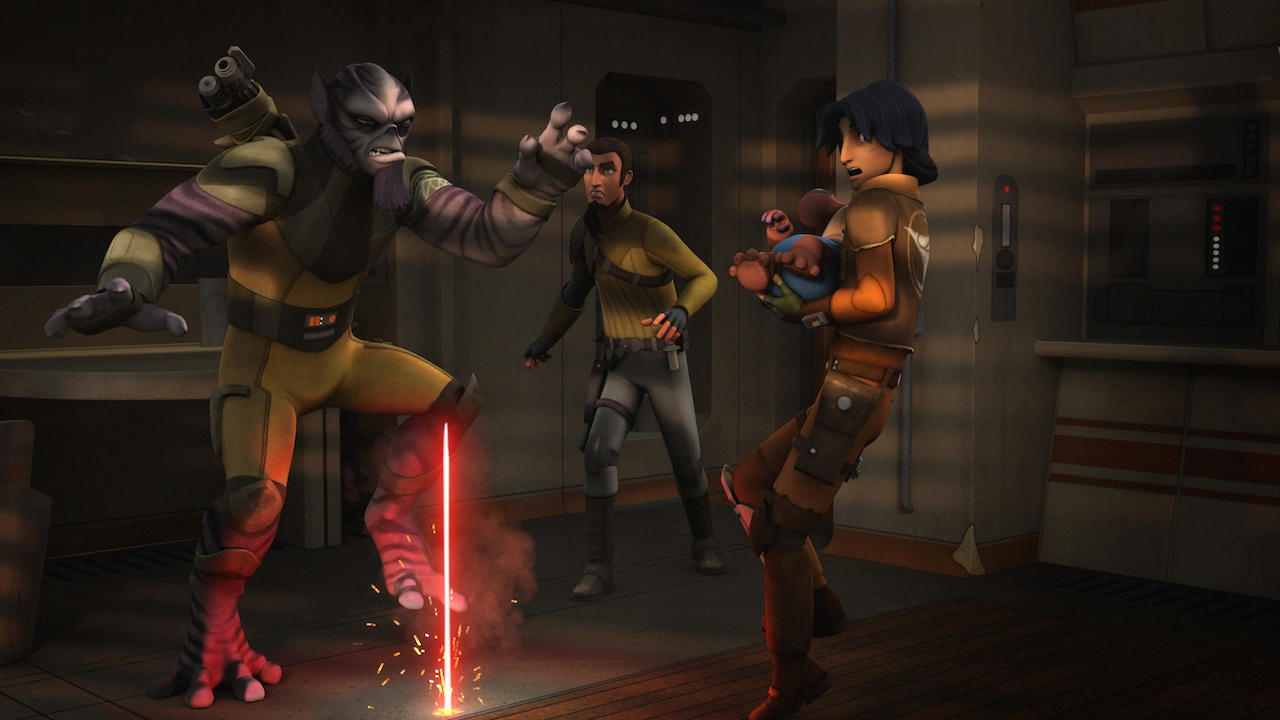
Jarrus, Orrelios and Bridger sieged by the Inquisitors.
Jarrus and Bridger promised Oora, who had sent her infant son Pypey away with a decoy droid, that they would find Pypey before the Inquisitors; he also informed Orrelios of their discovery, and Jarrus was in turn told of the other baby, Alora, and that they had discovered and sabotaged the Inquisitors' TIEs. Then, Jarrus instructed Orrelios to pick Pypey up while Chopper took care of Alora. When the Lasat found Pypey and was cornered by the Inquisitors, Jarrus and Bridger traveled to the apartment complex where Orrelios was hiding and met with him. However, Bridger unsettled Pypey since he could sense the boy's fear, and the Inquisitors quickly located them and poked their lightsabers through their room's floor and door. Eluding the Inquisitors, the rebels decided to split up—while Bridger headed into a ventilation shaft with Pypey, Jarrus and Orrelios would hold off the two Inquisitors. Though they detected and almost killed Bridger, Jarrus and Orrelios intervened and took on the Seventh Sister and the Fifth Brother respectively, but were quickly bested by them.[52]
Left with no other choice, they escaped by jumping out of a window and landing on a speeder by chance, but were promptly followed by the inquisitors who commandeered another speeder. During the chase, Jarrus disabled their ship, but their too was taken down by the Brother's lightsaber. Forced to flee on foot, Jarrus and Orrelios met with Bridger outside the spaceport and, unable to open the gates, they had to face the Inquisitors once again. The Jedi hunters quickly overpowered them, but before they could take the baby, Tano appeared and dueled them; under her orders, Jarrus and the other fled aboard the Phantom with Pypey. Tano managed to defeat them, but she was forced to flee when Imperial reinforcements arrived at the airport. While in hyperspace, they reunited Pypey with his mother, Oora. Tano also revealed to Jarrus that a a similar attempt to abduct Force-sensitive children had occurred during the Clone Wars. Yet, unbeknownst to them, Bridger had been recorded mentioning their current location on Garel by one of the Seventh Sister's ID9 seeker droids.[52]
Return to Lothal
- "Thank you for everything you've done for me. You're always there when I need you most."
"Hey. I know what it's like to lose someone close and not have anyone. When I lost my master, I was alone. Regardless of how this turns out, I didn't want you to be." - ―Ezra Bridger and Kanan Jarrus
During a discussion to find a viable base for the rebellion, Jarrus and Syndulla were interrupted by Bridger, who had received a vision of his parents Ephraim and Mira Bridger. Seeing his apprehension, the two disclosed what Tseebo had shared about the fate of the Bridgers—they had been imprisoned within a network of Imperial prisons scattered throughout the galaxy but the rebels were unable to determine which one. Thanks to Commander Sato, they received word that there had been a mass breakout from an Imperial prison on Lothal, and provided a list of prisoners. Jarrus instructed Bridger to locate the truth on the list, and Bridger let the Force single out "Prisoner X-10". Jarrus then offered to accompany him to Lothal.[8]
Shortly later, Imperial forces launched an attack on the Phoenix rebel presence on Garel, prompting Jarrus and Bridger to help Orrelios and Chopper escape a squad of stormtroopers under Kallus' command. However, when the Seventh Sister and the Fifth Brother arrived and goaded Bridger into a fight, Jarrus shot the blast doors close and reminded his apprentice that they had to focus on their mission to get to Lothal. Once the Ghost had departed to save Sato's command ship Liberator, Jarrus, Bridger and Chopper departed on the Phantom for Lothal. They managed to find a gap in the Imperial fleet and jumped into hyperspace.[8]
Upon their arrival at Lothal, the master-Padawan pair landed in Capital City and visited the latter's former home, which had been razed to the ground by the Empire. Jarrus then advised Bridger to follow the Force, for which they encountered a white loth-cat that led them to the wilderness. Eventually, they found the loth-cat and a speeder bike, as well as a hooded figure that fired at them. After Bridger managed to placate the stranger by revealing that he was the son of Ephraim and Mira, "Prisoner X-10" identified himself as Ryder Azadi. He explained that the Bridgers had been killed during the escape attempt and Bridger told him that he had another vision of his parents, Jarrus taught his Padawan that the Jedi believed that life did not end with death but merely changed form. To comfort Bridger, he told him that his parents would always be with him.[8]
Giving Bridger some time off, Jarrus contacted Syndulla and told her what had happed; in turn, she informed him that Bail Organa had sent reinforcements—three Hammerhead corvettes for the fleet. Before leaving, Jarrus tried to convince Azadi to fight the Empire, but when Azadi refused, Jarrus continued with their assignment. They left Chopper behind with the Phantom to meet with the Alderaanian delegation at the depot near Jalath. Upon the cruisers' landing, Jarrus and Bridger (disguised again as a stormtrooper and cadet, respectively) received Organa's delegate and daughter, Princess Leia Organa, whom they escorted and who intended for the Lothal rebels to steal her ships.[53]
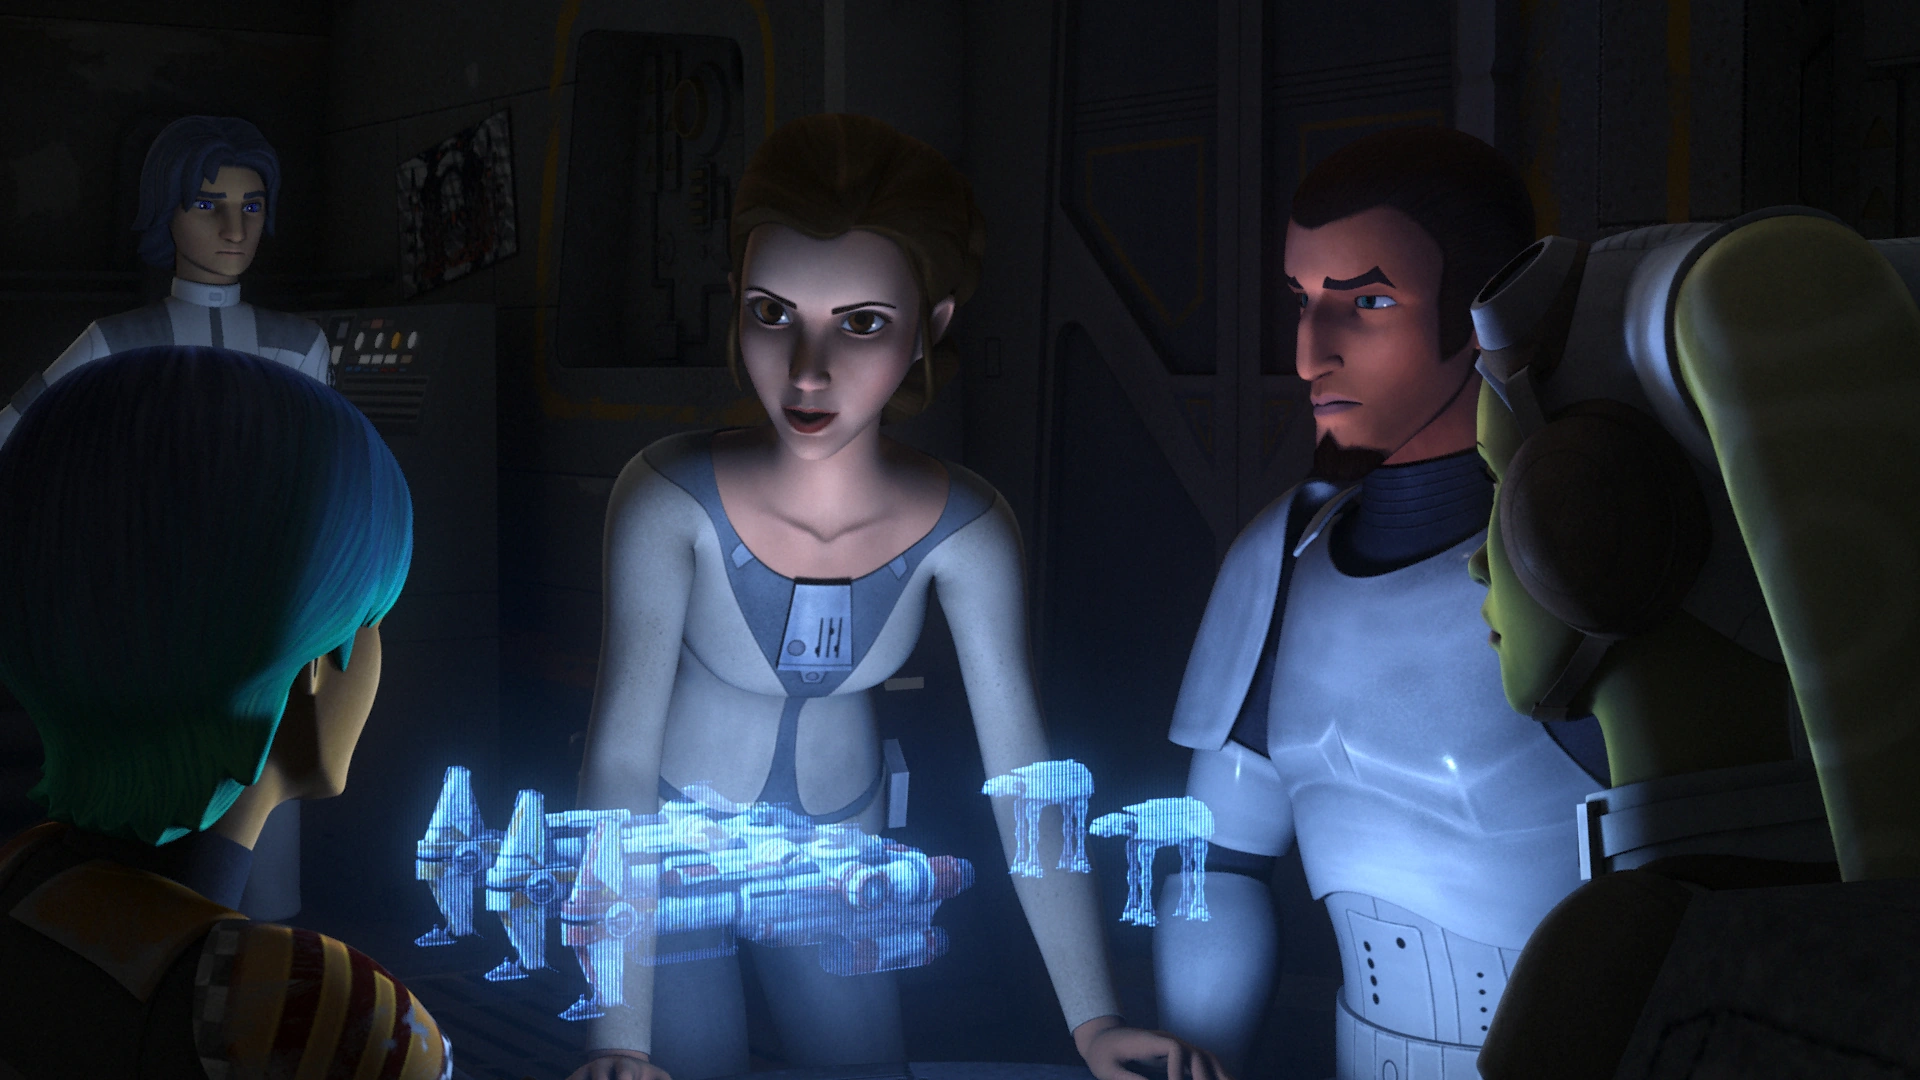

Jarrus and his crew working alongside Princess Leia Organa.
As Organa spoke to Lieutenant Yogar Lyste, and saw that gravity lock were clamped to the relief cruisers to prevent the robbery by Rebel forces, Organa, Jarrus and Bridger used Lyste's shuttle to leave the depot. Chopper then informed that stormtroopers had found him and Azadi, for which Jarrus decided to intervene and save Azadi from execution. So did the Ghost, prompting Jarrus to make it look as if the rebels were taking the princess, himself and the cadet prisoners. When they escaped aboard the Ghost, Jarrus advised Organa (who found herself in a similar position of responsibility as Bridger) to talk with him. Afterwards, when they formulated a plan to recover the cruisers, Jarrus and Bridger escorted Organa to the depot to distract Lyste while Azadi, Wren and Chopper unlocked the gravity locks and took control of P1, and Syndulla provided air support.[53]
However, when the walkers proved resilient to the Ghost’s armament, Jarrus ordered Bridger to secure P2 while he handled the walker. Jarrus then charged at the tank, ignited his lightsaber and leapt, slicing the walker's left legs. As it fell, he took off in the second cruiser, P3, while Azadi escaped in P2 and Bridger boarded P1 (piloted by Wren). With the ships secure, they met with the Phoenix fleet.[53]
Trouble at Concord Dawn
With the Empire continuing to hunt down the fledgling rebellion in the Outer Rim, Kanan and several other rebels including Hera, Sabine, Rex, and Commander Sato attended a meeting to discuss opening a new hyperspace route to the Lothal sector. During the meeting, Sabine suggested the Concord Dawn system, which was home to a Mandalorian colony known as the Protectors. While Commander Sato advocated sending a military force to deal with the Mandalorians, Kanan and Hera suggested negotiating for safe passage with the Protectors. Despite his reservations, Sato consented to Hera's diplomatic approach.[54]
Ultimately, Hera's diplomatic mission to the Protectors failed since their leader Fenn Rau had aligned his warriors with the Empire. Several RZ-1 A-wing interceptors were destroyed during a dogfight above Concord Dawn. Hera survived but was seriously wounded during the dogfight. Kanan comforted Sabine who blamed herself for Hera's injuries. At a later briefing, Kanan and the other crew of the Ghost including Ezra, Zeb, and Chopper were present when Sabine recommended a retaliatory military action against the Protectors. Sabine had managed to track down the Protectors' Gauntlet fighters to a base on the third moon of Concord Dawn. Kanan suggested infiltrating the base and destroying the starfighters. While Commander Sato approved the mission, Kanan insisted on going solo since he did not want to risk the lives of his crew. Instead, he asked Chopper to come along.[54]
Kanan and Chopper traveled to the Concord Dawn system in the Phantom, the Ghost's auxiliary ship. Upon arriving in the Concord Dawn system, the two discovered that Sabine had stowed aboard, intent on seeking revenge against Fenn Rau. As they approached the third moon, Kanan informed Sabine that he still wanted to negotiate with the Protectors. Upon approaching the moon, Chopper dropped them off near the Protectors camp before flying the Phantom away from the base. While performing reconnaissance on the outskirts of the camp, Jarrus and Wren discovered that the base housed eight fighters in total, including the ones that attacked Phoenix Squadron. Kanan allowed Sabine to plant explosives on each of them but ordered her to only activate them if diplomacy failed.[54]
Shortly later, Kanan and Sabine witnessed the arrival of an Imperial landing ship carrying supplies for the Protectors. The two rebels also saw Rau conversing with an Imperial officer and informing him of his encounter with the rebels. Having realized that the Protectors were working for the Empire, Sabine expressed doubts about the success of Kanan's plans. Nonetheless, they proceeded with Kanan's plan to seek diplomacy and only use hostilities as a last resort. While Sabine began planting her explosives, Kanan made his way into Rau's personal quarters and introduced himself to the Protectors' leader.[54]
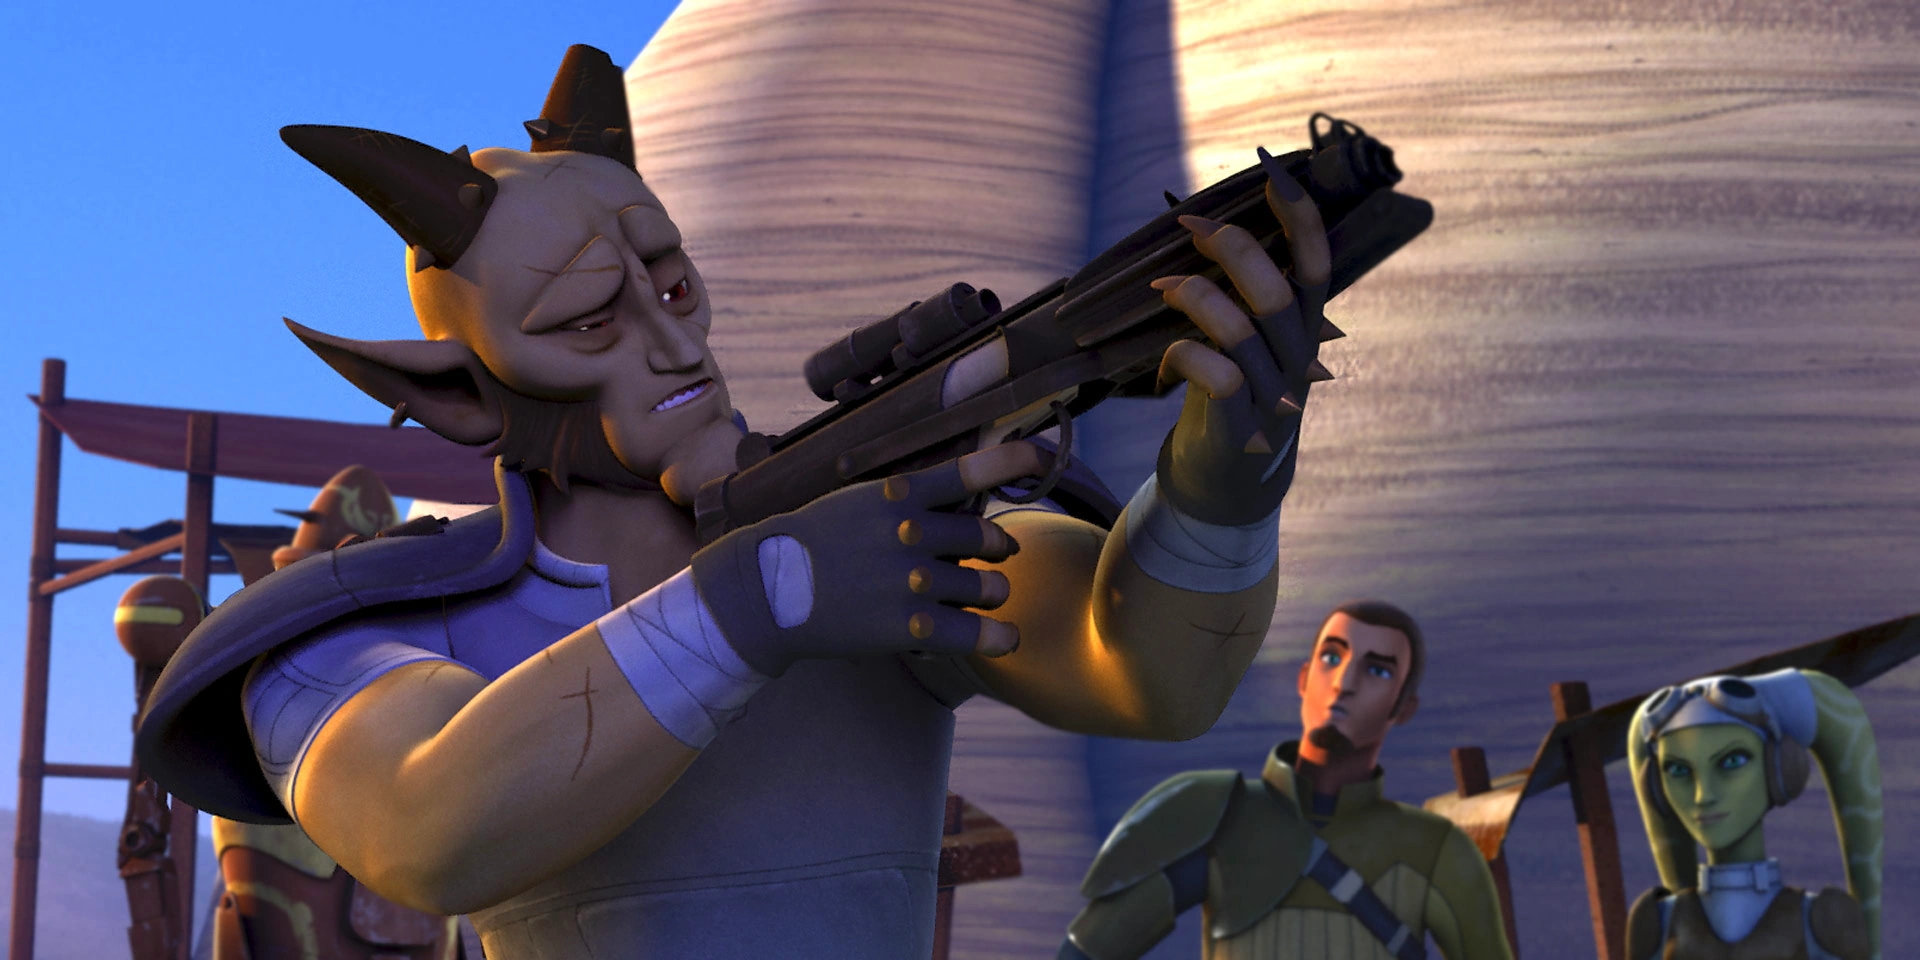
In an attempt to win the Clone Wars veteran over, Kanan introduced himself as a Jedi and explained that he too had fought in the Third Battle of Mygeeto, where he and his master, Depa Billaba, were saved by Rau and Skull Squadron from a Separatist attack. While Rau recalled the battle, he still demanded to know why Kanan was infiltrating his base. Kanan then asked the Mandalorian warrior to join the rebellion but Rau was unwilling to fight against the Empire. In Rau's view, the rebellion had no chance of victory and thus he saw no reason to join a losing side. Despite Kanan's arguments, Rau refused to commit to fighting what he regarded as another losing war with the Jedi.[54]
Kanan's conversation with Rau was interrupted when several Protectors entered the room, reporting that they had captured Sabine and that she had invoked the Mandalorian code to seek justice through combat. Rau accepted Sabine's challenge since her clan was part of House Vizsla, which had sided with the Death Watch; the adversaries of the Protectors during the Clone Wars. Kanan disagreed with Sabine's plan and tried unsuccessfully to convince her to stand down. Sabine responded by telling the Jedi to trust her. During the duel, Sabine shout Rau's blaster pistol out of his had and triggered her explosives, destroying seven of the eight Gauntlet fighters.[54]

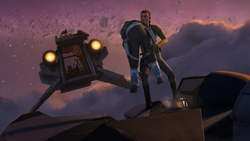
Kanan captures Fenn Rau and takes him back to the Rebellion.
However, Rau's fighter remained intact and he took it into space to attack the rebel fleet. Using his Force powers, Kanan jumped onto the Gauntlet fighter and managed to hand on to it despite Rau's best efforts to shake him off. Using his lightsaber, Kanan was able to damaged Rau's starfighter and breach the Mandalorian warrior's cockpit. After knocking Rau out, he grabbed the Mandlorian and jumped into the rear entrance of the Phantom, where he was joined by Chopper and Sabine. Having completed their mission to destroy the Protectors' starfighters, the three rebels traveled back on the Phantom to rejoin the Phoenix fleet.[54]
While traveling back to the rebel fleet, Rau stirred. Kanan then ordered his captive to contact the Protectors and order them to stand down and to keep his capture a secret from the Empire. Rau also granted the rebels safe passage through the Concord Dawn system. The rebels returned to the fleet with Rau in tow where he was taken into custody. Following their mission, Kanan and Sabine visited Hera, who was pleased with its outcome.[54]
Personality and traits
- "I lost my way for a long time, but now I have a chance to change things."
- ―Kanan Jarrus
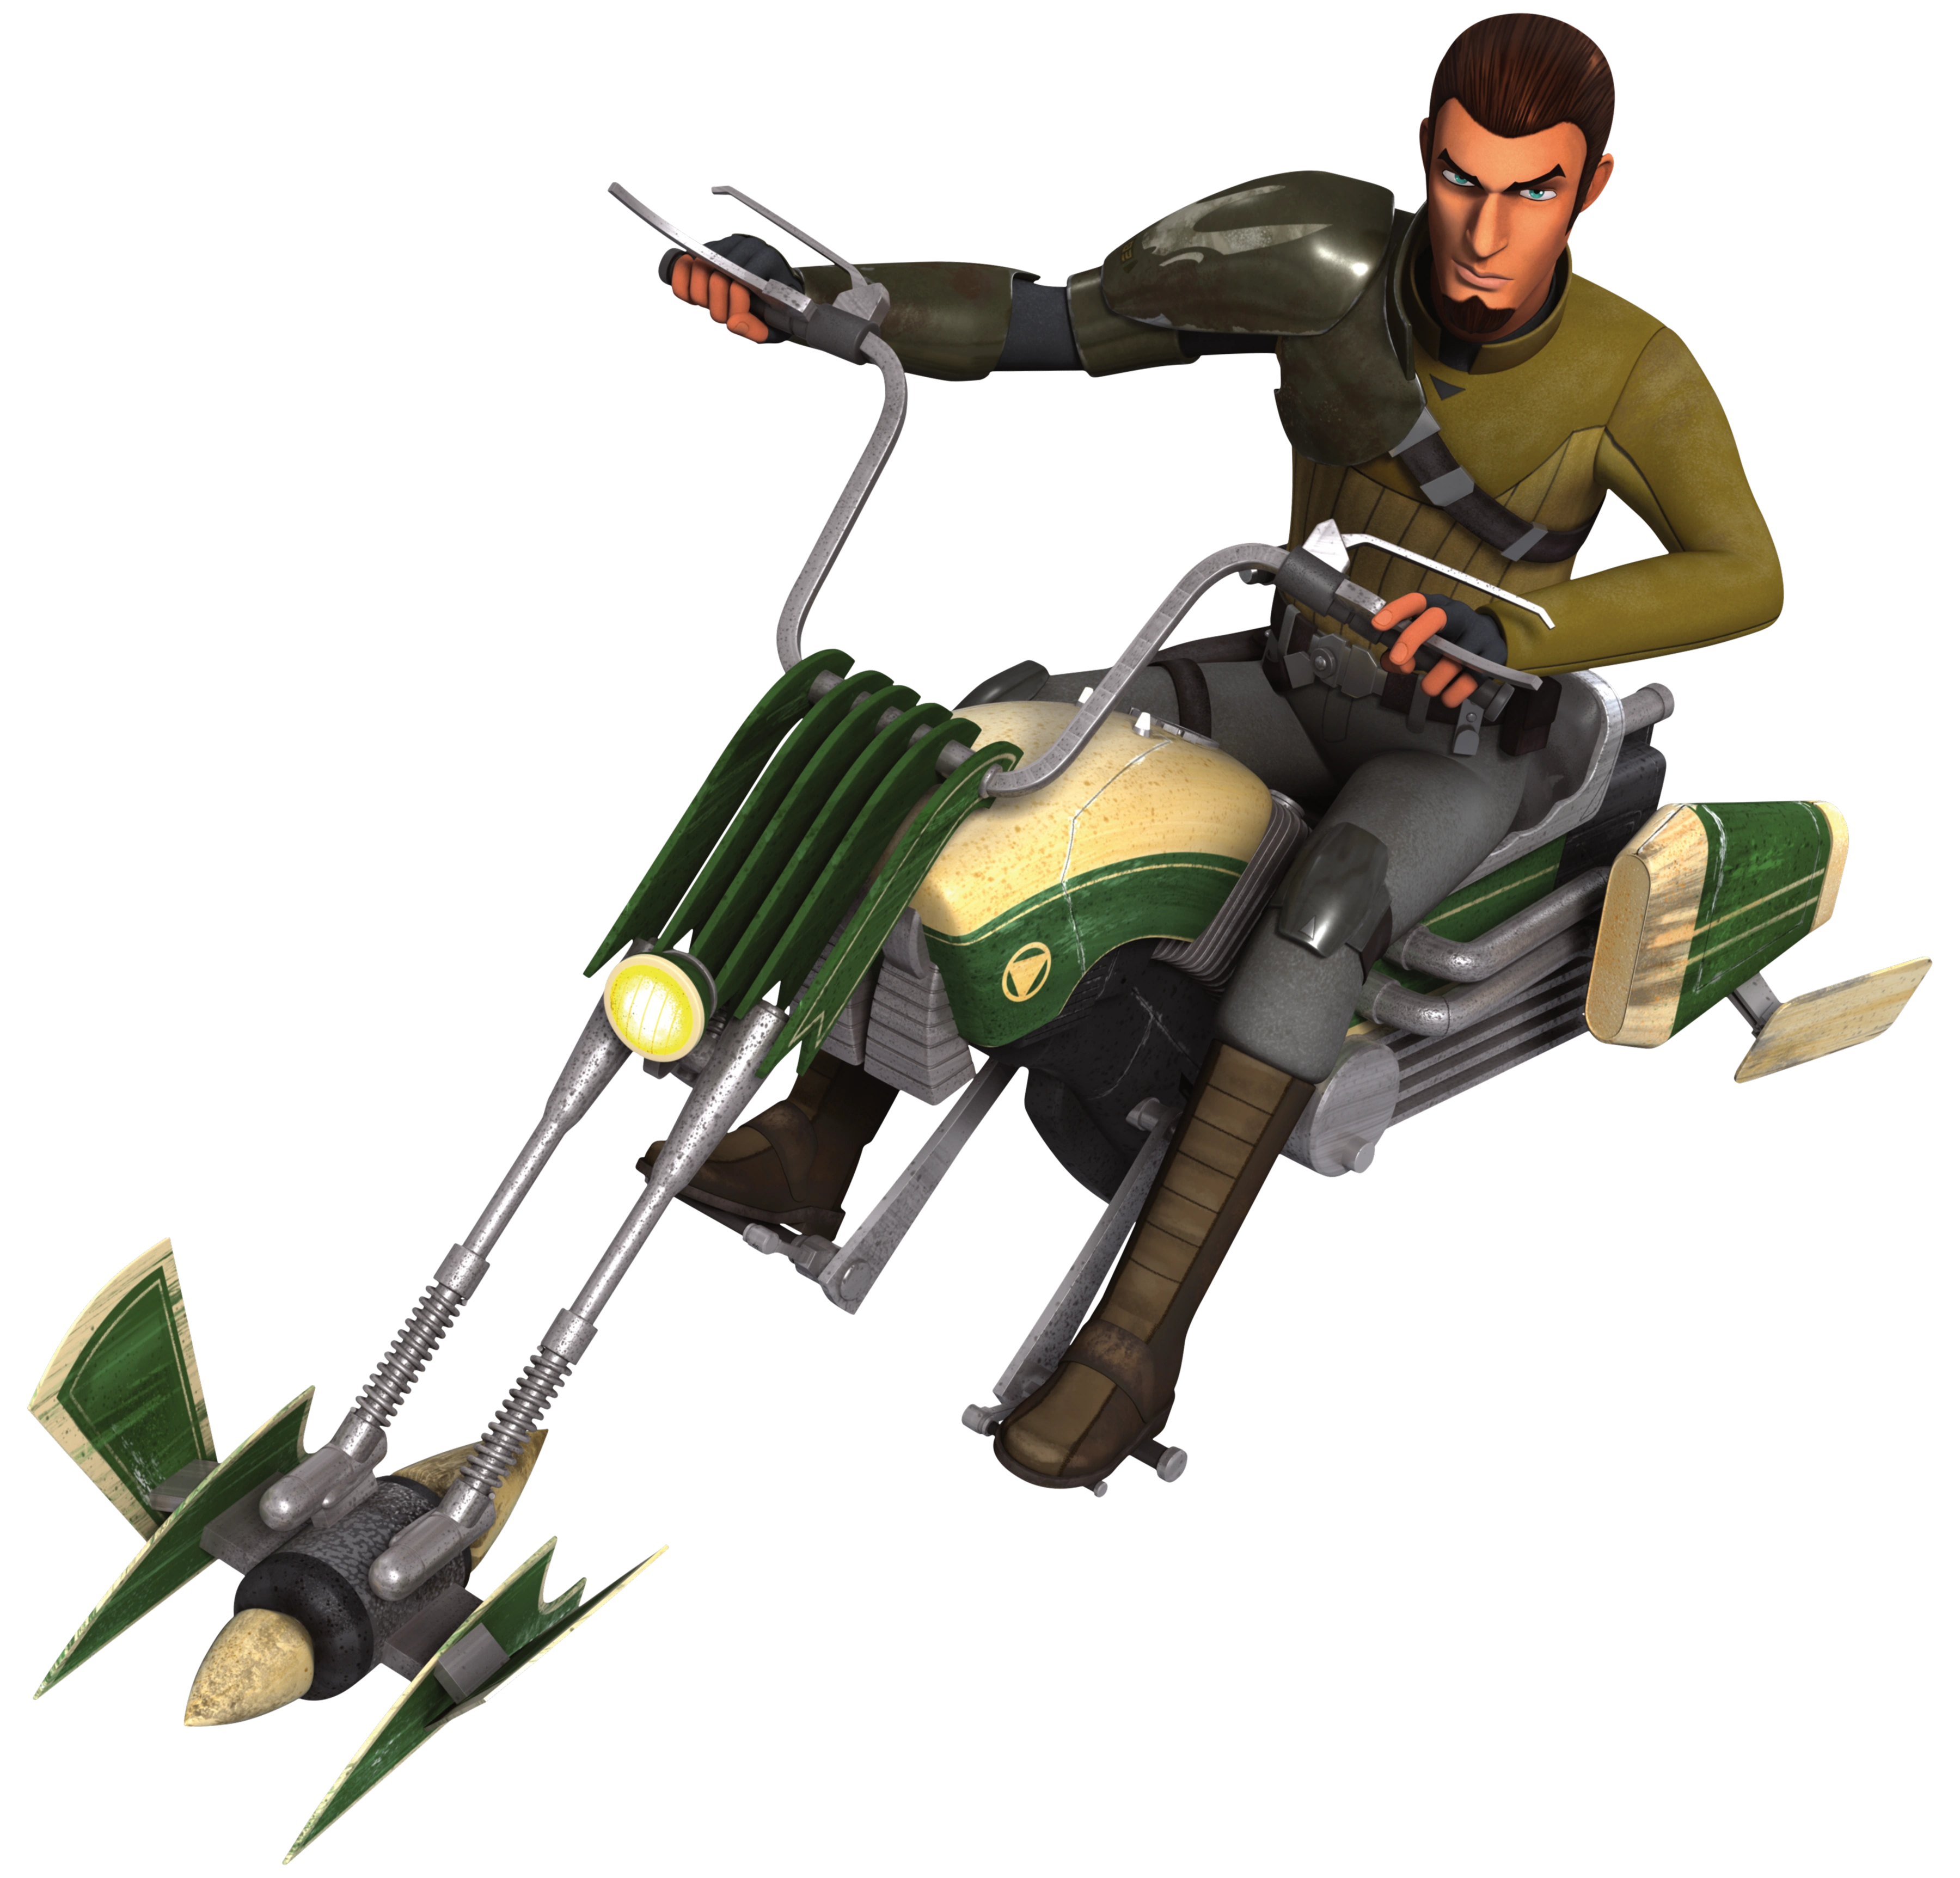

Jarrus riding his personal Joben T-85 speeder bike.
During his youth, Kanan Jarrus (or rather, Caleb Dume) had a tendency to ask many questions, hoping to better understand things, which earned him somewhat of a bad reputation among his peers,[2] but it was that inquisitive nature that motivated Billaba to choose him as her apprentice. She would, however, tease him about it, such as when she said questions seemed to be the "natural state" of his mind.[5] Young as he was, he was also reckless, rushing headlong into danger.[11] Any disrespect against his master would anger him, as did being called "kid".[5] Another peculiarity was that every time he got nervous, he would his hand through his hair.[15]
A secretive man,[2] Jarrus would rarely talk about his past, as he disliked to talk about it,[1] particularly so before meeting Hera Syndulla on Gorse. Before her, Jarrus was reckless, impatient and belligerent, as demonstrated by the little care he put in carrying explosives just to meet his schedule, or his tendency to start fights.[2] Seemingly prickly and detached, Jarrus showed his kindness and commitment to justice only when he thought no one was looking,[2] and his only aim in life was survival, until Syndulla (on whom he relied heavily for support) persuaded him to join her to fight for a lost way of life—to work as a rebel leader, for which he resumed his lost qualities of bravery, honor, and perseverance.[1] Having felt adrift since the destruction of the Jedi way of life, he had developed a cynical and cocky personality,[3] and couldn't stand "protocol nonsense."[44][51] He was also known for humorous banter and for having "a thousand one-liners ready to go."[55]
Never having made it past the rank of Padawan,[9] Jarrus had little confidence in his skills as a Jedi and teacher.[10][18] Because of his incomplete Jedi training, he was self-conscious about it and hesitated to train Ezra Bridger.[1] Furthermore, Depa Billaba's last words haunted him and, as the Inquisitor once commented, the former Jedi was afraid of his own power, afraid to wear his lightsaber out in the open.[6] Additionally, Jarrus's experiences during the Clone Wars left him wary of being involved with military affairs. When the Ghost crew was faced with the opportunity to join Phoenix Squadron and become full-fledged members of the Rebel fleet, Jarrus was reluctant to go along, citing his distaste for military protocol and the broader consequences of fighting a war, and became apprehensive and disdainful.[44]
Jarrus also harbored substantial animosity towards clone troopers for the role they had played in killing Billaba and hunting him down. As a result, Jarrus wound it difficult to trust the retired clones Rex, Gregor and Wolffe,[45] and yet, despite his hard feelings towards them, Kanan decided to rescue them during an Imperial attack on Seelos.[46] After Rex joined the Rebellion and befriended his apprentice Ezra, Jarrus argued with the former Clone Captain on a few occasions about how to train the young Jedi.[48][49] Despite his issues with clones, Jarrus was able to work with Rex to rescue Ezra and several other Phoenix rebels during a rescue mission aboard the Imperial Interdictor.[51]
Powers and abilities
- "You were right. I was a coward. But now I know there's something stronger than fear—far stronger. The Force. Let me show you how strong it is."
- ―Kanan Jarrus to the Grand Inquisitor
Lightsaber skills
Kanan Jarrus had some skill in Form III due to his training under Depa Billaba, who was a master of the style and emphasised its use in close quarter fighting. The Inquisitor noted Jarrus favoured the style "to a ridiculous degree."[10] During his third duel with the Inquisitor, Jarrus' skill had improved with practice, something the Inquisitor acknowledged.[41] In his final duel with the Inquisitor, Kanan demonstrated enough mastery of Jar'Kai to defeat the Jedi hunter.[6] In addition to Form III, Jarrus possessed skill in Form V, which he demonstrated on numerous occasions, to deflect blaster fire effectively.[11][22][51]
Force abilities
Jarrus showed skill in telekinesis, such as pinning the Inquisitor to the ceiling, or pulling stormtroopers in before clothslining them,[10] as well as pushing objects and multiple people.[17][43] Jarrus could also sense things through the Force, such as when he first felt Ezra Bridger's presence on Lothal,[22] and when he felt Luminara Unduli's presence on Stygeon Prime.[10] Jarrus also demonstrated an affinity for influencing animals through the Force as he did with a loth-cat in one of Bridger's lessons, and later to control several fyrnocks alongside his apprentice.[35][36]
He could also perform Force-enhanced jumps, such as when he escaped Agent Kallus,[35] or when he leapt to slice the left legs of a walker,[53] as well as mind tricks.[10][33][44] Through his Master, Caleb Dume was able to receive Force visions, such as when he witnessed the Jedi's destruction.[9]
Other abilities
Jarrus was an capable pilot, though he recognised that Hera Syndulla was much better than him in this aspect.[2] He also knew how to swim,[16] and was very accurate with the use of firearms, favouring a DL-18 blaster pistol—a gunslinger's weapon—much of the time, since drawing his lightsaber would attracted Imperial attention.[1] He also showed great skill in hand-to-hand combat as shown on their mission to Stygeon Prime: Jarrus easily disarmed and knocked out stormtroopers while unarmed,[10] or knocking Tápusk and all of his men with ease.[34]
A speaker of Basic,[22] Jarrus also understood Binary[20] and Ithorese.[52]
Behind the scenes
Kanan Jarrus was first revealed as a character from the forthcoming animated series Star Wars Rebels at the January 2014 Nuremberg International Toy Fair, where Jarrus was included on the packaging of the LEGO Star Wars Rebels Ghost model. However, the packaging merely represented Jarrus's LEGO mini-figure as a silhouetted form holding a blue-bladed lightsaber.[56][57]
On February 11, 2014, Lucasfilm began a promotional campaign to introduce the characters of Star Wars Rebels, starting with Kanan Jarrus. USA Today ran an online story featuring an exclusive first look at Jarrus's character and announcing that he would be voiced by actor Freddie Prinze Jr. The story included a Lucasfilm production video revealing the character's full design.[58]
Non-canon history
Kanan Jarrus appears in Angry Birds Star Wars II. He was co-piloting the Ghost when Sabine Wren and Hera Syndulla rescued the orphan Ezra Bridger and escaped from Agent Kallus.[59]
In the LEGO Star Wars Rebels Movie Shorts, Jarrus, Orellios, Syndulla, and were drinking in the Mos Eisley Cantina when Ezra Bridger called for a rescue. They went to the Ghost and rescued the young orphan from the Phantom. Bridger then suggested they charge the Star Destroyer's bridge and hide behind it, and eventually the warship jumped to hyperspace.[60] At another time, the Ghost was damaged by a Star Destroyer, forcing it to go to a space station for repairs. Jarrus and Orrelios left in escape pods and made it to a planet. Bridger rescued them and took them to the station in time to finish repairs to their starship and flee from Imperials.[61]
Appearances
Non-canon appearances
- Disney Infinity 3.0
- Angry Birds Star Wars II
- LEGO Star Wars Movie Short (Rebels: Saving the Phantom)
- LEGO Star Wars Movie Short (Rebels Ghost Story)
- Club Penguin Star Wars Rebels Takeover