| | |
Warning: This infobox is missing the following parameters: unit2, unit1
- "Attention! This is Lando Calrissian. Attention! The Empire is taking control of the city. I advise everyone to leave before more Imperial troops arrive."
- ―Lando Calrissian
The occupation of Bespin was a battle in the Galactic Civil War between the Bespin Wing Guard under Lando Calrissian (who turned to the side of the Rebel Alliance) and the Imperial stormtroopers under Darth Vader, that led into the Empire gaining control of the gas planet Bespin.
Prelude
- "I had no choice. They arrived right before you did. I'm sorry."
- ―Lando Calrissian to Solo and the other Rebels

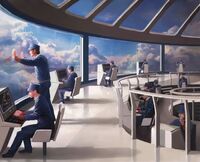
Bespin Wing Guards witness the Empire's arrival
In 3 ABY, the Galactic Empire won the Battle of Hoth and forced the Rebel Alliance offworld. Darth Vader pursued the Rebel leaders, in particular his son, Luke Skywalker. He hired Boba Fett and other bounty hunters to find the Millennium Falcon, the starship carrying the Rebel leaders. Fett spotted the Falcon fleeing the Hoth Imperial blockade and deduced its destination, Cloud City on the gas giant Bespin. Vader arrived before the Millennium Falcon and forged an initial agreement between himself and the Baron Administrator, Lando Calrissian. Calrissian would aid Vader in capturing the Rebels, in exchange for the continued freedom of his colony.[1]
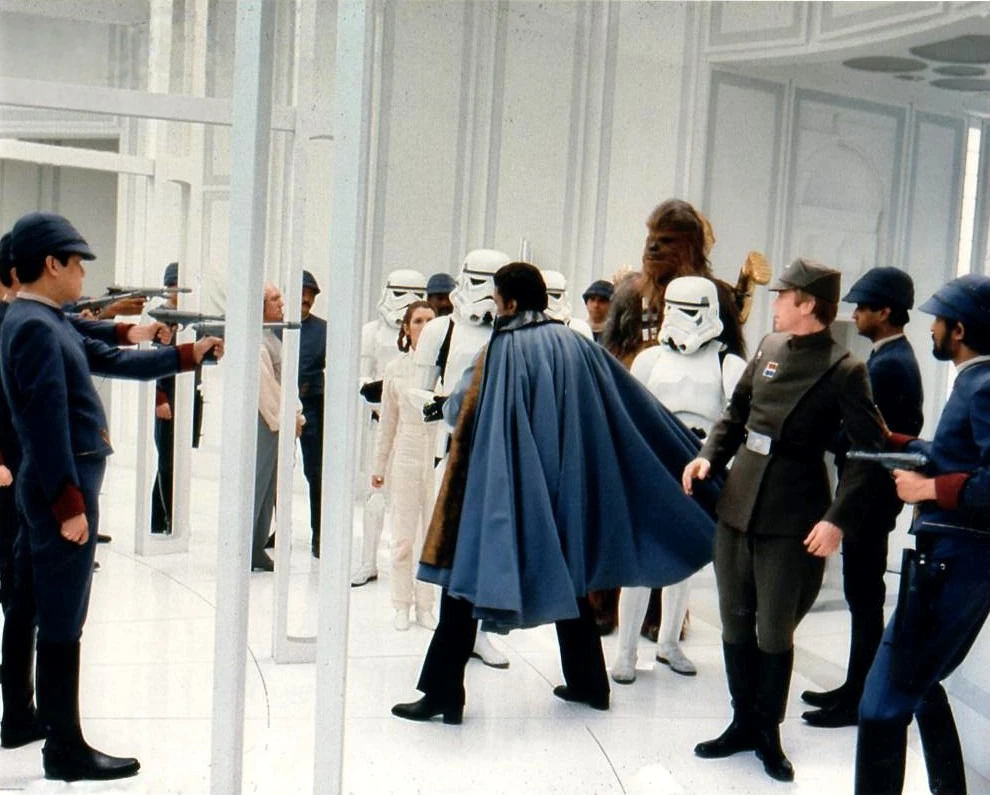
The Millennium Falcon entered and landed in Cloud City, piloted by Han Solo and the Wookiee Chewbacca. They also had princess Leia Organa and the protocol droid C-3PO on board. Its crew was greeted as welcomed guests by the Baron Administrator, who gave an especially warm welcome to his old friend, Han Solo. They were given accommodation in which to dwell while their ship was being repaired. After landing, C-3PO wandered off and was shot by a member of Gamma Squad, dismantling him. C-3PO's remains were later sent to the recycling area of Cloud City, although they were intercepted by Chewbacca, who retrieved the parts. After a while, Calrissian invited them to a dinner arrangement, which turned out to be a trap, set by Darth Vader. Solo, upon discovering Vader in the dining room, attempted to shoot the Dark Lord with his blaster, only for Vader to effortlessly absorb the bolts with his right hand, and telekinetically pull the smuggler's blaster away from him with his left. Stormtroopers surrounded the Rebels, ensuring their capture.[1]
Later, Lieutenant Sheckil informed Lord Vader of C-3PO's destruction, and Vader visited the wreckage, remembering back when he had created the protocol droid as a young boy, and ordered the droid to be returned to Chewbacca while he prepared to interrogate Solo.[7] He wanted to use Organa, Solo, and Chewbacca's capture as a lure to capture his primary objective, Skywalker. Indeed, Han Solo was tortured but not asked questions in order to trigger a response from Luke through the Force, sending him to rescue his friends.[1] The Imperials disabled the repaired Millennium Falcon's hyperdrive to prevent its escape.[8]
An altered deal

- "I am altering the deal. Pray I don't alter it any further."
- ―Darth Vader to Calrissian
Vader had Solo frozen in carbonite, to test to see if the freezing methods would effectively work on Skywalker. This was an important part of his plan; he would either take his frozen son to the Emperor for training as a Sith apprentice, or change plans and cooperate with him against his master. He had Solo shipped to the gangster Jabba the Hutt by way of Boba Fett, who claimed Solo's bounty.[1]
This was a violation of his agreement with Calrissian, something Vader casually dismissed as an alteration of the deal. Shortly afterward, Vader's hopes were realized as Skywalker's ship was detected heading towards the city. As Vader left to prepare for his confrontation with the young Rebel, he gave clear instructions to Calrissian to keep Leia and Chewbacca on the planet, violating the agreement again.[1]
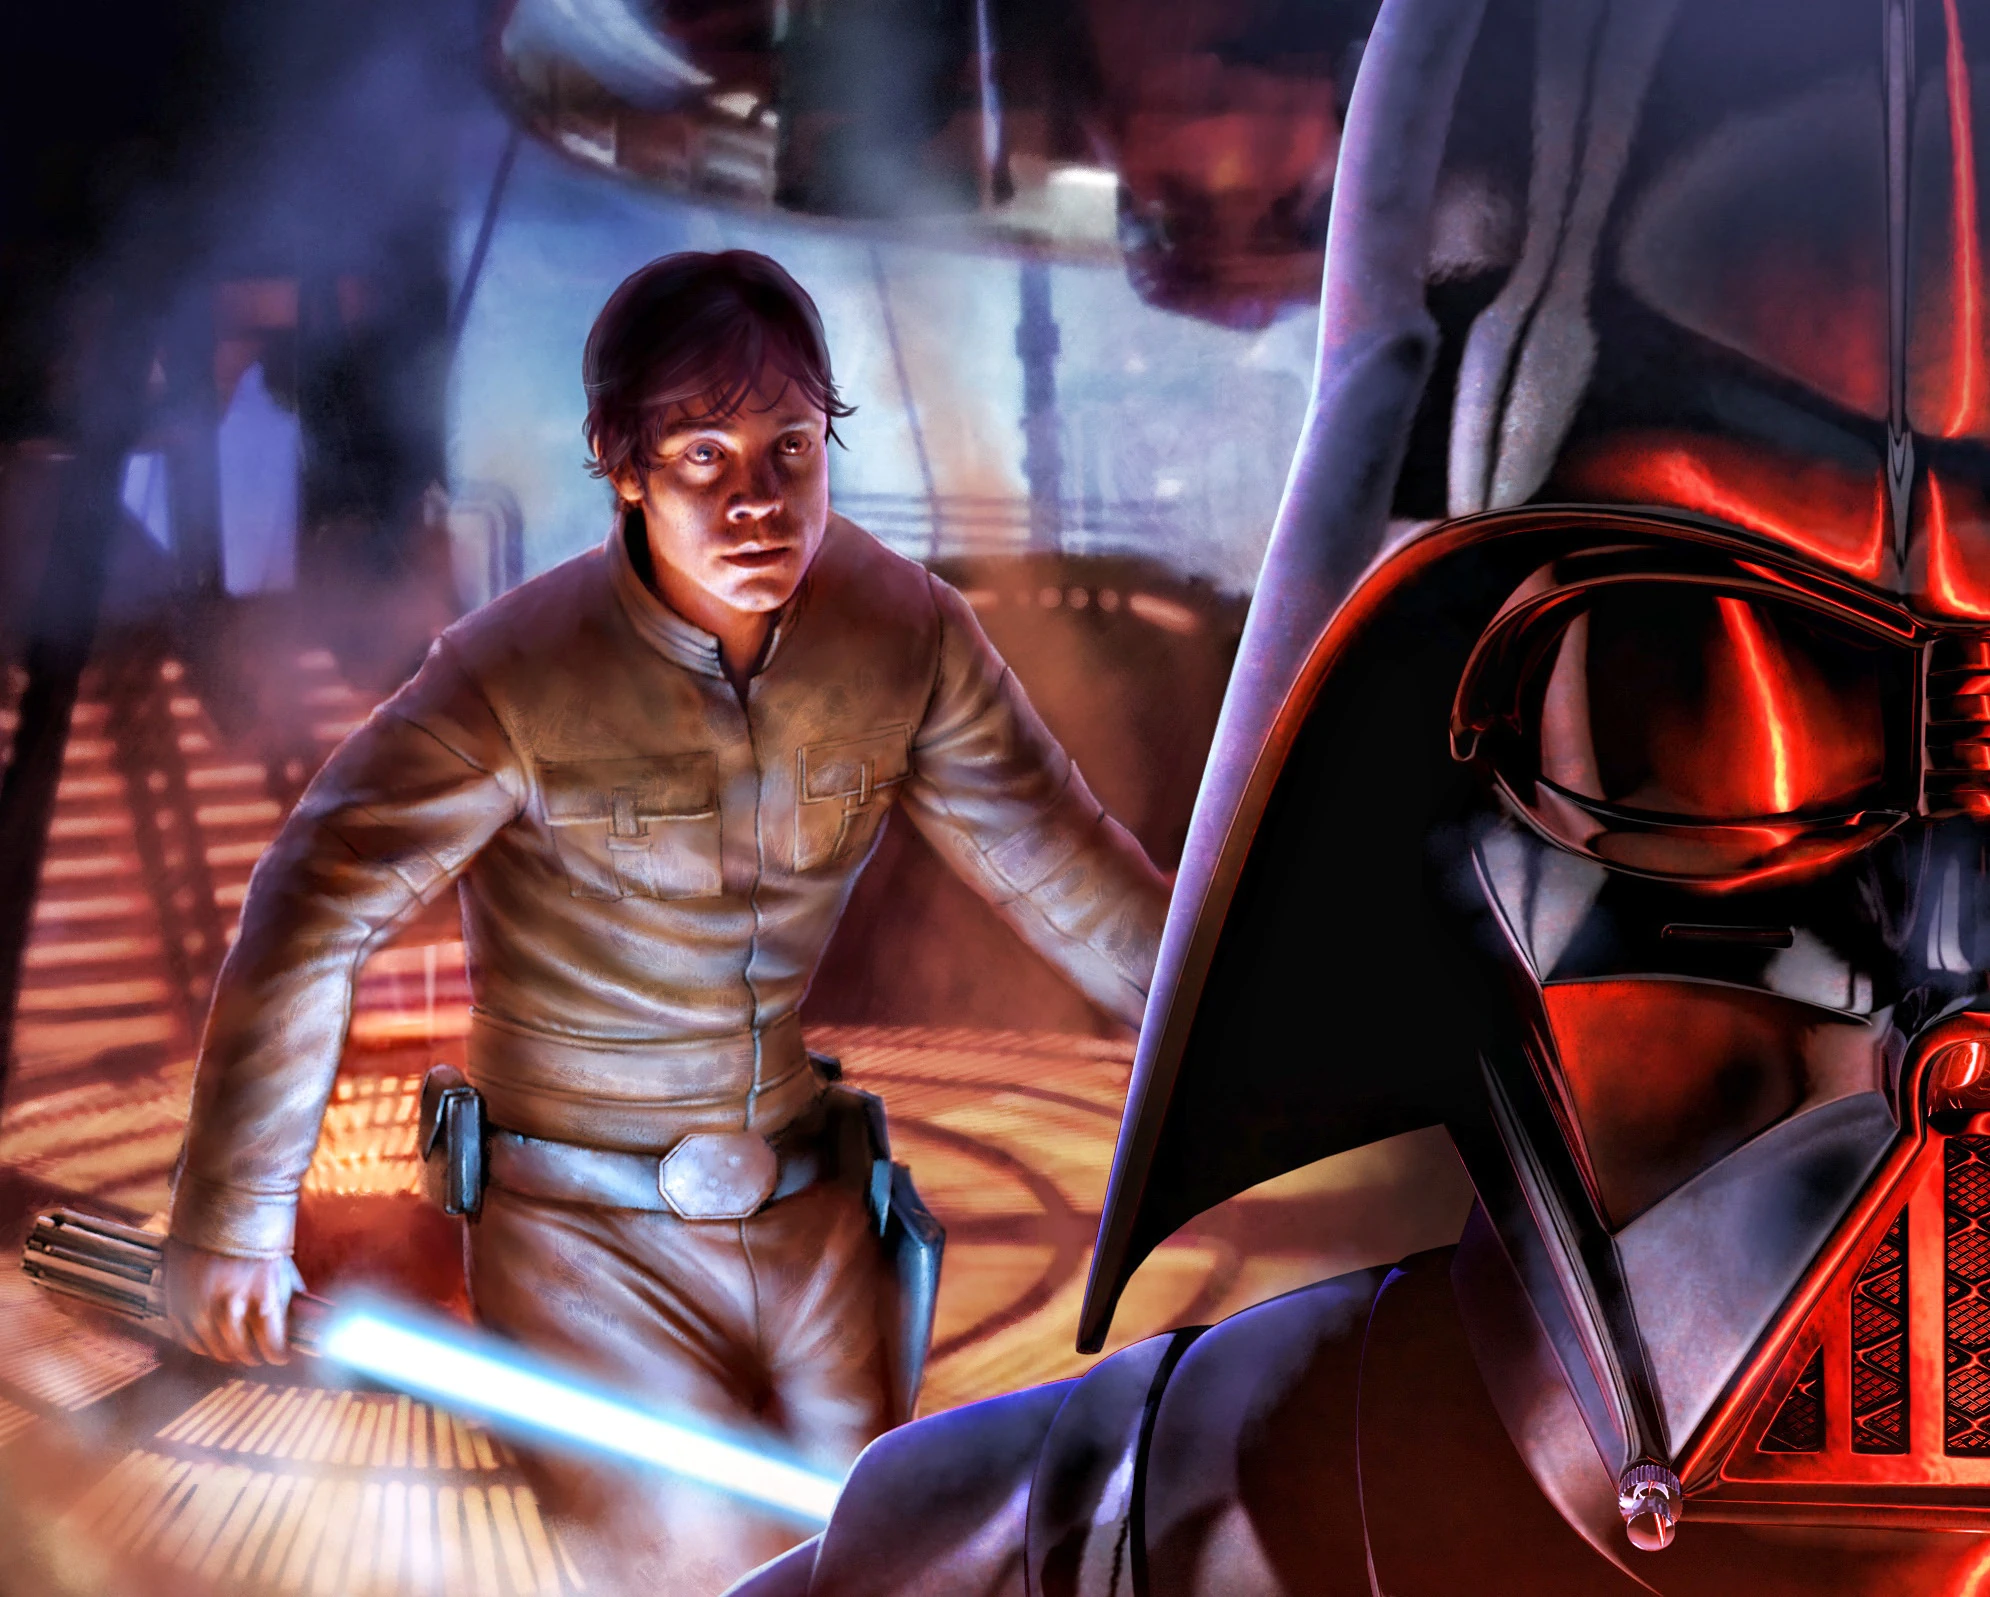
Meanwhile, Skywalker had landed in the city and caught a glimpse of his friends being taken away by Imperial troops led by Lieutenant Sheckil. He was caught in a brief firefight with Boba Fett, who was protecting his cargo. Though Princess Leia managed to shout a warning to him, Skywalker continued further into the city, ending up in a carbonite processing chamber where he faced the Dark Lord of the Sith in lightsaber combat.[1]

Luke Skywalker and Darth Vader duel.
Realizing that the situation was deteriorating, Lando Calrissian arranged for the Bespin Wing Guard members Helder Spinoza, Corman Jeihn, Pedar Solardo, Gir Endac, and Razell Tameron to free Organa and Chewbacca from their Imperial escorts, resulting in Sheckil and his Imperial unit's arrest in the process. However, Organa and Chewbacca did not trust him due to his earlier betrayal of Solo, the latter also nearly killing him via strangulation, although the latter ultimately managed to relay that they still have a chance to save Solo from Boba Fett, causing them to decide to aid Calrissian and pursue the bounty hunter. While escaping, Calrissian alerted the populace to the Empire's takeover of the city and advised that they evacuate the city before more Imperials arrive. Calrissian's announcement likewise caused a mass-panic that aided the group in slipping past most Imperial patrols.[1] Organa ordered the astromech droid R2-D2 to assist in opening doors for her to reach the Millennium Falcon.[9] R2-D2 then tried to access sockets to Cloud City's main computer to access the doors, although thanks to C-3PO's poor advice, the astromech droid inadvertently electrocuted itself at one of the sealed doors by accessing a power outlet instead. While pursuing Boba Fett, the bounty hunter returned fire and taunted about how Solo was now his and no one will take his bounty.[9] Just after accessing the landing pad for the Millennium Falcon, R2 also uncovered information from Cloud City's main computer that indicated that, although the hyperdrive was indeed fixed, it had also been deactivated by the Imperials, and attempted to warn them.[1]
The duel between Vader and Skywalker continued out onto an enormous wind tunnel, where Luke would lose his right hand to Vader's lightsaber and have his true parentage revealed. Even as Vader beckoned him to join his side and thus help end the Galactic Civil War, Luke stood defiant and chose to take his own life by falling from the platform they were on. As he plummeted towards the ground, he was sucked into one of the gas exhaust pipes and emerged below the city, grabbing onto a weather-vane.[10]


Rebel escape
In a final attempt at survival, Skywalker contacted Princess Leia through the Force, who having escaped in the Falcon, now ordered the ship around to look for him. As they were rescuing Skywalker and taking off again, four members of the TIE Fighter squadron, Obsidian Squadron, appeared off the tarmac and gave chase.[1] The Millennium Falcon fired back and shot down several TIEs.[9] The fighters had already been deployed for patrol duty even before the formal takeover of the planet.[11]
Having escaped the planet, the Falcon now headed out into space, where it encountered the Executor under the command of Admiral Piett in orbit. Attempting to flee into hyperspace, the crew found that Imperial technicians repaired their hyperdrive, but disabled it in the event of their escaping the city. As the Executor prepared to take the ship by tractor beam, R2-D2 managed to activate the hyperdrive, having been warned about the deactivation earlier by Cloud City's computer, and the Millennium Falcon escaped once again.[1]
Imperial takeover
An Imperial strike force was formed to take over the city. The TIE/D Defenders and TIE Interdictors cleared a landing zone in a break in the city's anti-air defenses and fighter cover. The strike force, a mixed force of stormtroopers with repeaters, four dewback troopers, five ASP-7 labor droids, deployed from the seven landing craft and spread out. The landing craft also deployed four All Terrain Scout Transports, six All Terrain Personal Transports, four Phase II dark troopers, four Imperial Thermal Detonator Troopers, and two Heavy Imperial Missile Launcher Troopers. The city had six Gravity Control Centers spread throughout, and the Rebels were planning on disabling them to scuttle the city and prevent its takeover. After landing, the strike force engaged T3-B heavy attack tanks sent their way and beat back Lando's Commandos.[3]
The Imperial strike force's bombers attacked a nearby tibanna gas platform and destroyed its storehouses to acquire additional resources. The strike force's labor droids established a base, and the force fought through the Rebel and the Bespin Security Force defenders, destroying storehouses in the process to acquire more resources. Walls prevented the strike force from accessing parts of the city; the strike force used their landing craft to reach those areas.[3]
The strike force reached the Gravity Control Centers to prevent their destruction. The Imperials also destroyed the Bespin Government Center and built an Imperial Palace in its place to cement their occupation.[3]
Aftermath

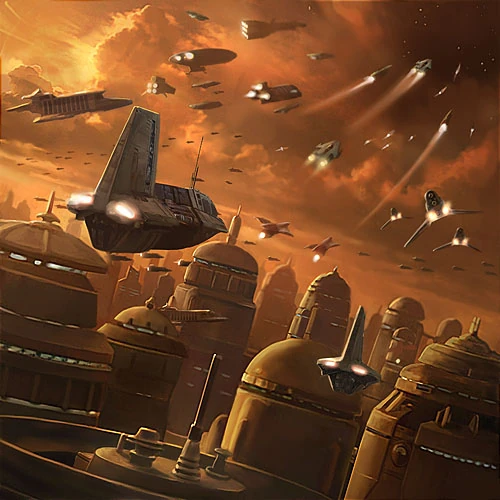
Cloud City inhabitants flee the Imperial occupation
Skywalker, Organa, Chewbacca, Calrissian, and the droids returned to the Alliance Fleet, where Skywalker received a prosthetic hand.[1] With the Rebels defeated, the Empire took control of the city and the tibanna gas mines. Cloud City and its remaining population had to endure the occupation of an Imperial garrison under the command of Hugo Treece for many months, until the Battle of Bespin,[12] which would see the Empire driven out of the colony.[13] Nonetheless, there were some minor skirmishes prior to its liberation, such as a raid by the Rebel Alliance on the tibanna gas platforms shortly before the Battle of Endor.[14]
Behind the scenes
The occupation of Bespin first appeared with the release of Star Wars: Episode V The Empire Strikes Back.
The 2001 video game Star Wars: Galactic Battlegrounds presents the player with the opportunity to play through the occupation during the Darth Vader campaign. The campaign was also included in the game's 2002 expansion pack, Clone Campaigns. The player is tasked with establishing a base and securing the Gravity Control Centers. The player has the option of building additional units, and may also attack a mining platform for its resources. Half of the six Gravity Control Centers must survive and the player must destroy the Bespin Government Center to complete the mission.
In Star Wars: Rogue Squadron III: Rebel Strike, the Occupation of Bespin was a bonus mission called "Escape from Bespin." It branched off from one of the main missions in Wedge's campaign, Guns of Dubrillion, implying that the event was concurrent with the Battle of Dubrillion.
The battle also appeared in LEGO form in two missions in the 2006 video game adaptation of the Original trilogy, LEGO Star Wars II: The Original Trilogy. The missions are also included in its 2007 compilation re-release.
Appearances
- Star Wars: Galactic Battlegrounds
- Star Wars: Battlefront
- Star Wars: Galactic Battlegrounds: Clone Campaigns
- Star Wars: Rogue Squadron III: Rebel Strike
- Star Wars: Episode V The Empire Strikes Back (First appearance)
- The Empire Strikes Back: A Storybook
- "Thank the Maker" — Star Wars Tales 6
- Star Wars 55: Plif! (Mentioned only)
- Star Wars 56: Coffin in the Clouds (Mentioned only)
 "Wind Raiders of Taloraan" — Star Wars Adventure Journal 5 (Mentioned only)
- Shadows of the Empire novel (Indirect mention only)
- Shadows of the Empire audio book (Indirect mention only)
- Shadows of the Empire junior novelization (Indirect mention only)
- The Rise and Fall of Darth Vader
- The Truce at Bakura (Mentioned only)
- Tatooine Ghost (Indirect mention only)
- Heir to the Empire (Indirect mention only)
- Jedi Search (Mentioned only)
Non-canon appearances
Sources
- Dark Force Rising Sourcebook
- Dark Empire Sourcebook
- The Last Command Sourcebook
- Star Wars: The Power of the Force (1995)
- Star Wars: Galactic Battlegrounds: Prima's Official Strategy Guide
- Star Wars Customizable Card Game — Cloud City Limited (Card: TIE Sentry Ships) (backup link) (First identified as occupation of Bespin)
- The Official Star Wars Fact File 8 (LOB1–4, Lobot)
- The Official Star Wars Fact File 10 (ART1–2, R2-D2 (Artoo-Detoo))
- Star Wars: Rogue Squadron II: Rogue Leader: Prima's Official Strategy Guide (Indirect mention only)
- Rogue Squadron III: Rebel Strike: Prima's Official Strategy Guide
- "The Fall of Cloud City" (original article link) on Wizards.com (content now obsolete; backup link)
- "Rough and Tundra: Adventure Settings and Scenarios for the Greater Javin" (original article link) on Wizards.com (content now obsolete; backup link)
- Star Wars: Beware the Sith
- The Essential Guide to Warfare
- Star Wars: The Ultimate Visual Guide: Updated and Expanded
- The Essential Reader's Companion
- Star Wars: The Legendary Yoda (Indirect mention only)
- Star Wars: Sith Wars
- "Rogues Gallery: The Cloud City Wing Guards" — Star Wars Insider 148
- "Classic Moment: Lando's Second Surprise" — Star Wars Insider 152
Notes and references
- ↑ 1.00 1.01 1.02 1.03 1.04 1.05 1.06 1.07 1.08 1.09 1.10 1.11 1.12 1.13 1.14 1.15 1.16 1.17 1.18 1.19 1.20 1.21 1.22 1.23 1.24 1.25 1.26 1.27 1.28 1.29 1.30 1.31 1.32 1.33 1.34 1.35 1.36 1.37 1.38 1.39 1.40 1.41 1.42 1.43 1.44 1.45 1.46 Star Wars: Episode V The Empire Strikes Back
- ↑ Star Wars 56: Coffin in the Clouds
- ↑ 3.00 3.01 3.02 3.03 3.04 3.05 3.06 3.07 3.08 3.09 3.10 3.11 3.12 3.13 3.14 3.15 3.16 3.17 3.18 3.19 3.20 Star Wars: Galactic Battlegrounds
- ↑ 4.0 4.1 4.2
 Star Wars Galaxies Trading Card Game — The Price of Victory (Dark Side scenario campaign)
- ↑ 5.0 5.1 Super Star Wars: The Empire Strikes Back
- ↑ 6.0 6.1 Star Wars: Rogue Squadron III: Rebel Strike
- ↑ "Thank the Maker" — Star Wars Tales 6
- ↑ The Essential Guide to Warfare
- ↑ 9.0 9.1 9.2 Star Wars: Rogue Squadron III: Rebel Strike
- ↑ Star Wars: The Ultimate Visual Guide: Updated and Expanded
- ↑
 Star Wars Customizable Card Game — Cloud City Limited (Card: TIE Sentry Ships) (backup link)
- ↑ The Truce at Bakura
- ↑ Star Wars: Episode VI Return of the Jedi
- ↑ Star Wars: Rogue Squadron II: Rogue Leader