Warning: This infobox has missing parameters: unit1, unit2, unit4, unit3 and unrecognized parameters: imageBG
- "The Droid Gotra heard about a surviving Geonosian queen with a droid factory. They wanted me to liberate it from the evil carbon-based oppression. But we can always steal it for us, eh?"
- ―Doctor Aphra and Darth Vader
The secret mission to Geonosis was carried out by the Sith Lord Darth Vader not long after the Battle of Yavin. Having fallen out of favor with Emperor Palpatine, his Sith Master, Vader had recruited the rogue archaeologist Doctor Aphra and the assassin droids BT-1 and 0-0-0, also known as Triple-Zero, to assist him in building an army of unquestionably loyal battle droids which Vader could utilize to find an Imperial agent and a Rebel pilot. Vader soon arrived on Geonosis and his team infiltrated a Geonosian queen's lair—who had utilized the droid factory to produce battle droids as her "children" after she was injured and left unable to produce offspring during the Sterilization of Geonosis some time earlier—beginning the heist of the queen's droid factory. BT fired on the queen's B1 battle droids while Aphra used her starship, the Ark Angel, to blow a large hole in the roof of the lair so that Vader's J-type 327 Nubian could lower a crane through the hole. Aphra then connected the factory to the crane and Vader's seemingly delicate ship extracted the team and the factory. The droid factory then produced several BX-series droid commandos and Cylo-IV, the Emperor's agent Vader had been looking for, was brought to Vader by the bounty hunter Black Krrsantan and tortured to death by Triple-Zero. During the interrogation, Triple-Zero learned of Cylo-IV's research base and so Vader assaulted the base with his new commando droid army.
Prelude
- "I need troops of unquestioning loyalty."
"Hey, I understand. Who wouldn't a phalanx of carefully restored battle droids... How do you feel about a secret mission to Geonosis, Lord Vader?"
"I have no feeling regarding Geonosis."
"Good." - ―Aphra and Darth Vader plan the mission
During the reign of the Galactic Empire, the Empire sterilized the planet Geonosis, killing nearly all life on Geonosis, except for a single insectoid Geonosian queen who was left injured and unable to produce offspring. She took up residence in a lair and attached herself to a droid factory to try and continue her race using the factory as her womb and the battle droids it produced as her "children."[4]

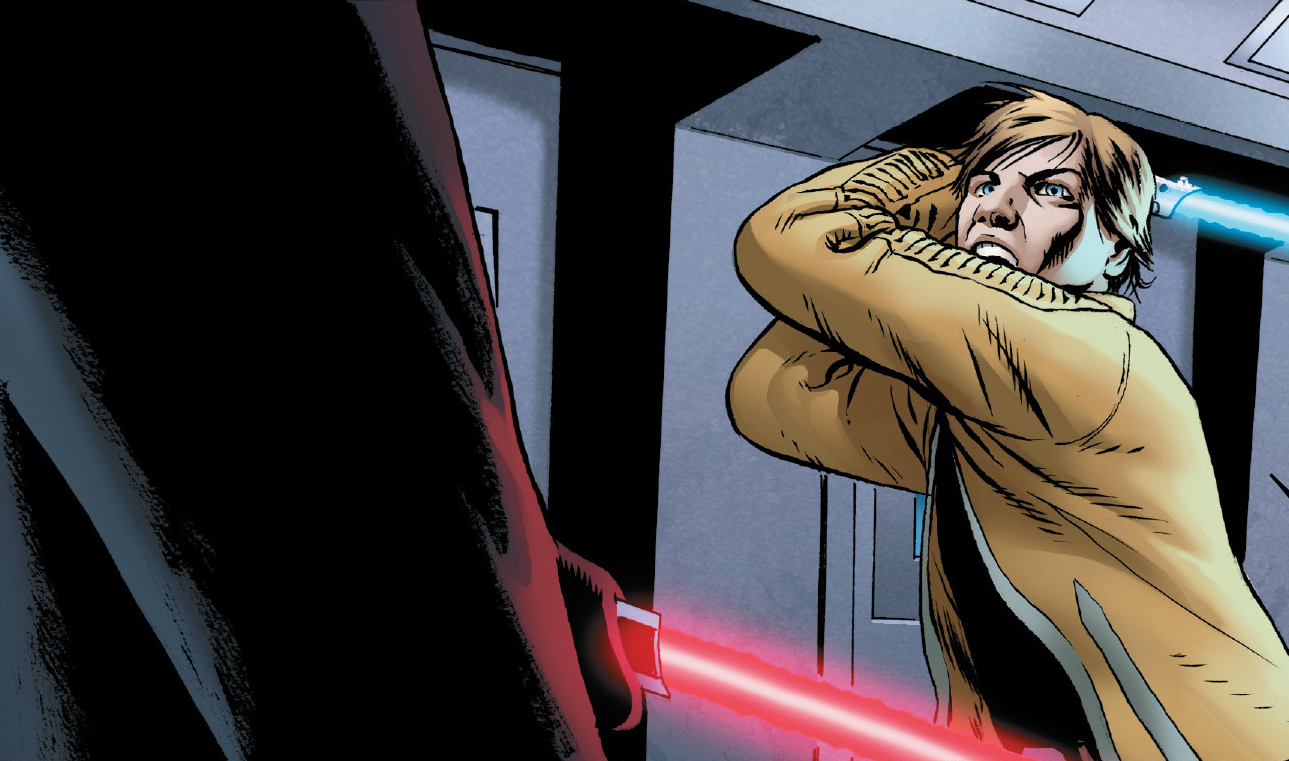
Luke Skywalker attacks Vader during the assault on Cymoon 1, gaining the Sith Lord's interest.
Sometime later, during the Galactic Civil War between the Empire and the Alliance to Restore the Republic, the Alliance destroyed the Empire's greatest weapon: the Death Star mobile battle station capable of destroying entire planets.[5] The Rebels pressed their victory at Yavin by launching a galaxy-wide campaign to attack the Empire's largest facilities. Notably, the Rebels bombed the Imperial shipyards at Kuat,[6] and assaulted the Empire's largest weapons factory on Cymoon 1.[7] The Rebels ultimately blew-up Weapons Factory Alpha after Darth Vader, a Dark Lord of the Sith, failed to stop them.[8] Emperor Palpatine, Vader's Sith Master, lost favor with Vader and demoted him for his failures at Yavin and Cymoon 1 and put him under the command of Grand General Cassio Tagge. Vader secretly hired two bounty hunters to hunt down an Imperial agent, Cylo-IV, who Sidious refused to identify to Vader, and a Rebel pilot, Luke Skywalker, who had destroyed both the Death Star and Weapons Factory Alpha—although their identities were unknown to Vader—[9] before meeting Tagge aboard his Super Star Destroyer Annihilator.[10]
Vader and Tagge soon attacked and defeated a group of pirates who utilized custom droideka security droids provided to them by a Doctor Aphra.[10] Vader had been impressed with the droidekas, and began a search for Aphra, and eventually found her on Quarantine World III. Vader recruited her in his plight, and she agreed to help the Sith Lord. The archaeologist also gave Vader two assassin droids, 0-0-0—commonly known as Triple-Zero—and BT-1 to help. Vader revealed that he needed private resources of his own to capture Cylo-IV and Skywalker: unquestionably loyal battle droids. Aphra understood, and knew of a Geonosian queen on Geonosis who had survived her homeworld's sterilization and possessed a droid factory. Vader agreed to her choice,[1] and they left for the old warzone of Geonosis aboard Aphra's starship, the Ark Angel.[4]
The mission
- "And now for our devilishly clever plan to steal a robot womb factory off a homicidaly broody alien queen. Do you still think this is a good idea, Lord Vader?"
"Yes." - ―Aphra and Darth Vader, as they begin the heist
Vader's team arrives on Geonosis
While en route to Geonosis, Vader brought in his J-type 327 Nubian starship to aid in the latter stages of the mission. Soon thereafter, the Ark Angel set down near the entrance to the queen's lair, while Aphra sent Triple Zero and BT into the cavern to scout out the most direct route to the queen's chamber. Vader had been to Geonosis several times before during the Clone Wars while still a Jedi Knight, and being on the red-desert world brought up painful memories of his deceased wife. So he ordered Aphra—who had been asking Vader personal questions—to be silent as they, too, entered the catacombs to steal the droid factory.[4]
Farther in the tunnels, BT and Triple Zero came across several of the queen's B1 battle droids and promptly burned them to death while Triple-Zero insulted them in their native language. Aphra and Vader soon came across the carnage. Aphra examined the burned droids, noting that they had "interesting tweaks," to the standard battle droid design. Aphra conflated that the "tweaks" meant the queen did not see the droids as droids, but as her own children. Vader and Aphra caught up with the two assassin droids and they together entered the queen's chamber.[4]
Vader ignored the queen's objections, and leaped down to the queen and cut her from her womb, the droid factorey using his lightsaber. She survived the attack and sent dozens of B1 battle droids, some capable of flight, to stop the Dark Lord. However, Vader ordered BT to open fire, the droid did with his built in chainguns and blasters; pulverizing many of the droids while Vader cut down others. Aphra, meanwhile, prepared the Ark Angel's locator beacon to send it to the ceiling of the lair. Although, its thrusters malfunctioned and she jumped down to Vader's position to ask if he could help. Before the rogue archaeologist could finish, Vader used the Force to throw the beacon to the roof with the point of his finger, leaving Aphra content with the Sith Lord's abilities.[4]
The queen's "children" fight back
The Ark Angel, at Aphra's order, barraged the roof of the lair, creating a massive hole in the ceiling and causing uncountable amounts of rock to rain down. However, Vader used the Force to create a "bubble" around himself and the doctor to protect themselves while Vader's Nubian starship lowered a crane through the hole. The queen continued to order the battle droids to stop Vader and bring back her "womb", warning them that her self-made empire would never end. Aphra attached the crane to the droid factory while Vader held off the queen's onslaught. Aphra was unsure if Vader's "pretty little" starship would be able to rip the factory from its foundations, but Vader assured him it would due to the "enhancements" he had given it. And it did, lifting Vader, Aphra, and the factory into the skies of Geonosis while BT and Triple Zero followed behind using BT's booster rockets.[4]
Aftermath
- "In a few hours you'll have your droid army. Some minor tweaks to get it 100%, but nothing BT can't handle."
- ―Aphra to Vader, after starting the droid factory
Vader and his team returned to his Nubian, and docked with the Ark Angel and began fine-tuning the droid factory. Not long after, BT and Aphra got it working successfully, it created a single BX-series commando droid that Triple Zero examined. Aphra remarked that Vader now had a private off-the-grid army, and no longer needed her services; thinking he would kill her. Vader, however, believed she was still useful and did not kill her. Soon, one of the bounty hunters Vader had hired, the Wookiee Black Krrsantan, came with a very important delivery.[4]
The commandos and Vader invade the base
Krrasantan soon captured Cylo-IV and brought him aboard where Vader ordered Triple-Zero, a specialist in torture, to learn what Sidious had tasked him with. Triple-Zero did so and was able to identify the agent and the location of his research base where assassins were being trained to possibly replace Vader as the Emperor's enforcer—with commission from Darth Sidious himself. The protocol droid accidentally killed Cylo-IV during the interrogation, and informed Vader of his findings. Vader ordered the course to the base be set, and they left immediately[4] to storm the base using two platoons of the newly built commando droids.[2]
Behind the scenes
- "But for this he will need his own personal forces. Vader recruits droid archaeologist Doctor Aphra to do so—and she lead the fallen Jedi to the old warzone of Geonosis..."
- ―The final paragraph of Star Wars: Darth Vader 4: Vader, Part IV's opening crawl.
The Secret mission to Geonosis was first mentioned in the Marvel comic book series third issue of their Darth Vader series; it was released on March 11, 2015.[11] And it first appeared in Star Wars: Darth Vader 4: Vader, Part IV that was released on April 8, 2015.[12] It was written by Kieron Gillen, with art by Salvador Larroca.[4] Gillen has been working alongside the Lucasfilm Story Group to develop the story and events of the ongoing comic series.[13]
Appearances
- Star Wars: Darth Vader 3: Vader, Part III Template:1stM
- Star Wars: Darth Vader 4: Vader, Part IV (First appearance)
- Star Wars: Darth Vader 6: Vader, Part VI (Indirect mention only)
Sources
Notes and references
- ↑ 1.00 1.01 1.02 1.03 1.04 1.05 1.06 1.07 1.08 1.09 1.10 1.11 1.12 Star Wars: Darth Vader 3: Vader, Part III
- ↑ 2.0 2.1 Star Wars: Darth Vader 5: Vader, Part V
- ↑ Star Wars: Darth Vader begins after Star Wars: Princess Leia, Heir to the Jedi and the first three issues of the Star Wars comic, we can deduce this event takes place after the said events because of this tweet by Kevin Hearne.
- ↑ 4.00 4.01 4.02 4.03 4.04 4.05 4.06 4.07 4.08 4.09 4.10 4.11 4.12 4.13 4.14 4.15 4.16 4.17 4.18 Star Wars: Darth Vader 4: Vader, Part IV
- ↑ Star Wars: Episode IV A New Hope
- ↑ Star Wars 4: Skywalker Strikes, Part IV
- ↑ Star Wars 1: Skywalker Strikes
- ↑ Star Wars 3: Skywalker Strikes, Part III
- ↑ Star Wars: Darth Vader 1: Vader
- ↑ 10.0 10.1 Star Wars: Darth Vader 2: Vader, Part II
- ↑ Marvel Comics Full March 2015 SOLICITATIONS on Newsarama (December 16, 2014) (backup link not verified!)
- ↑ Marvel Comics Full April 2015 SOLICITATIONS on Newsarama (January 19, 2015) (backup link not verified!)
- ↑ Star Wars: Darth Vader (Marvel)