Warning: This infobox has missing parameters: series, title and unrecognized parameters: movie name, era, canon, distributor
- "If you only knew the power of the dark side. Obi-Wan never told you what happened to your father."
"He told me enough! He told me you killed him."
"No. I am your father." - ―Darth Vader and Luke Skywalker
Star Wars: Episode V The Empire Strikes Back (originally titled only The Empire Strikes Back) is the second film and the fifth chapter in the film series by George Lucas. Originally released in 1980, the film has proved to be one of the most popular films of the series among many fans and critics. It was re-released with changes in 1997 and (on DVD) in 2004. The film was re-released on Blu-ray format in September of 2011. A radio adaptation was broadcast on National Public Radio in the U.S. in 1983. The film was selected in 2010 to be preserved by the Library of Congress as part of its National Film Registry.
The film concerns the continuing struggles of the Rebel Alliance against the Galactic Empire. During the film, Han Solo, Chewbacca, and Princess Leia Organa are being pursued across space by Darth Vader and his elite forces. Meanwhile, Luke Skywalker begins his major Jedi training with Yoda, after an instruction from Obi-Wan Kenobi's spirit. In an emotional and near-fatal confrontation with Vader, Luke is presented with a horrific revelation and must face his destiny.
Opening crawl
| Episode V THE EMPIRE STRIKES BACK |
|---|
Synopsis
The search for Skywalker
- "We have thousands of probe droids searching the galaxy. I want proof, not leads!"
- ―Admiral Kendel Ozzel
It is now three years after the events of A New Hope. The Rebel Alliance has been forced to flee its base on Yavin 4 and establish a new one on the ice planet of Hoth.
An Imperial Star Destroyer dispatched by the Sith Lord Darth Vader, continuing his quest for Luke Skywalker, launches thousands of probe droids across the galaxy, one of which lands on Hoth and begins its survey of the planet. Luke Skywalker, on patrol astride his tauntaun, discovers the probe, which he mistakes for a meteorite. After reporting to comrade Han Solo that he'll investigate the site, Luke is knocked unconscious by a deadly wampa.
When Luke fails to report in at Echo Base, Han Solo goes out on his tauntaun to search for him in an encroaching storm. Upon waking up, Luke finds himself hanging upside down in a cave; his eyes opening to the sight of a wampa eating his tauntaun. Using the Force, Luke is able to pull his lightsaber towards himself. After he ignites it, he cuts himself free and cuts off the attacking wampa's arm, running out of the cave and escaping into the cold night of Hoth.
Luke tries to make his way to Echo Base on foot, but he finds himself lost in the blizzard and collapses in the snow. Suddenly, he sees the Force spirit of Obi-Wan Kenobi appear before him. Ben tells Luke to go to Dagobah to undergo training under Yoda, a Jedi Grand Master. After the spirit disappears, Han arrives to find an almost unconscious Luke, who is mumbling indistinctly about Ben, Yoda and Dagobah. At this point, the tauntaun that Han was riding on collapses in the extreme cold. To keep Luke warm during the blizzard, Han uses Luke's lightsaber to cut open the dead tauntaun and places Luke in it. Han then sets about erecting a shelter that he and Luke will stay in during the night. They are forced to stay out during the night as the aircraft (snowspeeders) that the Rebels use for atmospheric flight had not yet been adapted for the extremely low temperatures of the Hoth night and are therefore unable to mount a rescue operation to retrieve Han and Luke.
The next morning, Rebel Pilots flying the snowspeeders set out from Echo Base to search for the missing men. Zev Senesca, one of the pilots in Rogue Group, makes contact with Han over comlink and the pair are rescued. When they are taken back to base, Luke is put in a bacta tank for healing under the care of medical droid, 2-1B.
Princess Leia Organa tries to urge Han to stay with the rebels, and when Han assumes it is because she has feelings for him, Leia loses her temper and calls him a "stuck-up, half-witted, scruffy-looking nerf herder."
Meanwhile, the probe droid has spotted signs that indicate Hoth is occupied and sends a signal to the Imperial fleet, shortly before being destroyed by Han Solo and Chewbacca. Aboard the Executor, Admiral Kendel Ozzel dismisses the information as evidence of smugglers, nothing more. However, Darth Vader knows better and orders the fleet to Hoth. General Rieekan, realizing the Empire is probably aware of their location, orders the evacuation of Echo Base to begin.
The Battle of Hoth
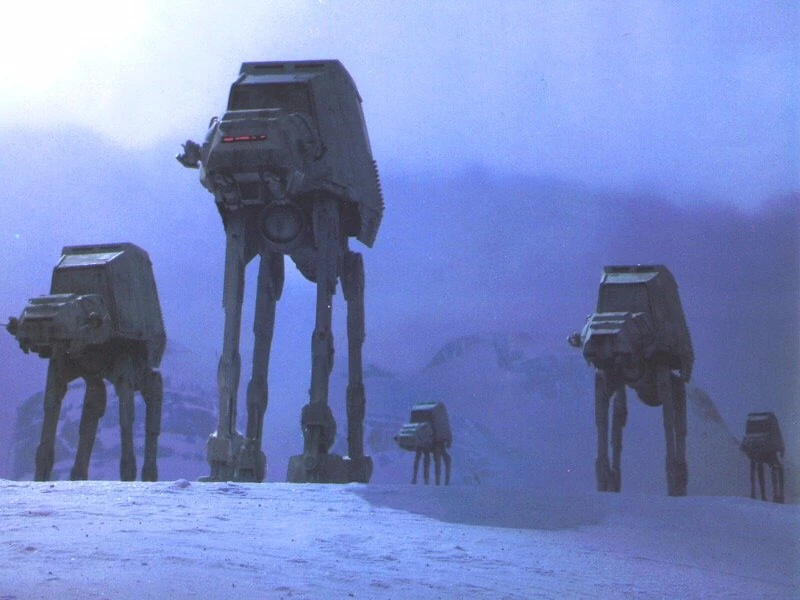

AT-ATs on Hoth.
Darth Vader and the Imperial forces set course for the Hoth system to set up the attack. The rebels load whatever equipment they can onto transports and plan a rear-guard action to secure their escape. Luke, now fully recovered from the Wampa attack and subsequent exposure, says farewell to Chewbacca and Solo, who have decided to leave the Alliance to resolve their debt to Jabba the Hutt. As the Imperial forces enter the Hoth system, General Rieekan orders full power to the energy shield that is protecting the base from orbital bombardment.
Aboard the Executor, General Maximillian Veers notifies Vader that Admiral Ozzel has emerged from lightspeed too close to Hoth. Ozzel intended to catch the Rebels unaware before they could set up their defenses. However, Vader realizes that the Rebels have been alerted to the fleet's arrival. Via video communication, Vader Force chokes Ozzel to death for his incompetence, then appoints Captain Firmus Piett the new Admiral on the spot. As Vader previously ordered, the Imperial ground forces, commanded by General Veers, land outside the Rebels' shield and march overland to destroy the power generator.
Princess Leia gives the Rebel fighters instructions on the evacuation to leave Hoth two to three ships at a time past the energy shield to a rendezvous point, which is beyond the outer rim. Rieekan lowers the shields to fire the Ion cannon at one of the Imperial Star Destroyers allowing the first transports to escape. The Rebel pilots assigned to hold off the Imperial ground assault depart the Hoth base for the oncoming battle against heavily equipped Imperial forces, who are armed with agile AT-STs (All Terrain Scout Transports) and monstrous AT-AT (All Terrain Armored Transport) walkers, led by General Veers.
The Rogue Squadron snowspeeder group led by Luke commences the attack. Luke quickly realizes the AT-AT's armor is far too strong for blasters and decides to use attached harpoons and tow cables to tangle the walker's legs. Luke's gunner Dak Ralter is hit and killed during the first approach. This leaves Wedge Antilles and his gunner Wes Janson to make the first pass. They manage to topple one of the AT-ATs, which is destroyed as Rebel troops storm it. The main AT-AT, commanded by General Veers, prepares to take their aim at the Rebel base's main power generator. Suddenly, Luke's speeder is shot down by the Imperials, and crash-lands in the snow. Luke escapes before an AT-AT can step on and crush his ship.
The Rebel base is now under direct attack and Imperial snowtroopers have entered the base, forcing Han, Leia, Chewbacca, and C-3PO to escape. Leia gives the evacuation command for the base as they leave.

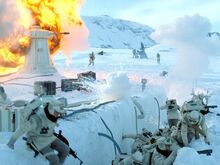
The Rebels' desperate fight.
Luke, meanwhile, manages to destroy another AT-AT by using his hoist cable and lightsaber to get into the belly of the transport, tossing in a thermal detonator, and then detaching himself from the cable as a series of explosions neutralize the AT-AT. The Rebels suffer major casualties as the result of the battle. The main AT-AT, being driven by General Veers, gets within firing range of the power generator, then successfully blasts and destroys it.
Han, Leia, and company, now realizing they are being followed by Vader (who has arrived personally on Hoth), make their way to the Millennium Falcon in time to escape. As the Falcon flies off, Luke reaches R2-D2 and his X-wing-starfighter and finally departs Hoth. Changing course from the rendezvous point, he sets his coordinates for Dagobah.
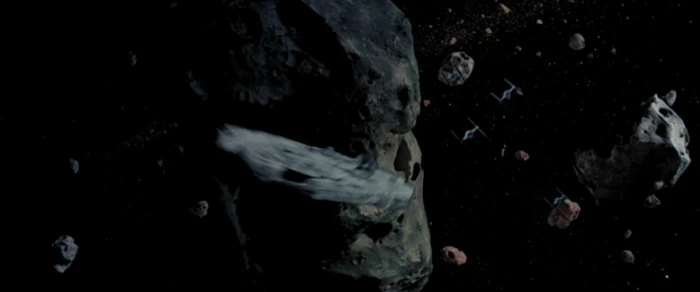
Han and company are pursued by Imperial TIE fighters. Flipping the switch to take them to lightspeed, Han realizes (with reluctant help from Threepio) that the hyperdrive has been damaged. While trying to fix the hyperdrive system, Han enters an asteroid field to hamper pursuit. He manages to land his ship inside a cavern on one of the larger asteroids to rest and find a way to fix the ship.
The destiny of a Jedi


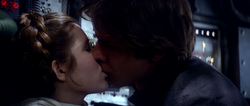
Han Solo and Princess Leia kissing.
Luke lands on the marshy planet Dagobah, swamping his X-wing in the process. There, he discovers a diminutive and eccentric figure who fiddles around with Luke's gear. After Luke tells him that he is looking for a Jedi Master, the being offers to take Luke to Yoda.
Back on the Falcon, while Leia tries to make repairs, Han makes his move on the Princess, drawing himself closer to her before both end up in a passionate kiss. When Threepio arrives, Leia withdraws and walks away.
Vader orders the entirety of Death Squadron to begin sweeping the asteroid field to find the Millennium Falcon As the search continued, the dangers of the field begin to take their toll: an asteroid smashes into the bridge tower of a Star Destroyer, presumably killing all aboard. On the Executor, Vader communicates with the captains of the other ships (the captain of the demolished star destroyer throws his arms up in horror, and the transmission fades). One officer, Captain Lorth Needa, tells Vader that they should consider their damage. Vader firmly replies that they will continue the search. Shortly afterward, Admiral Piett informs Vader that Emperor Sheev Palpatine commands he make contact immediately. Vader orders his ship out of the asteroid field for a clear transmission.
In his private quarters, Vader receives a holographic message from Palpatine, alias Darth Sidious, who alerts the Dark Lord to a "new enemy who could destroy" the Empire - Luke Skywalker. Vader suggests that if Luke could be turned, he would be a "powerful ally". Lord Sidious agrees, saying that Luke would be a "great asset" and asks his apprentice if it could be done. Vader declares Luke will join the Empire "or die".
Instead of going straight to Yoda, Luke is brought to the creature's hut. Luke insists on going to find Yoda immediately, but the small creature only responds with "Not far Yoda is, not far." The diminutive figure then declares the boy lacks patience, but the voice of Kenobi tells the figure that the boy will learn patience if he is to be trained. Only then does Luke realize that the small green figure IS Yoda. Yoda asks Kenobi if he will finish whatever training he begins, then suspects that Luke will someday succumb to fear.

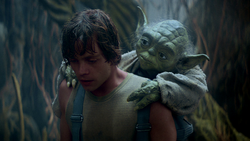
Yoda teaches Luke the way of the Jedi and to beware of the dark side of the Force.
The next day, while cleaning parasitic creatures called Mynocks off the Falcon, Solo and his companions are forced to escape what turns out to be a titanic space slug (which resided in the asteroid the Falcon landed on). Meanwhile, Luke begins a rigorous training regime from Yoda which includes moral lessons about the dangers of the dark side of the Force. That particular lesson is driven home when he is told to enter a cave that is strong with the Dark Side's power. Ignoring Yoda's counsel to leave his weapons, Luke enters the cavern armed. Once inside, he has a vision of himself angrily confronting Darth Vader and beheading him. However, the severed head's mask bursts apart and reveals Luke's face underneath; it is a warning that if Luke battles Vader with no emotional control, he will become Vader himself, seduced by the Dark Side.
Back on the Star Destroyer, Vader enlists the bounty hunters, Boba Fett, Dengar, IG-88, Bossk, 4-LOM and Zuckuss to find the Millennium Falcon for a "substantial reward". One of the Imperial commanders finally spots the Falcon, leading to another pursuit which results in the Falcon eluding the Empire by making the insanely counter intuitive move of attacking the lead Star Destroyer. However, at the last moment, the ship veers off and secretly attaches itself to the rear of the cruiser's command tower, which is not extensively covered by sensors, making it appear to have vanished from the Destroyer's point of view.
Days later, while training, Luke becomes distracted when he finds that his X-wing fighter has almost completely submerged into the swamp. Luke declares he will never be able to get the ship out, seeing that it is too big for him to extract from the water. Yoda says it is "no different, only different in your mind." Luke says he'll "try" to lift the ship, but Yoda says "No! Do or do not, there is no try." Luke tries to use the Force, but to no avail. Yoda reminds him that "size matters not" and gives him wisdom about the Force. Luke denies all of this, then Yoda decides to use the Force to lift the ship out himself. Luke is dumbfounded and incredulous. Yoda senses the youngster's failures within his mind.

Imperial pursuit.
When the fleet disperses to search for the Falcon, the Rebels wait for the ship to do its standard dump of refuse before jumping, then detach to float away with it. The Falcon's hyperdrive needs repairs, so Han decides to make their way to Cloud City, a gas-mining colony run by his "old friend" Lando Calrissian. Unfortunately, the bounty hunter Boba Fett had deduced the Falcon's escape method and had his ship jettisoned with the waste to stealthily follow the fugitives.
The next day, Yoda reminds Luke of the things the young Jedi will see in his mind, the future, the past, and of friends he recognizes. Luke loses concentration again and has a vision of his friends in danger. He wants to leave Dagobah to rescue them. Yoda reminds him that if Luke leaves now, everything his friends fought and suffered for will be destroyed.
The city in the clouds
- Leia: "I love you."
- Han: "I know."
- ―Han and Leia, on Cloud City[src]
Upon arrival at Cloud City, Han's party is welcomed by Lando. However, there are numerous elements that make the Rebels suspicious, not the least of which being C-3PO being found deactivated, dismembered, and almost recycled.


Cloud City on Bespin.
That evening, Luke and R2 prepare themselves to leave Dagobah, but are warned by both Yoda and the spirit form of Kenobi not to end training so soon for a fight Luke is not ready for. Ben declares that should Luke decide to face Vader, he will have to face him alone without interference. Luke understands this, and his ship takes off from Dagobah. Yoda is disappointed, declaring Luke is reckless. Ben tells Yoda that Luke is the Jedi's last hope, but Yoda answers back, "there is another..."
A day later, Han and company find themselves betrayed by Calrissian who was approached by the Empire before the Rebels' arrival and threatened him and the city unless he cooperated. They became the captives of Darth Vader, who proceeds to torture Han and Leia to create a disturbance in the Force for Luke to detect.
That afternoon, Vader enters a carbon-freezing chamber intending to freeze Luke Skywalker once he arrives. The Dark Lord uses the opportunity for Boba Fett to deliver Solo to Jabba the Hutt (to whom Han owed a debt) by testing the device on Solo himself. Han and company enter the chamber for the experiment. At first, Chewbacca resists the stormtroopers, but Han restrains him, saving his strength for another time. Han says goodbye to Leia with a passionate kiss before he is escalated into the carbon freezing chamber. When he is successfully entombed in carbonite in a state of suspended animation, Vader hands over Han to bounty hunter Boba Fett for transportation to Tatooine to receive a bounty from Jabba. One of the Imperial commanders informs Vader that Luke's starfighter has arrived on Bespin. The Dark Lord orders Lando to take Leia, Chewbacca, and Threepio to his Star Destroyer, reneging on a deal he made with Lando. But the Cloud City administrator has other plans.
Duel with the Dark Lord
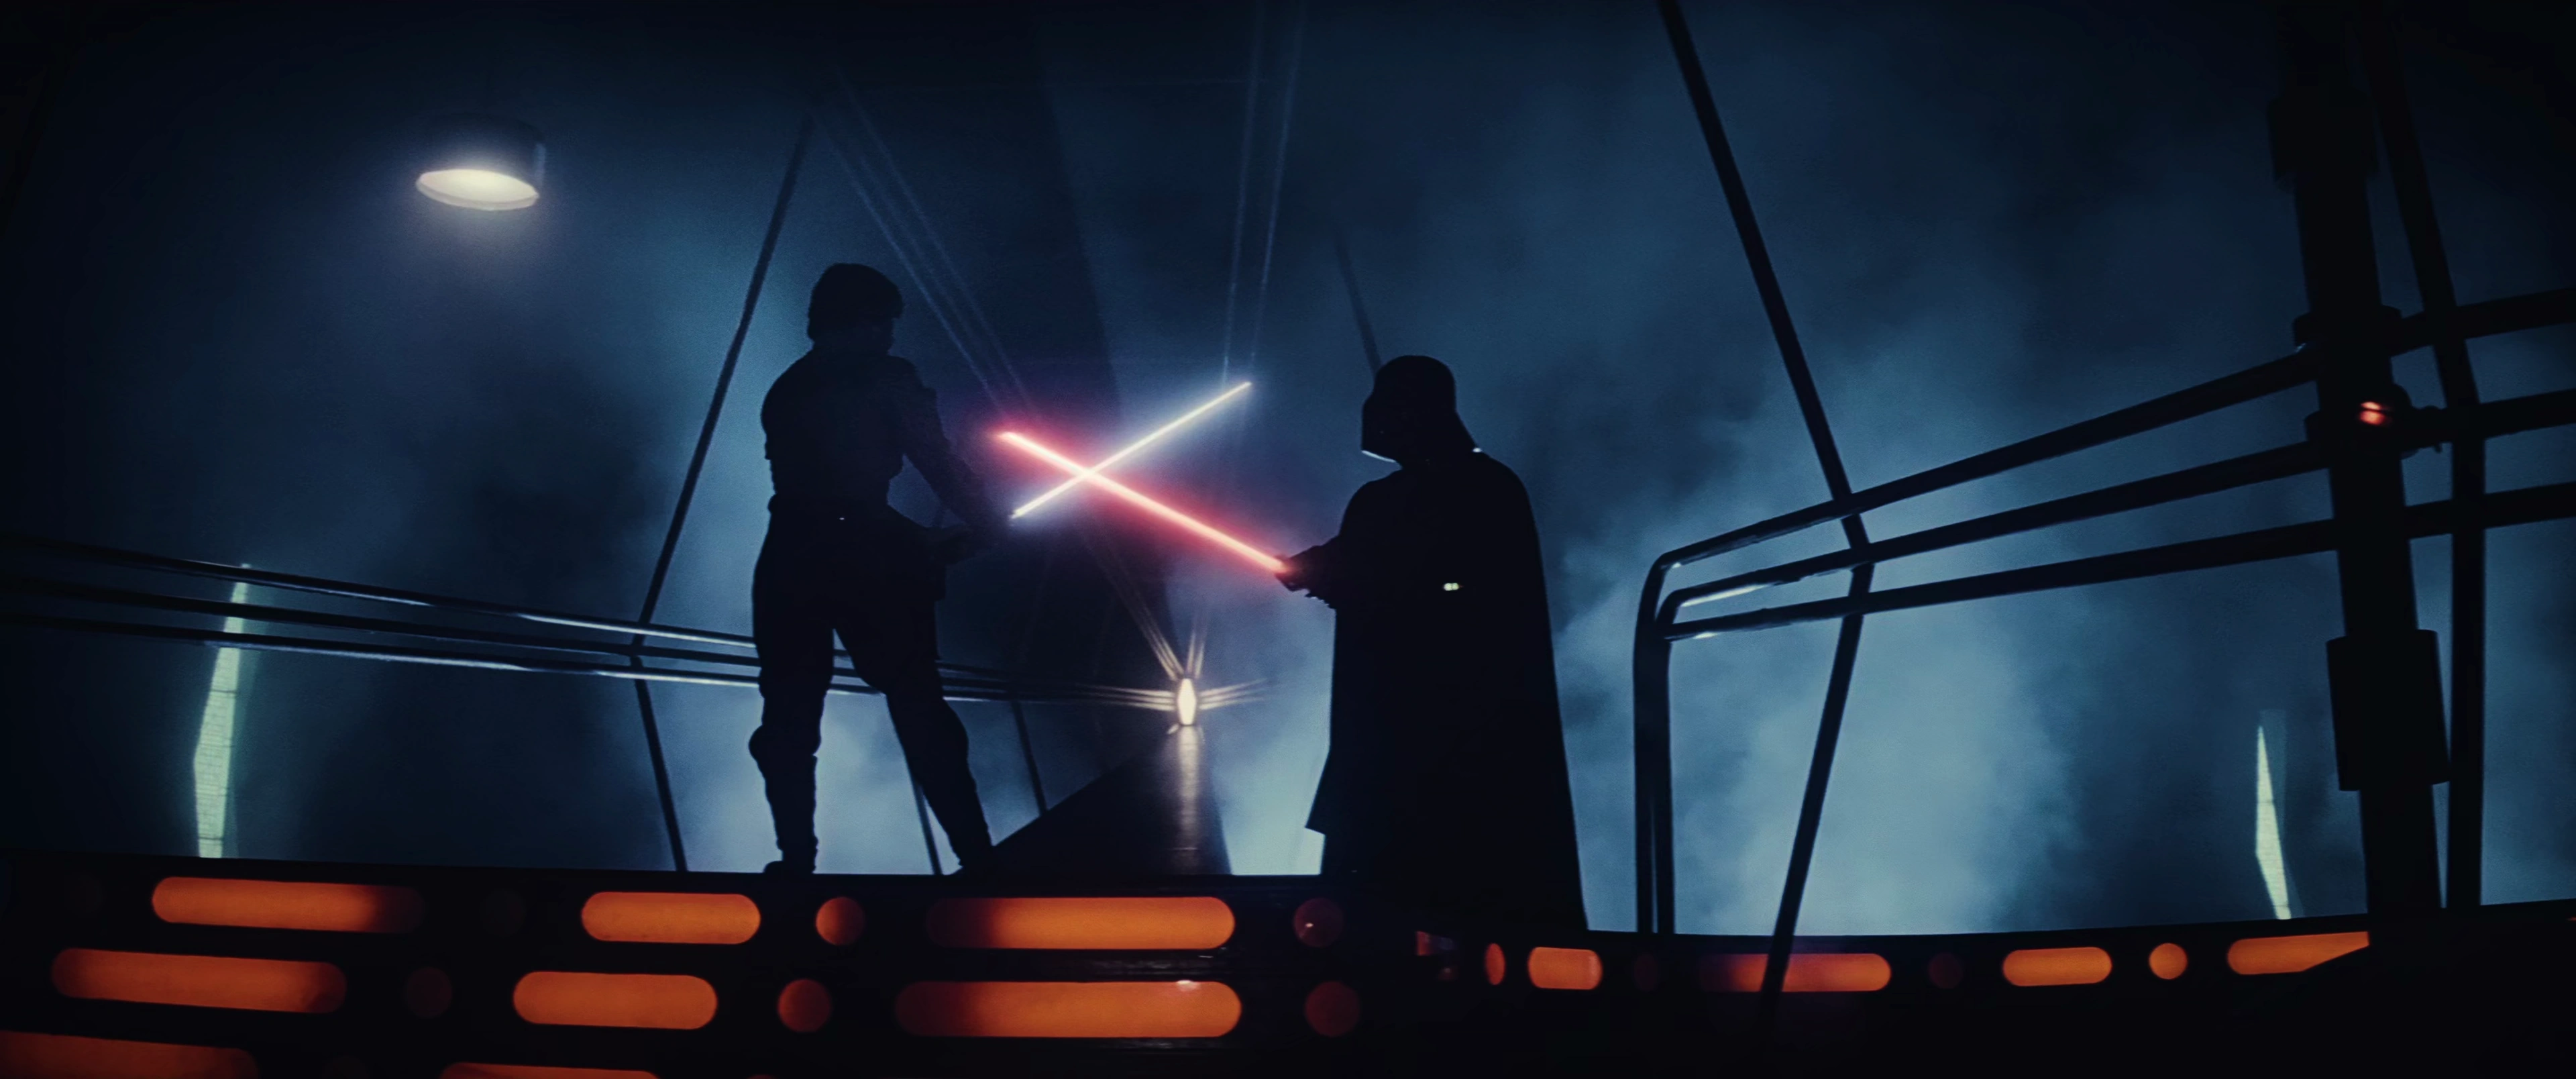
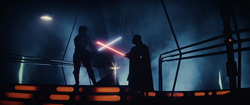
The epic duel begins.
Luke makes his way to Bespin safely. He quietly walks down the corridors of Cloud City. He spots Boba Fett who is taking the now-frozen Solo back to his ship. He attempts to follow but is thwarted when the bounty hunter notices and opens fire. Luke narrowly escapes and runs down farther into the corridor. He finally meets up with Leia, Chewie, and Lando, who have been captured by stormtroopers. Luke tries to ambush the group of Imperials, but is unsuccessful. Leia yells at him and tells him that "it's a trap!" Luke runs after his captured friends, hoping to save them, but wanders into the carbon-freezing chamber. There, he meets with Vader and the two fight in an epic lightsaber duel, where Luke's undeveloped Jedi skills are no match for Vader's experience.
The Imperials (escorting the Rebel prisoners out of Bespin) are overpowered by Cloud City security, setting Lando and company free. Chewbacca turns against Lando for betraying Han and chokes him, but he manages to tell the Wookiee there's still a chance to rescue Han at the East Platform. C-3PO is reunited with his companion R2-D2. Lando and company arrive too late as Fett's ship takes off, then engage in a fierce battle with stormtroopers.
Luke and Vader continue their lightsaber battle in the bowels of Cloud City, just nearly freezing Luke in the carbon freezing chamber. Vader uses the Dark Side of the Force against Luke by using whatever equipment is at hand, eventually thrusting Luke through a window and landing on one of the emergency platforms.
As the gunfight continues, Lando orders an evacuation of Cloud City, then the company manages to find their last hope of escape...the Millennium Falcon.
In the final phase of the lightsaber duel, Vader manages to cut off Luke's right hand, which then falls (along with the lightsaber which the hand grasped) into an abyss. In what has become one of the most memorable scenes in cinema history, Vader reveals to Luke the truth about his father:
- Darth Vader: "Obi-Wan never told you what happened to your father."
- Luke Skywalker: "He told me enough! He told me you killed him!"
- Darth Vader: "No, I am your father."
- ―Vader and Luke, on Cloud City[src]
A horrified Luke screams in denial. Vader attempts to persuade Luke to join him and embrace the Dark Side to defeat the Emperor. However, Luke chooses suicide over being corrupted and throws himself down a deep shaft.
"No. I am your father."
Luke is sucked into an air vent, exits the underbelly of the city and catches an antenna beneath Cloud City. Facing clear death, Luke calls out to Ben Kenobi in vain (Kenobi had warned Luke that he would not be able to help Luke once he faced Vader). Then, he calls out to the only other one who could help... Leia.
Leia mysteriously senses Luke's telepathic distress signal. The Falcon turns around and comes back to Cloud City. Using an escape hatch, Lando manages to catch Luke and rescue him before the wounded Jedi falls helplessly to the planet as TIEs race toward them. The Falcon finally leaves Bespin's gravitational field and is about to escape into hyperspace when the hyperdrive system again fails. Vader asks for confirmation that the Millennium Falcon's hyperdrive system was deactivated to prevent their escape, then orders weapons be set to stun.
The Rebels regroup and plan to rescue Han.
As the Imperials pursue the Falcon, the injured Luke telepathically hears the voice of Vader calling to him. He answers, "Father...", while Vader telepathically calls, "Son, come with me". Luke senses it is Vader, then cries, "Ben, why didn't you tell me?"
C-3PO commands that R2 finish reconstructing him after his ordeal in Cloud City. However, with quick ingenuity, R2 manages to re-activate the Falcon's hyperdrive system just in time for the ship to flee to hyperspace. Vader is disappointed and retreats to his secret quarters in his Star Destroyer, ignoring Piett's failure.
The film ends on a EF76 Nebulon-B escort frigate at the Rebel fleet's rendezvous point, where Luke under the care of 2-1B again which includes the implantation of a prosthetic hand. Lando and Chewbacca begin their parts of a most dangerous mission...rescuing Han. Lando promises to Leia they'll bring her back the man she loves. Luke, Leia, and the droids look on as the Falcon departs for unknown territories. Their own fates and futures are now uncertain. But the time will come when all will be resolved...it is only a question of how long.
Credits
Cast
- Luke Skywalker .... Mark Hamill
- Han Solo .... Harrison Ford
- Princess Leia .... Carrie Fisher
- Lando Calrissian .... Billy Dee Williams
- C-3PO .... Anthony Daniels
- Darth Vader .... David Prowse
- Voice of Darth Vader .... James Earl Jones
- Chewbacca .... Peter Mayhew
- R2-D2 .... Kenny Baker
- Performing Yoda .... Frank Oz
- Ben (Obi-Wan) Kenobi .... Alec Guinness
- Boba Fett .... Jeremy Bulloch
- Voice of Boba Fett .... Jason Wingreen, Temuera Morrison (DVD Release only)
- Lobot .... John Hollis
- Chief Ugnaught .... Jack Purvis
- Snow Creature .... Des Webb, Howie Weed (1997 re-release only)
- Performing Assistant for Yoda .... Kathryn Mullen
- Voice of Emperor Sheev Palpatine .... Clive Revill, Ian McDiarmid (DVD Release only)
- Emperor Sheev Palpatine .... Elaine Baker, Ian McDiarmid (DVD Release only)
- Admiral Piett .... Kenneth Colley
- General Veers .... Julian Glover
- Fleet Admiral Kendel Ozzel .... Michael Sheard
- Captain Needa .... Michael Culver
- Imperial Officers ....
- Captain Lennox .... John Dicks
- Captain Bewil .... Milton Johns
- Commander Nemet .... Mark Jones
- Lieutenant Cabbel .... Oliver Maguire
- General Rieekan .... Bruce Boa
- Zev (Rogue 2) .... Christopher Malcolm
- Wedge (Rogue 3) .... Denis Lawson
- Hobbie (Rogue 4) .... Richard Oldfield
- Dak (Luke's Gunner) .... John Morton
- Janson (Wedge's Gunner) .... Ian Liston
- Major Derlin .... John Ratzenberger
- Deck Lieutenant .... Jack McKenzie
- Head Controller .... Jerry Harte
- Rebel Officers ....
- Tamizander Rey .... Norman Chancer
- Jeroen Webb .... Norwich Duff
- Tigran Jamiro .... Ray Hassett
- Toryn Farr .... Brigitte Kahn
- Wyron Serper .... Burnell Tucker
- Dengar .... Morris Bush
- Officer M'kae .... Mark Capri
- Merril and Bossk .... Alan Harris
- General McQuarrie .... Ralph McQuarrie
- Stormtrooper/Imperial Comms Officer/Rebel Soldier .... Ralph Morse
- Zuckuss and Wiorkettle .... Cathy Munro
- Darth Vader .... C. Andrew Nelson (Special Edition)
- 4-LOM, K-3PO and Stormtrooper .... Chris Parsons
- Edian .... Quentin Pierre
- Jess Allashane, Echo Base Trooper, Jerrol Blendin, and Cloud City Trooper .... Treat Williams
- Rebel Technician .... Stephanie English
Crew[2]

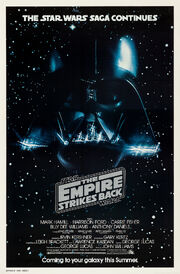
Poster with Vader's helmet
| Credit | Name |
|---|---|
| Directed By | Irvin Kershner |
| Produced By | Gary Kurtz |
| Screenplay By | Leigh Brackett Lawrence Kasdan |
| Story By | George Lucas |
| Executive Producer | George Lucas |
| Production Designer | Norman Reynolds |
| Director Of Photography | Peter Suschitzky B.S.C. |
| Edited By | Paul Hirsch A.C.E. |
| Special Visual Effects | Brian Johnson Richard Edlund |
| Music By | John Williams |
| Performed By | The London Symphony Orchestra |
| Original Music Copyright 1980 Fox Fanfare Music Inc. / Bantha Music | |
| Associate Producers | Robert Watts James Bloom |
| Design Consultant And Conceptual Artist | Ralph McQuarrie |
| Art Directors | Leslie Dilley Harry Lange Alan Tomkins |
| Set Decorator | Michael Ford |
| Construction Manager | Bill Welch |
| Assistant Art Directors | Michael Lamont Fred Hole |
| Sketch Artist | Ivor Beddoes |
| Draftsmen | Ted Ambrose Michael Boone Reg Bream Steve Cooper Richard Dawking |
| Modellers | Fred Evans Allan Moss Jan Stevens |
| Chief Buyer | Edward Rodrigo |
| Construction Storeman | Dave Middleton |
| Operating Cameramen | Kelvin Pike David Garfath |
| Assistant Cameramen | Maurice Arnold Chris Tanner |
| Second Assistant Cameramen | Peter Robinson Madelyn Most |
| Dolly Grips | Dennis Lewis Brian Osborn |
| Matte Photography Consultant | Stanley Sayer, B.S.C. |
| Gaffer | Laurie Shane |
| Rigging Gaffer | John Clark |
| Lighting Equipment And Crew From Lee Electric | |
| Make-Up And Special Creature Design | Stuart Freeborn |
| Chief Make-Up Artist | Graham Freeborn |
| Make-Up Artists | Kay Freeborn Nick Maley |
| Chief Hairdresser | Barbara Ritchie |
| Yoda Fabrication | Wendy Midener |
| Costume Designer | John Mollo |
| Wardrobe Supervisor | Tiny Nicholls |
| Wardrobe Mistress | Eileen Sullivan |
| Property Master | Frank Bruton |
| Property Supervisor | Charles Torbett |
| Property Dressing Supervisor | Joe Dipple |
| Head Carpenter | George Gunning |
| Head Plasterer | Bert Rodwell |
| Head Rigger | Red Lawrence |
| Sound Design And Supervising Sound Effects Editor | Ben Burtt |
| Sound Editors | Richard Burrow Teresa Eckton Bonnie Koehler |
| Production Sound | Peter Sutton |
| Sound Boom Operator | Don Wortham |
| Production Maintenance | Ron Butcher |
| Re-Recording | Bill Varney Steve Maslow Gregg Landaker |
| Music Recording | Eric Tomlinson |
| Orchestrations | Herbert W. Spencer |
| Supervising Music Editor | Kenneth Wannberg |
| Assistant Film Editors | Duwayne Dunham Phil Sanderson Barbara Ellis Steve Starkey Paul Tomlinson |
| Dialogue Editors | Curt Schulkey Leslie Shatz Joanne D'antonio |
| Optical Coordinator | Roberta Friedman |
| Assistant Sound Editors | John Benson Joanne Cappuccilli Ken Fischer Craig Jaeger Nancy Jencks Laurel Ladevich |
| Foley Editors | Robert Rutledge Scott Hecker |
| Foley Assistants | Edward M. Steidele John Roesh |
| Sound Effects Recording | Randy Thom |
| Recording Technicians | Gary Summers Howie Kevin O'Connell |
| Production Supervisor | Bruce Sharman |
| Assistant Production Manager | Patricia Carr |
| Production Coordinator | Miki Herman |
| First Assistant Director | David Tomblin |
| Second Assistant Directors | Steve Lanning Roy Button |
| Location Manager | Philip Kohler |
| Continuity | Kay Rawlings Pamela Mann |
| Casting | Irene Lamb Terry Liebling Bob Edmiston |
| Assistant To Producer | Bunny Alsup |
| Assistant To Director | Debbie Shaw |
| Assistant To Executive Producer | Jane Bay |
| Production Assistants | Barbara Harley Nick Laws Charles Wessler |
| Stunt Coordinator | Peter Diamond |
| Stunt Doubles | Bob Anderson Colin Skeaping |
| Production Accountant | Ron Phipps |
| Assistant Accountant | Michael Larkins |
| Set Cost-Controller | Ken Gordon |
| Location Accountant | Ron Cook |
| Still Photographer | George Whitear |
| Unit Publicist | Alan Arnold |
| Assistant Publicist | Kristen Wing |
| Studio Second Unit | |
| Directors | Harley Cokliss John Barry |
| Director Of Photography | Chris Menges |
| Assistant Director | Dominic Fulford |
| Second Assistant Director | Andrew Montgomery |
| Location Second Unit | |
| Director | Peter Macdonald |
| Director Of Photography | Geoff Glover |
| Operating Cameraman | Bob Smith |
| Assistant Cameramen | John Campbell Mike Brewster |
| Second Assistant Cameramen | John Keen Greg Dupre |
| Dolly Grip | Frank Batt |
| Production Manager | Svein Johansen |
| Assistant Directors | Bill Westley Ola Solum |
| Production And Mechanical Effects Unit | |
| Mechanical Effects Supervision | Nick Allder |
| Location Unit Supervisor | Allan Bryce |
| Senior Effects Technician | Neil Swan Dave Watkins |
| Robot Fabrication And Supervision | Andrew Kelly Ron Hone |
| Effects Technicians | Phil Knowles Barry Whitrod Martin Gant Brian Eke Guy Hudson Dennis Lowe |
| Effects Engineering | Roger Nichols Steve Lloyd |
| Electrical Engineer | John Hatt |
| Electronics Consultant | Rob Dickinson |
| Model Construction | John Pakenham |
| Effects Assistants | Alan Poole Digby Milner Robert McLaren |
| Effects Secretary | Gill Case |
| Minature And Optical Effects Unit | |
| Effects DirectorOf Photography | Dennis Muren |
| Effects Cameramen | Ken Ralston Jim Veilleux |
| Camera Operators | Don Dow Bill Neil |
| Assistant Cameramen | Selwyn Eddy Jody Westheimer Rick Fighter Clint Palmer Michael McAlister Paul Huston Richard Fish Chris Anderson |
| Optical Photography Supervisor | Bruce Nicholson |
| Optical Printer Operators | David Berry Kenneth Smith Donald Clark |
| Optical Line-Up | Warren Franklin Mark Vargo Peter Amundson Loring Doyle Thomas Rosseter Tam Pillsbury James Lim |
| Optical Coordinator | Laurie Vermont |
| Laboratory Technicians | Tim Geideman Duncan Myers Ed Jones |
| Art Director-Visual Effects | Joe Johnston |
| Assistant Art Director | Nilo Rodis-Jamero |
| Stop Motion Animation | Jon Berg Phil Tippett |
| Stop Motion Technicians | Tom St. Amand Doug Beswick |
| Matte Painting Supervisor | Harrison Ellenshaw |
| Matte Artists | Ralph McQuarrie Michael Pangrazio |
| Matte Photography | Neil Krepela |
| Additional Matte Photography | Michael Lawler |
| Matte Photography Assistants | Craig Barron Robert Elswit |
| Chief Model Maker | Lorne Peterson |
| Modelshop Foreman | Steve Gawley |
| Model Makers | Paul Huston Tom Rudduck Michael Fulmer Samuel Zolltheis Charles Bailey Ease Owyeung Scott Marshall Marc Thorpe Wesley Seeds Dave Carson Rob Gemmel Pat McClung |
| Animation And Rotoscope Supervisor | Peter Kuran |
| Animators | Samuel Comstock Garry Waller John Van Vliet Rick Taylor Kim Knowlton Chris Casady Nina Saxon Diana Wilson |
| Visual Effects Editorial Supervisor | Conrad Buff |
| Effects Editor | Michael Kelly |
| Assistant Effects Editors | Arthur Repola Howard Stein |
| Apprentice Editor | Jon Thaler |
| Production Administrator | Dick Gallegly |
| Production Secretary | Patricia Blau |
| Production Associate | Thomas Brown |
| Production Accountant | Ray Scalice |
| Assistant Accountant | Glenn Phillips Pam Traas Laura Crockett |
| Production Assistant | Jenny Oznowicz |
| Transportation | Robert Martin |
| Still Photographer | Terry Chostner |
| Lab Assistant | Roberto McGrath |
| Electronics Systems Designer | Jerry Jeffress |
| Systems Programming | Kris Brown |
| Electronic Engineers | Lhary Meyer Mike Mackenzie Gary Leo |
| Special Project Coordinator | Stuart Ziff |
| Equipment Engineering Supervisor | Gene Whiteman |
| Design Engineer | Mike Bolles |
| Machinists | Udo Pampel Greg Beaumonte |
| Draftsman | Ed Tennler |
| Special Projects | Gary Platek |
| Supervising Stage Technician | T.E. Moehnke |
| Stage Technicians | William Beck Bobby Finley Leo Loverro Edward Hirsh Dick Dova Ed Breed |
| Miniature Pyrotechnics | Joseph Viskocil Dave Pier Thaine Morris |
| Optical Printer Component Manufacturer | George Randle Co. |
| Camera And Movement Design | Jim Beaumonte |
| Special Optics Designer | David Grafton |
| Special Optics Fabrication | J.L. Wood Optical Systems |
| Optical Printer Component Engineering | Fries Engineering |
| High Speed Camera Movements | Mitchell Camera Corp. |
| Ultra High Speed Camera | Bruce Hill Productions |
| Color Timer | Ed Lemke |
| Negative Cutting | Robert Hart Darrell Hixson |
| Dolby Consultant | Don Digirolamo |
| Additional Optical Effects | Van Der Veer Photo Effects Modern Film Effects Ray Mercer & Company Westheimer Company Lookout Mountain Films |
Special Edition Crew
| Credit | Name |
|---|---|
| Producer | Rick McCallum |
| Editor | T.M. Christopher |
| Sound Designer | Ben Burtt |
| Re-Recording Mixer | Gary Summers |
| First Assistant Editor | Samuel Hinckley |
| Assistant Editor | Robert Marty |
| Assistant Avid Editors | Mike Jackson Robin Lee |
| Sound Editor | Teresa Eckton |
| Assistant Sound Editor | Lisa Storer |
| Re-Recordist | Ronald G. Roumas |
| Digital Mix Technician | Gary A. Rizzo |
| Archivist | Tim Fox |
| Optical Supervisors | Phillip Feiner Chris Bushman |
| Film Restoration Supervisor | Pete Comandini |
| Color Timer | Robert J. Raring |
| Negative Continuity | Ray Sabo |
| Negative Cutter | Bob Hart |
| Special Edition Digital Remastering Provided By Skywalker Sound A Lucas Digital Ltd. Company | |
| Film Restoration Consultant | Leon Briggs |
| Optical Restoration | Pacific Title |
| Film Restoration By | Ycm Laboratories |
| Industrial Light And Magic | |
| Visual Effects Supervisor | Dave Carson |
| Visual Effects Producer | Tom Kennedy |
| Computer Graphics Supervisor | Tom Hutchinson |
| Visual Effects Art Director | George Hull |
| Visual Effects Editor | Michael McGovern |
| Color Timing Supervisor | Bruce Vecchitto |
| Visual Effects Coordinator | Lisa Todd |
| Digital Effects Artists | Don Butler Michael Conte Howard Gersh Marshall Krasser Tia Marshall Stuart Maschwitz Julie Neary Ken Nielsen Eddie Pasquarello Ricardo Ramos Tom Rosseter Lawrence Tan Paul Theren Hans Uhlig Li-Hsein Wei Ron Woodall |
| Digital Matte Artists | Ronn Brown Eric Chauvin Brian Flora William Mather |
| 3d Matchmove Artist | James Hagedorn |
| Digital Paint & Roto Artists | Lisa Drostova Heidi Zabit |
| Chief Creature Maker | Howie Weed |
| Model & Creature Makers | Carol Bauman Don Bies Giovanni Donovan Wendy Morton Anne Polland Mark Siegel Steven Walton |
| Sabre Group Supervisor | Daniel McNamara |
| Sabre Artists | Rita Zimmerman Chad Taylor Mary McCulloch Grant Guenin Caitlin Content |
| Software Research And Development | David Benson Jim Hourihan Zoran Kacic-Alesic Florian Kainz Jeff Yost |
| Digital Scanning Supervisor | Joshua Pines |
| Digital Scanning Operators | Randall Bean Michael Ellis Earl Beyer |
| Negative Supervisor | Doug Jones |
| Negative Line-Up | Andrea Biklian Tim Geideman |
| Projectionist | Tim Greenwood |
| Digital Plate Restoration | Melissa Monterrosa Mike Van Eps Wendy Hendrickson |
| Assistant Visual Effects Art Director | Alex Laurant |
| Assistant Visual Effects Editor | John Bartle |
| Video Editor | Angela Leaper |
| Animatic Artist | Jonathan Rothbart |
| Digital Effects Technical Assistants | Okan Ataman Peter Chesloff Joshua Levine Dawn Matheson Daniel Shumaker |
| Digital Effects Resource Assistant | Daniel Brimer |
| Visual Effects Production Staff | Julie Creighton Joshua Marks |
| Video Assistants | Dawn Martin Wendy Bell |
| Production Engineering | Ken Beyer Ken Corvino Gary Meyer |
| Aerial Camera System By Wesscam Camera Systems (Europe) | |
| Aerial Cameraman | Ron Goodman |
| Assistant | Margaret Herron |
| Helicopter Supplied By Dollar Air Services Limited | |
| Pilot | Mark Wolfe |
| Cloud Plates Photographed With Astrovision(c) By Continental Camera Systems Inc. | |
| Snow Vehicles Supplied By Aktiv Fischer | |
| R2 Bodies Fabricated By White Horse Toy Company | |
| Special Assistance From Giltspur Engineering And Compair | |
| Photographed On The Hardengerjekulan Glacier, Finse, Norway And At Emi - Elstree Studios, Borehamwood, England | |
| Music Recorded At Anvil Studios, Denham, England | |
| Re-Recording At Samuel Goldwyn Studios, Los Angeles, California | |
| Special Visual Effects Produced At Industrial Light And Magic, Marin County, California | |
Appearances
| Characters | Organisms | Droid models | Events | Locations |
| Organizations and titles | Sentient species | Vehicles and vessels | Weapons and technology | Miscellanea |
Characters
Canon characters
|
|
Legends characters
Organisms
Canon organisms
|
Legends organisms
Droid models
Canon droids
|
Legends droids
Events
Canon events
|
Legends events
|
Locations
Canon locations
|
|
Legends locations
|
Organizations and titles
Canon organizations and titles
|
|
Legends organizations and titles
|
Sentient species
Canon species
|
Legends species
Vehicles and vessels
Canon vehicles
|
Legends vehicles
Weapons and technology
Canon technology
|
|
Legends technology
Miscellanea
Canon miscellanea
|
|
|
Legends miscellanea
|
Behind the scenes
Pre-production
Lucas hired screenwriter Leigh Brackett to write a screenplay based on his story treatment. Brackett finished the first draft on February 23, 1978 but she died soon afterwards. According to Lucas, he didn't like the direction in which her screenplay went. Without a writer to fix it, he was forced to write the second draft himself throughout March.[3] Major plot changes were made compared to the first draft and the storyline that is in the film was formed in this draft. One of the most notable changes was making Vader Luke's father[3]. When Lawrence Kasdan finished writing the screenplay for Raiders of the Lost Ark he was hired to rewrite and improve Lucas' draft. He wrote a few more drafts before the script conference was held in November between George Lucas, Lawrence Kasdan, Irvin Kershner and Gary Kurtz. After some additional input, the shooting script was finally formed. Minor changes to dialogues came from Kershner and actors throughout the filming and were mostly approved by Lucas.[3]
Majority of the concept art and designs for the film was done by Ralph McQuarrie, Joe Johnston and Nilo Rodis-Jamero based on Lucas' ideas[3]. The Yoda puppet was designed by British make-up artist Stuart Freeborn. He said he based Yoda's face on his own face and added some of Albert Einstein's facial features to it.[4]
Filming
Filming lasted from March 5 until September 24, 1979. Some of the Hoth sequence was filmed in Norway, in the area from the railway station Finse to the Hardangerjøkelen glacier. The scenes on Dagobah, Cloud City and inside the Hoth Echo Base were shot at Elstree Studios, England.
During the production, the film went seriously over-budget and over-schedule. When the film budget increased for $10 million the bank wanted to pull the loan. To secure the additional money required to complete the film, Lucas was forced to approach 20th Century Fox to negotiate a deal. The studio received more profit from the film while in exchange it guaranteed the loan. Despite this Lucas managed to retain the sequel and merchandising rights.[4]
Major musical themes
- Star Wars Main Title
- The Imperial March (Darth Vader's Theme)
- Han Solo and the Princess
- Yoda's Theme
Critical reception
The Empire Strikes Back initially received mixed reviews. Many critics had problems with the story, but at the same time said the film was a technical achievement. Critics also had various reactions to changes introduced in re-releases of this film.
According to the actors, Irvin Kershner would encourage group discussions and improvisations from the actors, and would do many takes of each scene, in contrast to Lucas, who would always stick to the script, usually do about three takes, and offer little direction to the actors.
It is believed to be the most morally ambiguous and darkest of the original trilogy[source?] and it is also the only one of the six Star Wars films in which no major character dies.
The film was selected in 2010 to be preserved by the Library of Congress as part of its National Film Registry.[5][6]
At theaters in Australia, the United Kingdom, and Scandinavia, the short film Black Angel was shown before The Empire Strikes Back's theatrical release. Black Angel was the directorial debut of Roger Christian, the art director for A New Hope. The film was shot in Scotland, Autumn 1979, for £25,000, a gift to Christian from George Lucas for his work on Star Wars.[7][8] Black Angel was officially re-released on YouTube on May 12, 2015.[9][10][11]
Re-releases
")
")
")
")
2010 marked the film's 30th Anniversary
Along with the other two films of his original trilogy, George Lucas issued a Special Edition of The Empire Strikes Back in 1997, making a number of changes and additions, including replacing a piece of music from the closing scene.
On September 21, 2004 the three original movies were finally released on DVD. There have been a few further minor changes to the film on this release—such as sound effects and improvements to the visual quality of the film. One highly noticeable change involving visually quality improvement is that the odd pink glow was removed from the Cloud City entrance scene, where the Cloud Car was replaced with a Tibanna refinery in the 1997 theatrical version.
In addition, the scene in which Darth Vader speaks with the Emperor was altered for the DVD release. Clive Revill, who performed Palpatine's voice, and Elaine Baker, who portrayed Palpatine, were both replaced with Ian McDiarmid, who would eventually be cast for the same role in Return of the Jedi, and all three prequels. Originaly, a woman was cast as Palpatine's profile with chimpanzee eyes superimposed over her own, with a male's voice dubbed in later. However, Clive Revill's name still appeared in the movie's credits as the voice actor for Palpatine. McDiarmid re-recorded the dialogue with James Earl Jones and they both added more lines for this scene.
Another addition was Temuera Morrison providing the voice for Boba Fett, further establishing the fact that Boba is indeed a clone of Jango Fett. It is unknown in this film if Boba is the last remaining clone of Jango.
The trilogy was re-released on separate two-disc Limited Edition DVD sets from September 12, 2006 to December 31, 2006; the original versions of the films were added as bonus material. Controversy surrounded the release because the unaltered versions were from the 1993 non-anamorphic Laserdisc masters, and were not retransferred with modern video standards.[12]
The Empire Strikes Back was re-released for a Blu-ray format re-release in September of 2011.[13]
Digital release
On April 7, 2015, the Walt Disney Studios, 20th Century Fox, and Lucasfilm jointly announced the digital releases of the six released Star Wars films. As Lucasfilm had retained digital distribution rights to Episodes I thru III and V thru VI, Walt Disney Studios Home Entertainment released The Empire Strikes Back for digital download on April 10, 2015.[14]
Cut content
The Death of General Veers
General Veers is about to destroy the shield generators when Hobbie, a Rebel pilot, flies his damaged snowspeeder toward Veers's walker. One of Veers's men says, "Look out! He's going to..." Hobbie crashes his fighter into the cockpit of Veers's AT-AT Walker, which is blown up, killing both Hobbie and Veers. (The Expanded Universe shows both of them alive after the Battle of Hoth.) This scene was likely cut because Veers succeeds in destroying the shield generators, and the filmmakers would have found it difficult to alter the scene so it takes place after Veers destroys them.
Wampa attack
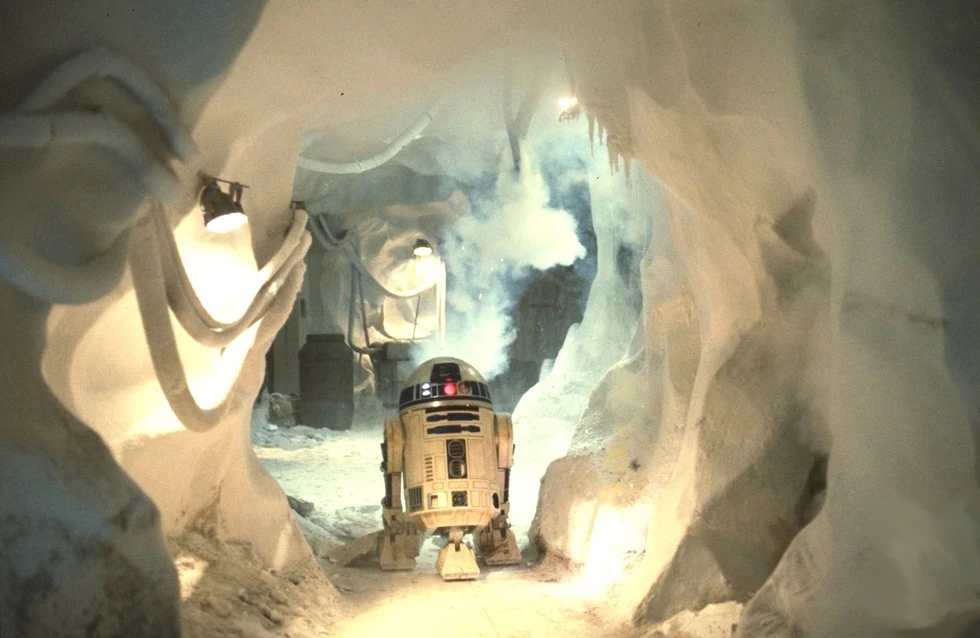

R2-D2 escapes a wampa
According to the fourth version of the script for The Empire Strikes Back, there is some extra dialogue concerning the wampas and a scene involving R2 getting chased down a hallway by one while the Rebels blast it. One of the Rebels calls in the report saying, "We got it, sir, but there may be more," (talking to General Rieekan). Alarms are buzzing and Leia inquires if the creature has been examined yet. The general tells her they are working on it and then they are alerted to a "visitor"—the Imperial probot. Since it is revealed to be metallic, Leia remarks, "Then it couldn't be one of those creatures"—referring to the wampas, of course.
Wampas infiltrate Echo Base
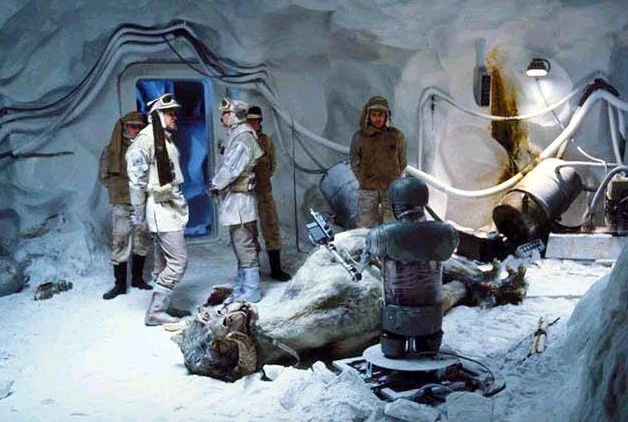
In the scene where Han Solo is about to go after Luke Skywalker on a tauntaun, a dead tauntaun is seen on the floor being examined by 2-1B, the medical droid. On the wall is what appears to be some blood, presumably from the dead animal. In the fourth draft of the script, one of the rebels says to his deck officer, "...I can't imagine, sir. Their necks are broken." (The script refers to three dead creatures, not one.) The wampas have already broken into the base at this point and have obviously attacked some tauntauns. They break in once around the time of Han and Leia's argument in the hallway (see the picture below from the comic adaptation) and again when C-3PO and R2-D2 are walking towards the hangar and commenting about the temperature in Leia's chamber. Later, when Han is wondering where Luke is, he comes across the Rebels examining the dead tauntaun. They are wondering what happened to this creature as they have no idea yet that wampas have infiltrated the base. It can be noted however, that this senario is present in the instant action mode of Star Wars: Battlefront II.
The Wampa Pen

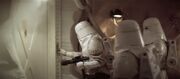
The pursuing snowtroopers enter the wampa pen
Out of all the cut scenes featuring wampas, this one is the most well-known, perhaps because this scene has left the most evidence behind. Sometime during the Hoth scenes, it's discovered that R2-D2's beeping noises attract the wampas—just like in the famous "Pied Piper" fairy tale. R2-D2 leads the wampas into a large room and the Rebels then place a red and yellow warning sign on the door so Rebels won't wander inside unaware and get eaten. This scene with R2-D2 was allegedly filmed, but never made it into the final cut. Later on, while on their way to the medical center to see Luke, R2-D2 and C-3PO pass by the wampa pen and discuss the creatures briefly.
Jumping ahead to the Rebel heroes' exodus from Echo Base during the Battle of Hoth, Han, Leia, and C-3PO are scurrying to get Leia to her transport. On the way out, they pass a door with a familiar yellow sign with red lettering. Han gives the door a quick look and almost stops but continues on past it after recognizing the warning (the quick shot is in the finished film, it appears directly after General Veers destroys the power generators). What wasn't included in the film was C-3PO (who is running behind Han and Leia trying to keep up) trudging up to the door after them. He stops and tears off the yellow warning sign (C-3PO is seen tearing off the sign on the "bonus features" DVD of the Trilogy box DVD set. The moment is briefly seen in the trailer for Episode V). He then proceeds to catch up with Han and Leia as they make their way to the Millennium Falcon.
After the snowtroopers burst into the base, they come across the door, left with only a small piece of the original warning sign. They open the door, only to be attacked by the already annoyed wampas inside.
Luke: Gunner


Luke Skywalker mans a heavy artillery weapon against the attacking wampas.
There have always been rumors and images that state there was originally a scene from Empire inside Echo Base where Luke mans a gun and blasts a few wampas. The only thing that really makes most fans believe this scene was actually shot is the following quote from Jon Knoles in the Star Wars Insider 33 (page 59) talking about the game, Shadows of the Empire for Nintendo 64:
"We knew, for instance, of the scene where a wampa actually broke through into Echo Base and mauled a tauntaun (and possibly some Rebel troops) and a scene where Luke actually took over an auto-laser cannon and blasts a wampa or two. The wampa filmed in this shot looked absolutely hilarious with a big fluffy face and metallic round eyeballs. We saw the picture in a Kodak shoebox Photo CD that Lucasfilm Ltd. provided us with some time ago."
Novelization
A novelization of the film was written by Donald F. Glut and was published on April 12, 1980.
One strange inaccuracy in the book is that several times it mentions Yoda as having blue skin instead of the well-known green of the movies. The Marvel Comics version of Yoda also depicted the character with blue skin. Possibly both Marvel and Glut were working with versions of the script that were later changed.
The novel also refers to Zuckuss as a Human bounty hunter when in fact he is a Gand. Furthermore, the novel omits 4-LOM from the lineup of bounty hunters. On top of that, the story includes a much expanded account of Luke's training by Yoda, as well as other inserted scenes. Also, Darth Vader's lightsaber is mentioned during the cave scene on Dagobah to be blue rather than the usual red.
There is a major discrepancy between the novel and the Expanded Universe, as the book shows Rebel pilot Hobbie, Luke's wingman during the battle, flying his snowspeeder into the head of General Veers's AT-AT walker on Hoth in a suicide run after he had been wounded. However, Hobbie is seen alive and well in the books and comics set after Hoth. In the Expanded Universe, Veers is stated to have survived as well.
Radio drama
A radio drama of the film was written by Brian Daley and produced for and broadcast on the National Public Radio in 1983.
Comics
- The film was adapted into comics form by Marvel Comics as part of their ongoing Star Wars series. Released in six parts (issues 39 to 44), the adaptation was scripted by Archie Goodwin and illustrated by Al Williamson.
- A manga adaptation illustrated by Toshiki Kudo was released in Japan in 1998 and in the United States in 1999.
Pinball
In November of 1980, Hankin, launched a pinball based on this movie, titled The Empire Strikes Back.
Collectibles
- In 1980, Kenner had launch a toyline based on Episode V.
- In 2007, Hasbro released a series of collectible tins in celebration of Star Wars 30th anniversary. It contained four figures in vintage packaging. The four figures included were a Snowtrooper, Luke Skywalker, Han Solo, and Chewbacca. It was tin number five of six.
Bibliography
 "Star Wars Publications Timeline" — Star Wars Insider 23
- "[[]]" — Star Wars Insider 47 (marks 20th anniversary of film; details deleted scenes)
- The Secrets of Star Wars: Shadows of the Empire
Notes and references
- ↑ Leland Chee (@HolocronKeeper) on Twitter: "0 10 10-13 13 27 32 35 36" (backup link (HolocronKeeper/status/495972415458250752) not verified!)—The tweet in question refers to the number of in-universe years between the canon films and television shows. Using simple math, it can be deduced when The Empire Strikes Back takes place on the timeline.
- ↑ Star Wars: Episode V The Empire Strikes Back on StarWars.com (content now obsolete; backup link (movies/episode-v/) not verified!)
- ↑ 3.0 3.1 3.2 3.3 The Making of The Empire Strikes Back
- ↑ 4.0 4.1 Empire of Dreams
- ↑ 'Empire Strikes Back' among 25 film registry picks on www.google.com (backup link not verified!)
- ↑ 'Empire Strikes Back,' 'Airplane!' Among 25 Movies Named to National Film Registry on www.hollywoodreporter.com (backup link not verified!)
- ↑ Exclusive interview: The worlds of Roger Christian on Shadowlocked (March 9, 2010) (backup link not verified!)
- ↑ Once-lost Star Wars-related short to screen for the first time in 33 years on Ars Technica (September 10, 2013) (backup link not verified!)
- ↑ [https:// www.youtube.com/watch?v=5L8pHKP-vv4 Black Angel (1980 short film)] on YouTube.com (May 12, 2015) (www.youtube.com/watch?v=5L8pHKP-vv4 backup link not verified!)
- ↑ [http:// jedinews.co.uk/news/news.aspx?newsID=21835 Black Angel Is Back And Available On YouTube For A Limited Time Only] on JediNews.co.uk (May 12, 2015) (jedinews.co.uk/news/news.aspx?newsID=21835 backup link not verified!)
- ↑ [http:// www.blackangelmovie.com/ BlackAngelMovie.com] on Black Angel Movie (May 12, 2015) (www.blackangelmovie.com/ backup link not verified!)
- ↑ Anamorphic Star Wars and Other Musings by Ian Dawe on Mindjack Film (backup link not verified!)
- ↑ Bring the Complete Collection Home: Star Wars: The Complete Saga on Blu-Ray on www.starwars.com (backup link not verified!)
- ↑ The Star Wars Digital Movie Collection Coming April 10 on StarWars.com (backup link)
See also
- Star Wars Episode V: The Empire Strikes Back novelization
- Star Wars The Empire Strikes Back Mobile (mobile game)
External links

- Star Wars Episode V: The Empire Strikes Back Official Site on StarWars.com (backup link)
- The Star Wars Digital Movie Collection Coming April 10 on StarWars.com (backup link)
- Lucasfilm - New Version Intro (2015) on the official Star Wars YouTube channel (backup link (AhO_YjAJq_w) not verified!)
- Star Wars Episode V: The Empire Strikes Back on the official Star Wars YouTube channel (backup link (Ooh3k8cJDBg) not verified!)
- Star Wars Episode V: The Empire Strikes Back - Trailer on the official Star Wars YouTube channel (backup link)
- Star Wars Episode V: The Empire Strikes Back - Digital Movie Collection Trailer on the official Star Wars YouTube channel (backup link)
- Star Wars Episode V: The Empire Strikes Back at Lucasfilm
- Official site on StarWars.com (content now obsolete; backup link (movies/episode-v/) not verified!)
- Template:Imdb title
- Star Wars Episode V: The Empire Strikes Back on Wikipedia
- Episode V Script
- The Star Wars Actors Database
Template:Films