Cade Calrayn (talk | contribs) mNo edit summary |
|||
| (7 intermediate revisions by 5 users not shown) | |||
| Line 91: | Line 91: | ||
While not expected to engage enemy fighters in dogfights due to their slower speed and agility, TIE Bombers could target them from a standoff distance with their large magazines of concussion missiles. During the conflict at [[Mylok IV]], a squadron of [[Demetrius Zaarin]]'s bombers held off large numbers of [[Nharwaak]] and Rebel [[BTL Y-wing starfighter|Y-wing]]s, allowing the Imperials to aid the [[Habeen]] in evacuating their base. Due to a shortage of TIE Interceptors during the pacification of the [[Pakuuni system]], [[Maarek Stele]] thrust his bomber into the space superiority role against Rebel and pirates, once defending [[Mitth'raw'nuruodo|Thrawn]]'s craft from an attack while he visited the newly completed outpost [[NL-1]].<ref name="TF" /> Imperial commanders used bombers to counter Rebel [[B-wing starfighter]]s, with the TIES launching their missiles directly into their flightpaths.<ref name="EGW">''[[The Essential Guide to Warfare]]''</ref> |
While not expected to engage enemy fighters in dogfights due to their slower speed and agility, TIE Bombers could target them from a standoff distance with their large magazines of concussion missiles. During the conflict at [[Mylok IV]], a squadron of [[Demetrius Zaarin]]'s bombers held off large numbers of [[Nharwaak]] and Rebel [[BTL Y-wing starfighter|Y-wing]]s, allowing the Imperials to aid the [[Habeen]] in evacuating their base. Due to a shortage of TIE Interceptors during the pacification of the [[Pakuuni system]], [[Maarek Stele]] thrust his bomber into the space superiority role against Rebel and pirates, once defending [[Mitth'raw'nuruodo|Thrawn]]'s craft from an attack while he visited the newly completed outpost [[NL-1]].<ref name="TF" /> Imperial commanders used bombers to counter Rebel [[B-wing starfighter]]s, with the TIES launching their missiles directly into their flightpaths.<ref name="EGW">''[[The Essential Guide to Warfare]]''</ref> |
||
| + | |||
| + | [[File:SIEN01AB.jpg|thumb|Sienar Fleet Systens' advertisement for the TIE/sa Bomber.]] |
||
The TIE Bomber's lack of shields was crucially exposed during the [[Sepan Civil War]]. There, the [[Ripoblus]] conducted an attack on the [[Dimok]] [[Battle of Science Station Youst|Science Station Youst]] spearheaded by six [[Gamma-class ATR-6 assault transport|Assault Transports]]. The station's defending fighters, consisting of [[Z-95 Headhunter]]s and [[Delta-class JV-7 escort shuttle|''Delta''-class JV-7 escort shuttles]], quickly fell victim to the turrets of the ATR-6 that they were trying to attack. When Admiral [[Harkov]]'s forces entered the area to repel the Ripoblus, they deployed TIE Bomber to take out the ATR-6s from a safe distance with [[proton torpedo]]es. Imperial pilots discovered that a full-strength ATR-6 could survive even three torpedo hits, with several Bombers lost trying to finish off the injured ATR-6 with laser cannon fire. [[Maarek Stele]] opted wisely to replace his payload with [[proton rocket]]s, which required more careful aiming, but one of these devastating warheads was enough to quickly destroy an ATR-6. Near the end of the campaign, while covering the transfer of [[TIE/ad starfighter|TIE Avenger]]s, Stele distracted the gunners of the [[Dimok]] cruiser ''[[Ben Het]]'' so bombers could safely conduct their torpedo runs against it, resulting in its destruction.<ref name="TF" /> |
The TIE Bomber's lack of shields was crucially exposed during the [[Sepan Civil War]]. There, the [[Ripoblus]] conducted an attack on the [[Dimok]] [[Battle of Science Station Youst|Science Station Youst]] spearheaded by six [[Gamma-class ATR-6 assault transport|Assault Transports]]. The station's defending fighters, consisting of [[Z-95 Headhunter]]s and [[Delta-class JV-7 escort shuttle|''Delta''-class JV-7 escort shuttles]], quickly fell victim to the turrets of the ATR-6 that they were trying to attack. When Admiral [[Harkov]]'s forces entered the area to repel the Ripoblus, they deployed TIE Bomber to take out the ATR-6s from a safe distance with [[proton torpedo]]es. Imperial pilots discovered that a full-strength ATR-6 could survive even three torpedo hits, with several Bombers lost trying to finish off the injured ATR-6 with laser cannon fire. [[Maarek Stele]] opted wisely to replace his payload with [[proton rocket]]s, which required more careful aiming, but one of these devastating warheads was enough to quickly destroy an ATR-6. Near the end of the campaign, while covering the transfer of [[TIE/ad starfighter|TIE Avenger]]s, Stele distracted the gunners of the [[Dimok]] cruiser ''[[Ben Het]]'' so bombers could safely conduct their torpedo runs against it, resulting in its destruction.<ref name="TF" /> |
||
| Line 111: | Line 113: | ||
During the [[Evacuation of Yavin]], TIE bombers bombed the [[Great Temple (Yavin 4)|Great Temple]], although several were destroyed by traps planted by [[General]] [[Jan Dodonna]].<ref name="SW:GB" /> |
During the [[Evacuation of Yavin]], TIE bombers bombed the [[Great Temple (Yavin 4)|Great Temple]], although several were destroyed by traps planted by [[General]] [[Jan Dodonna]].<ref name="SW:GB" /> |
||
| − | Around six months after the Battle of Yavin, the Empire [[Ambush at Mos Eisley|dispatched]] TIE bombers to [[Luke Skywalker]]'s [[homeworld]], [[Tatooine]].<ref name="RS I guide" /> The six-ship detachment attacked [[Mos Eisley]] [[Spaceport]], but were eliminated by the Rebel's [[Rogue Squadron]]. A group on the planet [[Barkhesh]] attempted to interdict a [[Barkhesh Resistance]] [[convoy]], but were stopped by Rogue Squadron. A flight was also [[Search for the Nonnah|sent to bomb]] the crashed Rebel [[starship]] ''[[Nonnah]]'' but failed in their mission. A squadron was also sent to [[Corellia]] to [[Battle of Corellia ( |
+ | Around six months after the Battle of Yavin, the Empire [[Ambush at Mos Eisley|dispatched]] TIE bombers to [[Luke Skywalker]]'s [[homeworld]], [[Tatooine]].<ref name="RS I guide" /> The six-ship detachment attacked [[Mos Eisley]] [[Spaceport]], but were eliminated by the Rebel's [[Rogue Squadron]]. A group on the planet [[Barkhesh]] attempted to interdict a [[Barkhesh Resistance]] [[convoy]], but were stopped by Rogue Squadron. A flight was also [[Search for the Nonnah|sent to bomb]] the crashed Rebel [[starship]] ''[[Nonnah]]'' but failed in their mission. A squadron was also sent to [[Corellia]] to [[Battle of Corellia (1 ABY)|interdict]] the defection of [[Crix Madine]]. Although the craft destroyed the [[Coronet Capitol Tower]], they were unable to prevent the escape of Madine. TIE bombers were also stationed at the [[Weapons Research Facility]] on [[Fest]], and attempted to [[Escape from Fest|destroy]] a Rebel [[commando]] team which had absconded with [[All Terrain Personal Transport]]s, but were again stopped by Rogue Squadron. A squadron was subsequently assigned to [[Blockade on Chandrila|blockade]] Chandrila where they failed to stop an [[armored hovertrain]] escorted by Rogue Squadron. Later, a squadron led by [[Moff]] [[Kohl Seerdon]] [[Attack on Thyferra|attacked]] [[Thyferra]]'s [[bacta]] supplies, but were again intercepted by Rogue Squadron.<ref name="RS I">''[[Star Wars: Rogue Squadron]]''</ref> |
During [[Tycho Celchu]]'s [[Mission to Dantooine|defection]], TIE bombers attempted to interdict the pilot.<ref name="RS III">''[[Star Wars: Rogue Squadron III: Rebel Strike]]''</ref> |
During [[Tycho Celchu]]'s [[Mission to Dantooine|defection]], TIE bombers attempted to interdict the pilot.<ref name="RS III">''[[Star Wars: Rogue Squadron III: Rebel Strike]]''</ref> |
||
| Line 117: | Line 119: | ||
During the [[Battle of Hoth]], several TIE bomber squadrons attacked escaping Rebel transports trying to run the blockade, causing significant losses among them. Only the intervention of Rogue Squadron in holding off enough of the bombers allowed the greater part of the Rebels to escape.<ref name="RS II">''[[Star Wars: Rogue Squadron II: Rogue Leader]]''</ref><ref name="RS III" /> Shortly afterwards, a group of these craft were used to bomb the [[Big One|asteroid]] in which ''[[Millennium Falcon]]'' was hiding.<ref name="SWE5">''[[Star Wars Episode V: The Empire Strikes Back]]''</ref> |
During the [[Battle of Hoth]], several TIE bomber squadrons attacked escaping Rebel transports trying to run the blockade, causing significant losses among them. Only the intervention of Rogue Squadron in holding off enough of the bombers allowed the greater part of the Rebels to escape.<ref name="RS II">''[[Star Wars: Rogue Squadron II: Rogue Leader]]''</ref><ref name="RS III" /> Shortly afterwards, a group of these craft were used to bomb the [[Big One|asteroid]] in which ''[[Millennium Falcon]]'' was hiding.<ref name="SWE5">''[[Star Wars Episode V: The Empire Strikes Back]]''</ref> |
||
| − | During the [[Raid |
+ | During the [[Raid at Bakura]], [[Wedge Antilles]] hijacked a TIE bomber from the prison facility to help save [[Derek Klivian]], who crash-landed on the surface of the planet.<ref name="RS III" /> Bombers also participated in various conflicts on Bespin, including a [[Raid on Bespin|minor raid]] conducted by the Rebel Alliance,<ref name="RS II" /> and the [[Battle of Bespin (Galactic Civil War)|Battle of Bespin]].<ref name="BFI">''[[Star Wars: Battlefront]]''</ref> |
After the [[Battle of Endor]], TIE bombers were among the forces which fought against the [[Wookiee]] [[Liberation of Kashyyyk|liberation effort]].<ref name="SW:GB" /> |
After the [[Battle of Endor]], TIE bombers were among the forces which fought against the [[Wookiee]] [[Liberation of Kashyyyk|liberation effort]].<ref name="SW:GB" /> |
||
| Line 160: | Line 162: | ||
While the designs for the bomber and boarding craft were made for ''[[Star Wars Episode IV: A New Hope|A New Hope]]'', the craft did not appear until the comic ''[[Star Wars 15: Star Duel]]'', and did not make its first movie appearance until ''[[Star Wars Episode V: The Empire Strikes Back|The Empire Strikes Back]]'' and had a brief appearance in ''[[Star Wars Episode VI: Return of the Jedi|Return of the Jedi]]''. The boarding craft is shown in the depiction of the Star Destroyer ''[[Devastator]]'' for ''[[Star Wars: Incredible Cross-Sections]]''. |
While the designs for the bomber and boarding craft were made for ''[[Star Wars Episode IV: A New Hope|A New Hope]]'', the craft did not appear until the comic ''[[Star Wars 15: Star Duel]]'', and did not make its first movie appearance until ''[[Star Wars Episode V: The Empire Strikes Back|The Empire Strikes Back]]'' and had a brief appearance in ''[[Star Wars Episode VI: Return of the Jedi|Return of the Jedi]]''. The boarding craft is shown in the depiction of the Star Destroyer ''[[Devastator]]'' for ''[[Star Wars: Incredible Cross-Sections]]''. |
||
| − | In ''[[Star Wars: Jedi Knight: Dark Forces II]]'' and its sequel, ''[[Star Wars: Jedi Knight: Jedi Academy]]'', a TIE/sa is shown to possess the ability to hover in place. This stationary flight is unmentioned in other works save for ''[[Star Wars: Galactic Battlegrounds: Clone Campaigns]]''. This latter occurrence, however, is thought to owe to game mechanics. In ''[[Star Wars: Battlefront]]'' and ''[[Star Wars: Battlefront II]]'', the TIE bomber can hold two people. In ''Battlefront'' it holds both the pilot and a bomb-aimer while in ''Battlefront II'' the pilot controls bombing while the passenger fires and manually-aims [[guided missile]]s. In ''[[Star Wars: TIE Fighter]]'', ''[[Star Wars: Rogue Squadron]]'', ''[[Star Wars: Rogue Squadron II: Rogue Leader]]'', and ''[[Star Wars: Rogue Squadron III: Rebel Strike]]'', the TIE Bomber was actually faster than the [[BTL Y-wing starfighter|Y-wing]]. |
+ | In ''[[Star Wars: Jedi Knight: Dark Forces II]]'' and its sequel, ''[[Star Wars: Jedi Knight: Jedi Academy]]'', a TIE/sa is shown to possess the ability to hover in place. This stationary flight is unmentioned in other works save for ''[[Star Wars: Galactic Battlegrounds: Clone Campaigns]]''. This latter occurrence, however, is thought to owe to game mechanics. In ''[[Star Wars: Battlefront]]'' and ''[[Star Wars: Battlefront II]]'', the TIE bomber can hold two people. In ''Battlefront'' it holds both the pilot and a bomb-aimer while in ''Battlefront II'' the pilot controls bombing while the passenger fires and manually-aims [[guided missile]]s. In ''[[Star Wars: TIE Fighter]]'', ''[[Star Wars: Rogue Squadron]]'', ''[[Star Wars: Rogue Squadron II: Rogue Leader]]'', and ''[[Star Wars: Rogue Squadron III: Rebel Strike]]'', the TIE Bomber was actually faster than the [[BTL Y-wing starfighter|Y-wing]]. In the X-wing series of video games, the TIE/sa has a speed of 80 MGLT. |
While the TIE bomber's reactor is listed as a Sienar Fleet Systems I-a2b solar ionization reactor in ''[[Star Wars: Complete Cross-Sections]]'', this same reactor is stated in both the same book and other sources to be the same reactor that powers large [[capital ship]]s like the [[Imperial I-class Star Destroyer|''Imperial''-class Star Destroyer]]s, in which it takes up almost half of the vessel. It is described as a "miniature sun", producing stellar-scale energy, and most likely annihilating tens of thousands of tons of fuel per second. There is no known official explanation for this, but it is possible that SFS produced multiple sizes of the reactor model. |
While the TIE bomber's reactor is listed as a Sienar Fleet Systems I-a2b solar ionization reactor in ''[[Star Wars: Complete Cross-Sections]]'', this same reactor is stated in both the same book and other sources to be the same reactor that powers large [[capital ship]]s like the [[Imperial I-class Star Destroyer|''Imperial''-class Star Destroyer]]s, in which it takes up almost half of the vessel. It is described as a "miniature sun", producing stellar-scale energy, and most likely annihilating tens of thousands of tons of fuel per second. There is no known official explanation for this, but it is possible that SFS produced multiple sizes of the reactor model. |
||
| Line 201: | Line 203: | ||
*''[[Star Wars: Rebellion 9: The Ahakista Gambit, Part 4]]'' |
*''[[Star Wars: Rebellion 9: The Ahakista Gambit, Part 4]]'' |
||
*''[[Boba Fett: Overkill]]'' |
*''[[Boba Fett: Overkill]]'' |
||
| − | * |
+ | *''[[Black Ice (adventure book)|Black Ice]]'' |
*{{Journal|9|Combat Moon (short story)|Combat Moon}} |
*{{Journal|9|Combat Moon (short story)|Combat Moon}} |
||
*''[[Star Wars Galaxies]]'' |
*''[[Star Wars Galaxies]]'' |
||
| Line 248: | Line 250: | ||
===Non-canon appearances=== |
===Non-canon appearances=== |
||
| + | *[[LEGO Star Wars: Microfighters (video game)|''LEGO Star Wars: Microfighters'' video game]] |
||
*''[[Tag & Bink Are Dead]]'' |
*''[[Tag & Bink Are Dead]]'' |
||
*''[[Star Wars Infinities: The Empire Strikes Back]]'' |
*''[[Star Wars Infinities: The Empire Strikes Back]]'' |
||
| Line 257: | Line 260: | ||
{{Imagecat|Images of TIE/sa bombers}} |
{{Imagecat|Images of TIE/sa bombers}} |
||
*''[[The Star Wars Sourcebook]]'' |
*''[[The Star Wars Sourcebook]]'' |
||
| + | *''[[Star Wars Campaign Pack]]'' |
||
*[[Imperial Sourcebook (First Edition)|''Imperial Sourcebook'']] |
*[[Imperial Sourcebook (First Edition)|''Imperial Sourcebook'']] |
||
*[[Galaxy Guide 2: Yavin and Bespin (First Edition)|''Galaxy Guide 2: Yavin and Bespin'']] |
*[[Galaxy Guide 2: Yavin and Bespin (First Edition)|''Galaxy Guide 2: Yavin and Bespin'']] |
||
Revision as of 00:12, 18 April 2014
| | |
Warning: This infobox has missing parameters: type and unrecognized parameters: modules, hidep, class, hideu, era, hidet, imageBG
- "When the TIE bombers first started shelling Yavin 4, I thought the planet would crack right open. Those egg layers leveled the jungle."
- ―Tigran Jamiro
The TIE/sa bomber, simply known as the TIE bomber, was a larger, less maneuverable TIE starfighter used for destroying large starships and pinpoint-precision bombing. The "sa" in the TIE bomber's designation stood for "surface assault."
Due to their distinctive dual-hull shape, TIE bombers came to be referred to occasionally as "dupes" or (albeit indirectly) "sitting ducks" by enemy pilots. The latter nickname was due to its bulky structure making it much slower and far less maneuverable than other TIE craft.
Characteristics

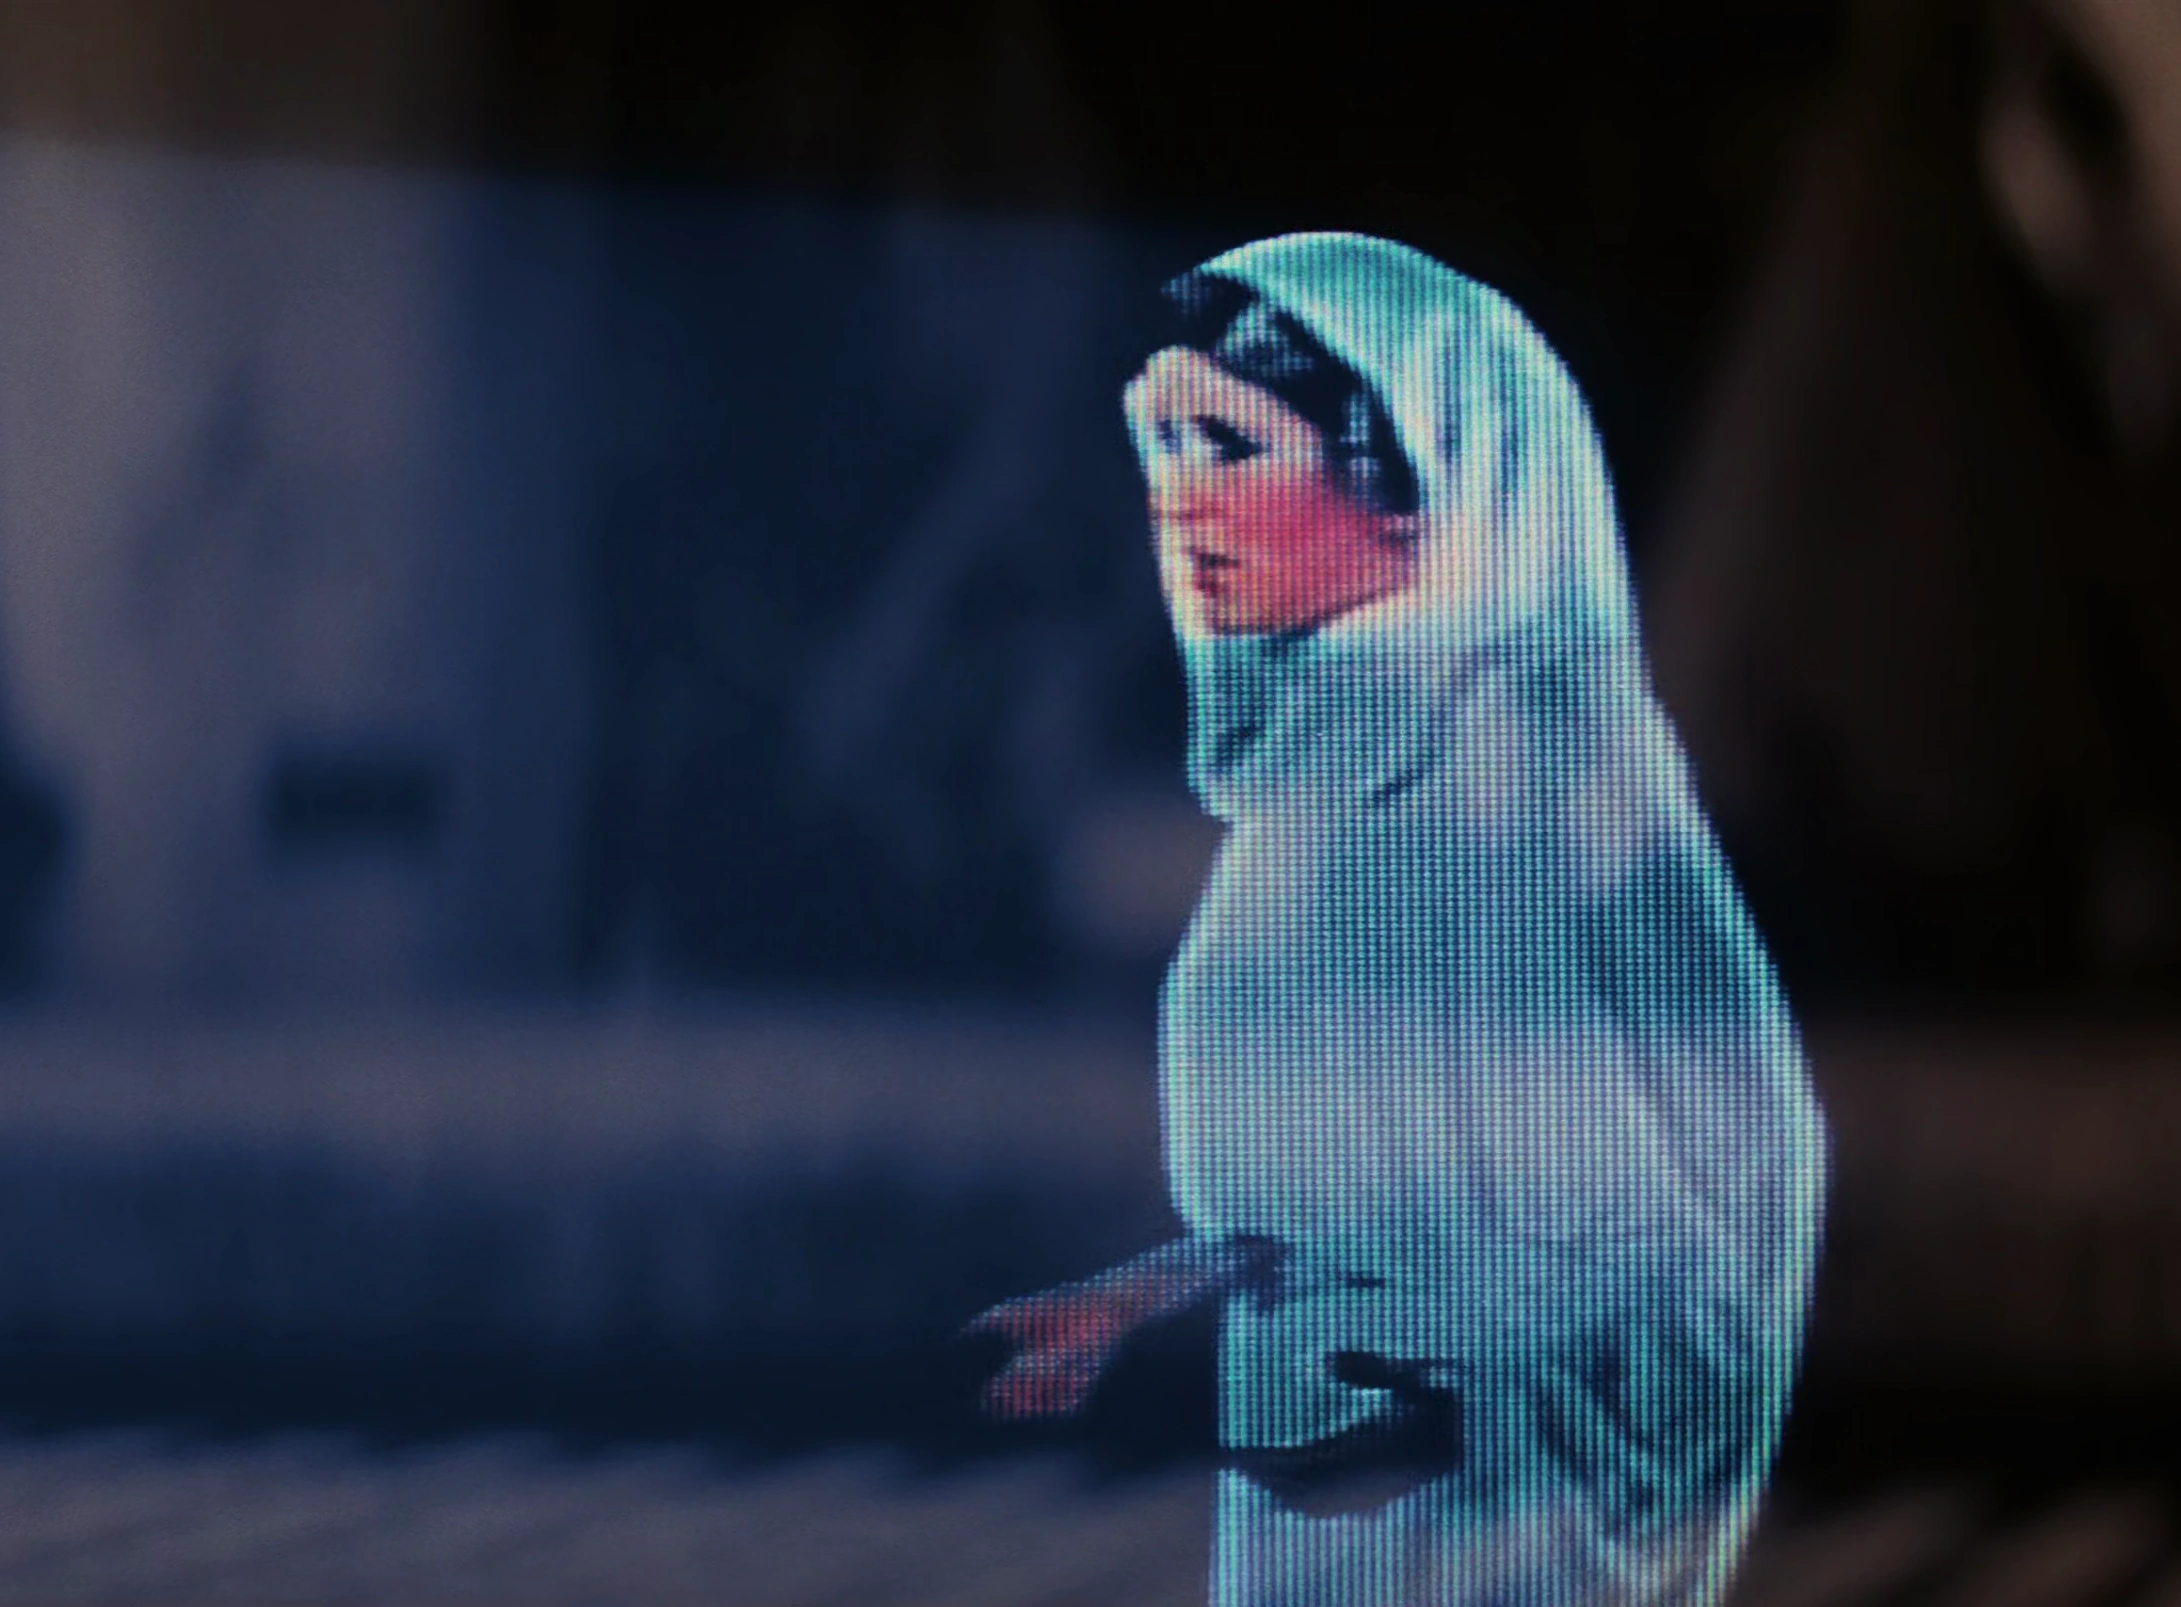
TIE bombers bombing the surface of Yavin 4.
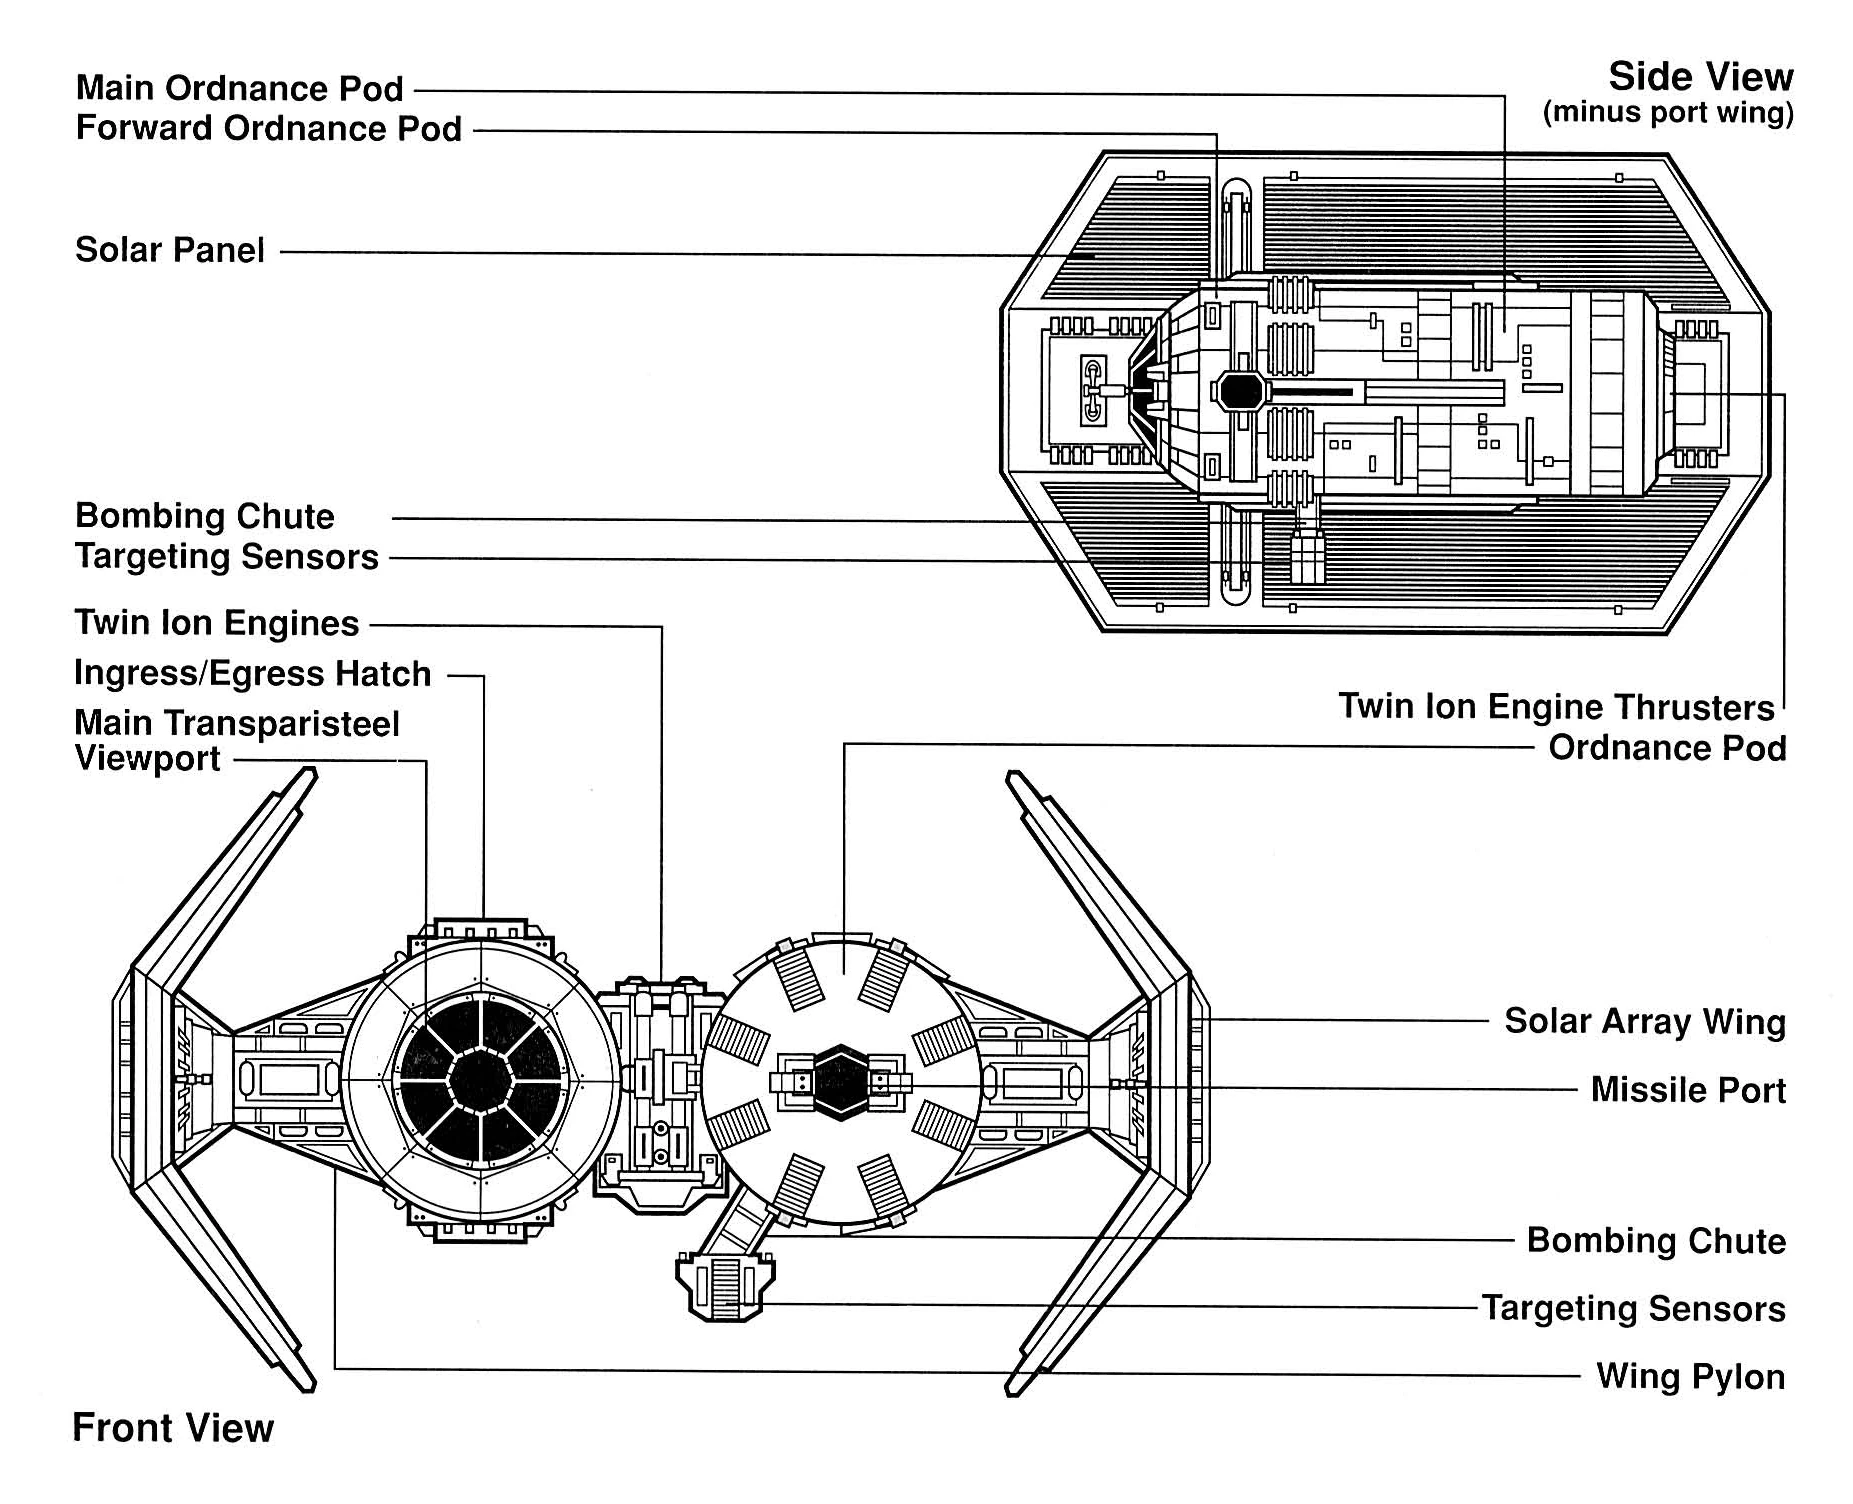
The TIE/sa bomber had two hulls next to each other; one carried the pilot and the other carried a pair of general purpose warhead launchers, enabling them to carry a variety of weapons tailored for the mission. The bomber was much more heavily built-up than the "fighter"-series of TIEs; it carried more sophisticated sensors to penetrate capital ship jamming and SFS P-s4 twin ion engines powered by a SFS I-a2b solar ionization reactor to allow a full payload to be carried at a reasonable speed.
An Imperial Star Destroyer generally carried a squadron of 12 bombers.[5] The TIE bomber was capable of carrying at least one of the following payloads, for a total of 15 metric tons:[12] sixteen concussion missiles, twelve proton torpedoes, eight proton rockets, six space mines, four proton bombs, sixty-four thermal detonators, or thousands of propaganda pamphlets. Guided concussion missiles/proton torpedoes were generally carried nearing the inside of the second hull, orbital mines were placed in a rack above the missile rack, while proton bombs and orbital mines were generally near the exterior of the hull, near the bomb-drop chute. In addition, the second hull also possessed an ordinance maneuvering arm that retrieves and loads armaments. Its fixed armament was two wing-mounted laser cannons.
The bomber was agile enough to deliver devastating strikes with surgical precision; as shown by a mission when a group of these craft destroyed a Rebel-occupied tower in the middle of a crowded city while leaving the surroundings untouched.
Nonetheless, the bomber was slower and less maneuverable than the TIE/LN starfighter. Like most mass-produced TIEs, it lacked shields, though it did partly compensate by having a stronger hull. This was largely the reason why one of its nicknames by Rebel pilots was "sitting duck," as they were considered easy prey. Standard Imperial doctrine required that bombers be escorted to target by other starfighters.
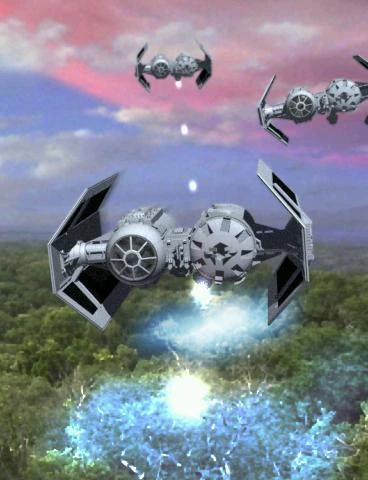
TIE bomber schematics.
While not expected to engage enemy fighters in dogfights due to their slower speed and agility, TIE Bombers could target them from a standoff distance with their large magazines of concussion missiles. During the conflict at Mylok IV, a squadron of Demetrius Zaarin's bombers held off large numbers of Nharwaak and Rebel Y-wings, allowing the Imperials to aid the Habeen in evacuating their base. Due to a shortage of TIE Interceptors during the pacification of the Pakuuni system, Maarek Stele thrust his bomber into the space superiority role against Rebel and pirates, once defending Thrawn's craft from an attack while he visited the newly completed outpost NL-1.[7] Imperial commanders used bombers to counter Rebel B-wing starfighters, with the TIES launching their missiles directly into their flightpaths.[13]
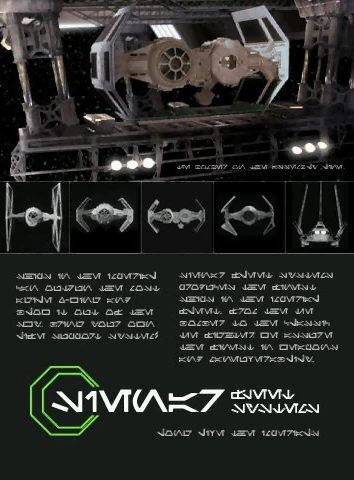
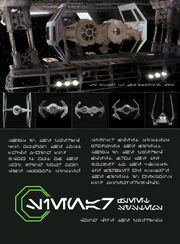
Sienar Fleet Systens' advertisement for the TIE/sa Bomber.
The TIE Bomber's lack of shields was crucially exposed during the Sepan Civil War. There, the Ripoblus conducted an attack on the Dimok Science Station Youst spearheaded by six Assault Transports. The station's defending fighters, consisting of Z-95 Headhunters and Delta-class JV-7 escort shuttles, quickly fell victim to the turrets of the ATR-6 that they were trying to attack. When Admiral Harkov's forces entered the area to repel the Ripoblus, they deployed TIE Bomber to take out the ATR-6s from a safe distance with proton torpedoes. Imperial pilots discovered that a full-strength ATR-6 could survive even three torpedo hits, with several Bombers lost trying to finish off the injured ATR-6 with laser cannon fire. Maarek Stele opted wisely to replace his payload with proton rockets, which required more careful aiming, but one of these devastating warheads was enough to quickly destroy an ATR-6. Near the end of the campaign, while covering the transfer of TIE Avengers, Stele distracted the gunners of the Dimok cruiser Ben Het so bombers could safely conduct their torpedo runs against it, resulting in its destruction.[7]
The TIE Bomber, unlike other TIE models, was also equipped with life support systems and a cockpit ejection seat, although pilots nonetheless wear flight suits in case of an emergency.
History
- "Watch out for those TIE bombers."
- ―Crix Madine during the Battle of Hoth
The TIE Bomber succeeded the TIE/gt starfighter as the Empire's primary ground assault craft in the TIE series. The TIE/gt being the first of the series to have its main pod elongated from a sphere to a cylindrical shape to accommodate a bomb bay. Backwater planets and lower priority capital ships had to initially make do with the TIE/gt, though the eventual widespread adaptation of the Bomber phased out the gt in areas such as the Dantooine system where "Deathfire" McDibs was known to pilot one. The TIE/sa Bomber adopted a longer, though similarly elongated pod to that of the TIE/gt for its dual-pod design and used larger curved wings, with an increased surface area of solar ionization paneling, providing higher power output to accommodate the increase in mass.
The TIE Bomber came into service during the early years of the Empire and was used to quell the Separatist holdouts still active at the time, namely Gizor Dellso's fleet of former CIS naval starships and private droid army.[6]
Two months after the Battle of Yavin, TIE bombers were deployed during a Rebel scouting mission to the Dominus sector to bomb the Rebel scouts, but the Rebels were able to escape the bombers.[14] A short while later, at least one bomber was equipped with a pod under its fuselage. The bomber had a hyperdrive, and under the orders of Colonel Bircher, the pilot followed Gray Flight away from an ambush. It detonated, severely damaging Leia Organa's X-wing.[15]
TIE bombers were constructed at Imperial Airbases on the order of Darth Vader during campaigns against the Rebel Alliance.[4]
During the Evacuation of Yavin, TIE bombers bombed the Great Temple, although several were destroyed by traps planted by General Jan Dodonna.[4]
Around six months after the Battle of Yavin, the Empire dispatched TIE bombers to Luke Skywalker's homeworld, Tatooine.[5] The six-ship detachment attacked Mos Eisley Spaceport, but were eliminated by the Rebel's Rogue Squadron. A group on the planet Barkhesh attempted to interdict a Barkhesh Resistance convoy, but were stopped by Rogue Squadron. A flight was also sent to bomb the crashed Rebel starship Nonnah but failed in their mission. A squadron was also sent to Corellia to interdict the defection of Crix Madine. Although the craft destroyed the Coronet Capitol Tower, they were unable to prevent the escape of Madine. TIE bombers were also stationed at the Weapons Research Facility on Fest, and attempted to destroy a Rebel commando team which had absconded with All Terrain Personal Transports, but were again stopped by Rogue Squadron. A squadron was subsequently assigned to blockade Chandrila where they failed to stop an armored hovertrain escorted by Rogue Squadron. Later, a squadron led by Moff Kohl Seerdon attacked Thyferra's bacta supplies, but were again intercepted by Rogue Squadron.[16]
During Tycho Celchu's defection, TIE bombers attempted to interdict the pilot.[17]
During the Battle of Hoth, several TIE bomber squadrons attacked escaping Rebel transports trying to run the blockade, causing significant losses among them. Only the intervention of Rogue Squadron in holding off enough of the bombers allowed the greater part of the Rebels to escape.[18][17] Shortly afterwards, a group of these craft were used to bomb the asteroid in which Millennium Falcon was hiding.[19]
During the Raid at Bakura, Wedge Antilles hijacked a TIE bomber from the prison facility to help save Derek Klivian, who crash-landed on the surface of the planet.[17] Bombers also participated in various conflicts on Bespin, including a minor raid conducted by the Rebel Alliance,[18] and the Battle of Bespin.[20]
After the Battle of Endor, TIE bombers were among the forces which fought against the Wookiee liberation effort.[4]
In 14 ABY, two TIE bombers were stationed at Vjun and tried to stop the Jedi Jaden Korr from entering Bast Castle.[21]
TIE bombers continued to see extensive use throughout the Galactic Civil War, where they often performed bombing runs on enemy forces, and even saw action in the early part of the Yuuzhan Vong War.
Successors
A TIE bomber.
The TIE Bomber quickly supplanted the TIE/gt starfighter as the Imperial Navy's front line assault bomber. Despite its disadvantages, notably its lack of speed, shields, and hyperdrive, it endeared itself to bureaucracy as it could be mass-produced like other inexpensive TIEs.
Other warhead-carrying fighters such as the Assault Gunboat, TIE Avenger (despite its lower magazine capacity), TIE Defender, and Missile Boat, despite having shields and a hyperdrive, were far costlier and only found deployment in specific missions. The TIE Bomber thus remained the mainstay of the Imperial Navy's heavy fighters. One of its most notable accomplishments was the destruction of Ali Tarrak's TIE Defender manufacturing facility.
Around the time the Rebel Alliance surfaced, approximately 3 BBY, the Sith Lord Darth Vader commissioned the development of the TIE Advanced x1 Starfighter, which incorporated the use of the wing design used on the TIE bomber, with a single spherical cockpit module, that had the advantage of an integrated hyperdrive and basic associated shielding, without the significant loss in performance that a TIE/LN starfighter would sacrifice with the added hardware. The project didn't see full production models assembled however, as the the TIE Interceptor assumed production as the Empire's superior model TIE starfighter due to its agility and speed, with usable firepower.
Further development of the TIE Bomber paved the way for the more advanced Scimitar assault bomber, which was designed with the input of Bomber pilots from the elite "Scimitar" wing.
Variants
TIE/sh shuttle
A variant of the bomber replaced the warhead bay with a small cargo bay that could hold two passengers. This craft could ferry personnel from one ship to another or from a ship to a planetary base. Captain Lorth Needa used a shuttle of this type to personally apologize to Darth Vader for losing track of Millennium Falcon. However, higher ranking officers usually used the Lambda shuttle.
TIE boarding craft
Another variant of the bomber featured an enlarged secondary pod with clamps and a hull-cutter. This could carry a stormtrooper raiding/boarding party for insertion into a captured or disabled enemy ship. It was used by Darth Vader and a team of stormtroopers to enter Princess Leia Organa's CR90 corvette, Tantive IV, as well as a kidnapping mission on Shiva IV.
TIE lander
Using larger, vertically elongated wings than that of the bomber, this landing craft carried an additional, much larger, personnel pod on its underside that carried ground troops for surface deployment. Shira Brie fictitiously recalls these craft landing on her homeworld as a child, as part of a convincing cover story to infiltrate the Rebel Alliance.
TIE Heavy Bomber
A TIE Heavy Bomber carried two ordnance pods, the second on top of the first.[4]
TIE Interdictor
The modular nature of TIE series technology allowed for expansion of the TIE bomber concept. This variant included four ordnance bays, though they appear to have been fairly rare.[4]
Gand starfighter
Gand Starfighters were modified TIE bombers, with a hyperdrive motivator and navicomp, wings cut in Interceptor shape, six concussion missiles and shields.
Scimitar assault bomber
It was 8 meters long, and thus longer than the standard TIE/LN starfighter. Its weapons included two laser cannons, concussion missile launchers, and chutes for thermal detonators and proton grenades. However, instead of two ion engines, it only had one, thus the lack of the prefix TIE. It was designed to bomb planets into submission.
Behind the scenes
While the designs for the bomber and boarding craft were made for A New Hope, the craft did not appear until the comic Star Wars 15: Star Duel, and did not make its first movie appearance until The Empire Strikes Back and had a brief appearance in Return of the Jedi. The boarding craft is shown in the depiction of the Star Destroyer Devastator for Star Wars: Incredible Cross-Sections.
In Star Wars: Jedi Knight: Dark Forces II and its sequel, Star Wars: Jedi Knight: Jedi Academy, a TIE/sa is shown to possess the ability to hover in place. This stationary flight is unmentioned in other works save for Star Wars: Galactic Battlegrounds: Clone Campaigns. This latter occurrence, however, is thought to owe to game mechanics. In Star Wars: Battlefront and Star Wars: Battlefront II, the TIE bomber can hold two people. In Battlefront it holds both the pilot and a bomb-aimer while in Battlefront II the pilot controls bombing while the passenger fires and manually-aims guided missiles. In Star Wars: TIE Fighter, Star Wars: Rogue Squadron, Star Wars: Rogue Squadron II: Rogue Leader, and Star Wars: Rogue Squadron III: Rebel Strike, the TIE Bomber was actually faster than the Y-wing. In the X-wing series of video games, the TIE/sa has a speed of 80 MGLT.
While the TIE bomber's reactor is listed as a Sienar Fleet Systems I-a2b solar ionization reactor in Star Wars: Complete Cross-Sections, this same reactor is stated in both the same book and other sources to be the same reactor that powers large capital ships like the Imperial-class Star Destroyers, in which it takes up almost half of the vessel. It is described as a "miniature sun", producing stellar-scale energy, and most likely annihilating tens of thousands of tons of fuel per second. There is no known official explanation for this, but it is possible that SFS produced multiple sizes of the reactor model.
Appearances
Non-canon appearances
- LEGO Star Wars: Microfighters video game
- Tag & Bink Are Dead
- Star Wars Infinities: The Empire Strikes Back
- LEGO Star Wars II: The Original Trilogy
- LEGO Star Wars: The Complete Saga
Sources
.JPG)
Notes and references
- ↑ 1.0 1.1 1.2 Star Wars: Empire at War: Prima Official Game Guide
- ↑ 2.0 2.1 2.2 2.3 2.4 2.5 2.6 Star Wars: Behind the Magic
- ↑ 3.0 3.1 3.2 3.3 3.4 3.5 3.6 Star Wars: Complete Cross-Sections
- ↑ 4.0 4.1 4.2 4.3 4.4 4.5 Star Wars: Galactic Battlegrounds
- ↑ 5.0 5.1 5.2 5.3 Star Wars: Rogue Squadron: The Official Nintendo Player's Guide
- ↑ 6.0 6.1 Star Wars: Battlefront II
- ↑ 7.0 7.1 7.2 Star Wars: TIE Fighter
- ↑ X-Wing: Rogue Squadron
- ↑ Vector Prime (novel)
- ↑ 10.0 10.1 Revelations
- ↑ Battlefront II: Prima Official Game Guide
- ↑ Star Wars: Rogue Squadron II: Rogue Leader: The Official Nintendo Player's Guide
- ↑ The Essential Guide to Warfare
- ↑ Star Wars 1: In the Shadow of Yavin, Part 1
- ↑ Star Wars 5: In the Shadow of Yavin, Part 5
- ↑ Star Wars: Rogue Squadron
- ↑ 17.0 17.1 17.2 Star Wars: Rogue Squadron III: Rebel Strike
- ↑ 18.0 18.1 Star Wars: Rogue Squadron II: Rogue Leader
- ↑ Star Wars Episode V: The Empire Strikes Back
- ↑ Star Wars: Battlefront
- ↑ Star Wars: Jedi Knight: Jedi Academy
External links
 TIE Bomber on the SWG Wiki