m (FAR) |
m (Redirect fixes) |
||
| (190 intermediate revisions by 40 users not shown) | |||
| Line 1: | Line 1: | ||
| + | {{Top|canon=TIE/d "Defender" Multi-Role Starfighter|fa}} |
||
{{HideContentSub}} |
{{HideContentSub}} |
||
| + | {{Otheruses|title=TIE/D}} |
||
| − | {{Eras|reb|new|njo|leg|featured}} |
||
| − | {{FAcleanup|TIE/D Defender/Legends}} |
||
| − | {{Youmay|the [[TIE Series|TIE]] Defender|the [[TIE/D automated starfighter]]}} |
||
{{Starship_class |
{{Starship_class |
||
|image=[[File:TIE_Defender.png]] |
|image=[[File:TIE_Defender.png]] |
||
|name=TIE/D Defender |
|name=TIE/D Defender |
||
| − | |manufacturer=[[Sienar Fleet Systems/Legends|Sienar Fleet Systems]]<ref name="TIE Guide">''[[TIE Fighter Collector's CD-ROM: The Official Strategy Guide]]''</ref> |
||
|designer= |
|designer= |
||
| − | | |
+ | |manufacturer=[[Sienar Fleet Systems/Legends|Sienar Fleet Systems]]<ref name="TF:OSG">''[[TIE Fighter Collector's CD-ROM: The Official Strategy Guide]]''</ref> |
| + | |line=[[TIE Series]]<ref name="TF">''[[Star Wars: TIE Fighter]]''</ref> |
||
|model=[[Twin ion engine/Legends|Twin Ion Engine]] Defender<ref name="SWTFTIE">''[[Star Wars: TIE Fighter]]'' identifies the ship as the "TIE Defender" while TIE is established as an acronym for "[[Twin ion engine/Legends|Twin Ion Engine]]" in several sources, including ''[[The Essential Guide to Vehicles and Vessels]]''.</ref> |
|model=[[Twin ion engine/Legends|Twin Ion Engine]] Defender<ref name="SWTFTIE">''[[Star Wars: TIE Fighter]]'' identifies the ship as the "TIE Defender" while TIE is established as an acronym for "[[Twin ion engine/Legends|Twin Ion Engine]]" in several sources, including ''[[The Essential Guide to Vehicles and Vessels]]''.</ref> |
||
| − | | |
+ | |type=[[Starfighter/Legends|Starfighter]]<ref name="TF" /> |
| − | |cost=*300,000 [[Galactic Credit Standard|credits]] |
+ | |cost=*300,000 [[Galactic Credit Standard/Legends|credits]] {{C|new}}<ref name="EGVV">''[[The Essential Guide to Vehicles and Vessels]]''</ref> |
| − | *80,000 credits |
+ | *80,000 credits {{C|used}}<ref name="SotG">[[Starships of the Galaxy (Saga Edition)|''Starships of the Galaxy'', Saga Edition]]</ref> |
|modifier= |
|modifier= |
||
|sysmods= |
|sysmods= |
||
| − | |length=9.2 [[Imperial standard meter|meters]]<ref name="Databank">{{DB|starship|tiedefender|TIE |
+ | |length=9.2 [[Imperial standard meter|meters]]<ref name="Databank">{{DB|starship|tiedefender|TIE defender}}</ref> |
|width= |
|width= |
||
|height= |
|height= |
||
| Line 23: | Line 22: | ||
|mglt=*144 MGLT with all recharges set to maintenance level<ref name="XWA" /> |
|mglt=*144 MGLT with all recharges set to maintenance level<ref name="XWA" /> |
||
*180 MGLT with tractor beam recharge fully redirected to engines<ref name="XWA" /> |
*180 MGLT with tractor beam recharge fully redirected to engines<ref name="XWA" /> |
||
| − | |max speed=1,680 [[Kilometer/Legends|km |
+ | |max speed=1,680 [[Kilometer per hour/Legends|km/h]]<ref name="NEGVV" /> |
| − | |maneuverability=110 [[DPF]]<ref name="XWA" /> |
+ | |maneuverability=110 [[DPF/Legends|DPF]]<ref name="XWA" /> |
| − | |engine=[[Sienar Fleet Systems/Legends|SFS]] [[P-sz9.7 twin ion engine]] |
+ | |engine=[[Sienar Fleet Systems/Legends|SFS]] [[P-sz9.7 twin ion engine/Legends|P-sz9.7 twin ion engines]] (rated 230 [[KTU]])<ref name="TF:OSG" /> |
|hyperdrive=Class 2.0<ref name="NEGVV" /> |
|hyperdrive=Class 2.0<ref name="NEGVV" /> |
||
|hdrange= |
|hdrange= |
||
| − | |hdsystem=[[Sienar Fleet Systems/Legends|SFS]] [[ND9 hyperdrive motivator]]<ref name=" |
+ | |hdsystem=[[Sienar Fleet Systems/Legends|SFS]] [[ND9 hyperdrive motivator]]<ref name="TF:OSG" /> |
|poweroutput= |
|poweroutput= |
||
| − | |power=[[Sienar Fleet Systems/Legends|SFS]] [[I-s4d solar ionization reactor]]<ref name=" |
+ | |power=[[Sienar Fleet Systems/Legends|SFS]] [[I-s4d solar ionization reactor/Legends|I-s4d solar ionization reactor]]<ref name="TF:OSG" /> |
| − | |shield gen=Forward/Rear projecting [[Novaldex/Legends|Novaldex]] [[Deflector shield/Legends|deflector shield]] [[Deflector shield generator/Legends|generators]]<ref name=" |
+ | |shield gen=Forward/Rear projecting [[Novaldex/Legends|Novaldex]] [[Deflector shield/Legends|deflector shield]] [[Deflector shield generator/Legends|generators]]<ref name="TF:OSG" /> (rated 100 [[SBD/Legends|SBD]])<ref name="TF:OSG" /><ref name="XWA" /> |
| − | |hull=[[Titanium/Legends|Titanium]] [[Hull/Legends|hull]] with [[Quadanium steel/Legends|Quadanium steel]] [[solar panel]]s<ref name=" |
+ | |hull=[[Titanium/Legends|Titanium]] [[Hull/Legends|hull]] with [[Quadanium steel/Legends|Quadanium steel]] [[solar panel]]s<ref name="TF:OSG" /> (rated 14 [[RU/Legends|RU]])<ref name="XWA" /> |
|sensor= |
|sensor= |
||
|target= |
|target= |
||
| − | |navigation=[[Sienar Fleet Systems/Legends|SFS]] [[N-s6 Navcon]]<ref name=" |
+ | |navigation=[[Sienar Fleet Systems/Legends|SFS]] [[N-s6 Navcon/Legends|N-s6 Navcon]]<ref name="TF:OSG" /> |
| − | |avionics=SFS [[F-s5x flight avionics system]]<ref name=" |
+ | |avionics=SFS [[F-s5x flight avionics system]]<ref name="TF:OSG" /> |
|maincomp= |
|maincomp= |
||
|countermeasures= |
|countermeasures= |
||
| − | |armament=*SFS [[L-s9.3 laser cannon]] |
+ | |armament=*SFS [[L-s9.3 laser cannon/Legends|L-s9.3 laser cannons]] (4)<ref name="TF:OSG" /> |
| − | *[[Borstel Galactic Defense|Borstel]] [[NK-3 ion cannon|NK-3 medium ion cannons]] (2)<ref name=" |
+ | *[[Borstel Galactic Defense/Legends|Borstel]] [[NK-3 ion cannon|NK-3 medium ion cannons]] (2)<ref name="TF:OSG" /> |
| − | *SFS [[M-g-2 general-purpose warhead launcher]]s (2)<ref name=" |
+ | *SFS [[M-g-2 general-purpose warhead launcher]]s (2)<ref name="TF:OSG" /> |
| − | **Standard load: 4 [[Concussion missile/Legends|concussion missiles]] or 3 [[Proton torpedo/Legends|proton torpedoes]] each<ref name=" |
+ | **Standard load: 4 [[Concussion missile/Legends|concussion missiles]] or 3 [[Proton torpedo/Legends|proton torpedoes]] each<ref name="TF" /> |
| − | *[[Tractor beam/Legends|Tractor beam]] projector |
+ | *[[Tractor beam/Legends|Tractor beam]] [[Tractor beam projector/Legends|projector]] {{C|1; optional}}<ref name="TF" /> |
|complement= |
|complement= |
||
|bays= |
|bays= |
||
| − | |escapepods=[[Ejector seat/Legends|Ejector seat]]<ref name=" |
+ | |escapepods=[[Ejector seat/Legends|Ejector seat]]<ref name="TF" /> |
| − | |crew=[[Pilot/Legends|Pilot]] (1)<ref name=" |
+ | |crew=[[Pilot/Legends|Pilot]] (1)<ref name="TF:OSG" /> |
|skeleton= |
|skeleton= |
||
| − | |passengers=None<ref name="More Starships!">{{WizardsCite|url=default.asp?x=starwars/article/sw20011115fleet|text=More Starships!|int=More Starships! |
+ | |passengers=None<ref name="More Starships!">{{WizardsCite|url=default.asp?x=starwars/article/sw20011115fleet|text=More Starships!|int=More Starships!}}</ref> |
|capacity=65 [[Kilogram/Legends|kilograms]]<ref name="More Starships!" /> |
|capacity=65 [[Kilogram/Legends|kilograms]]<ref name="More Starships!" /> |
||
|cargohandling= |
|cargohandling= |
||
| − | |consumables=1 [[Standard week|week]]<ref name="AoRCR"> |
+ | |consumables=1 [[Standard week/Legends|week]]<ref name="AoRCR">[[Star Wars: Age of Rebellion Core Rulebook|''Star Wars: Age of Rebellion'' Core Rulebook]]</ref> |
|lifesupport= |
|lifesupport= |
||
|communications= |
|communications= |
||
|othersystems=Wing-mounted maneuvering jets<ref name="EGVV" /> |
|othersystems=Wing-mounted maneuvering jets<ref name="EGVV" /> |
||
|availability= |
|availability= |
||
| − | |role=*Space superiority fighter<ref name="TIE Fighter |
+ | |role=*Space superiority fighter<ref name="DOE">''[[Star Wars: TIE Fighter: Defender of the Empire]]''</ref> |
| − | *[[Interceptor/Legends|Interceptor]]<ref name=" |
+ | *[[Interceptor/Legends|Interceptor]]<ref name="DOE" /> |
| − | *Light [[Bomber/Legends|bomber]]<ref name=" |
+ | *Light [[Bomber/Legends|bomber]]<ref name="DOE" /> |
|firstuse= |
|firstuse= |
||
|retired= |
|retired= |
||
| − | | |
+ | |affiliation=*[[Galactic Empire/Legends|Galactic Empire]]<ref name="TF" /> |
| − | *[[ |
+ | *[[Zaarin coup forces]]<ref name="DOE" /> |
| + | *[[Nami]]<ref name="DOE" /> |
||
| − | *[[New Jedi Order era]]<ref name="The Unifying Force">''[[The New Jedi Order: The Unifying Force]]''</ref> |
||
| − | *[[Legacy era]]<ref name="Ascension">''[[Fate of the Jedi: Ascension]]''</ref> |
||
| − | |affiliation=*[[Galactic Empire/Legends|Galactic Empire]]<ref name="TIE Fighter" /> |
||
| − | *[[Zaarin splinter government]]<ref name="TIE Fighter" /> |
||
| − | *[[Nami]]<ref name="TIE Fighter" /> |
||
*[[X1's faction]]<ref name="SWB:ES">''[[Star Wars Battlefront: Elite Squadron]]''</ref> |
*[[X1's faction]]<ref name="SWB:ES">''[[Star Wars Battlefront: Elite Squadron]]''</ref> |
||
| − | *[[Imperial Remnant]]<ref name="The Unifying Force" /> |
+ | *[[Imperial Remnant]]<ref name="The Unifying Force">''[[The New Jedi Order: The Unifying Force]]''</ref> |
| + | }} |
||
| − | |modules=}} |
||
| − | {{Quote|Imperial High Command decided that defender pilots would only be selected from TIE interceptor pilots who had flown at least twenty combat missions and survived. We're either the best pilots in the Imperial fleet or the luckiest.|[[Rexler Brath]]| |
+ | {{Quote|Imperial High Command decided that defender pilots would only be selected from TIE interceptor pilots who had flown at least twenty combat missions and survived. We're either the best pilots in the Imperial fleet or the luckiest.|[[Rexler Brath/Legends|Rexler Brath]]|<ref name="NEGVV" />}} |
| − | The '''TIE/D Defender''', commonly known as the '''TIE Defender''' or '''T/D''', was a high-performance [[TIE Series]] [[Starfighter/Legends|starfighter]] developed for the [[Imperial Navy/Legends|Imperial Navy]] by [[Sienar Fleet Systems/Legends|Sienar Fleet Systems]] shortly before the [[Battle of Endor/Legends|Battle of Endor]]. Representing a shift in starfighter design from previous TIE models, the ship featured a [[Hyperdrive/Legends|hyperdrive]] as well as [[Deflector shield/Legends|deflector shields]] to allow it to operate independently of [[Galactic Empire/Legends|Imperial]] [[Capital ship/Legends|capital ships]]. The ship's speed and agility, combined with its |
+ | The '''TIE/D Defender''', commonly known as the '''TIE Defender''' or '''T/D''', was a high-performance [[TIE Series]] [[Starfighter/Legends|starfighter]] developed for the [[Imperial Navy/Legends|Imperial Navy]] by [[Sienar Fleet Systems/Legends|Sienar Fleet Systems]] in a project overseen by [[Grand Admiral/Legends|Grand Admiral]] [[Demetrius Zaarin]] shortly before the [[Battle of Endor/Legends|Battle of Endor]]. Representing a shift in starfighter design from previous TIE models, the ship featured a [[Hyperdrive/Legends|hyperdrive]] as well as [[Deflector shield/Legends|deflector shields]] to allow it to operate independently of [[Galactic Empire/Legends|Imperial]] [[Capital ship/Legends|capital ships]]. The ship's speed and agility, combined with its arsenal of four [[L-s9.3 laser cannon/Legends|laser cannons]], two [[NK-3 ion cannon|ion cannons]], two [[M-g-2 general-purpose warhead launcher|warhead launchers]] and an optional [[Tractor beam/Legends|tractor beam]] projector made it arguably the most advanced starfighter available at the [[Time/Legends|time]]. |
| + | After Zaarin's [[Battle of Imperial Center|failed coup]] against [[Galactic Emperor/Legends|Emperor]] [[Palpatine/Legends|Palpatine]], the renegade admiral [[T/D Technology|attempted]] to gain control of the TIE Defender technology to give his [[Zaarin's fleet|forces]] a technological advantage over the Empire. The advanced starfighter also attracted the [[New Threats|attention]] of other factions, including the [[Alliance to Restore the Republic/Legends|Rebel Alliance]] and [[Pirate/Legends|pirate]] groups. Imperial forces under the command of Grand Admiral [[Mitth'raw'nuruodo/Legends|Thrawn]] were ultimately able to prevent the spread of the technology and the starfighter played a major role in Thrawn's successful [[Zaarin insurrection|campaign]] against Zaarin. |
||
| − | The ship's high cost, together with political factors, kept it from achieving widespread use in the Empire and units were assigned only to the most elite [[Pilot/Legends|pilots]]. The starfighter played a major role in the Empire's campaign against rogue [[Grand Admiral/Legends|Grand Admiral]] [[Demetrius Zaarin]] and units participated in several other battles including the Battle of [[Endor/Legends|Endor]]. The advanced starfighter attracted the attention of several other factions and the Empire struggled to prevent the spread of the technology. |
||
| + | Beyond the Zaarin campaign, the TIE Defender's high cost, together with political factors, kept it from achieving widespread use in the Empire and units were assigned only to the most elite [[Pilot/Legends|pilots]]. The fighters participated in several other engagements during the [[Imperial Period|Imperial era]], including the [[Battle of Mygeeto (Galactic Civil War)|Battle of Mygeeto]] and the Battle of [[Endor/Legends|Endor]]. Following the [[Death/Legends|death]] of Emperor Palpatine at Endor, the TIE Defender continued to see limited use by Imperial forces. TIE Defenders saw action during [[Cronal|Shadowspawn's]] campaign against the [[New Republic/Legends|New Republic]] in [[5 ABY/Legends|5 ABY]] and were used by the Republic's [[Rogue Squadron/Legends|Rogue Squadron]] during a brief [[Battle of Ciutric|alliance]] with former [[Director of Imperial Intelligence]] [[Ysanne Isard]] against [[Prince-Admiral/Legends|Prince-Admiral]] [[Delak Krennel]]'s [[Ciutric Hegemony]] in [[9 ABY/Legends|9 ABY]]. The fighters participated in multiple battles during the [[Yuuzhan Vong War]] and continued to be used by the [[Imperial Remnant]] until at least [[44 ABY]]. |
||
| − | Following the [[Death/Legends|death]] of [[Galactic Emperor/Legends|Emperor]] [[Palpatine]] at Endor, the TIE Defender continued to see limited use by the [[Imperial Remnant]] up to at least [[44 ABY]], and was involved in numerous conflicts, including the [[Yuuzhan Vong War]]. |
||
==Characteristics== |
==Characteristics== |
||
| − | {{Quote|A logical advance for Imperial fighter design.|Imperial propaganda| |
+ | {{Quote|A logical advance for Imperial fighter design.|Imperial propaganda|<ref name="FF53">{{FFCite|y=2014|53|TIE11-12, ''TIE/D Defender''}}</ref>}} |
| − | The high success rate of more advanced [[Alliance to Restore the Republic/Legends|Rebel]] [[Starfighter/Legends|starfighters]] against standard [[Galactic Empire/Legends|Imperial]] [[TIE/LN starfighter|TIE Fighters]] resulted in a mounting cost of replacing destroyed fighters. That, combined with the realization that the inclusion of a [[Hyperdrive/Legends|hyperdrive]] would allow the [[Fleet/Legends|fleet]] to be more flexible, caused the [[Imperial Navy/Legends|Imperial Navy]] to rethink its doctrine of using swarms of cheap craft instead of fewer high-quality ones, leading to the introduction of the [[TIE Advanced x1/Legends|TIE Advanced x1]]<ref name=" |
+ | The high success rate of more advanced [[Alliance to Restore the Republic/Legends|Rebel]] [[Starfighter/Legends|starfighters]] against standard [[Galactic Empire/Legends|Imperial]] [[TIE/LN starfighter|TIE Fighters]] resulted in a mounting cost of replacing destroyed fighters. That, combined with the realization that the inclusion of a [[Hyperdrive/Legends|hyperdrive]] would allow the [[Fleet/Legends|fleet]] to be more flexible, caused the [[Imperial Navy/Legends|Imperial Navy]] to rethink its doctrine of using swarms of cheap craft instead of fewer high-quality ones, leading to the introduction of the [[TIE Advanced x1/Legends|TIE Advanced x1]]<ref name="FF73">{{FFCite|73|TIE11-12, ''TIE Defender''}}</ref> and its successor, the [[TIE/ad starfighter|TIE Avenger]].<ref name="X-wing Guide">''[[X-Wing: The Official Strategy Guide]]''</ref> The TIE/D Defender,<ref name="TF:OSG" /> commonly known as the TIE Defender or T/D,<ref name="TF" /> was touted as the next "logical advance" of the [[TIE Series]]—a starfighter that was fast, well armed and capable of [[Hyperspace/Legends|hyperspace]] travel.<ref name="EGVV" /> |
| − | [[Sienar Fleet Systems/Legends|Sienar Fleet Systems]] followed specific Imperial instruction in developing the TIE Defender,<ref name="EGVV" /> among them the requirement that the fighter would exceed the mission capability of a [[Flight|flight group]] of four standard TIE Fighters.<ref name="TOSVC67"> |
+ | [[Sienar Fleet Systems/Legends|Sienar Fleet Systems]] followed specific Imperial instruction in developing the TIE Defender,<ref name="EGVV" /> among them the requirement that the fighter would exceed the mission capability of a [[Flight group/Legends|flight group]] of four standard TIE Fighters.<ref name="TOSVC67-LC">{{StarshipsVehiclesCite|67|Legendary Craft|The TIE/D defender}}</ref> As such, it was equipped with a series of innovations over previous models.<ref name="FF73" /> The practice of designing craft to explicit consumer specifications was one that Sienar would continue with the later [[Scimitar assault bomber]]<ref name="AJ15a">{{Journal|15|Special Military Unit Intelligence Update}}</ref> and [[Aleph-class starfighter|''Aleph''-class starfighter]].<ref name="Betrayal">''[[Legacy of the Force: Betrayal]]''</ref> The TIE Defender was 9.2 [[Imperial standard meter|meters]] long.<ref name="Databank" /> |
===Pilot module=== |
===Pilot module=== |
||
| + | {{Quote|Energy management will be a bit more complex, but the Defender has much more powerful energy systems. This will allow you to maintain most systems at maximum recharge and still retain a high speed.|[[Imperial briefing officer]]|audio=TDEnergyManagement-TF.ogg|<ref name="TF" />}} |
||
| − | [[File:DefenderFF1.jpg|thumb|left|A TIE Defender's pilot module]] |
||
| + | [[File:TIEDefenderCockpit-FF73.png|thumb|left|220px|A TIE Defender's pilot module]] |
||
| − | The [[Pilot/Legends|pilot]] module was similar to those found in other TIE series fighters, with a ball [[Cockpit/Legends|cockpit]] and a hatch on the top for entry and egress.<ref name="Fact File" /> The module had room for a single pilot,<ref name="TIE Guide" /> 65 [[Kilogram/Legends|kilograms]] of cargo<ref name="More Starships!" /> and consumables for up to one [[Standard week|week]].<ref name="AoRCR" /> Like previous TIE models, the TIE Defender lacked [[Life support/Legends|life support]] systems and pilots were required to wear the standard sealed [[TIE pilot]] [[Flight suit/Legends|flight suit]]. In a departure from the design of previous TIE models, instead of two parallel wings to either side of the pilot module, the TIE Defender had three [[Quadanium steel/Legends|quadanium steel]] [[Solar panel|solar array]] wings mounted around an aft section. The rear superstructure contained an [[I-s4d solar ionization reactor]] to store and convert solar energy collected from the wing panels.<ref name="TOSVC67" /> The distinctive triple-wing shape of the TIE Defender led [[Corran Horn]] to dub them "trips,"<ref name="Isard's Revenge" /> and the nickname was also adopted by other Rebel pilots.<ref name="TOSVC67" /> The wings themselves appeared similar to those found on the [[TIE/IN interceptor|TIE Interceptor]] and TIE Avenger; unlike on its predecessors, the wings on the TIE Defender were angled out instead of in.<ref name="Isard's Revenge" /> The inclusion of a third wing provided additional solar power to increase the ship's range<ref name="Fact File" /> and the ship's energy management system was designed to allow weapons and [[Deflector shield/Legends|shields]] to be charged with minimum loss of power to the propulsion system.<ref name="TIE Fighter" /> |
||
| + | The [[Pilot/Legends|pilot]] module was similar to those found in other TIE series fighters, with a ball [[Cockpit/Legends|cockpit]] and a hatch on the top for entry and egress.<ref name="FF73" /> The module had room for a single pilot,<ref name="TF:OSG" /> 65 [[Kilogram/Legends|kilograms]] of cargo<ref name="More Starships!" /> and consumables for up to one [[Standard week/Legends|week]].<ref name="AoRCR" /> Like previous TIE models, the TIE Defender lacked [[Life support/Legends|life support]] systems and pilots were required to wear the standard sealed [[TIE pilot]] [[Flight suit/Legends|flight suit]].<ref name="TOSVC67-LC" /> |
||
| + | |||
| + | In a departure from the design of previous TIE models, which typically had two parallel wings to either side of the pilot module,<ref name="TF" /> the TIE Defender had three [[Quadanium steel/Legends|quadanium steel]] [[Solar panel|solar array]] wings<ref name="TOSVC67-IC">{{StarshipsVehiclesCite|67|In Command|The TIE/D defender}}</ref> mounted around an aft section. The rear superstructure contained an [[I-s4d solar ionization reactor/Legends|I-s4d solar ionization reactor]] to store and convert solar energy collected from the wing panels.<ref name="TOSVC67-LC" /> The distinctive triple-wing shape of the TIE Defender led [[Corran Horn/Legends|Corran Horn]] to dub them "trips,"<ref name="Isard's Revenge">''[[X-Wing: Isard's Revenge]]''</ref> and the nickname was also adopted by other Rebel pilots.<ref name="TOSVC67-LC" /> The wings themselves appeared similar to those found on the [[TIE/IN interceptor/Legends|TIE Interceptor]] and TIE Avenger; unlike on its predecessors, the wings on the TIE Defender were angled out instead of in.<ref name="Isard's Revenge" /> The inclusion of a third wing provided additional solar power to increase the ship's range<ref name="FF73" /> and the ship's energy management system was designed to allow weapons and [[Deflector shield/Legends|shields]] to be charged with minimum loss of power to the propulsion system.<ref name="TF" /> |
||
| − | One disadvantage of the design was an aft blind spot which could potentially be exploited by enemy fighters maneuverable enough to get behind the Defender<ref name="CCG Special">{{CCG|set=Special Edition Limited|link=SpecialEdition-Dark/large/tiedefendermark1.gif|cardname=TIE Defender Mark I}}</ref> and which was the cause of some frustration among pilots.<ref name=" |
+ | One disadvantage of the design was an aft blind spot which could potentially be exploited by enemy fighters maneuverable enough to get behind the Defender<ref name="CCG Special">{{CCG|set=Special Edition Limited|link=SpecialEdition-Dark/large/tiedefendermark1.gif|cardname=TIE Defender Mark I}}</ref> and which was the cause of some frustration among pilots.<ref name="FF73" /> |
===Propulsion=== |
===Propulsion=== |
||
| + | {{Quote|With its hyperdrive capability, high maneuverability, the quickest acceleration and fastest sublight speed yet achieved, you have the most powerful starfighter in the galaxy!|Imperial briefing officer|audio=TDSalesPitch-TF.ogg|<ref name="TF" />}} |
||
| − | The TIE Defender was one of the fastest starfighters in use during the [[Galactic Civil War/Legends|Galactic Civil War]].<ref name="EGVV" /> Although it was based on the standard [[Twin ion engine/Legends|twin ion engine]] design, it was upgraded to the entirely new,<ref name="Fact File" /> powerful [[P-sz9.7 twin ion engine]], which allowed it a maximum acceleration of 4,220 G<ref name="NEGVV" /> or 21 [[Megalight|MGLT]]/[[Standard second|s]] and a top speed of 144 MGLT<ref name="XWA" /> or 1,680 [[Kilometer/Legends|km]]/[[Standard hour/Legends|h]] in an [[Atmosphere/Legends|atmosphere]]—almost 40 percent faster than a standard TIE Fighter.<ref name="NEGVV" /> With [[Tractor beam/Legends|tractor beam]] recharge power redirected to the engines, the top speed could be increased to 180 MGLT.<ref name="XWA" /> In addition to the main thrusters located in the aft section,<ref name="Fact File" /> the Defender's triple wing design allowed for three arrays of maneuvering jets<ref name="Databank" />—which gave it a maneuverability rating of 110 [[DPF]]<ref name="XWA" />—and it featured an advanced [[F-s5x flight avionics system]] to process the pilot's instructions. When combined, these systems made the ship not only faster, but more agile than any other starfighter in Imperial service<ref name="Databank" /> and capable of matching the fastest starfighters in the [[Alliance Fleet/Legends|Alliance Fleet]].<ref name="TOSVC67" /> |
||
| + | The TIE Defender was one of the fastest starfighters in use during the [[Galactic Civil War/Legends|Galactic Civil War]].<ref name="EGVV" /> Although it was based on the standard [[Twin ion engine/Legends|twin ion engine]] design, it was upgraded to the entirely new<ref name="FF73" /> [[P-sz9.7 twin ion engine/Legends|P-sz9.7 twin ion engine]], which was rated at 230 [[KTU]]<ref name="TF:OSG" /> and allowed it a maximum acceleration of 4,220 G<ref name="NEGVV" /> or 21 [[Megalight|MGLT]]/[[Standard second|s]] and a top speed of 144 MGLT<ref name="XWA" /> or 1,680 [[Kilometer per hour/Legends|km/h]] in an [[Atmosphere/Legends|atmosphere]]—almost 40 percent faster than a standard TIE Fighter.<ref name="NEGVV" /> With [[Tractor beam/Legends|tractor beam]] recharge power redirected to the engines, the top speed could be increased to 180 MGLT.<ref name="XWA" /> In addition to the main thrusters located in the aft section,<ref name="FF73" /> the Defender's triple wing design allowed for three arrays of maneuvering jets<ref name="Databank" />—which gave it a maneuverability rating of 110 [[DPF/Legends|DPF]]<ref name="XWA" />—and it featured an advanced [[F-s5x flight avionics system]] to process the pilot's instructions. When combined, these systems made the ship not only faster, but more agile than any other starfighter in Imperial service<ref name="Databank" /> and capable of matching the fastest starfighters in the [[Alliance Fleet]].<ref name="TOSVC67-LC" /> |
||
| − | The TIE Defender also featured a hyperdrive which allowed it to operate independently of [[Capital ship/Legends|capital ships]].<ref name="EGVV" /> Testing of the original prototype indicated the need for a more powerful hyperdrive<ref name="CCG DS2">{{CCG|set=Death Star II Limited|link=DeathStarII-Dark/large/onyx2.gif|cardname=Onyx 2}}</ref> and production models included a class 2,<ref name="NEGVV" /> [[ND9 hyperdrive motivator]]<ref name=" |
+ | The TIE Defender also featured a hyperdrive which allowed it to operate independently of [[Capital ship/Legends|capital ships]].<ref name="EGVV" /> Testing of the original prototype indicated the need for a more powerful hyperdrive<ref name="CCG DS2">{{CCG|set=Death Star II Limited|link=DeathStarII-Dark/large/onyx2.gif|cardname=Onyx 2}}</ref> and production models included a class 2,<ref name="NEGVV" /> [[ND9 hyperdrive motivator]]<ref name="TF:OSG" /> modified from the version developed for the TIE Avenger.<ref name="DOE" /> The ship had a Sienar [[N-s6 Navcon/Legends|N-s6 Navcon]] [[Navigation computer/Legends|navigation computer]]<ref name="TF:OSG" /> with a ten-jump memory.<ref name="SotG" /> |
===Armament=== |
===Armament=== |
||
| + | {{Quote|You'll find the Sienar Fleet Systems TIE Defender is the fastest, best-equipped starfighter in the galaxy.|An Imperial flight instructor|<ref name="Isard's Revenge" />}} |
||
| − | [[File:Defenderff2.jpg|thumb|left|One of the TIE Defender's quadanium steel solar array wings]] |
||
| + | [[File:TIEDefenderwing-FF73.png|thumb|right|220px|One of the TIE Defender's quadanium steel solar array wings]] |
||
| − | The TIE Defender's weapons systems were designed to allow it to engage multiple enemy fighters<ref name="EGVV" /> as well as the armed freighters frequently used by the Alliance.<ref name="More Starships!" /> It carried a formidable array of weaponry; in standard configuration it had four [[L-s9.3 laser cannon]]s mounted on the two lower wings and two [[NK-3 ion cannon]]s mounted on the upper wing. The laser and [[Ion cannon/Legends|ion cannons]] could be set to fire separately or, if concentrated power was required, to fire-linked in either pairs or quartets.<ref name="NEGVV" /> The ion cannons could even be fired simultaneously with the laser cannons.<ref name="More Starships!" /> Two targeting sensors were located between each pair of cannons to provide the pilot with a constant stream of targeting information.<ref name="Fact File" /> The ship also featured two [[M-g-2 general-purpose warhead launcher]]s on the bottom of the pilot module,<ref name="Databank" /> each of which could be equipped with a standard load of three [[Proton torpedo/Legends|proton torpedoes]] or four [[Concussion missile/Legends|concussion missiles]].<ref name="TOSVC67" /> Depending on the mission profile, the ship could be fitted with alternative [[warhead]]s such as [[Proton rocket/Legends|proton rockets]], [[Proton bomb/Legends|proton bombs]], or [[magnetic pulse]] warheads.<ref name="TIE Fighter" /> The inclusion of warhead launchers in the design was considered audacious by some members of the design team.<ref name="Fact File" /> |
||
| + | The TIE Defender's weapons systems were designed to allow it to engage multiple enemy fighters<ref name="EGVV" /> as well as the armed freighters frequently used by the Alliance.<ref name="More Starships!" /> It carried a formidable array of weaponry; in standard configuration it had four [[L-s9.3 laser cannon/Legends|L-s9.3 laser cannons]] mounted on the two lower wings and two [[NK-3 ion cannon]]s mounted on the upper wing. The laser and [[Ion cannon/Legends|ion cannons]] could be set to fire separately or, if concentrated power was required, to fire-linked in either pairs or quartets.<ref name="NEGVV" /> The ion cannons could even be fired simultaneously with the laser cannons.<ref name="More Starships!" /> Two targeting sensors were located between each pair of cannons to provide the pilot with a constant stream of targeting information.<ref name="FF73" /> |
||
| + | The ship also featured two [[M-g-2 general-purpose warhead launcher]]s on the bottom of the pilot module,<ref name="Databank" /> each of which could be equipped with a standard load of three [[Proton torpedo/Legends|proton torpedoes]] or four [[Concussion missile/Legends|concussion missiles]]. Depending on the mission profile, the ship could be fitted with alternative [[Warhead/Legends|warheads]] such as [[Proton rocket/Legends|proton rockets]], [[Proton bomb/Legends|proton bombs]], or [[Magnetic pulse (warhead)|magnetic pulse]] warheads.<ref name="DOE" /> The inclusion of warhead launchers in the design was considered audacious by some members of the design team.<ref name="FF73" /> |
||
| − | The small tractor beam projector developed for the TIE Avenger could be easily fitted to the Defender.<ref name="TIE Fighter" /> The tractor beam had limited range and could only be used for a short time before stopping to recharge, but it allowed the pilot to temporarily inhibit the mobility of enemy fighters, making it easier to target them with the ship's other weapon systems.<ref name="TOSVC67" /> Models produced by [[Ysanne Isard]]'s Defender production facility regularly carried such tractor beams and the technology found other uses, such as allowing TIE Defenders to tow damaged starfighters until they could achieve the required velocity to enter hyperspace. Corran Horn discovered that by using the beam to target a large object, he could effectively use it as an anchor, allowing the TIE Defender to achieve a tighter turning circle.<ref name="Isard's Revenge" /> |
||
| + | The small tractor beam projector developed for the TIE Avenger could be easily fitted to the Defender.<ref name="TF" /> The tractor beam had limited range and could only be used for a short time before stopping to recharge, but it allowed the pilot to temporarily inhibit the mobility of enemy fighters, making it easier to target them with the ship's other weapon systems.<ref name="TOSVC67-SVD">{{StarshipsVehiclesCite|67|Starship & Vehicle Directory|The TIE/ad avenger}}</ref> Models produced by [[Ysanne Isard]]'s Defender production facility regularly carried such tractor beams and the technology found other uses, such as allowing TIE Defenders to tow damaged starfighters until they could achieve the required velocity to enter hyperspace. Corran Horn discovered that by using the beam to target a large object, he could effectively use it as an anchor, allowing the TIE Defender to achieve a tighter turning circle.<ref name="Isard's Revenge" /> |
||
| − | The ship's defenses were provided by a pair of forward and rear projecting [[Novaldex/Legends|Novaldex]] deflector shield [[Deflector shield generator/Legends|generators]]—another advantage over standard TIE models.<ref name="Databank" /> The shields were designed to recharge more rapidly than in previous Imperial fighters<ref name="TIE Fighter" /> and were nearly as powerful as those found on capital ships,<ref name="Mindor">''[[Luke Skywalker and the Shadows of Mindor]]''</ref> with a total rating of 100 [[SBD]].<ref name="TIE Guide" /> The fighters were not equipped with [[Particle shield/Legends|particle shields]], relying on the reinforced [[Titanium/Legends|titanium]] [[Hull/Legends|hull]] to absorb impacts from matter.<ref name="Mindor" /> Its hull and wings were the strongest of any TIE series starfighter<ref name="TOSVC67" /> and were rated at 14 [[RU]].<ref name="XWA" /> |
||
| + | |||
| + | The ship's defenses were provided by a pair of forward and rear projecting [[Novaldex/Legends|Novaldex]] deflector shield [[Deflector shield generator/Legends|generators]]—another advantage over standard TIE models.<ref name="Databank" /> The shields were designed to recharge more rapidly than in previous Imperial fighters<ref name="TF" /> and were nearly as powerful as those found on capital ships,<ref name="Mindor">''[[Luke Skywalker and the Shadows of Mindor]]''</ref> with a total rating of 100 [[SBD/Legends|SBD]].<ref name="TF:OSG" /> The fighters were not equipped with [[Particle shield/Legends|particle shields]], relying on the reinforced [[Titanium/Legends|titanium]] [[Hull/Legends|hull]] to absorb impacts from matter.<ref name="Mindor" /> Its hull and wings were the strongest of any TIE series starfighter<ref name="TOSVC67-LC" /> and were rated at 14 [[RU/Legends|RU]].<ref name="XWA" /> |
||
===Systems=== |
===Systems=== |
||
| − | [[File:DefenderCockpit.jpg|thumb| |
+ | [[File:DefenderCockpit.jpg|thumb|left|220px|Interior view of a TIE Defender cockpit]] |
As with other TIE series fighters, the TIE Defender used a wheel and yoke control system. Pulling back would cause the ship to climb, pushing forward would cause it to dive and the ship could be made to bank and turn by twisting the controls. Grips on either side had the weapons trigger switches while an array of buttons and switches in the middle controlled other functions, including throttle, weapons selection and target acquisition. Manipulating rudder pedals caused maneuvering planes to expand or contract to angle [[Engine/Legends|engine]] thrust and quickly alter the ship's trajectory. The ship featured an auto-landing function to plot entry vector and landing speed, although the pilot could retain manual control if they preferred. When not in use, the ship could be left in a password controlled standby mode to prevent unauthorized use.<ref name="Isard's Revenge" /> |
As with other TIE series fighters, the TIE Defender used a wheel and yoke control system. Pulling back would cause the ship to climb, pushing forward would cause it to dive and the ship could be made to bank and turn by twisting the controls. Grips on either side had the weapons trigger switches while an array of buttons and switches in the middle controlled other functions, including throttle, weapons selection and target acquisition. Manipulating rudder pedals caused maneuvering planes to expand or contract to angle [[Engine/Legends|engine]] thrust and quickly alter the ship's trajectory. The ship featured an auto-landing function to plot entry vector and landing speed, although the pilot could retain manual control if they preferred. When not in use, the ship could be left in a password controlled standby mode to prevent unauthorized use.<ref name="Isard's Revenge" /> |
||
| − | Various display panels inside the cockpit allowed the pilot to monitor ship's systems and the surrounding area. The main [[Combat Multi-view Display]] displayed [[Sensor/Legends|sensor]] data on targeted ships while additional monitors displayed short range sensor contacts. Additional panels displayed the remaining charge of weapons, shields and tractor beam systems, current warhead load and power usage. A [[Chronometer/Legends|chronometer]] was used to display the mission time,<ref name=" |
+ | Various display panels inside the cockpit allowed the pilot to monitor the ship's systems and the surrounding area. The main [[Combat Multi-view Display]] displayed [[Sensor/Legends|sensor]] data on targeted ships while additional monitors displayed short range sensor contacts. Additional panels displayed the remaining charge of weapons, shields and tractor beam systems, current warhead load and power usage. A [[Chronometer/Legends|chronometer]] was used to display the mission time,<ref name="TF" /> or during hyperspace travel to countdown to reversion to [[Realspace/Legends|realspace]].<ref name="Isard's Revenge" /> A [[Heads-up display/Legends|heads-up display]] assisted the pilot in aiming the ship's weapons and displayed data from the ship's threat warning system.<ref name="TF" /> Like other TIE series starfighters, TIE Defenders were mounted on racks in the [[Hangar/Legends|hangar]] when carried aboard a capital ship.<ref name="TF" /><ref name="FF53" /> |
===Cost=== |
===Cost=== |
||
| − | [[File: |
+ | [[File:TIEdefender_schem.jpg|thumb|right|220px|TIE Defender schematics]] |
| − | The TIE Defender was in many ways far superior to any other starfighter of the time, capable of outperforming the majority of Rebel starfighters with its combination of firepower, speed, and maneuverability.<ref name=" |
+ | The TIE Defender was in many ways far superior to any other starfighter of the time, capable of outperforming the majority of Rebel starfighters with its combination of firepower, speed, and maneuverability.<ref name="FF73" /> The sophisticated features of the TIE Defender had two major implications: firstly the inclusion of the hyperdrive, shields, and reinforced armor made the ship heavier than any of its predecessors—a fact which made its speed and maneuverability all the more impressive.<ref name="FF73" /> Secondly and more importantly, the ship was very expensive, with each unit costing 300,000 [[Galactic Credit Standard/Legends|credits]]—more than five times the cost of a standard TIE fighter—<ref name="EGVV" />or 80,000 credits used.<ref name="SotG" /> High maintenance and training costs added further to the expense of the fighters.<ref name="AoRCR" /> |
==Role== |
==Role== |
||
| − | {{Quote|TIE Defender, standing by.|A TIE Defender pilot|Star Wars: Empire at War: Forces of Corruption}} |
+ | {{Quote|TIE Defender, standing by.|A TIE Defender pilot|<ref name="FoC">''[[Star Wars: Empire at War: Forces of Corruption]]''</ref>}} |
| − | The TIE Defender was designed to serve as a multi-role starfighter, capable and durable enough to take on a variety of missions.<ref name="AoRCR" /> Standard Imperial doctrine recommended that TIE Defenders operate in flight groups of four; however, Imperial commanders took advantage of the starfighter's superior abilities to customize mission forces on a case-by-case basis.<ref name="EGVV" /> Defender pilots often found themselves occupying mission roles previously held by older fighters such as TIE Interceptors and [[Alpha-class Xg-1 Star Wing|Assault Gunboats]].<ref name=" |
+ | The TIE Defender was designed to serve as a multi-role starfighter, capable and durable enough to take on a variety of missions.<ref name="AoRCR" /> Standard Imperial doctrine recommended that TIE Defenders operate in flight groups of four; however, Imperial commanders took advantage of the starfighter's superior abilities to customize mission forces on a case-by-case basis.<ref name="EGVV" /> Defender pilots often found themselves occupying mission roles previously held by older fighters such as TIE Interceptors and [[Alpha-class Xg-1 Star Wing/Legends|Assault Gunboats]].<ref name="DOE" /> |
| − | [[File: |
+ | [[File:TIEdefender_negvv.png|thumb|left|220px|A TIE Defender]] |
| − | The TIE Defender's weaponry and deflector shields made it an ideal space superiority fighter, capable of engaging multiple enemies at once.<ref name="EGVV" /> The craft possessed impressive speed promoting its function as a superior [[Interceptor/Legends|interceptor]], capable of eliminating incoming starfighters before they posed a threat to Imperial capital ships. Pound for pound each TIE Defender matched or exceeded all Rebel starfighters in speed, armament, defenses, and maneuverability, proving a worthy adversary against even Imperial forces.<ref name=" |
+ | The TIE Defender's weaponry and deflector shields made it an ideal space superiority fighter, capable of engaging multiple enemies at once.<ref name="EGVV" /> The craft possessed impressive speed promoting its function as a superior [[Interceptor/Legends|interceptor]], capable of eliminating incoming starfighters before they posed a threat to Imperial capital ships. Pound for pound each TIE Defender matched or exceeded all Rebel starfighters in speed, armament, defenses, and maneuverability, proving a worthy adversary against even Imperial forces.<ref name="TF:OSG" /> Their effectiveness against Rebel forces earned them the nickname "[[T-65 X-wing starfighter/Legends|X-wing]] Killers" among TIE Defender pilots and crew.<ref name="AoRCR" /> |
| − | Their hyperdrives allowed TIE Defenders to conduct patrols across large areas of space without support from capital ships.<ref name="EGVV" /> The versatility of the TIE Defender allowed a large degree of flexibility in its use, as even a single craft could prove formidable,<ref name="Databank" /> able to outrun or outgun enemy fighters. While on recon missions, Defenders could also bring heavy ordnance to bear on enemy capital ships. Upon the discovery of [[Grand Admiral/Legends|Grand Admiral]] [[Demetrius Zaarin|Zaarin's]] plot against [[Galactic Emperor/Legends|Emperor]] [[Palpatine]], the [[Sith Lord/Legends|Sith Lord]] [[Anakin Skywalker/Legends|Darth Vader]] employed the TIE Defender's abilities in that role, breaking through Zaarin's lines to reach the planet [[Coruscant/Legends|Coruscant]]. [[Lord/Legends|Lord]] Vader's flight group destroyed the [[Immobilizer 418 cruiser]] ''[[Harpago]]'', which was attempting to block his imperative voyage.<ref name=" |
+ | Their hyperdrives allowed TIE Defenders to conduct patrols across large areas of space without support from capital ships.<ref name="EGVV" /> The versatility of the TIE Defender allowed a large degree of flexibility in its use, as even a single craft could prove formidable,<ref name="Databank" /> able to outrun or outgun enemy fighters. While on recon missions, Defenders could also bring heavy ordnance to bear on enemy capital ships. Upon the discovery of [[Grand Admiral/Legends|Grand Admiral]] [[Demetrius Zaarin|Zaarin's]] plot against [[Galactic Emperor/Legends|Emperor]] [[Palpatine/Legends|Palpatine]], the [[Sith Lord/Legends|Sith Lord]] [[Anakin Skywalker/Legends|Darth Vader]] employed the TIE Defender's abilities in that role, breaking through Zaarin's lines to reach the planet [[Coruscant/Legends|Coruscant]]. [[Lord/Legends|Lord]] Vader's flight group destroyed the [[Immobilizer 418 Interdictor-class Heavy Cruiser|Immobilizer 418 cruiser]] ''[[Harpago]]'', which was attempting to block his imperative voyage.<ref name="TF" /> |
| − | The TIE Defender's ion cannons paired with the ability to carry multiple warhead types allowed it to function as an effective light bomber or assault fighter.<ref name="Rebellion Guide"> |
+ | The TIE Defender's ion cannons paired with the ability to carry multiple warhead types allowed it to function as an effective light bomber or assault fighter.<ref name="Rebellion Guide">[[Star Wars: Rebellion: Prima's Official Strategy Guide|''Star Wars: Rebellion'': Prima's Official Strategy Guide]]</ref> TIE Defenders often assumed missions to disable or destroy enemy installations or capital ships, at times by a single flight group or with only [[Gamma-class ATR-6 assault transport|''Gamma''-class ATR-6 assault transports]] as support.<ref name="DOE" /> Defender [[Squadron/Legends|squadrons]] could combine their firepower to eliminate a target as large as [[Alliance Space Station]]s, while still covering the starfighter interception role.<ref name="FoC Guide">[[Star Wars: Empire at War: Forces of Corruption Expansion: Prima Official Game Guide|''Star Wars: Empire at War: Forces of Corruption Expansion'': Prima Official Game Guide]]</ref> |
==Training== |
==Training== |
||
| − | {{Quote|You |
+ | {{Quote|Now, some good news for you! You have been selected to receive advanced combat training in the new TIE Defender. Report to the Combat Chamber...|Imperial briefing officer|<ref name="TF" />}} |
| − | [[File:Defhanger.jpg |
+ | [[File:Defhanger.jpg|thumb|right|220px|TIE Defender prior to launch]] |
| − | Opportunities to train on the TIE Defender were limited,<ref name="NEGVV" /> only high-ranking [[ace]] TIE Interceptor pilots<ref name="AoRCR" /> who had survived at least twenty combat missions,<ref name="NEGVV" /> and whose loyalty to the Empire was undisputed, were selected, ensuring that only the best pilots flew the advanced starfighter.<ref name="AoRCR" /> |
+ | Opportunities to train on the TIE Defender were limited,<ref name="NEGVV" /> only high-ranking [[Ace/Legends|ace]] TIE Interceptor pilots<ref name="AoRCR" /> who had survived at least twenty combat missions,<ref name="NEGVV" /> and whose loyalty to the Empire was undisputed, were selected, ensuring that only the best pilots flew the advanced starfighter.<ref name="AoRCR" /> During the Galactic Civil War, Imperial pilots were required to gain a training certificate by flying the TIE Defender through an enclosed training course before proceeding to [[Holosimulator|simulated]] combat missions. The training course consisted of a cylindrical loop containing targets and obstacles for pilots to traverse. Defender pilots raced against the clock to navigate the course, destroying targets when at all possible to gain bonus time.<ref name="TF" /> Having received a training certificate, Defender pilots could move onto the combat scenarios, some of which were based on historical sorties, designed to familiarize the pilot with the controls and handling of the starfighter before they entered actual combat.<ref name="TF:OSG" /> If the pilot successfully completed all four training missions, they received the gold TIE Defender combat medallion.<ref name="TF" /> |
| + | By the later years of the Empire, less rigid training regimes were in use. When [[Rogue Squadron/Legends|Rogue Squadron]] trained on the TIE Defender against Imperial forces commanded by Ysanne Isard, they engaged the Imperials in a series of mock battles including a recreation of an Imperial attack on Rogue Squadron's former base at [[Yag-prime]].<ref name="Isard's Revenge" /> |
||
| − | The first combat training exercise tested the pilot's ability to [[Starfighter combat/Legends|dogfight]] against a variety of Rebel starfighters and allowed them to customize the difficulty of the mission by controlling the number and skill of opponents, to a maximum of 250 potential [[Death/Legends|kills]]. For a greater challenge, the pilot could choose to face enemy TIE Defenders. Defender pilots began the simulation stationary, surrounded by five cargo containers. Upon inspection of named containers, for example "[[BTL Y-wing starfighter|Y-wing]]," individual starfighters entered the [[Star system/Legends|system]] at increasing difficulties, five in all. Defender pilots could increase the challenge by attacking the container, sending in all difficulty levels at one time. In the event that the pilot could not handle the increased demands of the mission, destroying the container resulted in the spacecraft derived from the inspection entering hyperspace. Another control level installed consisted of enemy fighters responding to the trainee's orders; pilots could instruct enemy fighters to wait or head for home in the event the challenge grew too great.<ref name="TIE Fighter" /> |
||
| + | ===Combat scenarios=== |
||
| − | In order to test the pilot's ability to make effective use of a tractor beam, the second combat exercise challenged them to prevent the escape of Rebel spy from a [[XQ3 Platform|salvage yard]] near [[Venzeiia 2 Prime]]. In a recreation of a mission led by the [[Imperial I-class Star Destroyer/Legends|''Imperial''-class Star Destroyer]] ''[[Glory (Imperial-class)|Glory]]'', the pilot had to snare a spy's [[YT-1300 light freighter/Legends|YT-1300 light freighter]] in order to disable it for capture by Imperial forces, and then assist in the capture of the yard itself. The pilot arrived in the system to find three [[Corellian/Legends|Corellian]] [[Transport/Legends|transports]] aboard the station. With multiple transports, some fleeing from the arrival of Imperial forces, pilots had to move quickly to disable all transports and locate the spy. Rebel [[RZ-1 A-wing interceptor/Legends|A-wings]] added to trainee frustration by acquiring missile locks as trainees scrambled to stop fleeing transports. After disabling all three transports, trainees had completed the primary objective, but could continue to aid in the capture of the platform, protect Imperial boarding craft, disable a Rebel [[A/SF-01 B-wing starfighter/Legends|B-wing]], and destroy any other Rebel sympathizer craft in the area.<ref name="TIE Fighter" /> |
||
| + | The first combat training exercise tested the pilot's ability to [[Starfighter combat/Legends|dogfight]] against a variety of Rebel starfighters and allowed them to customize the difficulty of the mission by controlling the number and skill of opponents, to a maximum of 250 potential [[Death/Legends|kills]]. For a greater challenge, the pilot could choose to face enemy TIE Defenders. Defender pilots began the simulation stationary, surrounded by five cargo containers. Upon inspection of named containers, for example "[[BTL Y-wing starfighter/Legends|Y-wing]]," individual starfighters entered the [[Star system/Legends|system]] at increasing difficulties, five in all. Defender pilots could increase the challenge by attacking the container, sending in all difficulty levels at one time. In the event that the pilot could not handle the increased demands of the mission, destroying the container resulted in the spacecraft derived from the inspection entering hyperspace. Another control level installed consisted of enemy fighters responding to the trainee's orders; pilots could instruct enemy fighters to wait or head for home in the event the challenge grew too great.<ref name="TF" /> |
||
| + | In order to test the pilot's ability to make effective use of a tractor beam, the second combat exercise challenged them to prevent the escape of a Rebel spy from a [[XQ3 Platform|salvage yard]] near [[Venzeiia 2 Prime]]. In a recreation of a mission led by the [[Imperial I-class Star Destroyer/Legends|''Imperial''-class Star Destroyer]] [[Glory (Imperial-class)|''Glory'']], the pilot had to snare a spy's [[YT-1300 light freighter/Legends|YT-1300 light freighter]] in order to disable it for capture by Imperial forces, and then assist in the capture of the yard itself. The pilot arrived in the system to find three [[Corellian/Legends|Corellian]] [[Transport/Legends|transports]] aboard the station. With multiple transports, some fleeing from the arrival of Imperial forces, pilots had to move quickly to disable all transports and locate the spy. Rebel [[RZ-1 A-wing interceptor/Legends|A-wings]] added to trainee frustration by acquiring missile locks as trainees scrambled to stop fleeing transports. After disabling all three transports, trainees had completed the primary objective, but could continue to aid in the capture of the platform, protect Imperial boarding craft, disable a Rebel [[A/SF-01 B-wing starfighter/Legends|B-wing]], and destroy any other Rebel sympathizer craft in the area.<ref name="TF" /> |
||
| − | [[File:Defender6.jpg|thumb|right|200px|A TIE Defender leaves the hangar.]] |
||
| − | The third combat exercise demonstrated the ship's ability to operate independent of capital ships by inspecting vessels passing through a hyperspace jump point and disabling any vessels carrying contraband for capture by Imperial forces. After entering the system, pilots waited as cargo craft began passing through the sector, starting with [[Modular conveyor]]s. [[Cargo ferry|Cargo ferries]] soon followed, one of which contained Rebels. Pilots could disable the craft for capture immediately upon the discovery, or wait until after inspecting the remaining transports, completing the primary objective. After disabling the contraband-carrying cargo ferry, trainees fended off multiple series of Rebel starfighters, protecting their command ship and boarding craft. All secondary and bonus objectives could be completed by eliminating all non-Imperial craft in the system, and successfully capturing the contraband.<ref name="TIE Fighter" /> |
||
| + | [[File:Defender_hangar_IA.png|thumb|left|240px|A TIE Defender leaves the hangar.]] |
||
| − | As a final test of the trainee's abilities, the pilot learned to use the TIE Defender as a light bomber to attack capital ships, using warheads to quickly eliminate their shields and ion cannons to disable them for capture. Armed with proton bombs, trainees arrived in system to discover two Rebel [[Ton-Falk-class escort carrier|''Ton-Falk''-class escort carriers]] loaded with starfighters, however the primary objective only dictated the necessity of capturing one [[Carrier/Legends|carrier]]. Despite the heavy payload, pilots used their wing mates to strategically assault at least one carrier by eliminating its weapon emplacements, being unable to completely lower the carrier's shields with projectile ordnance. Once the carrier was disabled, trainees had completed their primary objective, and were able to continue with secondary and bonus goals of destroying an enemy [[EF76 Nebulon-B escort frigate/Legends|frigate]], [[CR90 corvette/Legends|corvettes]], and various Rebel starfighters.<ref name="TIE Fighter" /> |
||
| + | The third combat exercise demonstrated the ship's ability to operate independent of capital ships by inspecting vessels passing through a hyperspace jump point and disabling any vessels carrying contraband for capture by Imperial forces. After entering the system, pilots waited as cargo craft began passing through the sector, starting with [[Modular conveyor]]s. [[Cargo ferry|Cargo ferries]] soon followed, one of which contained Rebels. Pilots could disable the craft for capture immediately upon the discovery, or wait until after inspecting the remaining transports, completing the primary objective. After disabling the contraband-carrying cargo ferry, trainees fended off multiple series of Rebel starfighters, protecting their command ship and boarding craft. All secondary and bonus objectives could be completed by eliminating all non-Imperial craft in the system, and successfully capturing the contraband.<ref name="TF" /> |
||
| + | As a final test of the trainee's abilities, the pilot learned to use the TIE Defender as a light bomber to attack capital ships, using warheads to quickly eliminate their shields and ion cannons to disable them for capture. Armed with proton bombs, trainees arrived in system to discover two Rebel [[Ton-Falk-class escort carrier|''Ton-Falk''-class escort carriers]] loaded with starfighters, however the primary objective only dictated the necessity of capturing one [[Carrier/Legends|carrier]]. Despite the heavy payload, pilots used their wing mates to strategically assault at least one carrier by eliminating its weapon emplacements, being unable to completely lower the carrier's shields with projectile ordnance. Once the carrier was disabled, trainees had completed their primary objective, and were able to continue with secondary and bonus goals of destroying an enemy [[EF76 Nebulon-B escort frigate/Legends|frigate]], [[CR90 corvette/Legends|corvettes]], and various Rebel starfighters.<ref name="TF" /> |
||
| − | By the later years of the Empire, less rigid training regimes were in use. When [[Rogue Squadron/Legends|Rogue Squadron]] trained on the TIE Defender against Imperial forces commanded by Ysanne Isard, they engaged the Imperials in a series of mock battles including a recreation of an Imperial attack on Rogue Squadron's former base at [[Yag-prime]].<ref name="Isard's Revenge" /> |
||
==History== |
==History== |
||
===Early development=== |
===Early development=== |
||
{{Main|TIE/Ad x7}} |
{{Main|TIE/Ad x7}} |
||
| − | The Empire's loss at the [[Battle of Yavin/Legends|Battle of Yavin]] forced it to reconsider its tactics in fighting the Rebellion. Several new weapons projects were initiated as a result, among them the TIE Defender.<ref name="TOSVC67" /> Such was the importance of the TIE Defender that the top secret development project was conducted under the supervision of top naval commanders,<ref name="Databank" /> including Grand Admiral Demetrius Zaarin, then head of research and development for starfighter technology, and the project would see several prototype stages before its completion shortly before [[ |
+ | The Empire's loss at the [[Battle of Yavin/Legends|Battle of Yavin]] forced it to reconsider its tactics in fighting the Rebellion. Several new weapons projects were initiated as a result, among them the TIE Defender.<ref name="TOSVC67-LC" /> Such was the importance of the TIE Defender that the top secret development project was conducted under the supervision of top naval commanders,<ref name="Databank" /> including Grand Admiral Demetrius Zaarin,<ref name="TF" /> then head of research and development for starfighter technology,<ref name="DOE" /> and the project would see several prototype stages before its completion shortly before the [[Battle of Endor/Legends|Battle of Endor]]<ref name="TF" /> in [[4 ABY/Legends|4 ABY]].<ref name="NEC">''[[The New Essential Chronology]]''</ref> |
| − | The initial prototype for the TIE Defender was the [[TIE/Ad x7]], developed at the [[Sienar Advanced Research Division]] on [[Corulag/Legends|Corulag]]<ref name="CCW">''[[Coruscant and the Core Worlds]]''</ref> with input from Zaarin.<ref name="TOSVC67" /> Although the tri-wing design of the ship was in place for the initial prototype, the ship was intended only as a test bed for the drive and targeting systems;<ref name="CCW" /> it did not have the final ion engines<ref name="TOSVC67" /> and lacked the hyperdrive, ion cannons, and missile launchers which were incorporated into later prototypes and the final design.<ref name="CCW" /> |
+ | The initial prototype for the TIE Defender was the [[TIE/Ad x7]], developed at the [[Sienar Advanced Research Division]] on [[Corulag/Legends|Corulag]]<ref name="CCW">''[[Coruscant and the Core Worlds]]''</ref> with input from Zaarin.<ref name="TOSVC67-WOB">{{StarshipsVehiclesCite|67|Welcome On Board|Grand Admiral Demetrius Zaarin}}</ref> Although the tri-wing design of the ship was in place for the initial prototype, the ship was intended only as a test bed for the drive and targeting systems;<ref name="CCW" /> it did not have the final ion engines<ref name="TOSVC67-AS">{{StarshipsVehiclesCite|67|Action Stations|The defender attacks!}}</ref> and lacked the hyperdrive, ion cannons, and missile launchers which were incorporated into later prototypes and the final design.<ref name="CCW" /> |
| − | In early [[3 ABY/Legends|3 ABY]], the Empire launched a [[Battle of Hoth/Legends|massive assault]] on the [[Echo Base/Legends|Rebel base]] on [[Hoth/Legends|Hoth]].<ref name="ESB"> |
+ | In early [[3 ABY/Legends|3 ABY]], the Empire launched a [[Battle of Hoth/Legends|massive assault]] on the [[Echo Base/Legends|Rebel base]] on [[Hoth/Legends|Hoth]].<ref name="NEC" /><ref name="ESB">{{Film|V}}</ref> As the main Rebel forces struggled to delay the Imperials,<ref name="TOSVC67-AS" /> the Alliance's [[Renegade Squadron/Legends|Renegade Squadron]] destroyed the weaponry on two [[Victory II-class frigate|''Victory II''-class frigates]]<ref name="Renegade Squadron">''[[Star Wars Battlefront: Renegade Squadron]]''</ref> as they attempted to escape. The Imperials decided to test out the TIE Advanced x7 prototypes and dispatched a unit of the vessels to join the fight.<ref name="TOSVC67-AS" /> However, the early models lacked the speed of the final version and, although they now included missile launchers, the ion cannons were still absent.<ref name="Renegade Squadron" /> Six of the TIE Advanced x7 prototypes were destroyed by Renegade Squadron<ref name="TOSVC67-AS" /> who also managed to board a [[Star Destroyer/Legends|Star Destroyer]] and steal one of the fighters to be studied by [[Alliance High Command/Legends|Alliance High Command]].<ref name="Renegade Squadron" /> The Empire dismissed the theft as unimportant since the prototype lacked most of the systems planned for later models and, despite the prototypes' failure against the Rebels, the data collected during the battle proved useful to Sienar Fleet System's technicians in further developing the fighter.<ref name="TOSVC67-AS" /> |
===Final development and testing=== |
===Final development and testing=== |
||
| − | {{Quote|Those are only modified versions of the TIE advanced. We have something far more impressive to offer.|Demetrius Zaarin, to Maarek Stele| |
+ | {{Quote|Those are only modified versions of the TIE advanced. We have something far more impressive to offer.|Demetrius Zaarin, to Maarek Stele|<ref name="TF:OSG" />}} |
| − | [[File: |
+ | [[File:SFSTIEDefender-HerosGuide.jpg|thumb|right|200px|TIE Defender being advertised by Sienar Fleet Systems.]] |
| − | Following the Battle of Hoth, Emperor Palpatine charged Grand Admiral Zaarin with the continuing development of the TIE series. Zaarin had all ongoing projects transferred to the [[XQ6 Platform]] [[Research]] in the [[Parmel system]], including the TIE Defender and TIE Avenger, an evolution of Darth Vader's TIE Advanced x1 which Zaarin saw as merely a step towards completion of the TIE Defender. Both projects relied heavily upon the development of a hyperdrive which could be mass produced and which would be small enough to fit inside the fuselage of a TIE fighter. When that proved problematic to Zaarin's team, the Grand Admiral managed to acquire the technology from the [[Habeen]] through a combination of diplomacy and military action against their rivals, the [[Nharwaak]].<ref name="TOSVC67" /> By the time that the TIE Avenger, modified by Zaarin to use the Habeen hyperdrive technology, entered service, the TIE Defender project had reached the final prototype stage<ref name=" |
+ | Following the Battle of Hoth, Emperor Palpatine charged Grand Admiral Zaarin with the continuing development of the TIE series. Zaarin had all ongoing projects transferred to the [[XQ6 Platform]] [[Research]] in the [[Parmel system]], including the TIE Defender and TIE Avenger, an evolution of Darth Vader's TIE Advanced x1 which Zaarin saw as merely a step towards completion of the TIE Defender. Both projects relied heavily upon the development of a hyperdrive which could be mass produced and which would be small enough to fit inside the fuselage of a TIE fighter. When that proved problematic to Zaarin's team, the Grand Admiral managed to acquire the technology from the [[Habeen]] through a combination of diplomacy and military action against their rivals, the [[Nharwaak]].<ref name="TOSVC67-WOB" /> By the time that the TIE Avenger, modified by Zaarin to use the Habeen hyperdrive technology, entered service, the TIE Defender project had reached the final prototype stage<ref name="TF" /> and the Empire was planning to roll the finished product out as a replacement for the Assault Gunboat.<ref name="MtS7">{{WizardsCite|url=default.asp?x=starwars/article/Mesop7|text=Message to Spacers 7|int=Message to Spacers 7}}</ref> |
| − | When the final prototypes were ready for inspection, Darth Vader instructed Zaarin to have six of the new fighters delivered to Emperor Palpatine on Coruscant for his personal review. Three cargo ferries from |
+ | When the final prototypes were ready for inspection, Darth Vader instructed Zaarin to have six of the new fighters delivered to Emperor Palpatine on Coruscant for his personal review. Three cargo ferries from group [[Sela (cargo ferry group)|''Sela'']] were sent to Zaarin's research facility to collect the prototypes, loaded into [[Class-B cargo container|containers]] for transport. The Rebel Alliance attempted to disrupt the loading operation but their raiding party was defeated by Imperial fighters.<ref name="TF" /> |
| − | The Empire soon learned that the Rebels were planning an ambush at [[Vinzen Neela 5]], where the prototypes were to be transferred to the Imperial escort carrier ''[[Hininbirg]]''. That time, Rebel fighters were joined by the CR90 corvettes ''[[Mar Duun]]'' and ''[[Vop Hui]]'', which were attempting to plant a [[Space mine|minefield]] around the rendezvous point. Responding quickly to the threat, [[Maarek Stele]] led a group of TIE Avengers to the rendezvous point, arriving before the Imperial ships to prevent the ambush and cover the transfer operation, allowing the ''Hininbirg'' to complete the delivery of the prototypes to Coruscant.<ref name=" |
+ | The Empire soon learned that the Rebels were planning an ambush at [[Vinzen Neela 5]], where the prototypes were to be transferred to the Imperial escort carrier ''[[Hininbirg]]''. That time, Rebel fighters were joined by the CR90 corvettes ''[[Mar Duun]]'' and ''[[Vop Hui]]'', which were attempting to plant a [[Space mine|minefield]] around the rendezvous point. Responding quickly to the threat, [[Maarek Stele/Legends|Maarek Stele]] led a group of TIE Avengers to the rendezvous point, arriving before the Imperial ships to prevent the ambush and cover the transfer operation, allowing the ''Hininbirg'' to complete the delivery of the prototypes to Coruscant.<ref name="TF" /> |
| + | ===Deployment=== |
||
| − | [[File:Defender2.jpg|thumb|left|225px|A group of TIE Defenders fight Rebel forces.]] |
||
| + | [[File:Defender2.jpg|thumb|left|260px|A group of TIE Defenders fight Rebel forces.]] |
||
| − | After initial testing of the prototypes, the fighter entered service, deployed to a limited number of elite squadrons for full field testing.<ref name="Fact File" /> The ship received an icy reception from those in the Imperial hierarchy. Many in the Imperial Navy who had not been privy to the starfighter's development were surprised by its sudden introduction. Some resented the ship due to a feeling that Zaarin had gathered too much power and prestige, while others saw the fact that the ship did not fit in with the traditional tactics of the Imperial Navy as an admission of failure,<ref name="TOSVC67" /> leading to some resentment towards the ship, and the commanders that used them in battle.<ref name="More Starships!" /> Such was the level of resentment toward the ship that, had certain elements of the Imperial Navy known of its secret development, it is likely the project would have been abandoned before completion.<ref name="SotG" /> In the end, the field tests were never extensive and this, together with the prohibitive cost, meant that even an organization as wealthy as the Imperial Navy chose not to mass-deploy such a fighter.<ref name="Fact File" /> |
||
| + | After initial testing of the prototypes, the fighter entered service, deployed to a limited number of elite squadrons for full field testing.<ref name="FF73" /> The ship received an icy reception from those in the Imperial hierarchy. Many in the Imperial Navy who had not been privy to the starfighter's development were surprised by its sudden introduction. Some resented the ship due to a feeling that Zaarin had gathered too much power and prestige, while others saw the fact that the ship did not fit in with the traditional tactics of the Imperial Navy as an admission of failure,<ref name="TOSVC67-AS" /> leading to some resentment towards the ship, and the commanders that used them in battle.<ref name="More Starships!" /> Such was the level of resentment toward the ship that, had certain elements of the Imperial Navy known of its secret development, it is likely the project would have been abandoned before completion.<ref name="SotG" /> In the end, the field tests were never extensive and this, together with the prohibitive cost, meant that even an organization as wealthy as the Imperial Navy chose not to mass-deploy such a fighter.<ref name="FF73" /> |
||
Some of the fighters were used to protect the [[TIE Experimental Project]], another starfighter development project with which Zaarin was heavily involved. A handful of TIE Defenders from [[Shadow Squadron (TIE Defender)|Shadow Squadron]] responded to the Rebel attack on the [[Bretie Facility]] but were too late to prevent the loss of the facility. Members of Shadow Squadron were again involved in action against Rebel forces when the Alliance attacked the [[Obsidian (XQ1 Platform)|Obsidian]] research [[XQ1 Platform|platform]] but were destroyed along with the facility.<ref name="XWA" /> |
Some of the fighters were used to protect the [[TIE Experimental Project]], another starfighter development project with which Zaarin was heavily involved. A handful of TIE Defenders from [[Shadow Squadron (TIE Defender)|Shadow Squadron]] responded to the Rebel attack on the [[Bretie Facility]] but were too late to prevent the loss of the facility. Members of Shadow Squadron were again involved in action against Rebel forces when the Alliance attacked the [[Obsidian (XQ1 Platform)|Obsidian]] research [[XQ1 Platform|platform]] but were destroyed along with the facility.<ref name="XWA" /> |
||
===Zaarin's betrayal=== |
===Zaarin's betrayal=== |
||
| − | {{Quote|We're no match for those TIE Defenders. Let's get out of here!|A TIE Avenger pilot| |
+ | {{Quote|We're no match for those TIE Defenders. Let's get out of here!|A TIE Avenger pilot|audio=TDNoMatch-TF.ogg|<ref name="DOE" />}} |
| − | The TIE Defender's most extensive use during the Galactic Civil War occurred when Zaarin attempted a coup against Emperor Palpatine. While Darth Vader led the search for the forces of the treacherous [[Admiral/Legends|Admiral]] [[Harkov]], Zaarin's forces attacked Vader's ship, the Star Destroyer |
+ | The TIE Defender's most extensive use during the Galactic Civil War occurred when Zaarin attempted a coup against Emperor Palpatine. While Darth Vader led the search for the forces of the treacherous [[Admiral/Legends|Admiral]] [[Harkov]], Zaarin's forces attacked Vader's ship, the Star Destroyer [[Garrett (Star Destroyer)|''Garrett'']]. Though the ''Garrett'' survived, it had sustained damage that would prevent Vader from reaching Coruscant in time to warn the Emperor. However, the ''Garrett'' was one of the few ships to be carrying TIE Defenders, the [[Dark Lord of the Sith/Legends|Dark Lord of the Sith]] having brought them aboard in the hope of conducting operational trials. Vader selected five ace pilots, including Maarek Stele, to accompany him to Coruscant in the new starfighter.<ref name="TF" /> |
| − | After escaping a trap set by Zaarin's Immobilizer 418 cruiser ''Harpago''—destroying the ship with the help of the [[Nebulon-B2 frigate]] ''[[Osprey]]''—they arrived at Coruscant to find the Emperor's Star Destroyer, the |
+ | After escaping a trap set by Zaarin's Immobilizer 418 cruiser ''Harpago''—destroying the ship with the help of the [[Nebulon-B2 frigate]] ''[[Osprey]]''—they arrived at Coruscant to find the Emperor's Star Destroyer, the [[Majestic (Imperial-class)|''Majestic'']], badly damaged and the Emperor being taken to Zaarin's [[Flagship/Legends|flagship]], the Star Destroyer ''Glory''. The TIE Defenders disabled the Emperor's shuttle and protected it while the Emperor was rescued by loyal forces.<ref name="TF" /> |
| − | The Empire soon came to suspect that Zaarin had been planning his coup during the development of the TIE Defender, using its advanced technology to give him an advantage over loyalist forces. Indeed, Zaarin quickly attempted to ensure a technological advantage by eliminating TIE Avenger production facilities throughout the Empire. Although the Empire was unable to prevent the destruction of the facilities, Zaarin's own starfighters were used against him as TIE Defenders held his forces off long enough for Imperial personnel to evacuate and to prevent Zaarin from looting technology which could be used to produce his own TIE Avengers and TIE Defenders. They also proved instrumental in capturing magnetic pulse warhead technology from the Rebel station [[RS-32]].<ref name=" |
+ | The Empire soon came to suspect that Zaarin had been planning his coup during the development of the TIE Defender, using its advanced technology to give him an advantage over loyalist forces. Indeed, Zaarin quickly attempted to ensure a technological advantage by eliminating TIE Avenger production facilities throughout the Empire. Although the Empire was unable to prevent the destruction of the facilities, Zaarin's own starfighters were used against him as TIE Defenders held his forces off long enough for Imperial personnel to evacuate and to prevent Zaarin from looting technology which could be used to produce his own TIE Avengers and TIE Defenders. They also proved instrumental in capturing magnetic pulse warhead technology from the Rebel station [[RS-32]].<ref name="DOE" /> |
| + | ===Technological advantage=== |
||
| − | [[File:Defender4.jpg|thumb|right|225px|TIE Defenders in battle]] |
||
| + | {{Quote|It seems clear that Zaarin believed the technology embodied in the TIE Defender would give him the edge he needed to take out the Emperor. He did not foresee the extraordinary way in which you would turn his deadly weapon against him.|Imperial briefing officer, to Maarek Stele|audio=TDZaarinEdge-TF.ogg|<ref name="DOE" />}} |
||
| − | With the Empire's ability to manufacture TIE Avengers severely reduced, Zaarin continued to pursue a technological advantage over the Empire by targeting the research facility where he had overseen development of the TIE Defender. As Zaarin's forces attempted to escape with several TIE Defender prototypes, an Imperial strike force, consisting of TIE Defenders and assault transports, arrived to prevent the loss of the prototypes and to recapture the base itself. The Empire succeeded in preventing Zaarin from acquiring most of the remaining TIE Defender prototypes and, after the facility was secured, the Star Destroyer ''[[Adarga]]'' arrived to defend it.<ref name="TIE Fighter" /> |
||
| + | [[File:Defender4.jpg|thumb|right|260px|TIE Defenders in battle]] |
||
| + | With the Empire's ability to manufacture TIE Avengers severely reduced, Zaarin continued to pursue a technological advantage over the Empire by targeting the research facility where he had overseen development of the TIE Defender. As Zaarin's forces attempted to escape with several TIE Defender prototypes, an Imperial strike force, consisting of TIE Defenders and assault transports, arrived to prevent the loss of the prototypes and to recapture the base itself. The Empire succeeded in preventing Zaarin from acquiring most of the remaining TIE Defender prototypes and, after the facility was secured, the Star Destroyer ''[[Adarga]]'' arrived to defend it.<ref name="DOE" /> |
||
| − | Zaarin soon sent his own TIE Defenders and assault transports to retake the base. With the ''Adarga''{{'s}} supply of fighters insufficient to repel the attack and the shields on the research facility not yet at full strength, the Empire was forced to call for reinforcements and deploy one of their few remaining TIE Defenders. Since TIE Defenders were considered too valuable to destroy, Maarek Stele, piloting the Empire's TIE Defender, was given instructions to disable Zaarin's own TIE Defenders. Although the Empire succeeded in eliminating Zaarin's forces, even managing to capture some of his valuable TIE Defenders in the process, the ''Adarga'' took heavy damage and was forced to withdraw, leaving the base undefended.<ref name=" |
+ | Zaarin soon sent his own TIE Defenders and assault transports to retake the base. With the ''Adarga''{{'s}} supply of fighters insufficient to repel the attack and the shields on the research facility not yet at full strength, the Empire was forced to call for reinforcements and deploy one of their few remaining TIE Defenders. Since TIE Defenders were considered too valuable to destroy, Maarek Stele, piloting the Empire's TIE Defender, was given instructions to disable Zaarin's own TIE Defenders. Although the Empire succeeded in eliminating Zaarin's forces, even managing to capture some of his valuable TIE Defenders in the process, the ''Adarga'' took heavy damage and was forced to withdraw, leaving the base undefended.<ref name="DOE" /> |
| − | Zaarin had no intention of letting the Empire control the TIE Defender technology and led an assault to destroy the facility from the ''Glory''. With the ''Adarga'' gone, the Empire was forced to evacuate the two remaining prototypes on the [[BFF-1 bulk freighter]] ''[[Mharsup]]'', while the chief engineer fled with his team and the project data on the [[Lambda-class T-4a shuttle/Legends|''Lambda''-class T-4a shuttle]] ''[[G'nabgib]]''. A third TIE Defender, flown by Stele, assisted [[Delta-class JV-7 escort shuttle|''Delta''-class JV-7 escort shuttles]] against Zaarin's fighters.<ref name=" |
+ | Zaarin had no intention of letting the Empire control the TIE Defender technology and led an assault to destroy the facility from the ''Glory''. With the ''Adarga'' gone, the Empire was forced to evacuate the two remaining prototypes on the [[BFF-1 bulk freighter/Legends|BFF-1 bulk freighter]] ''[[Mharsup]]'', while the chief engineer fled with his team and the project data on the [[Lambda-class T-4a shuttle/Legends|''Lambda''-class T-4a shuttle]] ''[[G'nabgib]]''. A third TIE Defender, flown by Stele, assisted [[Delta-class JV-7 escort shuttle|''Delta''-class JV-7 escort shuttles]] against Zaarin's fighters.<ref name="DOE" /> |
===In enemy hands=== |
===In enemy hands=== |
||
| − | {{Quote|Not a chance of getting a break from Zaarin's incessant TIE Defenders!| |
+ | {{Quote|Not a chance of getting a break from Zaarin's incessant TIE Defenders!|Imperial briefing officer|audio=TDIncessant-TF.ogg|<ref name="TFCD">''[[Star Wars: TIE Fighter: Collector's CD-ROM]]''</ref>}} |
| − | From early in the ship's operational history, the TIE Defender attracted the attention of several other groups who attempted to acquire its technology. As Zaarin launched his coup, [[Hamo Blastwell]], a Rebel agent posing as an [[Imperial officer/Legends|Imperial officer]], attempted to steal the plans to the starfighter from the ''Glory''. Blastwell managed to escape, though Zaarin's crew prevented him from taking the plans.<ref name=" |
+ | From early in the ship's operational history, the TIE Defender attracted the attention of several other groups who attempted to acquire its technology. As Zaarin launched his coup, [[Hamo Blastwell]], a Rebel agent posing as an [[Imperial officer/Legends|Imperial officer]], attempted to steal the plans to the starfighter from the ''Glory''. Blastwell managed to escape, though Zaarin's crew prevented him from taking the plans.<ref name="TF:OSG" /> |
| − | The Rebels again came close to acquiring the technology as the ''Mharsup'' rendezvoused with [[CR92a Assassin-class corvette|''Assassin''-class corvette]] group |
+ | The Rebels again came close to acquiring the technology as the ''Mharsup'' rendezvoused with [[CR92a Assassin-class corvette|''Assassin''-class corvette]] group [[Hashim group|''Hashim'']], near [[Navigation buoy/Legends|navigation buoy]] [[B-0F9]], to transfer the prototypes to the safer ships for delivery to Admiral [[Mitth'raw'nuruodo/Legends|Thrawn]], who was under orders to deliver them to a safe location. Shortly after the Imperials arrived at the rendezvous point, they came under [[Second Battle of Parmel|attack]] from a Rebel strike team which attempted to capture the convoy. However, Imperial forces were able to hold off the Rebels until the transfer was complete and ''Hashim'' group fled to hyperspace.<ref name="DOE" /> |
| − | [[File:SienarCargoFerry-TF.jpg|thumb|left|A cargo ferry delivers a new TIE Defender to Admiral Thrawn's Star Destroyer.]] |
+ | [[File:SienarCargoFerry-TF.jpg|thumb|left|220px|A cargo ferry delivers a new TIE Defender to Admiral Thrawn's Star Destroyer.]] |
| − | The Imperials' escape was short-lived as they came out of hyperspace into an [[Mine Type B|ion cannon minefield]] set by [[Rneekii]] [[Pirate/Legends|pirates]]. All three corvettes, as well as the ''G'nabgib'' were quickly disabled. With the arrival of Assault Gunboat reinforcements, the Imperials were able to prevent the capture of the corvettes by pirate [[Delta-class DX-9 stormtrooper transport|transports]]. The corvettes were still disabled and vulnerable, and the ''G'nabgib'' had been captured, giving the pirates access to the TIE Defender scientists. Though the Imperials suspected it would take some time for the pirates to replicate the technology, they knew that a program to create a counter to the fighter would need to be implemented immediately.<ref name=" |
+ | The Imperials' escape was short-lived as they came out of hyperspace into an [[Mine Type B|ion cannon minefield]] set by [[Rneekii]] [[Pirate/Legends|pirates]]. All three corvettes, as well as the ''G'nabgib'' were quickly disabled. With the arrival of Assault Gunboat reinforcements, the Imperials were able to prevent the capture of the corvettes by pirate [[Delta-class DX-9 stormtrooper transport|transports]]. The corvettes were still disabled and vulnerable, and the ''G'nabgib'' had been captured, giving the pirates access to the TIE Defender scientists. Though the Imperials suspected it would take some time for the pirates to replicate the technology, they knew that a program to create a counter to the fighter would need to be implemented immediately.<ref name="DOE" /> |
| − | The Empire quickly dispatched three cargo ferries from ''[[Mssan]]'' group to rescue the prototypes from the stranded corvettes. The transfer came under attack from Rebel starfighters and Zaarin's own TIE Defenders. While the Imperial forces battled the Rebels and Zaarin's forces, [[Nami]] pirates came out of hyperspace and used the distraction to capture the disabled ''Hashim 1'' and escape with its TIE Defender. Though the Empire was able to finally take the remaining TIE Defenders to Thrawn who saw them safely to Coruscant, the news that the technology had fallen into pirate hands presented a major threat.<ref name=" |
+ | The Empire quickly dispatched three cargo ferries from ''[[Mssan]]'' group to rescue the prototypes from the stranded corvettes. The transfer came under attack from Rebel starfighters and Zaarin's own TIE Defenders. While the Imperial forces battled the Rebels and Zaarin's forces, [[Nami]] pirates came out of hyperspace and used the distraction to capture the disabled ''Hashim 1'' and escape with its TIE Defender. Though the Empire was able to finally take the remaining TIE Defenders to Thrawn who saw them safely to Coruscant, the news that the technology had fallen into pirate hands presented a major threat.<ref name="DOE" /> |
| − | With the Empire's remaining TIE Defenders finally secured, they began a campaign to prevent the spread of the technology. The Rneekii pirates offered to ransom the lead scientist to the highest bidder. Although Zaarin negotiated with them, it was the Empire who made the highest bid and sent a shuttle to rendezvous with the pirates and conduct the exchange. Once the scientist was safely aboard, the Interdictor ''[[Red Claw]]'' arrived to trap the pirates while Imperial forces disabled and captured the transport carrying the ransom. The Nami pirates struck during the operation in an attempt to capture the scientist themselves—their leader, [[Ali Tarrak]], was hoping to use the captured prototype as a model for producing their own TIE Defenders and sought the scientist's expertise. Though the Imperial forces succeeded in stopping the Nami from capturing the scientist, the Nami were able to inflict damage on the ''Red Claw''{{'s}} hyperdrive, leaving it stranded in the system. The ''Assassin''-class corvette group |
+ | With the Empire's remaining TIE Defenders finally secured, they began a campaign to prevent the spread of the technology. The Rneekii pirates offered to ransom the [[Unidentified TIE Defender chief scientist|lead scientist]] to the highest bidder. Although Zaarin negotiated with them, it was the Empire who made the highest bid and sent a shuttle to rendezvous with the pirates and conduct the exchange. Once the scientist was safely aboard, the Interdictor ''[[Red Claw]]'' arrived to trap the pirates while Imperial forces disabled and captured the transport carrying the ransom. The Nami pirates struck during the operation in an attempt to capture the scientist themselves—their leader, [[Ali Tarrak]], was hoping to use the captured prototype as a model for producing their own TIE Defenders and sought the scientist's expertise. Though the Imperial forces succeeded in stopping the Nami from capturing the scientist, the Nami were able to inflict damage on the ''Red Claw''{{'s}} hyperdrive, leaving it stranded in the system. The ''Assassin''-class corvette group [[Chemeti group|''Chemeti'']] was sent to deliver supplies to the ''Red Claw'' and retrieve the rescued scientist. Zaarin sent his forces, including several TIE Defenders, to distract the Imperial forces, while [[Chemeti's impostor|his own corvette]], using ''Chemeti 1''{{'s}} [[transponder code]], collected the scientist.<ref name="DOE" /> |
| + | ===Missile Boat diplomacy=== |
||
| − | [[File:Stele4.jpg|thumb|right|150px|A TIE Defender under attack from a Missile Boat]] |
||
| + | {{Quote|Admiral Thrawn and the Emperor himself are gravely concerned over the possible proliferation of TIE Defenders. So potent a starfighter must not fall into enemy hands.|Imperial briefing officer|audio=TDProliferation-TF.ogg|<ref name="DOE" />}} |
||
| − | Of even greater concern than the loss of the lead scientist was the news of a Nami attack on an Imperial cargo transfer area in the [[Yrrna system]] using TIE Defenders. Not only did this indicate that the Nami had begun production of their own TIE Defenders, but the presence of the Rebel [[Carrack-class light cruiser/Legends|''Carrack''-class cruiser]] ''[[Jester (Carrack-class)|Jester]]'' to observe the attack indicated that the Nami may be negotiating to sell the technology to the Rebel Alliance.<ref name="TIE Fighter" /> |
||
| + | [[File:Stele4.jpg|thumb|right|200px|A TIE Defender under attack from a Missile Boat]] |
||
| + | Of even greater concern than the loss of the lead scientist was the news of a Nami attack on an Imperial cargo transfer area in the [[Yrrna system]] using TIE Defenders. Not only did this indicate that the Nami had begun production of their own TIE Defenders, but the presence of the Rebel [[Carrack-class light cruiser/Legends|''Carrack''-class cruiser]] [[Jester (Carrack-class)|''Jester'']] to observe the attack indicated that the Nami may be negotiating to sell the technology to the Rebel Alliance.<ref name="DOE" /> |
||
| − | Both the Emperor and Admiral Thrawn were concerned about the possible spread of the technology and the Empire resolved to eliminate all TIE Defenders in enemy hands. To that end, Admiral Thrawn had been secretly working with [[Cygnus Spaceworks/Legends|Cygnus Spaceworks]] to develop the [[Missile Boat]]—a starfighter specifically designed to counter to the TIE Defender.<ref name=" |
+ | Both the Emperor and Admiral Thrawn were concerned about the possible spread of the technology and the Empire resolved to eliminate all TIE Defenders in enemy hands. To that end, Admiral Thrawn had been secretly working with [[Cygnus Spaceworks/Legends|Cygnus Spaceworks]] to develop the [[Missile Boat]]—a starfighter specifically designed to counter to the TIE Defender.<ref name="DOE" /> |
| − | The Missile Boat soon made its debut—Imperial spies learned that the Nami arms merchant [[Strike-class medium cruiser|cruiser]] ''[[Nuance]]'' was carrying TIE Defenders for sale to the Rebel cruiser ''[[Prism]]'', and Thrawn ordered the capture of the fighters. Missile Boats engaged enemy forces while Thrawn, aboard the Star Destroyer ''[[Grey Wolf]]'', oversaw the capture of the ''Nuance''. The raid recovered eight TIE Defenders which the Empire was able to retain despite a subsequent Rebel attack on the ''Grey Wolf''. The Empire also acquired many [[Prisoner/Legends|prisoners]] who, under interrogation, revealed the location of the manufacturing plant where Tarrak was producing the fighters.<ref name=" |
+ | The Missile Boat soon made its debut—Imperial spies learned that the Nami arms merchant [[Strike-class medium cruiser|cruiser]] ''[[Nuance]]'' was carrying TIE Defenders for sale to the Rebel cruiser ''[[Prism]]'', and Thrawn ordered the capture of the fighters. Missile Boats engaged enemy forces while Thrawn, aboard the Star Destroyer ''[[Grey Wolf]]'', oversaw the capture of the ''Nuance''. The raid recovered eight TIE Defenders which the Empire was able to retain despite a subsequent Rebel attack on the ''Grey Wolf''. The Empire also acquired many [[Prisoner/Legends|prisoners]] who, under interrogation, revealed the location of the manufacturing plant where Tarrak was producing the fighters.<ref name="DOE" /> |
| − | With Tarrak's [[Deep Space Manufacturing Facility]] located, Thrawn led the ''Grey Wolf''{{'s}} forces in a major attack on the facility, aimed at eliminating any further threat from the proliferation of TIE Defender technology. With her TIE Defenders caught unprepared, Tarrak's starfighters were quickly eliminated and her factory soon fell to a combined Missile Boat and [[TIE/sa bomber]] attack, while Tarrak herself was captured as her ship attempted to flee.<ref name=" |
+ | With Tarrak's [[Deep Space Manufacturing Facility]] located, Thrawn led the ''Grey Wolf''{{'s}} forces in a major attack on the facility, aimed at eliminating any further threat from the proliferation of TIE Defender technology. With her TIE Defenders caught unprepared, Tarrak's starfighters were quickly eliminated and her factory soon fell to a combined Missile Boat and [[TIE/sa bomber/Legends|TIE/sa bomber]] attack, while Tarrak herself was captured as her ship attempted to flee.<ref name="DOE" /> |
| + | Although the Empire had prevented TIE Defender technology from spreading further, Zaarin still possessed a number of the starfighters and continued to use them in his campaign against Thrawn's forces. The Missile Boat proved an effective foil to Zaarin's TIE Defenders and enabled the Empire to greatly diminish his supply of the fighters. By the time that Thrawn finally trapped Zaarin in the [[Unknown Regions/Legends|Unknown Regions]], only a handful of the starfighters remained in the rogue Imperial's control.<ref name="TFCD" /> |
||
| − | [[File:D's and MIS's.jpg|thumb|left|225px|TIE Defenders and Missile Boats in battle]] |
||
| − | Although the Empire had prevented TIE Defender technology from spreading further, Zaarin still possessed a number of the starfighters and continued to use them in his campaign against Thrawn's forces. The Missile Boat proved an effective foil to Zaarin's TIE Defenders and enabled the Empire to greatly diminish his supply of the fighters. By the time that Thrawn finally trapped Zaarin in the [[Unknown Regions/Legends|Unknown Regions]], only a handful of the starfighters remained in the rogue Imperial's control.<ref name="TIE Fighter" /> |
||
===Other Imperial use=== |
===Other Imperial use=== |
||
| − | [[File: |
+ | [[File:Defender_IA.png|thumb|left|240px|A TIE Defender approaches the ''Executor''.]] |
| − | Some TIE Defenders were stationed aboard Darth Vader's flagship, the |
+ | Some TIE Defenders were stationed aboard Darth Vader's flagship, the [[Executor/Legends|''Executor'']]. During the [[Battle of Mygeeto (Galactic Civil War)|Battle of Mygeeto]]—as the ''Executor'' led Imperial forces in the invasion of the Rebel base on [[Mygeeto/Legends|Mygeeto]]—the Imperial fleet came under attack from several Rebel capital ships, and Admiral [[Firmus Piett/Legends|Firmus Piett]] ordered use of TIE Defenders in the defense of the fleet. Flown by elite pilots, TIE Defenders aided in the destruction of the Rebel ships and the Empire went on to capture the Rebel base.<ref name="Imperial Ace">''[[Star Wars: Imperial Ace]]''</ref> |
| − | A mixed squadron of TIE Defenders from the [[29th Fast Attack Squadron]] and TIE interceptors from the [[92nd Interceptor Squadron]] were stationed aboard the Nebulon-B frigate |
+ | A mixed squadron of TIE Defenders from the [[29th Fast Attack Squadron]] and TIE interceptors from the [[92nd Interceptor Squadron]] were stationed aboard the Nebulon-B frigate [[Mephitis (EF76 Nebulon-B escort frigate)|''Mephitis'']] while it was on assignment near [[Polis Massa/Legends|Polis Massa]]. The TIE Defenders were tasked with defending the frigate as it conducted tests of the [[TIE/ph phantom]], an Imperial starfighter fitted with an experimental [[Cloaking device/Legends|cloaking device]].<ref name="SOR">{{FFG|story=Phantoms in the Dark|book=Strongholds of Resistance}}</ref> At some point, TIE Defenders participated in a [[Base Delta Zero/Legends|Base Delta Zero]] [[Orbital bombardment/Legends|orbital bombardment]] operation led by the [[Assertor-class Star Dreadnought/Legends|''Assertor''-class Star Dreadnought]] [[Wrath (Assertor-class)/Legends|''Wrath'']]. Similarly, TIE Defenders also operated around the [[Naval Station Validusia/Legends|Naval Station ''Validusia'']].<ref name="TEGW">''[[The Essential Guide to Warfare]]''</ref> At one point, the [[Zann Consortium/Legends|Zann Consortium]] had the opportunity to acquire the ability to construct TIE Defenders by attacking Imperial assets in orbit of Corulag.<ref name="FoC" /> |
| − | In 4 ABY, the Empire lured the Rebel Alliance into attacking the [[Death Star II |
+ | In 4 ABY, the Empire lured the Rebel Alliance into attacking the [[Death Star II|second Death Star]] [[battlestation]] in orbit of [[Endor/Legends|Endor]], where the Imperial Navy would be waiting to spring a trap.<ref name="NEC" /><ref name="RotJ">{{Film|VI}}</ref> At least one element of TIE Defenders, as part of [[Onyx Squadron/Legends|Onyx Squadron]], saw action at the Battle of Endor, but they were a very small minority of craft at the battle.<ref name="SotG" /> The lack of TIE Defender involvement in the ambush was of only minor concern within the Empire due to the significant number of TIE interceptors taking part.<ref name="FF11">{{FFCite|11|END8, ''The Battle of Endor''}}</ref> The battle ultimately turned against the Empire and the small number of TIE Defenders were unable to make a significant impact.<ref name="SotG" /> |
| + | As the Empire began to crumble following the Battle of Endor and the death of Emperor Palpatine, the cost of the TIE Defender became an even greater factor and the model was decommissioned.<ref name="FF73" /> Though information obtained by the [[New Republic/Legends|New Republic]] on [[Spirana/Legends|Spirana]] in the year following the Battle of Endor indicated that there were over ten thousand production TIE Defenders unaccounted for,<ref name="Mindor" /> the cessation of production prevented it from ever achieving widespread use.<ref name="FF73" /> Nonetheless, any TIE/D Defenders that were already created prior to being decommissioned were placed into groups such as [[Elite Force]], at least two of which would later be used during the New Republic's [[Liberation of Coruscant (Galactic Civil War)|Liberation of Coruscant]] to defend the [[Imperial Palace/Legends|Imperial Palace]].<ref name="GBCC">''[[Star Wars: Galactic Battlegrounds: Clone Campaigns]]''</ref> |
||
| − | ===Later Imperial use=== |
||
| − | {{Quote|Nice machines. I still prefer my X-wing, but I'll take a trip in a pinch.|Wedge Antilles|X-Wing: Isard's Revenge}} |
||
| − | The TIE Defender received some support from [[Count/Legends|Countess]] [[Iran Ryad]], an Imperial [[Politics/Legends|politician]] who trained as a starfighter pilot in her spare time. After the Battle of Endor, Ryad requisitioned a TIE Defender and quit her political role to take command of a group of four TIE Defenders charged with patrolling the [[Core Worlds/Legends|coreward]] borders of the Empire. Ryad had her TIE Defender, the ''[[Red Star 1]]'', heavily modified to enhance its shields, provide increased maneuverability through an upgraded engine, and allow increased firepower by tuning the fire control system. However, the modifications came at a high cost of 62,500 credits. After several successful patrols, Ryad took command of [[Red Star Squadron]] and began attacking any ships entering Imperial space without permission. Her actions brought her into conflict with her commanders and, after being charged with [[Treason/Legends|treason]], she was eventually defeated by [[Baron/Legends|Baron]] [[Soontir Fel]].<ref name="More Starships!" /> |
||
| + | ===Post-Endor=== |
||
| − | Following Palpatine's death, the former [[Director of Imperial Intelligence]] and [[Prophets of the Dark Side|Prophet of the Dark Side]] [[Cronal|Shadowspawn]] acquired many of the remaining TIE Defenders. Establishing a [[Sorting Center|base]] on [[Mindor]] in the [[Taspan system]], Shadowspawn used the vessels to launch a series of raids<ref name="Mindor" /> in the [[Inner Rim/Legends|Inner Rim]], [[Expansion Region/Legends|Expansion Region]] and [[Mid Rim/Legends|Mid Rim]]<ref name="TEGW" /> aimed at capturing prisoners to serve as his [[Pawn]]s. Over the course of two months during [[5 ABY/Legends|5 ABY]], the TIE Defenders were involved in dozens of raids on shipping. Despite the New Republic's efforts to capture a TIE Defender pilot in the hopes of learning Shadowspawn's location, a deadman interlock fitted to the fighters ensured that they were destroyed if the pilot was killed or lost consciousness. [[Rogue Leader/Legends|Rogue Leader]] [[Wedge Antilles/Legends|Wedge Antilles]] eventually devised a plan to locate the base by attaching [[Homing beacon/Legends|tracking devices]] to the hulls of TIE Defenders. The New Republic developed [[flechette torpedo]]es specifically to engage TIE Defenders—taking advantage of the TIE Defender's lack of particle shields, the torpedoes detonated into a cloud of [[Durasteel/Legends|durasteel]] shrapnel which would pierce the hulls of fighters that passed through. Within the cloud were hidden thousands of miniature tracking devices which would attach to the hulls of surviving fighters.<ref name="Mindor" /> |
||
| + | {{Quote|These are still out there. Not many, but even one is more than I'd like to face if I don't have to.|Wedge Antilles|<ref name="IH">''[[Star Wars: Imperial Handbook: A Commander's Guide]]''</ref>}} |
||
| + | [[File:NewThreats-TIEFighterTheOfficialStrategyGuide.jpg|thumb|right|260px|TIE Defenders and Missile Boats in battle]] |
||
| + | The TIE Defender received some support from [[Count/Legends|Countess]] [[Iran Ryad]], an Imperial [[Politics/Legends|politician]] who trained as a starfighter pilot in her spare time. After the Battle of Endor, Ryad requisitioned a TIE Defender and quit her political role to take command of a group of four TIE Defenders charged with patrolling the [[Core Worlds/Legends|coreward]] borders of the Empire. Ryad had her TIE Defender, the ''[[Red Star 1]]'', heavily modified to enhance its shields, provide increased maneuverability through an upgraded engine, and allow increased firepower by tuning the fire control system. However, the modifications came at a high cost of 62,500 credits. After several successful patrols, Ryad took command of [[Red Star Squadron]] and began attacking any ships entering Imperial space without permission. Her actions brought her into conflict with her commanders and, after being charged with [[Treason/Legends|treason]], she was eventually defeated by [[Baron/Legends|Baron]] [[Soontir Fel/Legends|Soontir Fel]].<ref name="More Starships!" /> |
||
| + | Following Palpatine's death, the former [[Director of Imperial Intelligence]] and [[Prophets of the Dark Side|Prophet of the Dark Side]] [[Cronal|Shadowspawn]] acquired many of the remaining TIE Defenders. Establishing a [[Sorting Center|base]] on [[Mindor/Legends|Mindor]] in the [[Taspan system]], Shadowspawn used the vessels to launch a series of raids<ref name="Mindor" /> in the [[Inner Rim]], [[Expansion Region/Legends|Expansion Region]] and [[Mid Rim]]<ref name="TEGW" /> aimed at capturing prisoners to serve as his [[Pawn]]s. Over the course of two months<ref name="Mindor" /> during [[5 ABY/Legends|5 ABY]],<ref name="Mindor" /><ref name="ERC">''[[The Essential Reader's Companion]]''</ref> the TIE Defenders were involved in dozens of raids on shipping. Despite the New Republic's efforts to capture a TIE Defender pilot in the hopes of learning Shadowspawn's location, a deadman interlock fitted to the fighters ensured that they were destroyed if the pilot was killed or lost consciousness. [[Rogue Leader/Legends|Rogue Leader]] [[Wedge Antilles/Legends|Wedge Antilles]] eventually devised a plan to locate the base by attaching [[Homing beacon/Legends|tracking devices]] to the hulls of TIE Defenders. The New Republic developed [[flechette torpedo]]es specifically to engage TIE Defenders—taking advantage of the TIE Defender's lack of particle shields, the torpedoes detonated into a cloud of [[Durasteel/Legends|durasteel]] shrapnel which would pierce the hulls of fighters that passed through. Within the cloud were hidden thousands of miniature tracking devices which would attach to the hulls of surviving fighters.<ref name="Mindor" /> |
||
| − | Putting Antilles's plan into action, Rogue Squadron hid within a facsimile of the luxury liner ''[[Corellian Queen]]'', while [[New Republic Intelligence Service|New Republic Intelligence]] leaked information that lured a TIE Defender squadron commanded by [[Captain/Legends|Captain]] [[GC-1000|Klick]] into an [[Battle of the Corellian Queen|attack]]. The flechette torpedoes proved effective, allowing Rogue Squadron to destroy almost thirty percent of the enemy fighters, before the surviving TIE Defenders retreated, carrying the tracking devices with them. Though the devices were soon discovered, Shadowspawn, hoping to lure [[Jedi Knight/Legends|Jedi Knight]] [[Luke Skywalker/Legends|Luke Skywalker]] to Mindor, allowed the New Republic to receive a signal from the devices, leading them to his base. TIE Defenders were heavily involved in the subsequent [[Battle of Mindor]], engaging New Republic starfighters as they arrived in [[Orbit/Legends|orbit]] of Mindor, and subsequently ambushing New Republic reinforcements, including the ''[[Millennium Falcon/Legends|Millennium Falcon]]'', as they approached the system.<ref name="Mindor" /> |
||
| + | |||
| + | Putting Antilles's plan into action, Rogue Squadron hid within a facsimile of the luxury liner ''[[Corellian Queen]]'', while [[New Republic Intelligence Service|New Republic Intelligence]] leaked information that lured a TIE Defender squadron commanded by [[Captain/Legends|Captain]] [[Klick (clone trooper)/Legends|Klick]] into an [[Battle of the Corellian Queen|attack]]. The flechette torpedoes proved effective, allowing Rogue Squadron to destroy almost thirty percent of the enemy fighters, before the surviving TIE Defenders retreated, carrying the tracking devices with them. Though the devices were soon discovered, Shadowspawn, hoping to lure [[Jedi Knight/Legends|Jedi Knight]] [[Luke Skywalker/Legends|Luke Skywalker]] to Mindor, allowed the New Republic to receive a signal from the devices, leading them to his base. TIE Defenders were heavily involved in the subsequent [[Battle of Mindor]], engaging New Republic starfighters as they arrived in [[Orbit/Legends|orbit]] of Mindor, and subsequently ambushing New Republic reinforcements, including the [[Millennium Falcon/Legends|''Millennium Falcon'']], as they approached the system.<ref name="Mindor" /> |
||
| + | |||
| + | At some point following the Battle of Endor, the [[Force-sensitive/Legends|Force-sensitive]] Imperial [[Cloning/Legends|clone]] [[X1]] came into possession of several TIE Defenders, which were stationed aboard a Star Destroyer under his command when he traveled to [[Mustafar/Legends|Mustafar]] in order to create a clone army. X1's twin clone, [[X2]], leader of the Rebellion's [[Grey Squadron]], followed his brother to Mustafar in an effort to stop him. Landing aboard X1's orbiting Star Destroyer, Grey Squadron sabotaged the ship before escaping in X-wings. After defeating X1 in his personal TIE, the group were pursued by X1's TIE Defenders, but were able to destroy them before heading to the planet's surface.<ref name="SWB:ES" /> |
||
The ship resurfaced during the [[Thrawn campaign|return]] of Grand Admiral Thrawn, though they were still deemed too difficult to produce and maintain, and remained both a minority within the Imperial fleet<ref name="NEGVV" /> and politically unpopular.<ref name="More Starships!" /> The few squadrons that remained in service were largely used to patrol the boundaries of what would become the [[Imperial Remnant]].<ref name="More Starships!" /> |
The ship resurfaced during the [[Thrawn campaign|return]] of Grand Admiral Thrawn, though they were still deemed too difficult to produce and maintain, and remained both a minority within the Imperial fleet<ref name="NEGVV" /> and politically unpopular.<ref name="More Starships!" /> The few squadrons that remained in service were largely used to patrol the boundaries of what would become the [[Imperial Remnant]].<ref name="More Starships!" /> |
||
| + | ===Isard's revenge=== |
||
| − | [[File:TIE Defender SotG.jpg|thumb|left|200px|A flight of TIE Defenders]] |
||
| + | {{Quote|Nice machines. I still prefer my X-wing, but I'll take a trip in a pinch.|Wedge Antilles|<ref name="Isard's Revenge" />}} |
||
| − | During the New Republic's campaign against [[Prince-Admiral]] [[Delak Krennel]]'s [[Ciutric Hegemony]], Rogue Squadron was sent in search of an Imperial [[Superweapon/Legends|superweapon]] near [[Distna]]. The superweapon rumors were bait to lure them into a trap, and they were quickly [[Battle of Distna|ambushed]] by six squadrons of TIE series starfighters. The Rogues were rescued from the trap by the arrival of two squadrons of TIE Defenders, [[Interloper Squadron|Interloper]] and [[Stranger Squadron]]s, under the command of [[Colonel/Legends|Colonel]] [[Broak Vessery]]. The Defenders hit Krennel's forces hard, using a combination of lasers and torpedoes to eliminate Krennel's remaining forces within five minutes of their arrival. Despite the Rogues' reluctance to trust the Imperials, they agreed to follow them back to their base before Krennel sent reinforcements.<ref name="Isard's Revenge" /> |
||
| + | [[File:TIE_Defender_SotG.jpg|thumb|left|220px|A flight of TIE Defenders]] |
||
| + | During the New Republic's campaign against [[Prince-Admiral/Legends|Prince-Admiral]] [[Delak Krennel]]'s [[Ciutric Hegemony]], Rogue Squadron was sent in search of an Imperial [[Superweapon/Legends|superweapon]] near [[Distna]]. The superweapon rumors were bait to lure them into a trap, and they were quickly [[Battle of Distna|ambushed]] by six squadrons of TIE series starfighters. The Rogues were rescued from the trap by the arrival of two squadrons of TIE Defenders, [[Interloper Squadron|Interloper]] and [[Stranger Squadron]]s, under the command of [[Colonel/Legends|Colonel]] [[Broak Vessery]]. The Defenders hit Krennel's forces hard, using a combination of lasers and torpedoes to eliminate Krennel's remaining forces within five minutes of their arrival. Despite the Rogues' reluctance to trust the Imperials, they agreed to follow them back to their base before Krennel sent reinforcements.<ref name="Isard's Revenge" /> |
||
The Imperials were stationed at one of several secret Imperial bases throughout [[The galaxy/Legends|the galaxy]]. The base was one of the few facilities capable of producing TIE Defenders. It was an indication of the rarity of the TIE Defender that the three full squadrons of the fighters located at the base were more than Rogue Squadron's commander, [[General/Legends|General]] Wedge Antilles, thought had ever been built. The base was formerly under the command of General [[Arnothian]], who had intended to use the TIE Defenders to establish himself as a [[Warlord/Legends|warlord]] before Director of Imperial Intelligence Ysanne Isard disposed of him and took control of the facility.<ref name="Isard's Revenge" /> |
The Imperials were stationed at one of several secret Imperial bases throughout [[The galaxy/Legends|the galaxy]]. The base was one of the few facilities capable of producing TIE Defenders. It was an indication of the rarity of the TIE Defender that the three full squadrons of the fighters located at the base were more than Rogue Squadron's commander, [[General/Legends|General]] Wedge Antilles, thought had ever been built. The base was formerly under the command of General [[Arnothian]], who had intended to use the TIE Defenders to establish himself as a [[Warlord/Legends|warlord]] before Director of Imperial Intelligence Ysanne Isard disposed of him and took control of the facility.<ref name="Isard's Revenge" /> |
||
| − | Isard claimed that she wanted peace with the New Republic. To that end, she had dispatched Vessery to aid the Rogues and then proposed to prove her intentions by helping them eliminate Krennel and rescue prisoners from her ''[[Lusankya]]'', including famed Rebel [[Jan Dodonna/Legends|Jan Dodonna]]. Isard would provide Rogue Squadron with TIE Defenders and cover identities to aid them in infiltrating Krennel's [[Capital/Legends|capital]] on [[Ciutric IV]], posing as Imperial defectors. They would then eliminate the shield generators and defensive positions, allowing her forces to storm the [[Prison/Legends|prison]]. Meanwhile, a New Republic fleet would engage Krennel's forces.<ref name="Isard's Revenge" /> |
+ | Isard claimed that she wanted peace with the New Republic. To that end, she had dispatched Vessery to aid the Rogues and then proposed to prove her intentions by helping them eliminate Krennel and rescue prisoners from her ''[[Lusankya/Legends|Lusankya]]'', including famed Rebel [[Jan Dodonna/Legends|Jan Dodonna]]. Isard would provide Rogue Squadron with TIE Defenders and cover identities to aid them in infiltrating Krennel's [[Capital/Legends|capital]] on [[Ciutric IV]], posing as Imperial defectors. They would then eliminate the shield generators and defensive positions, allowing her forces to storm the [[Prison/Legends|prison]]. Meanwhile, a New Republic fleet would engage Krennel's forces.<ref name="Isard's Revenge" /> |
The Rogues quickly began training on the TIE Defender. Over the coming weeks, they engaged in frequent simulated battles against Interloper and Stranger Squadrons before departing for Ciutric. Although Isard betrayed both sides, using the Defenders, Rogue Squadron pilots successfully [[Battle of Ciutric|brought down]] the [[Planetary shield/Legends|planetary shield]] of Krennel's capital, rescued the prisoners, and eliminated a [[Ysanne Isard (clone)|clone]] of Isard herself. After the real Isard was killed in an attempt to retake the ''Lusankya'', Vessery disappeared along with his two squadrons of TIE Defenders.<ref name="Isard's Revenge" /> |
The Rogues quickly began training on the TIE Defender. Over the coming weeks, they engaged in frequent simulated battles against Interloper and Stranger Squadrons before departing for Ciutric. Although Isard betrayed both sides, using the Defenders, Rogue Squadron pilots successfully [[Battle of Ciutric|brought down]] the [[Planetary shield/Legends|planetary shield]] of Krennel's capital, rescued the prisoners, and eliminated a [[Ysanne Isard (clone)|clone]] of Isard herself. After the real Isard was killed in an attempt to retake the ''Lusankya'', Vessery disappeared along with his two squadrons of TIE Defenders.<ref name="Isard's Revenge" /> |
||
| + | Defenders remained in limited use under the Imperial Remnant, deployed in small numbers to the best pilots, rather than to whole squadrons. Shortly after the end of the [[Adumari Civil War]], the Empire launched an [[Battle of Adumar|assault]] on New Republic forces in orbit of [[Adumar/Legends|Adumar]]. Among the Imperial fighters were four TIE Defenders in the service of the [[181st Imperial Fighter Wing/Legends|181st Imperial Fighter Wing]] under [[Turr Phennir]], deployed in two pairs. These fighters acquitted themselves well and destroyed or disabled many New Republic starfighters. The Imperial forces were ultimately defeated and at least one of the TIE Defenders was destroyed in combat with members of Rogue Squadron, with Phennir's damaged and forced to withdraw.<ref name="Starfighters of Adumar">''[[X-Wing: Starfighters of Adumar]]''</ref> |
||
| − | At some point following the Battle of Endor, the [[Force-sensitive/Legends|Force-sensitive]] Imperial [[Cloning/Legends|clone]] [[X1]] came into possession of several TIE Defenders, which were stationed aboard a Star Destroyer under his command when he traveled to [[Mustafar/Legends|Mustafar]] in order to create a clone army. X1's twin clone, [[X2]], leader of the Rebellion's [[Grey Squadron]], followed his brother to Mustafar in an effort to stop him. Landing aboard X1's orbiting Star Destroyer, Grey Squadron sabotaged the ship before escaping in X-wings. After defeating X1 in his personal TIE, the group were pursued by X1's TIE Defenders, but were able to destroy them before heading to the planet's surface.<ref name="SWB:ES" /> |
||
| − | |||
| − | Defenders remained in limited use under the Imperial Remnant, deployed in small numbers to the best pilots, rather than to whole squadrons. Shortly after the end of the [[Adumari Civil War]], the Empire launched an [[Battle of Adumar|assault]] on New Republic forces in orbit of [[Adumar/Legends|Adumar]]. Among the Imperial fighters were four TIE Defenders in the service of the [[181st Imperial Fighter Wing]] under [[Turr Phennir]], deployed in two pairs. These fighters acquitted themselves well and destroyed or disabled many New Republic starfighters. The Imperial forces were ultimately defeated and at least one of the TIE Defenders was destroyed in combat with members of Rogue Squadron, with Phennir's damaged and forced to withdraw.<ref name="Starfighters of Adumar">''[[X-Wing: Starfighters of Adumar]]''</ref> |
||
===Yuuzhan Vong War and later use=== |
===Yuuzhan Vong War and later use=== |
||
| − | [[File: |
+ | [[File:TIEDefender-FF73.png|thumb|right|220px|A TIE Defender]] |
| − | Despite the Empire's long held resistance to the TIE Defender, they would continue to be used by the Imperial Remnant until at least the end of the [[Yuuzhan Vong War]], with the starfighters stationed on many Imperial capital ships including Grand Admiral [[Gilad Pellaeon |
+ | Despite the Empire's long held resistance to the TIE Defender, they would continue to be used by the Imperial Remnant until at least the end of the [[Yuuzhan Vong War]], with the starfighters stationed on many Imperial capital ships including Grand Admiral [[Gilad Pellaeon/Legends|Gilad Pellaeon's]] flagship, the ''[[Right to Rule]]''.<ref name="The Unifying Force" /> |
| − | During [[Second Battle of Bilbringi|Operation Trinity]], Captain [[Mynar Devis]] of the Immobilizer 418 cruiser ''[[Wrack]]'' personally flew one of three TIE Defenders escorting the ''Millennium Falcon'' to meet with Wedge Antilles's [[Alpha Fleet]] at [[Bilbringi system|Bilbringi]], after the [[Yuuzhan Vong]] crippled several [[HoloNet/Legends|HoloNet]] relay stations, cutting off communication between [[Galactic Federation of Free Alliances|Galactic Alliance]] forces. The group emerged from hyperspace to find Alpha Fleet embattled with Yuuzhan Vong forces and prevented from escaping by a [[Vua'spar interdictor]]. Devis sent one of his [[ |
+ | During [[Second Battle of Bilbringi|Operation Trinity]], Captain [[Mynar Devis]] of the Immobilizer 418 cruiser ''[[Wrack]]'' personally flew one of three TIE Defenders escorting the ''Millennium Falcon'' to meet with Wedge Antilles's [[Alpha Fleet]] at [[Bilbringi system|Bilbringi]], after the [[Yuuzhan Vong]] crippled several [[HoloNet/Legends|HoloNet]] relay stations, cutting off communication between [[Galactic Federation of Free Alliances|Galactic Alliance]] forces. The group emerged from hyperspace to find Alpha Fleet embattled with Yuuzhan Vong forces and prevented from escaping by a [[Vua'spar interdictor]]. Devis sent one of his [[Wingmate/Legends|wingmates]] to inform Grand Admiral Pellaeon of the Yuuzhan Vong trap, while the others assisted the Galactic Alliance forces attacking the Vua'spar. Though they eliminated several enemy ships, both TIE Defenders were destroyed helping destroy the Vua'spar to allow Alpha Fleet to escape.<ref name="The Final Prophecy">''[[The New Jedi Order: The Final Prophecy]]''</ref> |
| − | As the war entered its final stages, the Yuuzhan Vong mounted a major attack on the Galactic Alliance capital of [[Dac|Mon Calamari]]. At the [[Defense of Mon Calamari (Yuuzhan Vong War)|Battle of Mon Calamari]], many TIE Defenders were deployed into combat as part of an elite strike team, with other notable squadrons such as Rogue, [[Twin Suns Squadron|Twin Suns]], and [[Vanguard Squadron]] |
+ | As the war entered its final stages, the Yuuzhan Vong mounted a major attack on the Galactic Alliance capital of [[Dac|Mon Calamari]]. At the [[Defense of Mon Calamari (Yuuzhan Vong War)|Battle of Mon Calamari]], many TIE Defenders were deployed into combat as part of an elite strike team, with other notable squadrons such as Rogue, [[Twin Suns Squadron|Twin Suns]], and [[Vanguard Squadron (Hapes)|Vanguard Squadrons]]. Almost an entire squadron of TIE Defenders was incinerated when capital ships at the heart of the Yuuzhan Vong fleet fired [[Yaret-Kor]] [[Plasma cannon/Legends|plasma cannons]] en masse at the attacking starfighters.<ref name="The Unifying Force" /> |
| − | In [[44 ABY]], former Imperial admiral and Galactic Alliance [[Chief of State (Galactic Alliance)|Chief of State]] [[Natasi Daala]] plotted to overthrow the Imperial [[Head of State/Legends|Head of State]], [[Jagged Fel]]. Daala gathered her forces—comprising her [[Maw Irregular Fleet]] and the fleets of [[Moff/Legends|Moffs]] [[Drikl Lecersen]], [[Porrak Vansyn]], and [[Trevin]]—over [[Exodo II]] in the [[Meridian sector/Legends|Meridian sector]], but news of the rendezvous had reached Fel, who was waiting to spring a trap. As the loyalist Imperial fleet [[Battle over Exodo II|engaged]] Daala's forces, Lecersen launched [[baradium missile]]s at key points on Fel's flagship, the Star Destroyer |
+ | In [[44 ABY]],<ref name="ERC" /> former Imperial admiral and Galactic Alliance [[Chief of State (Galactic Alliance)|Chief of State]] [[Natasi Daala]] plotted to overthrow the Imperial [[Head of State/Legends|Head of State]], [[Jagged Fel]]. Daala gathered her forces—comprising her [[Maw Irregular Fleet]] and the fleets of [[Moff/Legends|Moffs]] [[Drikl Lecersen]], [[Porrak Vansyn]], and [[Trevin]]—over [[Exodo II]] in the [[Meridian sector/Legends|Meridian sector]], but news of the rendezvous had reached Fel, who was waiting to spring a trap. As the loyalist Imperial fleet [[Battle over Exodo II|engaged]] Daala's forces, Lecersen launched [[baradium missile]]s at key points on Fel's flagship, the Star Destroyer [[Gilad Pellaeon (starship)|''Gilad Pellaeon'']], forcing its crew to evacuate. Fel, along with his [[Aide/Legends|aide]] [[Kthira'shi'ktarloo|Ashik]] and his [[Jedi/Legends|Jedi]] [[Bodyguard/Legends|bodyguard]] [[Tahiri Veila]], fled in three of the ship's complement of TIE Defenders. Despite their age, the starfighters' combination of speed and maneuverability enabled the three to reach the safety of the [[Turbulent-class Star Destroyer|''Turbulent''-class Star Destroyer]] [[Bloodfin (Star Destroyer)|''Bloodfin'']].<ref name="Ascension">''[[Fate of the Jedi: Ascension]]''</ref> |
==Behind the scenes== |
==Behind the scenes== |
||
| + | ===Notable appearances=== |
||
| − | [[File:Defender3.jpg|thumb|left|A TIE Defender]] |
||
| + | [[File:Rebellion05-03-04.jpg|thumb|left|220px|What might be a TIE Defender in ''Rebellion'' 5]] |
||
| − | The TIE Defender was created for the [[1994]] [[LucasArts]] [[video game]] ''[[Star Wars: TIE Fighter]]'' in which the craft was flyable by the player. Although this craft was initially left out of the multiplayer ''[[Star Wars: X-Wing vs. TIE Fighter]]'' ([[1997]]) for the sake of balance, the game data files still have an entry for the TIE Defender in the craft library, with the description field reading "Advanced space superiority fighter. This craft is too powerful to be put in this simulation. Dream on, fanboy!"<ref name="XvT">''[[Star Wars: X-Wing vs. TIE Fighter]]''</ref> The TIE Defender returned in [[1999]]'s ''[[Star Wars: X-Wing Alliance]]'', making an appearance in the single-player campaign and available as a player craft in the multiplayer mode. Many of the starfighter's specifications changed between ''TIE Fighter'' and ''X-Wing Alliance''. The earlier game gave a speed rating of 155 MGLT, a maneuverability rating of 175 DPF and a hull rating of 20 RU. These were revised to 144 MGLT, 110 DPF and 14 RU in ''X-Wing Alliance''. The shield rating was given as 200 SBD in ''TIE Fighter'' but was listed as 100 SBD in both ''[[TIE Fighter: The Official Strategy Guide]]'' and ''X-Wing Alliance''. Since it is the latest source, this article uses the values from ''X-Wing Alliance.'' |
||
| + | The TIE Defender was created for the [[1994]] [[LucasArts]] [[video game]] ''[[Star Wars: TIE Fighter]]'' in which the craft was flyable by the player.<ref name="TF" /> Although this craft was initially left out of the multiplayer ''[[Star Wars: X-Wing vs. TIE Fighter]]'' ([[1997]]) for the sake of balance, the game data files still have an entry for the TIE Defender in the craft library, with the description field reading "Advanced space superiority fighter. This craft is too powerful to be put in this simulation. Dream on, fanboy!"<ref name="XvT">''[[Star Wars: X-Wing vs. TIE Fighter]]''</ref> The TIE Defender returned in [[1999]]'s ''[[Star Wars: X-Wing Alliance]]'', making an appearance in the single-player campaign and available as a player craft in the multiplayer mode.<ref name="XWA" /> |
||
| + | TIE Defenders appear in ''[[Star Wars Battlefront: Renegade Squadron]]'' and fighters which appear to be TIE Defenders can be seen in [[Rebellion 5|''Rebellion'' 5]], both of which take place before the [[canon]]ical debut of the class after the Battle of Hoth, as established by ''TIE Fighter'' and repeated in numerous sources.<ref name="TF" /><ref name="Renegade Squadron" /><ref name="Rebellion5">[[Rebellion 5|''Rebellion'' 5]]</ref> The appearance of the TIE Defender in ''Renegade Squadron'' was explained in [[Star Wars: The Official Starships & Vehicles Collection 67|''The Official Starships & Vehicles Collection'' 67]] which established them as early TIE Advanced x7 prototypes.<ref name="TOSVC67-AS" /> |
||
| − | There is also some discrepancy among sources as to the length of the ship. Recent sources, including the TIE Defender's [[Databank (original)|Databank]] entry and ''[[Star Wars: The Official Starships & Vehicles Collection 67|The Official Starships & Vehicles Collection 67]]'' describe it as 9.2 meters long;<ref name="Databank" /> however, ''Star Wars: TIE Fighter'' had originally given the length as 10 meters, a length which was repeated in ''[[The Official Star Wars Fact File 73]]'' and ''[[The Official Star Wars Fact File Part 53]]''. Furthermore, both ''[[The New Essential Guide to Vehicles and Vessels]]'' and ''[[More Starships!]]'' list the length as 6.6 meters. The 9.2 meter length also appears in ''[[Coruscant and the Core Worlds]]'' as the length of the TIE Advanced x7 which served as the prototype for the TIE Defender. |
||
| + | The TIE Defender also appears in ''[[Star Wars: Empire at War: Forces of Corruption]]'', in which the player, controlling the Zann Consortium, can acquire the technology. However, no canon source has yet confirmed whether [[Tyber Zann]] took this opportunity.<ref name="FoC" /> The fighters also appear in the [[2011]] novel ''[[Fate of the Jedi: Ascension]]'' by [[Christie Golden]], in which they are twice referred to as the "TIE Destroyer."<ref name="Ascension" /> [[LEGO]] released a TIE Defender set in [[2010]]. The LEGO TIE Defender has six [[Missile launcher/Legends|missile launchers]] and a cockpit that rotates when the model turns.<ref name="LEGO">{{WebCite|url=http://starwars.lego.com/en-US/Holobrick/Details/8087.aspx?|title=8087 - TIE Defender|work=LEGO.com Holobrick|archivedate=20120513020500}}</ref> |
||
| − | [[File:Rebellion05-03-04.jpg|thumb|right|What might be a TIE Defender in ''Star Wars: Rebellion 5: My Brother, My Enemy, Part 5'']] |
||
| − | In both ''TIE Fighter'' and ''X-Wing Alliance'', the TIE Defender is depicted as faster than both the RZ-1 A-wing interceptor and the TIE Interceptor. This was reinforced by ''[[Star Wars: X-Wing Alliance: Prima's Official Strategy Guide]]'', which described the ship as the "fastest and most maneuverable craft in the galaxy." The figures given in the ''New Essential Guide to Vehicles and Vessels'' do show it as faster than both, but only in an atmosphere, while its acceleration value is slightly lower than the TIE Interceptor and significantly below that of the A-wing. The [[2007]] edition of ''[[Starships of the Galaxy (Saga Edition)|Starships of the Galaxy]]'' describes the TIE Defender as "much faster than any other TIE variant," though it is unclear if this is referring to atmospheric speed or acceleration. ''[[Star Wars: Rebellion: Prima's Official Strategy Guide]]'' states that "only the A-wing and TIE interceptor are more agile in battle." This contradicts other sources, including the Databank, which state that the TIE Defender was the most agile Imperial starfighter. |
||
| + | The [[2012]] reference book ''[[The Essential Guide to Warfare]]'' includes illustrations of TIE Defenders at the Naval Station ''Validusia'' and accompanying the Star Dreadnought ''Wrath'' during an orbital bombardment.<ref name="TEGW" /> When asked about the presence of TIE Defenders in these images, illustrator [[Ansel Hsiao]] speculated that the units they were assigned to were considered of high importance due to the number of Star Dreadnoughts.<ref name="TIE/D presence explanation post">{{WebCite|url=http://www.scifi-meshes.com/forums/showthread.php?2212-Star-Wars-projects-thread&p=548825&viewfull=1#post548825|title=3D Star Wars projects thread|author=[[Ansel Hsiao|fractalsponge]]|date=2012-04-09|archivedate=20160317151018}}</ref> |
||
| − | Both ''[[The Essential Guide to Vehicles and Vessels]]'' and the TIE Defender's Databank entry place the cost of the ship at 300,000 credits. ''More Starships!'', however, states that each unit cost 200,000 credits. ''Starships of the Galaxy'' repeats the 200,000 credit value while simultaneously calling it "more than five times as expensive to produce as a standard TIE fighter." Since the cost of a TIE fighter is listed in the same book as 60,000 credits, the TIE Defender would have to have a 300,000 credit value to be five times the cost. ''More Starships!'' established that the TIE Defender could carry consumables for two [[Standard day/Legends|days]]. [[Fantasy Flight Games]]' [[2014]] reference book ''[[Star Wars: Age of Rebellion Core Rulebook]]'' later revised this to one week. This article takes the later figure. ''Age of Rebellion Core Rulebook'' also describes the fighter's ion cannons as "cockpit-mounted," contradicting earlier sources, including ''The Essential Guide to Vehicles and Vessels'', ''The New Essential Guide to Vehicles and Vessels'' and ''The Official Star Wars Fact File 73'', all of which place them on the upper wings. |
||
| + | ===Technical specifications=== |
||
| − | TIE Defenders appear in ''[[Star Wars Battlefront: Renegade Squadron]]'' and fighters which appear to be TIE Defenders can be seen in ''[[Rebellion 5: My Brother, My Enemy, Part 5]]'', both of which take place before the [[canon]]ical debut of the class after the Battle of Hoth, as established by ''TIE Fighter'' and repeated in numerous sources. This is similar to the history of the RZ-1 A-wing interceptor, whose pre-Yavin appearances have since been [[retcon]]ned into the [[R-22 Spearhead]]. The appearance of the TIE Defender in ''Renegade Squadron'' was explained in ''The Official Starships & Vehicles Collection 67'' which established them as early TIE Advanced x7 prototypes. |
||
| + | [[File:Defender3.jpg|thumb|right|220px|A TIE Defender]] |
||
| + | Many of the starfighter's specifications changed between ''TIE Fighter'' and ''X-Wing Alliance''. The earlier game gave a speed rating of 155 MGLT, a maneuverability rating of 175 DPF and a hull rating of 20 RU.<ref name="TF" /> These were revised to 144 MGLT, 110 DPF and 14 RU in ''X-Wing Alliance''.<ref name="XWA" /> The shield rating was given as 200 SBD in ''TIE Fighter''<ref name="TF" /> but was listed as 100 SBD in both ''[[TIE Fighter: The Official Strategy Guide]]''<ref name="TF:OSG" /> and ''X-Wing Alliance''. Since it is the latest source, this article uses the values from ''X-Wing Alliance.''<ref name="XWA" /> |
||
| + | There is also some discrepancy among sources as to the length of the TIE Defender. The TIE Defender's [[Databank (original)|Databank]] entry and ''The Official Starships & Vehicles Collection 67'' describe it as 9.2 meters long;<ref name="Databank" /><ref name="TOSVC67-IC" /> however, ''Star Wars: TIE Fighter'' had originally given the length as 10 meters,<ref name="TF" /> a length which was repeated in ''[[The Official Star Wars Fact File 73]]'' and ''[[The Official Star Wars Fact File Part 53]]''.<ref name="FF73" /><ref name="FF53" /> Furthermore, both ''[[The New Essential Guide to Vehicles and Vessels]]'' and ''[[More Starships!]]'' list the length as 6.6 meters.<ref name="NEGVV" /><ref name="More Starships!" /> The 9.2 meter length also appears in ''[[Coruscant and the Core Worlds]]'' as the length of the TIE Advanced x7 which served as the prototype for the TIE Defender.<ref name="CCW" /> |
||
| − | The TIE Defender also appears in ''[[Star Wars: Empire at War: Forces of Corruption]]'', in which the player, controlling the Zann Consortium, can acquire the technology. However, no canon source has yet confirmed whether [[Tyber Zann]] took this opportunity. The fighters also appear in the [[2011]] novel ''[[Fate of the Jedi: Ascension]]'' by [[Christie Golden]], in which they are twice referred to as the "TIE Destroyer." [[LEGO]] released a TIE Defender set in [[2010]]. The LEGO TIE Defender has six [[Missile launcher/Legends|missile launchers]] and a cockpit that rotates when the model turns.<ref name="LEGO">{{Cite web|url=http://starwars.lego.com/en-us/holobrick/details/8087.aspx|title=8087 - TIE Defender|accessdate=2013-01-09|work=LEGO.com Holobrick|archiveurl=http://web.archive.org/web/20120513020500/http://starwars.lego.com/en-US/Holobrick/Details/8087.aspx?|archivedate=2012-05-13}}</ref> |
||
| + | In both ''TIE Fighter'' and ''X-Wing Alliance'', the TIE Defender is depicted as faster than both the RZ-1 A-wing interceptor and the TIE Interceptor.<ref name="TF" /><ref name="XWA" /> This was reinforced by [[Star Wars: X-Wing Alliance: Prima's Official Strategy Guide|''Star Wars: X-Wing Alliance'': Prima's Official Strategy Guide]], which described the ship as the "fastest and most maneuverable craft in the galaxy."<ref name="XWA:OSG">[[Star Wars: X-Wing Alliance: Prima's Official Strategy Guide|''Star Wars: X-Wing Alliance'': Prima's Official Strategy Guide]]</ref> The figures given in the ''New Essential Guide to Vehicles and Vessels'' do show it as faster than both, but only in an atmosphere, while its acceleration value is slightly lower than the TIE Interceptor and significantly below that of the A-wing.<ref name="NEGVV" /> The [[2007]] edition of [[Starships of the Galaxy (Saga Edition)|''Starships of the Galaxy'']] describes the TIE Defender as "much faster than any other TIE variant," though it is unclear if this is referring to atmospheric speed or acceleration.<ref name="SotG" /> ''[[Star Wars: Rebellion: Prima's Official Strategy Guide]]'' states that "only the A-wing and TIE interceptor are more agile in battle."<ref name="Rebellion Guide" /> This contradicts other sources, including the Databank and ''[[The Essential Guide to Vehicles and Vessels]]'', which state that the TIE Defender was more agile than the TIE interceptor.<ref name="EGVV" /><ref name="Databank" /> |
||
| − | ''[[The Official Star Wars Fact File 11]]'' states that "the new TIE defender would not be at [the Battle of] Endor".<ref name="FF11" /> However, this contradicts the [[Death Star II Limited]] expansion set for the [[Star Wars Customizable Card Game|''Star Wars'' Customizable Card Game]], ''The New Essential Guide to Vehicles and Vessels'' and ''Starships of the Galaxy'', all of which establish that the pilots of Onyx Squadron used TIE Defenders during the battle.<ref name="CCG DS2" /><ref name="NEGVV" /><ref name="SotG" /> |
||
| + | ===Other inconsistencies=== |
||
| − | The [[2012]] reference book ''[[The Essential Guide to Warfare]]'' includes illustrations of TIE Defenders at the Naval Station ''Validusia'' and accompanying the Star Dreadnought ''Wrath'' during an orbital bombardment. When asked about the presence of TIE Defenders in these images, illustrator [[Ansel Hsiao]] speculated that the units they were assigned to were considered of high importance due to the number of Star Dreadnoughts.<ref name="TIE/D presence explanation post">{{Cite_web|url=http://www.scifi-meshes.com/forums/showthread.php?2212-Star-Wars-projects-thread&p=548825&viewfull=1#post548825|title=3D Star Wars projects thread|accessdate=2016-01-18|author=[[Ansel Hsiao|fractalsponge]]|date=[[April 9]], [[2012]]}}</ref> |
||
| + | Both ''The Essential Guide to Vehicles and Vessels'' and the TIE Defender's Databank entry place the cost of the ship at 300,000 credits.<ref name="EGVV" /><ref name="Databank" /> ''More Starships!'', however, states that each unit cost 200,000 credits.<ref name="More Starships!" /> ''Starships of the Galaxy'' repeats the 200,000 credit value while simultaneously calling it "more than five times as expensive to produce as a standard TIE fighter." Since the cost of a TIE fighter is listed in the same book as 60,000 credits, the TIE Defender would have to have a 300,000 credit value to be five times the cost.<ref name="SotG" /> ''More Starships!'' established that the TIE Defender could carry consumables for two [[Standard day/Legends|days]].<ref name="More Starships!" /> [[Fantasy Flight Games]]' [[2014]] reference book [[Star Wars: Age of Rebellion Core Rulebook|''Star Wars: Age of Rebellion'' Core Rulebook]] later revised this to one week. This article takes the later figure. ''Age of Rebellion Core Rulebook'' also describes the fighter's ion cannons as "cockpit-mounted,"<ref name="AoRCR" /> contradicting earlier sources, including ''The Essential Guide to Vehicles and Vessels'', ''The New Essential Guide to Vehicles and Vessels'' and ''The Official Star Wars Fact File 73'', all of which place them on the upper wings.<ref name="EGVV" /><ref name="NEGVV" /><ref name="FF73" /> |
||
| + | |||
| + | ''[[The Official Star Wars Fact File 11]]'' states that "the new TIE defender would not be at [the Battle of] Endor".<ref name="FF11" /> However, this contradicts the [[Death Star II Limited]] expansion set for the [[Star Wars Customizable Card Game|''Star Wars'' Customizable Card Game]], ''The New Essential Guide to Vehicles and Vessels'' and ''Starships of the Galaxy'', all of which establish that the pilots of Onyx Squadron used TIE Defenders during the battle.<ref name="SotG" /><ref name="NEGVV" /><ref name="CCG DS2" /> |
||
==Appearances== |
==Appearances== |
||
| − | {{ |
+ | {{Scroll_box|content={{Mediacat|imagecat=Images of TIE/D Defenders}} |
*''[[Star Wars: Galactic Battlegrounds]]'' |
*''[[Star Wars: Galactic Battlegrounds]]'' |
||
| − | * |
+ | *[[Star Wars: Rebellion (video game)|''Star Wars: Rebellion'']] |
| − | * |
+ | *[[Rebellion 5|''Rebellion'' 5]] |
*''[[Star Wars: Empire at War: Forces of Corruption]]'' |
*''[[Star Wars: Empire at War: Forces of Corruption]]'' |
||
*''[[Star Wars Battlefront: Renegade Squadron]]'' |
*''[[Star Wars Battlefront: Renegade Squadron]]'' |
||
*''[[Beyond the Rim]]'' {{Po}} |
*''[[Beyond the Rim]]'' {{Po}} |
||
| + | *''[[Star Wars Galaxies: The Complete Online Adventures]]'' |
||
| − | *{{SWG|An Empire Divided}} |
||
*''[[Star Wars: TIE Fighter]]'' {{1st}} |
*''[[Star Wars: TIE Fighter]]'' {{1st}} |
||
| + | *''[[Star Wars: TIE Fighter: Defender of the Empire]]'' |
||
| + | *''[[Star Wars: TIE Fighter: Collector's CD-ROM]]'' |
||
*''[[Star Wars: X-Wing Alliance]]'' |
*''[[Star Wars: X-Wing Alliance]]'' |
||
| − | *{{FFG |
+ | *{{FFG|story=Phantoms in the Dark|book=Strongholds of Resistance}} |
*''[[Star Wars: Imperial Ace]]'' |
*''[[Star Wars: Imperial Ace]]'' |
||
*''[[Star Wars Battlefront: Elite Squadron]]'' {{C|[[PlayStation Portable|PSP]] version only}} |
*''[[Star Wars Battlefront: Elite Squadron]]'' {{C|[[PlayStation Portable|PSP]] version only}} |
||
*''[[Luke Skywalker and the Shadows of Mindor]]'' |
*''[[Luke Skywalker and the Shadows of Mindor]]'' |
||
*''[[X-Wing: Isard's Revenge]]'' |
*''[[X-Wing: Isard's Revenge]]'' |
||
| + | *[[X-Wing: Isard's Revenge (audiobook)|''X-Wing: Isard's Revenge'' abridged audiobook]] |
||
*''[[X-Wing: Starfighters of Adumar]]'' |
*''[[X-Wing: Starfighters of Adumar]]'' |
||
| + | *[[X-Wing: Starfighters of Adumar (audiobook)|''X-Wing: Starfighters of Adumar'' abridged audiobook]] |
||
*''[[The New Jedi Order: The Final Prophecy]]'' |
*''[[The New Jedi Order: The Final Prophecy]]'' |
||
*''[[The New Jedi Order: The Unifying Force]]'' |
*''[[The New Jedi Order: The Unifying Force]]'' |
||
| + | *[[The New Jedi Order: The Unifying Force (audiobook)|''The New Jedi Order: The Unifying Force'' abridged audiobook]] |
||
*''[[Fate of the Jedi: Ascension]]'' |
*''[[Fate of the Jedi: Ascension]]'' |
||
| + | *[[Fate of the Jedi: Ascension (audiobook)|''Fate of the Jedi: Ascension'' audiobook]] |
||
| + | }} |
||
==Sources== |
==Sources== |
||
| − | {{ |
+ | {{Scroll_box|content= |
| − | *''[[TIE Fighter: The Official Strategy Guide]]'' {{1stID}} |
+ | *<!-- 1994-07-18 -->''[[TIE Fighter: The Official Strategy Guide]]'' {{1stID}} |
| − | *''[[TIE Fighter: |
+ | *<!-- 1994-08-24 -->''[[TIE Fighter: Authorized Strategy Guide]]'' |
| − | *''[[TIE Fighter: Defender of the Empire |
+ | *<!-- 1995-05-XX -->''[[TIE Fighter: Defender of the Empire: Official Secrets & Solutions]]'' |
| + | *<!-- 1995-10-XXF -->''[[Star Wars Gamemaster Screen, Revised]]'' |
||
| − | *''[[TIE Fighter Collector's CD-ROM: The Official Strategy Guide]]'' |
||
| − | *''[[The Essential Guide to Vehicles and Vessels]]'' |
+ | *<!-- 1996-03-19 -->''[[The Essential Guide to Vehicles and Vessels]]'' |
| + | *<!-- 1996-04-XX -->''[[TIE Fighter Collector's CD-ROM: The Official Strategy Guide]]'' |
||
| − | *{{InsiderCite|31|Pick a Card, Any Card: Making Movie Magic at Decipher, Inc.}} |
||
| + | *<!-- 1996-10-XX -->{{InsiderCite|31|Pick a Card, Any Card: Making Movie Magic at Decipher, Inc.}} |
||
| − | *''[[Star Wars Gamemaster Screen, Revised]]'' |
||
| + | *<!-- 1997-XX-XX -->{{Galoob|set=Micro Machines Star Wars Action Fleet|pack=TIE Defender w/ Moff Jerjerrod & TIE Pilot|link=photo.asp?image=toys/mmaftiedefender.jpg}} |
||
| − | *''[[Star Wars: Rebellion: Prima's Official Strategy Guide]]'' |
||
| + | *<!-- 1998-03-27 -->[[Star Wars: Rebellion: Prima's Official Strategy Guide|''Star Wars: Rebellion'': Prima's Official Strategy Guide]] |
||
| − | *{{CollectorCite|2|Around the Galaxy}} |
||
| + | *<!-- 1998-05-XX -->{{CollectorCite|2|Around the Galaxy}} |
||
| − | *''[[Micro Machines Star Wars Action Fleet]]'' {{C|Pack: [http://www.rebelscum.com/photo.asp?image{{=}}toys/mmaftiedefender.jpg TIE Defender]}} |
||
| − | *''[[Star Wars Encyclopedia]]'' |
+ | *<!-- 1998-06-30 -->''[[Star Wars Encyclopedia]]'' |
| − | + | <!-- 1998-11-XX -->{{CardGameSet|set={{CCG|set=Special Edition Limited|parent=1}}|cards= |
|
| − | *{{CCG|set=Special Edition Limited|link=SpecialEdition-Dark/large/intrudermissile.gif|cardname=Intruder Missile (Dark)}} |
+ | *<!-- 1998-11-XX -->{{CCG|set=Special Edition Limited|link=SpecialEdition-Dark/large/intrudermissile.gif|cardname=Intruder Missile (Dark)}} |
| + | *<!-- 1998-11-XX -->{{CCG|set=Special Edition Limited|link=SpecialEdition-Dark/large/tiedefendermark1.gif|cardname=TIE Defender Mark I}} |
||
| − | *''[[Star Wars: X-Wing Alliance: Prima's Official Strategy Guide]]'' |
||
| + | }} |
||
| − | *{{CCG|set=Death Star II Limited|link=DeathStarII-Dark/large/onyx1.gif|cardname=Onyx 1}} |
||
| + | *<!-- 1999-05-03 -->[[Star Wars: X-Wing Alliance: Prima's Official Strategy Guide|''Star Wars: X-Wing Alliance'': Prima's Official Strategy Guide]] |
||
| − | *{{CCG|set=Death Star II Limited|link=DeathStarII-Dark/large/onyx2.gif|cardname=Onyx 2}} |
||
| − | + | <!-- 2000-07-19 -->{{CardGameSet|set={{CCG|set=Death Star II Limited|parent=1}}|cards= |
|
| − | *{{CCG|set=Death Star II Limited|link=DeathStarII-Dark/large/captainyorr.gif|cardname=Captain Yorr}} |
+ | *<!-- 2000-07-19 -->{{CCG|set=Death Star II Limited|link=DeathStarII-Dark/large/captainyorr.gif|cardname=Captain Yorr}} |
| + | *<!-- 2000-07-19 -->{{CCG|set=Death Star II Limited|link=DeathStarII-Dark/large/coloneljendon.gif|cardname=Colonel Jendon}} |
||
| − | *{{FFCite|11|END8, ''The Battle of Endor''}} |
||
| + | *<!-- 2000-07-19 -->{{CCG|set=Death Star II Limited|link=DeathStarII-Dark/large/onyx1.gif|cardname=Onyx 1}} |
||
| − | *''[[The New Essential Guide to Characters]]'' |
||
| + | *<!-- 2000-07-19 -->{{CCG|set=Death Star II Limited|link=DeathStarII-Dark/large/onyx2.gif|cardname=Onyx 2}} |
||
| − | *{{FFCite|73|TIE11-12, ''TIE Defender''}} |
||
| + | }} |
||
| − | *''[[Coruscant and the Core Worlds]]'' |
||
| + | *<!-- 2001-11-15 -->{{WizardsCite|url=default.asp?x=starwars/article/sw20011115fleet|text=More Starships!|int=More Starships!}} |
||
| − | *''[[The New Essential Guide to Vehicles and Vessels]]'' |
||
| + | *<!-- Unknown -->{{LucasArtsCite|url=games/swbattlefrontrenegadesquadron|text=''Star Wars Battlefront: Renegade Squadron'' Official Site}} |
||
| − | *''[[Star Wars: Empire at War: Forces of Corruption: Prima Official Game Guide]]'' |
||
| + | *<!-- Unknown -->{{LucasArtsCite|url=games/swempireatwar_foc|text=''Empire at War: Forces of Corruption'' Official Site}} |
||
| − | *[[Starships of the Galaxy (Saga Edition)|''Starships of the Galaxy'', Saga Edition]] |
||
| + | *<!-- 2002-03-13 -->{{FFCite|11|END8, ''The Battle of Endor''}} |
||
| − | *''[[Star Wars: The Official Starships & Vehicles Collection 3]]'' |
||
| − | *''[[The |
+ | *<!-- 2002-04-23 -->''[[The New Essential Guide to Characters]]'' |
| + | *<!-- 2003-01-XX -->''[[Coruscant and the Core Worlds]]'' |
||
| − | *''[[Star Wars: The Official Starships & Vehicles Collection 13]]'' |
||
| + | *<!-- 2003-05-21 -->{{FFCite|73|TIE11-12, ''TIE Defender''}} |
||
| − | *{{WizardsCite|url=default.asp?x=starwars/article/sw20011115fleet|text=More Starships!|int=More Starships!|archivedate=20070210224709}} |
||
| + | *<!-- 2003-09-30 -->''[[The New Essential Guide to Vehicles and Vessels]]'' |
||
| − | *{{LucasArtsCite|url=games/swbattlefrontrenegadesquadron/|text=''Star Wars Battlefront: Renegade Squadron''}} |
||
| − | * |
+ | *<!-- 2006-10-24 -->[[Star Wars: Empire at War: Forces of Corruption Expansion: Prima Official Game Guide|''Star Wars: Empire at War: Forces of Corruption Expansion'': Prima Official Game Guide]] |
| + | *<!-- 2007-12-18 -->[[Starships of the Galaxy (Saga Edition)|''Starships of the Galaxy'', Saga Edition]] |
||
| − | *{{LEGOCite|eu|8087|TIE Defender}} |
||
| + | *<!-- 2008-10-23E -->{{StarshipsVehiclesCite|3|Action Stations|Facing the Empire's massed fighters}} |
||
| − | *{{WizardsCite|url=default.asp?x=starwars/article/Mesop7|text=Message to Spacers 7|int=Message to Spacers 7|archivedate=20100415034008}} |
||
| + | *<!-- 2008-12-09 -->''[[The Complete Star Wars Encyclopedia]]'' |
||
| − | *''[[Star Wars: The Official Starships & Vehicles Collection 67]]'' |
||
| + | *<!-- 2009-03-12E -->{{StarshipsVehiclesCite|13|Action Stations|An expendable resource}} |
||
| − | *{{SonyCite|url=players/news_archive.vm?id=69208&month=082011|text=Galactic Civil War 2 – Space: The Ship}} |
||
| − | *{{ |
+ | *<!-- 2009-12-XX -->{{LEGOCite|eu|8087|TIE Defender}} |
| + | *<!-- 2010-04-13 -->{{WizardsCite|url=default.asp?x=starwars/article/Mesop7|text=Message to Spacers 7|int=Message to Spacers 7}} |
||
| − | *{{DB|starship|tieinterceptor|TIE Interceptor|archivedate=20100325105443}} |
||
| + | *<!-- 2011-04-07E -->{{StarshipsVehiclesCite|67|A Revolution In Film|Star Wars: TIE Fighter}} |
||
| − | *{{DB|technology|tractorbeam|tractor beam|archivedate=20110903134144}} |
||
| + | *<!-- 2011-04-07E -->{{StarshipsVehiclesCite|67|Action Stations|The defender attacks!}} |
||
| − | *''[[The Essential Guide to Warfare]]'' |
||
| + | *<!-- 2011-04-07E -->{{StarshipsVehiclesCite|67|Did You Know?}} |
||
| − | *''[[The Essential Reader's Companion]]'' |
||
| + | *<!-- 2011-04-07E -->{{StarshipsVehiclesCite|67|In Command|The TIE/D defender}} |
||
| − | *{{SW|url=news/the-imperial-warlords-despoilers-of-an-empire-part-3|int=The Imperial Warlords: Despoilers of an Empire|text=The Imperial Warlords: Despoilers of an Empire, Part 3|archivedate=20170909121115}} |
||
| + | *<!-- 2011-04-07E -->{{StarshipsVehiclesCite|67|Legendary Craft|The TIE/D defender}} |
||
| − | *{{FFGXW|TIE Defender Expansion Pack|link=http://www.fantasyflightgames.com/ffg_content/x-wing/news/wave4/colonel-vessery.png|cardname=Colonel Vessery—TIE Defender}} |
||
| + | *<!-- 2011-04-07E -->{{StarshipsVehiclesCite|67|Movie Magic|Realising The Concept}} |
||
| − | *{{FFGXW|TIE Defender Expansion Pack|link=http://www.fantasyflightgames.com/ffg_content/x-wing/news/wave4/delta-squadron-pilot.png|cardname=Delta Squadron Pilot—TIE Defender}} |
||
| + | *<!-- 2011-04-07E -->{{StarshipsVehiclesCite|67|Welcome On Board|Grand Admiral Demetrius Zaarin}} |
||
| − | *{{FFGXW|TIE Defender Expansion Pack|link=|cardname=Onyx Squadron Pilot—TIE Defender}} |
||
| + | *<!-- 2011-08-18 -->{{SonyCite|url=players/news_archive.vm?id=69207&month=082011|text=Game Update 20: Galactic Civil War 2 – Space}} |
||
| − | *{{FFGXW|TIE Defender Expansion Pack|link=https://images-cdn.fantasyflightgames.com/ffg_content/x-wing/news/wave4/outmaneuver.png|cardname=Outmaneuver}} {{Po}} |
||
| + | *<!-- 2011-08-19 -->{{SonyCite|url=players/news_archive.vm?id=69208&month=082011|text=Galactic Civil War 2 – Space: The Ships}} |
||
| − | *{{FFGXW|TIE Defender Expansion Pack|link=http://www.fantasyflightgames.com/ffg_content/x-wing/news/wave4/rexler-brath.png|cardname=Rexler Brath—TIE Defender}} |
||
| + | *<!-- 2011-09-13 -->{{DB|starship|tiedefender|TIE defender}} |
||
| − | *{{FFGXW|E-Wing Expansion Pack|cardname=Outmaneuver|link=https://images-cdn.fantasyflightgames.com/ffg_content/x-wing/news/wave4/outmaneuver.png}} {{Po}} |
||
| + | *<!-- 2011-09-13 -->{{DB|starship|tieinterceptor|TIE interceptor}} |
||
| − | *''[[Star Wars: Age of Rebellion Core Rulebook]]'' |
||
| + | *<!-- 2011-09-13 -->{{DB|technology|tractorbeam|tractor beam}} |
||
| − | *<!-- 2014/10/20 -->''[[Star Wars: Imperial Handbook: A Commander's Guide]]'' |
||
| + | *<!-- 2012-04-03 -->''[[The Essential Guide to Warfare]]'' |
||
| − | *{{FFGXW|IG-2000 Expansion Pack|cardname=Feedback Array|link=https://images-cdn.fantasyflightgames.com/ffg_content/x-wing/news/scum-and-villainy/feedback-array.png}} {{Po}} |
||
| + | *<!-- 2012-10-02 -->''[[The Essential Reader's Companion]]'' |
||
| − | *{{FFCite|y=2014|53|TIE11-12, ''TIE/D Defender''}} |
||
| + | *<!-- 2014-01-07 -->{{SW|url=news/the-imperial-warlords-despoilers-of-an-empire-part-3|text=The Imperial Warlords: Despoilers of an Empire, Part 3|int=The Imperial Warlords: Despoilers of an Empire|nolive=1}} |
||
| − | *''[[Strongholds of Resistance]]'' |
||
| + | <!-- 2014-06-26 -->{{CardGameSet|set={{FFGXW|set=TIE Defender Expansion Pack}}|cards= |
||
| − | *{{FFGXW|Imperial Veterans Expansion Pack|link=https://images-cdn.fantasyflightgames.com/filer_public/a9/07/a907d78c-bf22-4630-b7b2-2992a40a3134/swx52-countess-ryad.png|cardname=Countess Ryad—TIE Defender}} |
||
| − | *{{FFGXW| |
+ | *<!-- 2014-06-26 -->{{FFGXW|set=TIE Defender Expansion Pack|link=http://www.fantasyflightgames.com/ffg_content/x-wing/news/wave4/colonel-vessery.png|cardname=Colonel Vessery—TIE Defender}} |
| − | *{{FFGXW| |
+ | *<!-- 2014-06-26 -->{{FFGXW|set=TIE Defender Expansion Pack|link=http://www.fantasyflightgames.com/ffg_content/x-wing/news/wave4/delta-squadron-pilot.png|cardname=Delta Squadron Pilot—TIE Defender}} |
| + | *<!-- 2014-06-26 -->{{FFGXW|set=TIE Defender Expansion Pack|cardname=Onyx Squadron Pilot—TIE Defender}} |
||
| − | *{{FFGXW|Imperial Veterans Expansion Pack|link=https://images-cdn.fantasyflightgames.com/filer_public/19/e0/19e0f4f4-ac93-4f45-ab7e-9045a3de9080/swx52-tie-d.png|cardname=TIE/D}} |
||
| + | *<!-- 2014-06-26 -->{{FFGXW|set=TIE Defender Expansion Pack|link=https://images-cdn.fantasyflightgames.com/ffg_content/x-wing/news/wave4/outmaneuver.png|cardname=Outmaneuver}} {{Po}} |
||
| + | *<!-- 2014-06-26 -->{{FFGXW|set=TIE Defender Expansion Pack|link=http://www.fantasyflightgames.com/ffg_content/x-wing/news/wave4/rexler-brath.png|cardname=Rexler Brath—TIE Defender}} |
||
| + | }} |
||
| + | *<!-- 2014-06-26 -->{{FFGXW|set=E-Wing Expansion Pack|cardname=Outmaneuver|link=https://images-cdn.fantasyflightgames.com/ffg_content/x-wing/news/wave4/outmaneuver.png}} {{Po}} |
||
| + | *<!-- 2014-07-03 -->[[Star Wars: Age of Rebellion Core Rulebook|''Star Wars: Age of Rebellion'' Core Rulebook]] |
||
| + | *<!-- 2014-10-14 -->''[[Star Wars: Imperial Handbook: A Commander's Guide]]'' |
||
| + | *<!-- 2015-01-14 -->{{FFCite|y=2014|53|TIE11-12, ''TIE/D Defender''}} |
||
| + | *<!-- 2015-02-26 -->{{FFGXW|set=IG-2000 Expansion Pack|cardname=Feedback Array|link=https://images-cdn.fantasyflightgames.com/ffg_content/x-wing/news/scum-and-villainy/feedback-array.png}} {{Po}} |
||
| + | *<!--2015-04-09 -->{{FFGTCG|set=Draw Their Fire|cardname=Delta One|link=rogue-squadron/draw-their-fire/delta-one-r1273}} |
||
| + | *<!-- 2015-11-12 -->''[[Strongholds of Resistance]]'' |
||
| + | *{{BuildFalconCite|48|Starship Fact File|TIE/D Defender}} |
||
| + | <!-- 2016-06-30 -->{{CardGameSet|set={{FFGXW|set=Imperial Veterans Expansion Pack}}|cards= |
||
| + | *<!-- 2016-06-30 -->{{FFGXW|set=Imperial Veterans Expansion Pack|link=https://images-cdn.fantasyflightgames.com/filer_public/a9/07/a907d78c-bf22-4630-b7b2-2992a40a3134/swx52-countess-ryad.png|cardname=Countess Ryad—TIE Defender}} |
||
| + | *<!-- 2016-06-30 -->{{FFGXW|set=Imperial Veterans Expansion Pack|link=https://images-cdn.fantasyflightgames.com/filer_public/54/10/54107776-5fc5-4f03-b51f-9fa6e4c6ce78/swx52-glaive-squadron-pilot.png|cardname=Glaive Squadron Pilot—TIE Defender}} |
||
| + | *<!-- 2016-06-30 -->{{FFGXW|set=Imperial Veterans Expansion Pack|link=https://images-cdn.fantasyflightgames.com/filer_public/76/3a/763a09d2-05be-48f2-a9b4-9bf1349cf89d/swx52-maarek-stele.png|cardname=Maarek Stele—TIE Defender}} |
||
| + | *<!-- 2016-06-30 -->{{FFGXW|set=Imperial Veterans Expansion Pack|link=https://images-cdn.fantasyflightgames.com/filer_public/19/e0/19e0f4f4-ac93-4f45-ab7e-9045a3de9080/swx52-tie-d.png|cardname=TIE/D}} |
||
| + | }} |
||
| + | *<!--2018-01-26-->{{InsiderCite|178|Keeper of the Holocron}} |
||
| + | <!-- 2018-09-13 -->{{CardGameSet|set={{FFGXW2|set=Galactic Empire Conversion Kit}}|cards= |
||
| + | *<!-- 2018-09-13 -->{{FFGXW2|set=Galactic Empire Conversion Kit|link=https://xwing-miniatures-second-edition.fandom.com/wiki/Colonel_Vessery|cardname=Colonel Vessery}} {{C|Reissued in ''[[TIE/D Defender Expansion Pack]]''}} |
||
| + | *<!-- 2018-09-13 -->{{FFGXW2|set=Galactic Empire Conversion Kit|link=https://xwing-miniatures-second-edition.fandom.com/wiki/Countess_Ryad|cardname=Countess Ryad}} {{C|Reissued in ''[[TIE/D Defender Expansion Pack]]''}} |
||
| + | *<!-- 2018-09-13 -->{{FFGXW2|set=Galactic Empire Conversion Kit|link=https://xwing-miniatures-second-edition.fandom.com/wiki/Delta_Squadron_Pilot|cardname=Delta Squadron Pilot}} {{C|Reissued in ''[[TIE/D Defender Expansion Pack]]''}} |
||
| + | *<!-- 2018-09-13 -->{{FFGXW2|set=Galactic Empire Conversion Kit|link=https://xwing-miniatures-second-edition.fandom.com/wiki/Onyx_Squadron_Ace|cardname=Onyx Squadron Ace}} {{C|Reissued in ''[[TIE/D Defender Expansion Pack]]''}} |
||
| + | *<!-- 2018-09-13 -->{{FFGXW2|set=Galactic Empire Conversion Kit|link=https://xwing-miniatures-second-edition.fandom.com/wiki/Rexler_Brath|cardname=Rexler Brath}} {{C|Reissued in ''[[TIE/D Defender Expansion Pack]]''}} |
||
| + | }} |
||
| + | *<!-- 2020-01-31 -->{{FFGXW2|set=TIE/in Interceptor Expansion Pack|link=https://xwing-miniatures-second-edition.fandom.com/wiki/Outmaneuver|cardname=Outmaneuver}} {{Po}} |
||
}} |
}} |
||
==Notes and references== |
==Notes and references== |
||
| − | {{ |
+ | {{Scroll_box|content={{Reflist}}}} |
==External links== |
==External links== |
||
| Line 354: | Line 404: | ||
{{Interlang |
{{Interlang |
||
| − | |cs=TIE Defender |
+ | |cs=TIE/D Defender/Legendy |
| − | |de=TIE- |
+ | |de=TIE/D-Abwehrjäger#legends |
|es=Defensor TIE/D |
|es=Defensor TIE/D |
||
| − | |fr=Défenseur TIE |
||
| − | |nl=TIE Defender |
||
| − | |ja=TIE/Dディフェンダー |
||
| − | |no=TIE Defender |
||
| − | |pl=TIE/D Defender |
||
| − | |pt=Defensor TIE/D |
||
| − | |ru=TIE/D Защитник |
||
|fi=TIE/D puolustaja |
|fi=TIE/D puolustaja |
||
| + | |fr=Défenseur TIE/Légendes |
||
| − | |fiFA=1 |
||
| + | |nl=TIE/d Defender |
||
| − | |ruFA=1 |
||
| + | |no=TIE Defender |
||
| + | |pl=TIE/D Defender/Legendy |
||
| + | |pt=Legends:Defensor TIE/D |
||
| + | |uk=TIE/D «Захисник» |
||
}} |
}} |
||
| − | [[Category: |
+ | [[Category:Imperial Remnant starship classes]] |
| + | [[Category:Imperial vehicles]] |
||
[[Category:TIE Series|Defender]] |
[[Category:TIE Series|Defender]] |
||
[[Category:TIE/D Defenders| ]] |
[[Category:TIE/D Defenders| ]] |
||
| + | [[Category:Zann Consortium starfighter classes]] |
||
Latest revision as of 04:31, 10 April 2024
| | |
- "Imperial High Command decided that defender pilots would only be selected from TIE interceptor pilots who had flown at least twenty combat missions and survived. We're either the best pilots in the Imperial fleet or the luckiest."
- ―Rexler Brath
The TIE/D Defender, commonly known as the TIE Defender or T/D, was a high-performance TIE Series starfighter developed for the Imperial Navy by Sienar Fleet Systems in a project overseen by Grand Admiral Demetrius Zaarin shortly before the Battle of Endor. Representing a shift in starfighter design from previous TIE models, the ship featured a hyperdrive as well as deflector shields to allow it to operate independently of Imperial capital ships. The ship's speed and agility, combined with its arsenal of four laser cannons, two ion cannons, two warhead launchers and an optional tractor beam projector made it arguably the most advanced starfighter available at the time.
After Zaarin's failed coup against Emperor Palpatine, the renegade admiral attempted to gain control of the TIE Defender technology to give his forces a technological advantage over the Empire. The advanced starfighter also attracted the attention of other factions, including the Rebel Alliance and pirate groups. Imperial forces under the command of Grand Admiral Thrawn were ultimately able to prevent the spread of the technology and the starfighter played a major role in Thrawn's successful campaign against Zaarin.
Beyond the Zaarin campaign, the TIE Defender's high cost, together with political factors, kept it from achieving widespread use in the Empire and units were assigned only to the most elite pilots. The fighters participated in several other engagements during the Imperial era, including the Battle of Mygeeto and the Battle of Endor. Following the death of Emperor Palpatine at Endor, the TIE Defender continued to see limited use by Imperial forces. TIE Defenders saw action during Shadowspawn's campaign against the New Republic in 5 ABY and were used by the Republic's Rogue Squadron during a brief alliance with former Director of Imperial Intelligence Ysanne Isard against Prince-Admiral Delak Krennel's Ciutric Hegemony in 9 ABY. The fighters participated in multiple battles during the Yuuzhan Vong War and continued to be used by the Imperial Remnant until at least 44 ABY.
Characteristics[]
- "A logical advance for Imperial fighter design."
- ―Imperial propaganda
The high success rate of more advanced Rebel starfighters against standard Imperial TIE Fighters resulted in a mounting cost of replacing destroyed fighters. That, combined with the realization that the inclusion of a hyperdrive would allow the fleet to be more flexible, caused the Imperial Navy to rethink its doctrine of using swarms of cheap craft instead of fewer high-quality ones, leading to the introduction of the TIE Advanced x1[15] and its successor, the TIE Avenger.[16] The TIE/D Defender,[1] commonly known as the TIE Defender or T/D,[2] was touted as the next "logical advance" of the TIE Series—a starfighter that was fast, well armed and capable of hyperspace travel.[4]
Sienar Fleet Systems followed specific Imperial instruction in developing the TIE Defender,[4] among them the requirement that the fighter would exceed the mission capability of a flight group of four standard TIE Fighters.[17] As such, it was equipped with a series of innovations over previous models.[15] The practice of designing craft to explicit consumer specifications was one that Sienar would continue with the later Scimitar assault bomber[18] and Aleph-class starfighter.[19] The TIE Defender was 9.2 meters long.[6]
Pilot module[]
- "Energy management will be a bit more complex, but the Defender has much more powerful energy systems. This will allow you to maintain most systems at maximum recharge and still retain a high speed."
- ―Imperial briefing officer
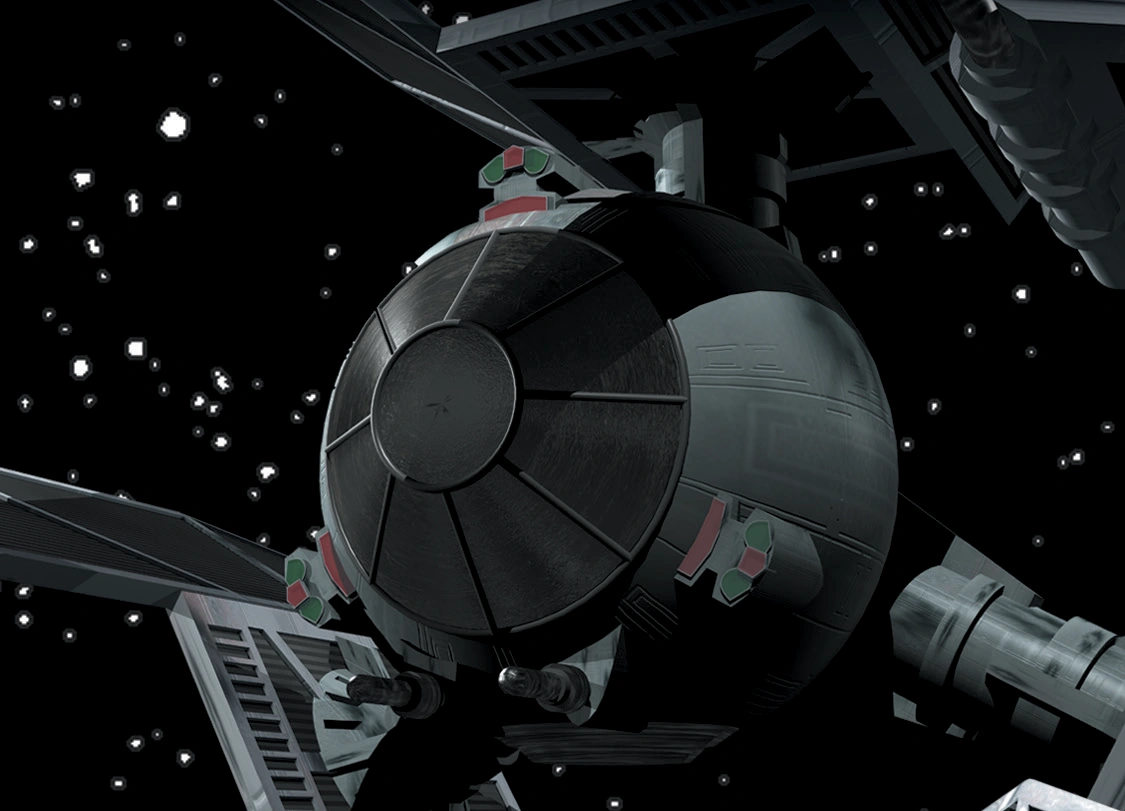
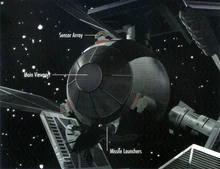
A TIE Defender's pilot module
The pilot module was similar to those found in other TIE series fighters, with a ball cockpit and a hatch on the top for entry and egress.[15] The module had room for a single pilot,[1] 65 kilograms of cargo[9] and consumables for up to one week.[10] Like previous TIE models, the TIE Defender lacked life support systems and pilots were required to wear the standard sealed TIE pilot flight suit.[17]
In a departure from the design of previous TIE models, which typically had two parallel wings to either side of the pilot module,[2] the TIE Defender had three quadanium steel solar array wings[20] mounted around an aft section. The rear superstructure contained an I-s4d solar ionization reactor to store and convert solar energy collected from the wing panels.[17] The distinctive triple-wing shape of the TIE Defender led Corran Horn to dub them "trips,"[21] and the nickname was also adopted by other Rebel pilots.[17] The wings themselves appeared similar to those found on the TIE Interceptor and TIE Avenger; unlike on its predecessors, the wings on the TIE Defender were angled out instead of in.[21] The inclusion of a third wing provided additional solar power to increase the ship's range[15] and the ship's energy management system was designed to allow weapons and shields to be charged with minimum loss of power to the propulsion system.[2]
One disadvantage of the design was an aft blind spot which could potentially be exploited by enemy fighters maneuverable enough to get behind the Defender[22] and which was the cause of some frustration among pilots.[15]
Propulsion[]
- "With its hyperdrive capability, high maneuverability, the quickest acceleration and fastest sublight speed yet achieved, you have the most powerful starfighter in the galaxy!"
- ―Imperial briefing officer
The TIE Defender was one of the fastest starfighters in use during the Galactic Civil War.[4] Although it was based on the standard twin ion engine design, it was upgraded to the entirely new[15] P-sz9.7 twin ion engine, which was rated at 230 KTU[1] and allowed it a maximum acceleration of 4,220 G[7] or 21 MGLT/s and a top speed of 144 MGLT[8] or 1,680 km/h in an atmosphere—almost 40 percent faster than a standard TIE Fighter.[7] With tractor beam recharge power redirected to the engines, the top speed could be increased to 180 MGLT.[8] In addition to the main thrusters located in the aft section,[15] the Defender's triple wing design allowed for three arrays of maneuvering jets[6]—which gave it a maneuverability rating of 110 DPF[8]—and it featured an advanced F-s5x flight avionics system to process the pilot's instructions. When combined, these systems made the ship not only faster, but more agile than any other starfighter in Imperial service[6] and capable of matching the fastest starfighters in the Alliance Fleet.[17]
The TIE Defender also featured a hyperdrive which allowed it to operate independently of capital ships.[4] Testing of the original prototype indicated the need for a more powerful hyperdrive[23] and production models included a class 2,[7] ND9 hyperdrive motivator[1] modified from the version developed for the TIE Avenger.[11] The ship had a Sienar N-s6 Navcon navigation computer[1] with a ten-jump memory.[5]
Armament[]
- "You'll find the Sienar Fleet Systems TIE Defender is the fastest, best-equipped starfighter in the galaxy."
- ―An Imperial flight instructor
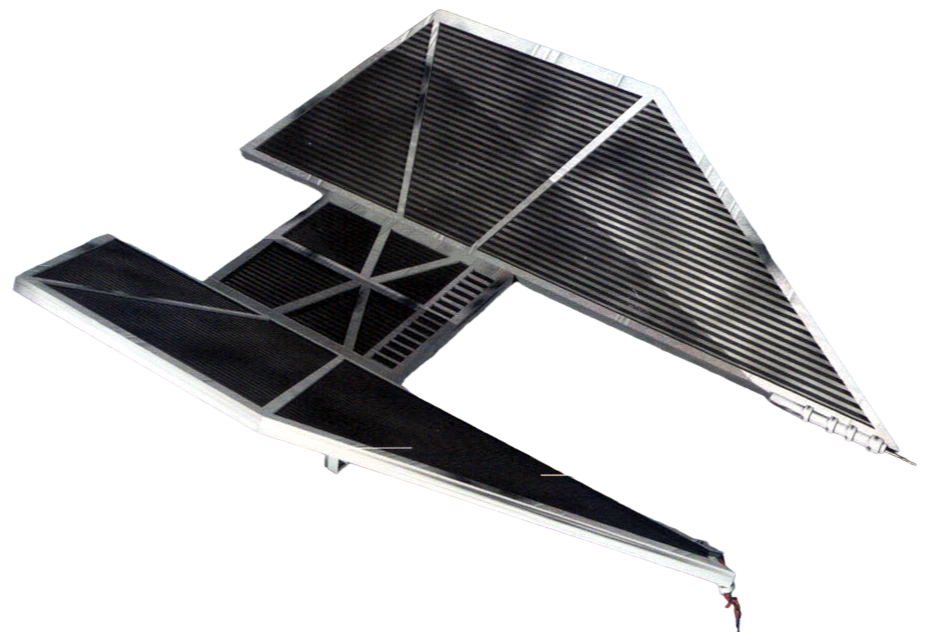
One of the TIE Defender's quadanium steel solar array wings
The TIE Defender's weapons systems were designed to allow it to engage multiple enemy fighters[4] as well as the armed freighters frequently used by the Alliance.[9] It carried a formidable array of weaponry; in standard configuration it had four L-s9.3 laser cannons mounted on the two lower wings and two NK-3 ion cannons mounted on the upper wing. The laser and ion cannons could be set to fire separately or, if concentrated power was required, to fire-linked in either pairs or quartets.[7] The ion cannons could even be fired simultaneously with the laser cannons.[9] Two targeting sensors were located between each pair of cannons to provide the pilot with a constant stream of targeting information.[15]
The ship also featured two M-g-2 general-purpose warhead launchers on the bottom of the pilot module,[6] each of which could be equipped with a standard load of three proton torpedoes or four concussion missiles. Depending on the mission profile, the ship could be fitted with alternative warheads such as proton rockets, proton bombs, or magnetic pulse warheads.[11] The inclusion of warhead launchers in the design was considered audacious by some members of the design team.[15]
The small tractor beam projector developed for the TIE Avenger could be easily fitted to the Defender.[2] The tractor beam had limited range and could only be used for a short time before stopping to recharge, but it allowed the pilot to temporarily inhibit the mobility of enemy fighters, making it easier to target them with the ship's other weapon systems.[24] Models produced by Ysanne Isard's Defender production facility regularly carried such tractor beams and the technology found other uses, such as allowing TIE Defenders to tow damaged starfighters until they could achieve the required velocity to enter hyperspace. Corran Horn discovered that by using the beam to target a large object, he could effectively use it as an anchor, allowing the TIE Defender to achieve a tighter turning circle.[21]
The ship's defenses were provided by a pair of forward and rear projecting Novaldex deflector shield generators—another advantage over standard TIE models.[6] The shields were designed to recharge more rapidly than in previous Imperial fighters[2] and were nearly as powerful as those found on capital ships,[25] with a total rating of 100 SBD.[1] The fighters were not equipped with particle shields, relying on the reinforced titanium hull to absorb impacts from matter.[25] Its hull and wings were the strongest of any TIE series starfighter[17] and were rated at 14 RU.[8]
Systems[]
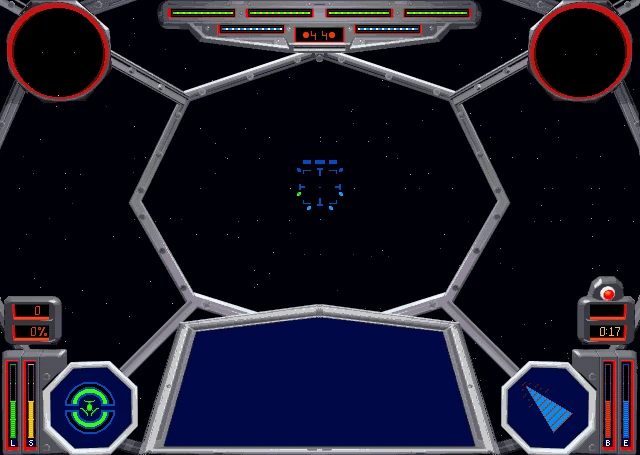
Interior view of a TIE Defender cockpit
As with other TIE series fighters, the TIE Defender used a wheel and yoke control system. Pulling back would cause the ship to climb, pushing forward would cause it to dive and the ship could be made to bank and turn by twisting the controls. Grips on either side had the weapons trigger switches while an array of buttons and switches in the middle controlled other functions, including throttle, weapons selection and target acquisition. Manipulating rudder pedals caused maneuvering planes to expand or contract to angle engine thrust and quickly alter the ship's trajectory. The ship featured an auto-landing function to plot entry vector and landing speed, although the pilot could retain manual control if they preferred. When not in use, the ship could be left in a password controlled standby mode to prevent unauthorized use.[21]
Various display panels inside the cockpit allowed the pilot to monitor the ship's systems and the surrounding area. The main Combat Multi-view Display displayed sensor data on targeted ships while additional monitors displayed short range sensor contacts. Additional panels displayed the remaining charge of weapons, shields and tractor beam systems, current warhead load and power usage. A chronometer was used to display the mission time,[2] or during hyperspace travel to countdown to reversion to realspace.[21] A heads-up display assisted the pilot in aiming the ship's weapons and displayed data from the ship's threat warning system.[2] Like other TIE series starfighters, TIE Defenders were mounted on racks in the hangar when carried aboard a capital ship.[2][14]
Cost[]

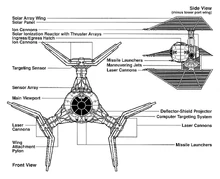
TIE Defender schematics
The TIE Defender was in many ways far superior to any other starfighter of the time, capable of outperforming the majority of Rebel starfighters with its combination of firepower, speed, and maneuverability.[15] The sophisticated features of the TIE Defender had two major implications: firstly the inclusion of the hyperdrive, shields, and reinforced armor made the ship heavier than any of its predecessors—a fact which made its speed and maneuverability all the more impressive.[15] Secondly and more importantly, the ship was very expensive, with each unit costing 300,000 credits—more than five times the cost of a standard TIE fighter—[4]or 80,000 credits used.[5] High maintenance and training costs added further to the expense of the fighters.[10]
Role[]
- "TIE Defender, standing by."
- ―A TIE Defender pilot
The TIE Defender was designed to serve as a multi-role starfighter, capable and durable enough to take on a variety of missions.[10] Standard Imperial doctrine recommended that TIE Defenders operate in flight groups of four; however, Imperial commanders took advantage of the starfighter's superior abilities to customize mission forces on a case-by-case basis.[4] Defender pilots often found themselves occupying mission roles previously held by older fighters such as TIE Interceptors and Assault Gunboats.[11]
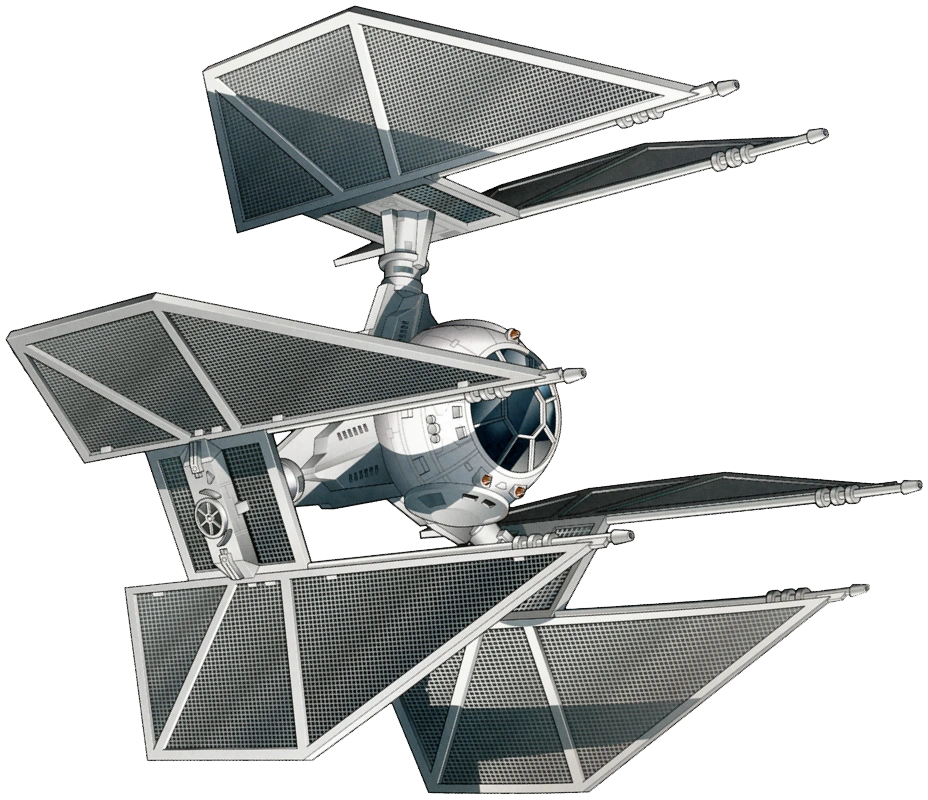
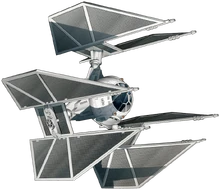
A TIE Defender
The TIE Defender's weaponry and deflector shields made it an ideal space superiority fighter, capable of engaging multiple enemies at once.[4] The craft possessed impressive speed promoting its function as a superior interceptor, capable of eliminating incoming starfighters before they posed a threat to Imperial capital ships. Pound for pound each TIE Defender matched or exceeded all Rebel starfighters in speed, armament, defenses, and maneuverability, proving a worthy adversary against even Imperial forces.[1] Their effectiveness against Rebel forces earned them the nickname "X-wing Killers" among TIE Defender pilots and crew.[10]
Their hyperdrives allowed TIE Defenders to conduct patrols across large areas of space without support from capital ships.[4] The versatility of the TIE Defender allowed a large degree of flexibility in its use, as even a single craft could prove formidable,[6] able to outrun or outgun enemy fighters. While on recon missions, Defenders could also bring heavy ordnance to bear on enemy capital ships. Upon the discovery of Grand Admiral Zaarin's plot against Emperor Palpatine, the Sith Lord Darth Vader employed the TIE Defender's abilities in that role, breaking through Zaarin's lines to reach the planet Coruscant. Lord Vader's flight group destroyed the Immobilizer 418 cruiser Harpago, which was attempting to block his imperative voyage.[2]
The TIE Defender's ion cannons paired with the ability to carry multiple warhead types allowed it to function as an effective light bomber or assault fighter.[27] TIE Defenders often assumed missions to disable or destroy enemy installations or capital ships, at times by a single flight group or with only Gamma-class ATR-6 assault transports as support.[11] Defender squadrons could combine their firepower to eliminate a target as large as Alliance Space Stations, while still covering the starfighter interception role.[28]
Training[]
- "Now, some good news for you! You have been selected to receive advanced combat training in the new TIE Defender. Report to the Combat Chamber..."
- ―Imperial briefing officer


TIE Defender prior to launch
Opportunities to train on the TIE Defender were limited,[7] only high-ranking ace TIE Interceptor pilots[10] who had survived at least twenty combat missions,[7] and whose loyalty to the Empire was undisputed, were selected, ensuring that only the best pilots flew the advanced starfighter.[10] During the Galactic Civil War, Imperial pilots were required to gain a training certificate by flying the TIE Defender through an enclosed training course before proceeding to simulated combat missions. The training course consisted of a cylindrical loop containing targets and obstacles for pilots to traverse. Defender pilots raced against the clock to navigate the course, destroying targets when at all possible to gain bonus time.[2] Having received a training certificate, Defender pilots could move onto the combat scenarios, some of which were based on historical sorties, designed to familiarize the pilot with the controls and handling of the starfighter before they entered actual combat.[1] If the pilot successfully completed all four training missions, they received the gold TIE Defender combat medallion.[2]
By the later years of the Empire, less rigid training regimes were in use. When Rogue Squadron trained on the TIE Defender against Imperial forces commanded by Ysanne Isard, they engaged the Imperials in a series of mock battles including a recreation of an Imperial attack on Rogue Squadron's former base at Yag-prime.[21]
Combat scenarios[]
The first combat training exercise tested the pilot's ability to dogfight against a variety of Rebel starfighters and allowed them to customize the difficulty of the mission by controlling the number and skill of opponents, to a maximum of 250 potential kills. For a greater challenge, the pilot could choose to face enemy TIE Defenders. Defender pilots began the simulation stationary, surrounded by five cargo containers. Upon inspection of named containers, for example "Y-wing," individual starfighters entered the system at increasing difficulties, five in all. Defender pilots could increase the challenge by attacking the container, sending in all difficulty levels at one time. In the event that the pilot could not handle the increased demands of the mission, destroying the container resulted in the spacecraft derived from the inspection entering hyperspace. Another control level installed consisted of enemy fighters responding to the trainee's orders; pilots could instruct enemy fighters to wait or head for home in the event the challenge grew too great.[2]
In order to test the pilot's ability to make effective use of a tractor beam, the second combat exercise challenged them to prevent the escape of a Rebel spy from a salvage yard near Venzeiia 2 Prime. In a recreation of a mission led by the Imperial-class Star Destroyer Glory, the pilot had to snare a spy's YT-1300 light freighter in order to disable it for capture by Imperial forces, and then assist in the capture of the yard itself. The pilot arrived in the system to find three Corellian transports aboard the station. With multiple transports, some fleeing from the arrival of Imperial forces, pilots had to move quickly to disable all transports and locate the spy. Rebel A-wings added to trainee frustration by acquiring missile locks as trainees scrambled to stop fleeing transports. After disabling all three transports, trainees had completed the primary objective, but could continue to aid in the capture of the platform, protect Imperial boarding craft, disable a Rebel B-wing, and destroy any other Rebel sympathizer craft in the area.[2]
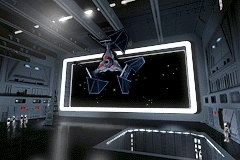
A TIE Defender leaves the hangar.
The third combat exercise demonstrated the ship's ability to operate independent of capital ships by inspecting vessels passing through a hyperspace jump point and disabling any vessels carrying contraband for capture by Imperial forces. After entering the system, pilots waited as cargo craft began passing through the sector, starting with Modular conveyors. Cargo ferries soon followed, one of which contained Rebels. Pilots could disable the craft for capture immediately upon the discovery, or wait until after inspecting the remaining transports, completing the primary objective. After disabling the contraband-carrying cargo ferry, trainees fended off multiple series of Rebel starfighters, protecting their command ship and boarding craft. All secondary and bonus objectives could be completed by eliminating all non-Imperial craft in the system, and successfully capturing the contraband.[2]
As a final test of the trainee's abilities, the pilot learned to use the TIE Defender as a light bomber to attack capital ships, using warheads to quickly eliminate their shields and ion cannons to disable them for capture. Armed with proton bombs, trainees arrived in system to discover two Rebel Ton-Falk-class escort carriers loaded with starfighters, however the primary objective only dictated the necessity of capturing one carrier. Despite the heavy payload, pilots used their wing mates to strategically assault at least one carrier by eliminating its weapon emplacements, being unable to completely lower the carrier's shields with projectile ordnance. Once the carrier was disabled, trainees had completed their primary objective, and were able to continue with secondary and bonus goals of destroying an enemy frigate, corvettes, and various Rebel starfighters.[2]
History[]
Early development[]
The Empire's loss at the Battle of Yavin forced it to reconsider its tactics in fighting the Rebellion. Several new weapons projects were initiated as a result, among them the TIE Defender.[17] Such was the importance of the TIE Defender that the top secret development project was conducted under the supervision of top naval commanders,[6] including Grand Admiral Demetrius Zaarin,[2] then head of research and development for starfighter technology,[11] and the project would see several prototype stages before its completion shortly before the Battle of Endor[2] in 4 ABY.[29]
The initial prototype for the TIE Defender was the TIE/Ad x7, developed at the Sienar Advanced Research Division on Corulag[30] with input from Zaarin.[31] Although the tri-wing design of the ship was in place for the initial prototype, the ship was intended only as a test bed for the drive and targeting systems;[30] it did not have the final ion engines[32] and lacked the hyperdrive, ion cannons, and missile launchers which were incorporated into later prototypes and the final design.[30]
In early 3 ABY, the Empire launched a massive assault on the Rebel base on Hoth.[29][33] As the main Rebel forces struggled to delay the Imperials,[32] the Alliance's Renegade Squadron destroyed the weaponry on two Victory II-class frigates[34] as they attempted to escape. The Imperials decided to test out the TIE Advanced x7 prototypes and dispatched a unit of the vessels to join the fight.[32] However, the early models lacked the speed of the final version and, although they now included missile launchers, the ion cannons were still absent.[34] Six of the TIE Advanced x7 prototypes were destroyed by Renegade Squadron[32] who also managed to board a Star Destroyer and steal one of the fighters to be studied by Alliance High Command.[34] The Empire dismissed the theft as unimportant since the prototype lacked most of the systems planned for later models and, despite the prototypes' failure against the Rebels, the data collected during the battle proved useful to Sienar Fleet System's technicians in further developing the fighter.[32]
Final development and testing[]
- "Those are only modified versions of the TIE advanced. We have something far more impressive to offer."
- ―Demetrius Zaarin, to Maarek Stele
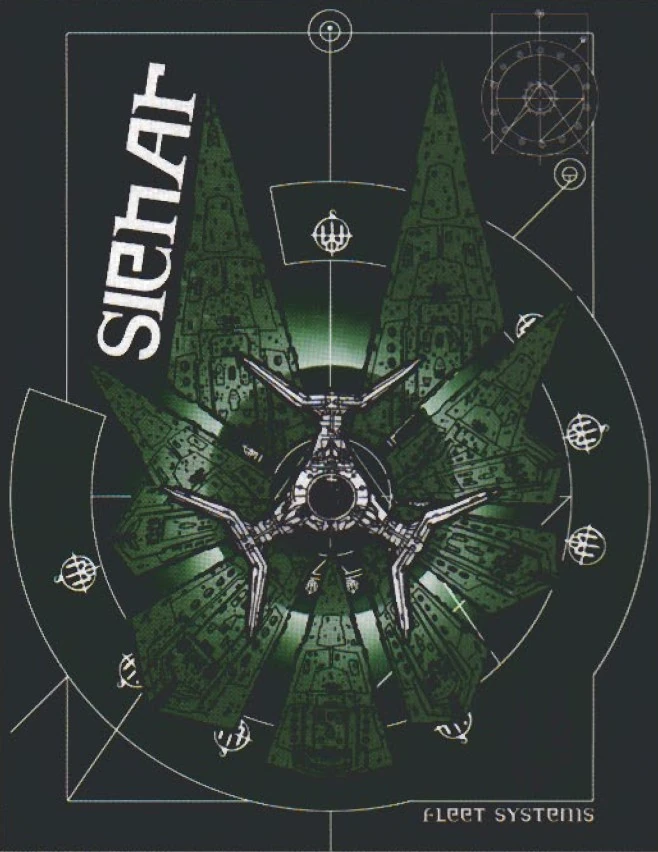

TIE Defender being advertised by Sienar Fleet Systems.
Following the Battle of Hoth, Emperor Palpatine charged Grand Admiral Zaarin with the continuing development of the TIE series. Zaarin had all ongoing projects transferred to the XQ6 Platform Research in the Parmel system, including the TIE Defender and TIE Avenger, an evolution of Darth Vader's TIE Advanced x1 which Zaarin saw as merely a step towards completion of the TIE Defender. Both projects relied heavily upon the development of a hyperdrive which could be mass produced and which would be small enough to fit inside the fuselage of a TIE fighter. When that proved problematic to Zaarin's team, the Grand Admiral managed to acquire the technology from the Habeen through a combination of diplomacy and military action against their rivals, the Nharwaak.[31] By the time that the TIE Avenger, modified by Zaarin to use the Habeen hyperdrive technology, entered service, the TIE Defender project had reached the final prototype stage[2] and the Empire was planning to roll the finished product out as a replacement for the Assault Gunboat.[35]
When the final prototypes were ready for inspection, Darth Vader instructed Zaarin to have six of the new fighters delivered to Emperor Palpatine on Coruscant for his personal review. Three cargo ferries from group Sela were sent to Zaarin's research facility to collect the prototypes, loaded into containers for transport. The Rebel Alliance attempted to disrupt the loading operation but their raiding party was defeated by Imperial fighters.[2]
The Empire soon learned that the Rebels were planning an ambush at Vinzen Neela 5, where the prototypes were to be transferred to the Imperial escort carrier Hininbirg. That time, Rebel fighters were joined by the CR90 corvettes Mar Duun and Vop Hui, which were attempting to plant a minefield around the rendezvous point. Responding quickly to the threat, Maarek Stele led a group of TIE Avengers to the rendezvous point, arriving before the Imperial ships to prevent the ambush and cover the transfer operation, allowing the Hininbirg to complete the delivery of the prototypes to Coruscant.[2]
Deployment[]
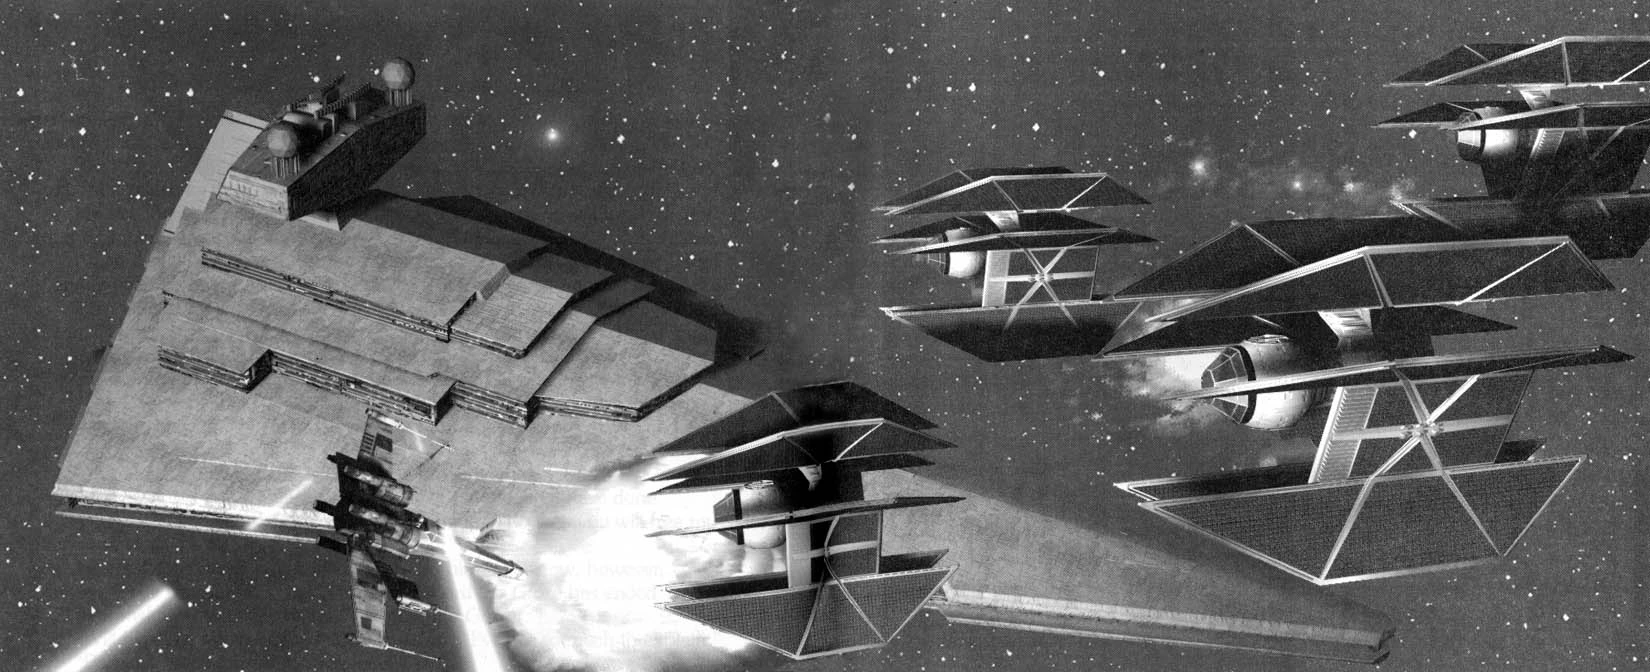
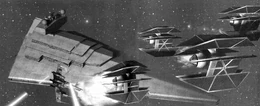
A group of TIE Defenders fight Rebel forces.
After initial testing of the prototypes, the fighter entered service, deployed to a limited number of elite squadrons for full field testing.[15] The ship received an icy reception from those in the Imperial hierarchy. Many in the Imperial Navy who had not been privy to the starfighter's development were surprised by its sudden introduction. Some resented the ship due to a feeling that Zaarin had gathered too much power and prestige, while others saw the fact that the ship did not fit in with the traditional tactics of the Imperial Navy as an admission of failure,[32] leading to some resentment towards the ship, and the commanders that used them in battle.[9] Such was the level of resentment toward the ship that, had certain elements of the Imperial Navy known of its secret development, it is likely the project would have been abandoned before completion.[5] In the end, the field tests were never extensive and this, together with the prohibitive cost, meant that even an organization as wealthy as the Imperial Navy chose not to mass-deploy such a fighter.[15]
Some of the fighters were used to protect the TIE Experimental Project, another starfighter development project with which Zaarin was heavily involved. A handful of TIE Defenders from Shadow Squadron responded to the Rebel attack on the Bretie Facility but were too late to prevent the loss of the facility. Members of Shadow Squadron were again involved in action against Rebel forces when the Alliance attacked the Obsidian research platform but were destroyed along with the facility.[8]
Zaarin's betrayal[]
- "We're no match for those TIE Defenders. Let's get out of here!"
- ―A TIE Avenger pilot
The TIE Defender's most extensive use during the Galactic Civil War occurred when Zaarin attempted a coup against Emperor Palpatine. While Darth Vader led the search for the forces of the treacherous Admiral Harkov, Zaarin's forces attacked Vader's ship, the Star Destroyer Garrett. Though the Garrett survived, it had sustained damage that would prevent Vader from reaching Coruscant in time to warn the Emperor. However, the Garrett was one of the few ships to be carrying TIE Defenders, the Dark Lord of the Sith having brought them aboard in the hope of conducting operational trials. Vader selected five ace pilots, including Maarek Stele, to accompany him to Coruscant in the new starfighter.[2]
After escaping a trap set by Zaarin's Immobilizer 418 cruiser Harpago—destroying the ship with the help of the Nebulon-B2 frigate Osprey—they arrived at Coruscant to find the Emperor's Star Destroyer, the Majestic, badly damaged and the Emperor being taken to Zaarin's flagship, the Star Destroyer Glory. The TIE Defenders disabled the Emperor's shuttle and protected it while the Emperor was rescued by loyal forces.[2]
The Empire soon came to suspect that Zaarin had been planning his coup during the development of the TIE Defender, using its advanced technology to give him an advantage over loyalist forces. Indeed, Zaarin quickly attempted to ensure a technological advantage by eliminating TIE Avenger production facilities throughout the Empire. Although the Empire was unable to prevent the destruction of the facilities, Zaarin's own starfighters were used against him as TIE Defenders held his forces off long enough for Imperial personnel to evacuate and to prevent Zaarin from looting technology which could be used to produce his own TIE Avengers and TIE Defenders. They also proved instrumental in capturing magnetic pulse warhead technology from the Rebel station RS-32.[11]
Technological advantage[]
- "It seems clear that Zaarin believed the technology embodied in the TIE Defender would give him the edge he needed to take out the Emperor. He did not foresee the extraordinary way in which you would turn his deadly weapon against him."
- ―Imperial briefing officer, to Maarek Stele
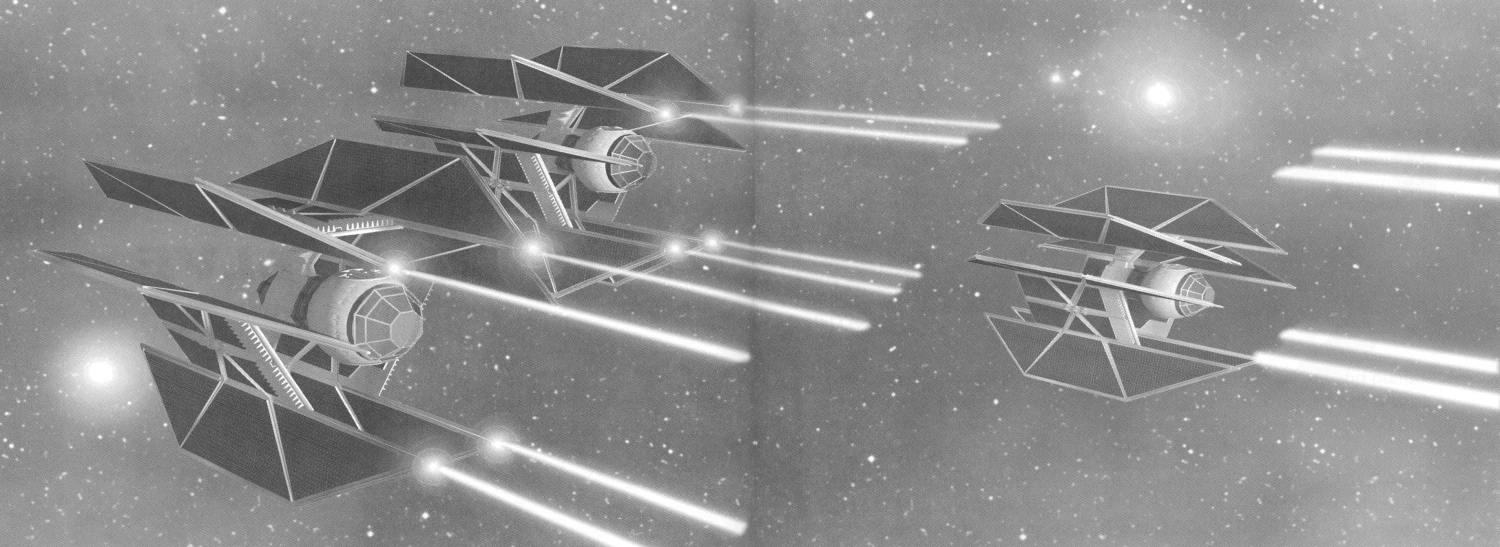

TIE Defenders in battle
With the Empire's ability to manufacture TIE Avengers severely reduced, Zaarin continued to pursue a technological advantage over the Empire by targeting the research facility where he had overseen development of the TIE Defender. As Zaarin's forces attempted to escape with several TIE Defender prototypes, an Imperial strike force, consisting of TIE Defenders and assault transports, arrived to prevent the loss of the prototypes and to recapture the base itself. The Empire succeeded in preventing Zaarin from acquiring most of the remaining TIE Defender prototypes and, after the facility was secured, the Star Destroyer Adarga arrived to defend it.[11]
Zaarin soon sent his own TIE Defenders and assault transports to retake the base. With the Adarga's supply of fighters insufficient to repel the attack and the shields on the research facility not yet at full strength, the Empire was forced to call for reinforcements and deploy one of their few remaining TIE Defenders. Since TIE Defenders were considered too valuable to destroy, Maarek Stele, piloting the Empire's TIE Defender, was given instructions to disable Zaarin's own TIE Defenders. Although the Empire succeeded in eliminating Zaarin's forces, even managing to capture some of his valuable TIE Defenders in the process, the Adarga took heavy damage and was forced to withdraw, leaving the base undefended.[11]
Zaarin had no intention of letting the Empire control the TIE Defender technology and led an assault to destroy the facility from the Glory. With the Adarga gone, the Empire was forced to evacuate the two remaining prototypes on the BFF-1 bulk freighter Mharsup, while the chief engineer fled with his team and the project data on the Lambda-class T-4a shuttle G'nabgib. A third TIE Defender, flown by Stele, assisted Delta-class JV-7 escort shuttles against Zaarin's fighters.[11]
In enemy hands[]
- "Not a chance of getting a break from Zaarin's incessant TIE Defenders!"
- ―Imperial briefing officer
From early in the ship's operational history, the TIE Defender attracted the attention of several other groups who attempted to acquire its technology. As Zaarin launched his coup, Hamo Blastwell, a Rebel agent posing as an Imperial officer, attempted to steal the plans to the starfighter from the Glory. Blastwell managed to escape, though Zaarin's crew prevented him from taking the plans.[1]
The Rebels again came close to acquiring the technology as the Mharsup rendezvoused with Assassin-class corvette group Hashim, near navigation buoy B-0F9, to transfer the prototypes to the safer ships for delivery to Admiral Thrawn, who was under orders to deliver them to a safe location. Shortly after the Imperials arrived at the rendezvous point, they came under attack from a Rebel strike team which attempted to capture the convoy. However, Imperial forces were able to hold off the Rebels until the transfer was complete and Hashim group fled to hyperspace.[11]


A cargo ferry delivers a new TIE Defender to Admiral Thrawn's Star Destroyer.
The Imperials' escape was short-lived as they came out of hyperspace into an ion cannon minefield set by Rneekii pirates. All three corvettes, as well as the G'nabgib were quickly disabled. With the arrival of Assault Gunboat reinforcements, the Imperials were able to prevent the capture of the corvettes by pirate transports. The corvettes were still disabled and vulnerable, and the G'nabgib had been captured, giving the pirates access to the TIE Defender scientists. Though the Imperials suspected it would take some time for the pirates to replicate the technology, they knew that a program to create a counter to the fighter would need to be implemented immediately.[11]
The Empire quickly dispatched three cargo ferries from Mssan group to rescue the prototypes from the stranded corvettes. The transfer came under attack from Rebel starfighters and Zaarin's own TIE Defenders. While the Imperial forces battled the Rebels and Zaarin's forces, Nami pirates came out of hyperspace and used the distraction to capture the disabled Hashim 1 and escape with its TIE Defender. Though the Empire was able to finally take the remaining TIE Defenders to Thrawn who saw them safely to Coruscant, the news that the technology had fallen into pirate hands presented a major threat.[11]
With the Empire's remaining TIE Defenders finally secured, they began a campaign to prevent the spread of the technology. The Rneekii pirates offered to ransom the lead scientist to the highest bidder. Although Zaarin negotiated with them, it was the Empire who made the highest bid and sent a shuttle to rendezvous with the pirates and conduct the exchange. Once the scientist was safely aboard, the Interdictor Red Claw arrived to trap the pirates while Imperial forces disabled and captured the transport carrying the ransom. The Nami pirates struck during the operation in an attempt to capture the scientist themselves—their leader, Ali Tarrak, was hoping to use the captured prototype as a model for producing their own TIE Defenders and sought the scientist's expertise. Though the Imperial forces succeeded in stopping the Nami from capturing the scientist, the Nami were able to inflict damage on the Red Claw's hyperdrive, leaving it stranded in the system. The Assassin-class corvette group Chemeti was sent to deliver supplies to the Red Claw and retrieve the rescued scientist. Zaarin sent his forces, including several TIE Defenders, to distract the Imperial forces, while his own corvette, using Chemeti 1's transponder code, collected the scientist.[11]
Missile Boat diplomacy[]
- "Admiral Thrawn and the Emperor himself are gravely concerned over the possible proliferation of TIE Defenders. So potent a starfighter must not fall into enemy hands."
- ―Imperial briefing officer
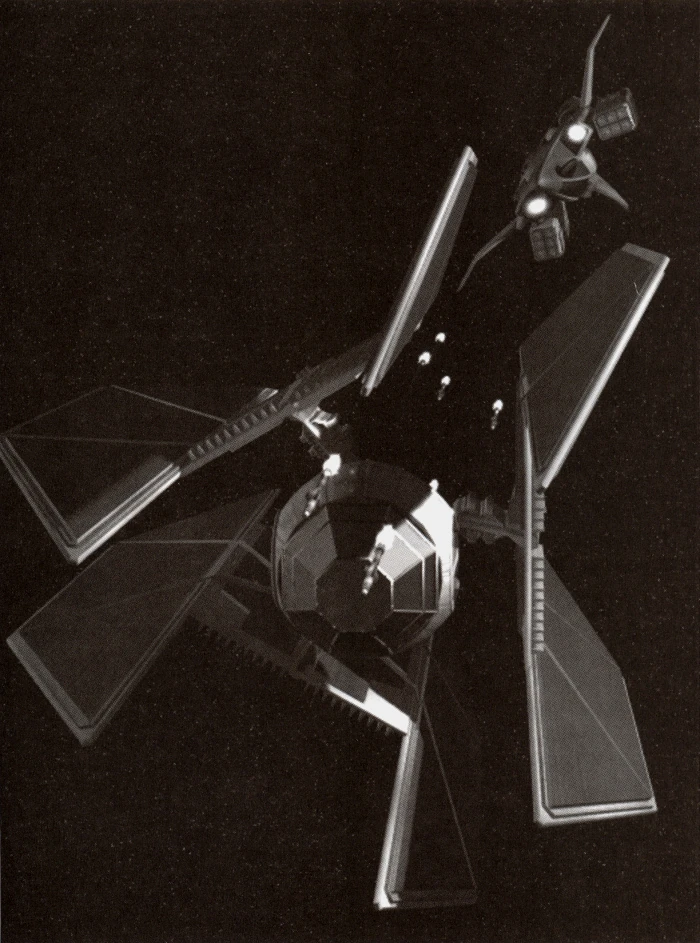
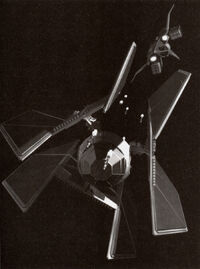
A TIE Defender under attack from a Missile Boat
Of even greater concern than the loss of the lead scientist was the news of a Nami attack on an Imperial cargo transfer area in the Yrrna system using TIE Defenders. Not only did this indicate that the Nami had begun production of their own TIE Defenders, but the presence of the Rebel Carrack-class cruiser Jester to observe the attack indicated that the Nami may be negotiating to sell the technology to the Rebel Alliance.[11]
Both the Emperor and Admiral Thrawn were concerned about the possible spread of the technology and the Empire resolved to eliminate all TIE Defenders in enemy hands. To that end, Admiral Thrawn had been secretly working with Cygnus Spaceworks to develop the Missile Boat—a starfighter specifically designed to counter to the TIE Defender.[11]
The Missile Boat soon made its debut—Imperial spies learned that the Nami arms merchant cruiser Nuance was carrying TIE Defenders for sale to the Rebel cruiser Prism, and Thrawn ordered the capture of the fighters. Missile Boats engaged enemy forces while Thrawn, aboard the Star Destroyer Grey Wolf, oversaw the capture of the Nuance. The raid recovered eight TIE Defenders which the Empire was able to retain despite a subsequent Rebel attack on the Grey Wolf. The Empire also acquired many prisoners who, under interrogation, revealed the location of the manufacturing plant where Tarrak was producing the fighters.[11]
With Tarrak's Deep Space Manufacturing Facility located, Thrawn led the Grey Wolf's forces in a major attack on the facility, aimed at eliminating any further threat from the proliferation of TIE Defender technology. With her TIE Defenders caught unprepared, Tarrak's starfighters were quickly eliminated and her factory soon fell to a combined Missile Boat and TIE/sa bomber attack, while Tarrak herself was captured as her ship attempted to flee.[11]
Although the Empire had prevented TIE Defender technology from spreading further, Zaarin still possessed a number of the starfighters and continued to use them in his campaign against Thrawn's forces. The Missile Boat proved an effective foil to Zaarin's TIE Defenders and enabled the Empire to greatly diminish his supply of the fighters. By the time that Thrawn finally trapped Zaarin in the Unknown Regions, only a handful of the starfighters remained in the rogue Imperial's control.[36]
Other Imperial use[]
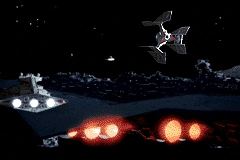
A TIE Defender approaches the Executor.
Some TIE Defenders were stationed aboard Darth Vader's flagship, the Executor. During the Battle of Mygeeto—as the Executor led Imperial forces in the invasion of the Rebel base on Mygeeto—the Imperial fleet came under attack from several Rebel capital ships, and Admiral Firmus Piett ordered use of TIE Defenders in the defense of the fleet. Flown by elite pilots, TIE Defenders aided in the destruction of the Rebel ships and the Empire went on to capture the Rebel base.[37]
A mixed squadron of TIE Defenders from the 29th Fast Attack Squadron and TIE interceptors from the 92nd Interceptor Squadron were stationed aboard the Nebulon-B frigate Mephitis while it was on assignment near Polis Massa. The TIE Defenders were tasked with defending the frigate as it conducted tests of the TIE/ph phantom, an Imperial starfighter fitted with an experimental cloaking device.[38] At some point, TIE Defenders participated in a Base Delta Zero orbital bombardment operation led by the Assertor-class Star Dreadnought Wrath. Similarly, TIE Defenders also operated around the Naval Station Validusia.[39] At one point, the Zann Consortium had the opportunity to acquire the ability to construct TIE Defenders by attacking Imperial assets in orbit of Corulag.[26]
In 4 ABY, the Empire lured the Rebel Alliance into attacking the second Death Star battlestation in orbit of Endor, where the Imperial Navy would be waiting to spring a trap.[29][40] At least one element of TIE Defenders, as part of Onyx Squadron, saw action at the Battle of Endor, but they were a very small minority of craft at the battle.[5] The lack of TIE Defender involvement in the ambush was of only minor concern within the Empire due to the significant number of TIE interceptors taking part.[41] The battle ultimately turned against the Empire and the small number of TIE Defenders were unable to make a significant impact.[5]
As the Empire began to crumble following the Battle of Endor and the death of Emperor Palpatine, the cost of the TIE Defender became an even greater factor and the model was decommissioned.[15] Though information obtained by the New Republic on Spirana in the year following the Battle of Endor indicated that there were over ten thousand production TIE Defenders unaccounted for,[25] the cessation of production prevented it from ever achieving widespread use.[15] Nonetheless, any TIE/D Defenders that were already created prior to being decommissioned were placed into groups such as Elite Force, at least two of which would later be used during the New Republic's Liberation of Coruscant to defend the Imperial Palace.[42]
Post-Endor[]
- "These are still out there. Not many, but even one is more than I'd like to face if I don't have to."
- ―Wedge Antilles
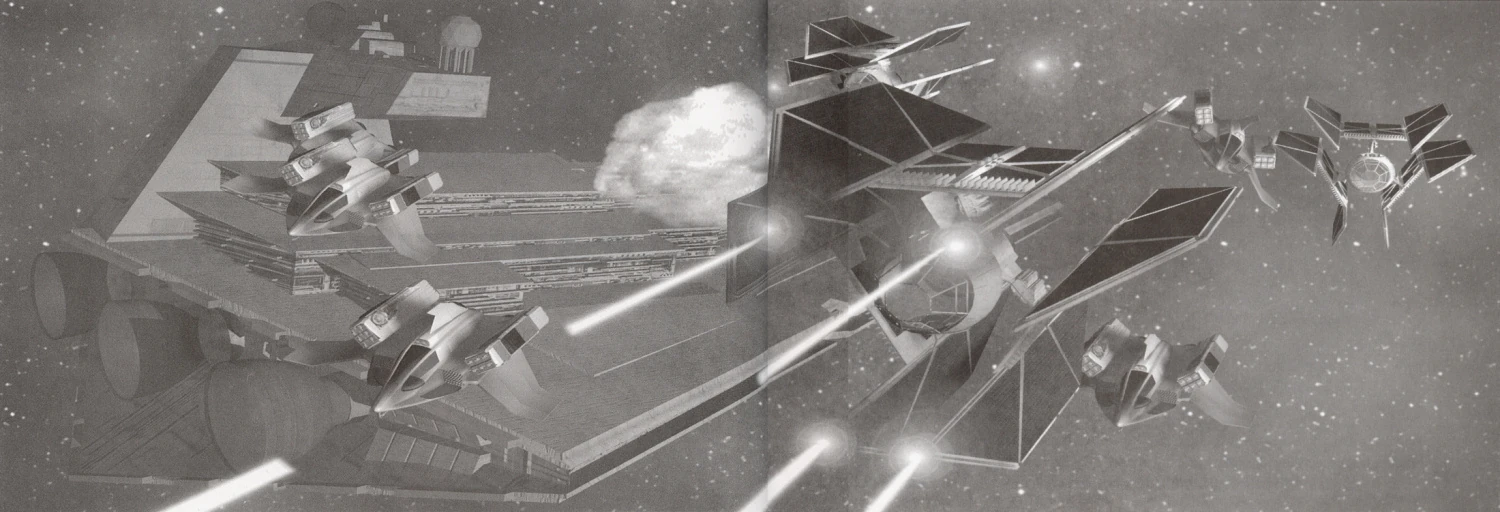
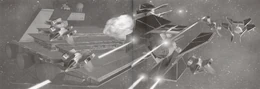
TIE Defenders and Missile Boats in battle
The TIE Defender received some support from Countess Iran Ryad, an Imperial politician who trained as a starfighter pilot in her spare time. After the Battle of Endor, Ryad requisitioned a TIE Defender and quit her political role to take command of a group of four TIE Defenders charged with patrolling the coreward borders of the Empire. Ryad had her TIE Defender, the Red Star 1, heavily modified to enhance its shields, provide increased maneuverability through an upgraded engine, and allow increased firepower by tuning the fire control system. However, the modifications came at a high cost of 62,500 credits. After several successful patrols, Ryad took command of Red Star Squadron and began attacking any ships entering Imperial space without permission. Her actions brought her into conflict with her commanders and, after being charged with treason, she was eventually defeated by Baron Soontir Fel.[9]
Following Palpatine's death, the former Director of Imperial Intelligence and Prophet of the Dark Side Shadowspawn acquired many of the remaining TIE Defenders. Establishing a base on Mindor in the Taspan system, Shadowspawn used the vessels to launch a series of raids[25] in the Inner Rim, Expansion Region and Mid Rim[39] aimed at capturing prisoners to serve as his Pawns. Over the course of two months[25] during 5 ABY,[25][44] the TIE Defenders were involved in dozens of raids on shipping. Despite the New Republic's efforts to capture a TIE Defender pilot in the hopes of learning Shadowspawn's location, a deadman interlock fitted to the fighters ensured that they were destroyed if the pilot was killed or lost consciousness. Rogue Leader Wedge Antilles eventually devised a plan to locate the base by attaching tracking devices to the hulls of TIE Defenders. The New Republic developed flechette torpedoes specifically to engage TIE Defenders—taking advantage of the TIE Defender's lack of particle shields, the torpedoes detonated into a cloud of durasteel shrapnel which would pierce the hulls of fighters that passed through. Within the cloud were hidden thousands of miniature tracking devices which would attach to the hulls of surviving fighters.[25]
Putting Antilles's plan into action, Rogue Squadron hid within a facsimile of the luxury liner Corellian Queen, while New Republic Intelligence leaked information that lured a TIE Defender squadron commanded by Captain Klick into an attack. The flechette torpedoes proved effective, allowing Rogue Squadron to destroy almost thirty percent of the enemy fighters, before the surviving TIE Defenders retreated, carrying the tracking devices with them. Though the devices were soon discovered, Shadowspawn, hoping to lure Jedi Knight Luke Skywalker to Mindor, allowed the New Republic to receive a signal from the devices, leading them to his base. TIE Defenders were heavily involved in the subsequent Battle of Mindor, engaging New Republic starfighters as they arrived in orbit of Mindor, and subsequently ambushing New Republic reinforcements, including the Millennium Falcon, as they approached the system.[25]
At some point following the Battle of Endor, the Force-sensitive Imperial clone X1 came into possession of several TIE Defenders, which were stationed aboard a Star Destroyer under his command when he traveled to Mustafar in order to create a clone army. X1's twin clone, X2, leader of the Rebellion's Grey Squadron, followed his brother to Mustafar in an effort to stop him. Landing aboard X1's orbiting Star Destroyer, Grey Squadron sabotaged the ship before escaping in X-wings. After defeating X1 in his personal TIE, the group were pursued by X1's TIE Defenders, but were able to destroy them before heading to the planet's surface.[12]
The ship resurfaced during the return of Grand Admiral Thrawn, though they were still deemed too difficult to produce and maintain, and remained both a minority within the Imperial fleet[7] and politically unpopular.[9] The few squadrons that remained in service were largely used to patrol the boundaries of what would become the Imperial Remnant.[9]
Isard's revenge[]
- "Nice machines. I still prefer my X-wing, but I'll take a trip in a pinch."
- ―Wedge Antilles
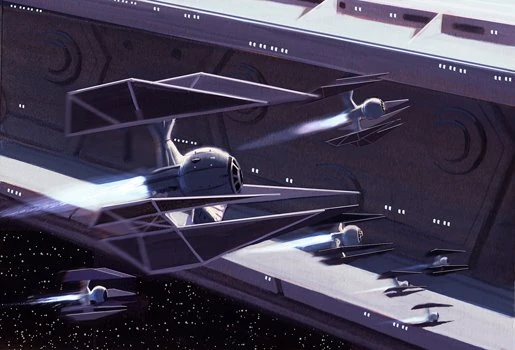

A flight of TIE Defenders
During the New Republic's campaign against Prince-Admiral Delak Krennel's Ciutric Hegemony, Rogue Squadron was sent in search of an Imperial superweapon near Distna. The superweapon rumors were bait to lure them into a trap, and they were quickly ambushed by six squadrons of TIE series starfighters. The Rogues were rescued from the trap by the arrival of two squadrons of TIE Defenders, Interloper and Stranger Squadrons, under the command of Colonel Broak Vessery. The Defenders hit Krennel's forces hard, using a combination of lasers and torpedoes to eliminate Krennel's remaining forces within five minutes of their arrival. Despite the Rogues' reluctance to trust the Imperials, they agreed to follow them back to their base before Krennel sent reinforcements.[21]
The Imperials were stationed at one of several secret Imperial bases throughout the galaxy. The base was one of the few facilities capable of producing TIE Defenders. It was an indication of the rarity of the TIE Defender that the three full squadrons of the fighters located at the base were more than Rogue Squadron's commander, General Wedge Antilles, thought had ever been built. The base was formerly under the command of General Arnothian, who had intended to use the TIE Defenders to establish himself as a warlord before Director of Imperial Intelligence Ysanne Isard disposed of him and took control of the facility.[21]
Isard claimed that she wanted peace with the New Republic. To that end, she had dispatched Vessery to aid the Rogues and then proposed to prove her intentions by helping them eliminate Krennel and rescue prisoners from her Lusankya, including famed Rebel Jan Dodonna. Isard would provide Rogue Squadron with TIE Defenders and cover identities to aid them in infiltrating Krennel's capital on Ciutric IV, posing as Imperial defectors. They would then eliminate the shield generators and defensive positions, allowing her forces to storm the prison. Meanwhile, a New Republic fleet would engage Krennel's forces.[21]
The Rogues quickly began training on the TIE Defender. Over the coming weeks, they engaged in frequent simulated battles against Interloper and Stranger Squadrons before departing for Ciutric. Although Isard betrayed both sides, using the Defenders, Rogue Squadron pilots successfully brought down the planetary shield of Krennel's capital, rescued the prisoners, and eliminated a clone of Isard herself. After the real Isard was killed in an attempt to retake the Lusankya, Vessery disappeared along with his two squadrons of TIE Defenders.[21]
Defenders remained in limited use under the Imperial Remnant, deployed in small numbers to the best pilots, rather than to whole squadrons. Shortly after the end of the Adumari Civil War, the Empire launched an assault on New Republic forces in orbit of Adumar. Among the Imperial fighters were four TIE Defenders in the service of the 181st Imperial Fighter Wing under Turr Phennir, deployed in two pairs. These fighters acquitted themselves well and destroyed or disabled many New Republic starfighters. The Imperial forces were ultimately defeated and at least one of the TIE Defenders was destroyed in combat with members of Rogue Squadron, with Phennir's damaged and forced to withdraw.[45]
Yuuzhan Vong War and later use[]
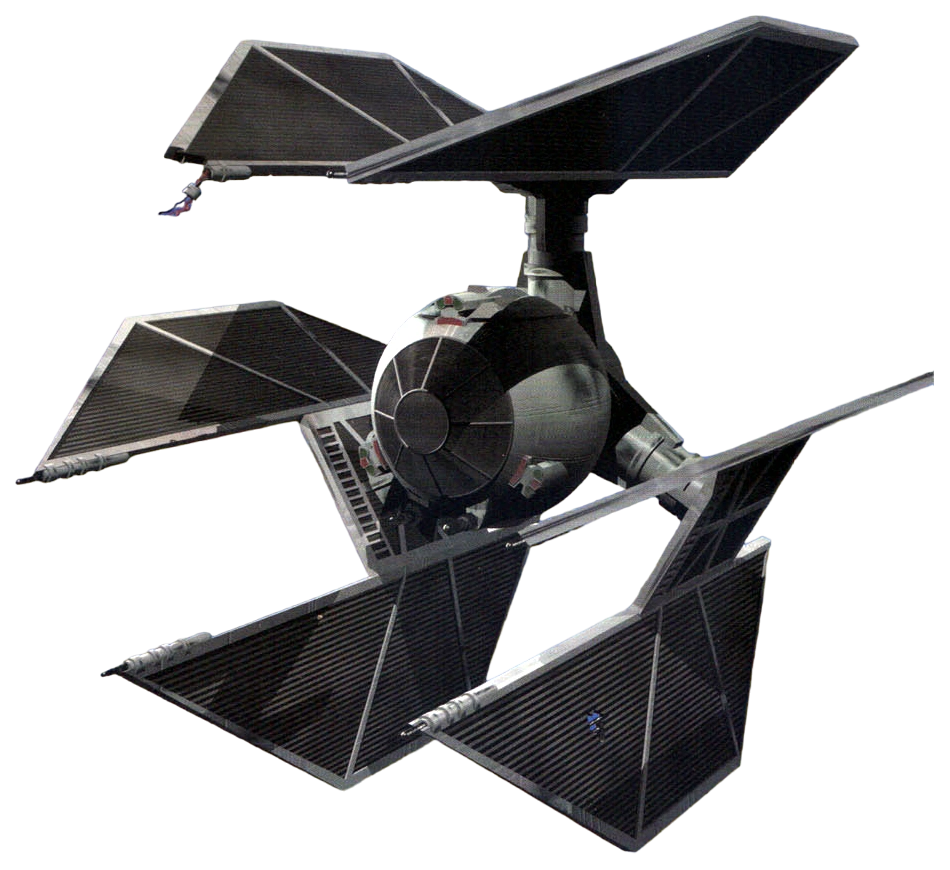
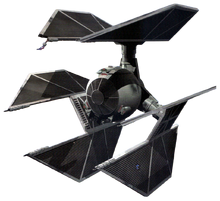
A TIE Defender
Despite the Empire's long held resistance to the TIE Defender, they would continue to be used by the Imperial Remnant until at least the end of the Yuuzhan Vong War, with the starfighters stationed on many Imperial capital ships including Grand Admiral Gilad Pellaeon's flagship, the Right to Rule.[13]
During Operation Trinity, Captain Mynar Devis of the Immobilizer 418 cruiser Wrack personally flew one of three TIE Defenders escorting the Millennium Falcon to meet with Wedge Antilles's Alpha Fleet at Bilbringi, after the Yuuzhan Vong crippled several HoloNet relay stations, cutting off communication between Galactic Alliance forces. The group emerged from hyperspace to find Alpha Fleet embattled with Yuuzhan Vong forces and prevented from escaping by a Vua'spar interdictor. Devis sent one of his wingmates to inform Grand Admiral Pellaeon of the Yuuzhan Vong trap, while the others assisted the Galactic Alliance forces attacking the Vua'spar. Though they eliminated several enemy ships, both TIE Defenders were destroyed helping destroy the Vua'spar to allow Alpha Fleet to escape.[46]
As the war entered its final stages, the Yuuzhan Vong mounted a major attack on the Galactic Alliance capital of Mon Calamari. At the Battle of Mon Calamari, many TIE Defenders were deployed into combat as part of an elite strike team, with other notable squadrons such as Rogue, Twin Suns, and Vanguard Squadrons. Almost an entire squadron of TIE Defenders was incinerated when capital ships at the heart of the Yuuzhan Vong fleet fired Yaret-Kor plasma cannons en masse at the attacking starfighters.[13]
In 44 ABY,[44] former Imperial admiral and Galactic Alliance Chief of State Natasi Daala plotted to overthrow the Imperial Head of State, Jagged Fel. Daala gathered her forces—comprising her Maw Irregular Fleet and the fleets of Moffs Drikl Lecersen, Porrak Vansyn, and Trevin—over Exodo II in the Meridian sector, but news of the rendezvous had reached Fel, who was waiting to spring a trap. As the loyalist Imperial fleet engaged Daala's forces, Lecersen launched baradium missiles at key points on Fel's flagship, the Star Destroyer Gilad Pellaeon, forcing its crew to evacuate. Fel, along with his aide Ashik and his Jedi bodyguard Tahiri Veila, fled in three of the ship's complement of TIE Defenders. Despite their age, the starfighters' combination of speed and maneuverability enabled the three to reach the safety of the Turbulent-class Star Destroyer Bloodfin.[47]
Behind the scenes[]
Notable appearances[]

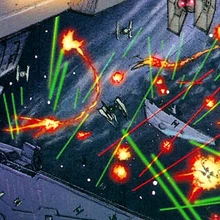
What might be a TIE Defender in Rebellion 5
The TIE Defender was created for the 1994 LucasArts video game Star Wars: TIE Fighter in which the craft was flyable by the player.[2] Although this craft was initially left out of the multiplayer Star Wars: X-Wing vs. TIE Fighter (1997) for the sake of balance, the game data files still have an entry for the TIE Defender in the craft library, with the description field reading "Advanced space superiority fighter. This craft is too powerful to be put in this simulation. Dream on, fanboy!"[48] The TIE Defender returned in 1999's Star Wars: X-Wing Alliance, making an appearance in the single-player campaign and available as a player craft in the multiplayer mode.[8]
TIE Defenders appear in Star Wars Battlefront: Renegade Squadron and fighters which appear to be TIE Defenders can be seen in Rebellion 5, both of which take place before the canonical debut of the class after the Battle of Hoth, as established by TIE Fighter and repeated in numerous sources.[2][34][49] The appearance of the TIE Defender in Renegade Squadron was explained in The Official Starships & Vehicles Collection 67 which established them as early TIE Advanced x7 prototypes.[32]
The TIE Defender also appears in Star Wars: Empire at War: Forces of Corruption, in which the player, controlling the Zann Consortium, can acquire the technology. However, no canon source has yet confirmed whether Tyber Zann took this opportunity.[26] The fighters also appear in the 2011 novel Fate of the Jedi: Ascension by Christie Golden, in which they are twice referred to as the "TIE Destroyer."[47] LEGO released a TIE Defender set in 2010. The LEGO TIE Defender has six missile launchers and a cockpit that rotates when the model turns.[50]
The 2012 reference book The Essential Guide to Warfare includes illustrations of TIE Defenders at the Naval Station Validusia and accompanying the Star Dreadnought Wrath during an orbital bombardment.[39] When asked about the presence of TIE Defenders in these images, illustrator Ansel Hsiao speculated that the units they were assigned to were considered of high importance due to the number of Star Dreadnoughts.[51]
Technical specifications[]
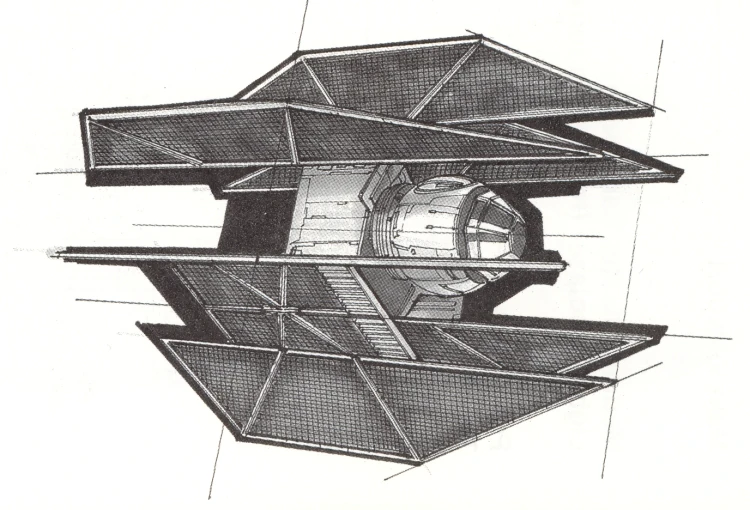
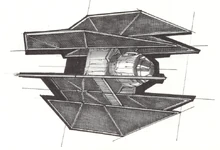
A TIE Defender
Many of the starfighter's specifications changed between TIE Fighter and X-Wing Alliance. The earlier game gave a speed rating of 155 MGLT, a maneuverability rating of 175 DPF and a hull rating of 20 RU.[2] These were revised to 144 MGLT, 110 DPF and 14 RU in X-Wing Alliance.[8] The shield rating was given as 200 SBD in TIE Fighter[2] but was listed as 100 SBD in both TIE Fighter: The Official Strategy Guide[1] and X-Wing Alliance. Since it is the latest source, this article uses the values from X-Wing Alliance.[8]
There is also some discrepancy among sources as to the length of the TIE Defender. The TIE Defender's Databank entry and The Official Starships & Vehicles Collection 67 describe it as 9.2 meters long;[6][20] however, Star Wars: TIE Fighter had originally given the length as 10 meters,[2] a length which was repeated in The Official Star Wars Fact File 73 and The Official Star Wars Fact File Part 53.[15][14] Furthermore, both The New Essential Guide to Vehicles and Vessels and More Starships! list the length as 6.6 meters.[7][9] The 9.2 meter length also appears in Coruscant and the Core Worlds as the length of the TIE Advanced x7 which served as the prototype for the TIE Defender.[30]
In both TIE Fighter and X-Wing Alliance, the TIE Defender is depicted as faster than both the RZ-1 A-wing interceptor and the TIE Interceptor.[2][8] This was reinforced by Star Wars: X-Wing Alliance: Prima's Official Strategy Guide, which described the ship as the "fastest and most maneuverable craft in the galaxy."[52] The figures given in the New Essential Guide to Vehicles and Vessels do show it as faster than both, but only in an atmosphere, while its acceleration value is slightly lower than the TIE Interceptor and significantly below that of the A-wing.[7] The 2007 edition of Starships of the Galaxy describes the TIE Defender as "much faster than any other TIE variant," though it is unclear if this is referring to atmospheric speed or acceleration.[5] Star Wars: Rebellion: Prima's Official Strategy Guide states that "only the A-wing and TIE interceptor are more agile in battle."[27] This contradicts other sources, including the Databank and The Essential Guide to Vehicles and Vessels, which state that the TIE Defender was more agile than the TIE interceptor.[4][6]
Other inconsistencies[]
Both The Essential Guide to Vehicles and Vessels and the TIE Defender's Databank entry place the cost of the ship at 300,000 credits.[4][6] More Starships!, however, states that each unit cost 200,000 credits.[9] Starships of the Galaxy repeats the 200,000 credit value while simultaneously calling it "more than five times as expensive to produce as a standard TIE fighter." Since the cost of a TIE fighter is listed in the same book as 60,000 credits, the TIE Defender would have to have a 300,000 credit value to be five times the cost.[5] More Starships! established that the TIE Defender could carry consumables for two days.[9] Fantasy Flight Games' 2014 reference book Star Wars: Age of Rebellion Core Rulebook later revised this to one week. This article takes the later figure. Age of Rebellion Core Rulebook also describes the fighter's ion cannons as "cockpit-mounted,"[10] contradicting earlier sources, including The Essential Guide to Vehicles and Vessels, The New Essential Guide to Vehicles and Vessels and The Official Star Wars Fact File 73, all of which place them on the upper wings.[4][7][15]
The Official Star Wars Fact File 11 states that "the new TIE defender would not be at [the Battle of] Endor".[41] However, this contradicts the Death Star II Limited expansion set for the Star Wars Customizable Card Game, The New Essential Guide to Vehicles and Vessels and Starships of the Galaxy, all of which establish that the pilots of Onyx Squadron used TIE Defenders during the battle.[5][7][23]
Appearances[]
Sources[]
Notes and references[]
External links[]
 TIE Defender on the SWG Wiki